
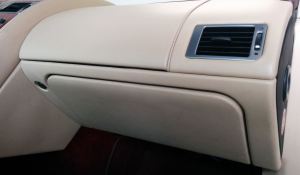
 If you’ve had to remove the Glove Box and Surrounding Panel on your DB9 as part of some other service event (such as changing your cabin air filters) you eventually need to reinstall it. The process isn’t difficult and will only take about 5 minutes once you see how, but there is a little finesse required to get it put back together just right, and I wanted to share that with you here.
In other posts I’ve explained how to:
- Remove the Glove Box and surrounding panel
- Select the right replacement filters
- Change the cabin air filters
Tools Required
Not many tools are needed:
- A Phillips head screwdriver
- A small inspection light (optional) to help you see the screws.
Procedure
The entire process will only take about 5 minutes. Reinstalling is essentially a reversal of the removals steps, but paying close attention to the alignment in a few steps I will detail below.
I am assuming you have the glove box housing removed, the leather surround panel removed, and the glove box itself hanging in the foot well by its tethered cable.
- First we need to reinstall the plastic glove box housing. Engage the small felt wrapped plastic tab in the top center, being sure to get it into the slot. Then rotate the housing back up into place aligning it with the four screw holes.
- I’d suggest putting one of the two bottom screws in first since the plastic tab will hold the top in place to start with.
- Get all four screws started loosely first, then wiggle/jiggle the housing into a nice square alignment in the opening.
- Snug each of the four screws up, but don’t over tighten them and risk striping the hole. Just snug is fine.
- Lift the glove box back up into place aligning the bottom hinge section first and then you can close the glove box allowing the top latch to snap into place. This will hold the glove box up while you do up the hinge screws.
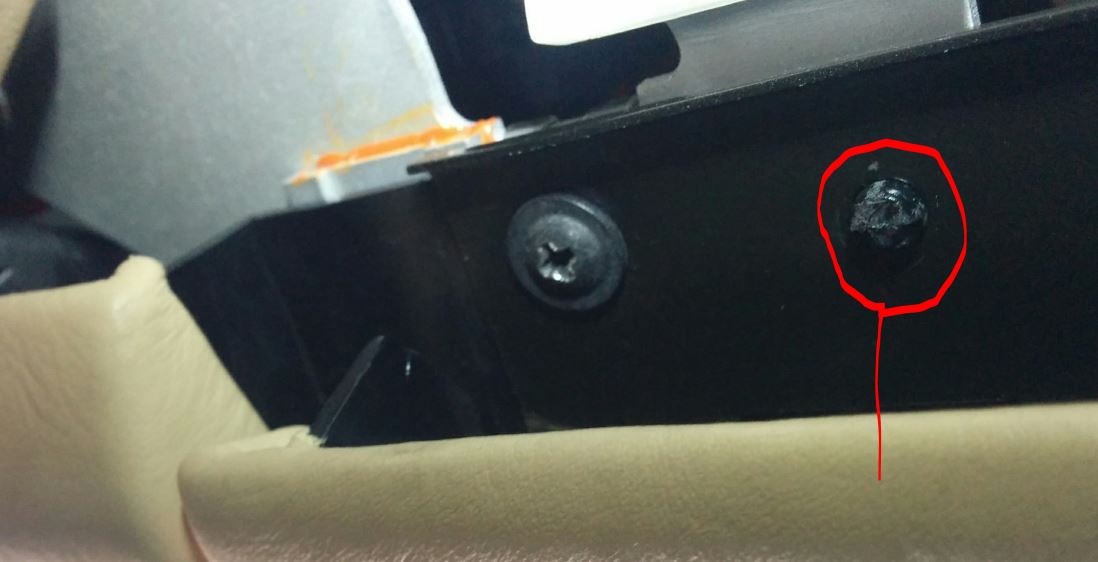
- Crawl back into the foot well with your Phillips screwdriver, inspection light and the three screws previously removed from the hinge. In a position where you can clearly see the hinge, wiggle it into position aligning the three screw holes.

One of Two Glove Box Hinge Alignment Pins - NOTE – there are also two alignment pins to engage. You will see these (near the left and right screws). Make sure the holes in the hinge are lined up and firmly over the pins, and this should perfectly align your screw holes.
- Install the three screws, snugging them firmly. Again, don’t overtighten them.
- Now it’s time to reinstall the leather surround.
- Reconnect the electrical connector to the glove box open button.
Align the three snaps along the top edge of the panel with the corresponding holes in the dash, and then press to engage them until the soundly ‘snap’ into place. - Now check that the snaps on both the left and right lower side of the panel align well with their corresponding openings, and if they line up go ahead and press them into place.
- NOTE – checking that the snap and hole align before trying to press them into place is important. If they are slightly misaligned and you smash on it, you could snap the plastic post off and be really, really upset you’ve just broken something expensive and difficult to replace. Take your time with this.
- Push the glove box release button and check that it works well. Close the glove box and make sure that works well. If something isn’t working right, go back and check what’s binding and adjust. Shouldn’t be a problem though.
- Put your manual or other items back in the glove box. You’re done!
Check out my short video below to see how I lined up the parts, it will make the procedure above make sense.

Hi Steve
Once again a fantastic written description and video.
I love our DB9 but she is prone to niggles.
With your posts and videos I really feel I can tackle all of the various jobs you have done.
Looking forward to your next post.
Kind regards
Rakesh.
LikeLike
Thanks for the Kudos Rakesh. Niggles is a good description :>)
LikeLike
Steve, I’ve just repaired the two long dash panels located closest to the windshield on the DB9. The sun really beats down hardest in this area on both passenger and drivers sides resulting in the leather drying out, shrinking and pulling away from the injection molded substrate panels underneath, a common problem on all Aston’s I believe. I found only one youtube video dealing with this particular repair but it leaves out some very important facts needed to remove the panels successfully and specifically by not identifying correctly the additional hidden screws and steps required. Example the removal of the dash cover over the passenger airbag a necessary and a difficult task. Anyway I have details if and when you decide to tackle this issue. Don’t try this at home folks, before knowing what’s involved or be prepared for a long day and some potentially broken and expensive replacement parts.
LikeLike
Hi Cor. I’ve already tackled this, the video is shot, and the articles will come sometime in the next few months. I have shot a series already about taking out all the dash panels entirely, and the headliner. Two of my dash panels needed glued too. My video’s focus on techniques to remove and reinstall the panels, and adding felt selectively to stop squeeks and rattles. I used an upholsterer to do the glue up. Stay tuned.
LikeLike
Great, I look forward to the new video’s.
LikeLike
Excellent and thanks for the update Rakesh
LikeLike
Sorry about that Steve thought it was Rakesh responding. As they say downunder, “good on ya”
LikeLike
I am looking for DB9 information help on two (2) matters: 1) my hood latch only works part of the time and I am concerned it will not work when needed Is there help available on a fix?; 2) my convertible top canvass is beginning to separate from the the rear window. Is there a fix without replacing the top?
Thanks,
Frank
LikeLike
Hi Frank. Not much help for you unfortunately. There was a Field Service Bulletin about the hood catch to fit it with a different sized loop, not sure if that has anything to do with it. As far as the top goes, I’d probably be looking to find a convertible top specialist, they may have a trick or two to deal with it. Good luck!
LikeLike