
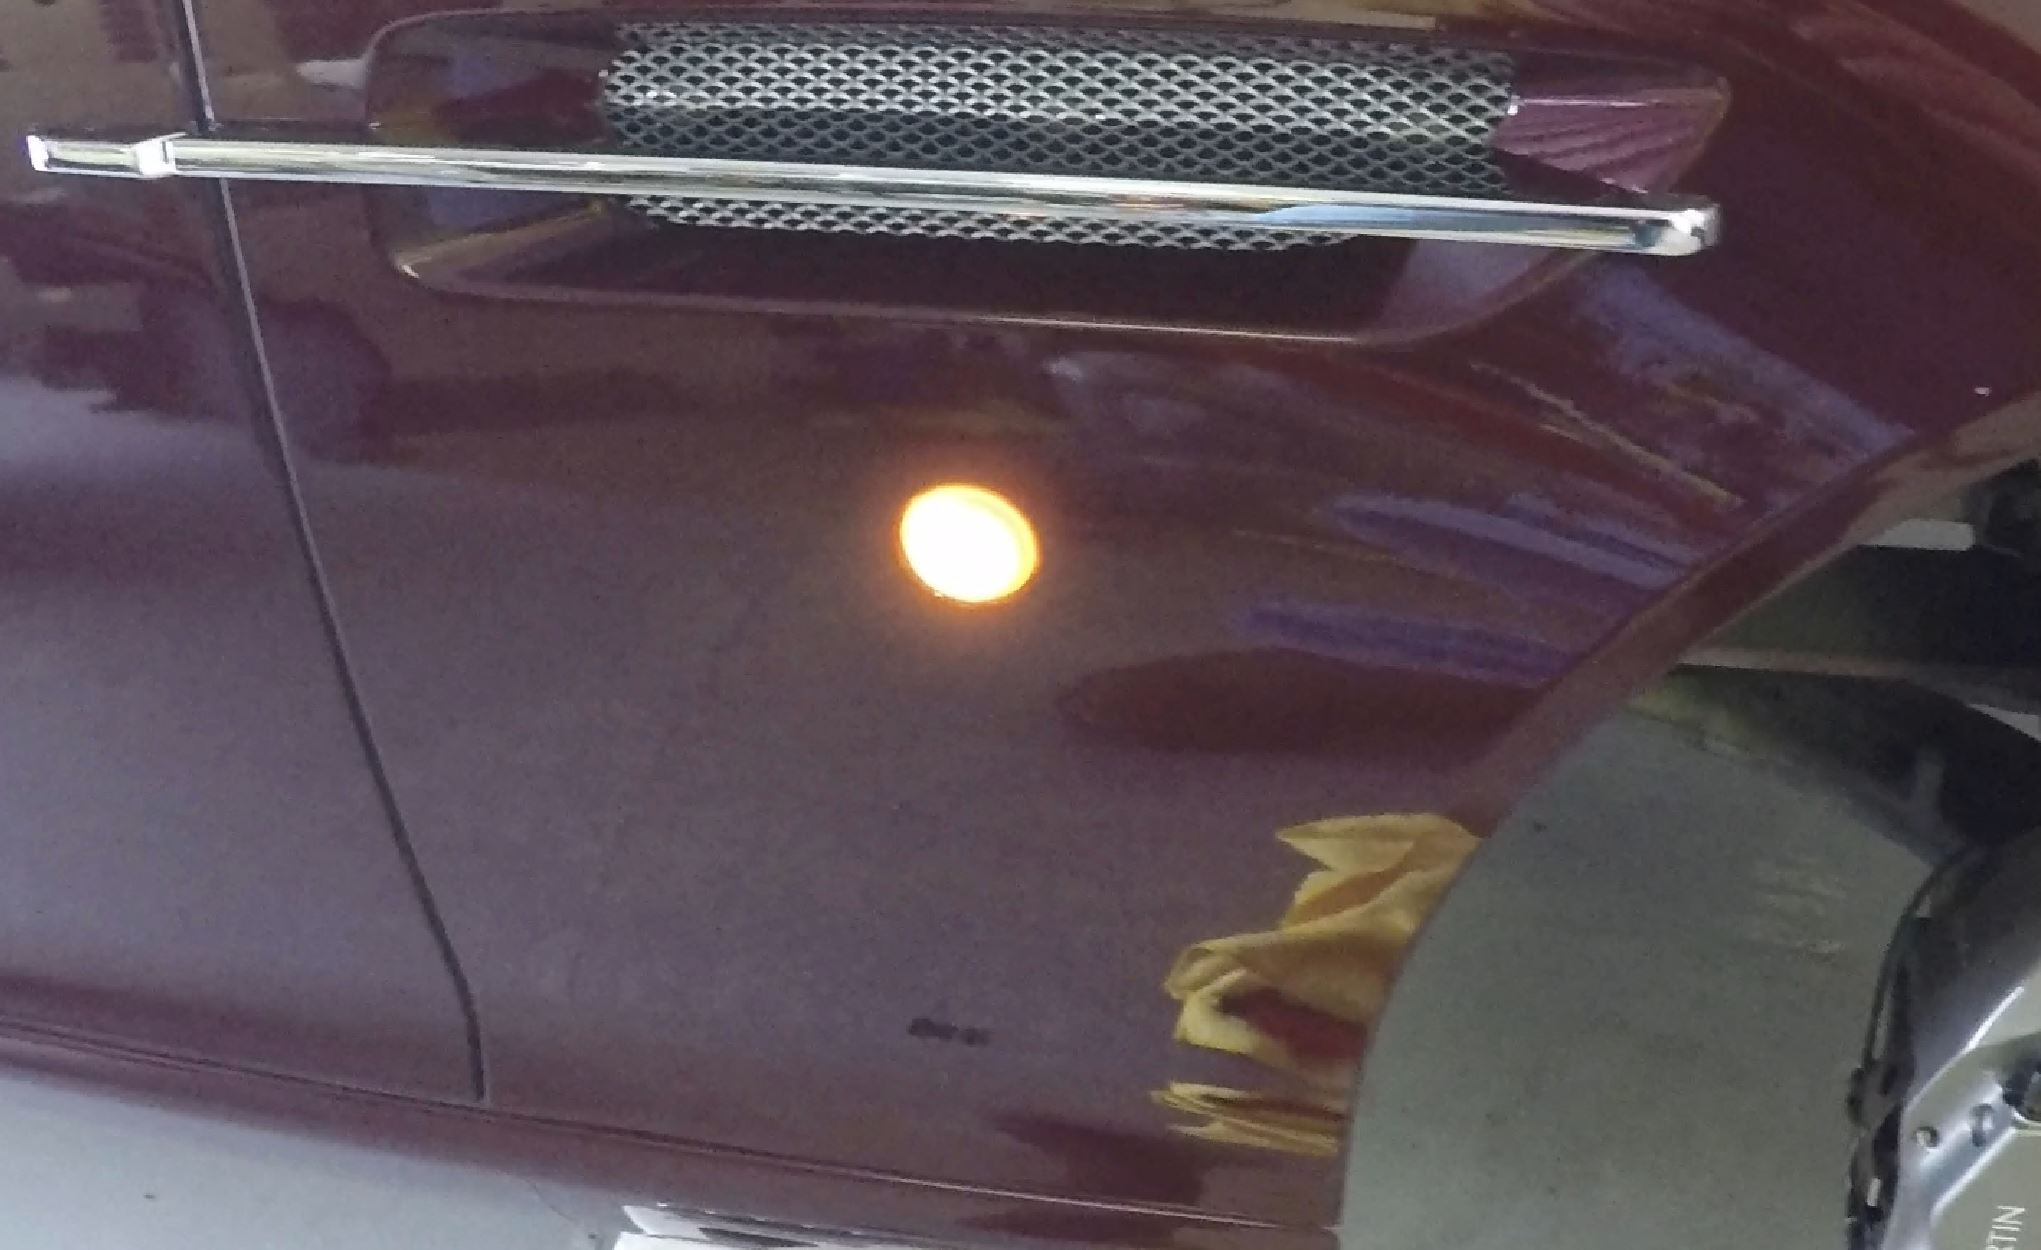
The Side Repeater Lights on my DB9 have discolored to a Yellow’ish from the UV in the harsh California sunlight. I know, this concept is completely unfathomable to my readers in the UK, and probably a design issue the factory never considered – “Sunlight? Bahh – just make it waterproof you twit – this is England”. When I purchased my car from the DPO (Damn Previous Owner) it had the issue quite notably on just the left hand side assembly. I can presume he parked the car during the day with that side facing South.
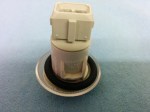
 The side repeater light is a turn indicator light mounted on the side of each front fender/wing. When new, the plastic assembly is a clear lens with some white. As you can see in this photo, the old one has got that ugly faded yellow plastic color compared to the bright, fresh and clean look of the new one.
I’ve wanted to freshen the look of this up so I ordered a pair of the assemblies and decided to replace them. Here’s how if you’d like to do the same for your car.
Note: If you just need to change a burned out light bulb in your side repeater, you can easily use this process below to see how to get to and change the bulb.
Parts Required
You just need one or two of the assemblies depending if you want to go to the trouble to change just one or both. I’d suggest doing both since it’s an easy process and they aren’t expensive. You can then be sure they ‘match’. The same part is used on either side.
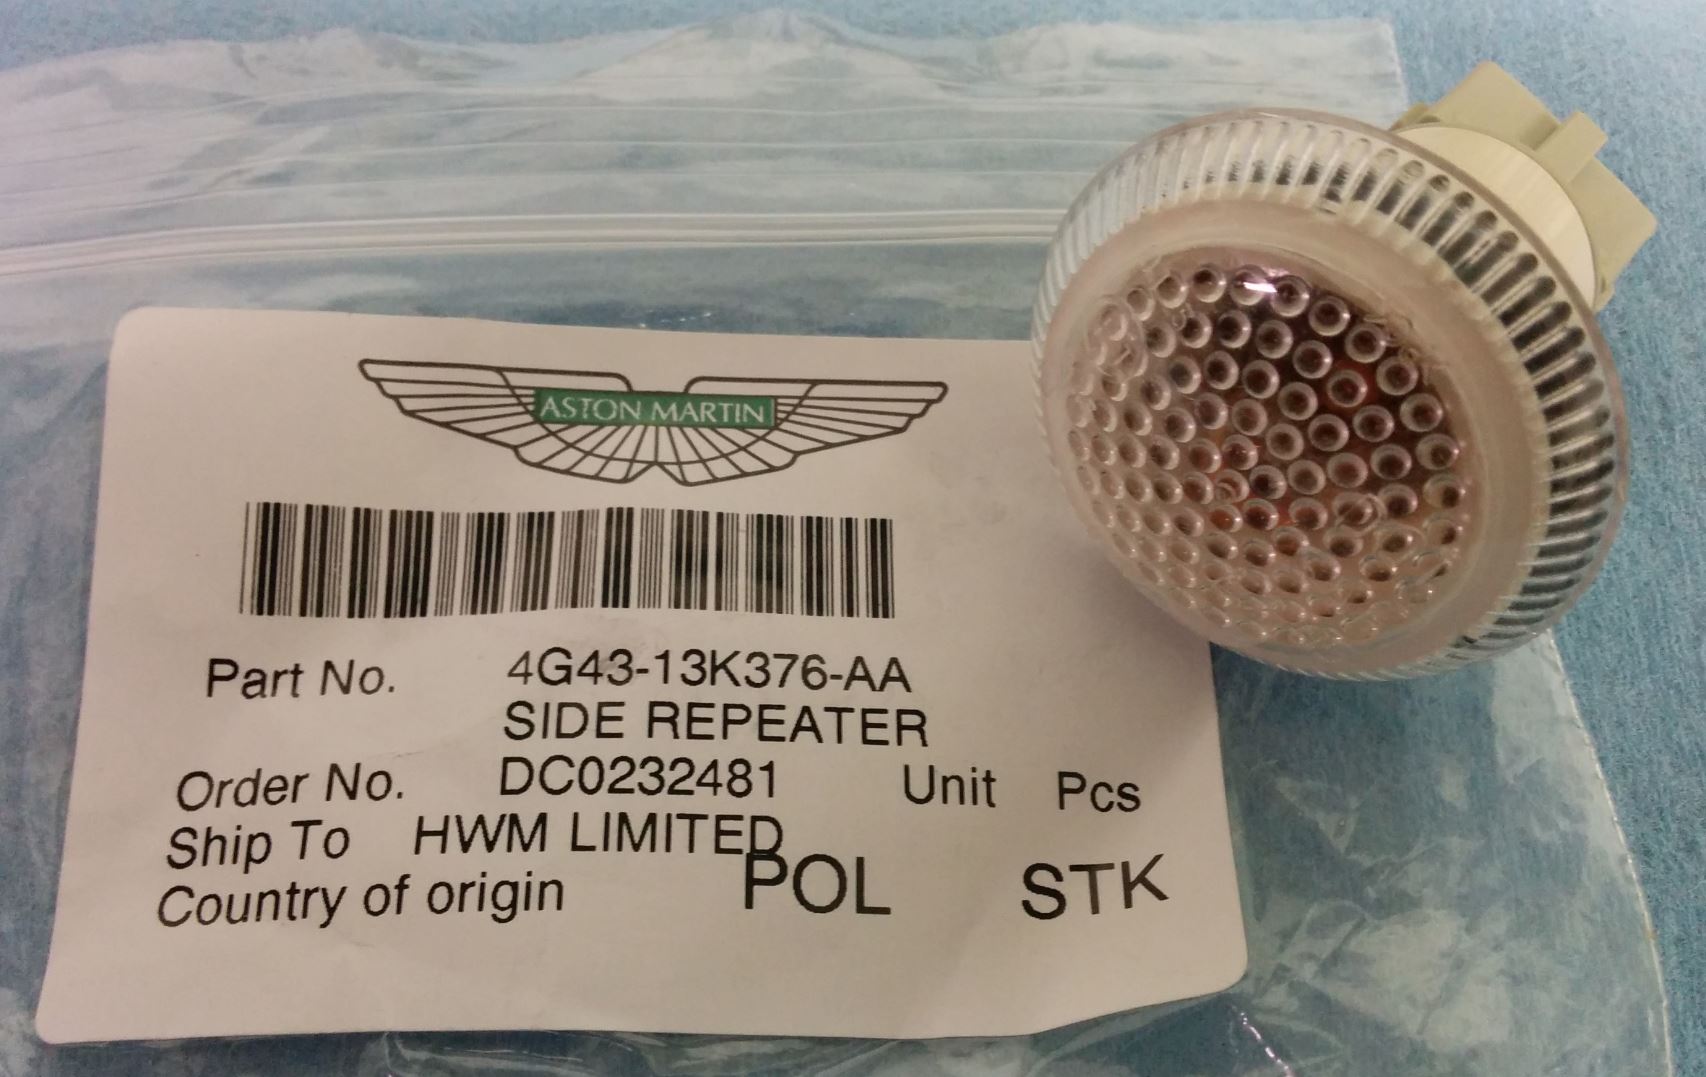 They are Aston Martin part number 4G43-13K376-AA. You can find them online here for about $29.07 USD each, or for about $20.54 USD (£16.49) each by reaching out and contacting the parts team at HWM in England (where I got mine). As Aston parts go, these aren’t too expensive.
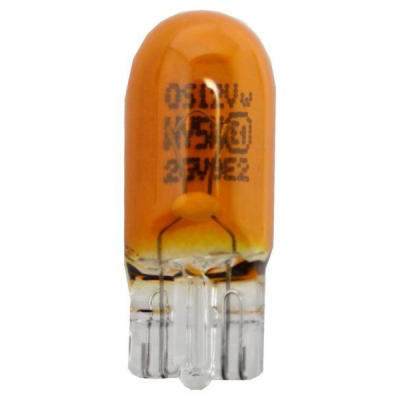 Note: The assembly DOES include a new bulb. If you are bulb shopping anyways, the bulb is a WY5W Amber that you can find online at Amazon.com for about $8 USD per pair. LED versions are also available since this is a standard format. [In a future article I will be covering replacement options for all bulbs in the car]
Interesting Footnote – A keen reader of the blog had noticed that the lamp looked identical to the one you would find on a Ford Transit van of the same era (more of that Ford Heritage – ick). They actually ordered one to find out, but alas the lens area was identical, but the body behind the lens wasn’t a match and didn’t snap properly into the fender. It was about the same price anyways, so not worth debating.
Tools Required
To just swap the assembly you really don’t need any tools other than your hands. I’d suggest having a clean, damp micro fiber towel to clean the painted recess in the fender while you have the assembly removed and access to the area.
As you’ll see in my procedure below you need to get access to the assembly you’ll need to tackle a few steps outlined in other articles, and those require some tools. Read on to find out.
Procedure
The swap of the assembly itself will take less than 2 minutes once you have access. The process is simple, but you need to tackle a few steps first.
To get access to the assembly you will need to follow the steps covered in my other articles already:
Conceivably, if you have a full garage ‘ramp’ where you could raise the car, I suspect you could only remove some of the screws in the back half of the inner fender liner, and flex it out of the way to reach up to the assembly. But alas, my Sweetie still hasn’t let me get one and I make do using my floor jack.
Once you have access:
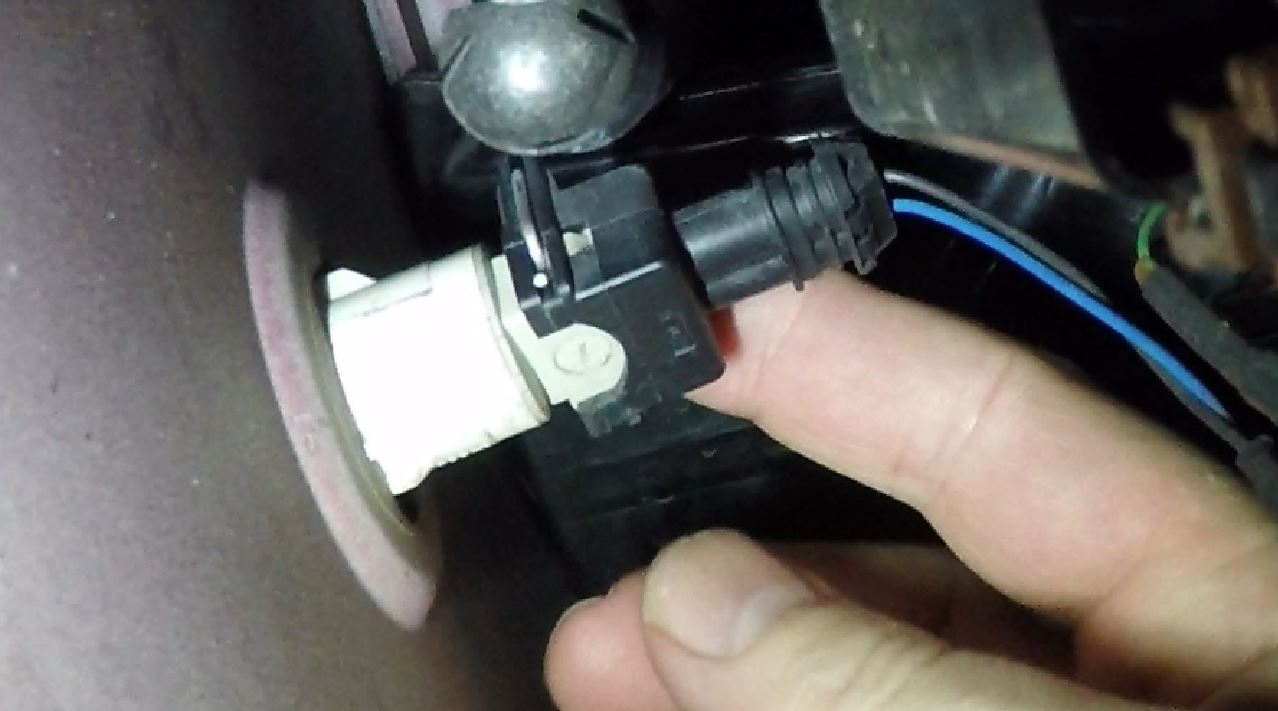
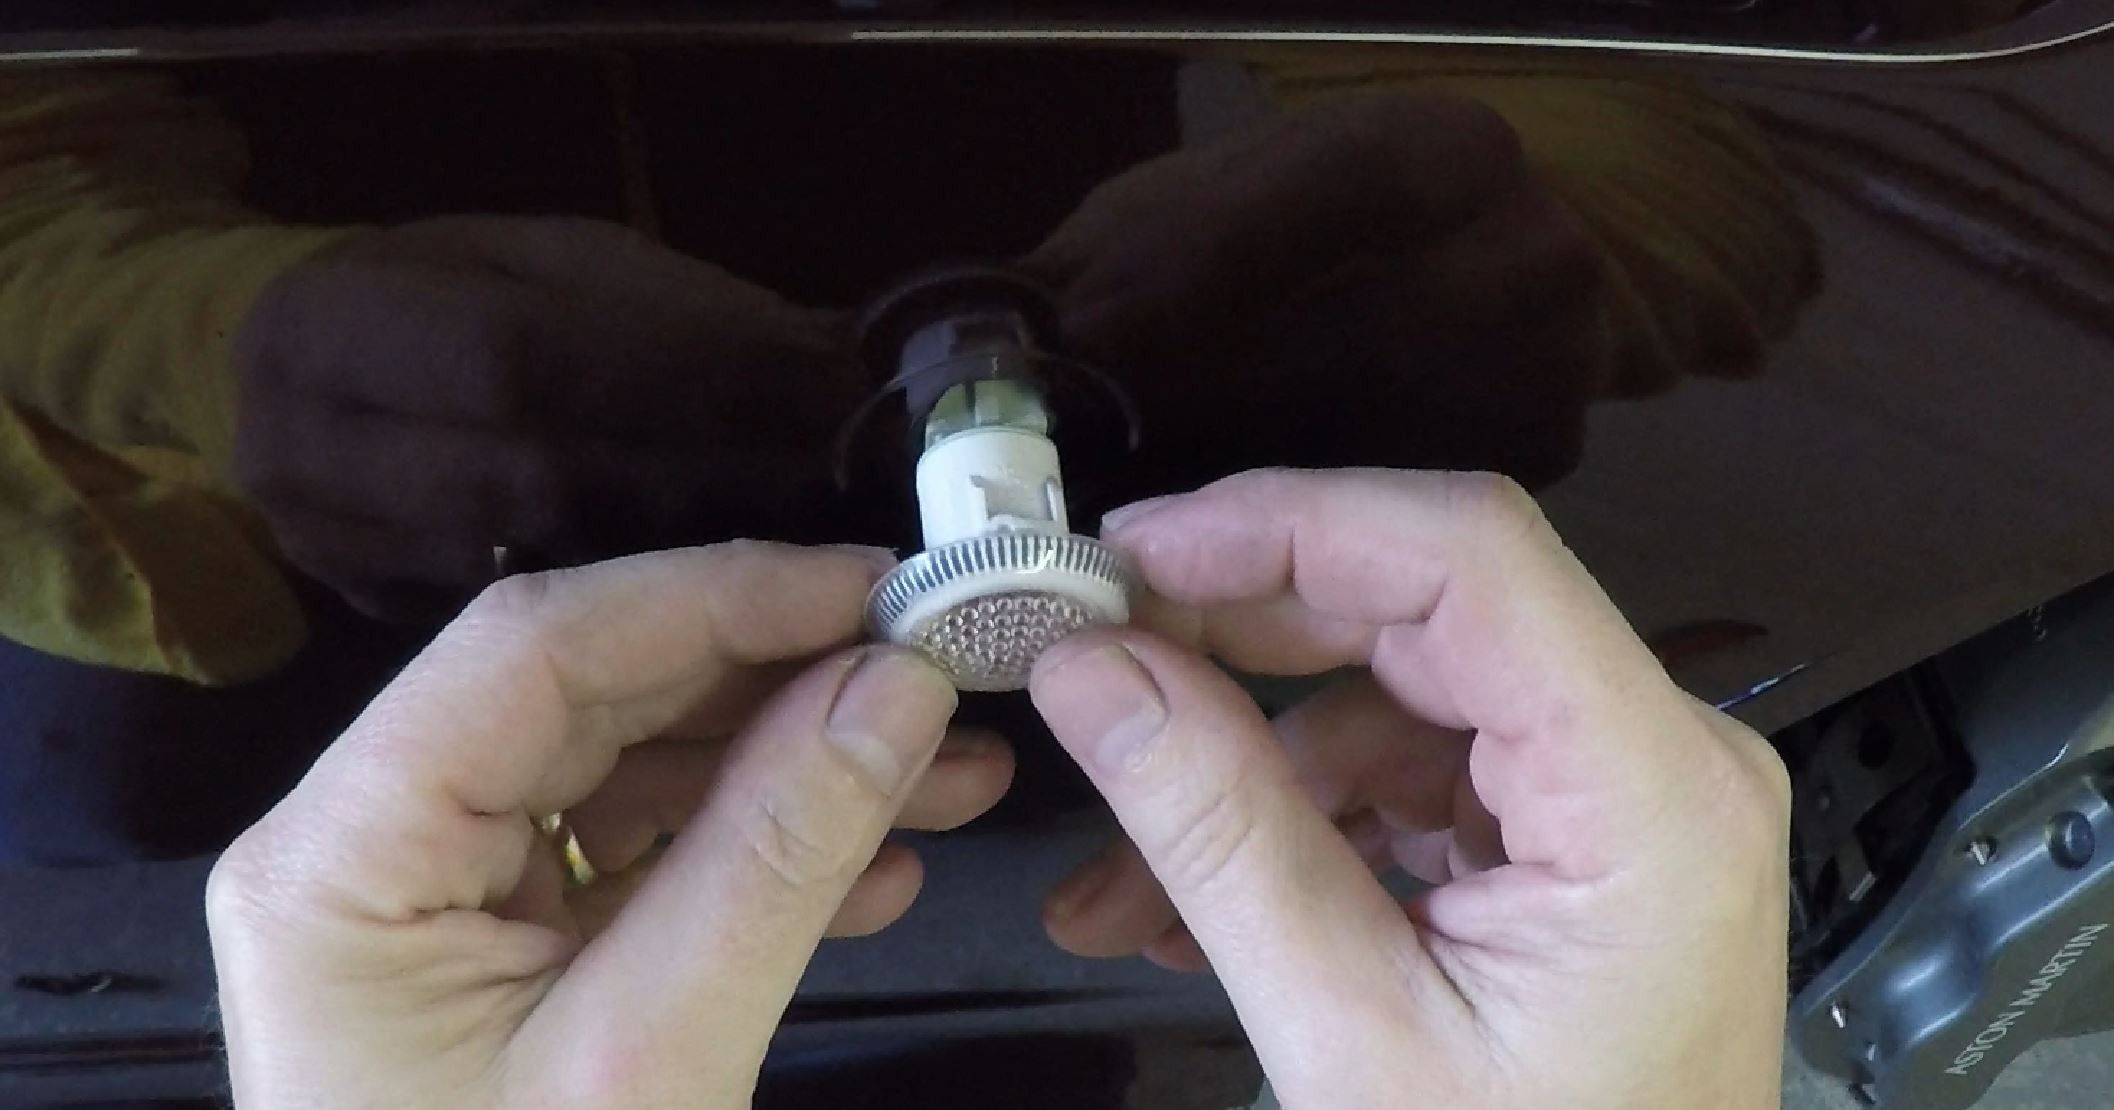
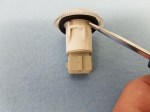
 Stick yourself inside the fender and look at the back of the Side Marker light assembly.
- Remove the electrical connection by squeezing in the wire band. I really, really suggest you check out my video below to see me show how to do this clearly.
 Super simple once you see how. Hard to figure out in a dark space.
 - With the electrical connector now removed, grip the light assembly and turn it about 30 degrees counter clockwise (until it won’t turn any more) to release it.
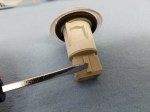
- Gently ease it out through the fender opening and catch it with your other hand.
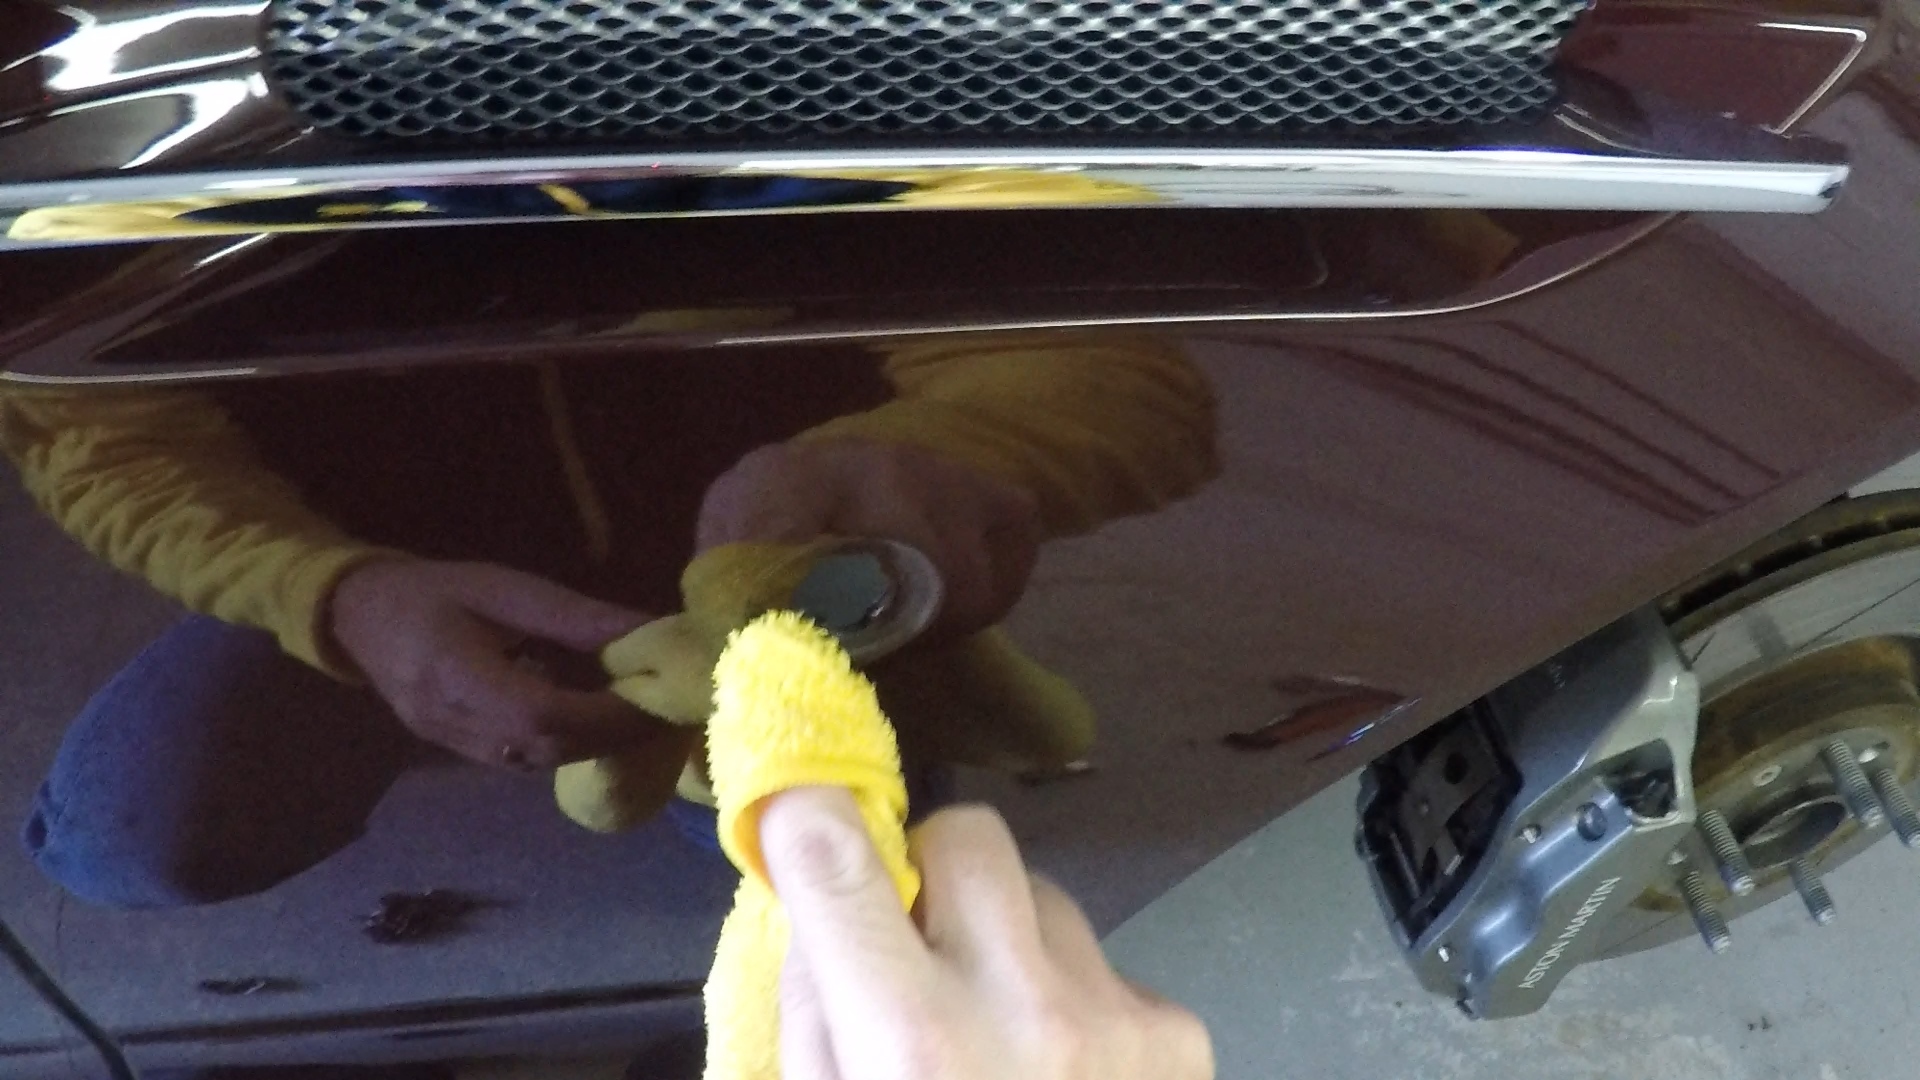
 Now is a great time to use your damp microfiber towel to cleanup the freshly exposed paint in the recess where the light assembly normally sits. You’ll probably have a mixture of dirt and wax residue that has accumulated in this hard to clean recess.
- Note that the opening in the fender is ‘keyed’ with a wider slot opening at one end. The lamp assembly will only fit in one way.
 Carefully insert your new lamp assembly into the opening, and rotate it back to lock it into position.
- Reconnect the electrical connection.
- The connector only goes on only one way. There is a alignment key on the lamp assembly that aligns to the connector. Check out the video to see.
 Tip – BEFORE you start to put your fender liner and wheel back on, now is the time to TEST that the light is actually working. Turn on the turn signal and make sure the lamp is blinking properly.
- Tip – Save the old bulb from the old assembly as a spare!

Finish up the process by checking out my other articles and videos on:
- Installing the front inner wheel liner
- Installing the road wheel
- Lower your baby off the jack
- And finally properly Torque the road wheel
Here is a quick video of the procedure:
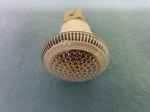
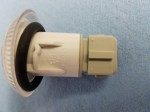
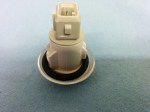
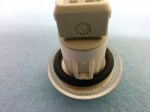
Bonus Photos
Here are a bunch of high resolution photos of the light assembly for those so inclined to check it out up close.


Can you please let me know how to reset the crash mode in my 2012 Rapide after a battery change?
LikeLike
Hi. I’m not sure how that done. Most of my experience is with the DB9. Maybe check out PistonHeads for an answer. Good luck!
LikeLike
Hi Steve.
Did you know there is a way to replace the bulb and lens without having to remove the wheel and arch cover?
I have just replaced both bulbs and lenses in under ten minutes, I am happy to share with you for your site and future viewers.
All the best Michael
LikeLike
Would be great to learn how! Please share and I will include in an article and pass along the credit…..
LikeLike
Hi Steve.
It is pretty simple, the only thing required is 14 inches of fishing line (10lb line should do it).
First release the side lens by turning clockwise, once the fitting is loose pull it out as far as you can, it will not come out all the way of course as the large black block connector is still attached inside the wing.
Here we use the fishing line.
Fold the fishing line in half making a loop, place the loop over the top of the bulb holder collar (light grey part) that you will just be able to see and feed fishing line all the way around at both sides, the fishing line easily feeds itself around the collar of the bulb holder once you have got it around the top of the collar, with the fishing line around the bulb holder collar pull both ends downwards/outwards.
So, with your left hand holding both ends of the fishing line downwards/outwards you can then hold the lens with your right hand, pull the lens towards you and turn it counter at the same time, you do not have to pull hard, just enough to disengage the bulb holder (grey part) from the lens assembly (white part), just keep holding the fishing line so you do not let the bulb holder assembly fall back into the wing once the lens has disengaged..
So with the lens off you can change the bulb and the gasket if needed and of course the lens.
Using this method the only thing you cannot change if the bulb holder (light grey part)
Assembly is easy too, just pull the fishing line downwards/outwards again and place the lens in position using enough outward/downwards force on the fishing line so the lens can be turned clockwise to engage the bulb holder again.
All done.
Cheers Michael
LikeLike
Wow this is pretty ingenious Michael, but the most impressive part is how did you think of trying this method?
Steve I woke up yesterday and noticed the lens of my side repeater light is totally missing, knocked off somewhere. I’m assuming that this is a one piece assembly and that the lens is not separate in which case I’ll need to purchase the complete unit? Thanks for the instruction part numbers and video, As usual your’e a life saver or should I say time saver.
BTW do you or any members have any information about the Volvo compatible GPS update disc set for HDD based GPS systems 2009-20013 I think? I know your 2005 model has the DVD based unit but after 2008 MY AM changed to a hard drive based system supposedly the same as used in most Volvo’s of the same years. Found this link on ebay but not sure it’s compatible with AM cars?
Cheers
http://www.ebay.co.uk/itm/Volvo-VNS-HDD-2015-2016-Navigation-Map-Update-DVD-MMM-North-America/201979734579?ssPageName=STRK%3AMEBIDX%3AIT&_trksid=p2060353.m1438.l2649
LikeLike
An added twist, I am pretty sure the side marker is actually a lens used on the Ford Transit Van. Our company owns one, and I swear it looks like the exact same part.
I just did a quick google and found a link here to the Ford part with a picture. See for yourself ….. https://www.tascaparts.com/oe-ford/9t1z13k376a?origin=pla&gclid=CjwKCAjw16HLBRBFEiwAElREqJ5sm4KRE2cV5oeHFdpH7DioyQAPcauqanCELylOpbB4OraaQb5TuhoCbk0QAvD_BwE
The Aston part isn’t that much more, but maybe it would be easier to find this one in stock near you, or on Amazon Prime, etc. If its the wrong part, hey, its only $17.
If you get the Ford part and it IS the right piece, please let me know and we can share this with the world.
LikeLike
Will do Steve thankyou
LikeLike
Steve I ordered the transit van repeater lights from the link you gave me and will let you know how they fit. Checked with Rob in England but think the freight will be an issue for these small parts.
Thanks again
Cor
LikeLike
I’ll be interested to see if it is the same part. Could be that the electrical connector will be different or something like that. If it works perfect, take a few pics of the new one so I can let the rest of the world know.
LikeLike
Replacing the AM DB9 Side Repeater Light revisited.
On a hot and steamy Saturday afternoon in Florida, I undertook to replace the drivers side repeater light assembly on my MY09 DB9. The repeater light assembly is a three part unit, the outer domed plastic light assembly, the inner plastic light bulb carrier and the wiring harness with connector. Only the outer domed light typically needs replacing.
I can state for the record that although one can fairly easily turn the outside light assembly the 30 degree of cam rotation required to unlock the light assembly from the vender, one cannot pull the entire assembly and connecting wiring harness back through to the outside as has been suggested (fishing line method) at least it didn’t work for me and resulted in the light assembly separating and falling back inside the wheel well. This then required the removal of the inner wheel liner. (see previous Steve blog on this) I found that removing only the screws on the right side of the liner (closest to the repeater light) was sufficient to gain good access to the light assembly inside the wheel well.
I can now also confirm that the Ford Transit lamp as it’s called (the repeater) as previously identified as a possible replacement, does NOT fit. At first glance they look identical but the throat depth of the locking cam is substantially different because I suspect the Transit Van has a thin gauge metal fender while the AM composite vendor is much thicker making it incompatible with our cars. I suggest an LED orange replacement bulb while you have this thing apart.
Part number for Transit Van is 9T1Z-13K376-A
Part number on AM DB9 is 4643-13K376-AA
I do have pics Steve if you need them.
Cor
LikeLike
Hi Cor
Could you please send me what you have for photos of the Side Repeater steps you took above. I’d like to update the article. I can give you an email address if you would be interested…..
LikeLike
I may not be smart enough Steve, to attach pictures but the Ford Transit repeater light looks and is identical to the AM unit, part # 4G43 13K376-AA. The only difference being the throat depth of the locking/twist cam on the repeater light assembly for the Aston, is somewhat wider since we have composite side fenders on our cars and therefore thicker that that on the Transit Van which is a straight sheet metal affair. Other than that the parts look absolutely identical.
LikeLike
sorry about the auto spell check for Fender
LikeLike
I noticed one had fallen off my passengers side, saw my wife’s Range Rover from the same year,,,,,,,,to not incriminate myself, while im waiting for a replacement to show up (about 20 bucks OEM) my problem is fixed and she isnt aware of having one.
Amazed how many parts I can use between the two cars around the 2910-2012 models
LikeLike
Cool. I’ll need to check out a 2010 Range Rover. Glad you didn’t get busted :>)
LikeLike
Thank Steve for this information! Just a note, I did this without jacking and wheel removal. I turn the steering wheel full lock left and only removed 3 wheel wheel liner retaining torx screws to gain access. One that is level with the repeater and the ones above and below that one. Tight squeeze but with your information on how it disconnects was able to do it by feel.
LikeLike