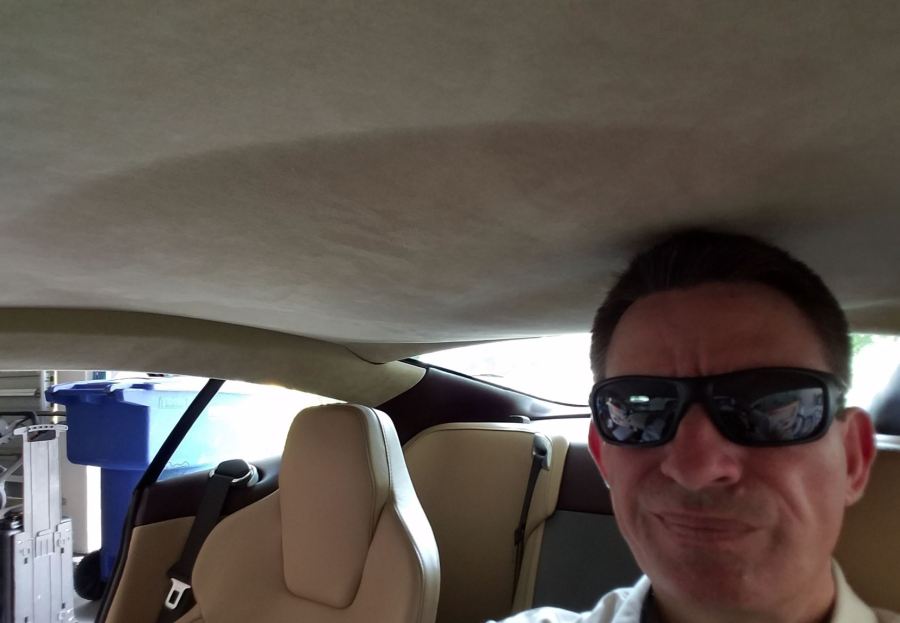

It all started on hot sunny California summer day when I got into my DB9 after work. Open the beautiful swan wing door, slide butt into supple sculpted leather seat, and then WTF?! Why is there fabric on my head? As you can see in my happy owner photo here my headliner sagged and was draping across my head. Crap – something else to fix and I am not an upholsterer.
You can’t ignore this problem and it needs immediate attention else it will drive you completely insane as it flaps in the wind with the windows open, or just lays on you and your passengers head when you sit in the car.
I posted about this briefly a year ago when it happened (my backlog of articles is that long I guess – apologies), and now that I look back on the event I can share a few measured thoughts:
- This is not the end of the world.
- It ultimately only cost me about $150 USD to fix.
- You can do most of the leg work yourself very easily, and these articles will show you how.
What has really happened
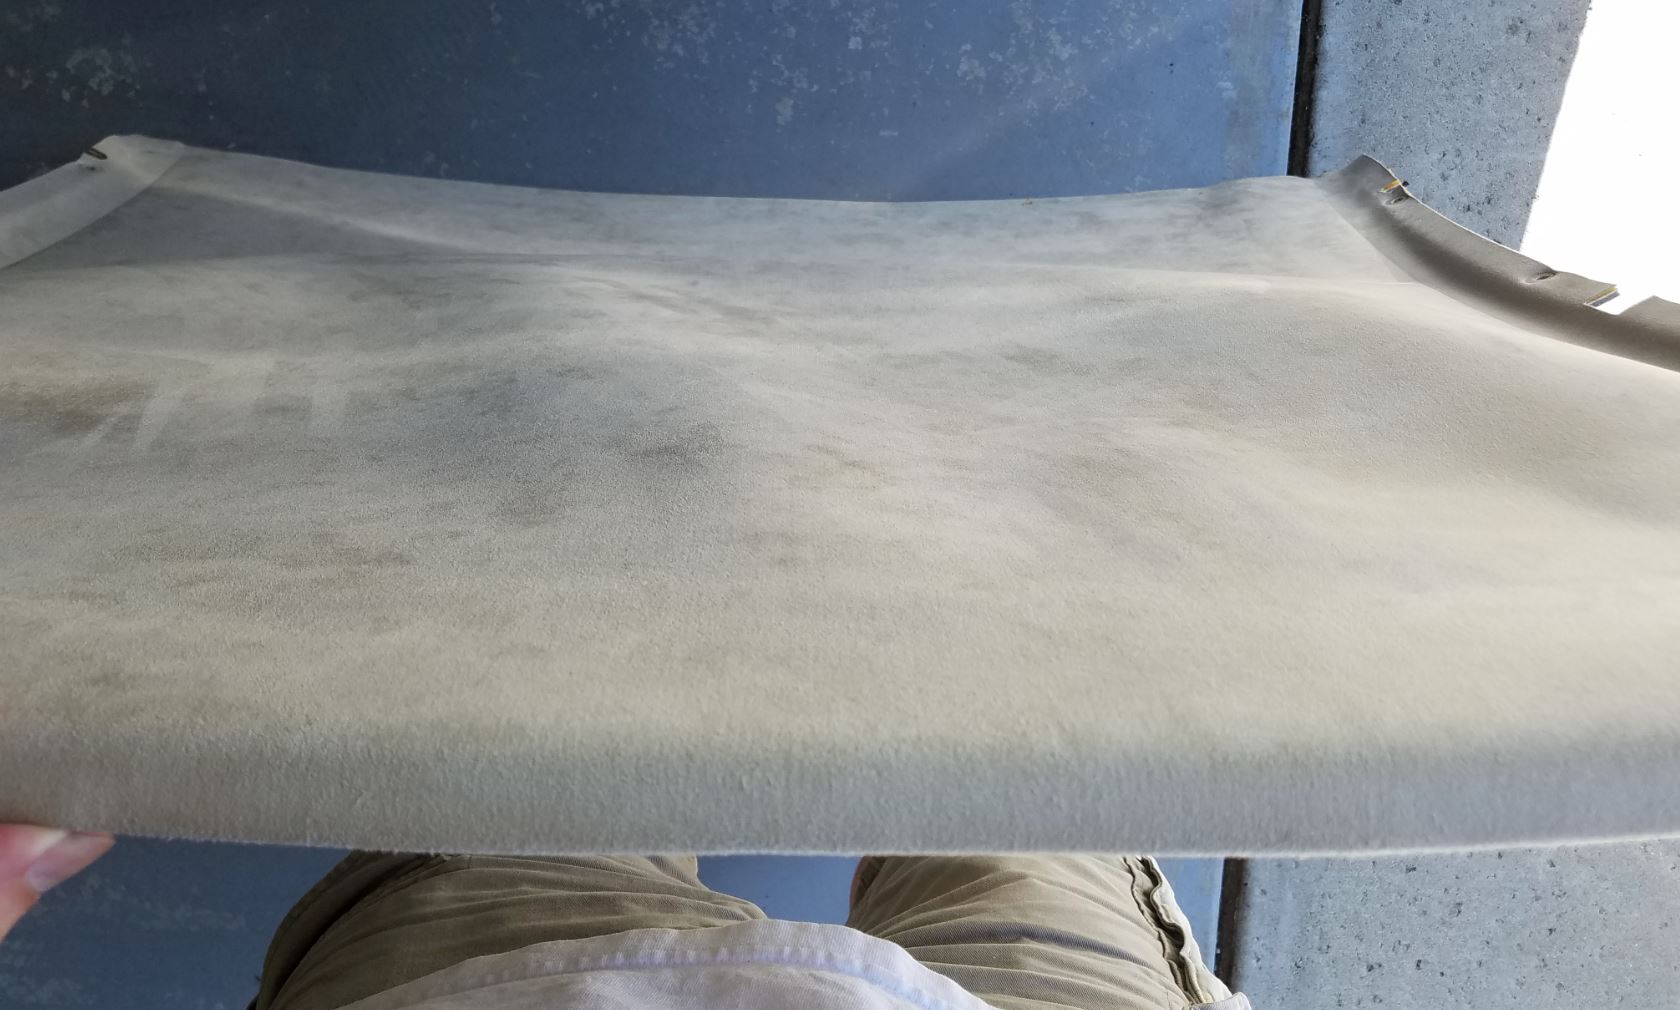 The headliner sagging is just a simple case of 11 year old glue failing. The headliner in a DB9 is a beautiful Alcantara suede like material, and it is glued to a stiff shaped form that gives the headliner its shape and rigidity. The glue (probably contact cement) apparently breaks down over time due to age, heat and UV. The glue failed between the center portion of the fabric and the form, the area most ‘stretched’ and unsupported by edges. Simple as that, the glue let go.
I live in Northern California in a city where the daily average high temperature in the summer is about 92°F (33°C), and we have several weeks of 100+ °F (38+ °C) temperatures. I drive my car every day, and park it outside in the sunlight. There is no shaded parking at all where I work (sucks), and I don’t have the discipline to use an outdoor car cover every time I park [or the desire to look like a tool while using it]. The inside temp of the car probably easily reaches 130+ °F (54 °C) for several hours on the hottest days, and since the headliner is right against the roasting hot roof, this makes it even worse. Those of you in sunny England should be gloating right now. But, I suspect that many readers of this blog live in similar hot climates and may suffer a similar fate (Florida, Dubai, Australia, Japan and others). Will this happen to every DB9? Probably with enough time, I just think the heat accelerates the condition.
How to Fix it?
The simplest answer is “Glue it back on”.
How to achieve this is what the rest of this article and series is about. I definitely have some massive time and cost saving tips to share along the way, so I encourage you to check out the rest of the series if this is happening to you.

Since the Alcantara fabric was in perfect condition and only required re-gluing, I decided that my plan would be to remove the headliner myself and take it to a recommended upholstery shop. Once it was removed from the car, at least I could keep driving it while I waited on the upholsterer to do his magic.
Another option I didn’t investigate was purchasing a new headliner. The biggest challenge here might be getting a perfect color match to the rest of the Alcantra material that remains (covering the A pillars). A look online shows that you can purchase a headliner shell for about $1,250 USD if this route is more desirable for your situation, and I don’t even think that price includes the Alcantara fabric, its probably just the shell.
How Aston Martin Says to Do It
 After my initial despair I plunged into the Official Aston Martin Workshop Manual to see how to remove the headliner. Section 1.05 covers the Roof Trim (check it out here).
Essentially the process they lay out is:
- Remove the long sweeping A pillar trim panels that stretch along the side of the interior from the front of the windshield to the rear window glass since these support the sides of the headliner. In the manual they call these the “Cant Rail”.
- But, to remove the A pillar trim panels you must remove the front most upper dash panels (nearest the defroster vents, items 5 and 10 in their diagram) since these lock in the front edges of the A pillar covers. In the manual they refer to this as “IP” which I can only assume means Instrument Panel. [Re-reading their instructions they might be saying that you don’t have to remove this dash panel and can merely pull it out of the space]
- But, to remove this particular dash panel you have to remove EVERY upper and lower dash panel from both the drivers and passenger side since they layer upon each other. OMG!
- You also are told to remove the rear view mirror, reading lamp pod, sun visors and the front headliner trim panel. [I discovered you only need to remove the rear view mirror]
- Along the way you will yank out 18 or so ‘single use only’ plastic fir tree clips.
With all those elements out of the way, you can finally drop the headliner down and remove it from the car to have it re-glued. There is an easier way….
How I recommend you do it
I rolled up my sleeves and got to work. This was the path I embarked on and you will see in the next series of articles. BUT, let me share a huge time and labor saver with you that I only discovered once I reached the end of the project.
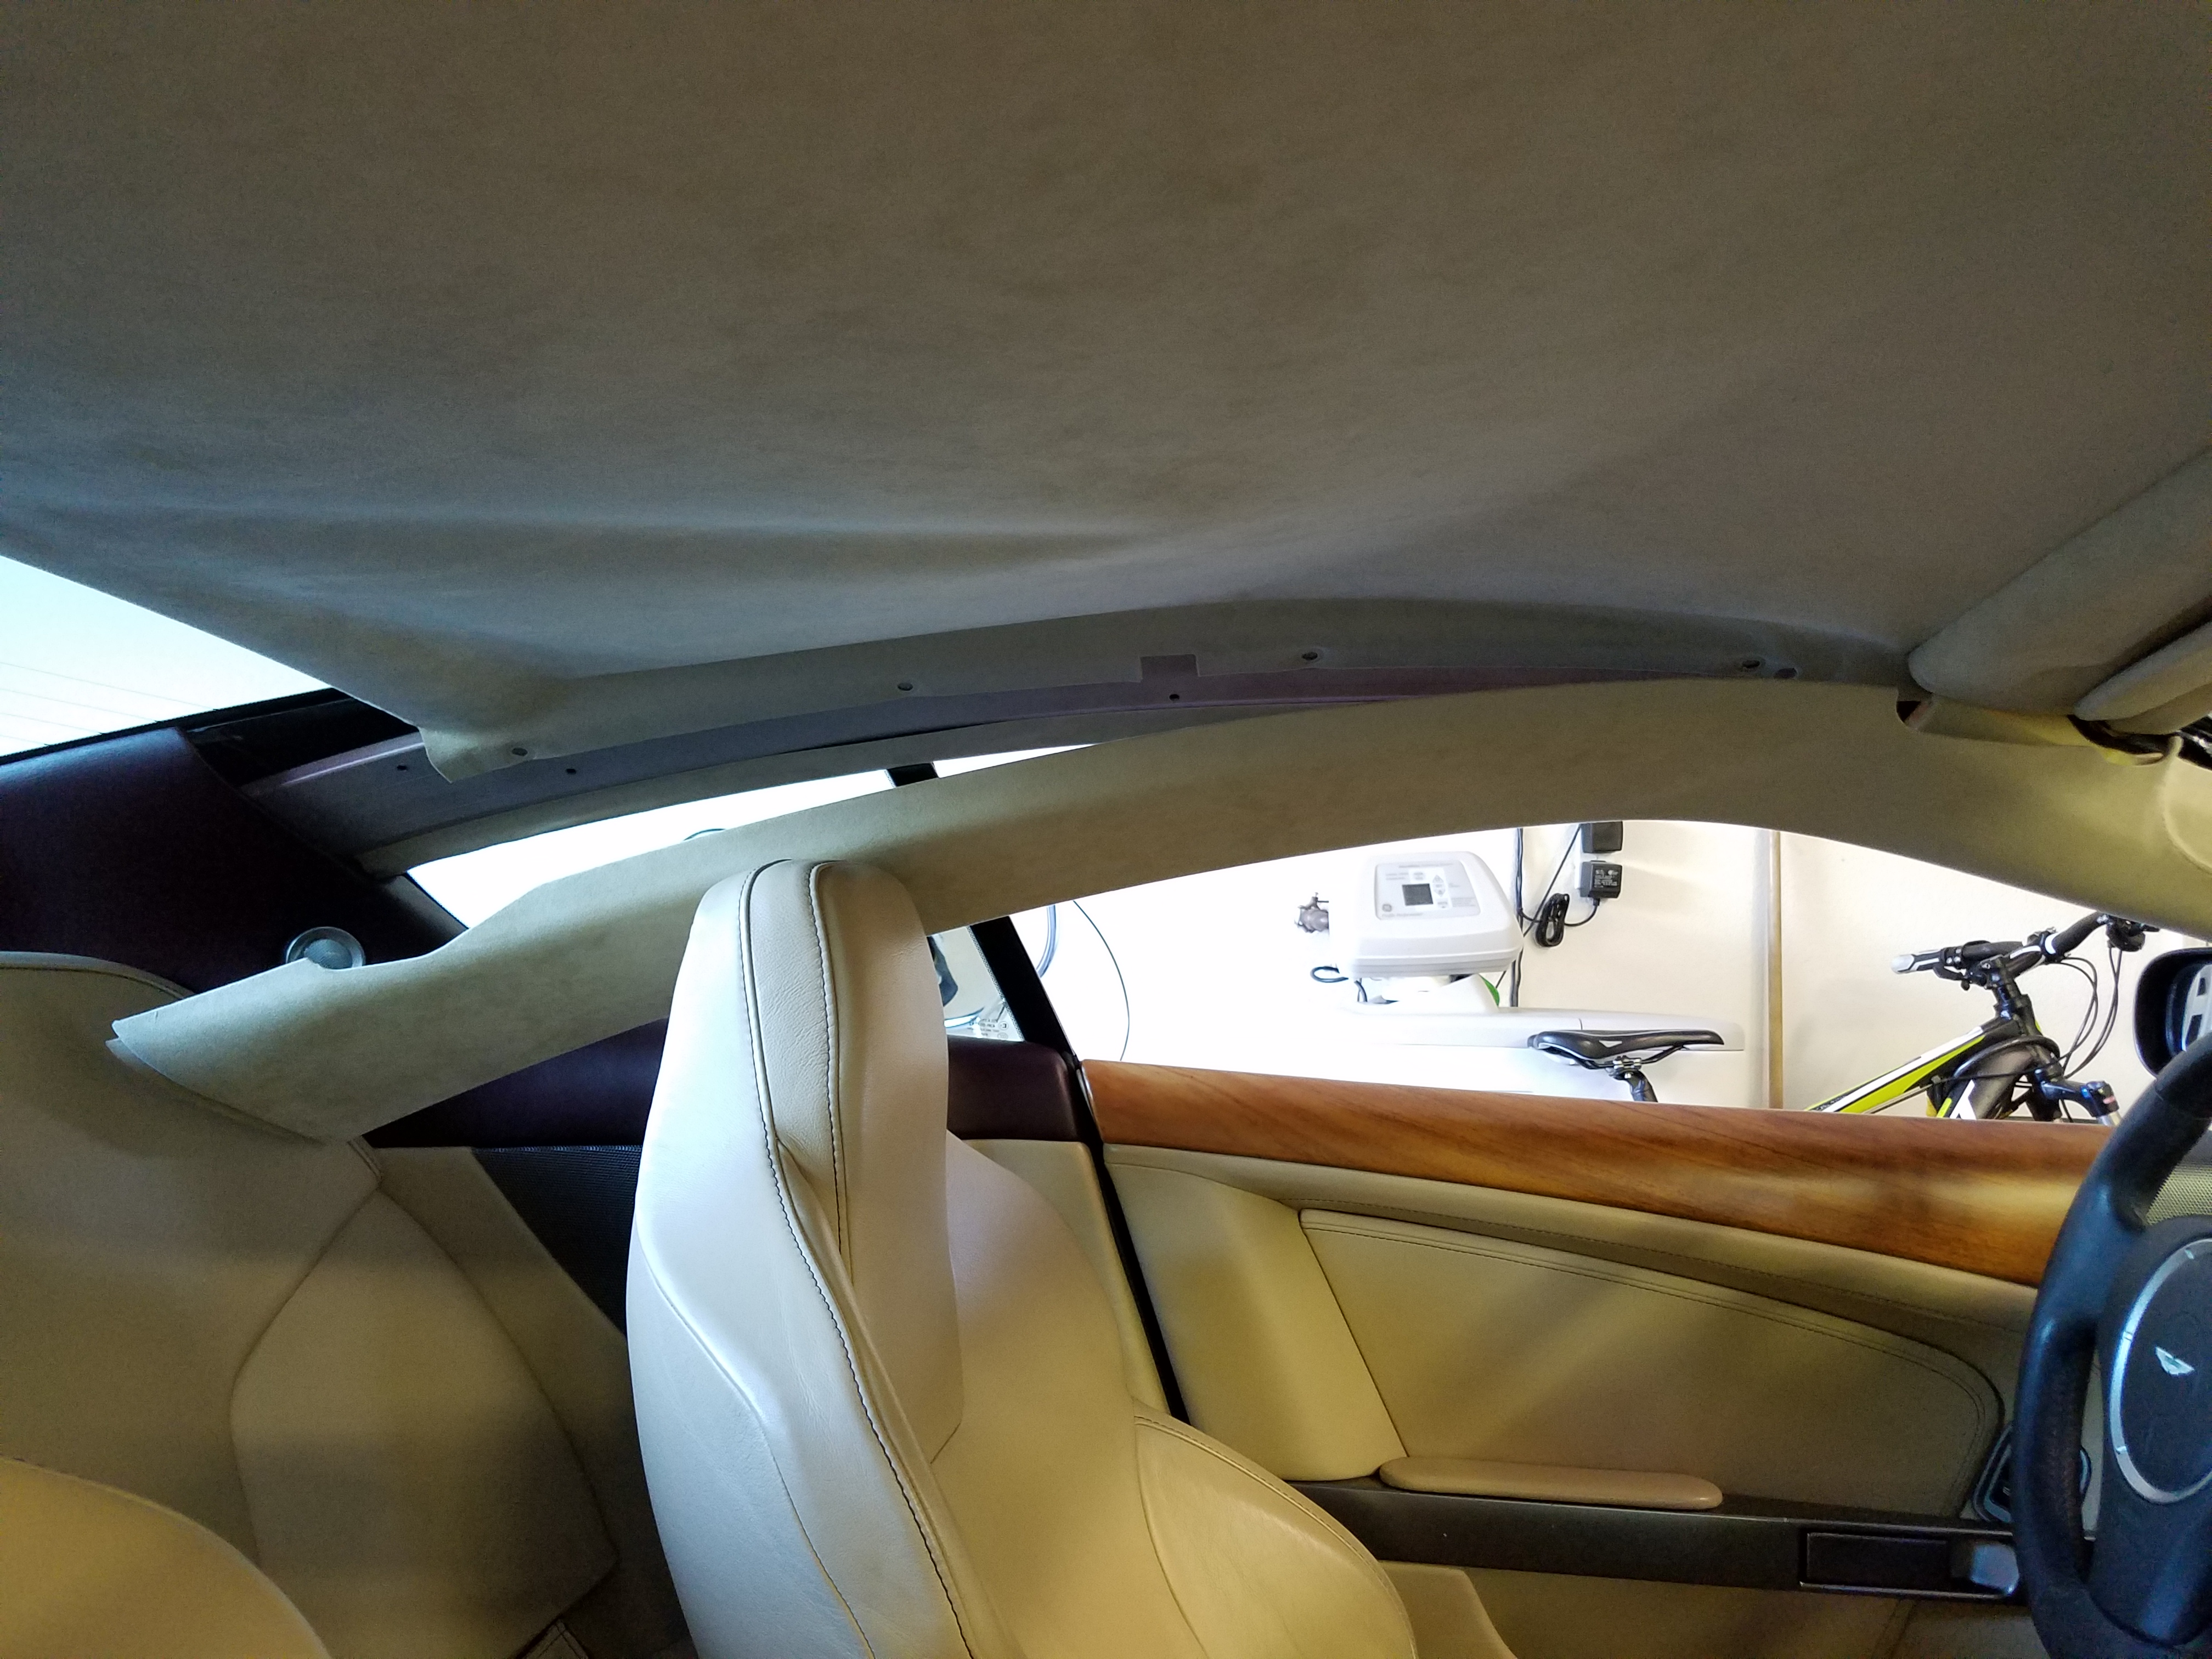
I discovered it is not necessary to completely remove the A pillar trim, and in particular you can leave the front edges in place. This is a big deal and means you do NOT have to remove ANY of the dash panels at all. It is still necessary to release all the A pillar clips and free it from the roof structure, but it can just sag out of the way while the headliner form is removed (as you will see in the videos). This will save you probably at least an hour of time and hassle plus remove the risks of snapping off any of the dash panel clips or damaging any of the dash panel leather in the process.
‘While you are at it’ syndrome
Even so, I will still include all the details on removing the dash panels anyways in the next series of articles for you to optionally consider, and here is why. When I had my dash panels off I wanted to take care of a few issues:
-

Airbag Dash Panel Leather Glue Failing I had a great opportunity to inspect them closely. I discovered that three of them had the glue failing on the corners and this was allowing the leather to curl up and look less than perfect. This is a VERY common issue with the front most dash panels that are exposed to the sun the most.
- I was able to deep clean the leather. With the shallow rake of the DB9 windshield it is very difficult to get to the front most panels, and after 11 years I wanted to give all the panels a thorough clean.
- My car (like many others) suffers from niggling dash rattles/squeaks. I wanted a look under the Dash Panels to tighten any loose screws, restrain any rattling wires or cables, etc. I even used a little felt tape where the leather panels meet the plastic dash.

Procedure
Here are links to all my articles detailing the steps:
- Parts needed to Remove and Reinstall your Headliner
- Tools needed to Remove and Reinstall your headliner
- Removing the Drivers Side Dash Panels
- Removing the Passenger Side Dash Panels
- Removing the Rear View Mirror
- Removing the A Pillar (Cant Rail) Covers
- Removing the Headliner
- Cleaning the Leather Interior Panels
- Repairing the broken clips on a Dash Instrument Panel
- Repairing the Failed Glue of the Alcantara Covered Headliner and Leather Dash Panels
- Installing the Headliner
- Installing the A pillar (Cant Rail) Covers
- Installing the Rear View Mirror
- Installing the Drivers Side Dash Panels
- Installing the Passenger Side Dash Panels
- The Final Result
Video
I’ve created a YouTube playlist for this series of video’s so you can watch the process in its entirety (start to finish). You can check it out here.

I read your post and thought “I hope that does not happen to me”. So I was driving the other day and started to look more closely at the headliner in my 2007, as I live in Atlanta I have the same heat…..and now I have a sagging headliner too. Thank you for the timely posts….whatever you post seems to happen with my 2007 on about the same schedule as your 2005.
LikeLike
Not laughing here in England, I have this same issue! I was slightly concerned about just having glue applied, the fabric appears backed by a Foam type material which has started to break down. I see from your image you seemed to have this too – were the upholstery shop still able to glue this?
LikeLike
Hi Paul. Sorry to hear about the sagging liner. My guy scrubbed off all the dead foam. You can’t reglue it. After it was scrubbed away, they applied a new layer and new glue for all.
LikeLike
can the firtree connections be reused that are holding the cant rail and headliner in place or do I need new ones? If I need new ones do you have a source other than Aston? In the repairing the Alcantara headliner section, did you have a spray glue recommended, like 3M 38808?
LikeLike
The new article with this information will be out in a few days. Stay tuned.
LikeLike
Steve, recently had the sagging headliner issue. I live in Australia and it’s been very warm recently. Moved the car out of the garage the other day to do a few things. The next day I found that the headliner had sagged. So…. I read your article, and spoke to Aston… Very expensive to get it fixed by them.
Found a local trimmer who was keen to give it a try, I gave them your article and YouTube video and they were able to fix it in a matter of hours! For only $400 AUD – which is totally awesome. Could not have done it without your video – thank you so much.
LikeLike
Hi Sean. Very glad to hear that, its the whole point that I do this. I just have to get the last few articles in the video series for the headliner published.
LikeLike
Hi Steve, I have a 2011 Jaguar XKR coupe with the alcantara headliner that has fallen. I thought about just gluing it back on. Did it bother you or look strange not having the original foam backing. Allan in hot Florida
LikeLike
Hi Allan. Visually you can’t even tell there isn’t a thin foam layer under it. If you run your hand across the surface, you can tell it isn’t as soft and supple as before. An upholsterer can add the foam layer back if you’d like. Definitely need to scrape the old foam and glue out though, I’ve seen so many botched partial repairs where someone tries to stick the partially sagging headliner back up using spray contact cement, etc. Good luck with your repair.
LikeLike
Thanks for the fast reply Steve. I’ve already pulled out the headliner but just haven’t done a lot of vetting on upholstery shops. I didn’t realize they could “refoam” the old Alcantara material. I wonder if that would be beneficial for sound and heat? Thanks again.
Your DB9 is stunning. Allan
LikeLike
Hi Steve, thank you SO much for all the fantastic information!
You’ve saved me tons of time on the many maintenance tasks (including brakes) and fixes I do on my Meteorite Gray 2005 DB9. Using your tips I just pulled out my sagging headliner. Took about 15 minutes instead of the likely 3 hours if I were to have done my usual routine and just followed the factory shop manual procedure. Now off to the upholstery shop 🙂
– Keith
LikeLike
Hi Steve, finally cold wet England got very hot this summer and guess what my headlining has sagged! Based on your advice I asked a local car restoration company if they could recommend a local trim company to fix it and he took a look and said “you can easily do that yourself, just make sure you use the right adhesive”.
So I have to ask why someone like you who has taken on far more challenging tasks on your car decided to take it to an upholsterer? Was it really fear of messing up or just the great price you were quoted?
Keep up the great work.
Best regards
Martin
LikeLike
Hi Martin.
I think I suck at interior work, or am more timid at least. I’m sure I could do it but I had a trimmer I knew and trusted and $150 for the effort seemed reasonable.
I think any good quality spray on upholstery adhesive will do the trick. Something like this 3M Spray Adhesive is what I would use
LikeLike
Hi Steve,
My upholsterer was slow coming back to me to confirm what he was going to do for £300 and as I already had extensive dialogue with Boyriven about obtaining new Alcantara (£72) if I messed up, I decided to have a go myself.
I had already bought high temperature spray Trim-Fix glue and ordered 3mm scrim foam which arrived on Saturday so on Sunday I glued the scrim foam to the frame which was very easy if you do it a little strip at a time, Then I trimmed the foam and cut all the holes. I then placed the Alcantara on the foam and lined up all the holes, folded one half back, took a deep breath and started gluing the Alcantara to the foam in strips from the center to the front and then did the same from the center to the back where it wraps over.
The result looks great and I have refitted the panel with new fir trees bought from HWM.
So the car interior is looking good again.
Thanks for all the great information.
Best regards
Martin
LikeLike
Hi Martin. That’s awesome that you did it all yourself along with the Alcantara and the foam. Well done!
LikeLike