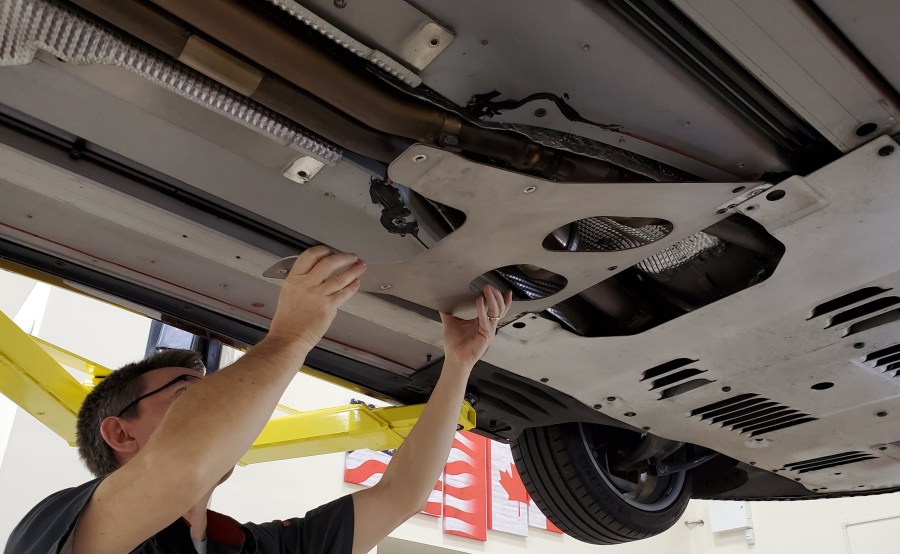

One of the terrific aspects of any Aston Martin is the handling. Part of the magic to that is creating a car that is ‘stiff’, meaning that it doesn’t twist and flex during cornering or over bumps. The DB9 is no exception, and part of that body stiffness is created by a thick aluminum plate underneath the bottom of the car in the center of the vehicle, the “Shear Panel”. There is nothing fancy to it, it’s just a metal plate bolted up rigidly to the left and right hand sides of the transmission/drive shaft/torque tube tunnel the runs from front to back. The tunnel itself is a weakness to the car, so the plate bolts across the bottom of the tunnel to make the vehicle stiffer.
Why would you care about this? You probably wouldn’t unless you need to do some work on the things that are up inside that tunnel, above the Shear Panel. In particular, the dual exhaust pipes run along there. For me, I am planning on installing a ‘Secondary Cat Delete Kit’ which is a fancy way of saying removing the two rearmost catalytic converters and replacing them with a straight pipe kit offered from several vendors (more about that in a future article). Any maintenance to the center portion of the exhaust system will require removal of the Shear Panel.
The good news is that it’s easy enough to remove, and only takes about 10 minutes once you have the car off the ground.
Preparation
You’ll need to have access under the car to work on it, so this means getting it up off the ground on four jack stands or with a hoist.
Note: Aston makes a fuss about removing this panel, and in particular NOT to do it if the car isn’t even and level. For example, don’t remove the panel if you’ve only got the car jacked up at one corner since this introduces a twist into the car’s frame, and if you remove and reinstall the panel in this condition you may allow the car to twist, and then lock it in permanently when you reinstall the panel. Raise the car so its level and evenly supported at all four corners at the official jacking points.
Here are some articles and video’s that will assist you:
Tools
You only need a few simple tools to tackle this job:
- T30 Torx Bit
- T40 Torx Bit
- A 3 or 6” extension (to save you barking your knuckles)
- A strong ratchet, breaker bar, etc to break the bolts loose
- Inspection Light
- [Optional] 3/8″ Electric Impact Driver (to make the work go faster)

Procedure
I started by looking up what Aston Martin has to say in the official Workshop manual. While they reference the requirement to remove the panel in a few places, there is zippo about actually how to do it. Not a big deal for removing, but reinstalling it requires knowing the correct torques for these bolts.
Here’s what I did:
- The plate is held on with six (6) T40 bolts, three (3) on the left and three (3) on the right. There are also two (2) T30 bolts that must also be removed from the front aerodynamic undertray that over laps.

- Use the T30 Torx bit, extension and ratchet to remove the two T30 bolts, one left, one right.
- Use the T40 Torx bit, extension and breaker bar to crack each of the six T40 bolts loose.

- With them all loose I remove the front two and rear two, leaving just one on each side in the middle of the plate to hold it up while I worked.
- Don’t be surprised when you discover there front and middle bolts have a small aluminum disc spacer above them. These may drop out and startle you.

- Don’t be surprised when you discover there front and middle bolts have a small aluminum disc spacer above them. These may drop out and startle you.
- Finally, remove the last two bolts, but support the plate somehow with the help of a friend, floor jack or your free arm. Just be aware that it weighs a couple of pounds and could hurt if it dropped and whacked you while under it.


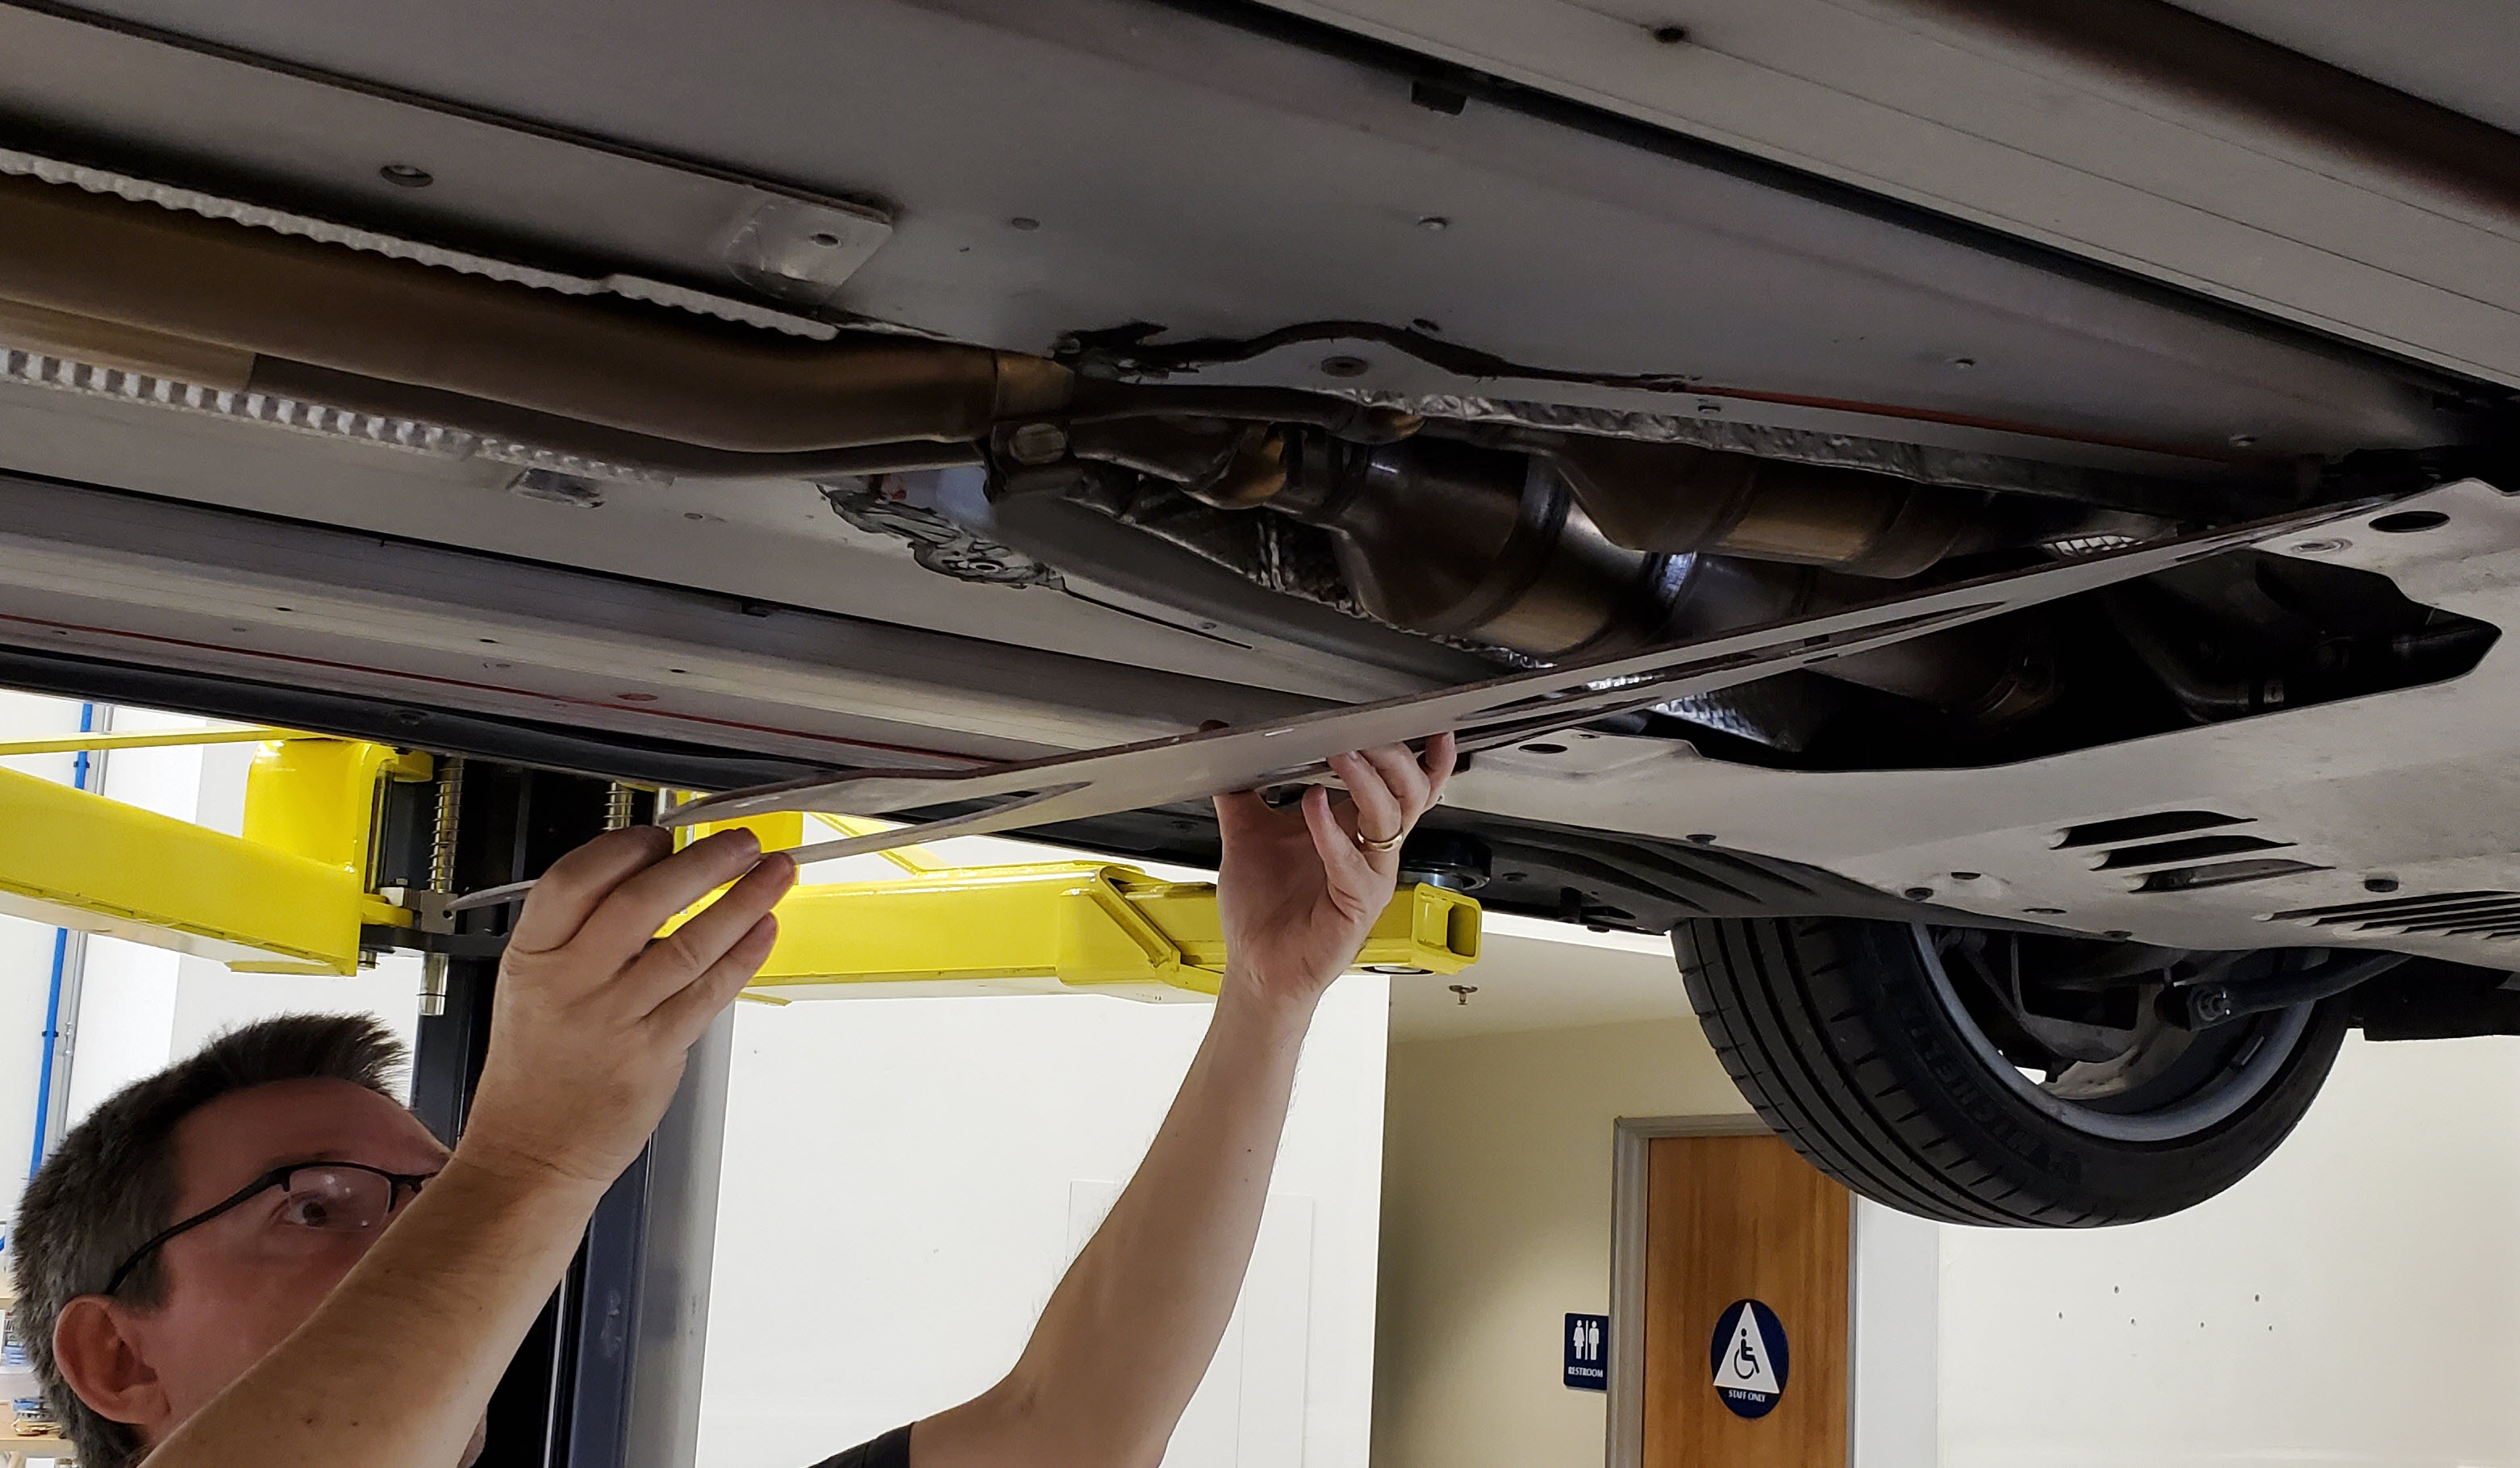

That’s it. With the plate removed you’ll see the exposed gubbin’s of the tunnel and you can get to work on your next step of your project. You can clearly see the secondary catalytic converters, the heat shielding, the header bolts, and the exhaust clamps.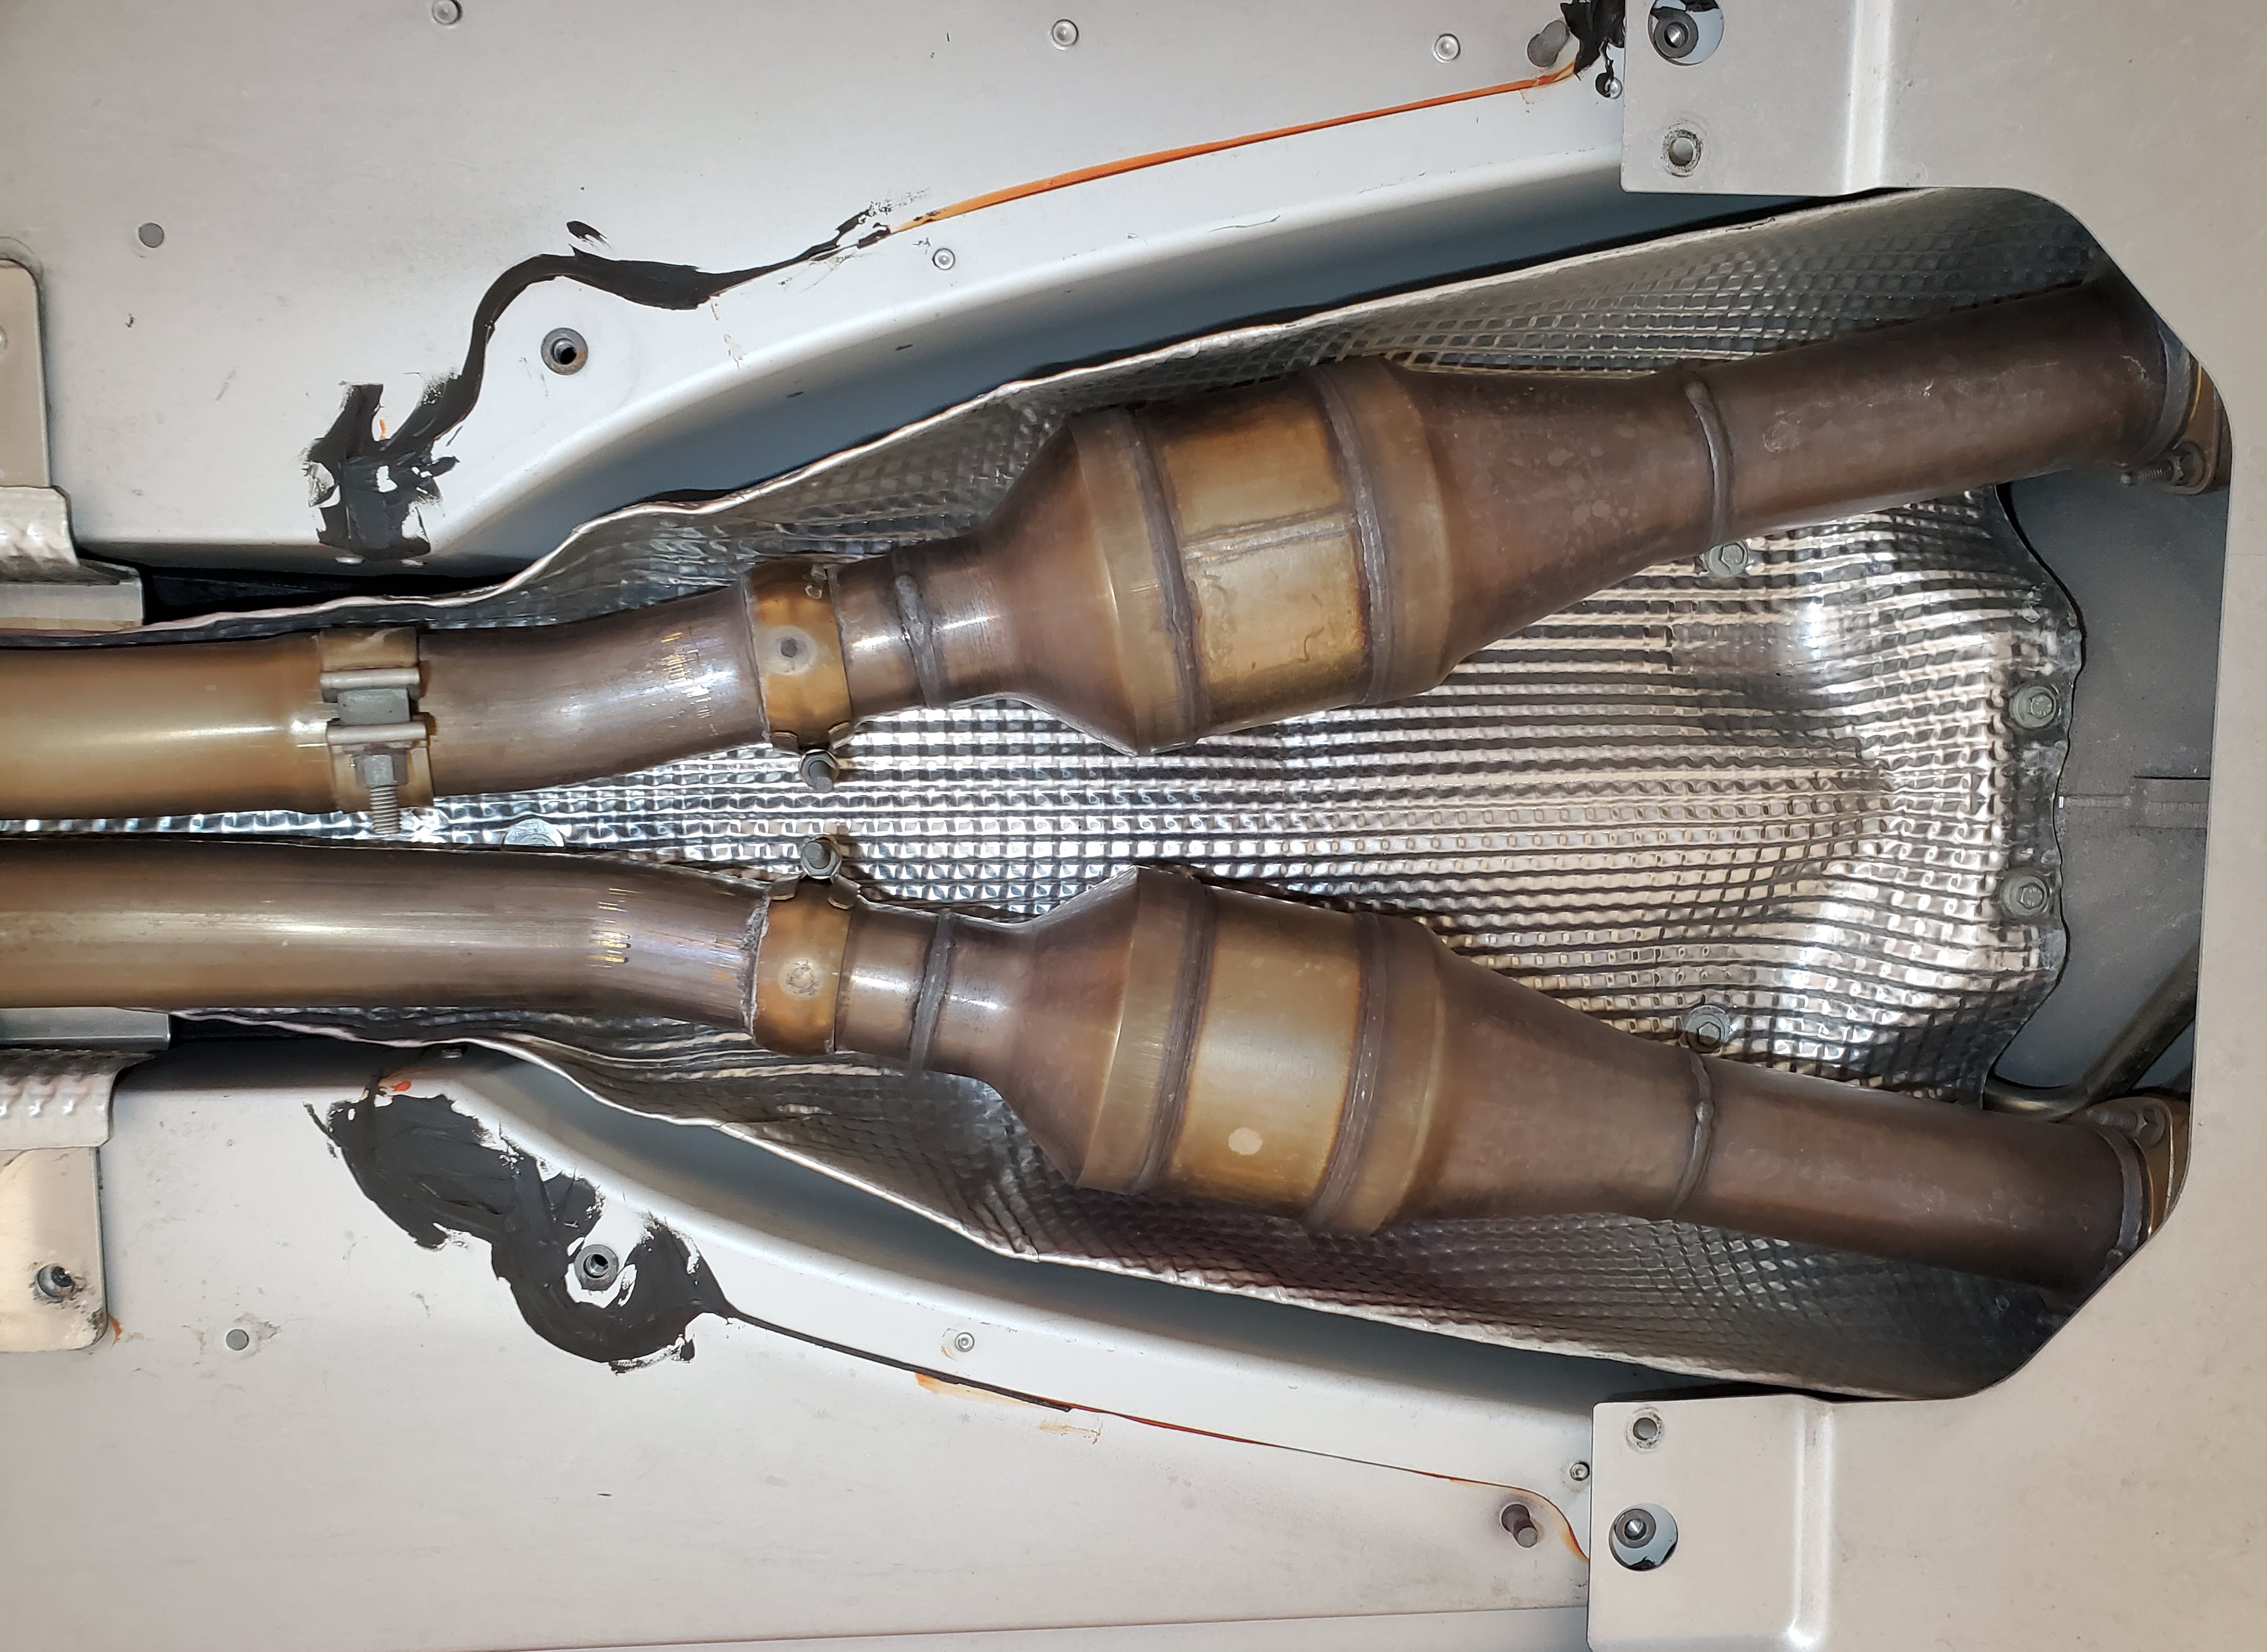
Looking at the photo of the shear panel removed, you can actually see some signs of an exhaust gas leak from the right hand side. There is a carbon deposit accumulating on the panel, and it looks to be positioned directly below the pipe clamp to the rear of the catalytic converter. Aston messed up on fitting the clamp properly to totally seal the connection I guess. I’ll need to do better refitting it.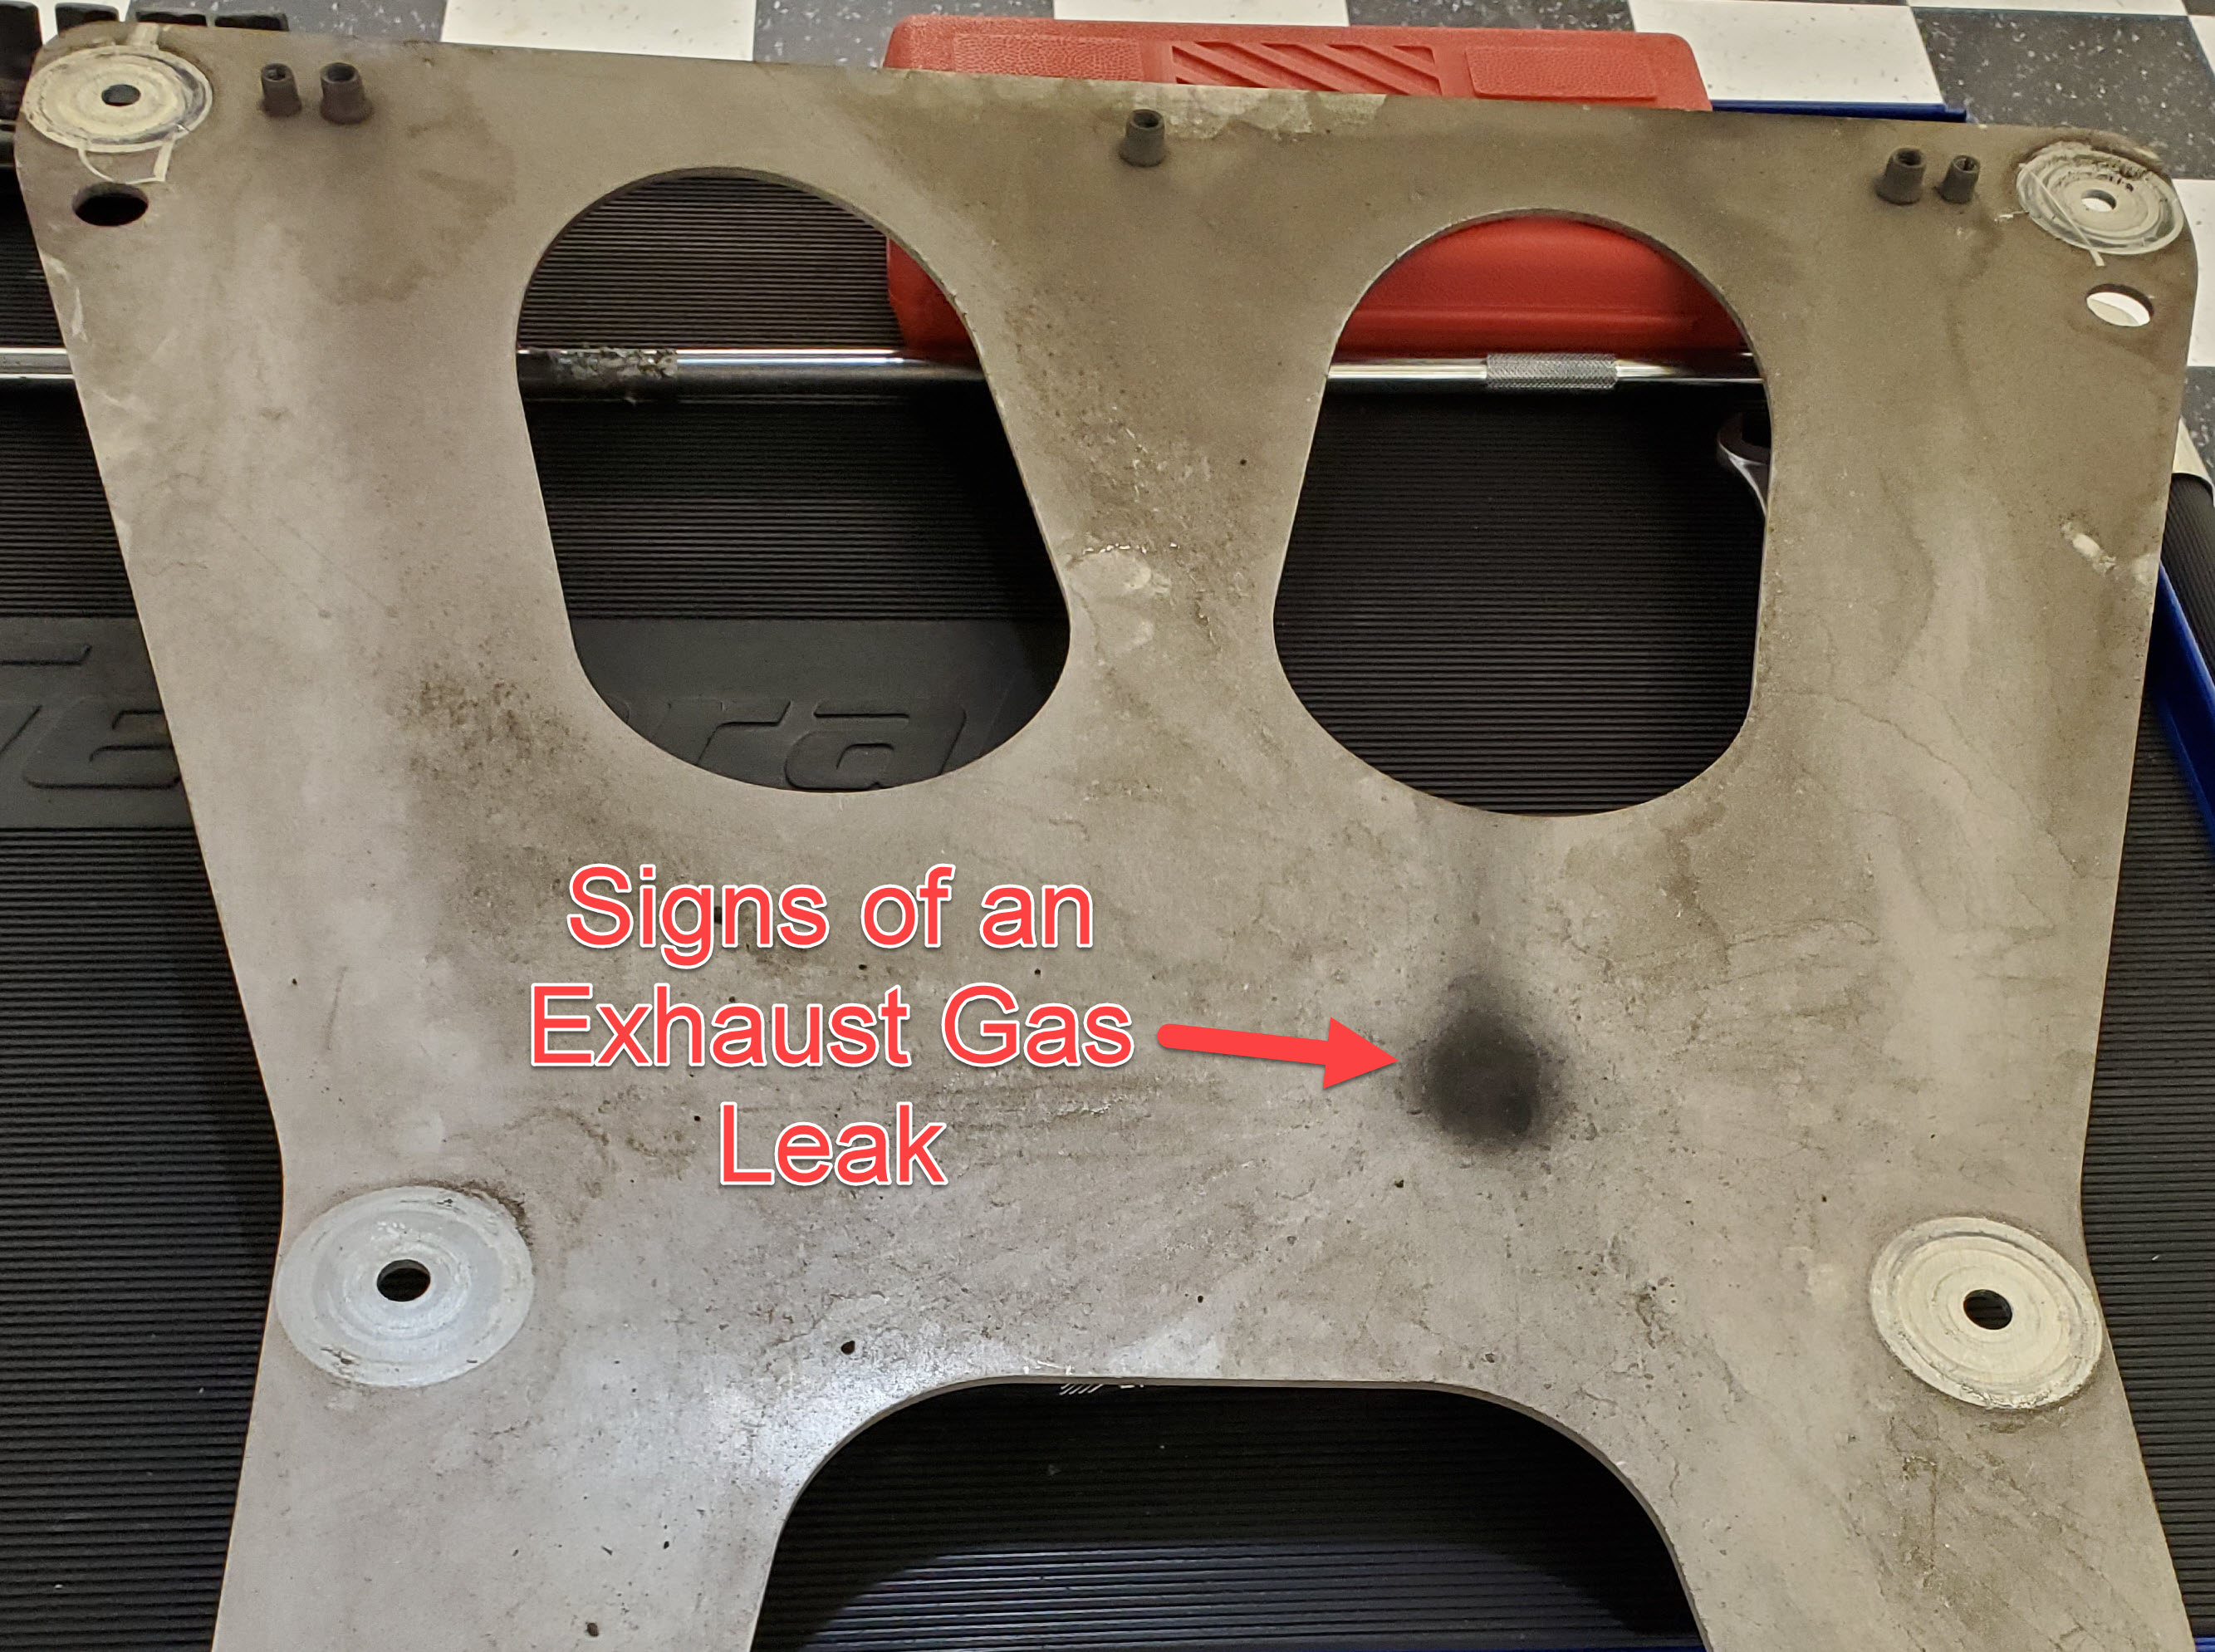
When it’s time to reinstall please check out my other article and video (click here) on how to get it properly torqued up and bolts locked in place so you don’t introduce any new squeaks or rattles in your car.
Video
I made a short video of this process you can check out to see how to tackle this yourself.

I did the same job installing Velocity AP cat delete pipes ( very nicely made BTW), Shear panel removal was a breeze. Be prepared for a very different sounding DB9, takes a bit of getting used to, more harsh and crackle and louder than to soft OE V12
LikeLike
I’d agree. Been running it for a few weeks not. More of a Snarl. I’ll be posting a quality audio recording of the before and after soon.
LikeLike