![]() Removing the Oil Pan/Sump from the Touchtronic II 6-speed Automatic Transmission fitted to most Aston Martin DB9, DBS and Rapide between 2004 and 2014 is necessary for several reasons. You might be wanting to change the automatic transmission fluid & filter, or needing to access the Mechatronics unit inside to change the seals. The fluid filter is integral to the plastic sump body, so if you want to change the filter you are going to need to replace the entire Oil Pan. I’ve doing an entire series on these tasks (check it out here). Let me show you how.
Removing the Oil Pan/Sump from the Touchtronic II 6-speed Automatic Transmission fitted to most Aston Martin DB9, DBS and Rapide between 2004 and 2014 is necessary for several reasons. You might be wanting to change the automatic transmission fluid & filter, or needing to access the Mechatronics unit inside to change the seals. The fluid filter is integral to the plastic sump body, so if you want to change the filter you are going to need to replace the entire Oil Pan. I’ve doing an entire series on these tasks (check it out here). Let me show you how.
Tools Required
You only need a few tools and supplies. I’ve covered them in detail (along with where to purchase them) in another article for the overall transmission service process (find it here), but here is the subset needed for this step.![]()
- T40 Torx Socket
- 3/8″ ratchet
- 6″ extension
- Electric 3/8″ impact driver (optional)
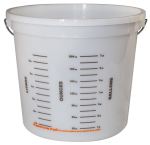 Drain Bucket
- In the video you will see me use a 10 liter plastic mixing bucket I sourced from a local home center for about $4 USD
- Drip Tray
- You are going to make a mess, so rather than fluid splashing and dripping all over your garage floor or onto cardboard that’s going to get soggy, I sought out a better solution
- I purchased a dog kennel plastic tray/liner that was perfect for the task. One that was 35″ x 22″ was only $16 USD on Amazon with free shipping.
 Pig Mat absorbent towels
- When the mess happens you are going to need to be able to soak up the spills. Pig Mat isn’t just ordinary paper towel, it can absorb a ton of fluid and just one or two sheets is all I needed.
- You can pickup a 50 ft roll on Amazon for $24 USD.
- Alternately you can just use a ton of regular paper towels.
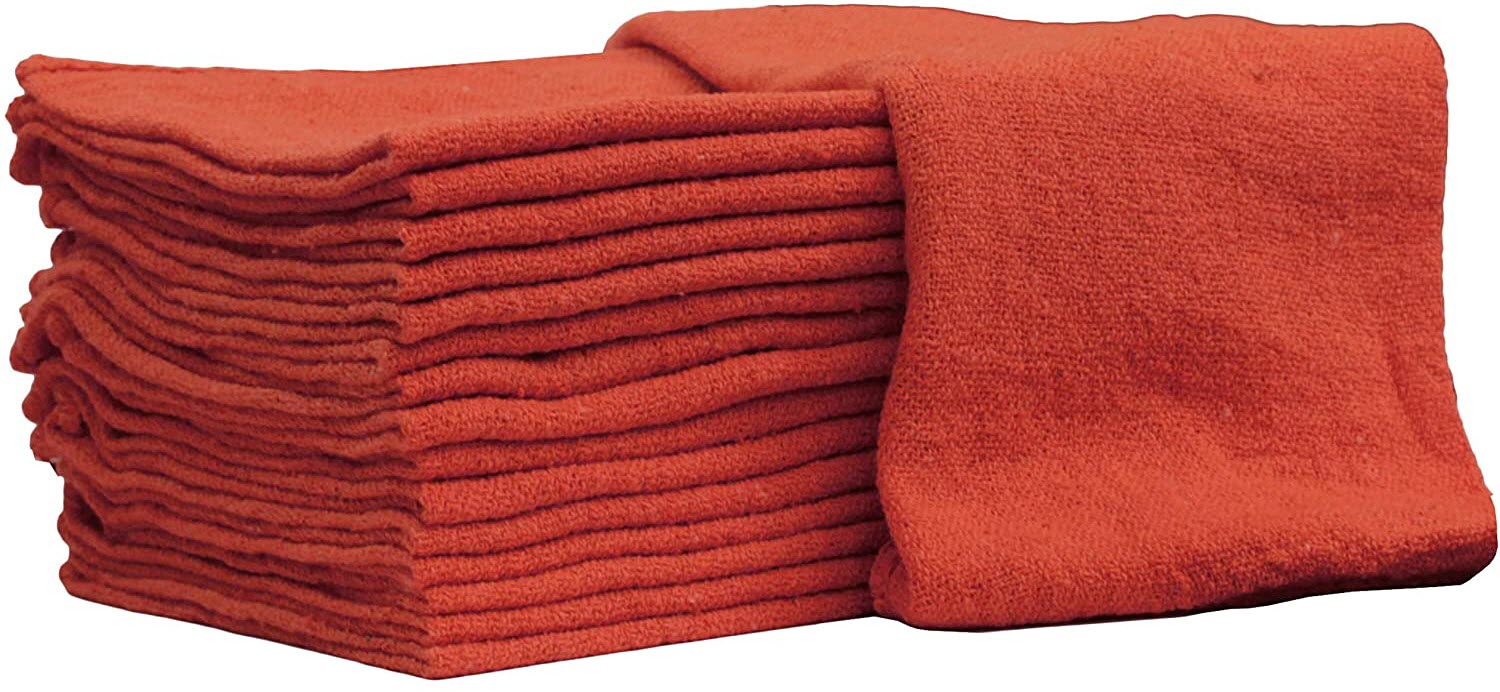
 Shop Rags
- Your hands and tools are going to get oily. Have a good supply of lint free shop towels on hand.
- I get a bag of 100 for about $25 USD from Amazon.
 Disposable gloves
- You are going to get covered in fluid, so a half dozen pairs of disposable gloves would be handy to have.


It’s going to be messy, so don’t wear your Sunday best to do the work. Time to put on your ‘garage clothes’.
Preparation
You need to do a number of steps to get ready to drain the fluid, and I’ve already prepared articles on these steps.
- Get your car up level on Jack Stands (as high as possible)
- Remove the rear undertray
- Remove the rear subframe crossmember
- Remove the right rear exhaust heat shield
- Draining the Fluid from the Sump
- Remove the Thermostatic Control Valve
With those steps out of the way we can get on with it.
Procedure
The process will take about 10 minutes once you have all the preparation steps done.
As I’ve written about elsewhere, the transmission is really a ZF brand model 6HP26. ZF has an official service manual for the transmission and you can find it here. Most important to this procedure is the pattern we are going to use to loosen the 21 (yep – twenty one) bolts that hold the plastic oil pan on.
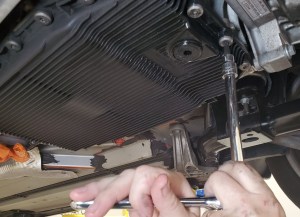
- Use the T40 Torx socket on the extension and ratchet and just crack loose each of the 21 bolts by hand.
- Follow the pattern in reverse, starting with 21 and working backwards to 1.
- I take the time to crack each loose before going ahead and removing them all. I want to be sure one of them isn’t seized before I commit to removing it.
- Do this by hand – don’t use an electric impact. ‘Feel’ what’s happening as you break each one free. Don’t strip or break any off!
- With them all cracked loose, you can now set to removing 19 of the bolts, and I leave bolts 1 and 2 installed just to hold it up until I am ready.
- I used my electric 3/8″ ratchet to speed up the process taking them out. It’s a lot of bolts.
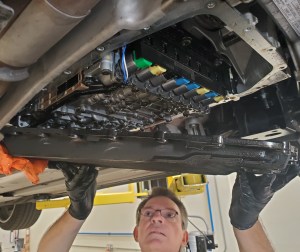
- Position your drain bucket and drip tray under the sump. Even though you think you’ve already drained the sump, there will certainly be some fluid that sloshes out as you remove it. You’ll see my arm get a full dousing in the video below as I was surprised by this.
- Support the weight of the sump in the center with one hand.
- Remove the two final bolts.
- Lower the sump away – keeping in mind there is a spigot on one end that inserts up into the transmission body. You’ll need to lower it a few inches straight down before its fully disengaged (watch the video below).
- Keep it as level as you can and then tip and drain it into your drain bucket.
- Check the spigot on the sump to make sure the O-ring came out with it and is not still stuck up in the bore (find and remove it if it is).

- In my experience, fluid keeps dripping down for a LONG time from all over the place, so the drain bucket can’t be everywhere at once. The drip tray was essential and I needed to empty it into the bucket a few times over the next hour.

Inspection
With the oil pan/sump removed its prudent to take a little time to inspect what’s lurking in the bottom of it. You are looking for tangible debris. And chunks. Anything like that at all would be ‘bad’, and a sign that something serious is beginning to fail. If you discover something like this, I’d stop and consult an Aston Dealer or ZF Transmission specialist before moving on.
The oil pan/sump is fitted with two round magnets mounted inside the bottom of the sump near the drain plug. Their job is to attract metal particles floating in the fluid and anchor them to the magnets so they aren’t circulating doing damage. I inspected my magnets to look for larger flakes or chunks, and saw only the fine pasty/gritty goo that is very, very fine particles. This photo is of my cars total accumulated material after about 46,000 miles. Doesn’t look too bad considering. I’d call this ‘normal’.
![]()
The View
Once you have the oil pan removed you’ll have a clear view looking up at the inside of the transmission, a view dominated by the Mechatronics unit. I’ll be covering how to remove the Mechatronics (check it out here). If you are heading down that path, the next step in order to get there is to remove the Electronics Sleeve (check out my article here).![]()
Video
You can see exactly how I removed the sump in my video on draining all the fluid from the transmission. Pickup the action at about the 18:36 mark.

Steve, et al,
I have not yet removed and replaced the fluid in my DB9, but I did remove/replace all the fluid from the ZF 5 speed transmission in my BMW 840Ci a couple of years ago. I have one suggestion as a way to reduce SOME, but maybe not all of the fluid mess that occurred when you took the pan down.
First, to minimize the dripping of oil from the valve body, I drained the pan late one afternoon, then re-placed the drain plug. Left the shop and returned for the next steps the following day. This allowed a majority of the oil in the valve body to drip into the bottom of the nearly empty pan over about 15 hours..
Then, when removing the bolts holding the pan (also plastic) the next day I totally removed the ones at the end nearest the drain plug, and about halfway to the other end on both sides. Then I loosened each of the bolts at the other end of the drain pan only about 3-4 revolutions. Following that, working toward the drain plug end, I progressively loosened bolts on both sides a little more than those.. Before loosening the two in the middle, I removed the drain plug with the used oil receiver under it. Then, as I slowly removed the two center bolts on each side, the drain end of the oil pan tilted down, and the majority of the remaining oil in the pan drained out. When it stopped draining, I re-installed the drain plug.
With most of the old oil removed, the drain pan was no longer very heavy, so by carefully holding it up and removing the remainder of the bolts, I could remove the pan and had no further mess associated with that part of the procedure.
Might save getting a lot of oil on that nice shirt you were wearing!! = ha
PS: For anyone doing this, DO use the procedure Steve has for replacing the bolts in the new pan.
LikeLike
So I was doing the flush today on my DB9 and was curious to see what happens if i push air in to transmission lines which goes to transmission, not the one towards the front of the car which goes to transmission cooler.
I gave quick few burs of ai in to bone lines and AFT fluid starts draining from Transmission it self as if i opened a drain plug or something, I got about 1.2-1.4 lit out thats after drainig fluid form pan, cooler lines. my total fluid volume which came out is about 9.2-9.4 liter.
I hope i have not caused damaged to something in transmission by pushing compressed air. I will find out if car works fine tomorrow once i reassemble the whole thing.
LikeLike