 The Thermostatic Valve is an integral part of the Automatic Transmission Fluid cooling system. It regulates the flow of fluid from the transmission at the rear of the car to the transmission oil cooler at the very front. You may have removed your Thermostatic Valve as part of doing a full transmission service including changing the fluid, filter and seals like I did (read all about that process here). Maybe you’ve had it out because it failed, or was leaking, or you had to change the fluid piping. Whatever the reason, reinstalling it isn’t that hard but there are a few tricks along the way. Let me share the process with you.
In the article on removing the valve I have some background on how it operates (check it out here if you are interested).
Tools Required
You don’t need any exotic tools to reinstall the Thermostatic Valve. I’ve covered them in detail (along with where to purchase them) in another article for the overall transmission service process (find it here), but here is the subset needed for this step: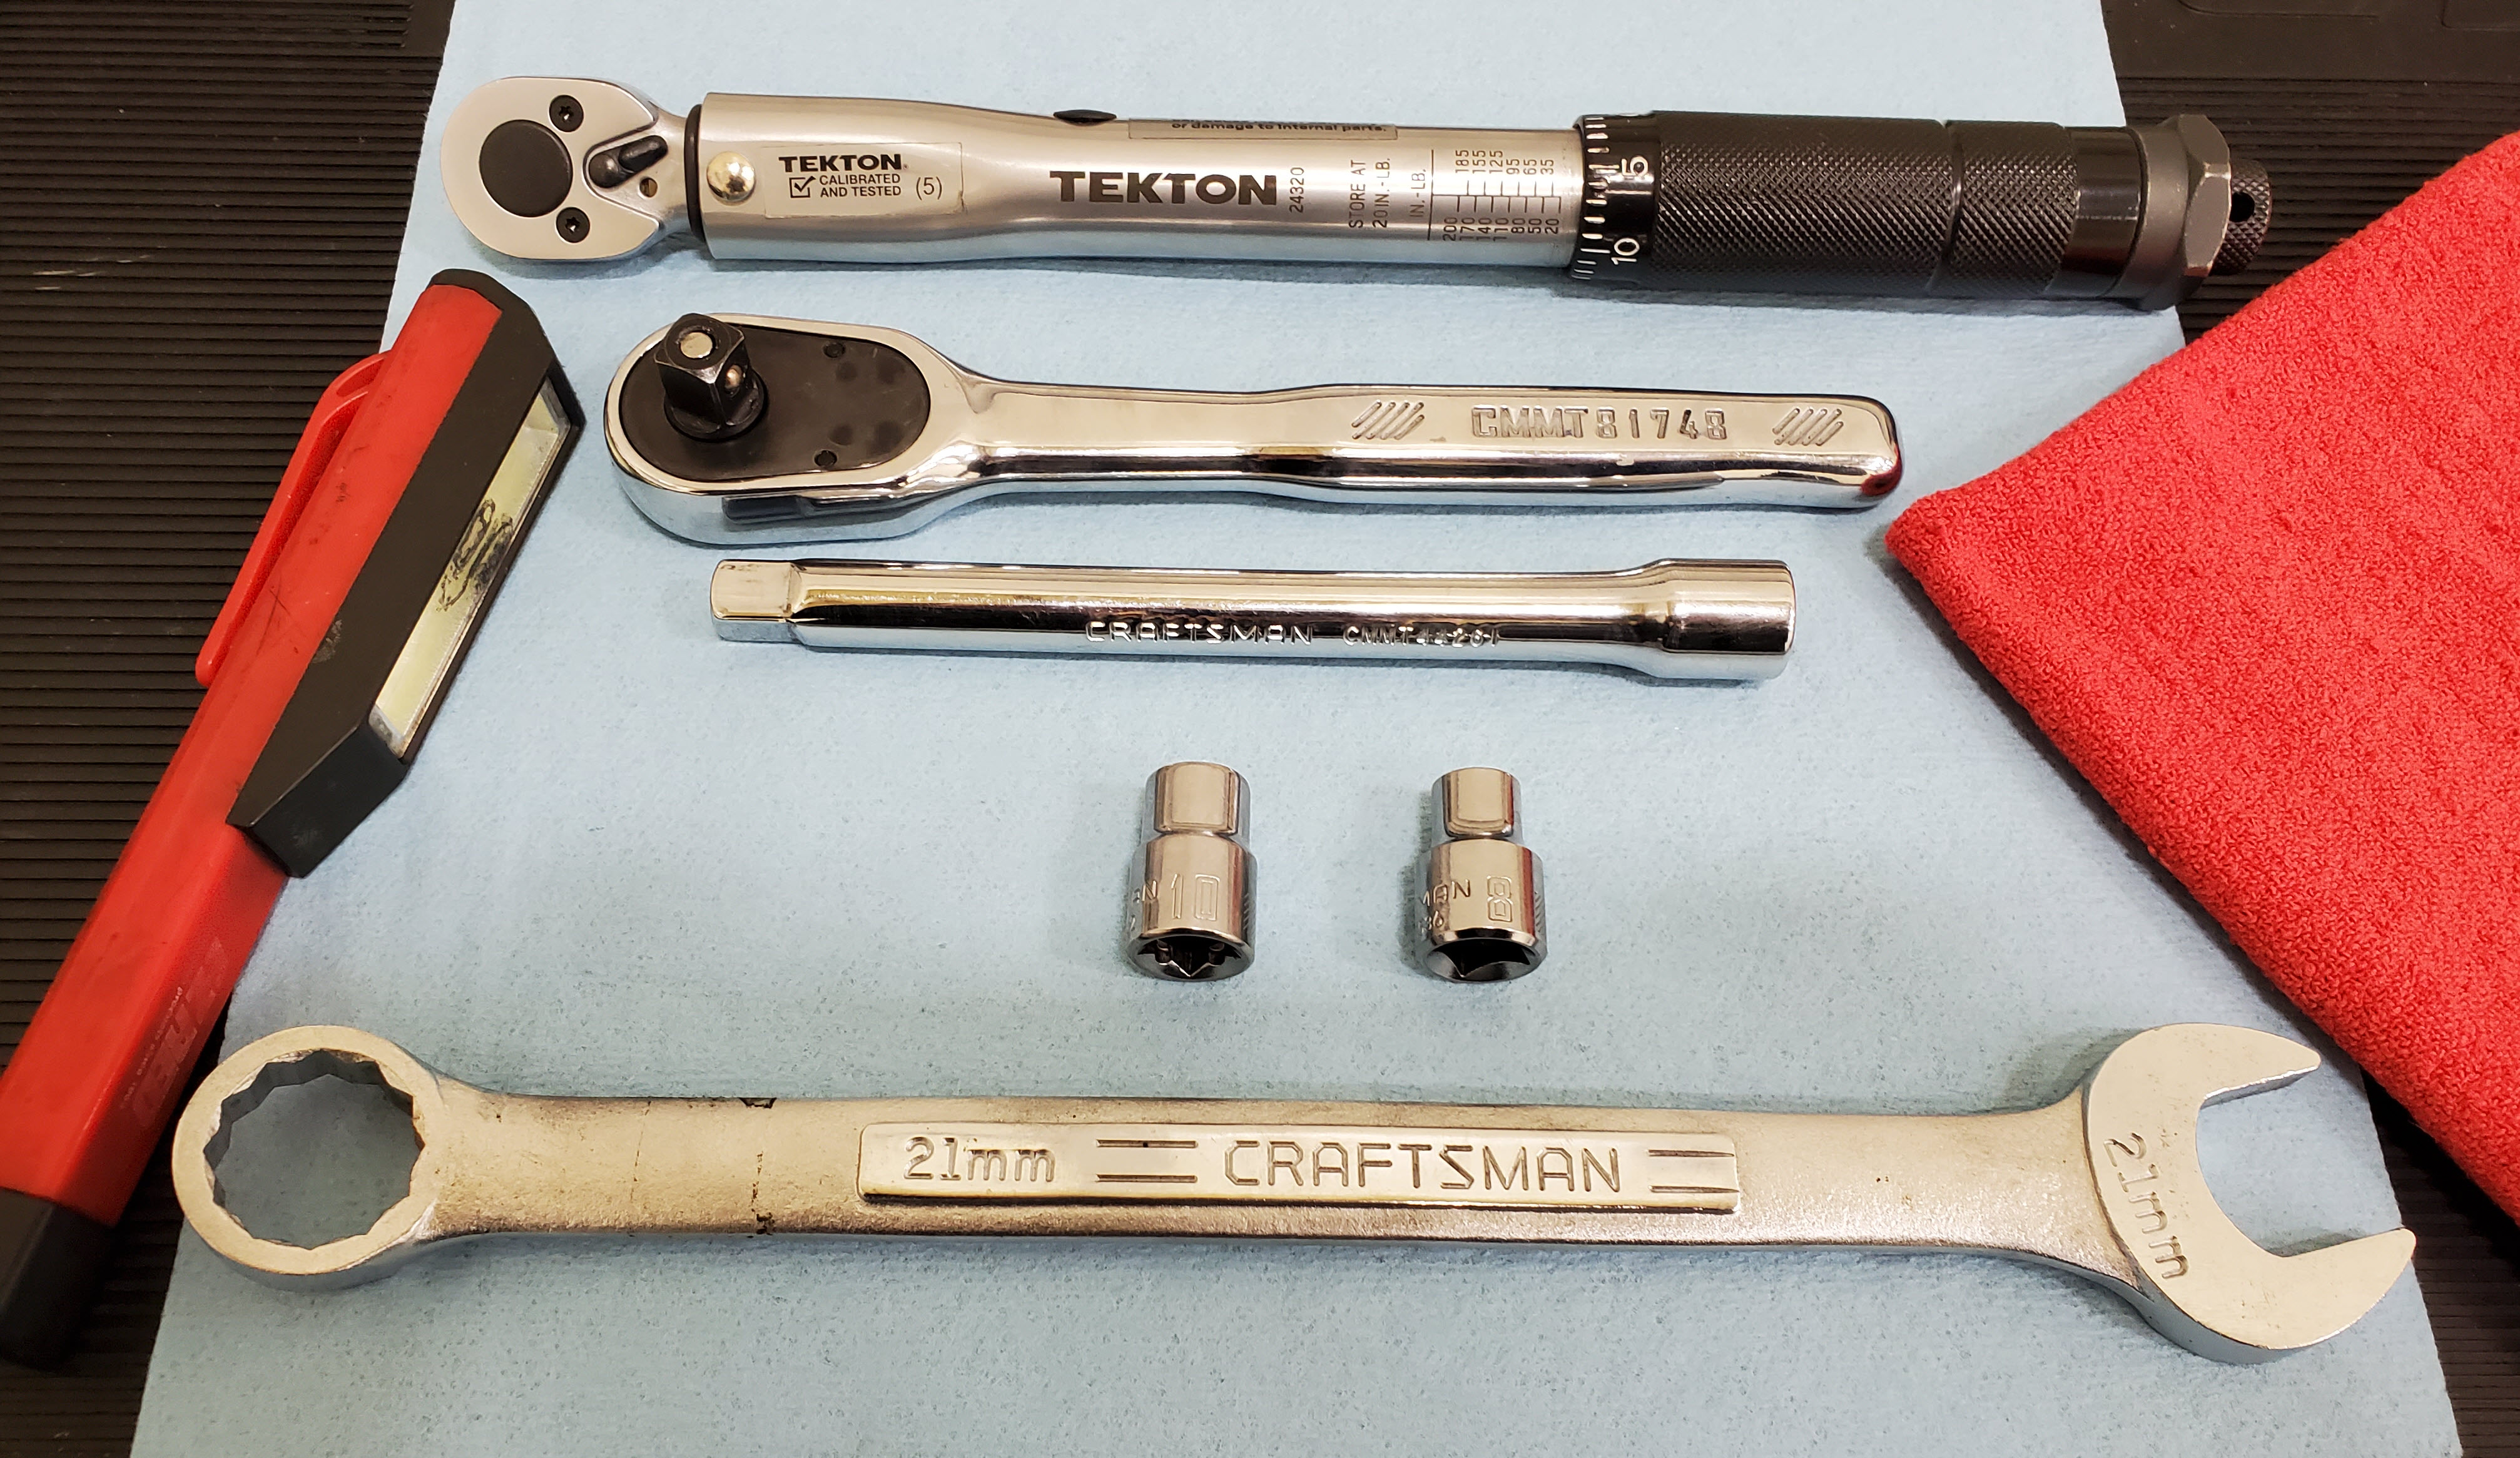
- 21 mm open end wrench
- 8mm socket
- 10mm socket
- 6″ extension
- Ratchet
- Torque Wrench capable of a fairly low 9 Nm.
- Drip Tray
 The transmission lines never seems to stop dripping, so rather than fluid dripping all over your garage floor or onto cardboard that’s going to get soggy, I sought out a better solution
- I purchased a dog kennel plastic tray/liner that was perfect for the task. One that was 35″ x 22″ was only $16 USD on Amazon with free shipping.

 Pig Mat absorbent towels
- If a mess happens you are going to need to be able to soak up the spills. Pig Mat isn’t just ordinary paper towel, it can absorb a ton of fluid and just one or two sheets is all I needed.
- You can pickup a 50 ft roll on Amazon for $24 USD.
- Alternately you can just use a ton of regular paper towels.
 Shop Rags
- Your hands and tools are going to get oily. Have a good supply of lint free shop towels on hand.
- I get a bag of 100 for about $25 USD from Amazon.
 Disposable gloves
- Even installing the Thermostatic Valve can be a messy business, so having a couple of pairs of disposable gloves would be handy to have.


It might get messy, so don’t wear your Sunday best to do the work. Time to put on your ‘garage clothes’.
Preparation
You need to do a number of steps to get to the point where you are ready to reinstall the valve. These steps below include everything to do the fluid, filter and seal service, but if you are just working on your valve or piping you can pick and choose. I’ve already prepared articles on these steps.
- Get your car up level on Jack Stands (as high as possible)
- Remove the rear undertray
- Remove the rear subframe crossmember
- Remove the right rear exhaust heat shield
- Draining the Fluid from the Sump
- Remove the Thermostatic Control Valve
- Remove the Oil Pan/Sump
- Remove the Electronics Sleeve
- Remove the Mechatronics Unit
- Changing the Mechatronic Valve and Bridge Seals
- Installing the Mechatronics Unit
- Installing the Electronics Sleeve
- Installing the Oil Pan/Sump
With those steps out of the way we can get on with it.
Procedure
Reinstalling the Valve should take about 15 minutes once you have all the preliminary work done.
![]() The Official Aston Martin Workshop Manual Section 7.02 on Transmission Cooling includes a few words about installing the Thermostatic Valve. Essentially install the bracket then the pipes. Uh, ya.
The Official Aston Martin Workshop Manual Section 7.02 on Transmission Cooling includes a few words about installing the Thermostatic Valve. Essentially install the bracket then the pipes. Uh, ya.
Here is the process I followed.
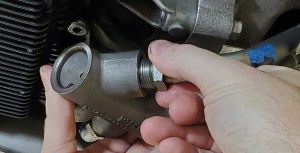
- Make sure the valve body is clean and the ports are free of debris or grit. In particular look in each of the four threaded bores and make sure there is no debris where the O-rings on the end of the pipe fittings will seat.
- We want to get all four pipes loosely threaded into the valve body before we mount the bracket to the transmission.
- Offer up the valve and bracket to the two pipes that come from the transmission first.
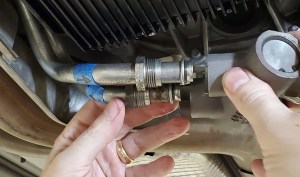
- These pipes were swung down a wee bit when we removed the valve. This makes access easier.
- Insert the pipe straight in until it seats smoothly
- HAND start the threaded fitting. BE CAREFUL here. The threaded fitting is steel, the housing is aluminum. It will take very little effort to cross thread the fitting and ruin the valve. If it won’t turn easily, back it out and realign and start again.
- As you get them started do them 3/4 of the way up, but leave them still loose so there is some wiggle in the valve body to help with the next steps.
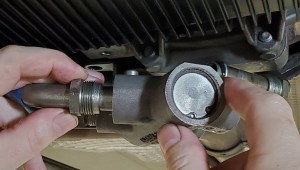
- With the first two pipes mostly done up, now offer up the two pipes that run to the front of the car.
- I found this more difficult (same as it was removing them)
- Just be patient and gently tug and tease the valve and pipes around until they seat.
- Be careful as you insert the two pipes so that the steel pipe itself doesn’t mangle across the aluminum threads as it inserts.
- Same as before, HAND start the fittings carefully.
- Once all four pipes are mostly done up but still a little bit of flexibility, time to mount the valve and bracket. Offer it up into proper position aligning the two bolt holes.
- Install the two bolts loosely at first until both are hand snugged
- Torque the 8mm bolt to 9 Nm and the 10mm bolt to 20 Nm

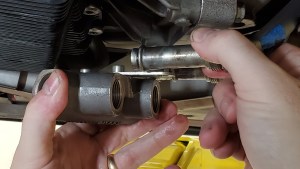
- With the bracket firmly fixed, now its time to do the final snug and tighten of the four pipe fittings.
- Using the 21 mm wrench gently take up the last of the slack in all four fittings making sure the pipe guides in straight into the bore until you feel the fitting fully seat (and this seals the O-ring).
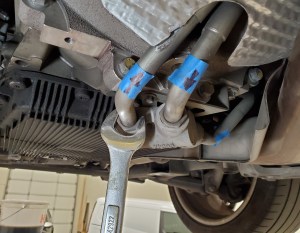
- There is an official Torque spec for these fittings of 20 Nm.
- I wasn’t sure how to Torque a fitting like this, so I just used the wrench and made them well snug.
- I didn’t go overboard on tightening them since the O-ring is really doing the sealing, not the threads.
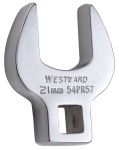 A helpful viewer of the video on YouTube pointed out that this is what a crows foot spanner is for. You can us it with the Torque wrench at a 90° angle to accomplish the task. Learned something new and will apply this next time!


That’s it – your valve is now installed. If you are buttoning up your Transmission as part of the full service, the next step is getting on with the proper refilling process (check out that article here).
Video
You can see me installing the Thermostatic Valve in my car during this video at the 19:50 minute mark.
If you are interested on how the valve operates, I have a small sidebar piece in the video here at the 16:49 minute mark.

Steve,
Fabulous write-up of this complete drain/refill procedure. THANK YOU.
It appears you re-used the ‘O’ rings in this thermostatic valve when re-installing. Is that correct?
If I wanted to replace these ‘O’ rings when I drain/refill this spring, do you have a reference for purchasing new ones?
LikeLike
Hi Gary. Mine weren’t 15 years old so I wasn’t as worried, but I’d agree with you. I just don’t know the _exact_ spec for them. Size and material. All o-rings are not alike. There is no separate service part listed for these I am aware of. If it can be figured out, I’m sure a set would cost less than a couple bucks.
LikeLike
Thanks Steve. IF I find a source and part number for the OE ‘O’ rings, I’ll post it here.
Gary
LikeLike
Hi Gary, That would be excellent. If you can figure out what it needs to be based on some reference source, please let me know that do. I was reluctant to just measure the o-ring and guess at the material. Hoping to find something definitively documented. Stay in touch!
LikeLike