
 Removing the Secondary Catalytic Converter from a DB9 isn’t something you’d do every day unless you are working on the exhaust system. For me, I’m working on installing and testing a ‘Secondary CAT Delete Kit’ that supposedly improves the performance and sound of the car [read about that project in my other article here]. The first step in that process is to remove the original secondary CAT, and that’s what this article is about.
Before I go on I know some of you out there will be muttering about air pollution and that if it could just be deleted, Aston would have. I must agree, but find it irresistible to find out. My plans are fairly simple:
- Remove the Original Secondary CATs
- Install the Secondary CAT Delete Kit
- Dyno test the car to determine if there are actual performance gains
- If not, put the CATs back since there is no upside to the chance
- SMOG test the car and see if it passes. I live in California, the US state with the most stringent emission standards. If it passes, to me its proof that the car is still as clean as need be.
- If it fails, I plan on putting the original CATs back in.
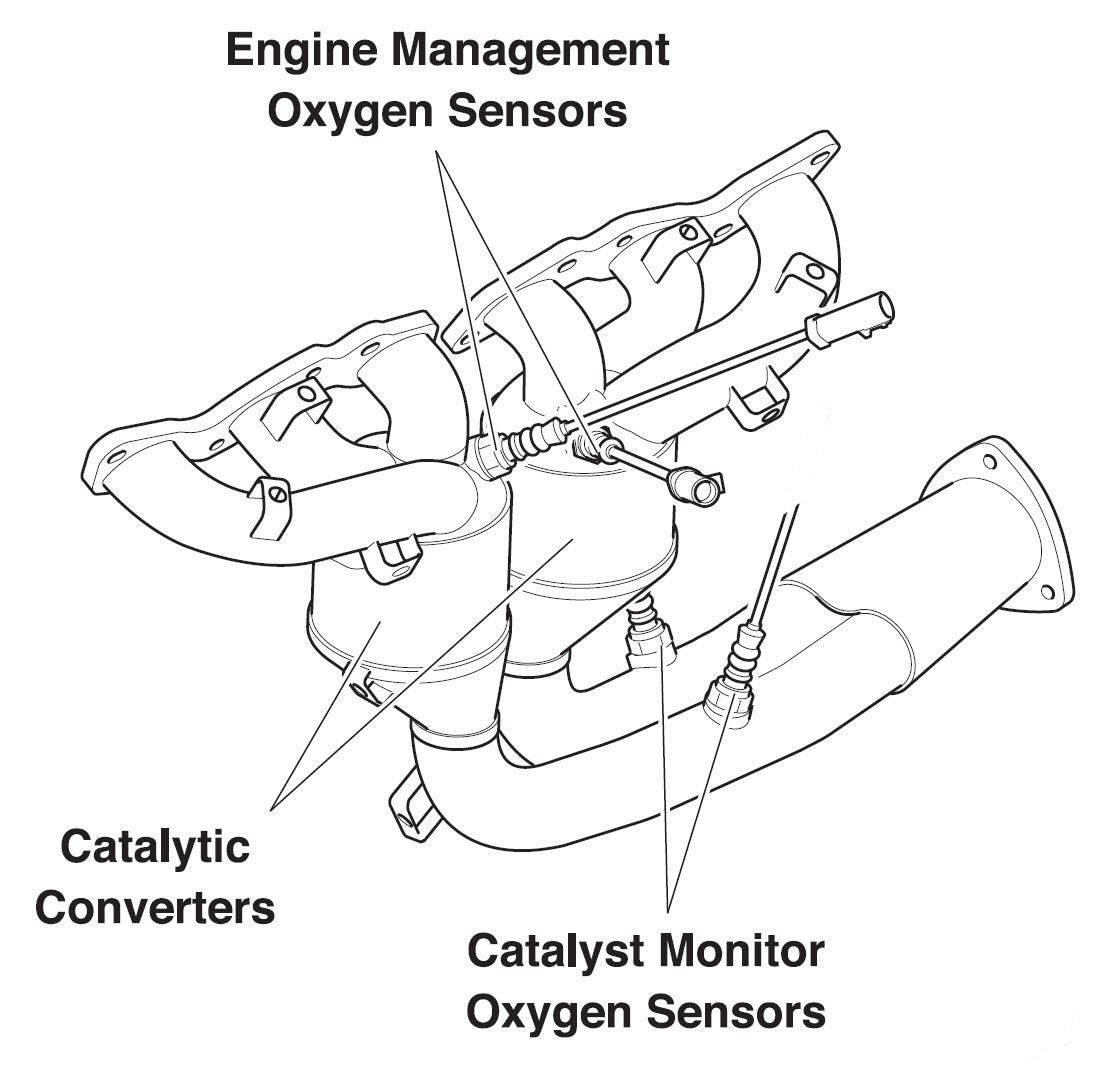
These aren’t the only Catalytic converters in the car. There are FOUR (4) Primary CATs upstream. Each exhaust header (Left and Right) has TWO CATs in it, each servicing three cylinders. The O2 sensors surround those CATs. The Secondary CATs are downstream several feet in the middle section of the exhaust system, and do NOT have any electronic monitoring at all. What’s their function? Maybe cold start polishing of the exhaust, but honestly they won’t be doing much either since they will be stone cold and take longer to heat up than the Primaries. Anyways, my car still have four Primary CATs installed so I don’t feel so bad about trying this out.
Note: You should be sure any changes you make to your car follow all the laws for where you live. Modifications to a vehicles emission system in most any way are generally frowned upon.
Preparation
To get to this point I’ve already done several steps that I have created articles and videos for:
Tools
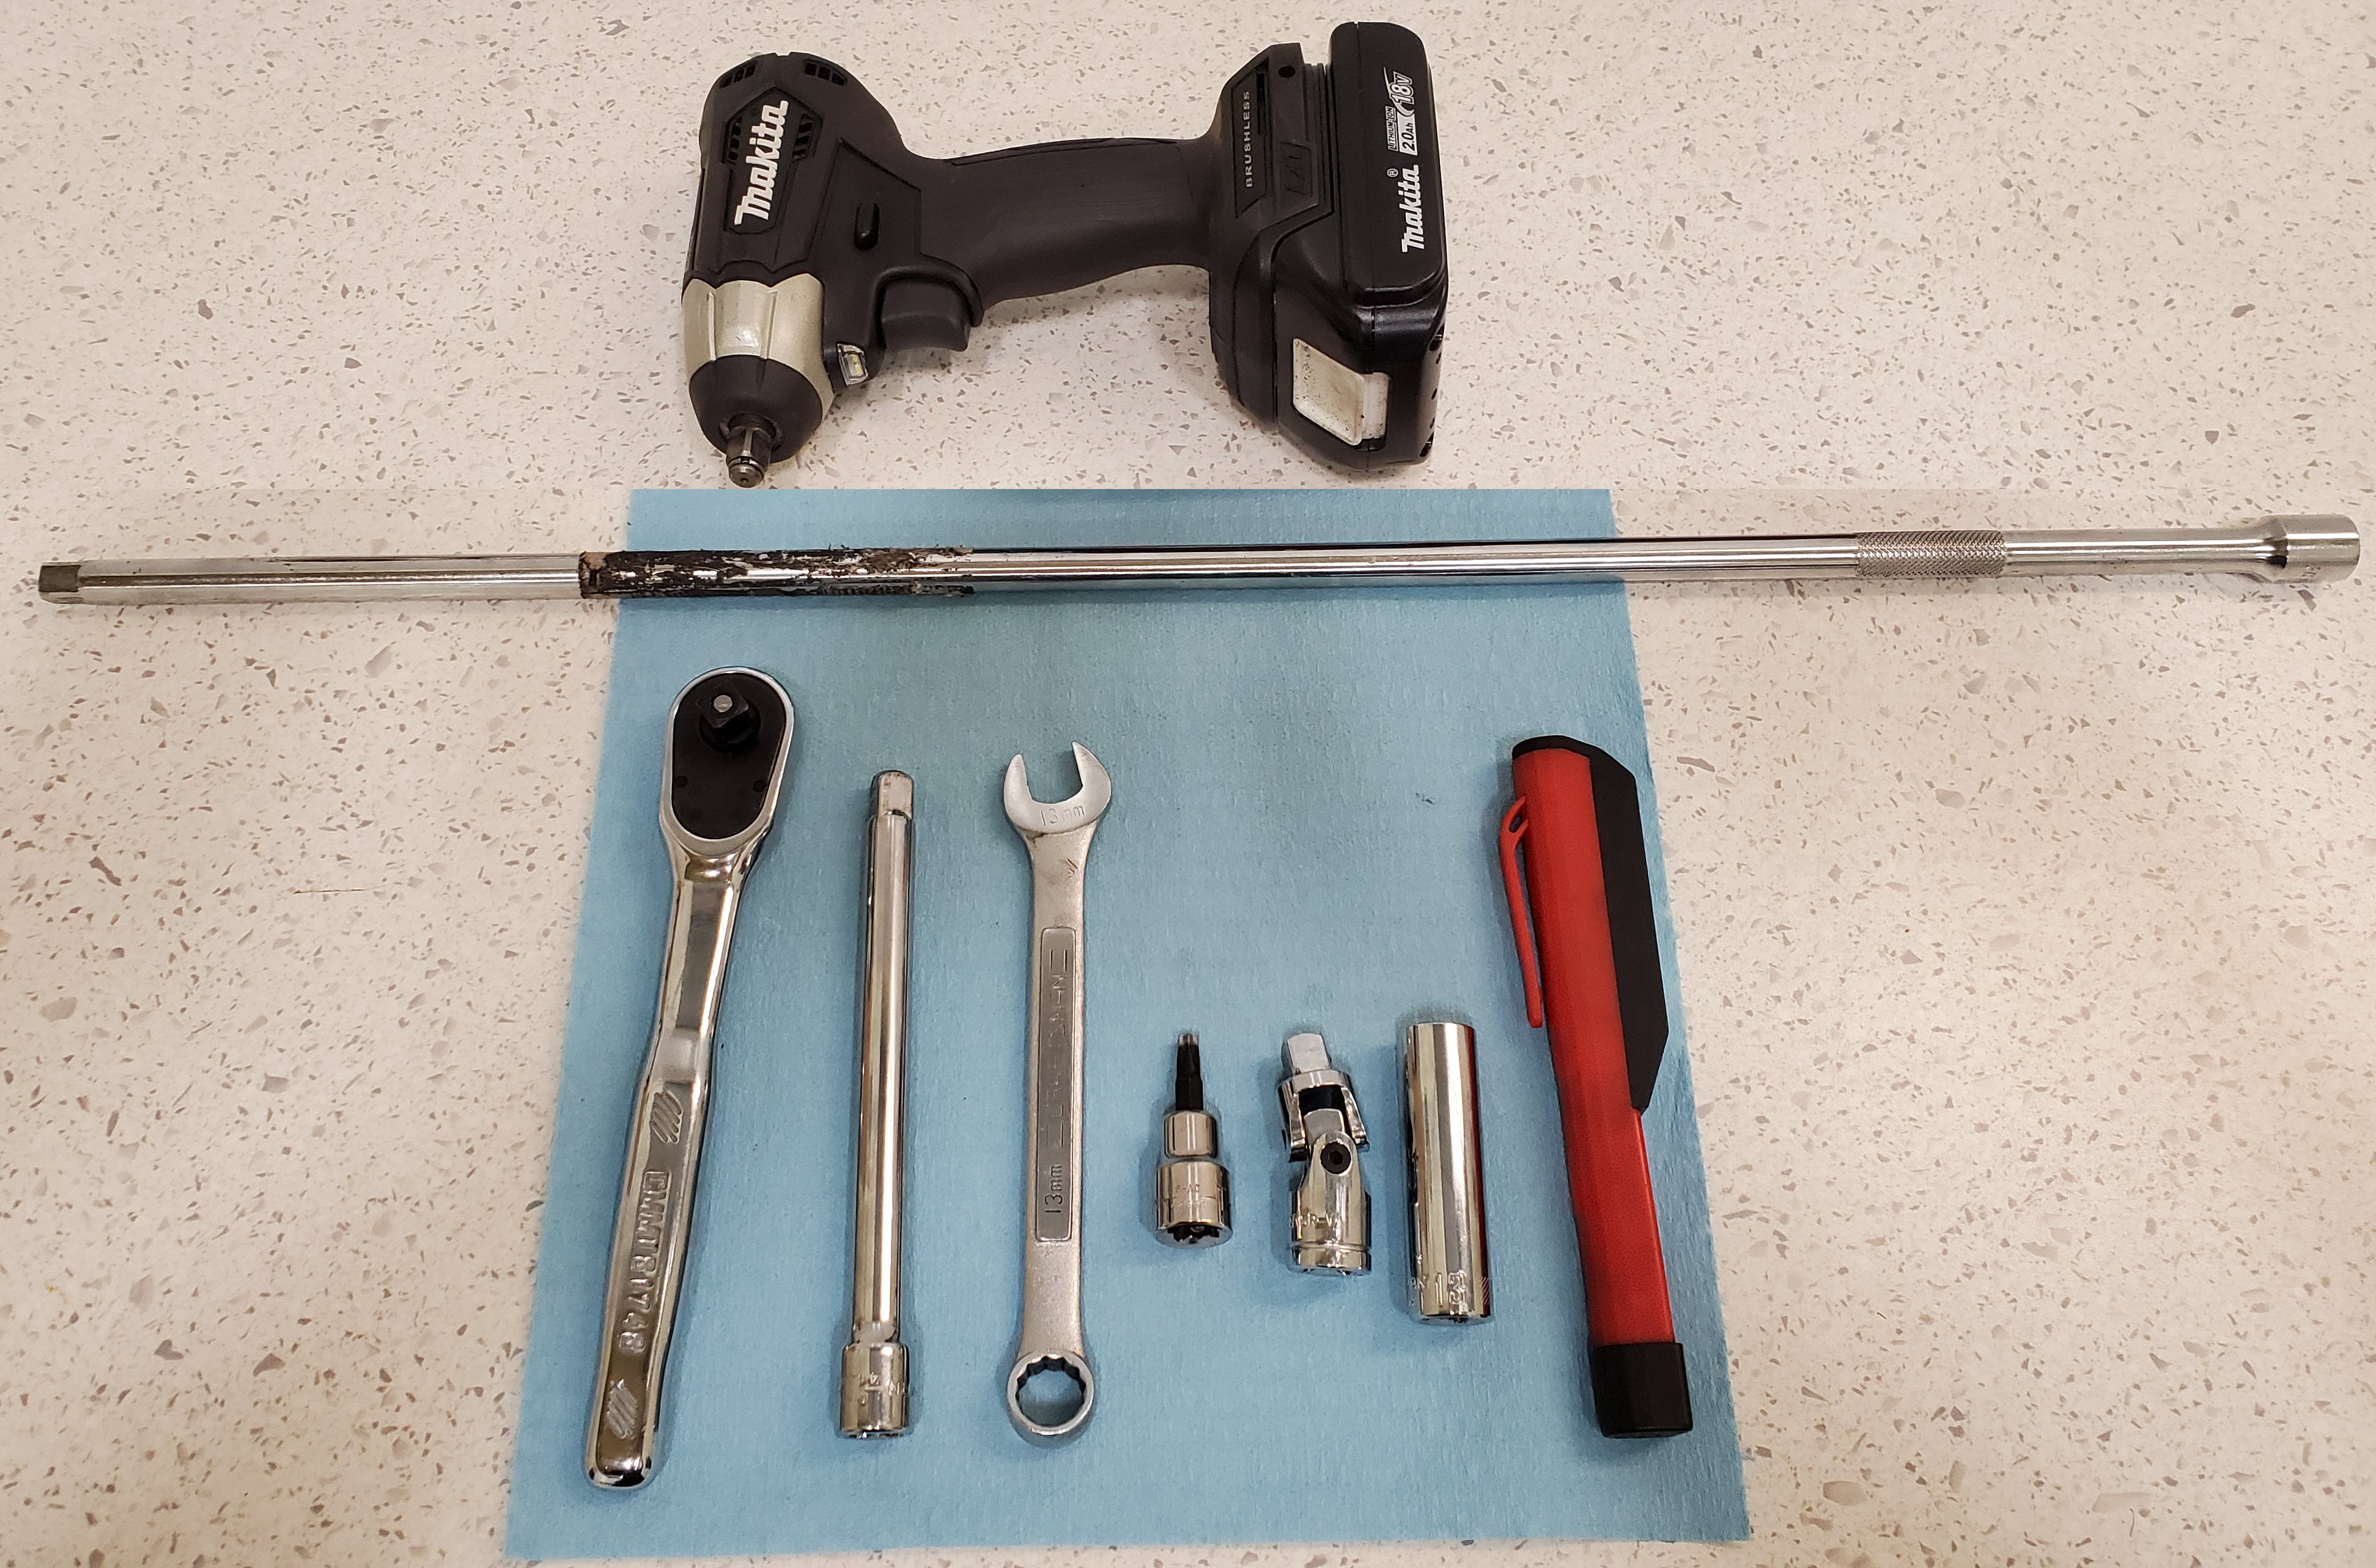
Removing the Secondary CATs requires only a few simple tools:
- 13 mm Deep Socket
- 13 mm Combination Wrench
- T30 Torx Bit
- Universal joint
- Extensions & ratchet for the socket
- 6″ extension
- A 12″ or 18″ extension is really helpful for reaching the upper most bolt. You can combine multiple extensions together to come up with the necessary length.
- Inspection Light
- [Optional] 3/8″ Electric Impact Driver to make the process go quicker
You might need some penetrating fluid to help loosen the exhaust bolts depending on the environment your car has lived in. My car is a lifelong California car, so no rust or corrosion at least.
Procedure
 To start with I checked out the official Aston Martin Workshop Manual Section 9.03 on the Exhaust System – Pipes and Supports. It’s not very detailed (11 words TOTAL pertaining to the CATs), but did provide the Torque spec’s at least. What follows is mostly my own description.
The Process will take you about 15-30 minutes to complete once you have the preparation steps out of the way.
Note: Do this when the engine and exhaust will be cool. If you just went for a drive and pulled into your garage, the pipes will be SUPER hot (CATs run at 800+ °F). They will cool down in an hour or so, probably enough time while you do your prep work.
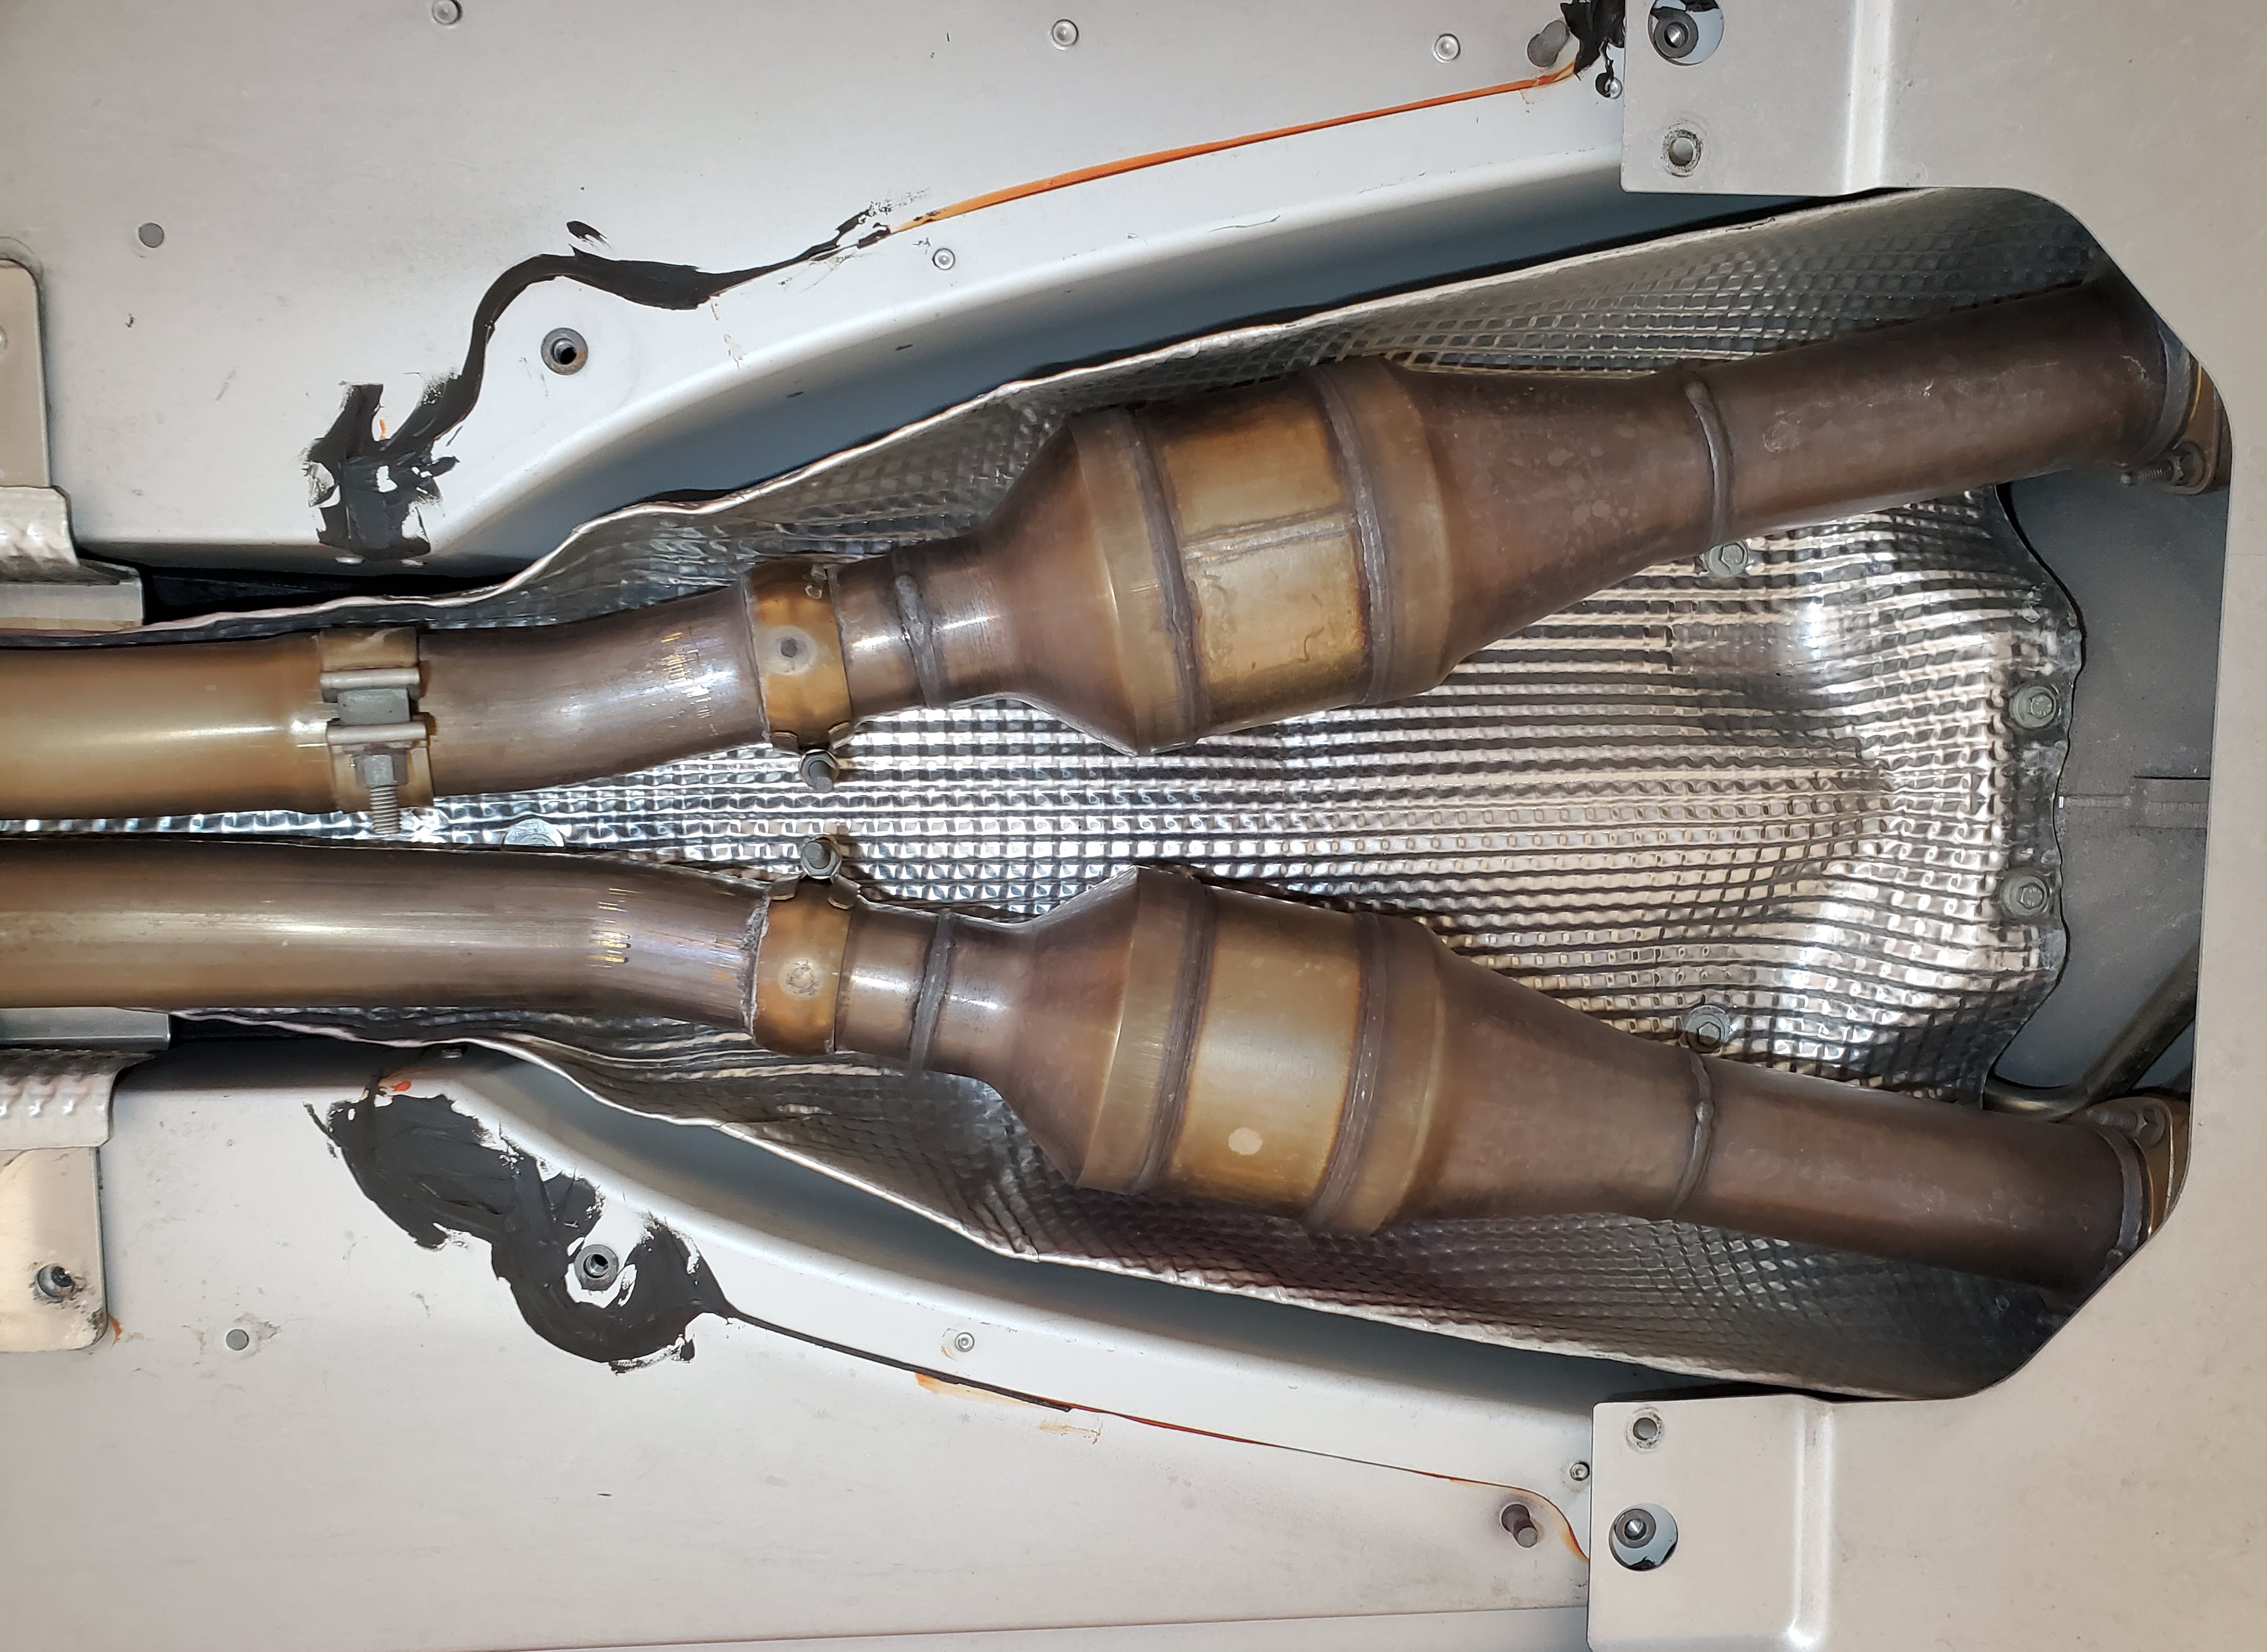
- There are two secondary catalytic converters to remove, one in each exhaust pipe. They were revealed when you removed the Shear Panel.

- Each CAT has three bolts that hold it on at the upstream header end and one clamp bolt at the downstream end.
- Inspect your bolts. If they look nasty and corroded, presoak them for a while with penetrating fluid to make your life easier. You should be able to see and spray the ends of all the bolts.
- To make access to the back sides of the header bolts easier (necessary to get a wrench on them), use your T30 Torx bit and remove the nearest two bolts one each side that hold the aerodynamic under tray on. This will allow you to ‘flex’ it down slightly so that you can slip your arm in later. Check out my video below to see what I mean.

- Starting on one side, use your 13mm Deep Socket, universal joint and extensions as needed to get on the three header bolt nuts and crack them loose. You probably don’t need the wrench to hold the head of the bolt yet, and this allows you to use both hands to apply enough force to break them loose. Mine were tight. Once they get a little loose, the bolt starts to spin. Crack all three loose.
- Use the box end of your combination wrench to get on the head of each bolt to hold it in place while removing the nut the rest of the way. This is the tricky bit. Check out the video to see exactly how.
- The uppermost bolt I could just barely get the wrench on with it pointed towards the center of the car. On the left side I had to position it between the two transmission fluid cooling lines. It just fits.

- The lower outer bolt I needed to stuff my arm in above the loosened aerodynamic undertray (tugging it down slightly to make space), and then I could easily fit the box end onto the bolt.

- The lower inner bolt head was easy enough to access.

- The uppermost bolt I could just barely get the wrench on with it pointed towards the center of the car. On the left side I had to position it between the two transmission fluid cooling lines. It just fits.
- Remove the three bolts and the exhaust gasket should fall out as well. Put them carefully aside.
- On the downstream end, use your 13mm deep socket and completely remove the nut and washer from the clamp. Yes, it will need to spread that far.

- Using both hands, grip and spread the clamp so it slides completely downstream off the joint, exposing it entirely.
- Keep in mind as you do this the CAT pipe has the potential to fall on you. It weighs about 9 pounds. If you want to play it safe leave one bolt loosely fitted to the header side just to hold it up.
- With the clamp disengaged, I have the downstream exhaust pipe a push away to try and make a tiny gap. It’s on rubber mounts, so it will have some wiggle to it. Give it a heave and it will move some.
- Finally wiggle the pipe out of the space. I needed to get the downstream end separated first, then lower it away and pull out the header end. Easy enough.

- With one fully removed now, tackle the other. It will be a little easier since you’ll have more room for your arms since the first CAT is already removed.


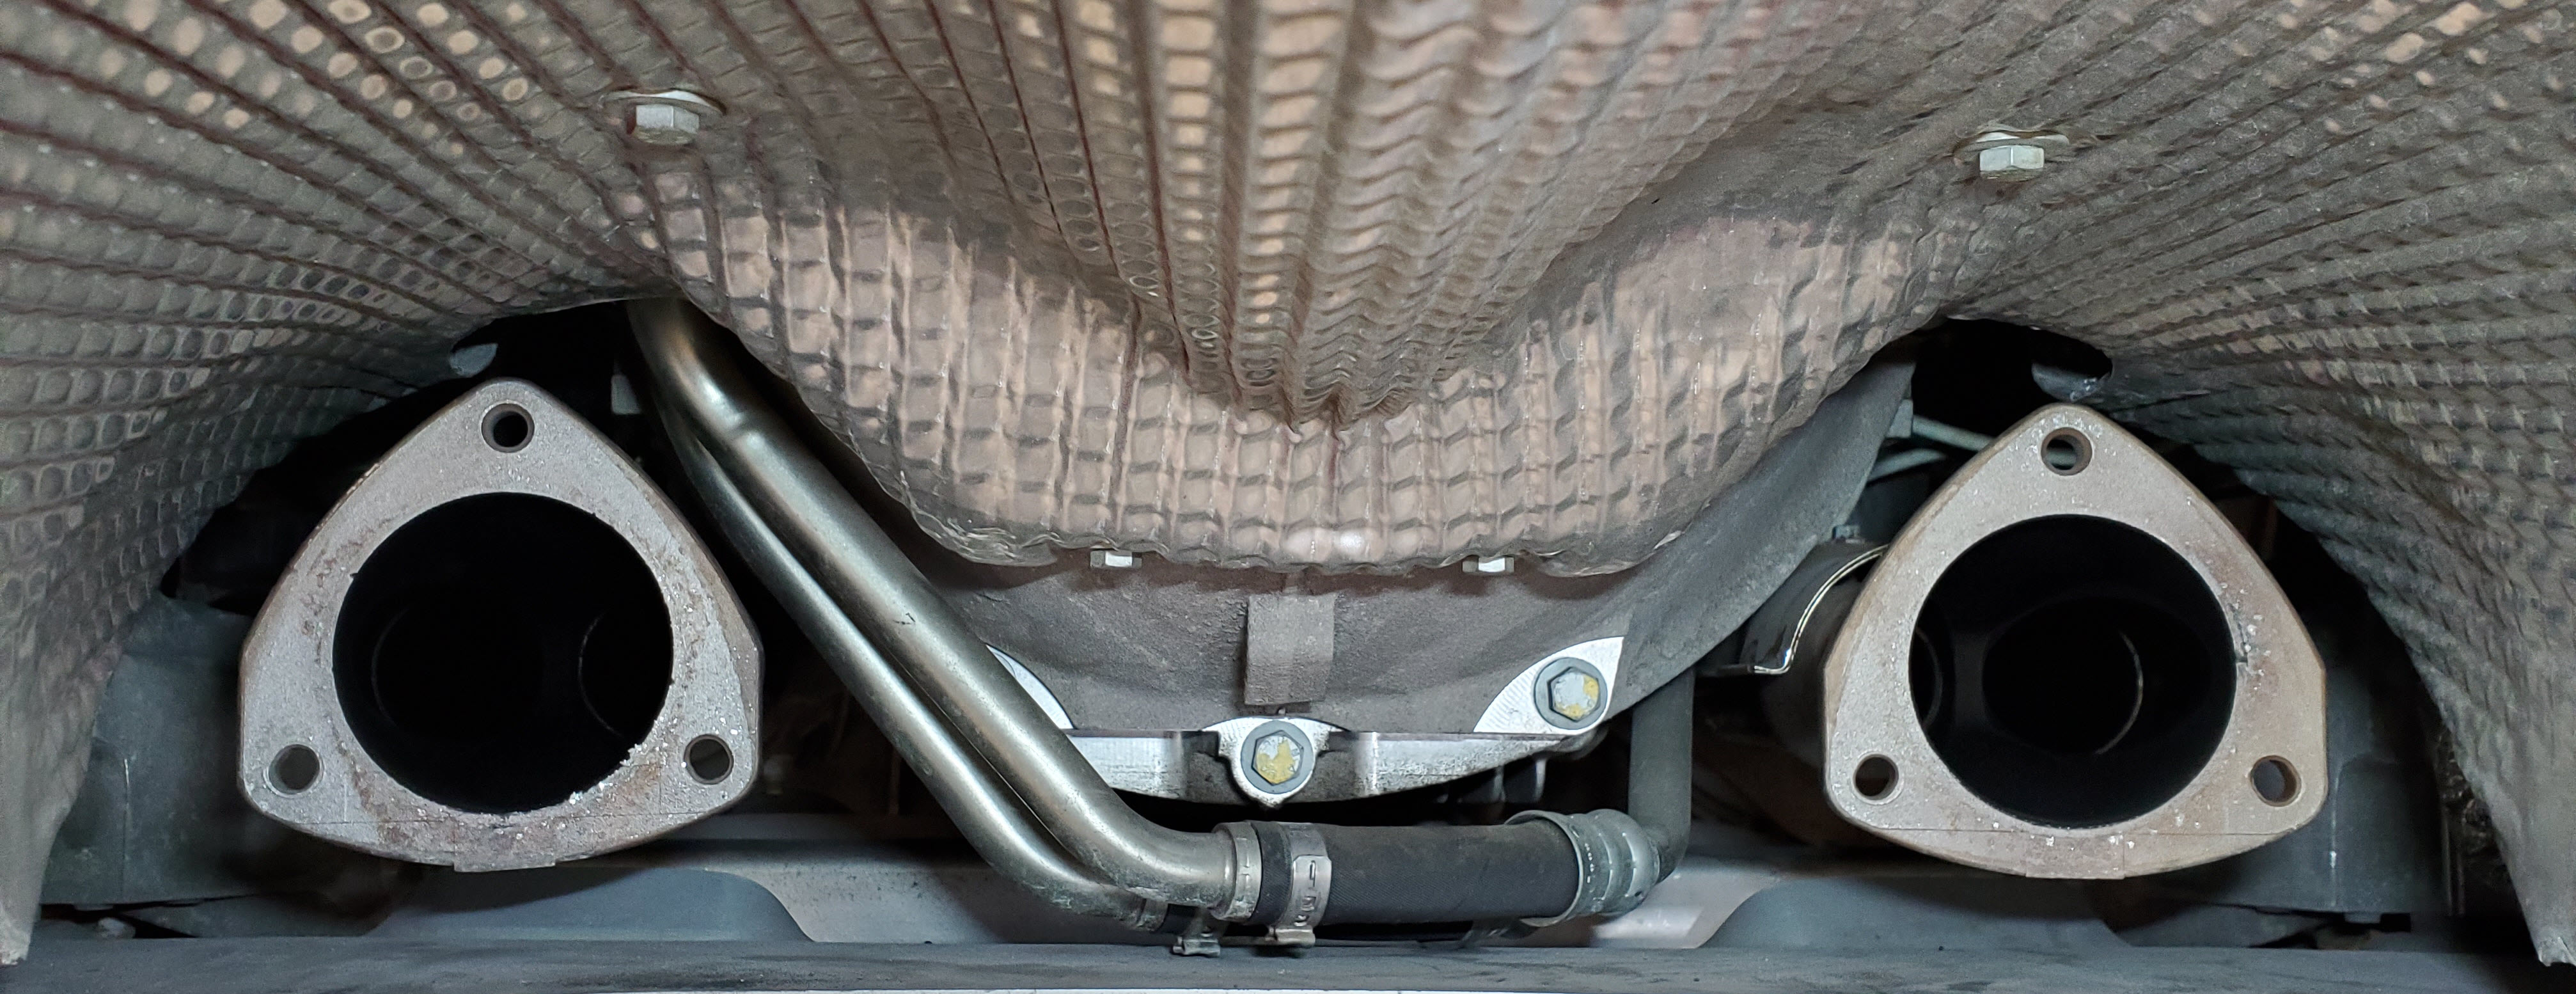
With the Secondary CATs removed, I had a look down the pipes at its inner workings. You should see an even mess/matrix that is all the hundreds of channel the exhaust air flows through. If you see any damage to the pattern, or debris on the surface, something is wrong and you should investigate further. Mine were fine as you can see in these photos.


Now you can get on with the next steps of whatever project you are undertaking. I don’t have an article specifically on re-installing the original secondary CATs, but you can find all the information you’d need about torque specs, gaskets, and procedures in my articles for installing the Secondary CAT delete kits (check them out here).
Video
I’ve made a video of this process that you can check out here:

Hi Steve,
I did the secondary cat delete a few months ago and added a set of quicksilver’s. I’m in California too and was recently sent to a star smog test station. Apparently these cars are considered to be potential gross polluters and need to be tested to a more stringent standard. It passed with no problems. I did buy a set of new gaskets just to make sure the new pipe flanges didn’t leak.
I did the delete to get a little more of what we all love, that exhaust note. Cold starts are spectacular! Once warmed up at idle there’s only a small volume change. There is noticeably more of a exhaust sound at speed which is what I was after. I can hear more of that V12 symphony but not to an annoying volume level, no drone either.
There’s claims of a few more horsepower to be had by doing this mod too so I’m really interested to see what the dyno says. As always, great article Steve. Well done.
LikeLike
Hi Russell. I’ve already completed the change out and yes, noticed the sound change for sure. I have an article with quality sound recordings done before and after coming up. Just pushing out the articles that lead up to it first. The Dyno test is schedule for this Thursday if the Covid issues don’t screw it all up.
LikeLike
Steve,
I had Fabspeed do this and put a straight through X pipe on as replacement. Pulled fuse 22 and the tone was fantastic without being obnoxious. I have not tested on a dyne to see how much more HP it produced but certainly could feel the difference with the exhaust gases being released much quicker.
Fabspeed have a video on Youtube after the work was completed.
LikeLike