An Essential Tool for Every Toolbox

Are you missing one of the most essential tools for the modern toolbox?

The Gaydon era Aston Martins (DB9, Vantage, DBS, Rapide, Vanquish, etc.) are mechanical wonders, but what really runs the cars are the computers.   My 2005 DB9 coupe has about 13 computer modules that control everything from the Engine and Transmission to the Doors and Stereo system.  Many of us recoil at the idea of working on our own cars now because of these mysterious black boxes and our lack of knowledge about them.

Typical Post for Help in Facebook Group

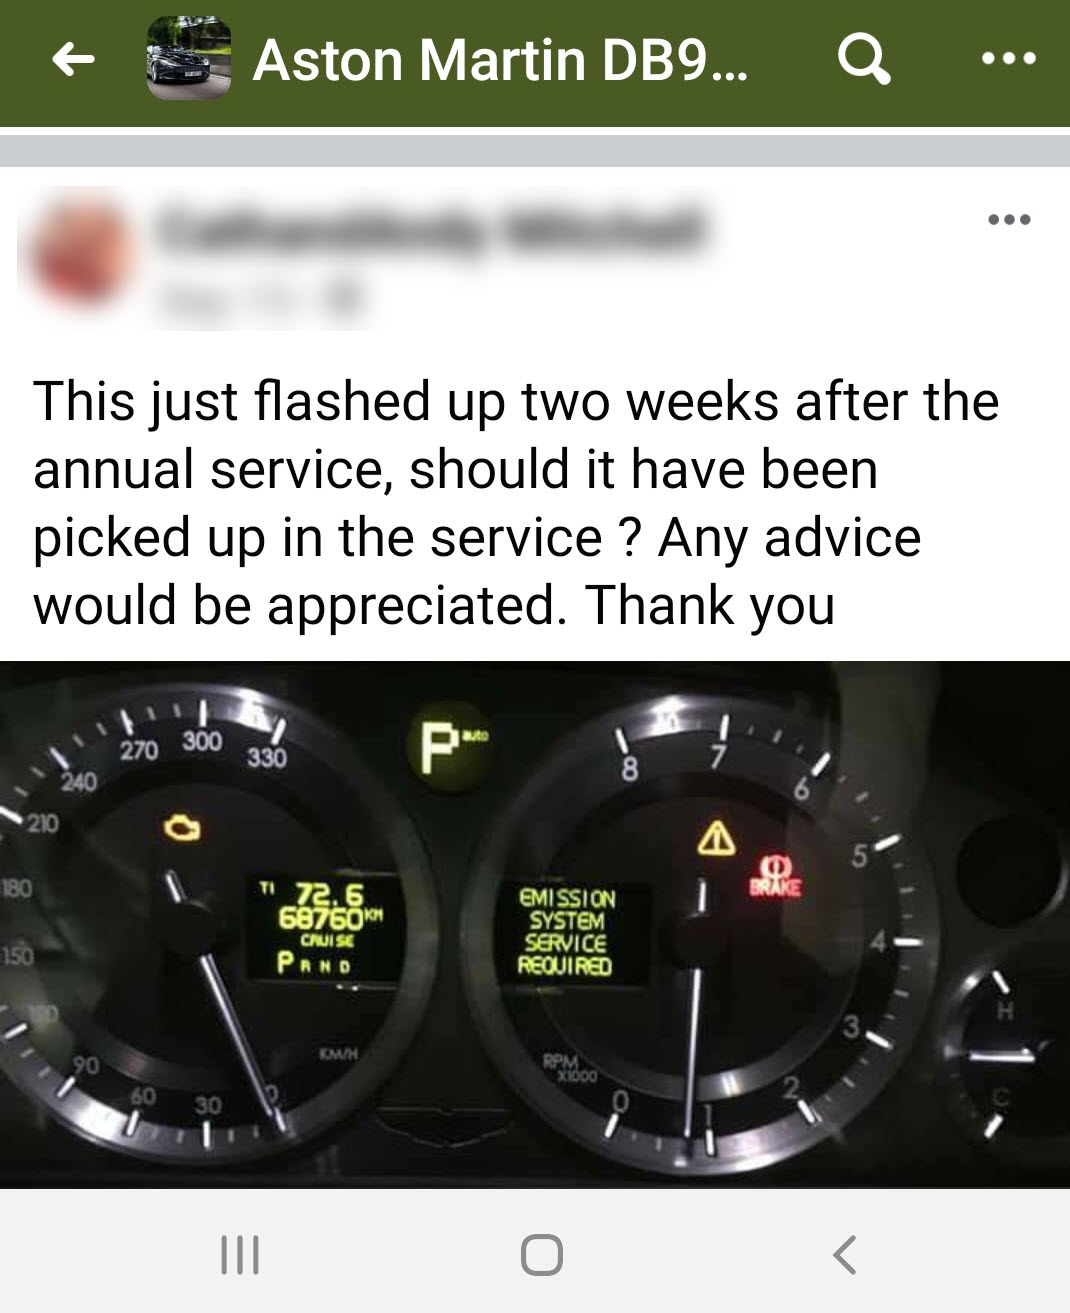
One of my personal pet peeves out on the Internet forums is a near daily occurrence of Aston owners posting that their car has turned on the check engine light and some warning message has appeared like “Service Emission System”.  They post a photo of the message and ask all the other forum members for advice.  What usually follows is a wild array of random guesses and home brew advice that ranges from “Ignore it and see if it goes away” to “Tighten the gas cap” to my least favorite “Give it an Italian Tune Up” [offensive].   Most advice given isn’t based on any actual facts.  My advice is to ‘talk’ to your car and ask it what is wrong rather than a bunch of well-intentioned strangers.

I am here to tell you it is not that scary – you just need the right tool to ‘talk’ to it.  By talking to it you will know a lot more about what is going on with your car and be empowered to better deal with it.

OBDII to the Rescue

The Aston Martin DB9 has two ODBII Connections

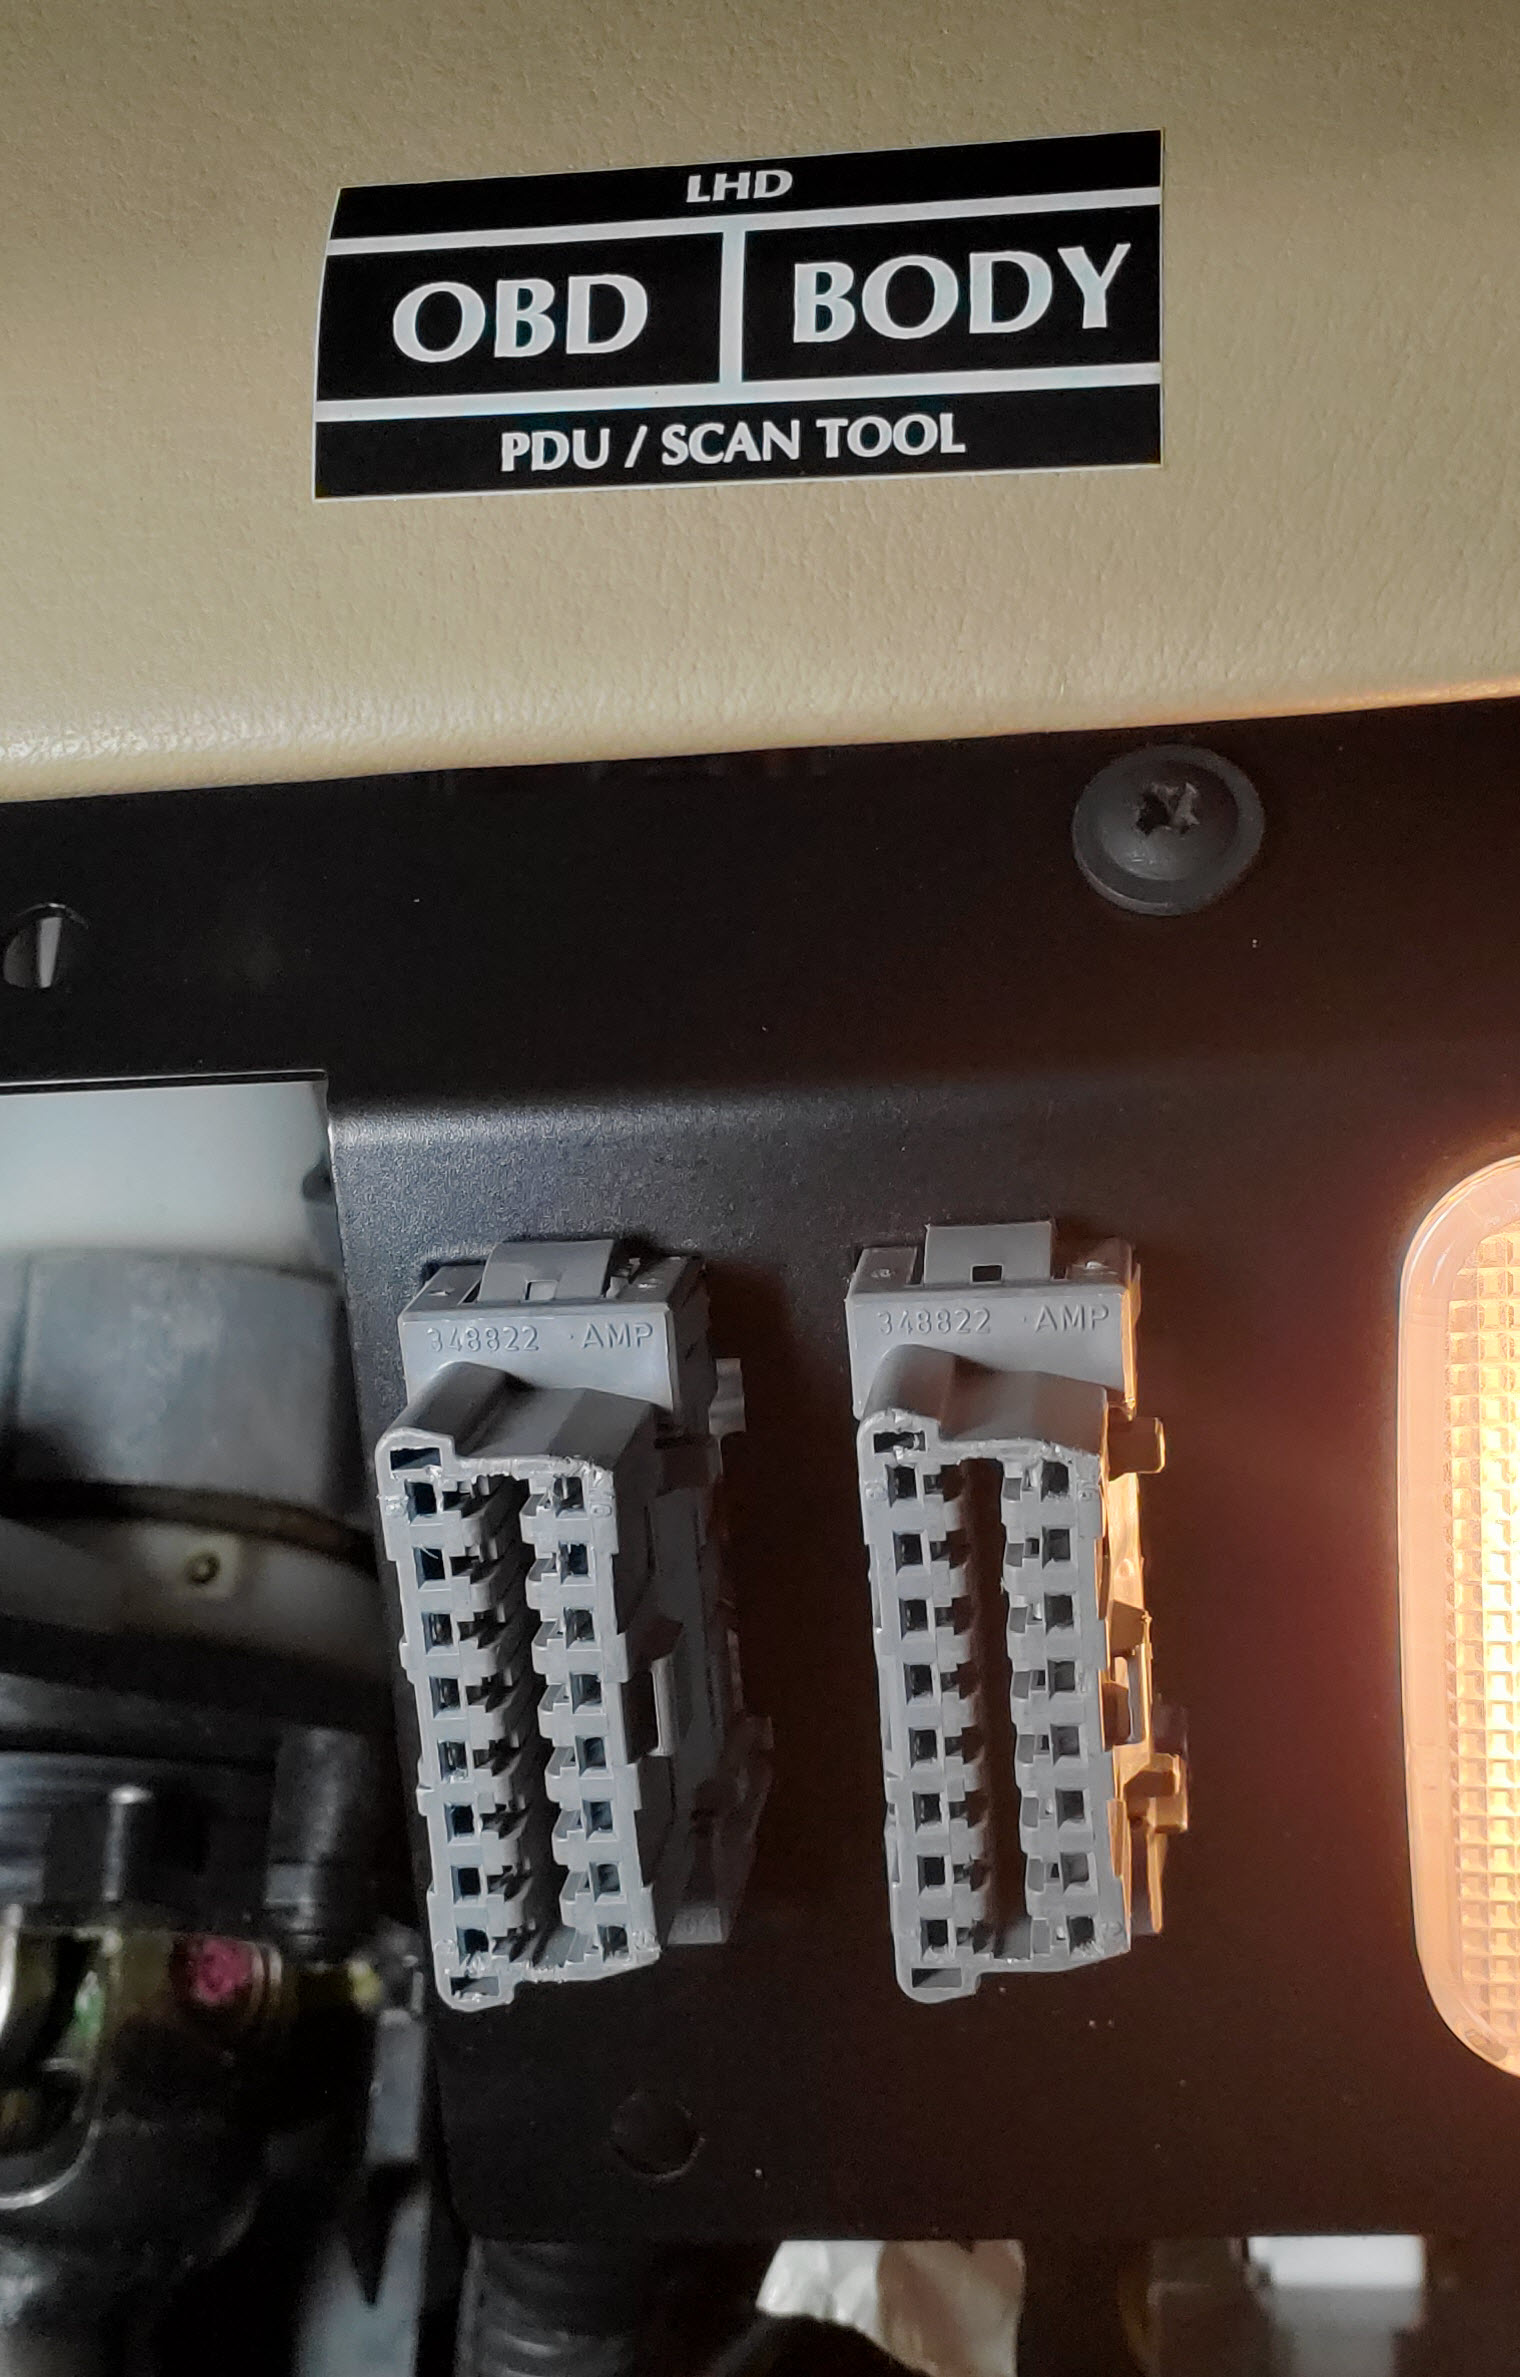
All cars built since 1996 have an On Board Diagnostics port, more commonly known as an OBDII port [Oh-Bee-Dee-Two].   This port is our gateway to plug into the car and see what it is thinking.   Aston Martin’s are a bit unique in this respect, they have TWO OBDII ports.   One is for the computers that run the engine, and the other is for all the other modules like the transmission, braking systems, airbag systems, doors, center console, etc.   The V12 engine cars actually have TWO engine control computers, one each bank of six cylinders.   You can find the OBDII ports just under the lower edge of the Dash in the drivers side footwell.   The “OBDII” port is for the Engine, Transmission and Antilock Brakes, the “Body” port is for all the other control modules (doors, stereo, dash, etc.).

To talk to the car you need an OBDII diagnostic tool.   Steady now – stay with me here – if you can manage to use your Smart Phone you’ll be able to manage using an OBDII tool.  What makes OBDII nice is that all manufacturers have agreed to use a common language to communicate through the OBDII ports, and most cars share a common set of Diagnostic Trouble Codes (DTCs) that reflect issue that can arise.  For example, if the engine module diagnoses that it has a misfiring issue it will set the P0300 error code. Same code for a Toyota Camry or a V12 Aston Martin Vanquish.   Manufacturers are allowed to develop their own unique DTCs and special functions.

Aston Martin AMDS laptop connected to a DB9

Aston Martin Dealers have the holy grail of OBDII devices, essentially a laptop that connects to the car through both OBDII ports at the same time.  They call this the AMDS system (Aston Martin Dealer System).   The AMDS can talk to the control modules, program them, and do all sorts of neat tricks that they can charge you for (like program new keys).   I’d cut the dealers some slack – the tools are expensive and the technicians have to be trained to use them, so they are due some reward for their investment.  But, we can use aftermarket tools to do many (but not all) of the same things.

Inexpensive OBDII Code Scanner

Many, many generic OBDII tools exist that you can purchase for as little as $40 USD at the local auto parts stores.   These cheap, basic tools are known as Code Scanners, and can essentially plug into the OBDII port and read any DTCs that are present.  They will allow you to clear or reset most (but not all) of them.   This is why many users buy one, they just want to stick their head in the sand and reset the ‘Check Engine Light’ by clearing any DTCs present (Tada – problem solved).   The problem with a generic OBDII code scanner is that they can only provide the most basic common information, and only about the engine control module.  On the V12’s they can’t even talk to the 2nd engine control module, so you only get half the picture.  While a generic OBDII code scanner is OK for a Toyota Camry, you need something a little smarter to get the full story from your Aston.

Foxwell NT510 OBDII Diagnostic Scanner that can talk to an Aston Martin

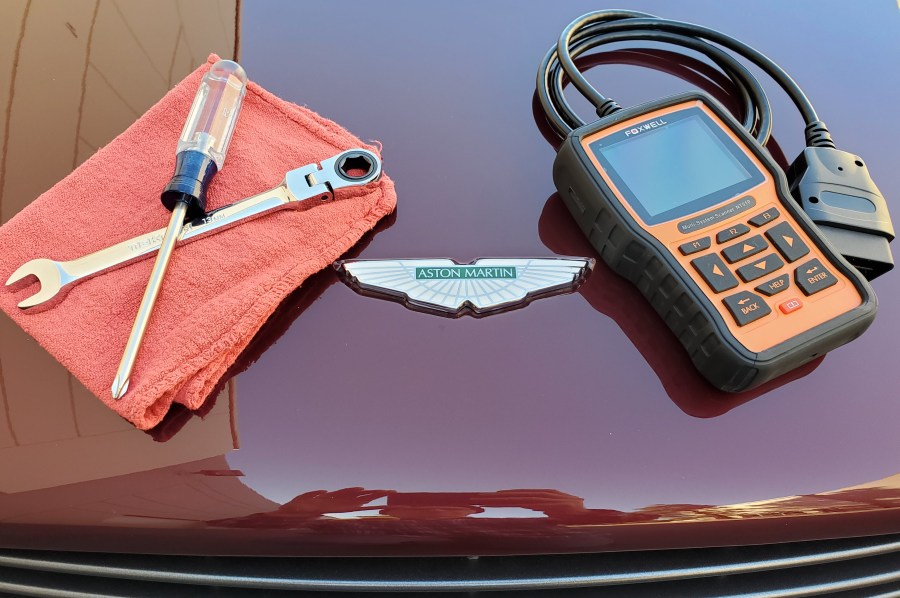
Several OBDII Tool makers have more intelligent OBDII Diagnostic scanners that are able to talk to all the Aston Martin modules.  They know the special DTCs, and that the V12’s have two control modules.   While they aren’t a full blown AMDS system, they can tell you a LOT about what’s going on in your Aston.   While I don’t know all of the companies that make OBDII tools that can do this trick, I know several models from Autel and Foxwell Technologies can. [Note: I have no financial gain listing these brands, I am just sharing my experience]  Both companies specifically list certain models of their tools are fully Aston Martin compatible (verify this before purchasing).   I personally use a Foxwell NT510.   I purchased this amazing little tool for just $179 USD from FoxwellTool.com (also available on Amazon).  While not as cheap as a low end generic tool, it can do so much more.   Having one of these intelligent ODBII tools is essential for the modern toolbox.

Now What?

You can Reset the Time for Service Message using a Foxwell NT510

With the Tool in hand, what can you do with it?    You can talk to the modules, ask them what DTCs they might be suffering from, even look at the live data from the hundreds of sensors (Engine temperature, transmission gear, wheel speed, interior temperature, all that stuff).   The Foxwell system I own can even reset the “Time for Service” reminder after my annual oil change (it’s a special function of the Drivers Information Module).

Using the Foxwell NT510 to talk to a DB9

If your Aston turns on the Check Engine light, you can plug in your trusty ODBII tool and ask it to ‘Auto Scan’ all the modules.   It will then talk to each module in turn and collect all the DTC codes, including the special Aston Martin ones.   It will present the codes to you in a slightly more user friendly manner.   For example, if you have a P0300, it will also include the text that this is a “Random Misfire Detected”.    It won’t tell you why you have a misfire (neither will the almighty AMDS – the Technician needs to work it out), but you know have a much better starting point for your troubleshooting.   You might get a combination of DTCs, like a P0300 about a random misfire and a second code P0192 Fuel Rail Pressure Sensor Low Input.   You might then surmise that the misfire could be a symptom of the low fuel pressure, and focus your efforts on solving that problem first and then see of the misfire issue clears afterwards.    It’s still up to you or the mechanic to work out the problem based on the DTC and the live sensor data you can now access.

Sample of Aston Martin DTC Guide

To help with understanding the cause of the DTC codes, Aston Martin created a technical service guide that goes into detail about the potential causes, and remedies, for each DTC code.   The idea being you look up the P0300 code in the guide and see what Aston suggests.  This is the guide for their trained service technicians, and is a great place to look for more understanding.  I’ve posted all I’ve research and found about the DTCs all in one place here.

Your new tool and the information it provides you will demystify much of the electronics side of your Modern Aston.   You can now post an informed question in the forums and groups such as “My 2005 DB9 Coupe is generating a P0309 code about a misfire on cylinder 9.   Has anyone seen that before and how do you resolve”.  You’re likely to get a much better answer from the Interwebs, or know at least that the issue is serious and you need to not ignore it and take your car to a knowledgeable specialist or Aston Dealer that can dig in even deeper to help.


[Updated March 2021] – The beauty of the Blog over the Published article is that I can keep updating it as things evolve.   While the Foxwell is a great tool, you might also want to check out my review of the ThinkCar ThinkDiag Bluetooth OBDII tool.  It also speaks native Aston Martin, but outshines many of the others with a number of Special Functions previously only available in the Factory AMDS.   Check out my video on it here.


Aston Martin Quarterly Magazine

I originally wrote this article for the Winter 2020/2021 edition Volume 54 Number 229 (pages 41 to 43) of the Aston Martin Quarterly magazine.  (you can find the original magazine format of the article here).

I think all Aston owners should be active members of the Aston Martin Owners Club (AMOC) and with that you’ll receive (amongst other benefits) the quarterly high quality coffee table editions of the AMQ magazine.  If you aren’t yet an AMOC member, please consider signing up here.

Don’t slam your DB9’s Bootie – Changing the Boot Lid Gas Strut on an Aston Martin DB9

Ever since I bought Aston 2209 the boot has effectively closed under free fall. We have of course learnt to be careful with it, but after a couple of frighteners where we have dropped it and it has slammed shut I decided for the small amount of money involved it was crazy not to resolve the problem. The potential for breaking the rear glass really exists. The boot lid is supported on gas struts that are part of the hinge assembly but once the gas has started to leak away they loose their effectiveness. Even when you have removed an old gas strut you will find it very hard to depress so you might think there is nothing wrong with it. Unfortunately there is, so bite the bullet and buy a couple of new ones. Continue reading “Don’t slam your DB9’s Bootie – Changing the Boot Lid Gas Strut on an Aston Martin DB9”

Loud knock from the rear – on acceleration and braking

So, either it was a coincidence or something to be remembered in the future. Just before Christmas I washed Aston 2209 and put it in the garage where it stayed for nearly 3 weeks over the Christmas / New Year period. In the New Year we decided to go to Anglesey for a day trip and a walk along Newborough Beach to Llanddwyn Island followed by an early evening dinner at The Oyster Catcher in Rhosneigr.

I got in the Aston and selected “R” and didn’t move …… strange I thought, so I gave it a little more right foot and with a loud bang/crack we were moving. I put it down to the brake pads and discs/rotors being stuck and thought no more about it. I guessed that the wheels having just been washed and rinsed off meant that there would still be water between the pads and the discs/rotors. As you will have probably seen when you leave a car for a few days following rain or washing a light rust discolouration can take place on the surface of the discs/rotors which disappears as soon as you start driving. Aston 2209 had been put away with wet discs/rotors and stood for about 3 weeks so I suspect that there was a bond created between the pads and the discs/rotors.

So off we went on our day out but it was soon apparent that something wasn’t quite right. As we pulled out onto the main road there was quite a loud knock that sounded like something banging against the underbody of the car. You start to think of all the worst-case scenarios …. Is it gearbox? Is it the differential? What is it?.  I drove on carefully with no other noises and in fact kicked the Aston down and accelerated along the country lane and nothing, no noise at all. I then had to stop when a set of traffic lights further along the road changed to red, as I started to brake we heard the knock again. When we set off again “knock” ….. I was now convinced that we most probably had a bush that had worn and quickly found that as long as I didn’t accelerate hard from rest or brake hard the Aston drove perfectly so we continued on and had a fantastic day.

A few days later I got Aston 2209 up on the lift/ramps to see what the problem was. Out came a couple of levers to start levering all the ball joints and bushes on both sides of the rear end with a bias towards the LHS as that was where the sound seemed to be coming from. I missed the offending bush the first time around and wrongly came to the conclusion that it must be something else.

I have been wanting to change the differential oil for a while and as I had everything already bought and available I thought I would do it now to rule out any damage that might be evident in the differential. My thinking was that if the knock was coming from the differential then when I dropped the oil there might be some metal bits on the magnetic drain plug. After the oil had fully drained I checked the filter which was relatively clean and there was no evidence of anything metallic on the drain plug.

A warning when undoing the filling plug
take care you don’t do as I did and damage
the oil cooler fins as the filling plug comes
loose. I had the socket on a breaker bar and
the filler plug being quite tight caused me to
swing the breaker bar into the cooling fins,
fortunately no real damage done.
This image has an empty alt attribute; its file name is 20200115_135316-2.jpg

On the second pass of playing with the levers I found the offending bush. What I found was not actually a damaged bush but in fact a fractured outer bush mounting in the lower wish bone suspension arm on the LHS. The bottom outer bush mounting in the arm was completely cracked across its width as you can see in the photo indicated by the arrow.  

The 3D drawing extracted from my workshop manual shows a good view of the rear subframe and the various suspension item locations. I have highlighted the Lower Wishbone.

Once the mounting bolts had been removed from the lower wishbone it was a simple manoeuvre to lever it downwards and out.

With the wishbone out it was easier to see the extent of the fracture that extended the full width of the bush mounting area.

The bush is an interference press fit into the wishbone arm at the outer end where the wheel hub mounts. Having been cracked the required interference fit is compromised and the bush is able to move backwards and forwards when mounted in the car and as it moves from one extent of travel to the other it “knocks” against the body of the wheel hub. The bush was very easily tap out.

NEW and OLD

The new wishbone comes complete with factory pressed fit bushes already in place. Installation of the new wishbone arm is a direct reversal of the removal sequence however there is one aspect that must be adhered to. Rubber bushes have a predetermined operating range from the as installed position. Bushes are not a rotating joint, the bush is designed to allow say a defection / part rotation of  +/- 10-20 deg dependant on the characteristics of the rubber and the application.

Aston require that on assembly none of the bolts are torqued up until the ride height is set and to do this requires movement of the suspension to simulate the weight of the car + passengers + Fuel + luggage.

Ride height measurements
How do we do this? In my case I
have the advantage of a car lift so
what I can do is lower the car so
that the disc/hub rests on wooden
blocks on the floor thus
compressing the suspension as
though the wheel was on the
ground
This image has an empty alt attribute; its file name is 2020-03-03_22-09-11-1.jpg

If you don’t have the benefit of a car lift and you are on axle stands you can use a jack from the floor under the disc/rotor but take care that the disc does not rotate. Apply the handbrake particularly is your Aston is a manual drive as you will not have the benefit of the gearbox being locked in park.

So the car has to be lowered onto my wooden blocks until we reach a normal ride height at a hub centre to underside of rear bodywork dimension of between say 360 – 390mm, but these dimensions are based on the following according to my manual.

“2 x 68kg people in the car + 14kg luggage in the boot (trunk) + a full tank of fuel” ….. really !!!!

I’d better start bringing people in off the street and weighing them as I weigh about 85kg so that would give an uneven weight distribution, besides I can’t be in the car and torqueing up the bolts at the same time and I’ve got less than half a tank of fuel in anyway !!!!!!!!!!

Since the height is to be set without being fully loaded I decided that if the dimension was a little higher than the target 276.5mm then it wouldn’t matter too much as there is quite a wide tolerance of +/- 15mm. This dimension is only to set a neutral position for the rubber bushes so they are in their optimum position for least stress during normal running.

With the lower wishbone bolts in place (snug) but not torqued up the bushes will rotate on the bolts to the correct neutral position as the Aston compresses the suspension to the correct ride height as it sits down on the wooden blocks. With the lower wishbone positioned to the ride height the fixing bolts can then be torqued up. If you simply torque up the bolts with the wishbone in the lower position you are effectively fixing the bushes in a very low position. When the rubber of the bush in the wishbone rotates as the car sits down on the suspension it may, as a result, already be at the end of its working limit with just the weight of the car. The reality is that as we drive the bush has to accommodate +/- movements from the norm and if the bush is already at its extreme position it will then be over stressed and lead to premature failure due to the rubber failing.

With everything back together and checked all that remains is to refit the inner wing liner. As it’s still winter and damp, I have decided to defer the surface rust treatment of the subframe until the summer when everything will be a lot drier and more conducive to doing a good job and getting a good result.

Even though I removed the inner wing liner you could do this job leaving it in place. Unfortunately at the time I didn’t know that the nut for the front inner wishbone was captive as it was hidden behind the inner liner. You now know so you can remove the bolt without having to get a spanner on the nut.

A video of the search for the problem is below and includes the steps to do the repair. If you ever have this problem don’t be afraid to handle it yourself as it’s quite straight forward.

See https://youtu.be/6t6ZiGIhhSo

Mike (Aston 2209)

**********************For additional interest **********************

I have cut out a section of the Fracture to photograph for analysis by anyone who has the knowledge to do so, feel free to leave comments in the blog.

Mike (Aston 2209)

Bedding in OEM Brake Pads on an Aston Martin DB9 or Vantage

Glowing brake rotor on a DB9

One of the most common maintenance items on any car, the DB9 and Vantage included, is servicing your brakes.   When your service includes either changing the brake pads, the brake rotors, or both, it is necessary to properly ‘mate’ the two components together for optimal performance and, in the case of an Aston Martin, to reduce or eliminate brake squeal. Continue reading “Bedding in OEM Brake Pads on an Aston Martin DB9 or Vantage”

Let there be light !

Since buying Aston 2209, my DB9, in April of 2017 I have always thought that the interior cabin lighting was a little dark. My wife Barbara despite having Satnav in the DB9 and Google Maps on her phone still likes to use a paper map so she also agreed with me that the reading light could do with some improvement.

With the arrival of LED technology options are now available for us to replace existing lamps (bulbs) with LEDs. The good thing is that LEDs are a win win technology using less current and providing a brighter light.

I set out to investigate what was available to me searching Ebay and Amazon under “W3W LED Bright White Car Bulbs” and found that there are many manufacturers available making any number of LED lamps to suit our Astons, however the search only came back with W5W fitting. I not saying the W3W fitting bulbs are not available but my search at the time kept coming back with only W5W and that is what I bought.

In the video the lamp is installed from the back and you must make sure the
angular offset of the mount is pointed to the centre.  
However if you install without removing the rear view mirror or the centre roof lining as I did in the video, the slot arrowed in the head lining ensures the correct orientation of the lamp so the offset is towards the centre. The orientation slot is not there for other lamps.

I also settled on what I considered to be an excellent manufacturer, “Osram”, since most of the items on offer did not give clear indication of the manufacturer. [They’re all made in China anyway!]

As you can see they offer a 6 year guarantee, not that they cost much, I paid £13.83 (approx USD17.00) for two lamps in the pack, however if they give a 6 year guarantee it should be a while before I have replace them.

Power consumption is stated as being 1 Watt each, which is less than the original lamps that are rated at 3 Watts each.  I must admit I was a little concerned when I ordered the lamps particularly in respect of the fittings. However they fit perfectly and I’ll now buy more for the rear cabin lights, the footwells and the boot (trunk).

I wanted to have a “white” light as I believe it gives a modern look – other light colours are available such as Warm Light and colours !!!

Here is a video of the installation of the bulbs for your information.

See: https://youtu.be/oPL2AzBiSns

Mike Aston 2209

How to Remove and Reinstall the Rear View Mirror in an Aston martin DB9, DBS, or Vantage

Whatsa behind me is Not Important!

Watch the clip here on YouTube

A great line proclaimed by ‘Franco’ (played by Raul Julia) from one of my favorite campy car movies or all time ‘Gumball Rally’.   Totally worth watching if you are a car guy/gal since the cars are real and some of the footage is just great.  427 AC Cobra, Jag E Type, Ferrari’s, Porsche’s and more.  You can watch it online from many streaming services like Amazon and YouTube (for just $2.99 USD), etc.

Anyways, back to today’s post on removing the rear view mirror.  Ripping it off like Franco probably isn’t the advisable way to tackle this in an Aston Martin DB9 and I wanted to share how I did it.  There could be any number of reasons to remove it, but for me it was that I wanted to loosen the Alcantra covered ‘Front Heading’ trim piece that spans the width of the front edge of the headliner so that I could remove the entire headliner to be re-upholstered after it started to sag.  You can check out that whole process in my other article here.

Continue reading “How to Remove and Reinstall the Rear View Mirror in an Aston martin DB9, DBS, or Vantage”