
If you are a member of any of the Aston Martin Owners FaceBook Group or online Forums (like PistonHeads or 6SpeedOnline) you will likely have seen some chatter talking about fitting a ‘Secondary Cat Delete Kit’ (SCDK) in your car to increase the power and improve the sound. It’s not like the stock DB9 has a deficiency in either department already, but its promise is a simple change will give you more of each. Intrigued by this I couldn’t resist researching how to tackle this.
![]() There are several vendors that make SCDKs, and in this article I will be covering my experience with the kit from Velocity AP. Velocity AP is a great company steered by Stuart Dickinson. They started in the UK, and moved their facilities to British Columbia, Canada a few years back. They make all their products in house. Read on to learn about their kit and how to fit it.
There are several vendors that make SCDKs, and in this article I will be covering my experience with the kit from Velocity AP. Velocity AP is a great company steered by Stuart Dickinson. They started in the UK, and moved their facilities to British Columbia, Canada a few years back. They make all their products in house. Read on to learn about their kit and how to fit it.
Background
What is a Secondary Cat Delete Kit? I had to figure this out too. The DB9 V12 engine is fitted with a total of six (6) Catalytic Converters. Two Primaries and one Secondary for each bank of the engine. So four primaries total, and two secondaries.
A Catalytic Converters job is to reach very high temperatures internally (as much as 800 °F) to chemically change the pollutants in the exhaust stream into less nasty things. They contain very expensive exotic metals to do this, including platinum. You can learn more about it over on Wikipedia here. Basically an exhaust gas cleanser.
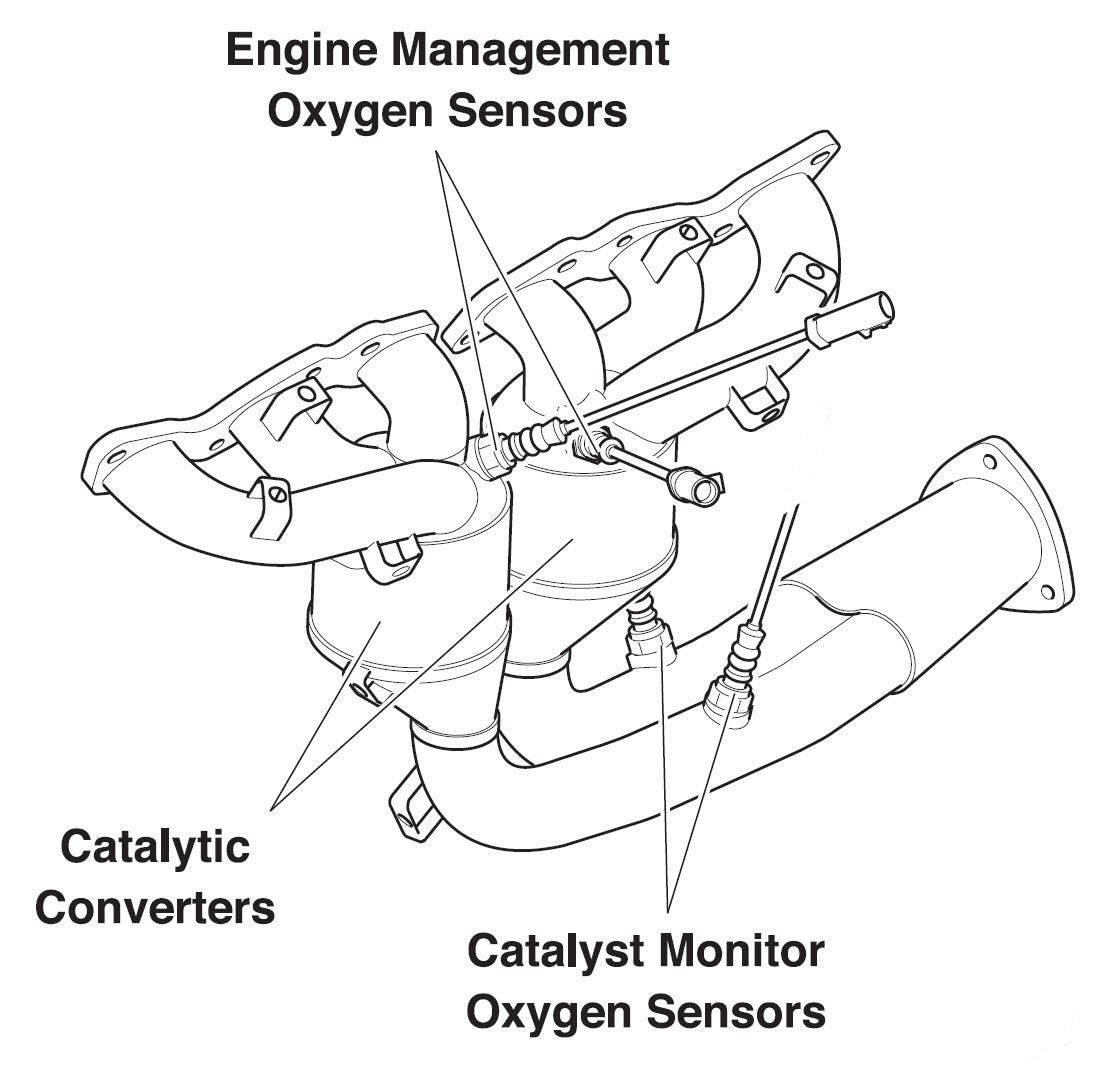 The Primaries are located right up in the engine bay and are integrated into the exhaust headers near the cylinder head. Each primary serves three cylinders.
There are O2 sensors up and down stream of each primary catalytic converter. O2 sensors tell the PCM (the computer that controls the engine) how much unburnt fuel is in the exhaust stream as it enters the converter and as it exits. The PCM then adjusts the amount of fuel injected into those three cylinders to achieve the perfect balance of Air/Fuel ratio, maximizing fuel economy, power and minimizing emissions.
Most cars only have a primary catalytic convertor. This begs the question what is the secondary catalytic converter installed in the DB9 and Vantage actually doing. I don’t know. There are no O2 sensors fitted around it, so it has zero influence on the cars control system. I suspect it might be fitted to ‘polish’ the exhaust stream in cold start scenarios where for a very short period of time while the converters are getting up to temperature some pollutants are slipping through the primaries. But, the secondaries will be colder than the primaries, and thus function even worse. Hence, I don’t know.
The downside of this extra set of converters is additional restriction (back pressure) in the exhaust system flow. For performance reasons we do everything we can to eliminate back pressure so we can let the exhaust breath easier. More flow generally means more power. The best scenario is big short straight pipes with no restrictions (just like a Top Fuel Dragster). We can’t exactly have flames spitting straight out the side of the engine bay, so we are seeking a compromise.
A SCDK does just what it says, it removes the Secondary Catalytic Converter and replace it with a simple straight section of pipe. Supposedly this accomplishes three things that you might find desirable in your car:
- Improves power by reducing back pressure and improving air flow
- Improves the sound of the car since less of the exhaust noise will be stifled by the converter
- Reduces the weight of the car by removing two big bulky converters with a simple and lighter straight section of pipe.
Is is legal? In the US the answer is officially ‘No’. Generally anything the modifies anything with respect to the emission controls system is not allowed. As such, I am only doing this as a test of what a SCDK will do and then I will return my car to stock ;>)
The Plan
I know there will be some of you saying “Aston designed it into the system for some reason and it would be foolish to remove it”. I get that. But, I also believe manufacturers have to make cars that work in the world market, and perhaps this was designed in as a safety factor or mandated requirement for some country that doesn’t apply to where I live. I couldn’t resist trying it out, so here is my plan:
- Record the sound of the exhaust using professional equipment before the change
- Fit the Secondary Cat Delete Kit
- Take the car in for a Dynometer performance test and measure if its added any power to the car.
- If it hasn’t added any power, then there is no point to this and I will just reinstall the original converters and debunk the myth that this is a performance upgrade using fact.
- I’ve already been to the Dyno test facility twice and you can see the results in these two videos:
- Check out this article to see how it did on the Dyno with the SCDK installed.
- Measure the weight saved by fitting the kit
- Less weight equates to better performance and mileage
- Record the sound after the fitment so you can hear the difference.
- I will publish the before and after sounds in a separate article
- Check out that article here!
- Take my car to a California Emissions SMOG test station to see if it still passes.
- I live in one of the strictest places on earth for meeting air quality emission standards, California USA. If it passes the annual emission tests here it should be good anywhere, and I won’t feel guilty about removing them.
- If it fails the test, I will remove the kit and restore my original converters.
- You can check out the results of the Test Here!
OK, enough research and planning, lets get on with bolting some parts on the car!
Parts
We need to only order a couple of items to tackle this project.
The Velocity AP Secondary Cat Delete kit is available online direct from Velocity AP for about $795 USD (find it online here). They ship everywhere, but obviously this is a great choice in Canada and the USA.

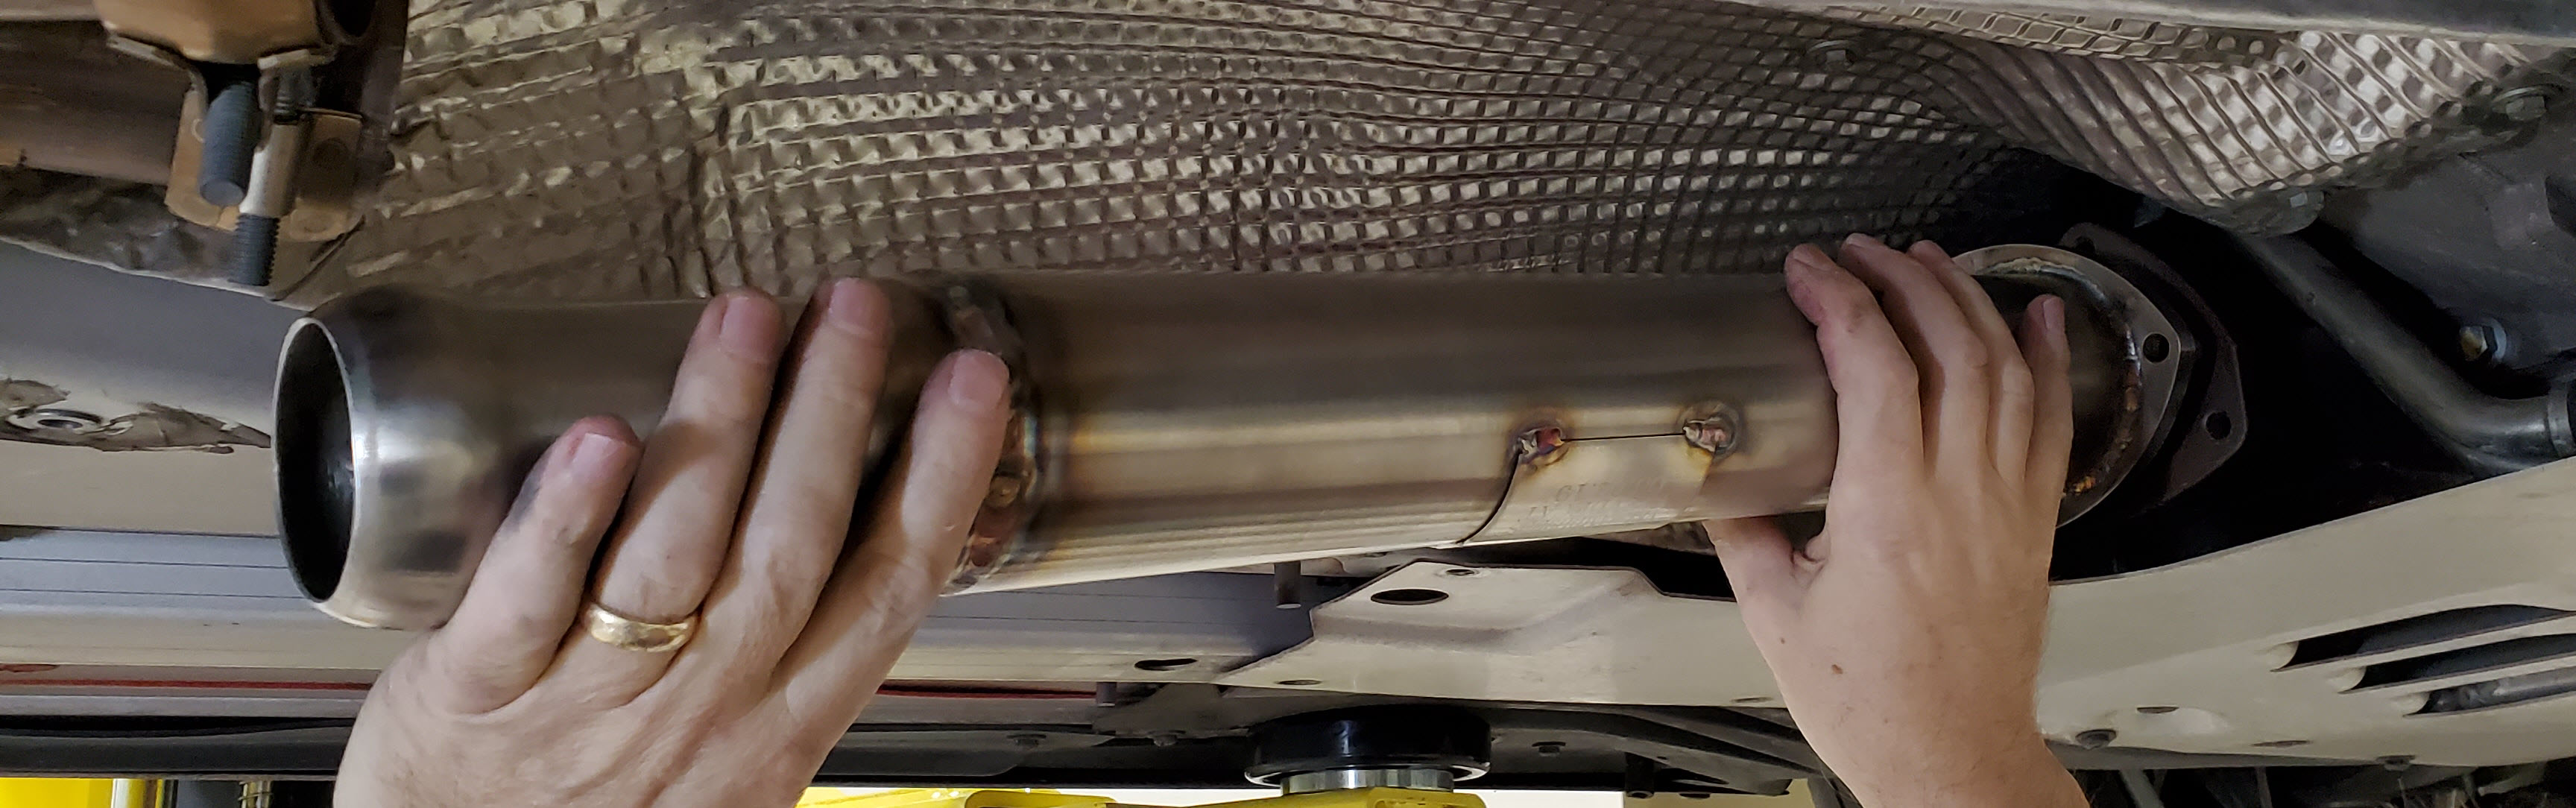
It’s a very professional looking kit. The pipes are made from Stainless Steel. The welds are ground and polished internally. Unlike other kits they keep the larger header diameter for 75% of the length of the pipe, and then neck down to the smaller diameter of the exhaust pipe with a second section of pipe welded in. A potential advantage to this is that keeping the pipe size larger improves the ‘flow’ for a longer period of time.
The kit includes the two secondary Cat delete pipes, PLUS the six stainless steel nuts and bolts to replace the likely deteriorated ones that mount it to the exhaust headers.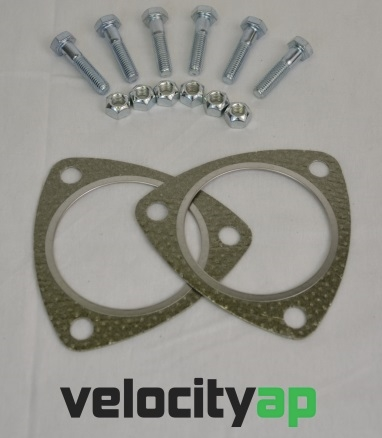
The kit I actually received didn’t include the gaskets that are now shown on the product page. Not sure why (shipping oversight?) or perhaps they’ve decided to include them now. I generally don’t like to reuse gaskets as a rule. They are Aston Martin p/n 4G43-5E281-AA-PK (2 pack). You can it from your local Aston Dealer or online for about $36.57 USD here. I actually picked mine up from Frank Marino who had an extra set he was selling off on the FaceBook group for Aston Martin Parts (which I suggest you join, lots of interesting stuff at good prices show up there, find it here).
Note: As you’ll see in the video when I install the kit, the old gaskets I removed were in remarkably good condition after 15 years and 42,000 miles. They easily could have been reused. I live in corrosion free dry California. You might opt to pick up the gaskets anyways since they aren’t a big investment and to have them in case yours aren’t in the same shape.
 One supply I ordered in to have on hand was Exhaust Paste. The official Aston Martin Workshop Manual Section 9.03 on the Exhaust System Piping says to use some undefined Exhaust Paste during reassembly of the clamped end. I ordered a small tube of Permatex Exhaust Paste online from Amazon for about $3.70 USD. My plan was to review the joint when I disassembled it and if it had no paste on it from the factory, I was NOT going to apply any during the pipe install unless there was any pitting or corrosion on the downstream exhaust pipes. As you’ll see mine are in near pristine condition, so I ended up not using this. But, if you live in a more corrosion prone environment, you might have some on hand and use a dab during reassembly to make sure you get a gas tight seal.
Ok, we’ve got pipes, nuts, bolts and gaskets. Next up….
Tools Required
You don’t need anything exotic, just some basic shop tools:
- 13 mm combination wrench
- 13 mm deep socket
- T30 Torx Bit
- Universal Joint for Socket
- 6″ extension
- 18″ extension, or multiple smaller extensions
- Ratchet
- Torque Wrench capable of 30 Nm
- Inspection Light
- Microfiber towel

Preparation
You’ll need to tackle a few steps first to get to the point where its time to install the Secondary Cat Delete Kit. I’ve made articles and videos on each of the steps to get you ready:
- Getting the car up on Jack Stands
- Removing the Shear Panel
- Removing the Secondary Catalytic Converters
Procedure
 The only reference is about 11 words in the official Aston Martin Workshop Manual Section 9.03 on the Exhaust System Piping. It makes reference to using the exhaust paste and provides the torque specs (which is good). Below is my more detailed description with a few tips along the way.
The whole process will take only about 20-30 minutes.
- Work on one side at a time. Install the entire left pipe or the right pipe first, then move onto the other. This works out better with wrenching for the first one you do.
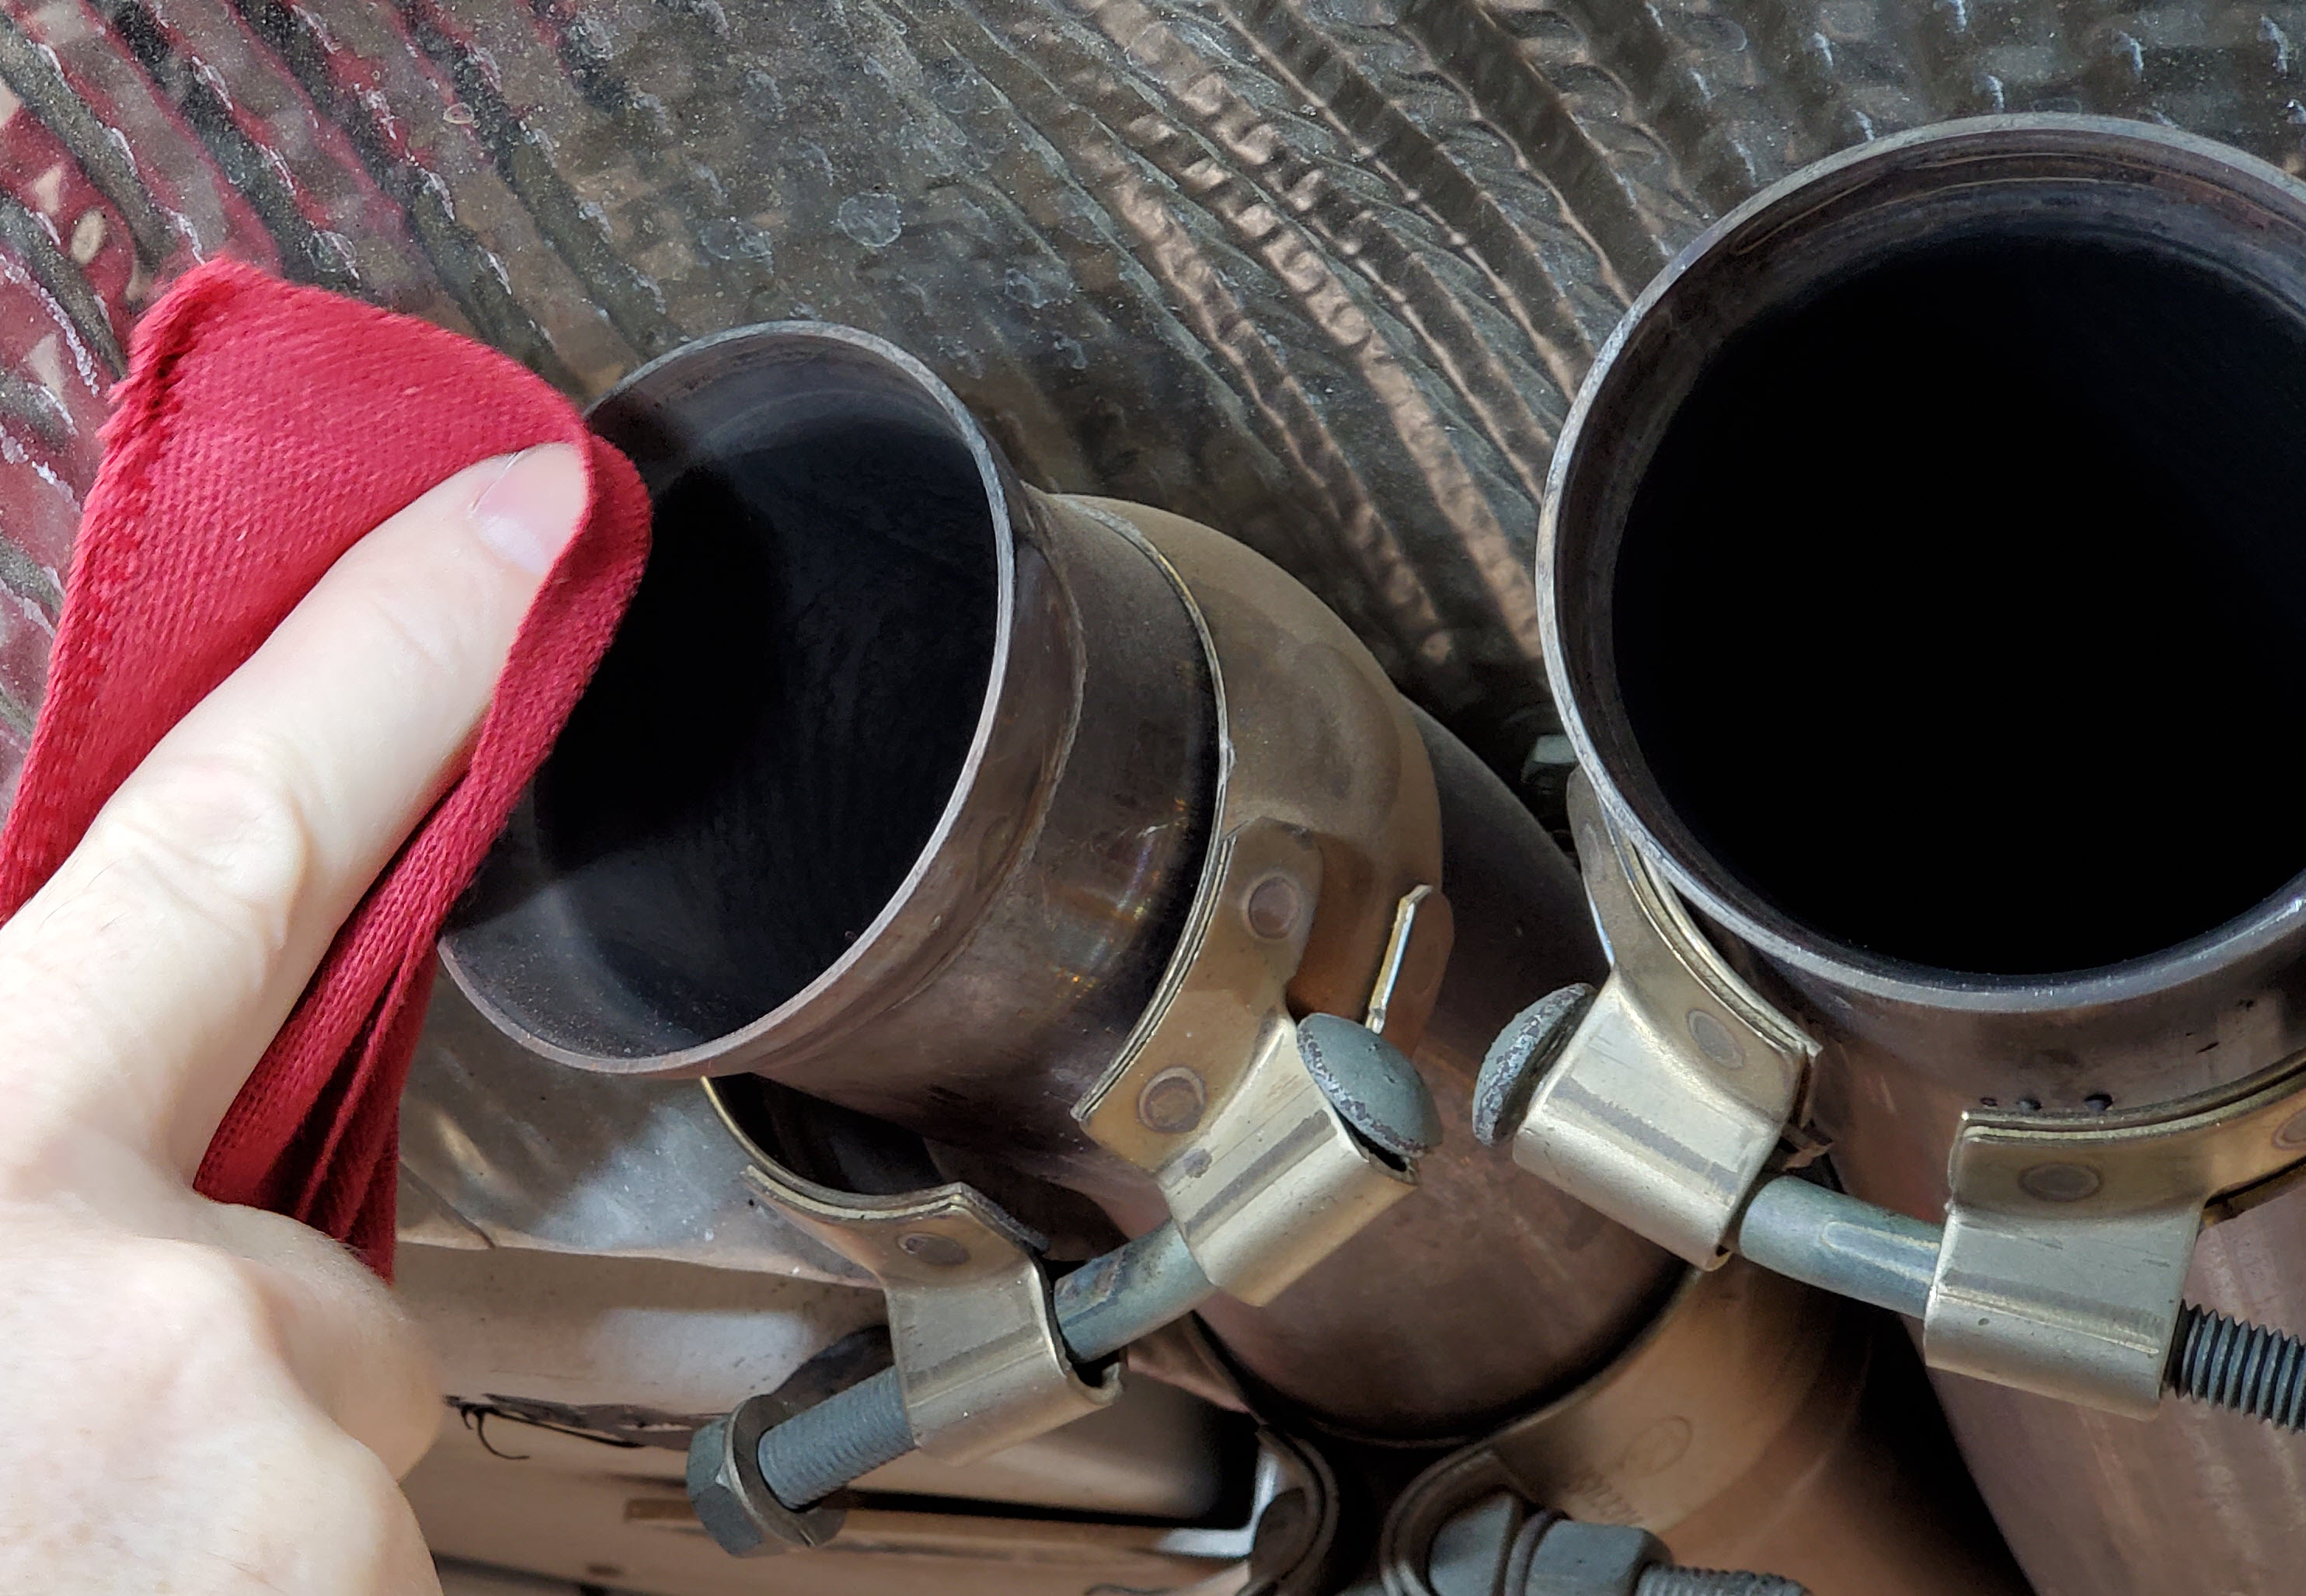
- Clean the header flange of any gasket residue or carbon build up. I merely used a shop towel to wipe mine down. If yours has more residue or corrosion, use some emery paper or whatever is necessary to get a nice smooth surface for the gaskets.

- Cleaner the down stream piper flared pipe connection. Again, I was able just to wipe mine out and make sure it was smooth.

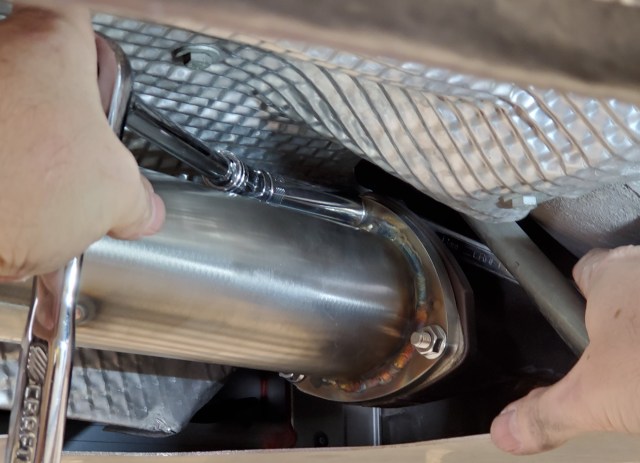
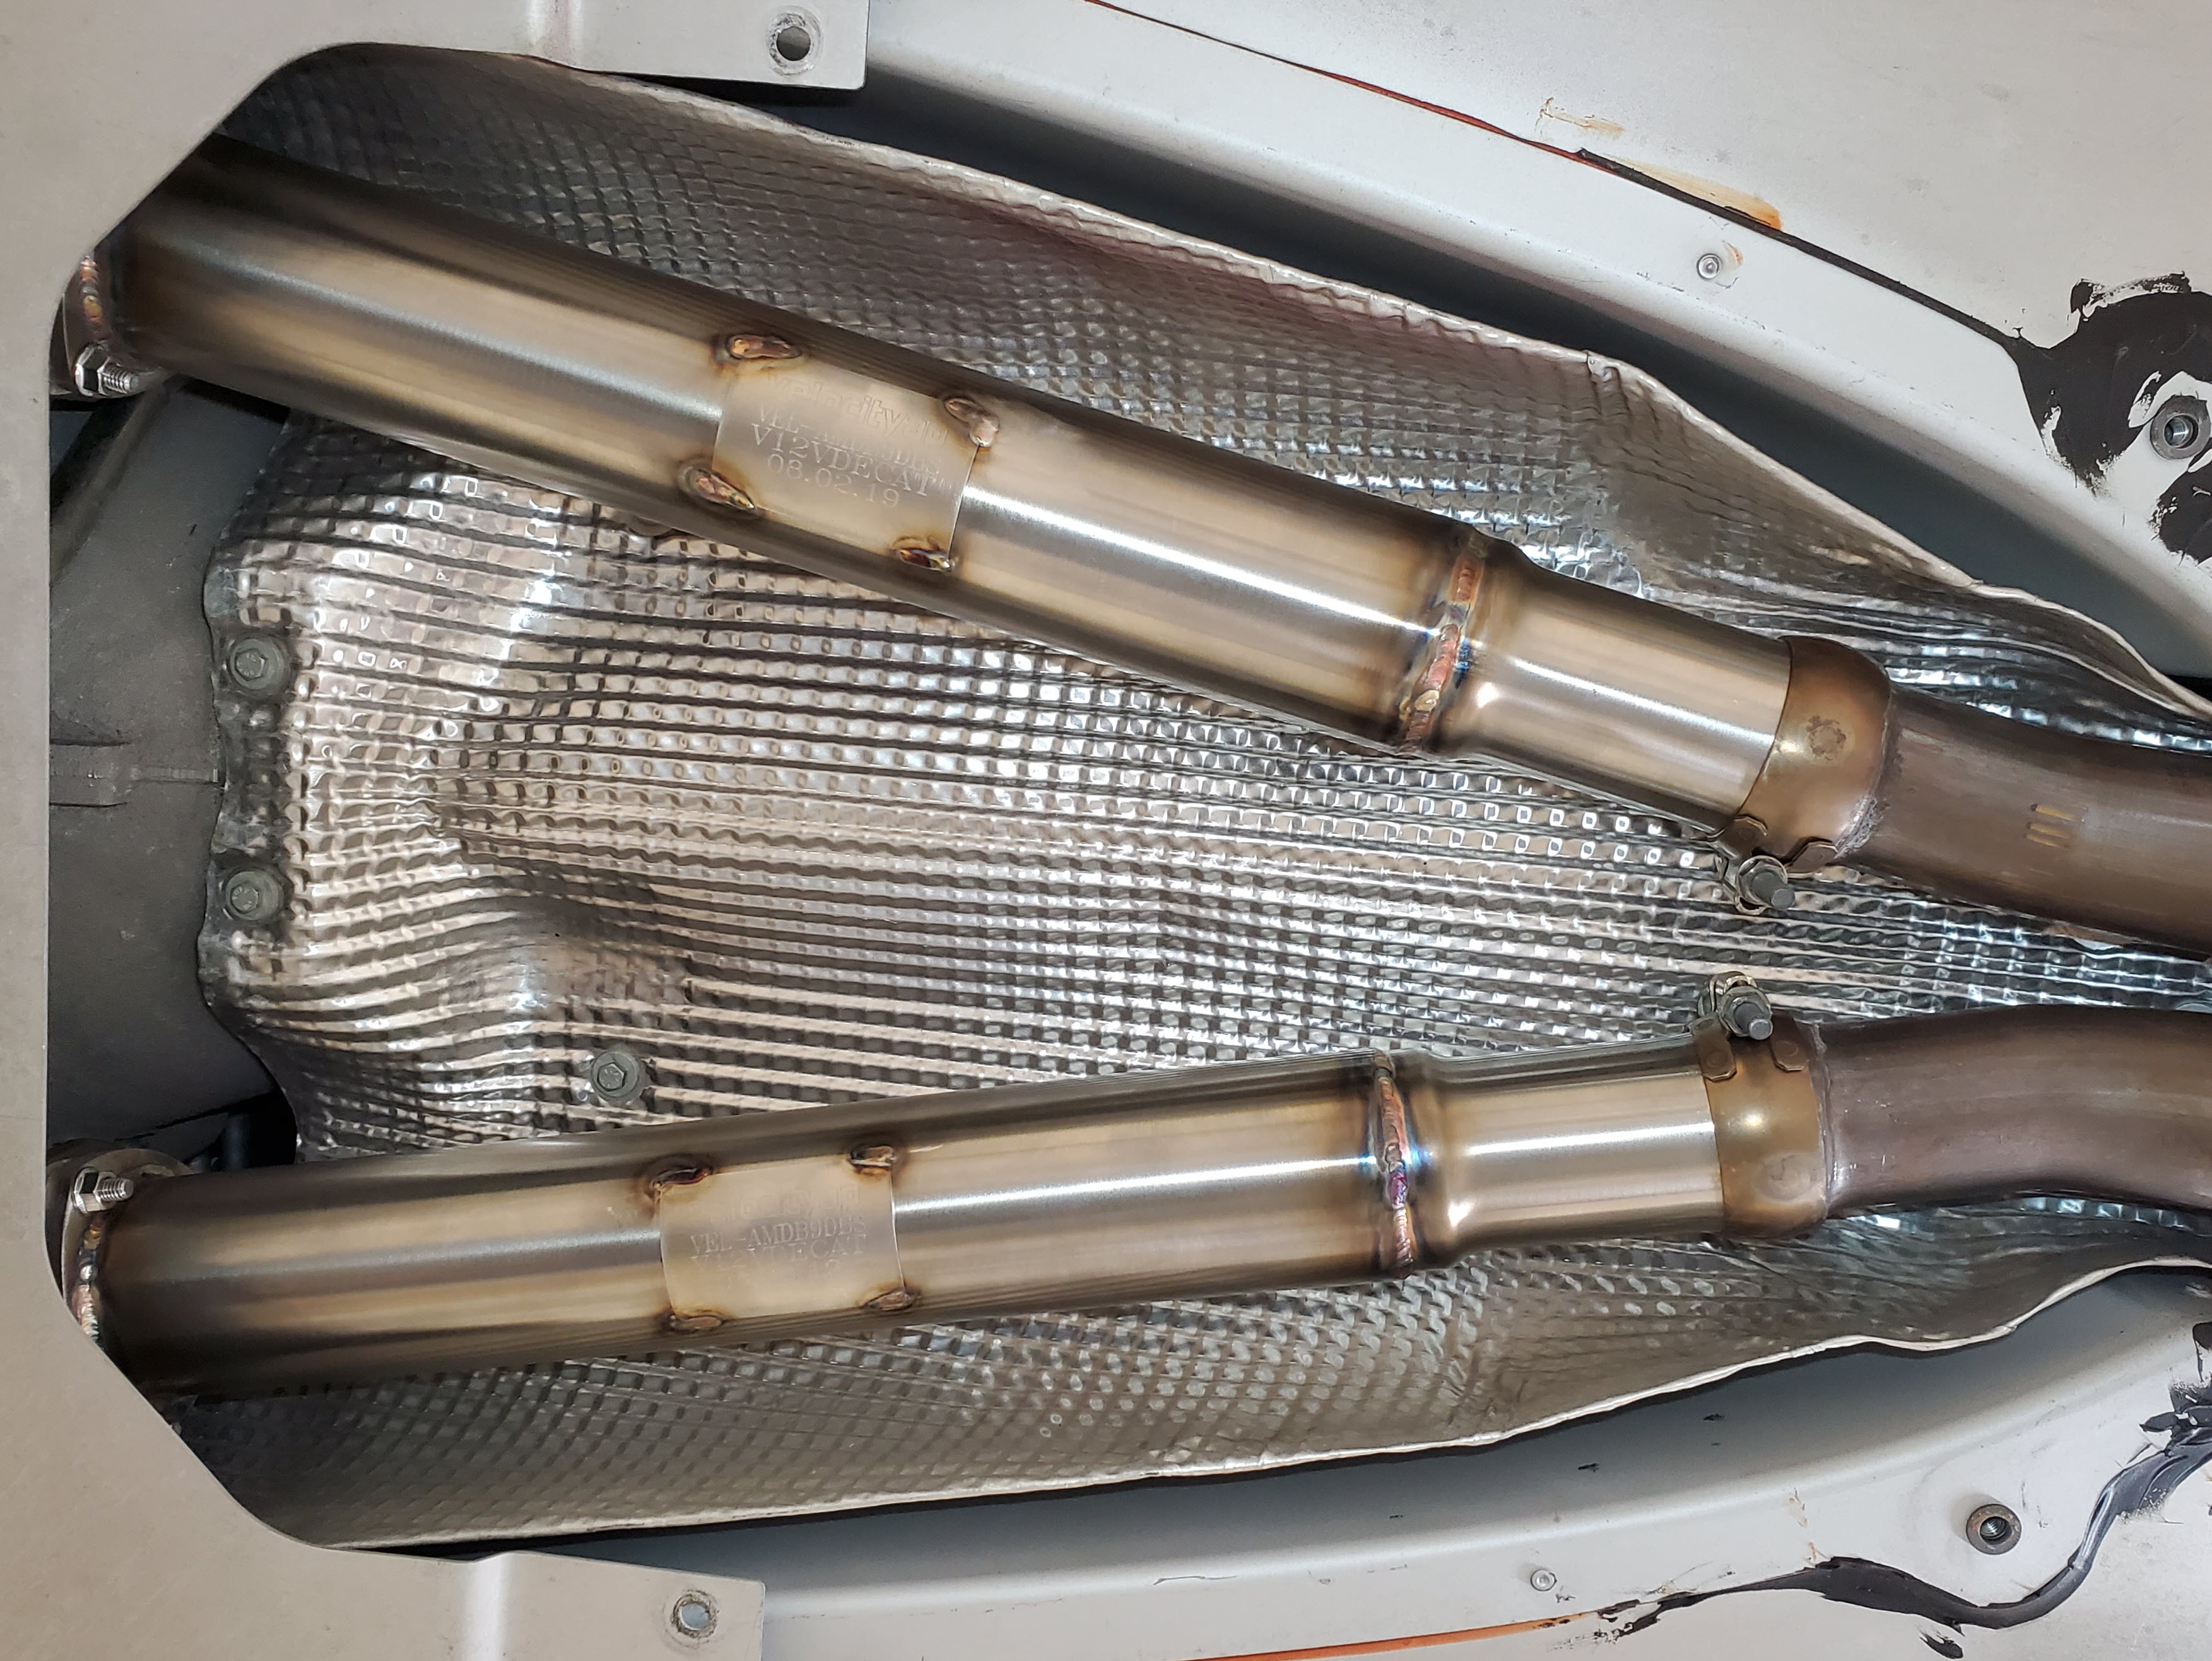
- Offer the pipe up into position. I aligned mine so the cool looking identity plate was facing the ground, and thus will be visible through the shear plate holes.

- I loosely fitted one of the bolts to keep it from dropping on my head while I fiddled with the clamp end.

- I moved the clamp over the flared ends to just loosely hold it up in place. I deliberately did NOT tighten this joint yet.

- I found that the Velocity AP pipe was about 3/8″ shorter than the OEM assembly (measured on the floor), and sure enough there was a similar gap at the header end to deal with. The rear section of the exhaust ultimately just ‘hangs’ on flexible rubber mounts, so it will be able to flex forward to close this gap.
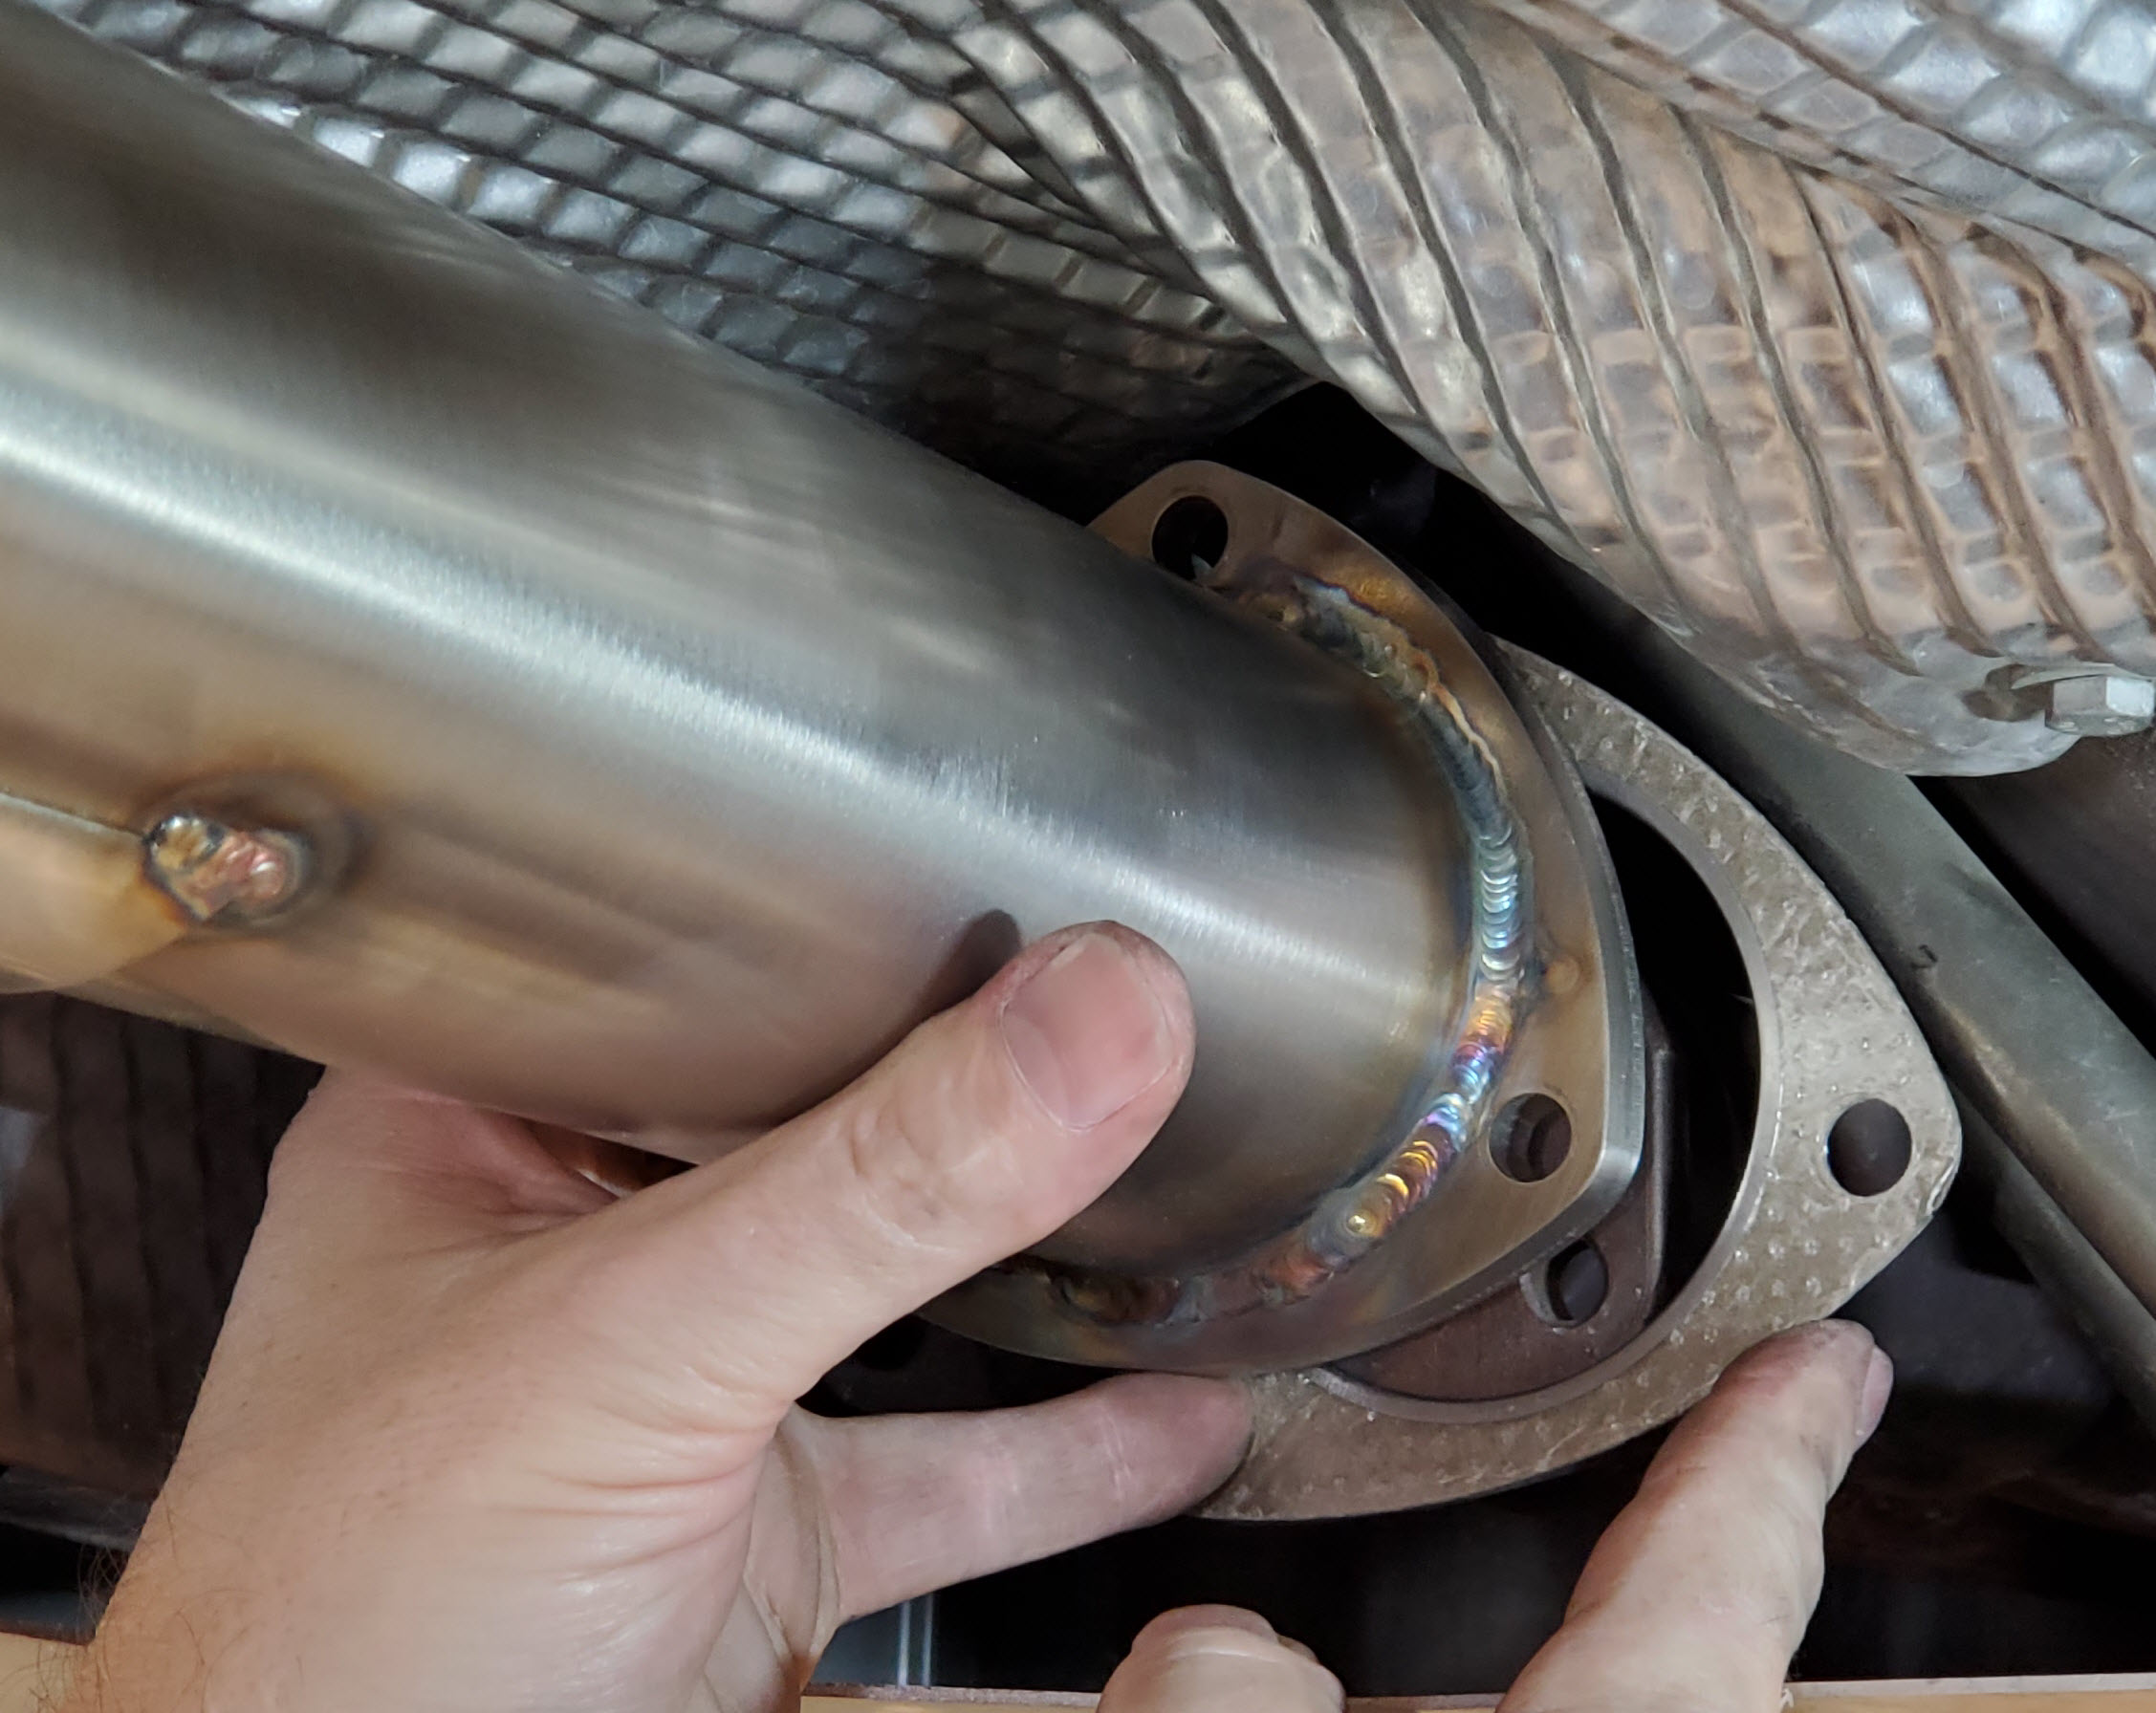
- Fit your gasket into place.

- Loose fit the three bolts through the flange and gaskets. The bolts point to the back of the car, and pass through from the front same as you removed the old ones. Fit the nuts as tight as you can make them finger tight.

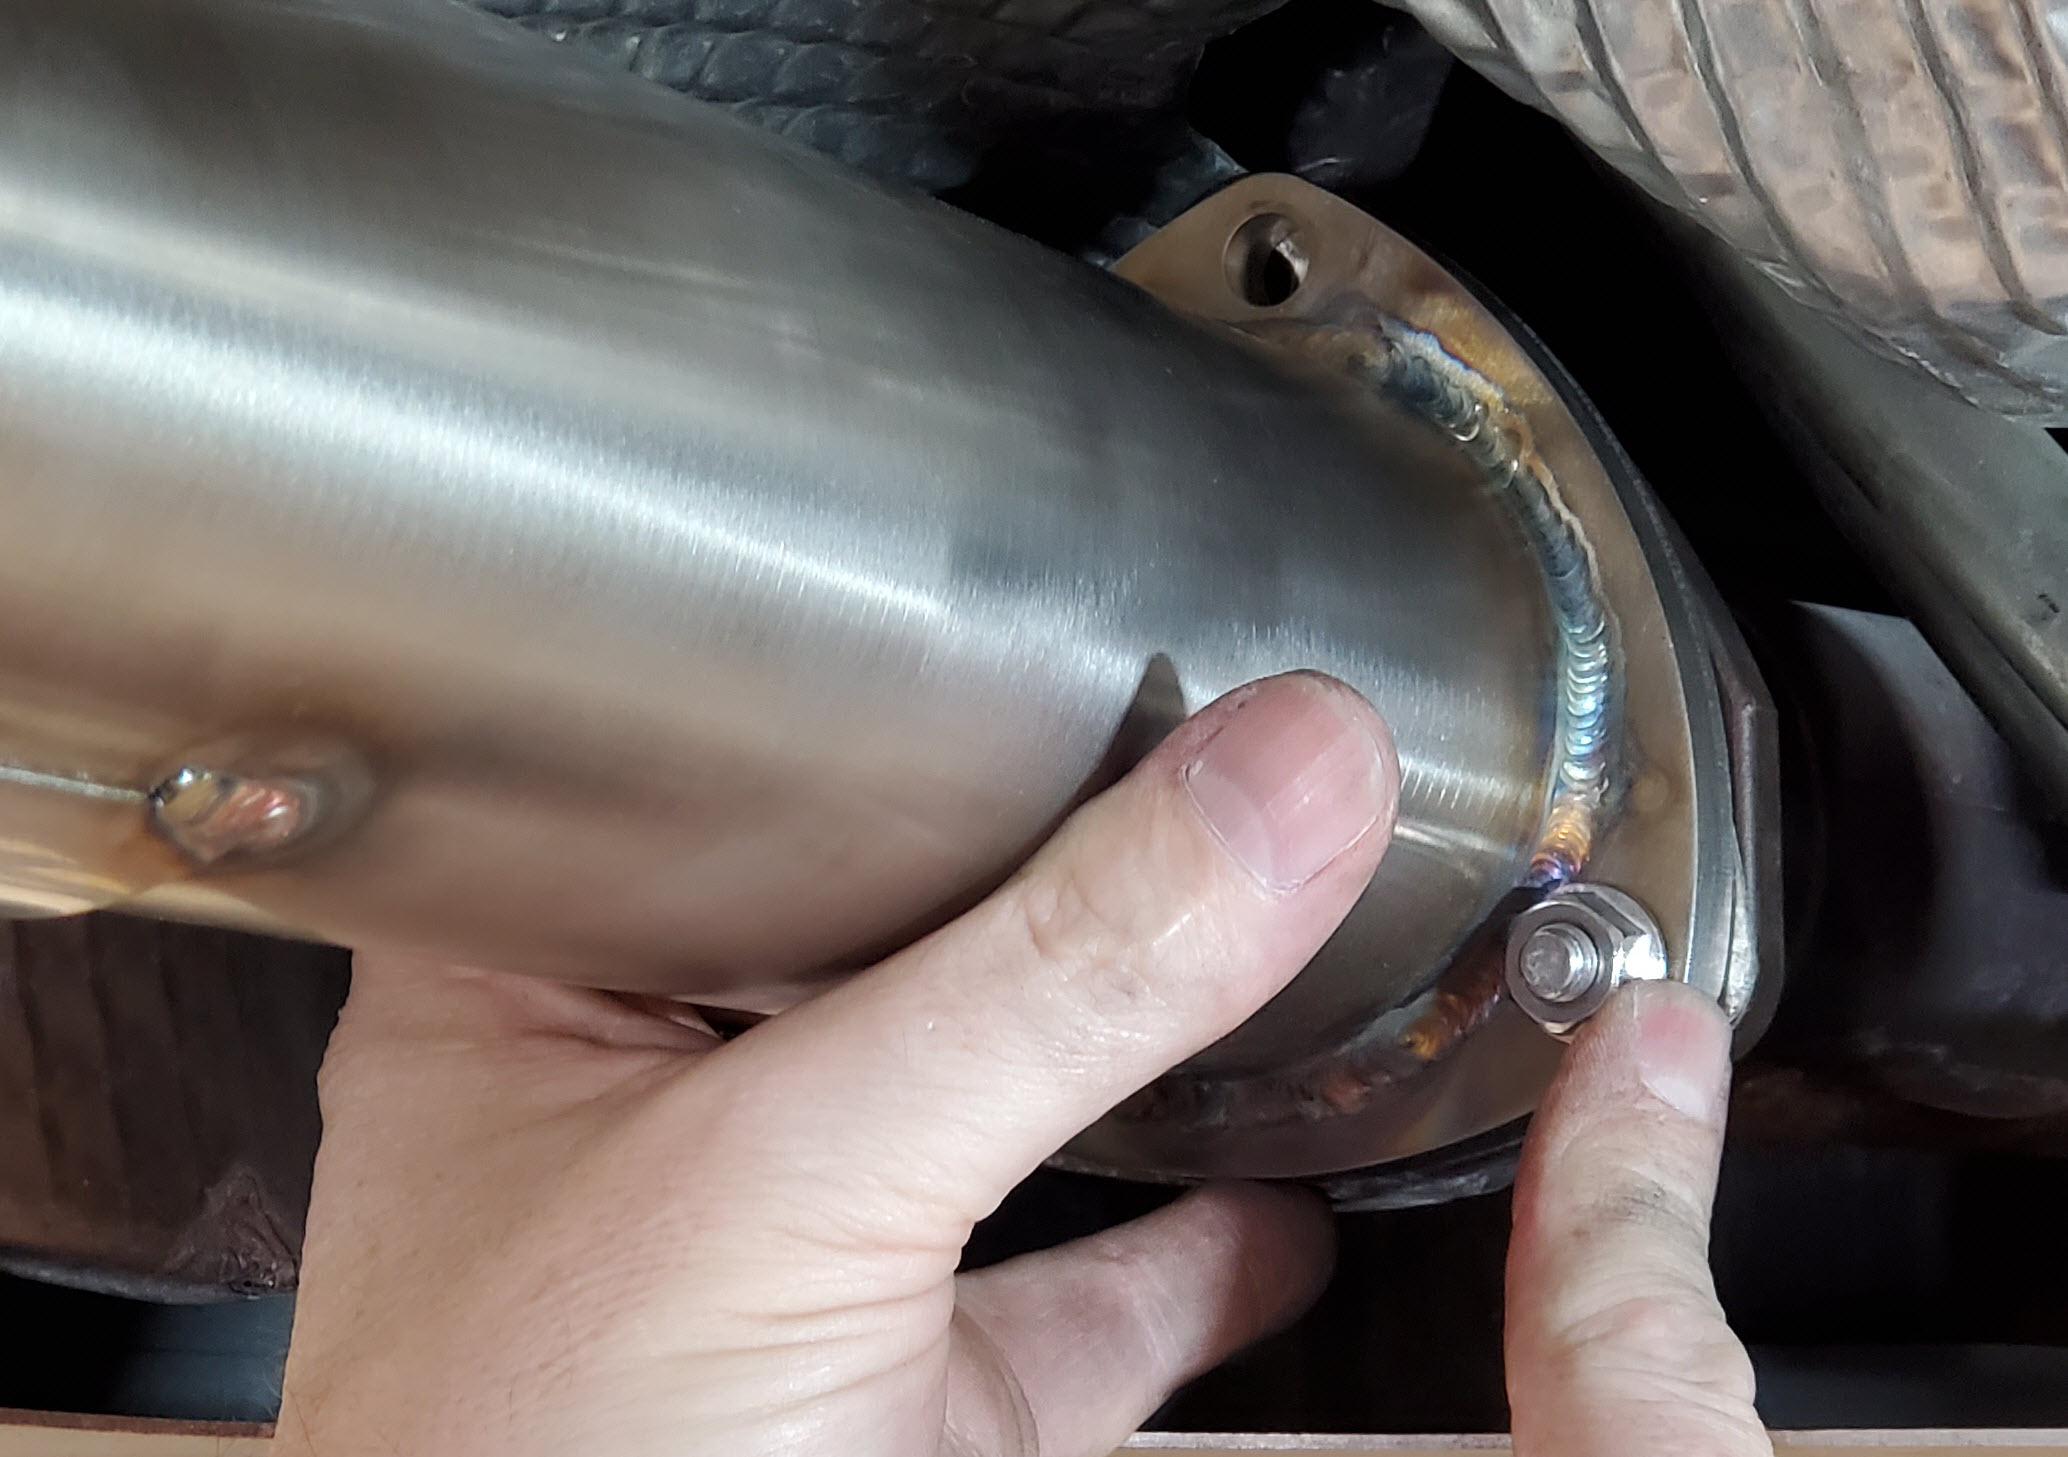
- Snug up all three nuts:
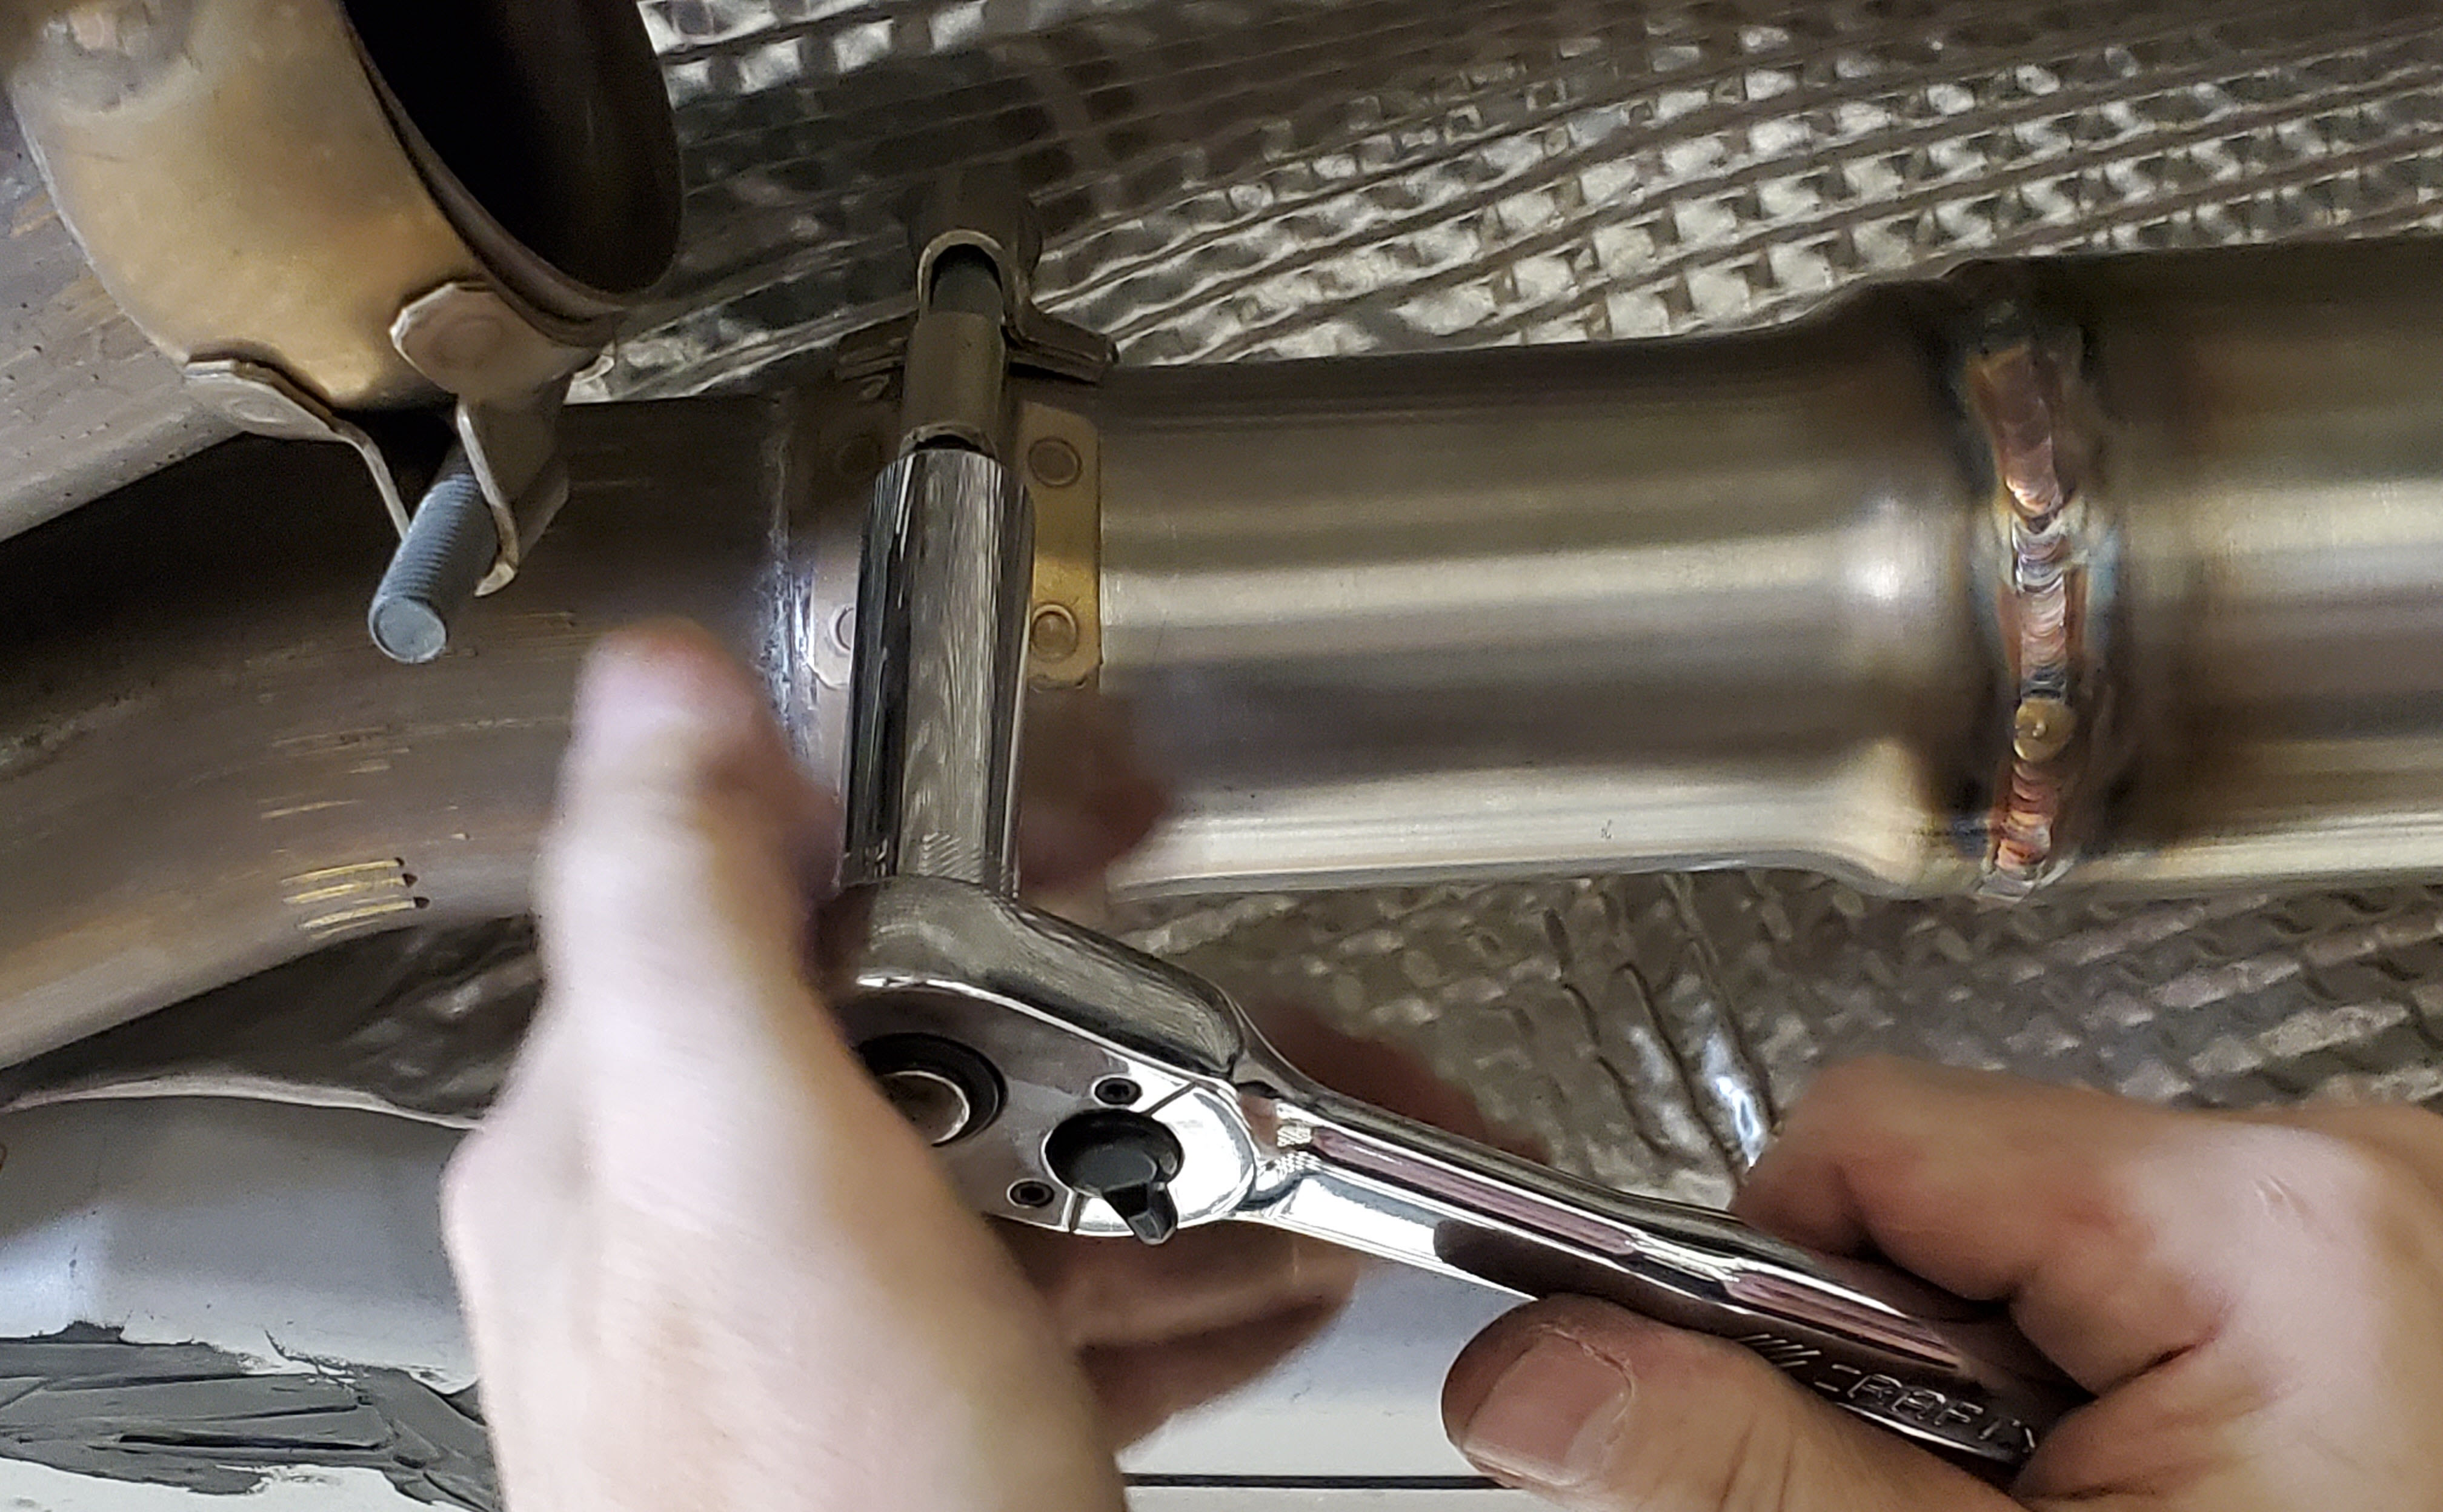
- Uppermost – I used the 13 mm box end of the combination wrench and could just barely get it onto head of the bolt, but it will fit. Hold it in place with one hand. I used the 6 or 18″ extension, universal joint, 13 mm socket and ratchet to get on the nut (see photo). Snug the nut up tight, but leave the final torquing for later.
- Lower outer – Getting the wrench on requires stuffing your arm in above the aerodynamic under tray. Not hard, just tug it down and put your arm in. Getting the wrench on isn’t hard. Use the 13 mm socket, universal joint, 6″ extension and ratchet to get on and snug this one up.
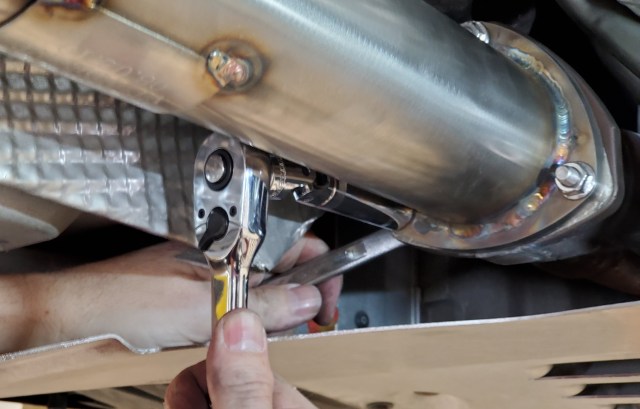
- Lower inner – easiest of the three. Follow the same process to snug it up.

- Uppermost – I used the 13 mm box end of the combination wrench and could just barely get it onto head of the bolt, but it will fit. Hold it in place with one hand. I used the 6 or 18″ extension, universal joint, 13 mm socket and ratchet to get on the nut (see photo). Snug the nut up tight, but leave the final torquing for later.
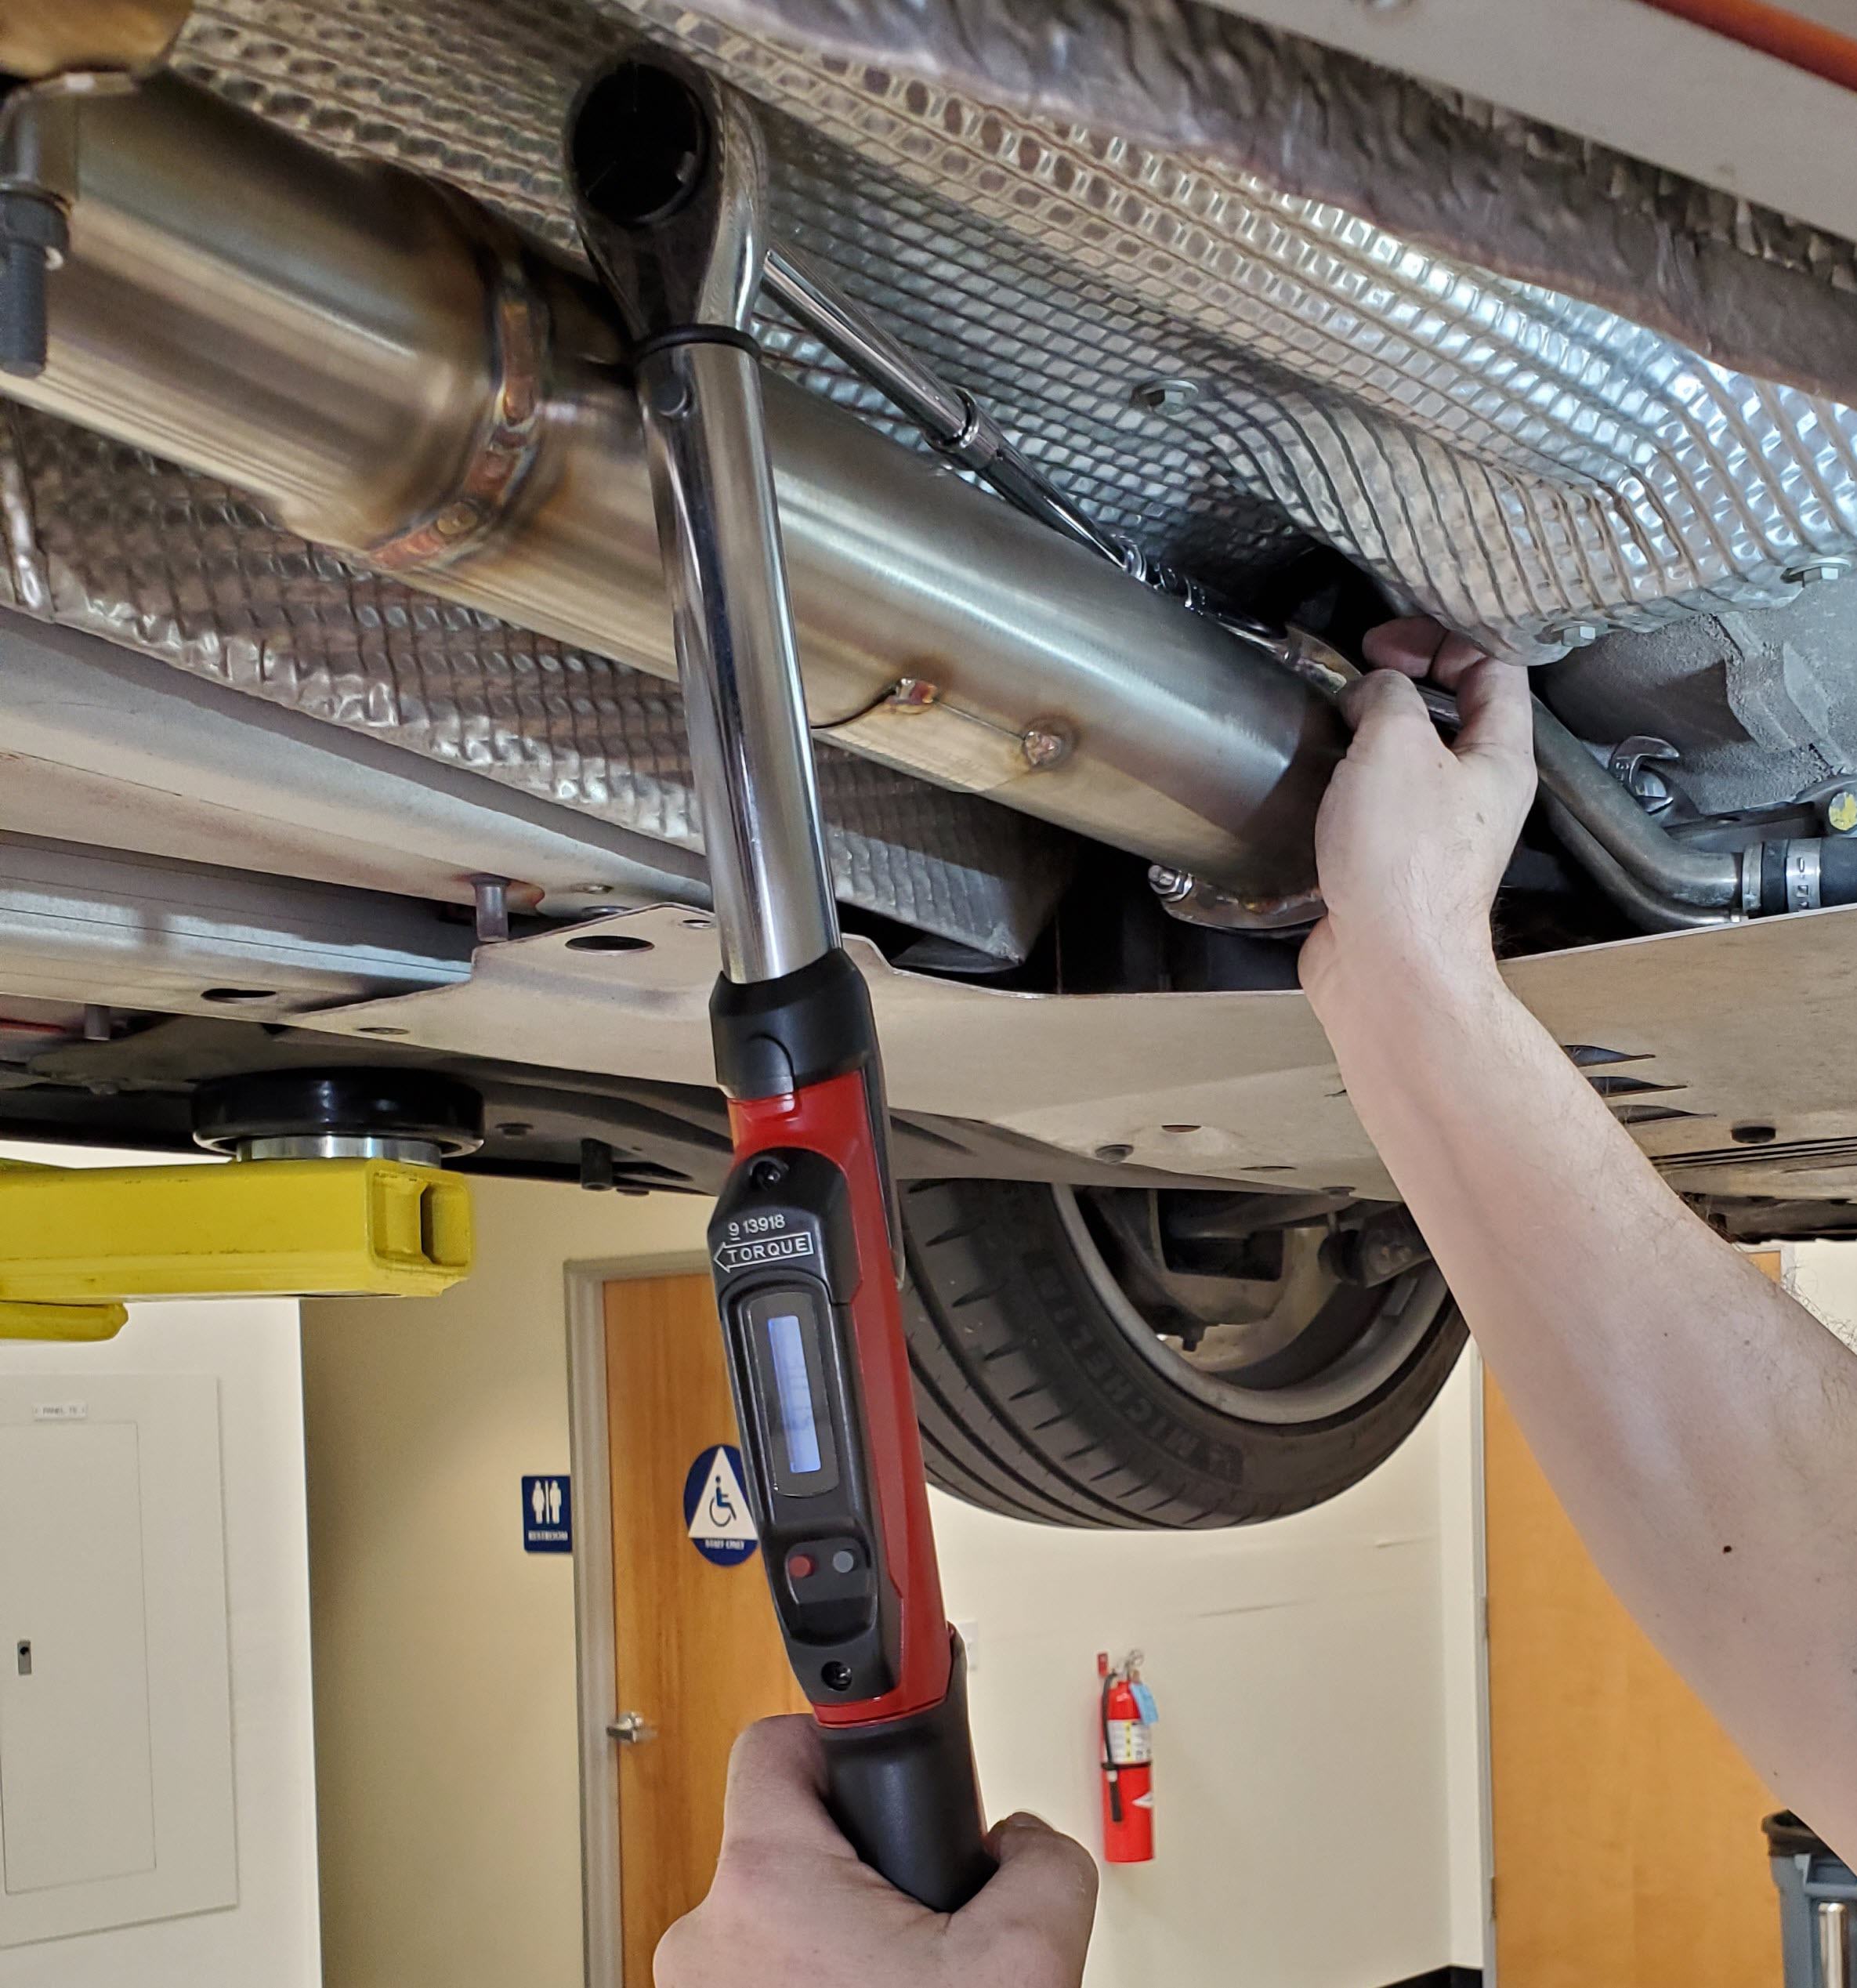
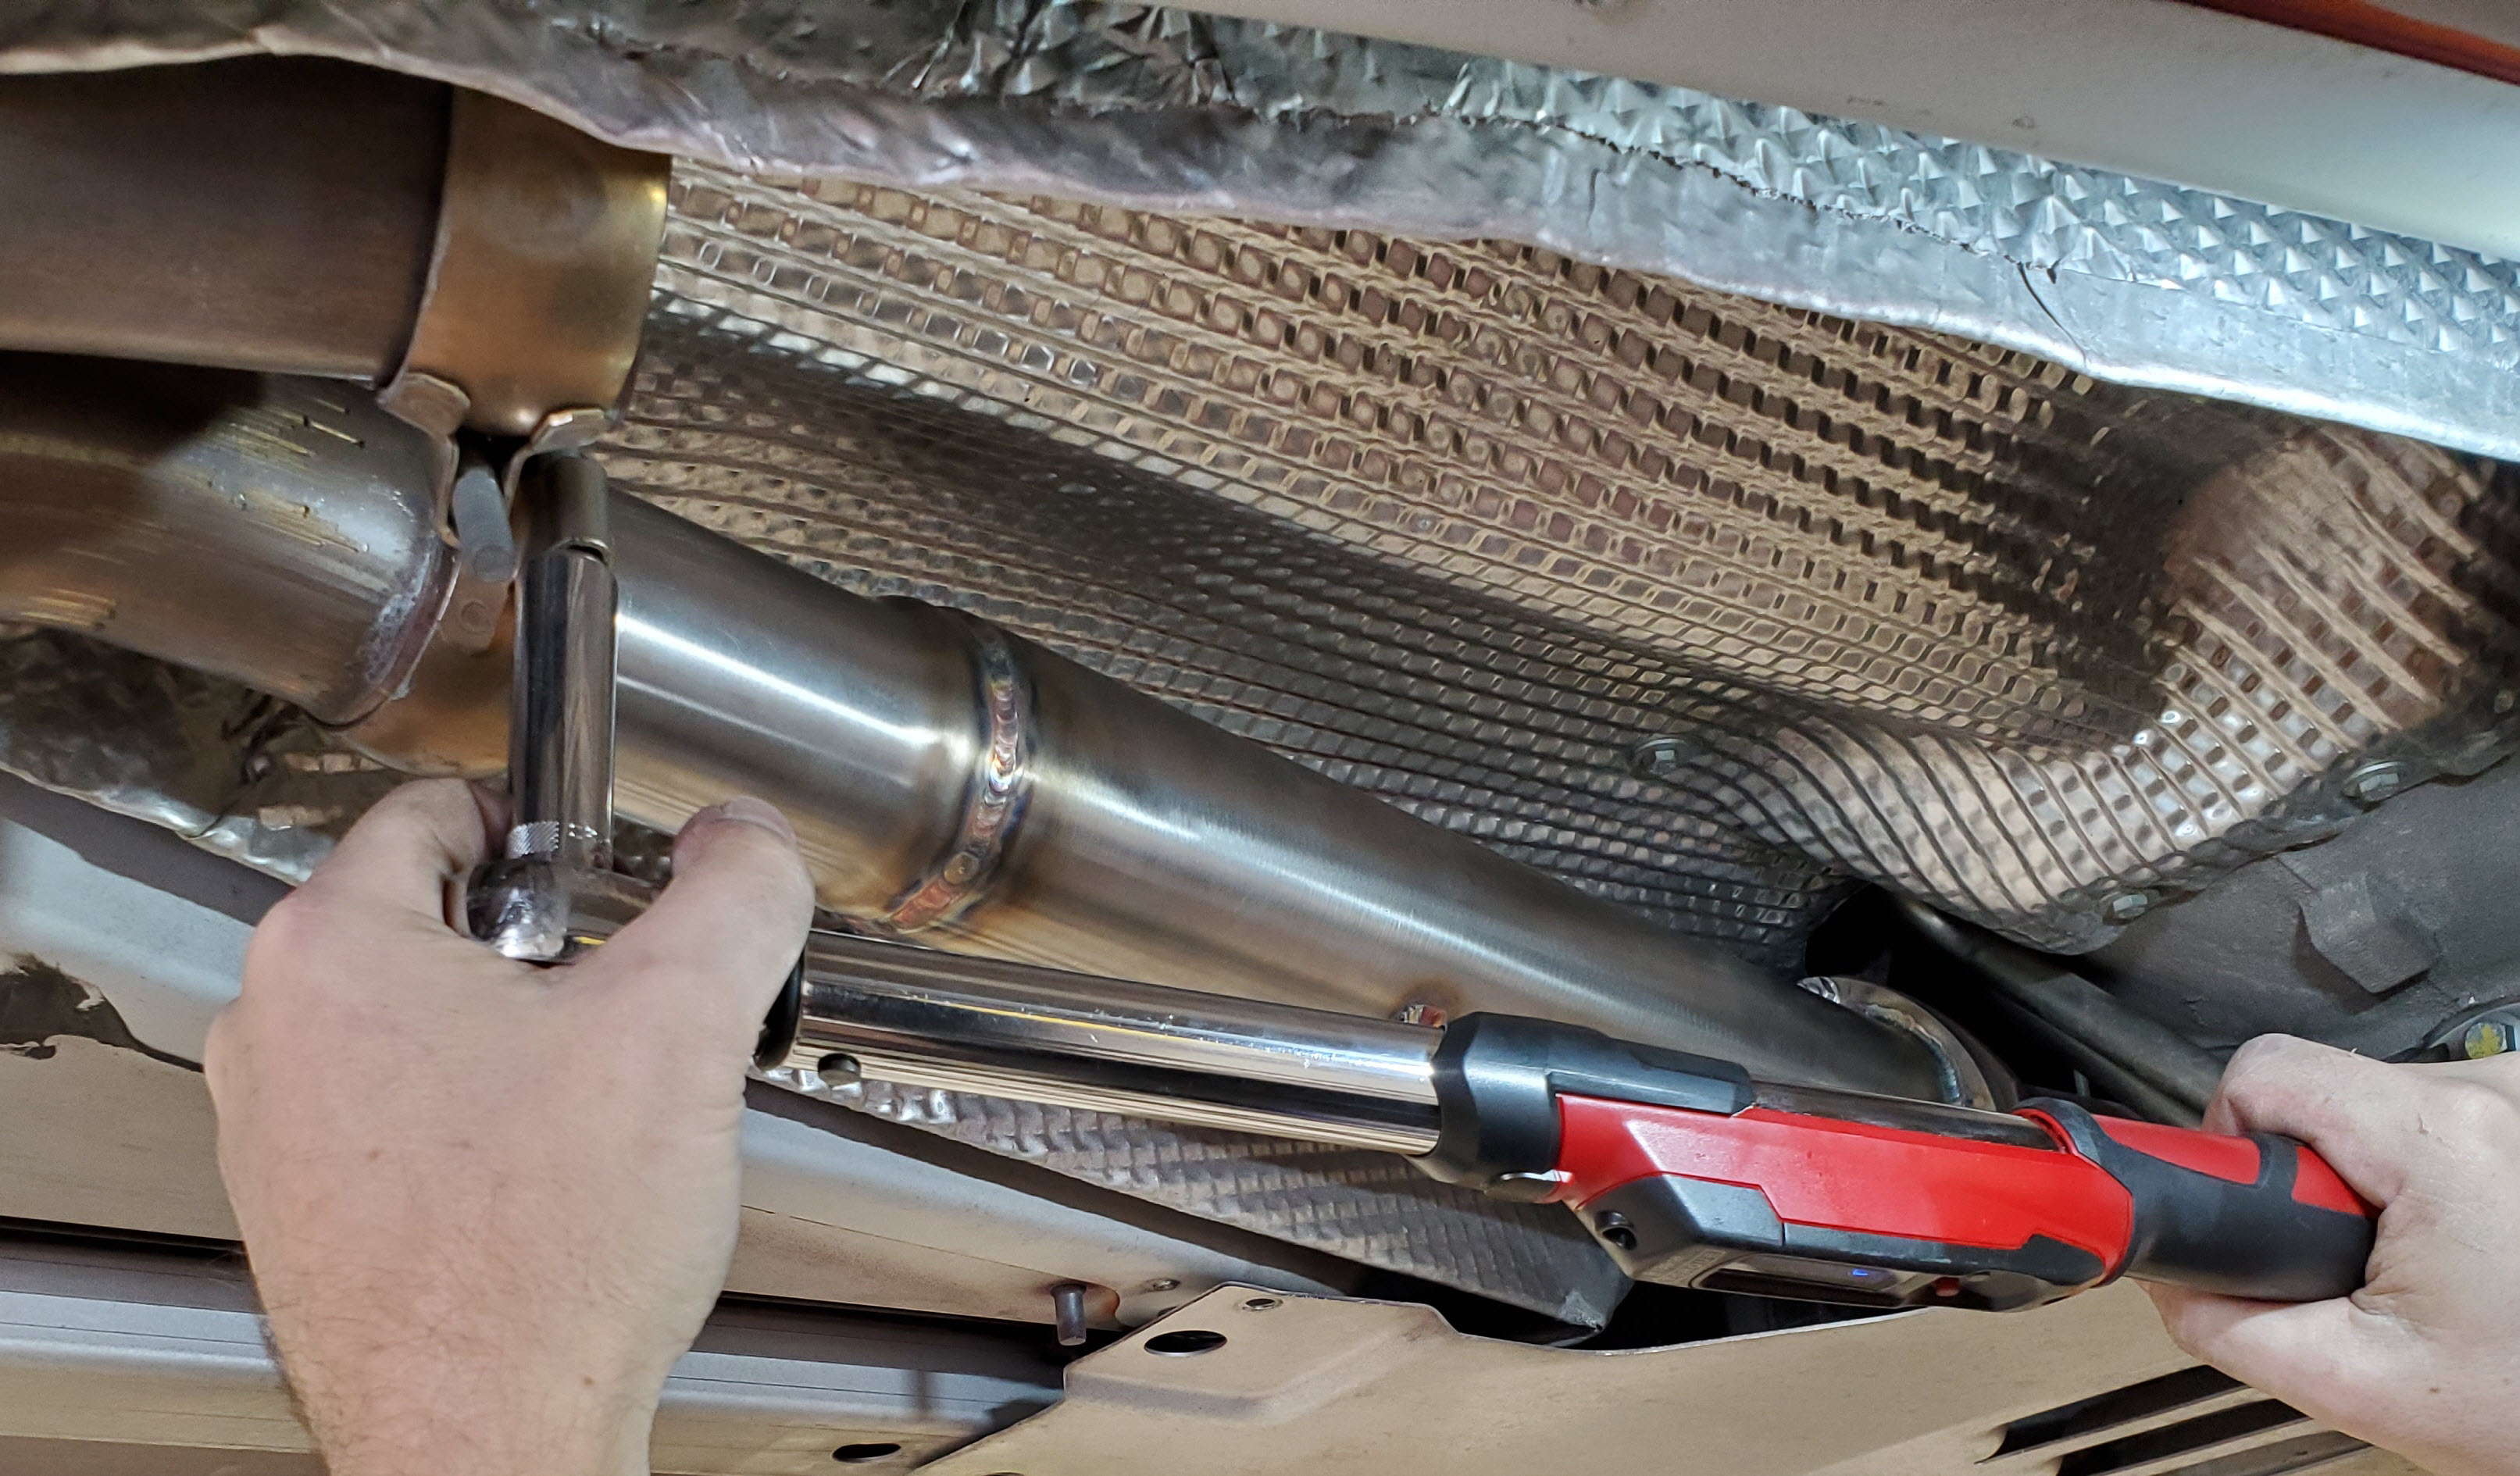
- Torque up all three nuts to 30 Nm (22 ft-lbs). Similar to snugging them up, I follow the same process to get my torque wrench in place and properly tighten them.

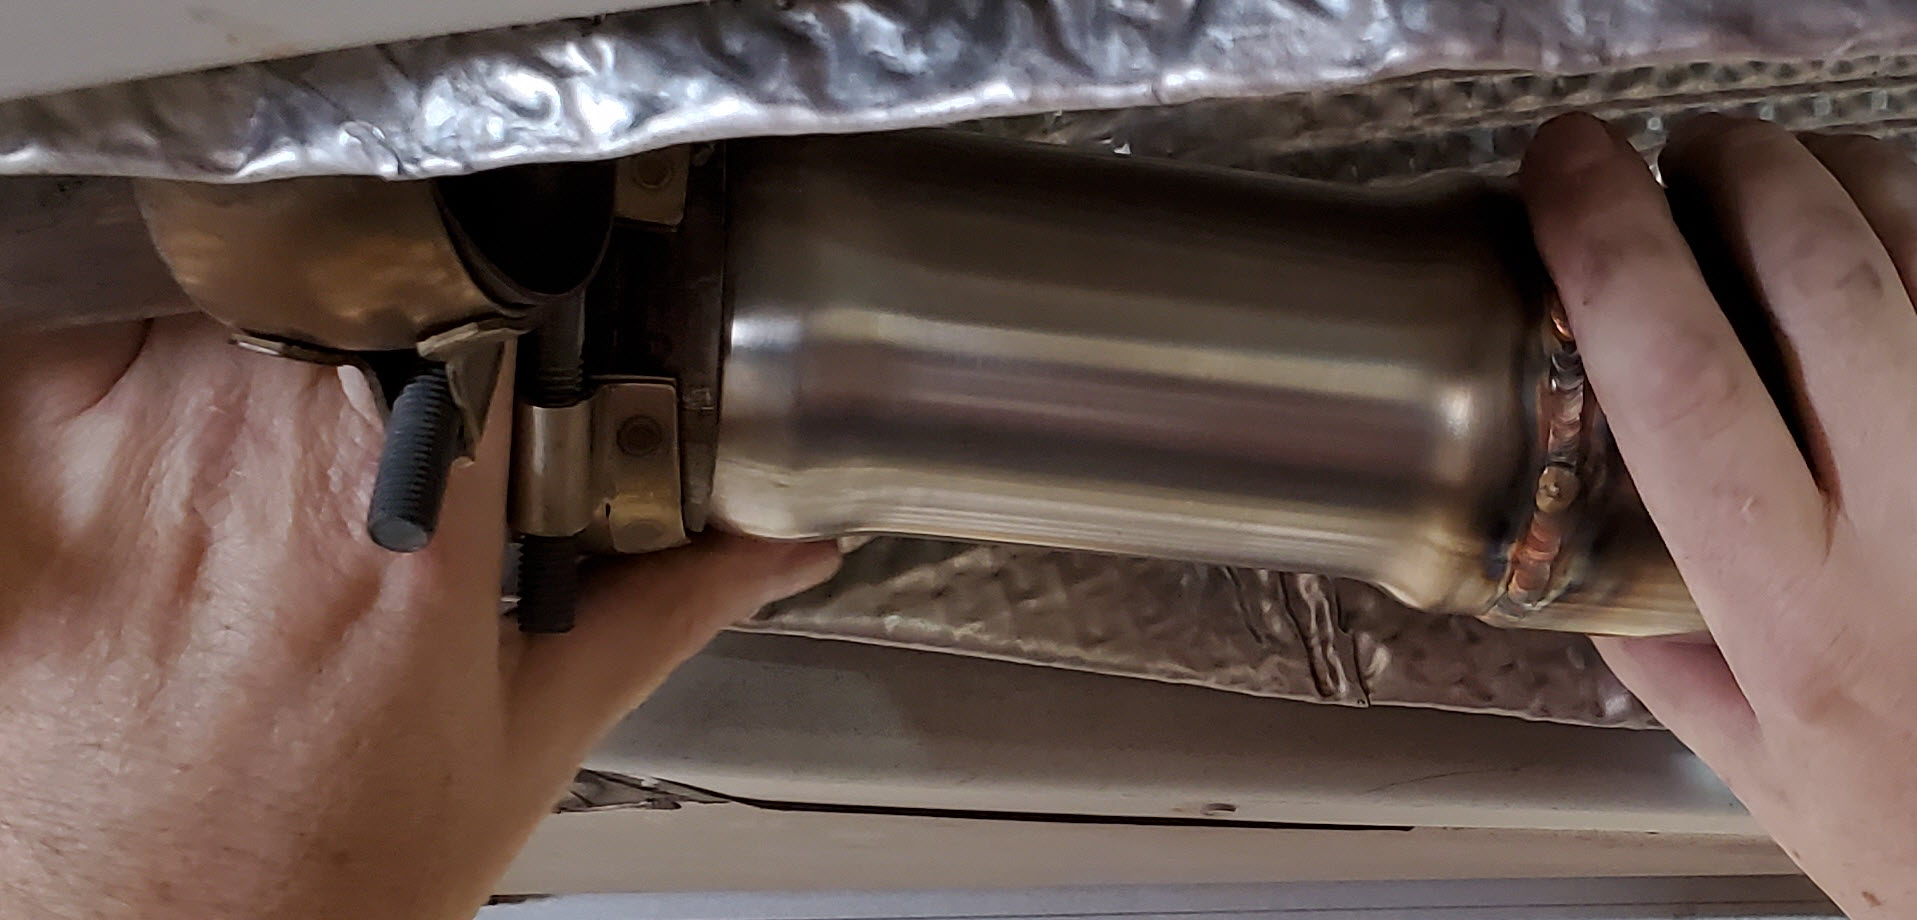
- With the flanged end all tight, we can not move to the back end of the pipe and worry about mating it up with the flared exhaust pipe. You’ll probably discover the 3/8″ gap I described due to the Velocity AP pipes being slightly too short.
- If your joint needs to have exhaust paste to seal it up, now is the time to fit it. As noted, mine is in great condition so I omitted this step.
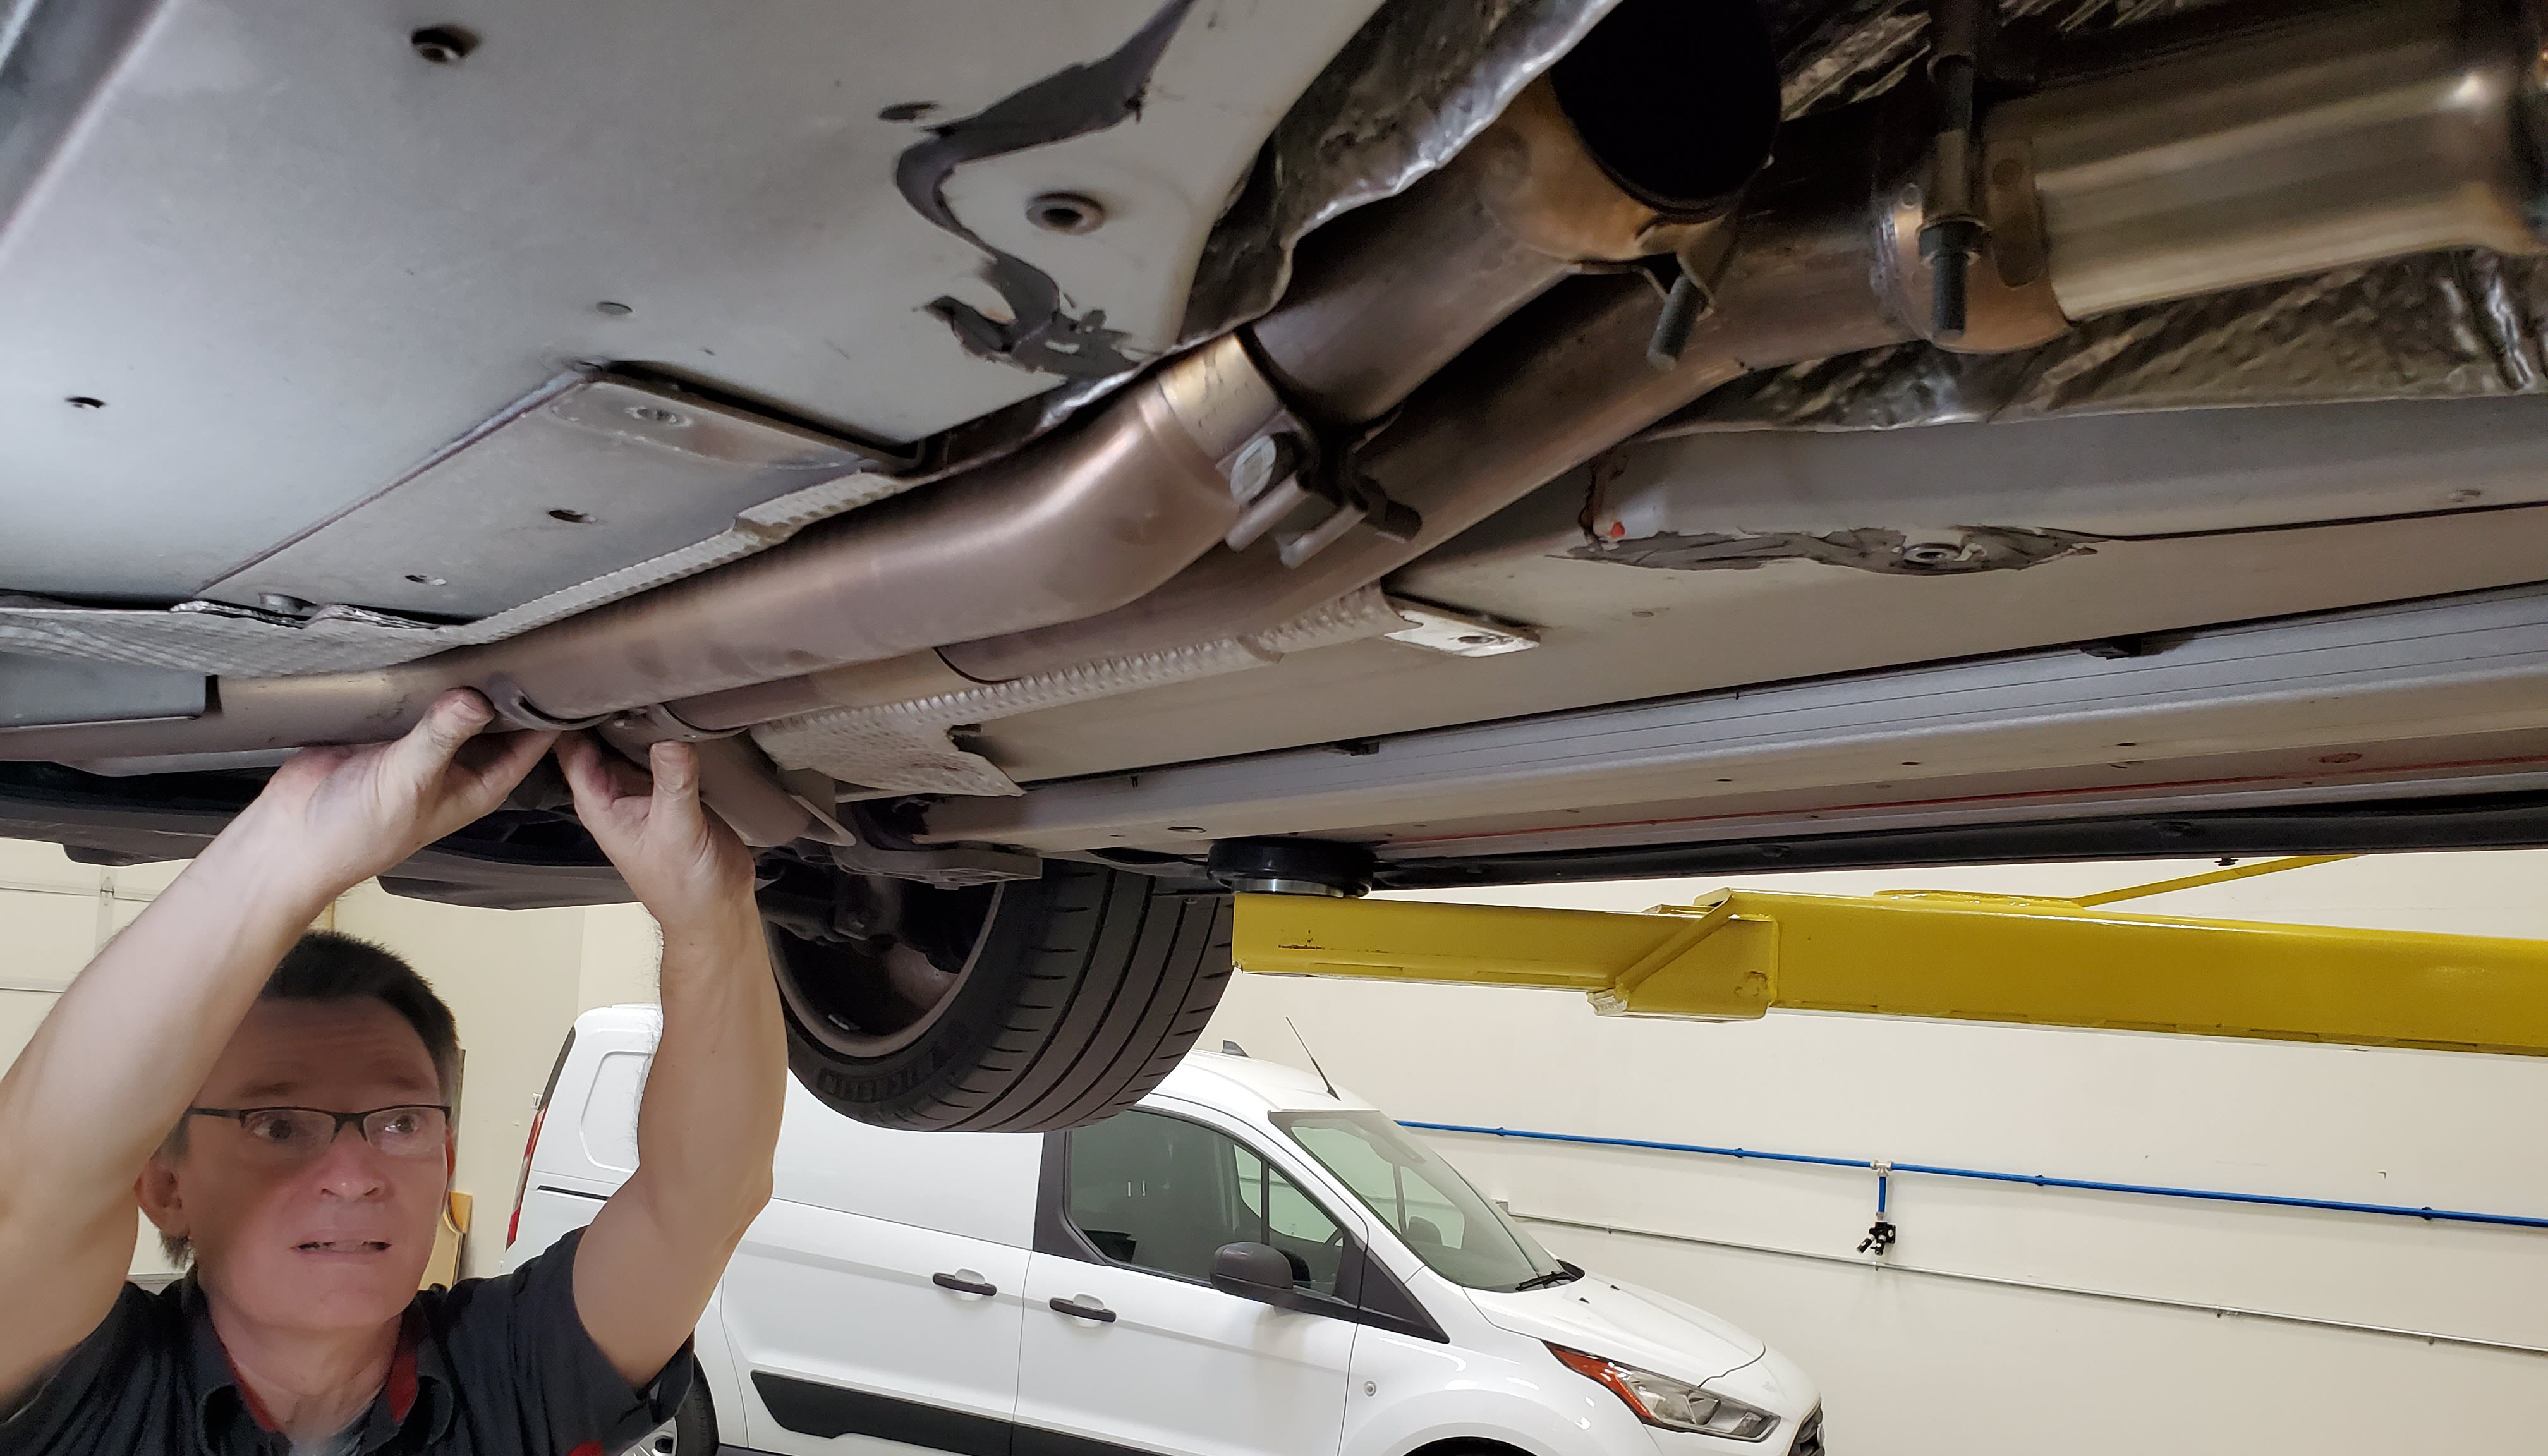
- I went to the back of the car, grabbed the rear section of the exhaust pipe and gave it a few mighty shoves forward to butt it up tight to the new pipe. While I was doing this I went back and wiggled the joint each time to help align the two surfaces between pushes. Spend the time on this to get them flush fit to each other. This is important. The clamp will NOT suck them together that much.

- Using the 13 mm deep socket and ratchet, run the nut up just until the clamp begins to snug up, but you can still move it around a little bit.
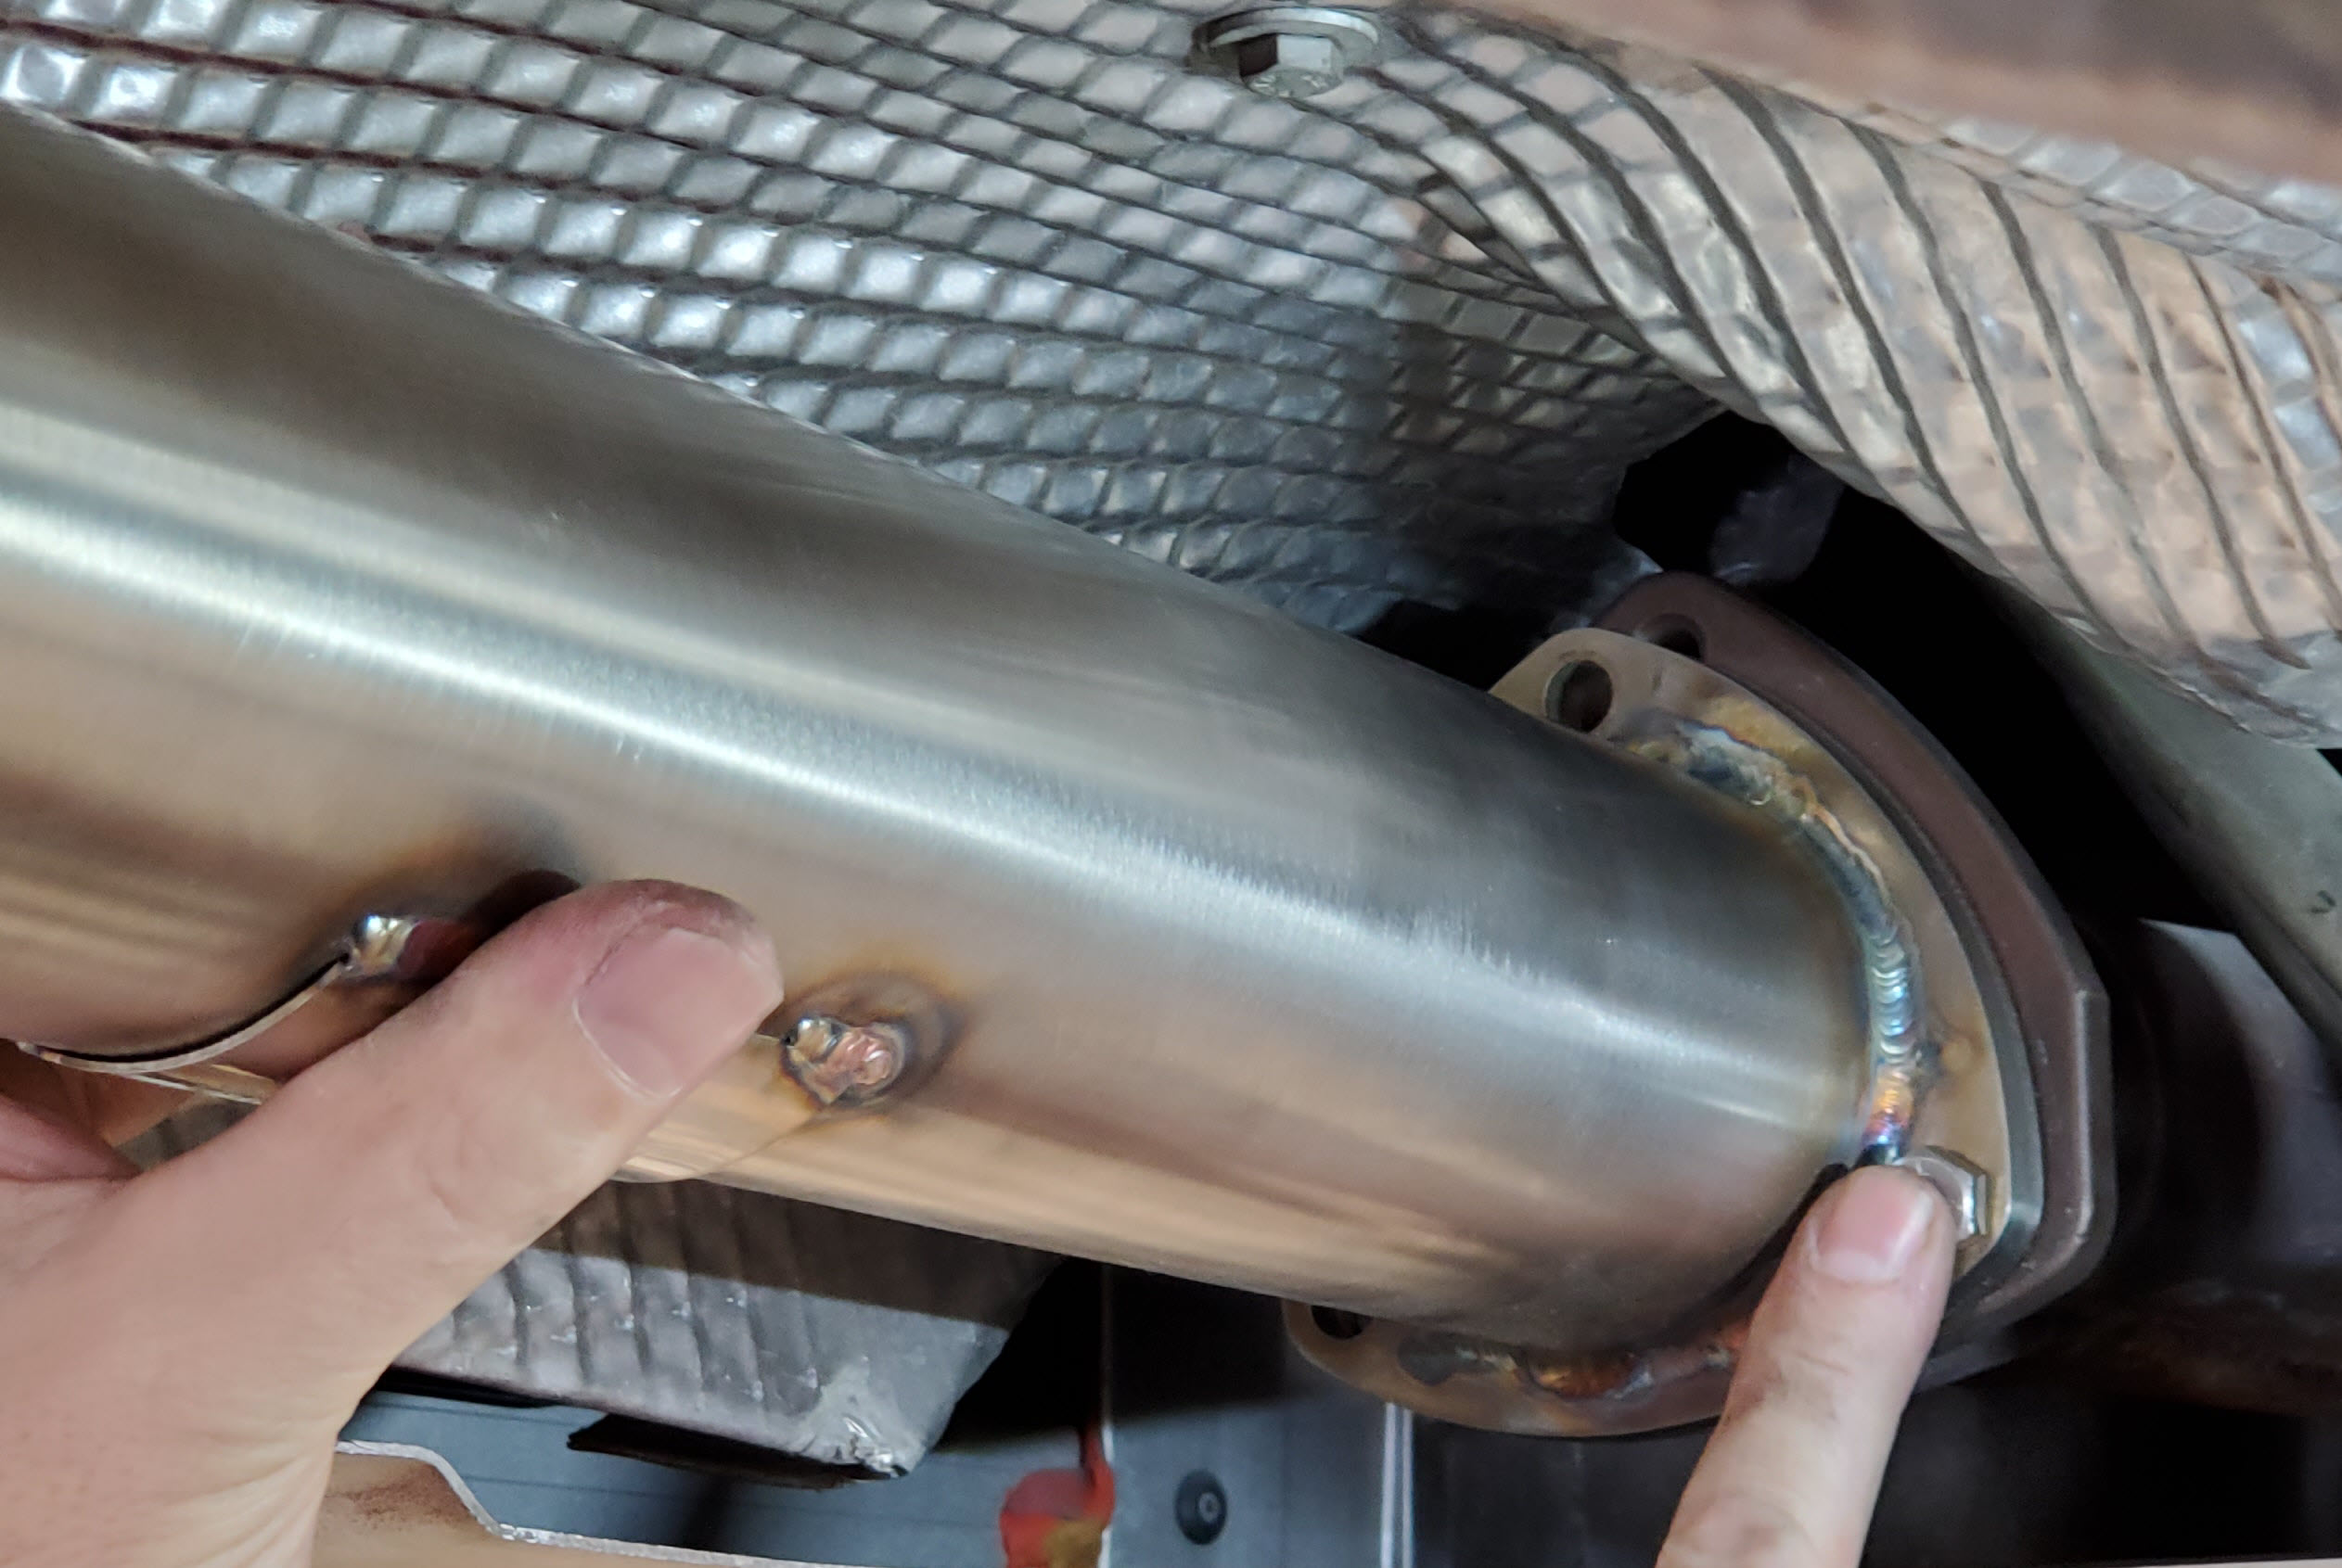
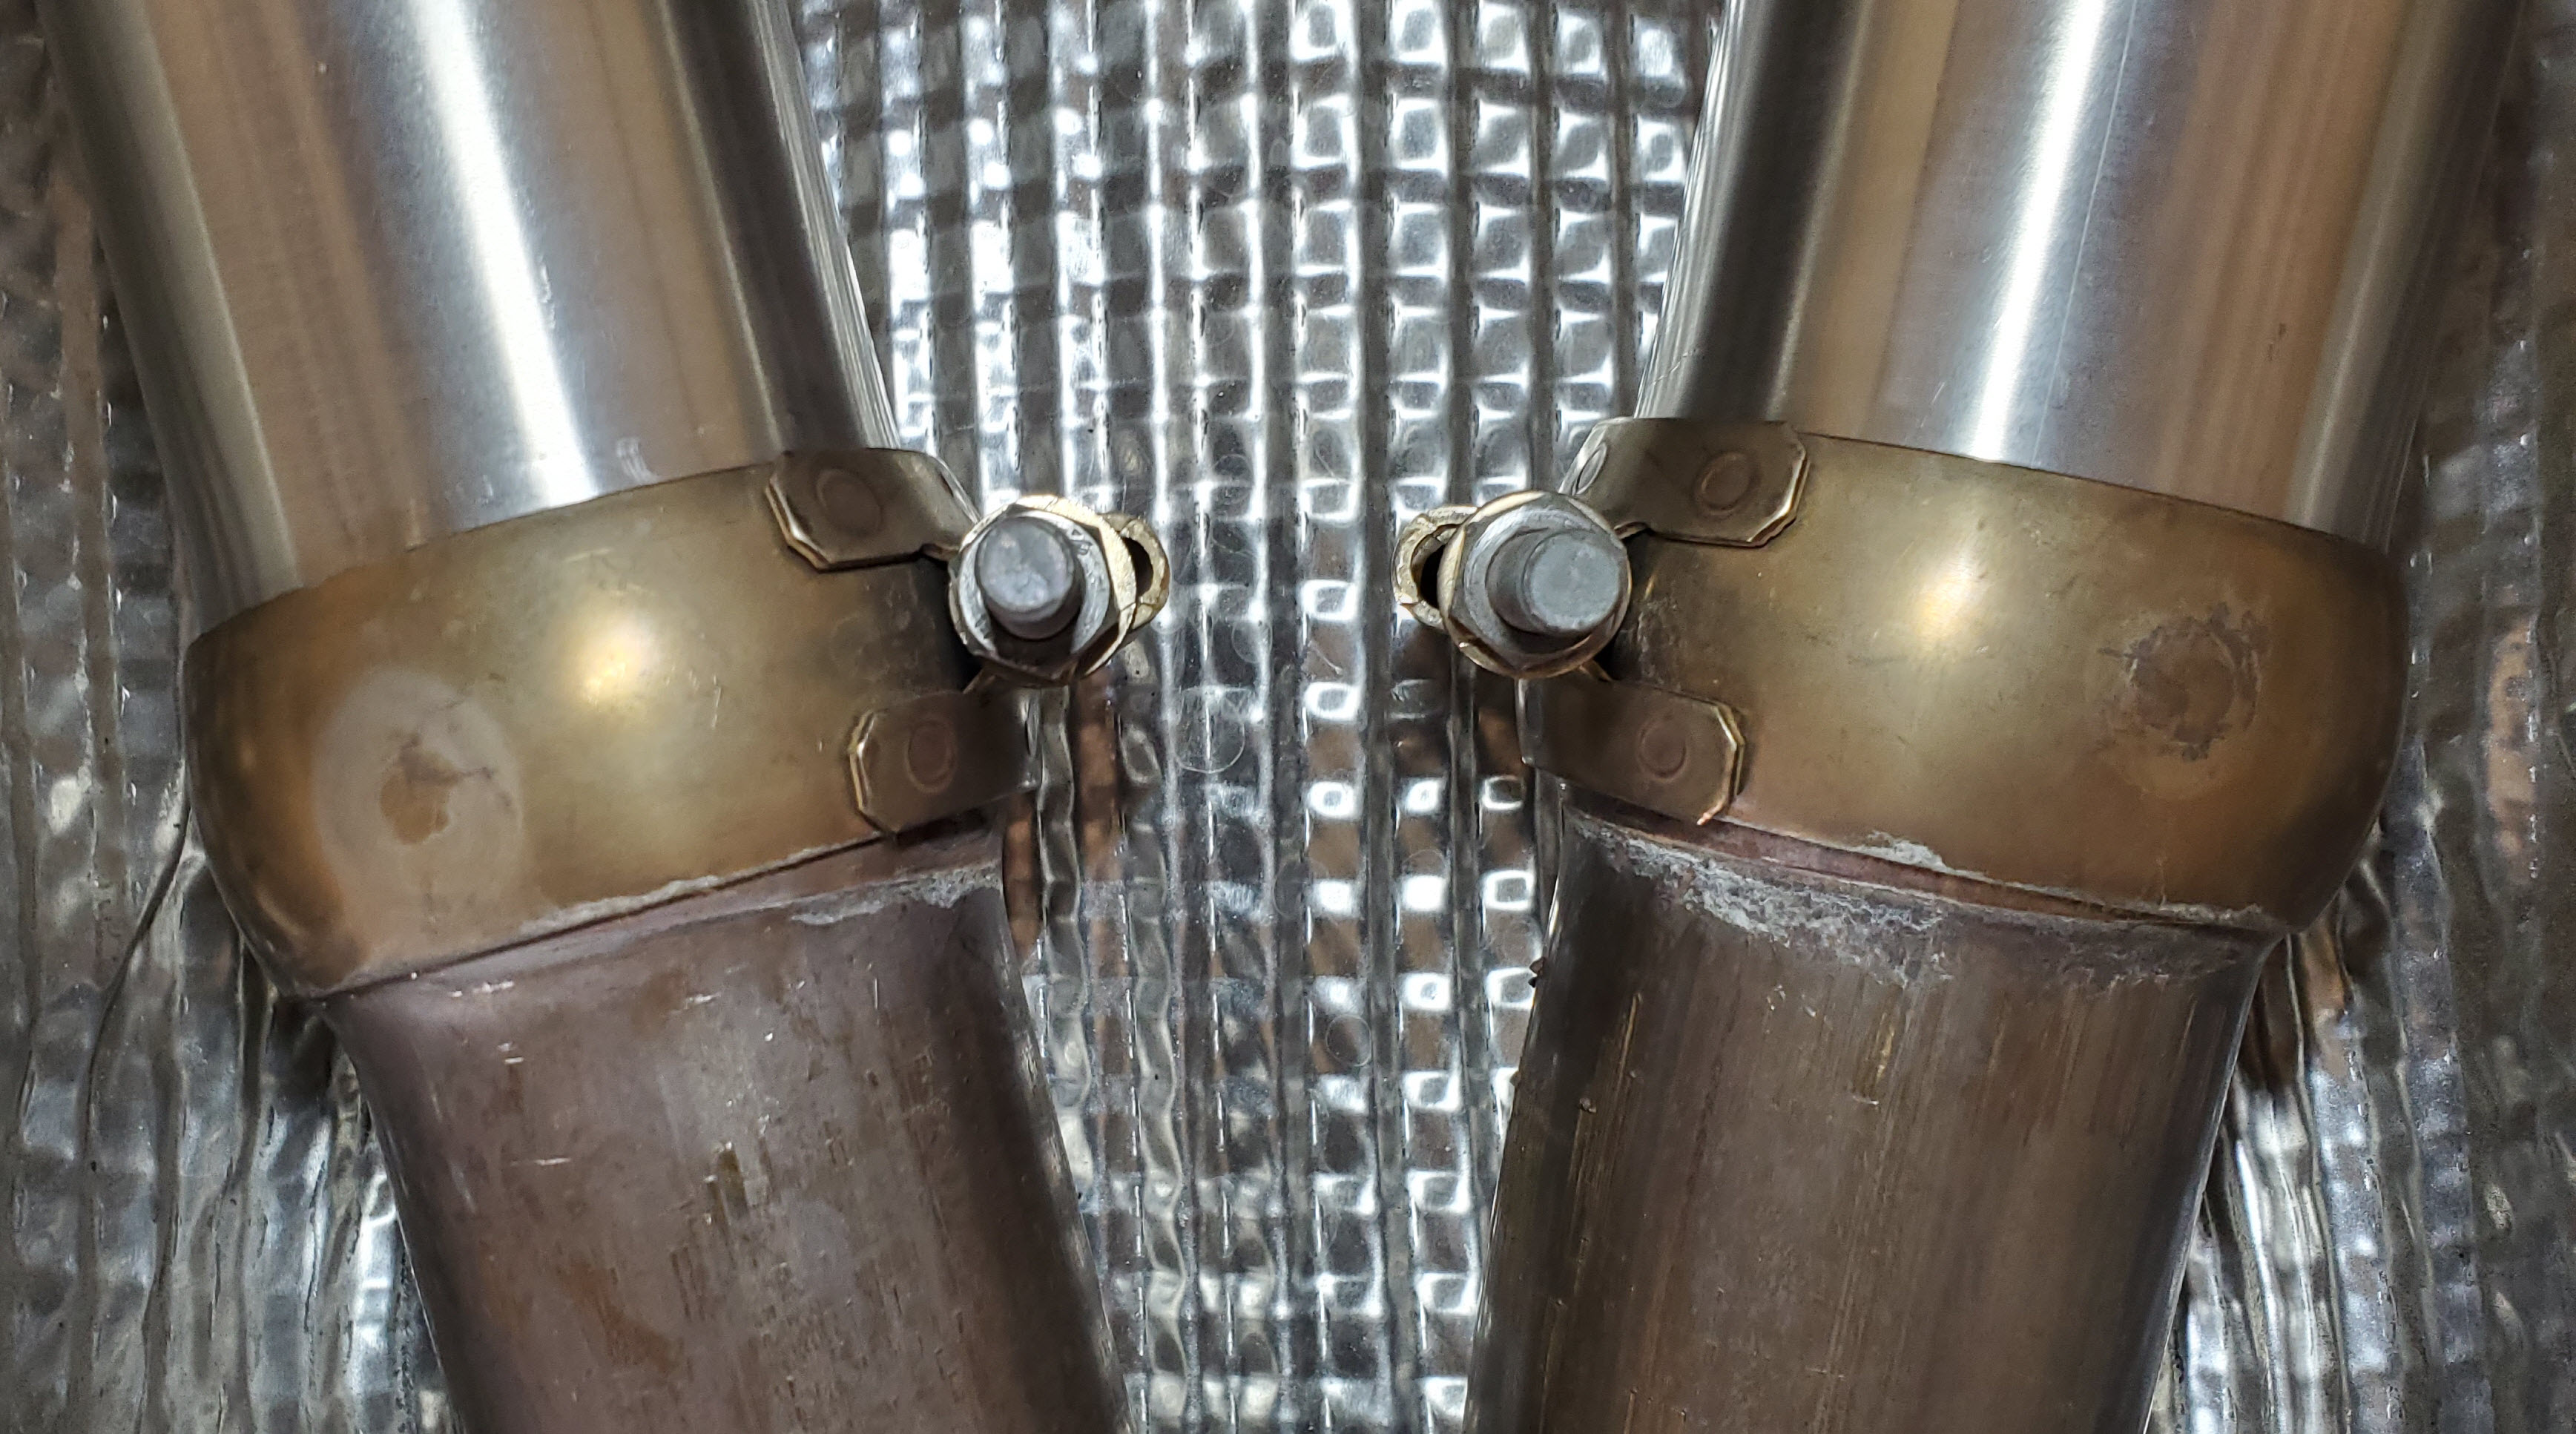
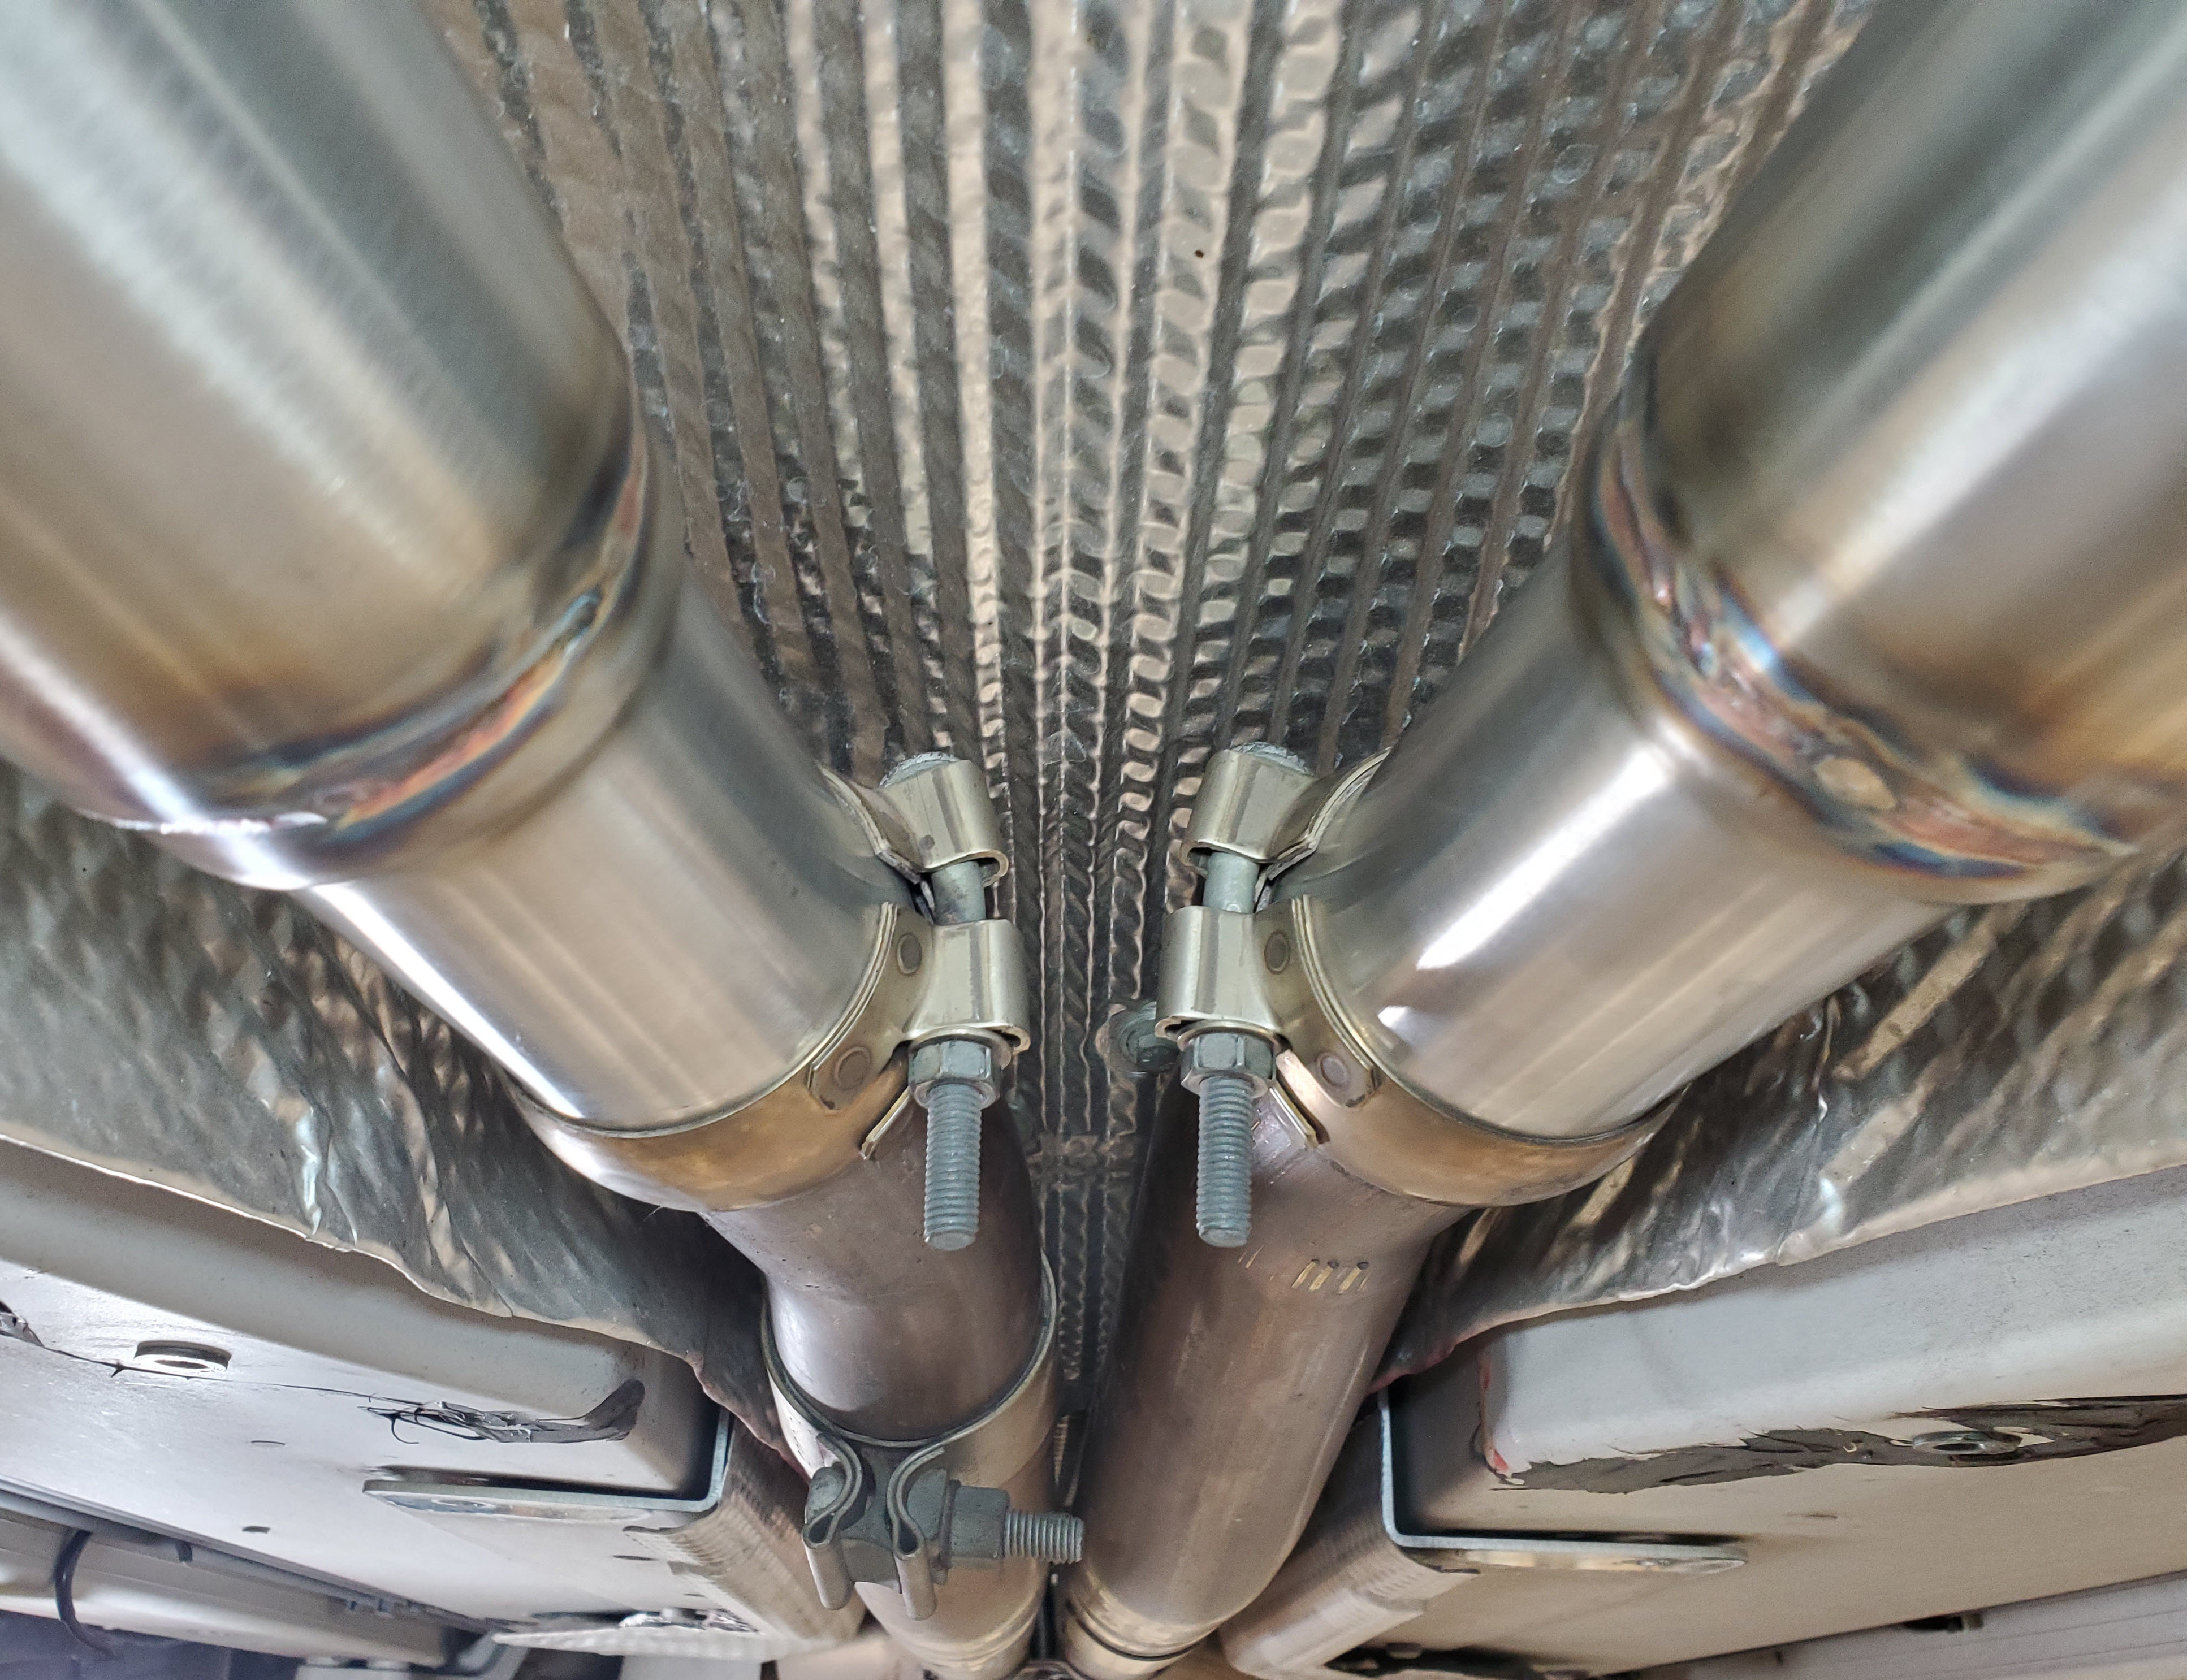
- With them butt flush, center the clamp over the joint and get it squared up into position. It can wobble around a fair bit. Pay close attention to the position of the threaded bolt bit. You want it in the original position mostly straight up and down towards the center, but slightly rotated up so that it doesn’t stick down too far where it will interfere with the shear plate when you reinstall it. See the photo.

- With it aligned, snug it up.
- Use your torque wrench and do a final torque to 20 Nm (15 ft-lbs).

- The pipe should be fully installed now. Give it a solid tug/wag to be sure it feels 100% solid in the car. Check your clamped joint with the inspection light and make sure it looks fully butted and sealed up.


- Now move on and repeat this process on the other side.
- When both pipes are installed, give them a wipe down with the micro fiber towel to leave them shiny and remove any greasy hand prints you left on them. You want to get this grease off before you start the car so it doesn’t smoke off when it gets hot (and it will get really hot). Don’t be surprise by a tiny bit of odor the first time you run the car.


Buttoning Up
With the pipes fitted you can get on with putting the rest of it back together, including the proper way to refit the shear panel. I’ve got a few articles and videos to help:
Weight Savings
While I had the old secondary cats removed, and the new pipes still on the bench I stole my sweetie’s kitchen scale and weighed the difference.
The original secondary Cats weighed about 3.67 Kgs each, for a total of 7.334 kgs (16.17 lbs).
The Velocity AP pipes weight just 3.867 kgs (8.53 lbs) TOTAL for both of them. That’s a 3.467 kgs (7.64 lbs) weight saving. Not quite the 10 lbs of weight savings claimed on the Velocity AP website, but close (perhaps that was from a different donor car measured).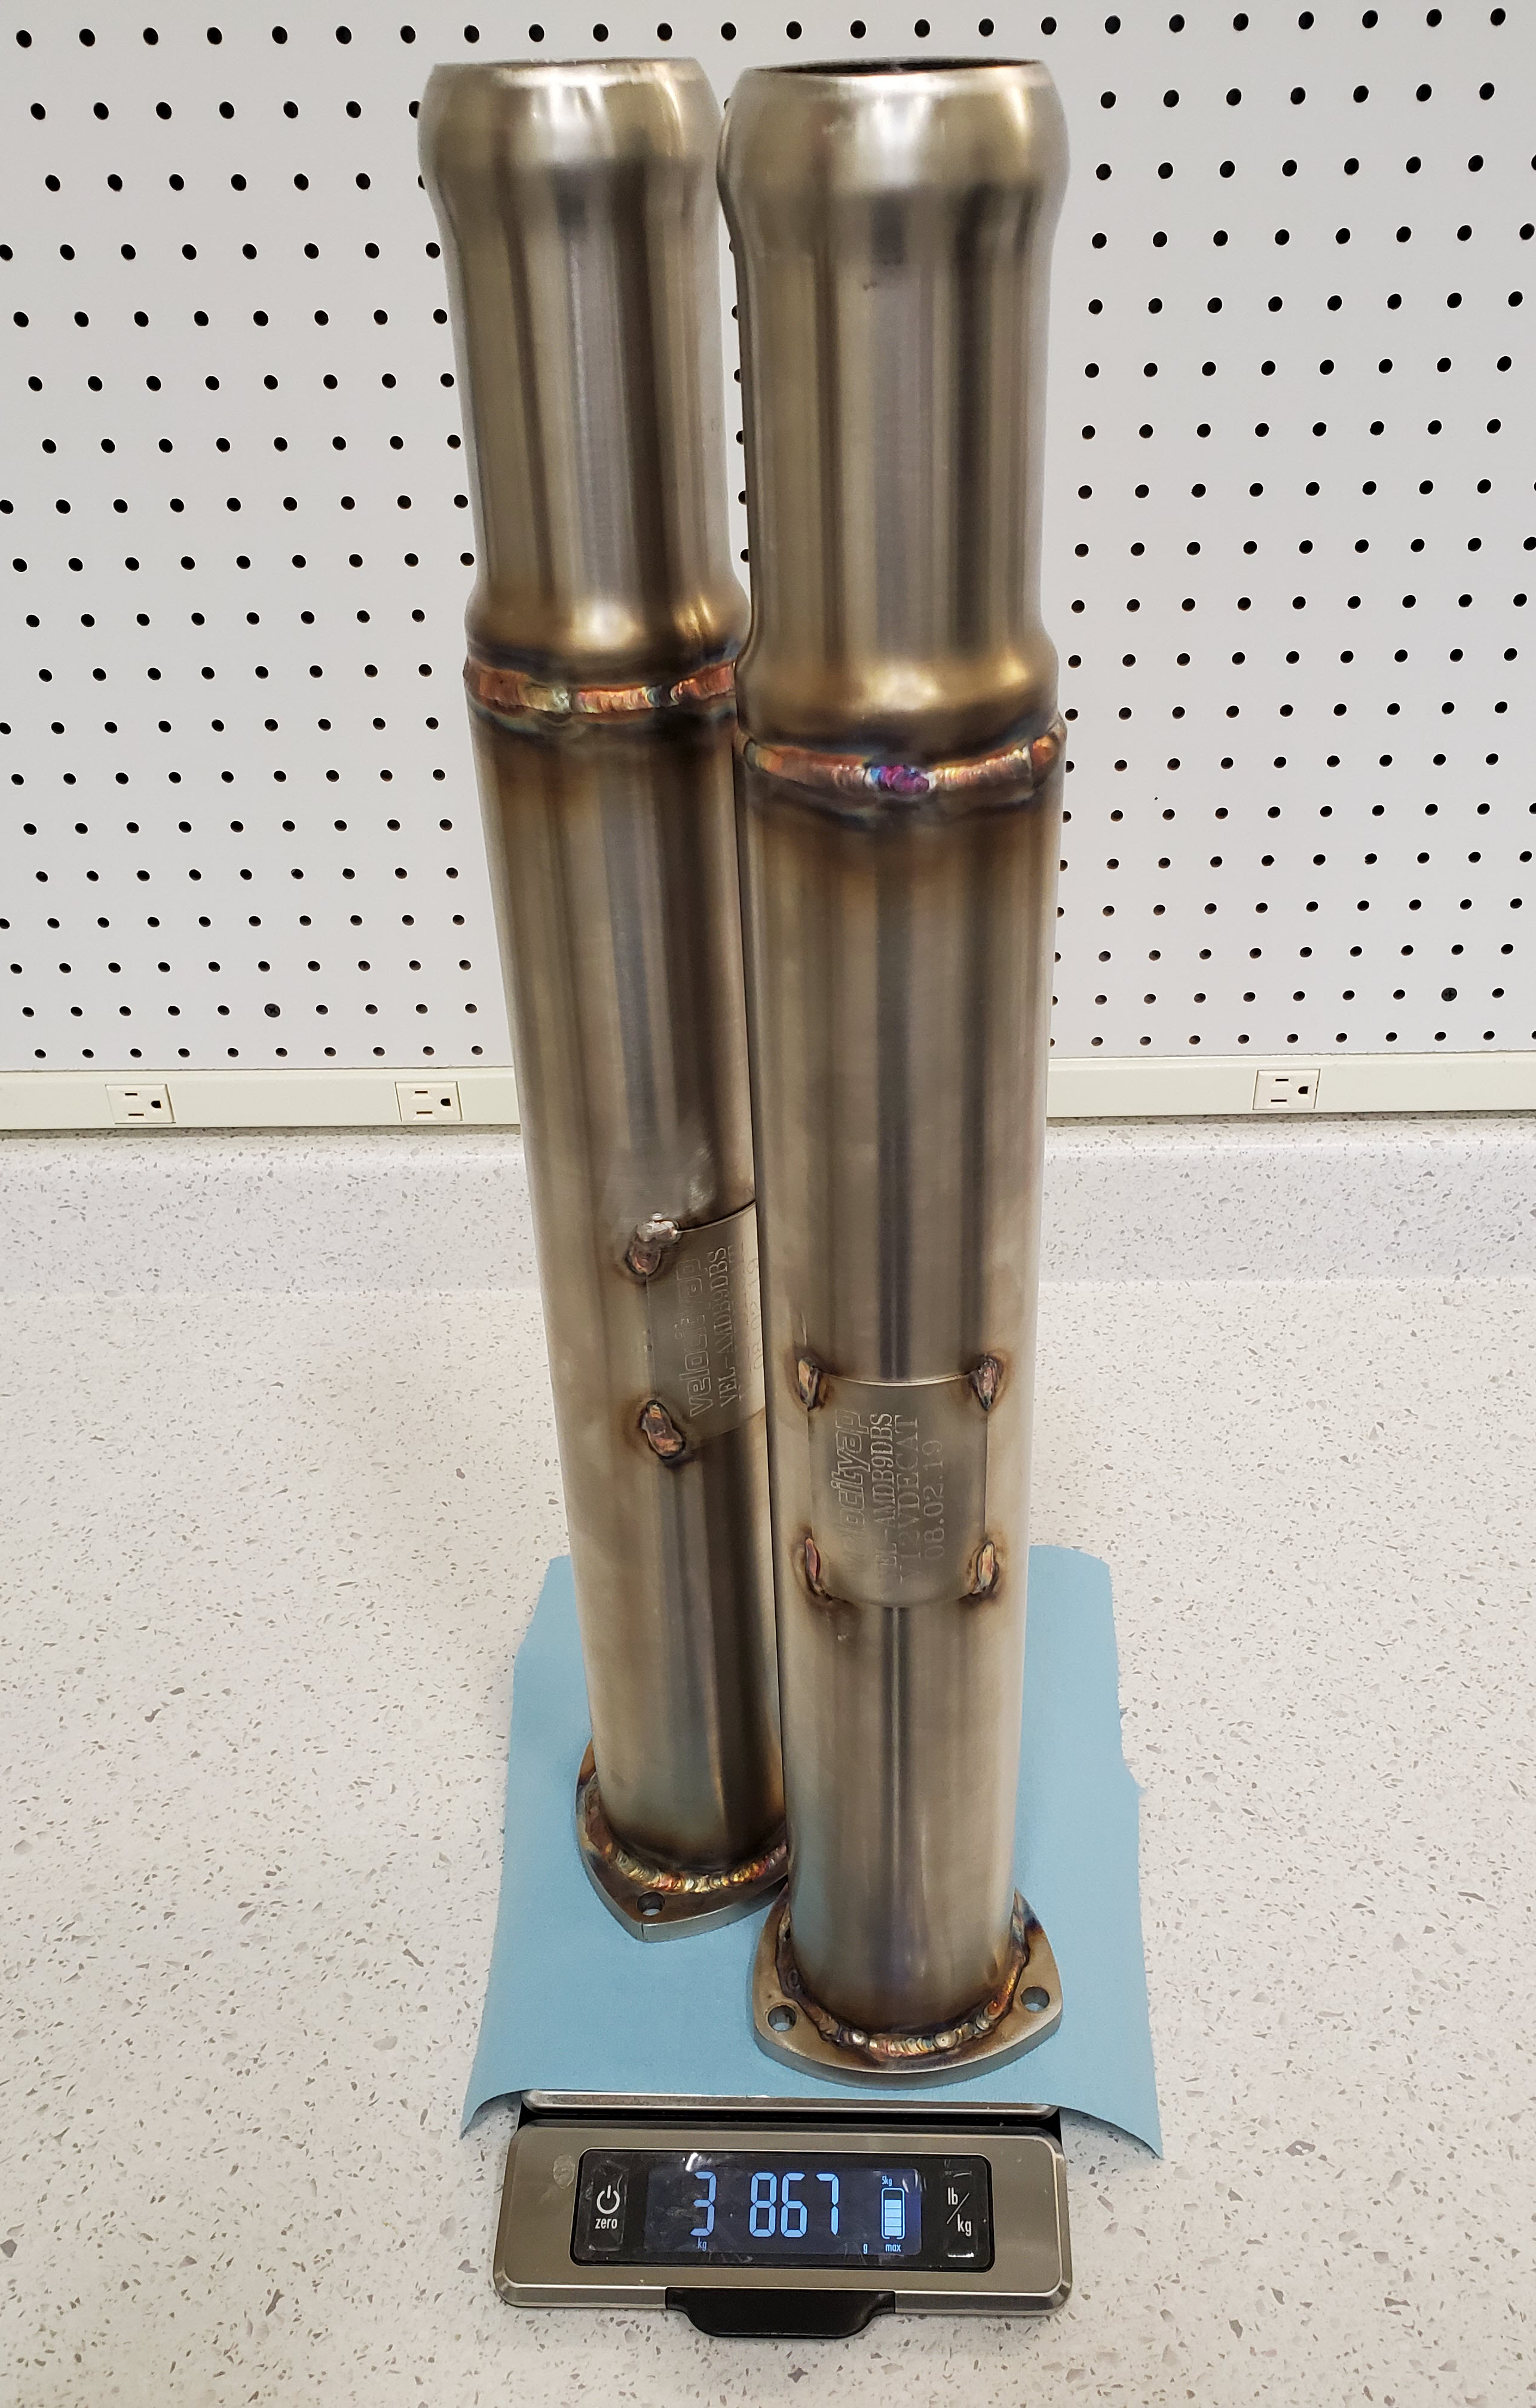
If you’ve read my other article on the Power to Weight Ratio of an Aston Martin DB9 (check it out here) you’ll see that a weight savings of 8.82 lbs is equivalent to adding 1 bhp of engine performance. Therefore our 7.64 lbs of weight savings here is equivalent to adding about 0.87 bhp just on its own. Small, but every bit helps.
Sound, Power, and SMOG testing
In my next articles I will cover the change in sound (which is immediately notable – check out the article here), is there an increase in power by Dyno testing her again (they claim it adds 10+ bhp – check out the article here to see how it does), and show the results of the California Emissions SMOG testing (check out how it did on the test here).
Video
Here is a video where I follow the procedure to get them fitted. Check it out, seeing how its done is always helpful.

Steve. Your a real Pro. at this. 👍 john 🇨🇦
LikeLike
Thanks John. Catching up on all the articles I’ve been meaning to publish. Hope you are safe and well up there.
LikeLike
Hey Steve, great work and vids. I noticed in the video you had different SCDK than the Velocity AP. Could you tell us what happened?
LikeLike
Hi Mohommad – sharp eye! I actually had two separate kits to test. One from AML Performance in the UK, the other from Velocity AP in Canada. When I am all done the series you’ll see videos and articles for both kits, which ever suits your needs best. For some of the opener scenes I used whichever was handy. Check out the new videos, I have three scheduled over the next week to publish over on YouTube channel. Covid lockdown means I have some time to catch up on the backlog.
LikeLike
Did Steve mention anywhere why he switched from AML to VAP?
LikeLike
Hi. Was just trying them both out to see if there was any significant difference. Both are good choices. If in Canada or the USA you might go Velocity AP, if in the UK or EU probably AML. Mostly for ease of shipping.
LikeLike
Hi
I need to change the starter motor on my automatic 2009 DB9 , how hard is it?
Many thanks
LikeLike
Hi Nabil. Thanks for asking. Honestly I have no idea since I haven’t done it. I suspect it will be a serious challenge to get access to it since it may be surrounded by exhaust header and subframe.
What’s leading you to think the starter needs replaced?
LikeLike
Hello Steve
Thanks for the great videos
I see that you have installed straight pipes from AML and then you switched to AP velocity , I am about to do the same , which ones do you recommend ?
LikeLike
Hi Hassan, I didn’t switch exactly, I did videos on both to see if there was a difference, etc.
Both are a good choice, and I think work equally well.
I’d get whatever is ‘easiest’ for you. If you are in the UK or Europe, it might be easier to source the AML ones. If in Canada/US the Velocity AP’s might be easier.
Velocity includes the bolts nuts and gaskets I think, and that might be something you want/need.
Both will do a great job and sound terrific.
LikeLike
Thanks v much 🙏🏻🙏🏻
LikeLike
Pingback: Aston Martin 3 way switchable Exhaust Valve - DB9S.com
Love all your content. Did u have a Check Engine light come on afterwards ? I did.
there is no Aston Martin on the Island where i live, so i will have to figure this out and fix it myself. Any Advice?
i put Velocity AP 2nd Cat delete and in the rear,
i took the muffler off and put the Velocity AP GT4 muffler. (i left the valvetronic hose alone.) was i supposed to plug it maybe? thanx for everything.
LikeLike