
 In a previous article I discussed how to remove the chassis stiffening ‘Shear Panel’ from my DB9 (read about it here). I was removing it to access the exhaust system hidden above it while I was tackling installation of a Secondary Cat Delete kit (read more about that here). Reinstalling the panel is the last step of the process, and it’s important to get it right so your DB9’s structural rigidity is restored. Here is how I did it.
Preparation
You have to have the car off the ground obviously. Let me repeat the warning from Aston Martin just so you don’t mess up your car.
Note: Aston makes a fuss about removing this panel, and in particular NOT to do it if the car isn’t even and level. For example, don’t remove the panel if you’ve only got the car jacked up at one corner since this introduces a twist into the car’s frame, and if you remove and reinstall the panel in this condition you may allow the car to twist, and then lock it in permanently when you reinstall the panel.
Only reinstall the panel if your car is level and evenly supported.
If you’ve had the panel off, I am assuming then that you have the car up level on 4 jack stands or on a vehicle lift.
Tools
You only need a few tools to tackle this job:
- T30 Torx bit
- T40 Torx bit
- A 3 or 6” extension (to save you barking your knuckles)
- Ratchet
- A Torque wrench capable of 25 Nm (18 ft-lbs)
- An Inspection light is always handy
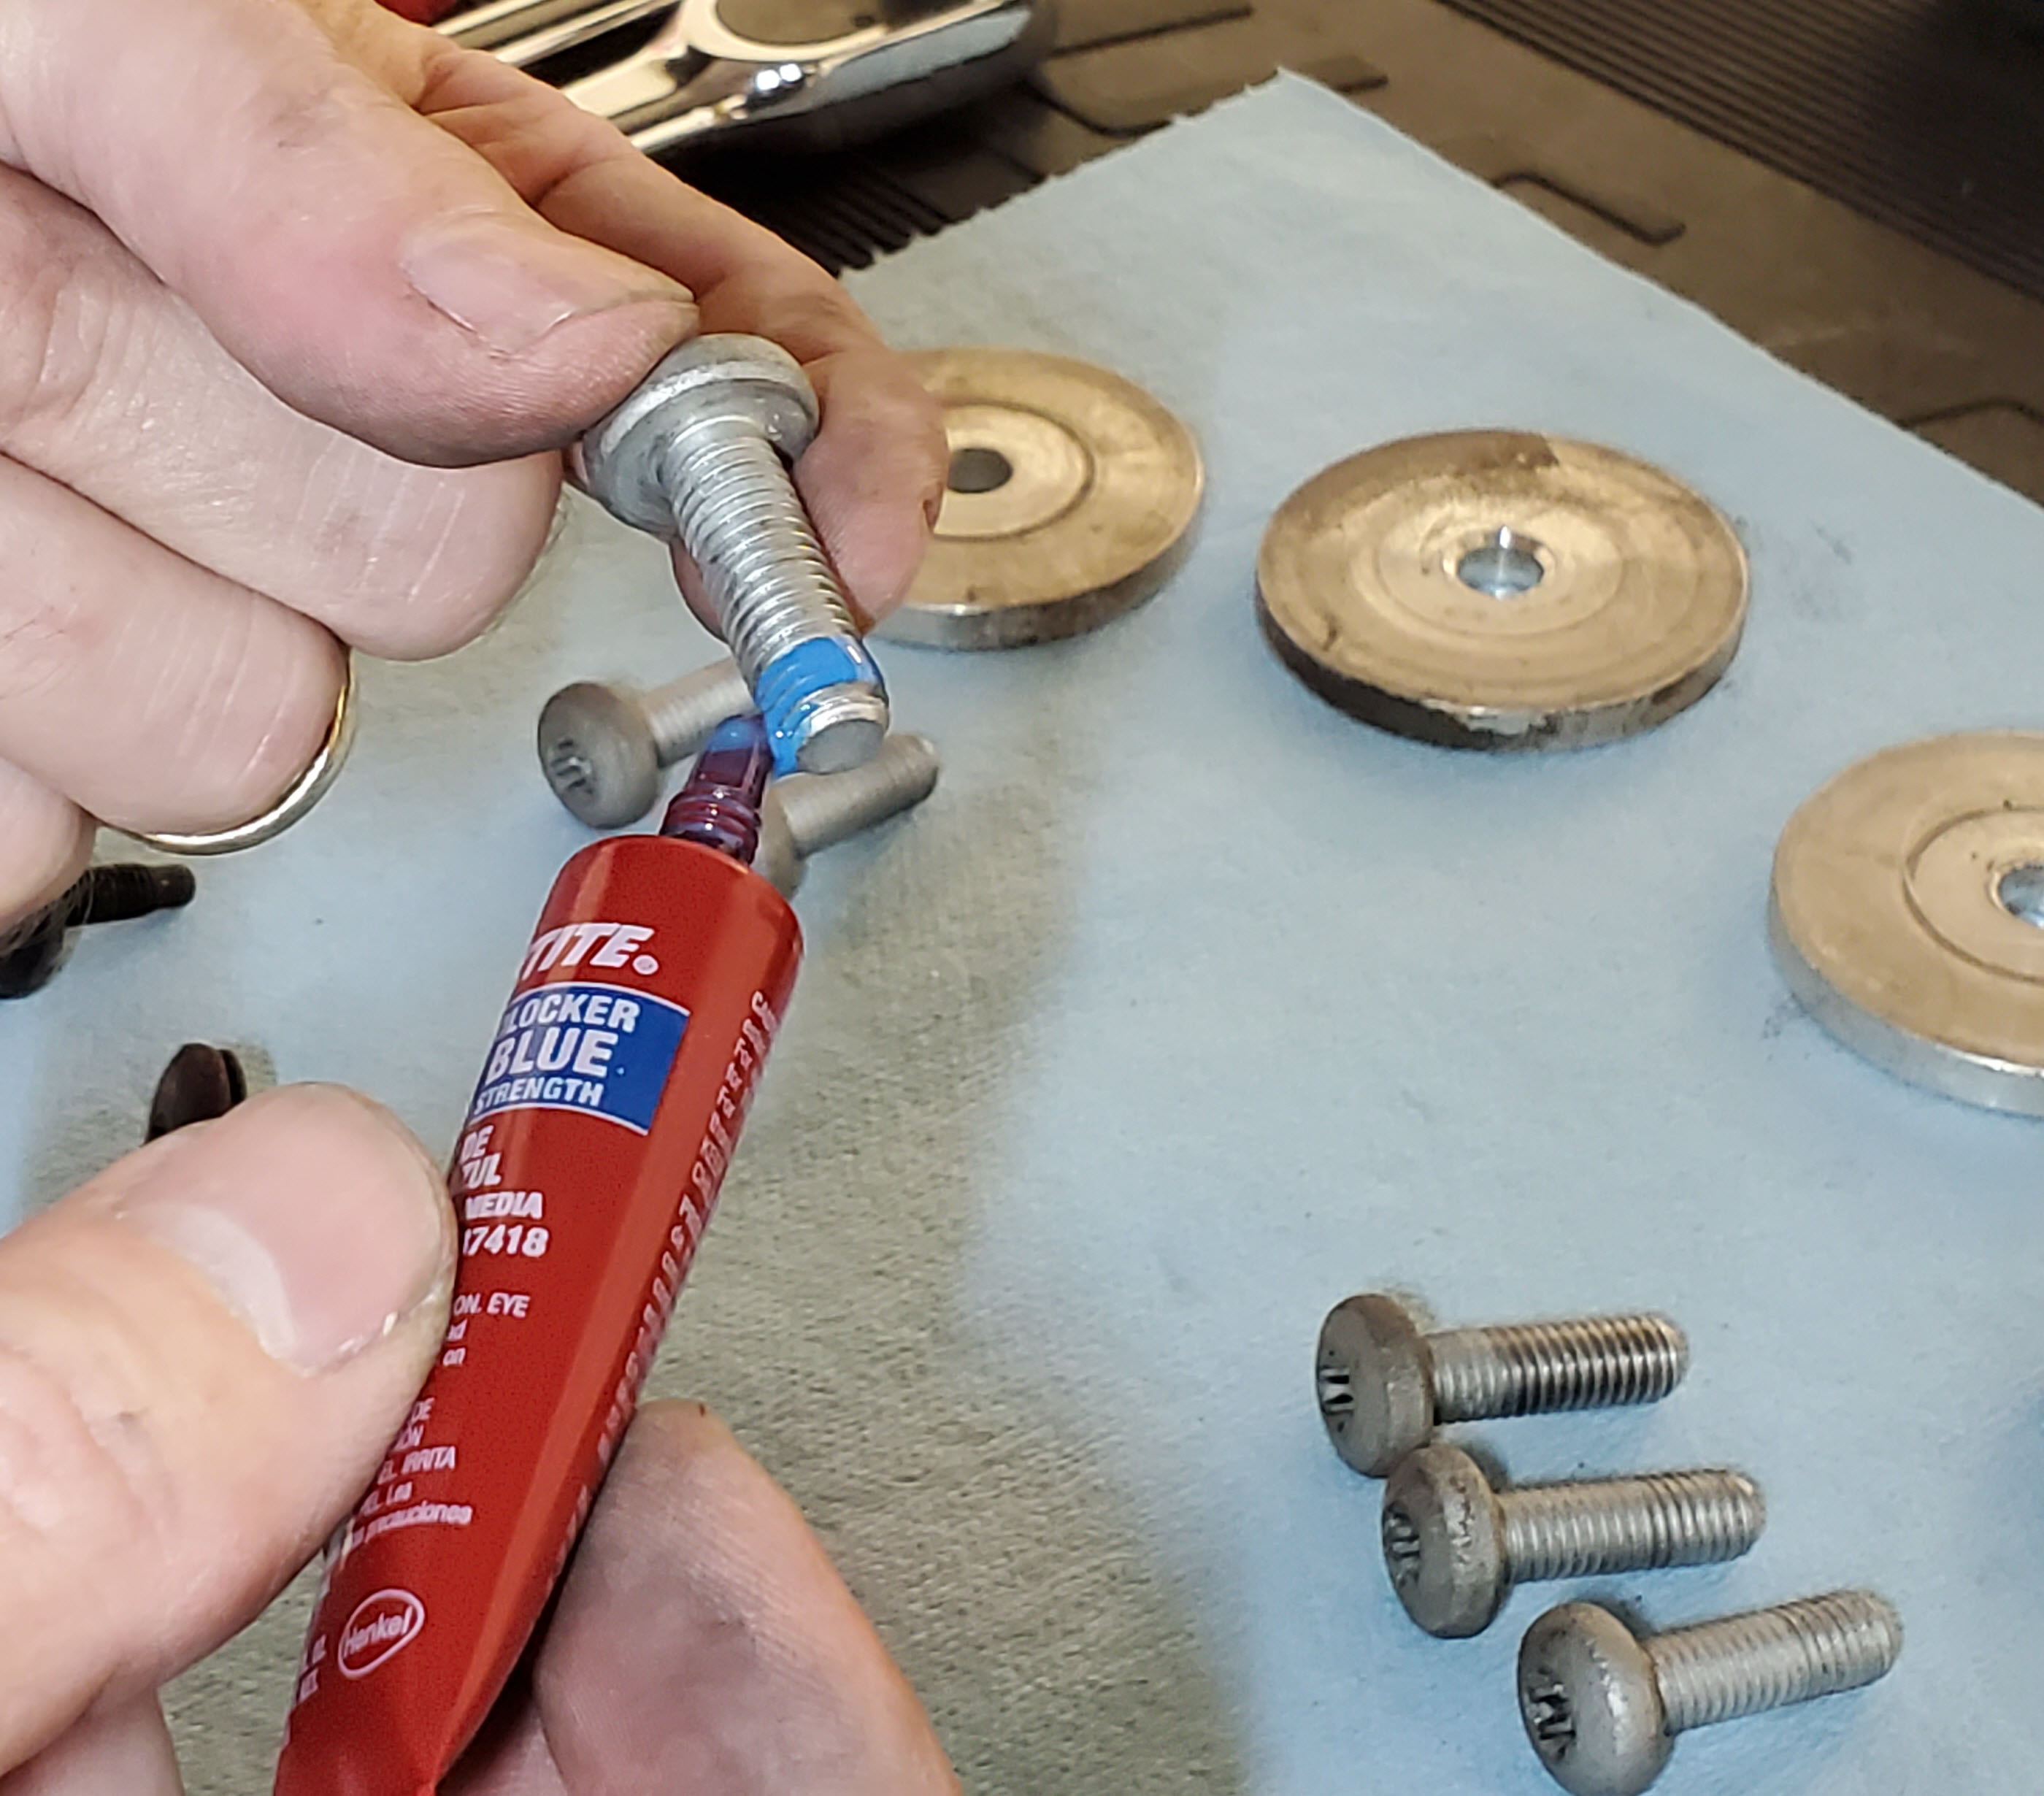
You might also want to have some Loctite 242 Medium Strength Blue Thread Locker on hand. These bolts are important, and you don’t want them coming loose. Thread Locker Blue is some simple insurance, and isn’t permanent. You can pick up a small tube of this for about $6 on Amazon.com or from your local auto supply store.
Procedure
As mentioned previously I started by looking up what Aston Martin has to say in the official Workshop manual. While they reference the requirement to remove the panel in a few places, there is Zippo about actually how to install it. Not a big deal for removing, but reinstalling it requires knowing the correct torques for these bolts.
The whole process will only take about 10 minutes to complete.
- I started by cleaning the six (6) bolts that hold it on. I plan on using Loctite blue with them, and clean bolts help. You can use a shop rag and/or a squirt of brake cleaner/carb cleaner that you might have in your shop to degrease them if needed.


- Apply thread locker to the first few threads on each bolt just before you install them. A dab or two is enough, you don’t need to soak all the threads.

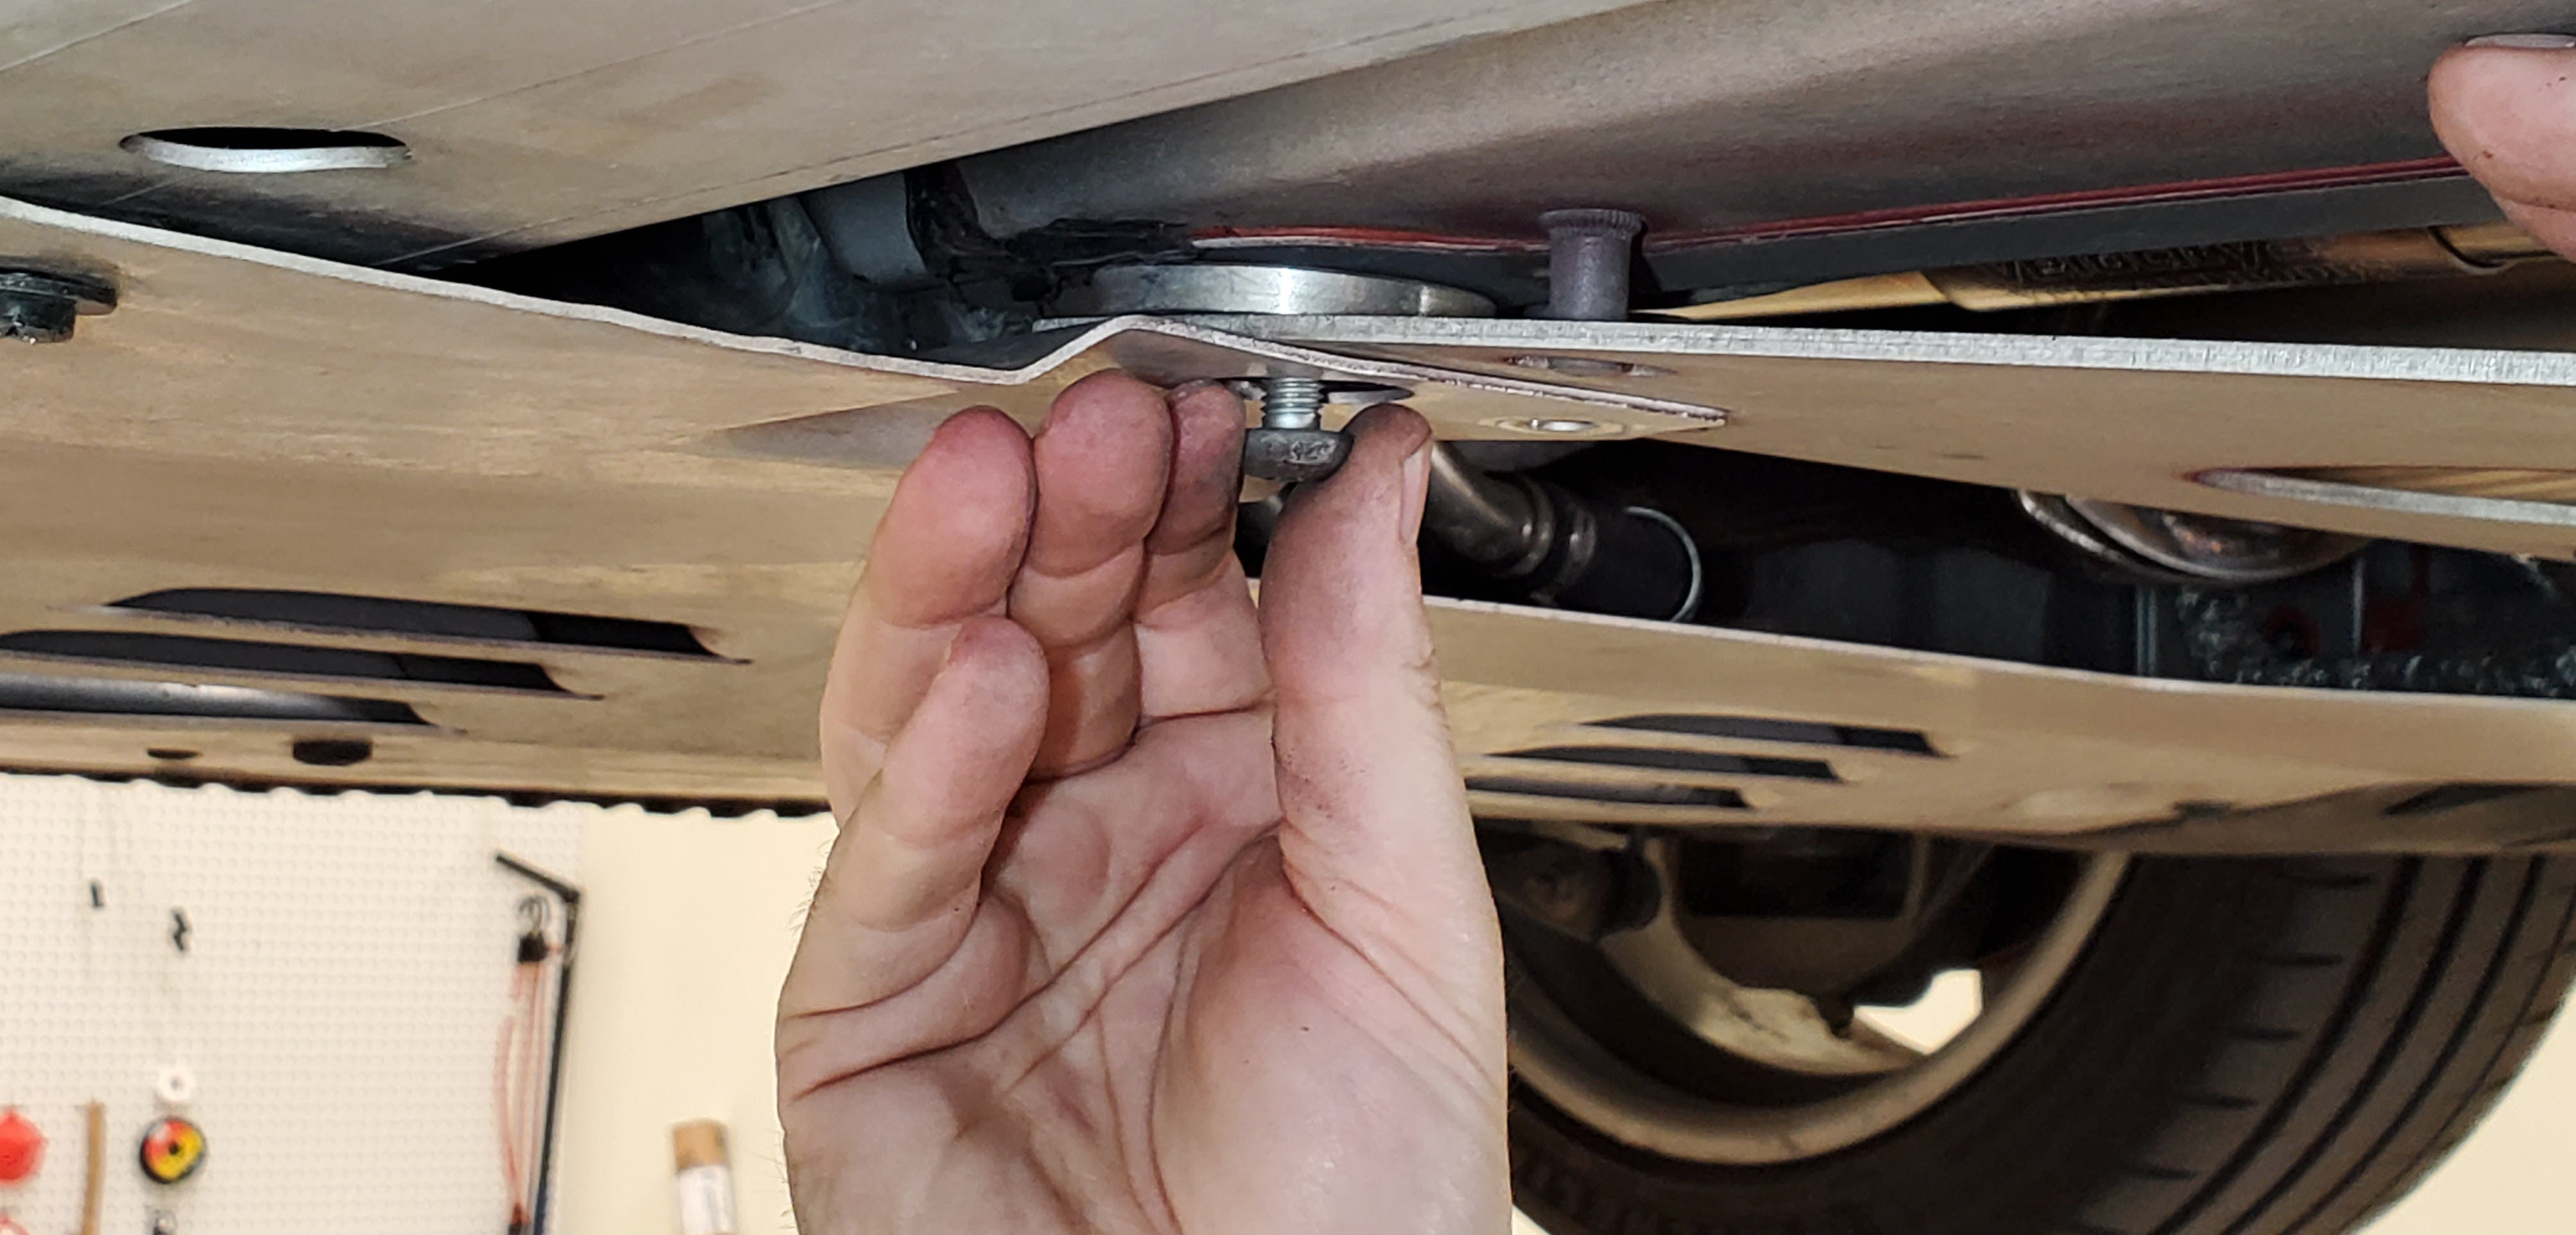
- The two front, and two center bolts have a aluminum spacer disk that must be placed between the Shear Panel and the car body. You’ll need to fiddle these around aligning the holes as you put things into place.
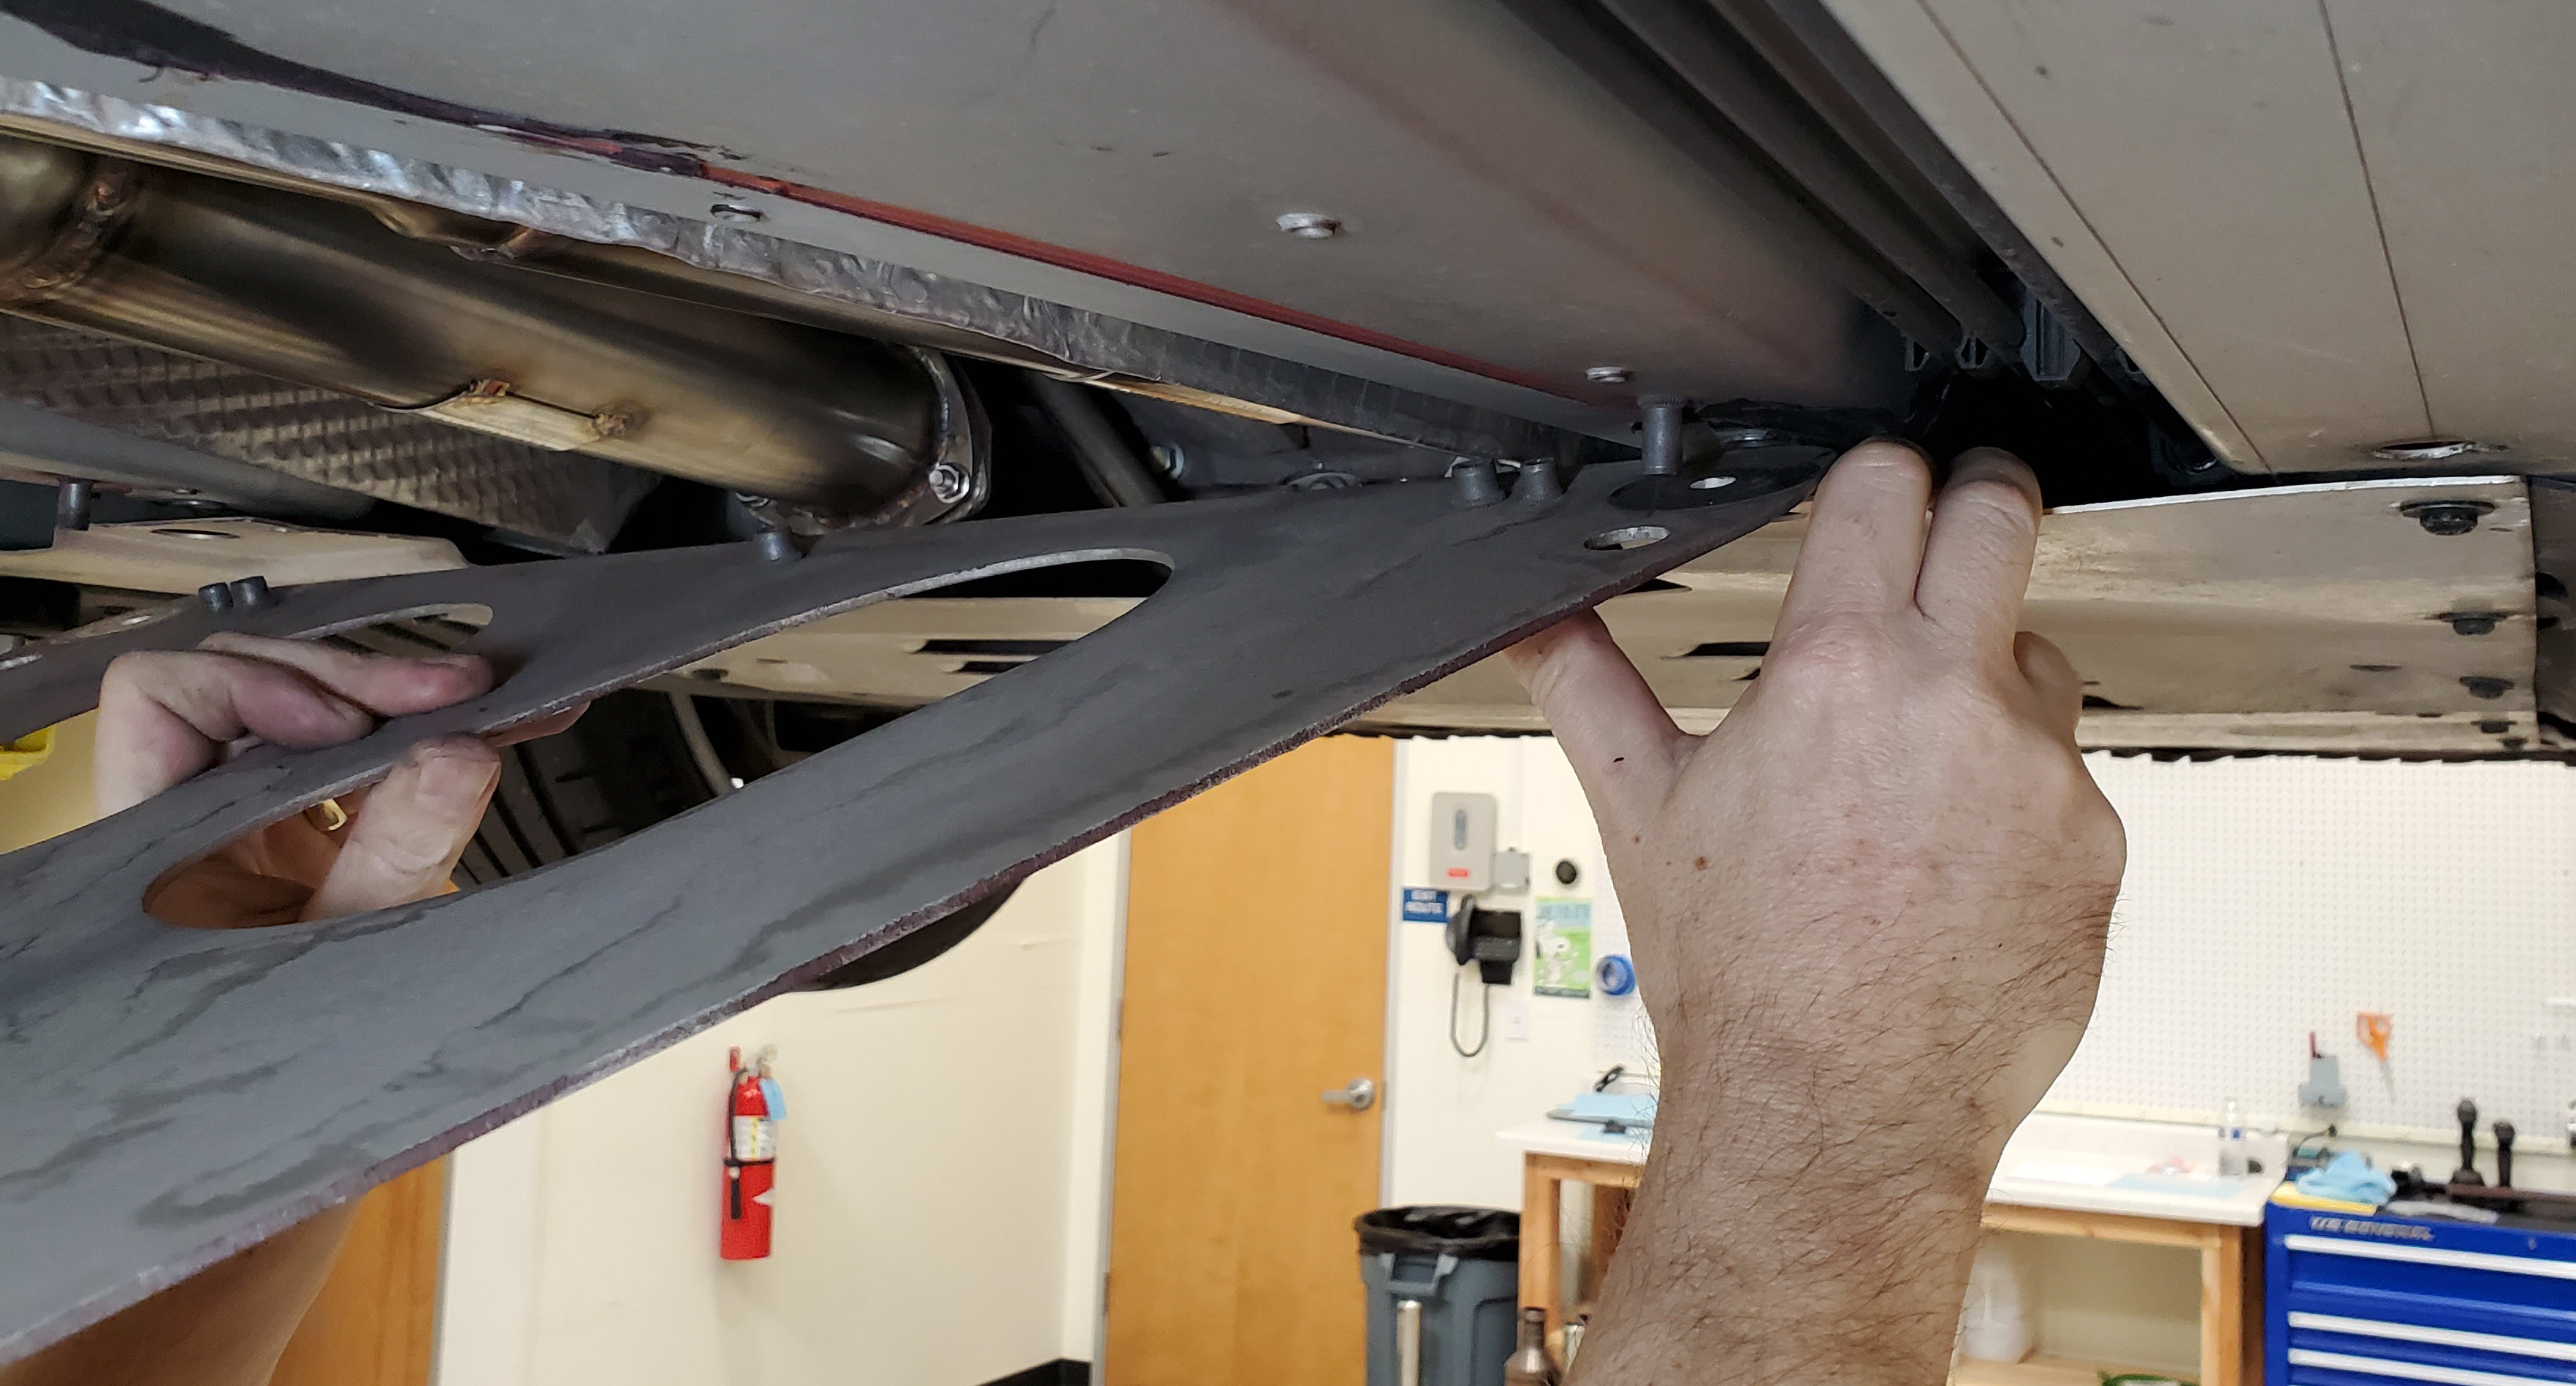
- Lift the plate up roughly into position with the help of a friend, floor jack or a strong arm.

- Weave the front edge of the plat between the front aerodynamic under tray and the cars body. There is a stud sticking down on both sides you need to weave over.

- Install the front bolt on either side to hold the plate up so you can work on the rest. Make sure you have the aluminum spacer placed and aligned so the bolt passes through it. Run them in by hand, but don’t tighten anything yet, you want to leave it loose while you get the rest of the bolts installed.


- Install the other four (4) bolts.
- Remember to align the circular aluminum spacer above the center holes.

- Remember to align the circular aluminum spacer above the center holes.
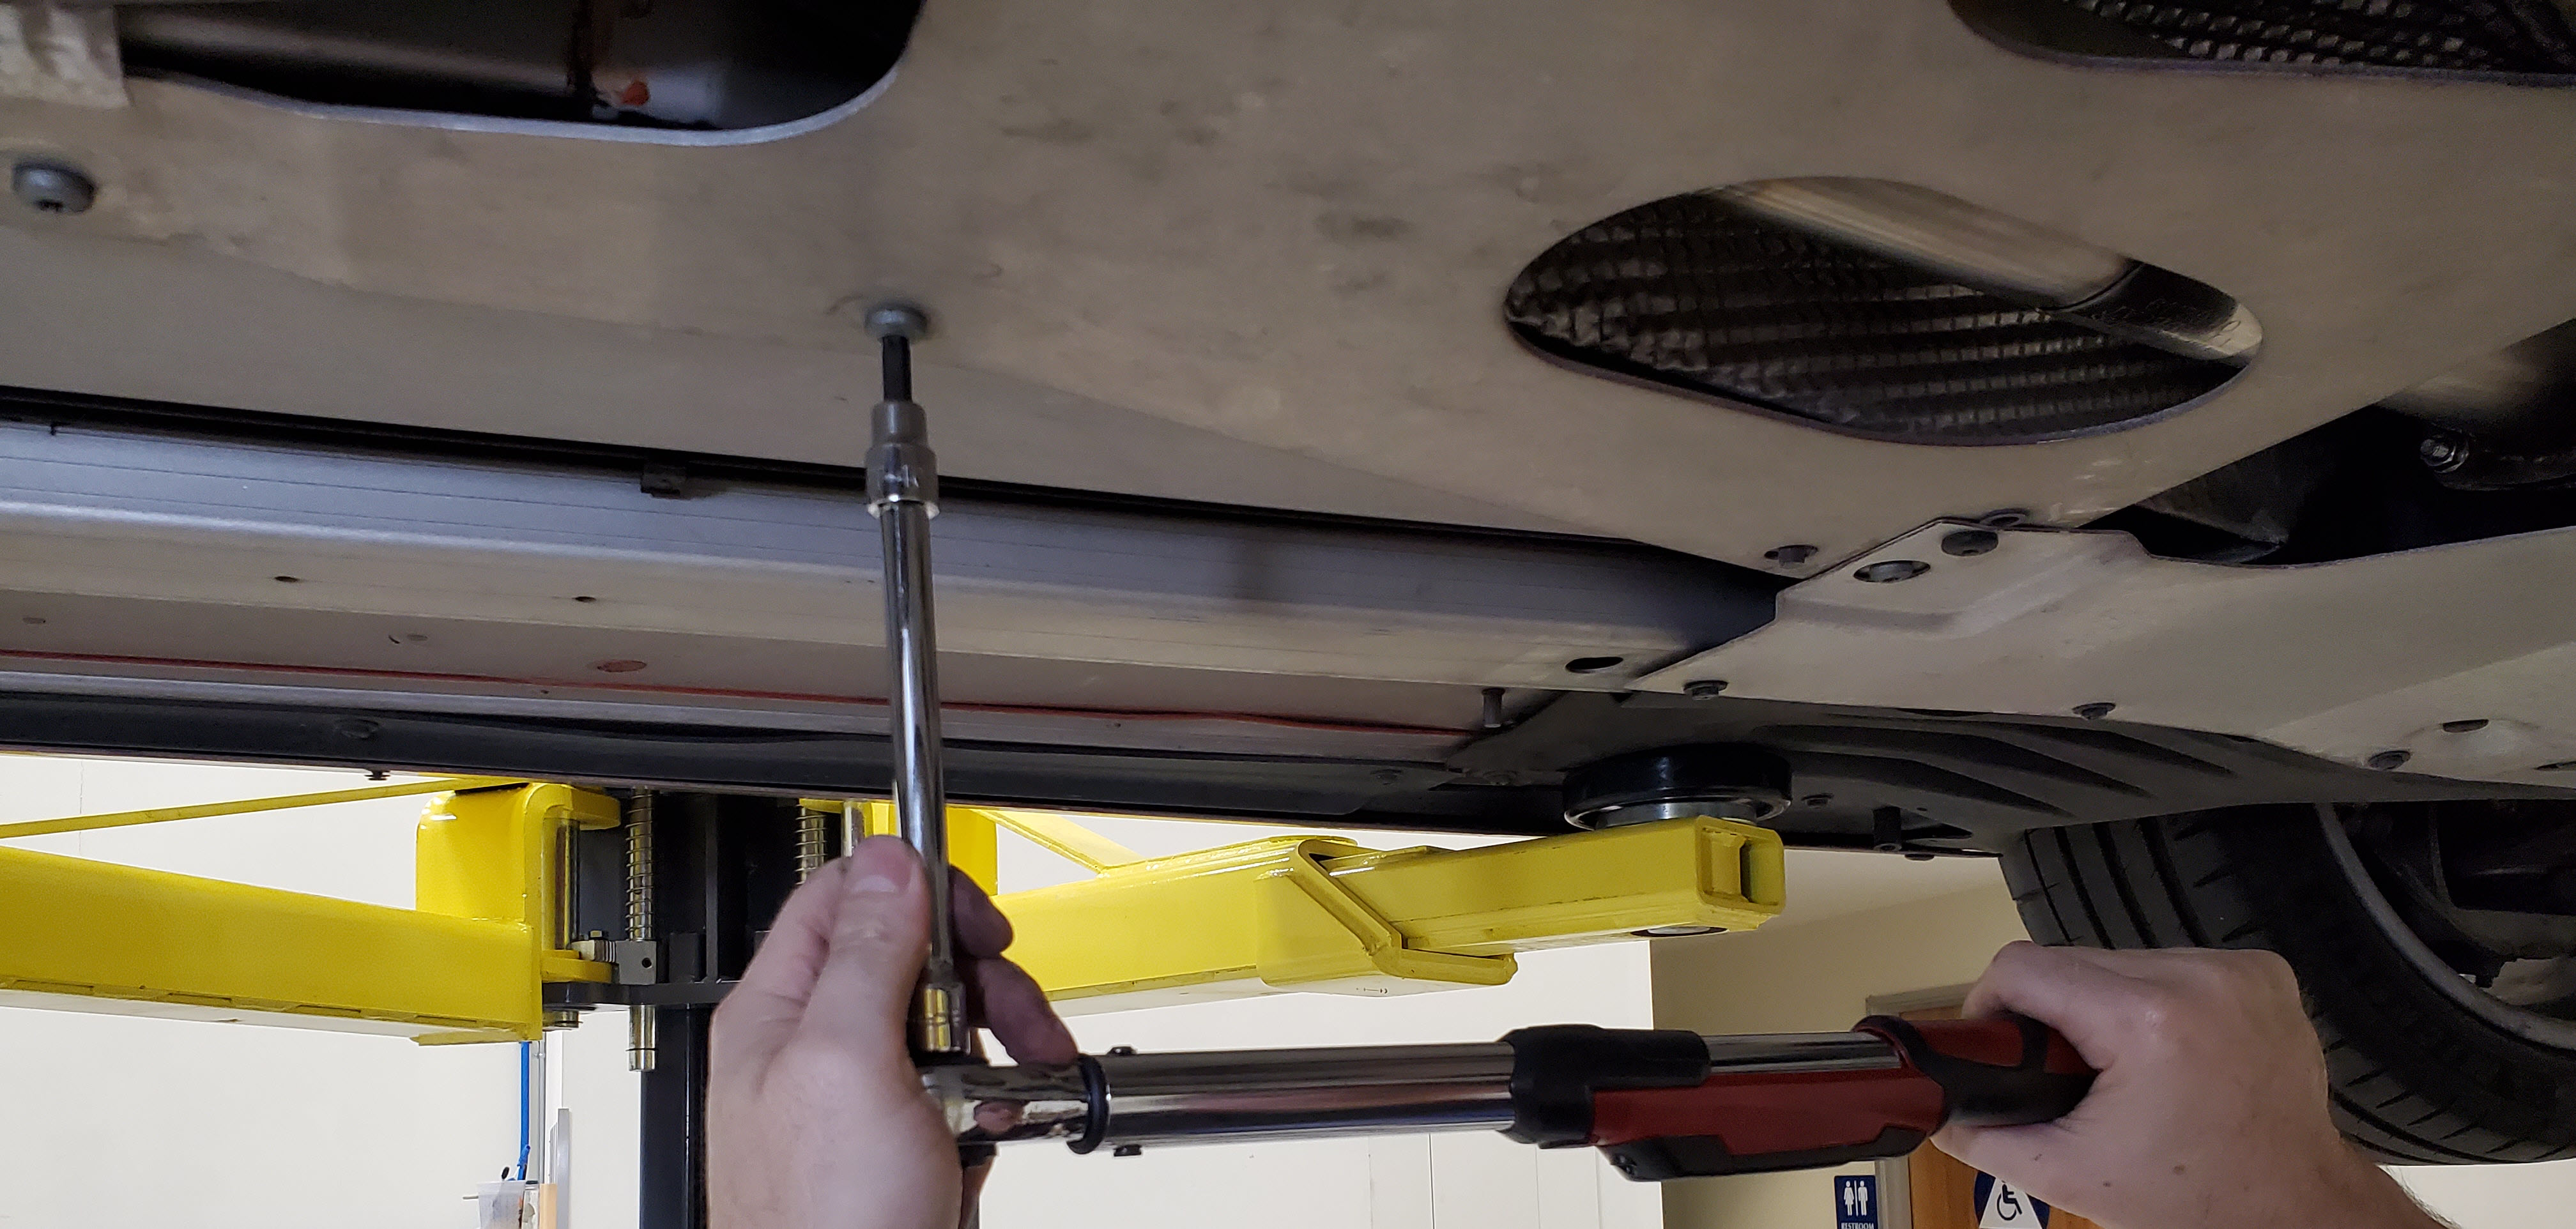
- Using your T40 Torx bit, extension and ratchet snug all the bolts up by hand, but don’t torque them yet.

- Time to torque the bolts to 25 Nm (18 ft-lbs).
- Note: When tightening a plate, you should follow a spiral pattern starting from the center moving outward. Tighten the center bolts first, then the front, then the rears (see photo below).


- Note: When tightening a plate, you should follow a spiral pattern starting from the center moving outward. Tighten the center bolts first, then the front, then the rears (see photo below).
- The final step is to install the two T30 torx bolts you had removed from the front aerodynamic under tray. Use your T30 Torx bit, extension and ratchet and just make them ‘Snug’ being careful not to over tighten them (8-10Nm if you want to use a Torque wrench).


That’s it. You still need to get her down off of jack stands, and I have a quick article about that here that might help (check it out here).
Hopefully your project is complete now and you can go take your baby for a ride.
Video
I made a short video of this process you can check out to see how to tackle this yourself.
