 Not everything on an Aston Martin needs to be complicated. One of the simplest (and essential) tasks we can perform ourselves is to adjust the Windshield Washer Fluid Sprayers so they are properly aimed. While often overlooked, this is a serious safety issue when you consider it. Being able to wash off debris that splashes up and obscures your vision while driving is a real necessity. Checking this should be part of every annual maintenance event, but it can even be accomplished road side when you discover they aren’t working as needed on a trip. Let me show you how.
Like most cars there are a pair of washer jets that are the final part of the washer fluid system. There is a reservoir tank in the right front fender well, and with that there is a washer fluid pump, level sensor, and tubing to link it all together. When all that works properly it pumps fluid to the washer jets that are hidden beneath the trailing edge of the hood (bonnet).
You’d think they would be adjusted for life. But tolerance of plastic parts, fitment of the hood and other factors demand that they are adjustable to get an ideal alignment of the spray on the glass.
The Perfect Alignment
What is the perfect alignment in the first place. I checked! There are three (3) general arguments:
- Smack Dab in the middle. Seems logical.
- 1/3rd off the bottom. The logic being that it sprays onto the wiper blade at the bottom and then is swept up across the windscreen.
- 1/3rd off the top. The logic being that the ‘wind’ at speed will come into affect and push the spray down to the 1/2 mark to be optimal. A compromise for the autobahn driver perhaps.
Aston actually discusses this in the glovebox Owners Manual under maintenance! “adjust up/down to that the fluid strikes between a thrid and half way up the windshield”. Here’s that page if you are interested.
Some YouTube research led me to a Mercedes Benz Owners Club video (view it here) on their very precise location, which appeared to be just around 1/2 way or a bit lower.
I also reached out to Mike at Bamford Rose. As many of you know Mike is co-founder of an Independent Aston Martin Specialist shop in the UK, and has been servicing Aston’s for 10+ years. Mikes advice was “We aim jets 1/3rd up the screen when static, the jet doesn’t creep much when at speed.”
So, my Aston1936 approach is aim for between 1/3rd and 1/2 way up the windshield (just below half way). 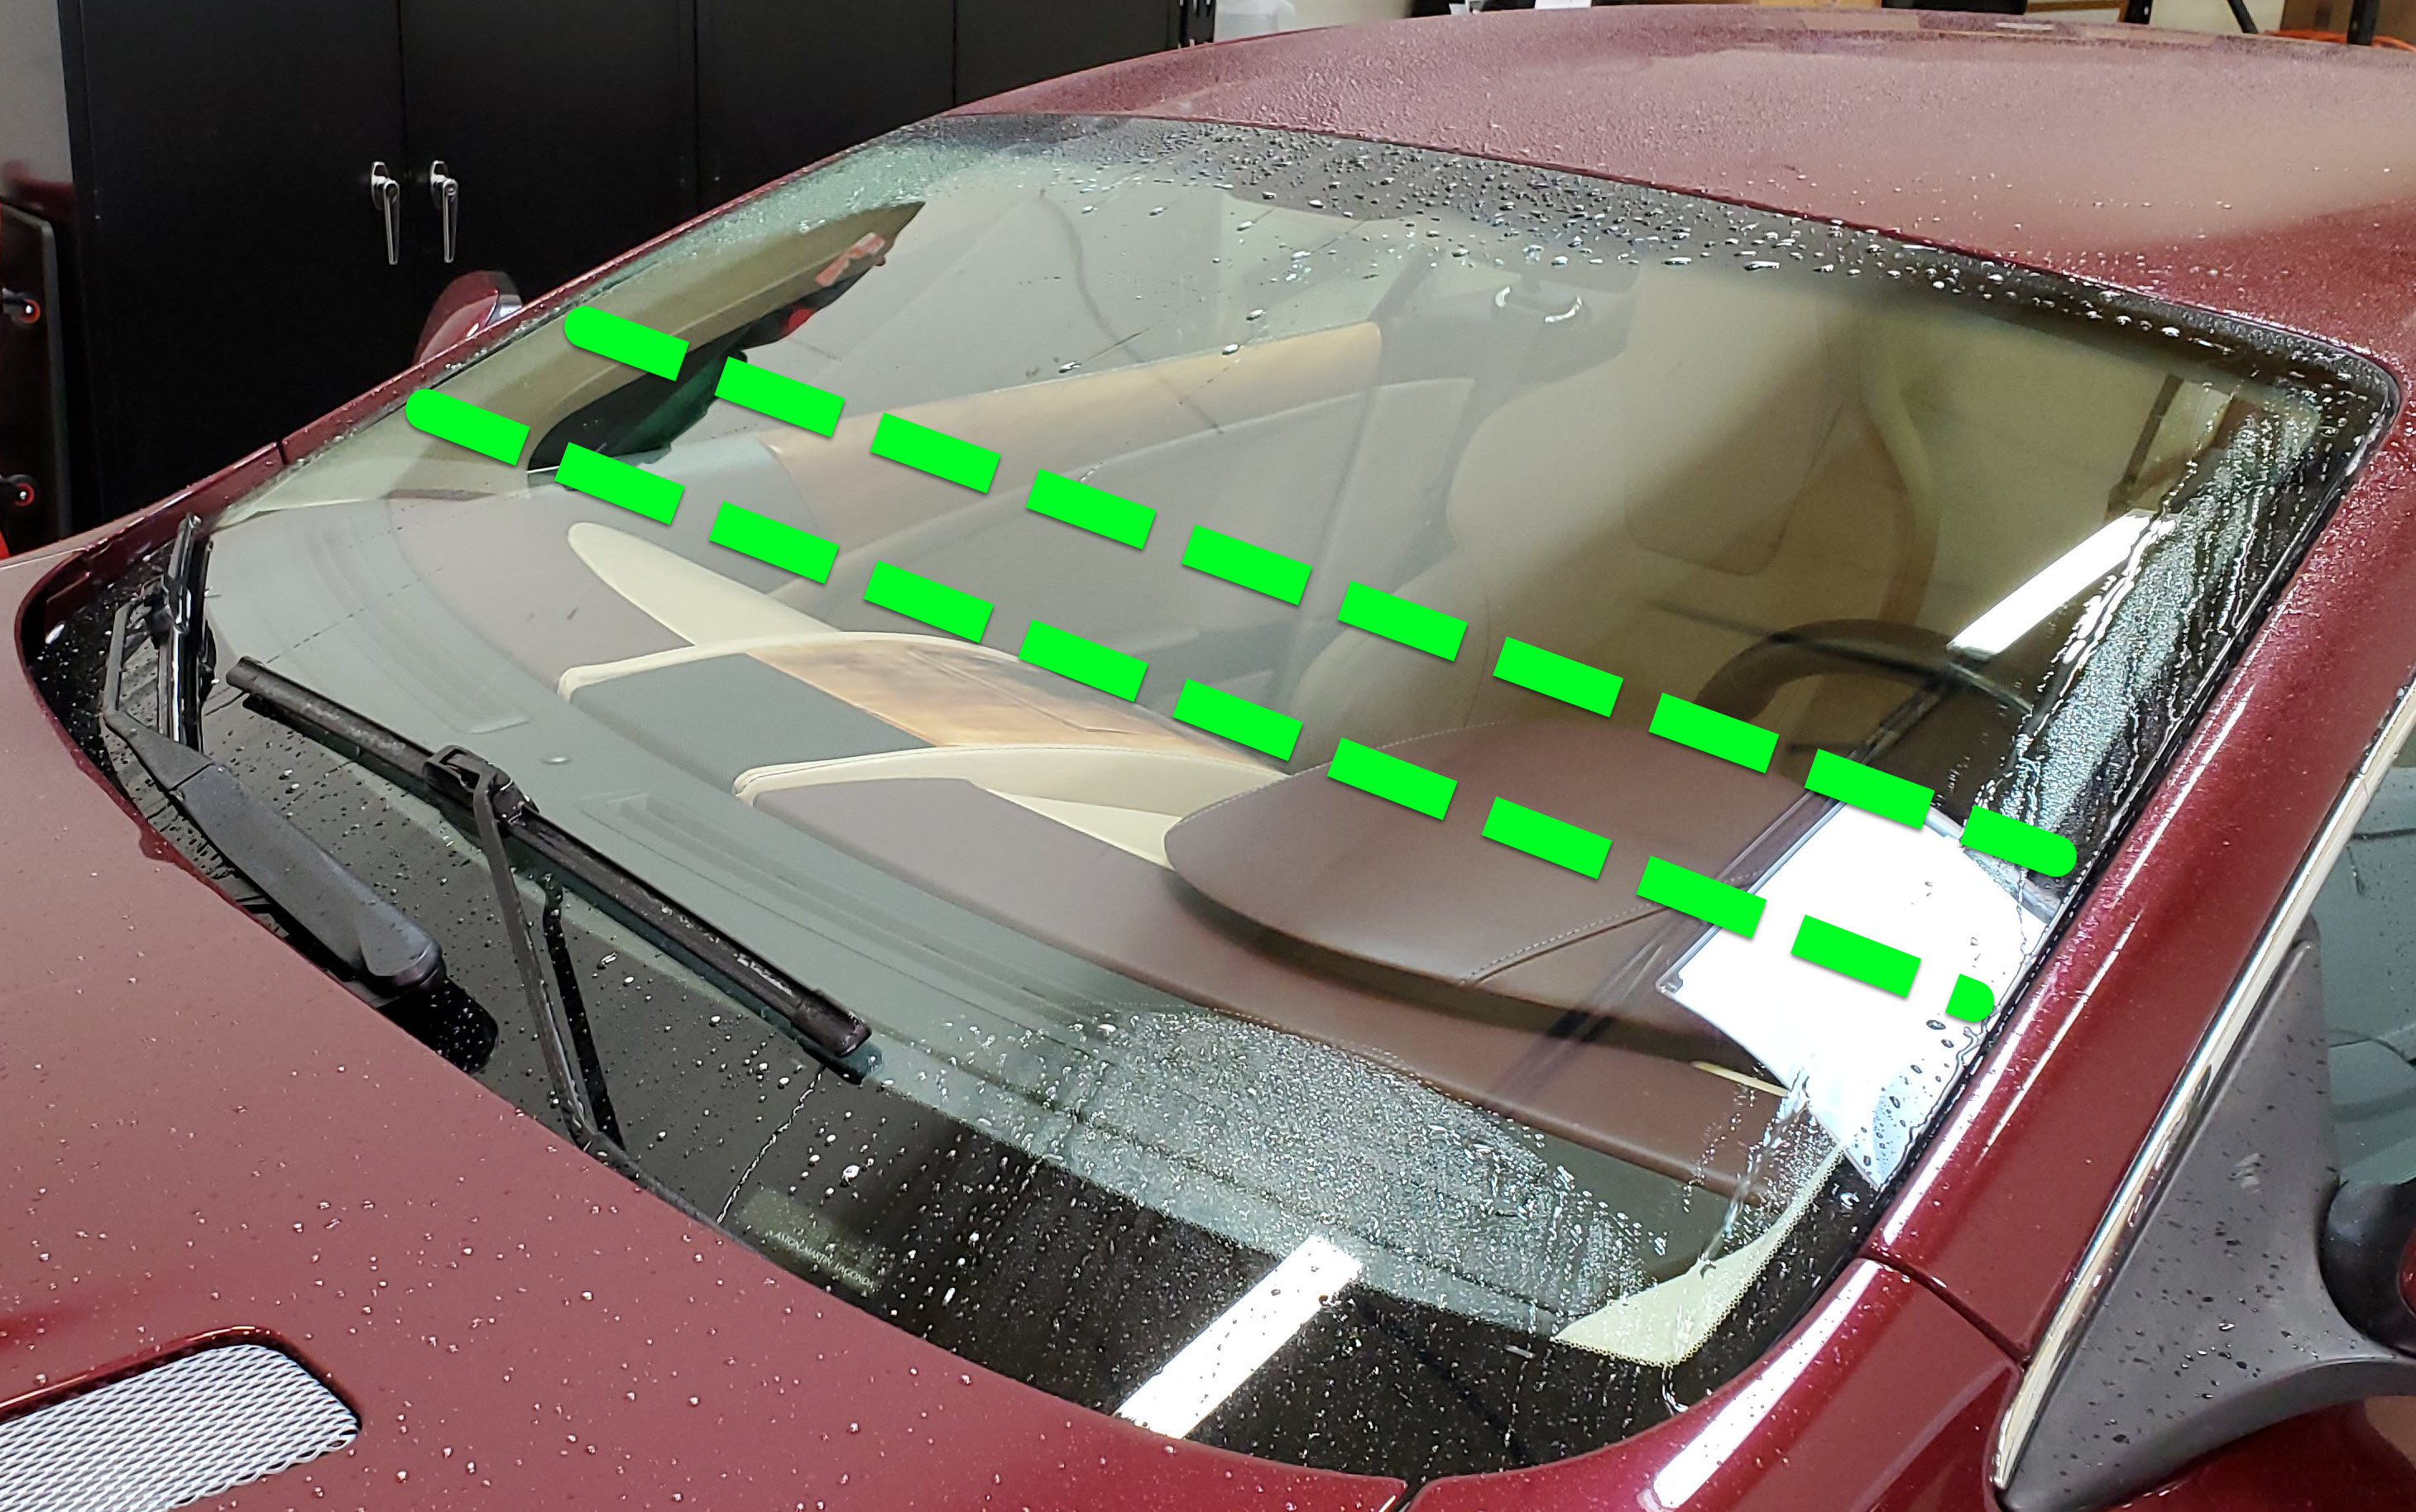
Tools
It’s not going to be a pin point exact process, so no need to go grabs a tape measure or tools. You just need your fingers!
Parts

Well – you don’t need any parts to just do a re-alignment if your jets are working fine. But a helpful reader provided a great tip I wanted to share. It turns out the adjustable plastic washer jet assembly is a part used in many cars, and it’s a VW part number 6E0955985 (was used in the Golf/Beetle of the 2004 era when the DB9 was designed). You can pickup a pair of aftermarket brands ones on Amazon for as little as $12 USD. You can find the Aston Martin packaged part (p/n 4G43-17666-BA) for about $17 USD each online. Just wanted to let you know that if yours are shot, you can just replace them for a few bucks [and then follow the alignment procedure below!].
Procedure
This will take just a minute or two per side and can be done in your garage, driveway, gas station or roadside. It’s simple once you see how.
Of course you need fluid in your washer tank for this to work, and your key will need to be in the On position. The engine does NOT need to be running.
If you are fanatical about keeping your car clean and shiny, you might plan to do this just before you wash your car (to get rid of the signs of overspray, etc.)
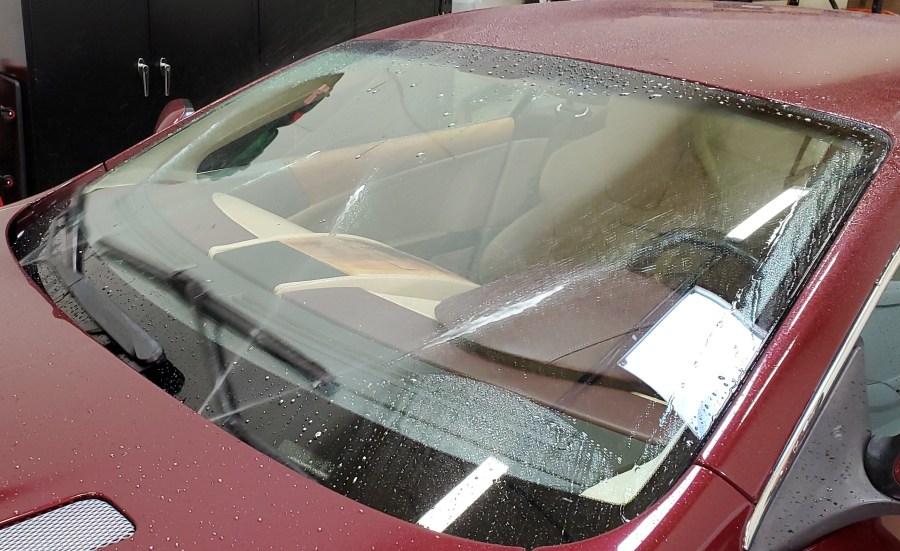
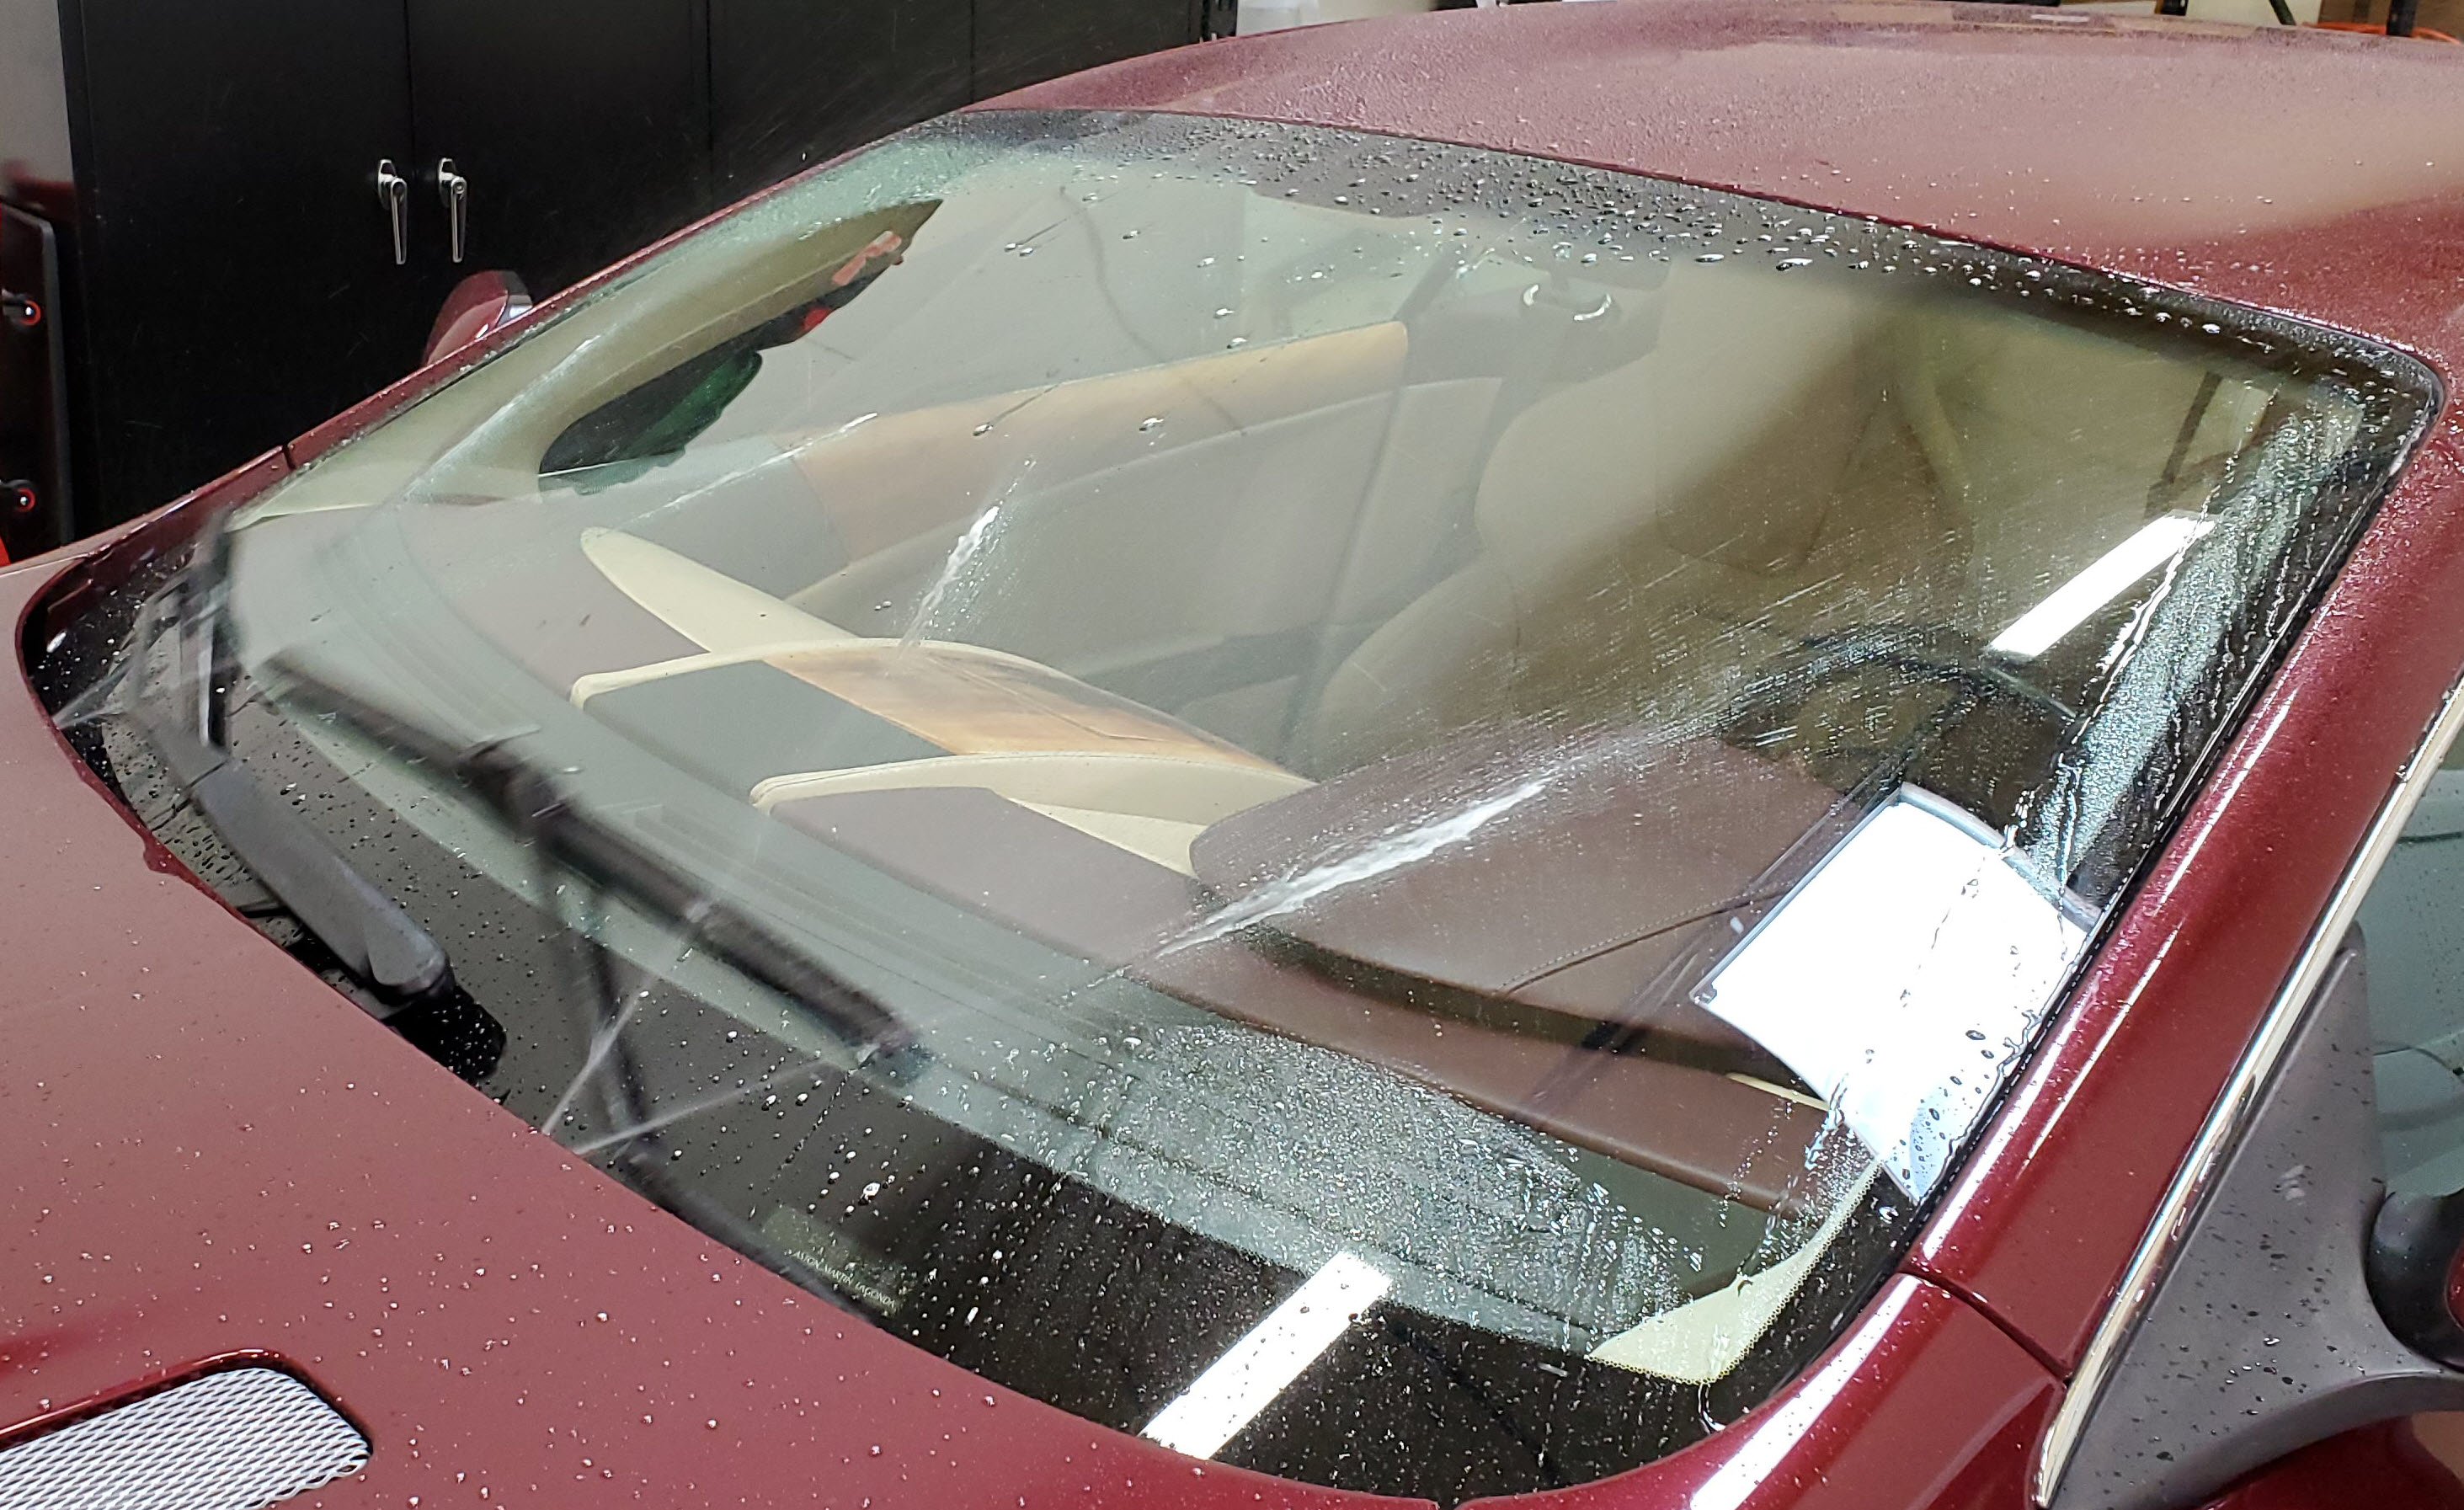
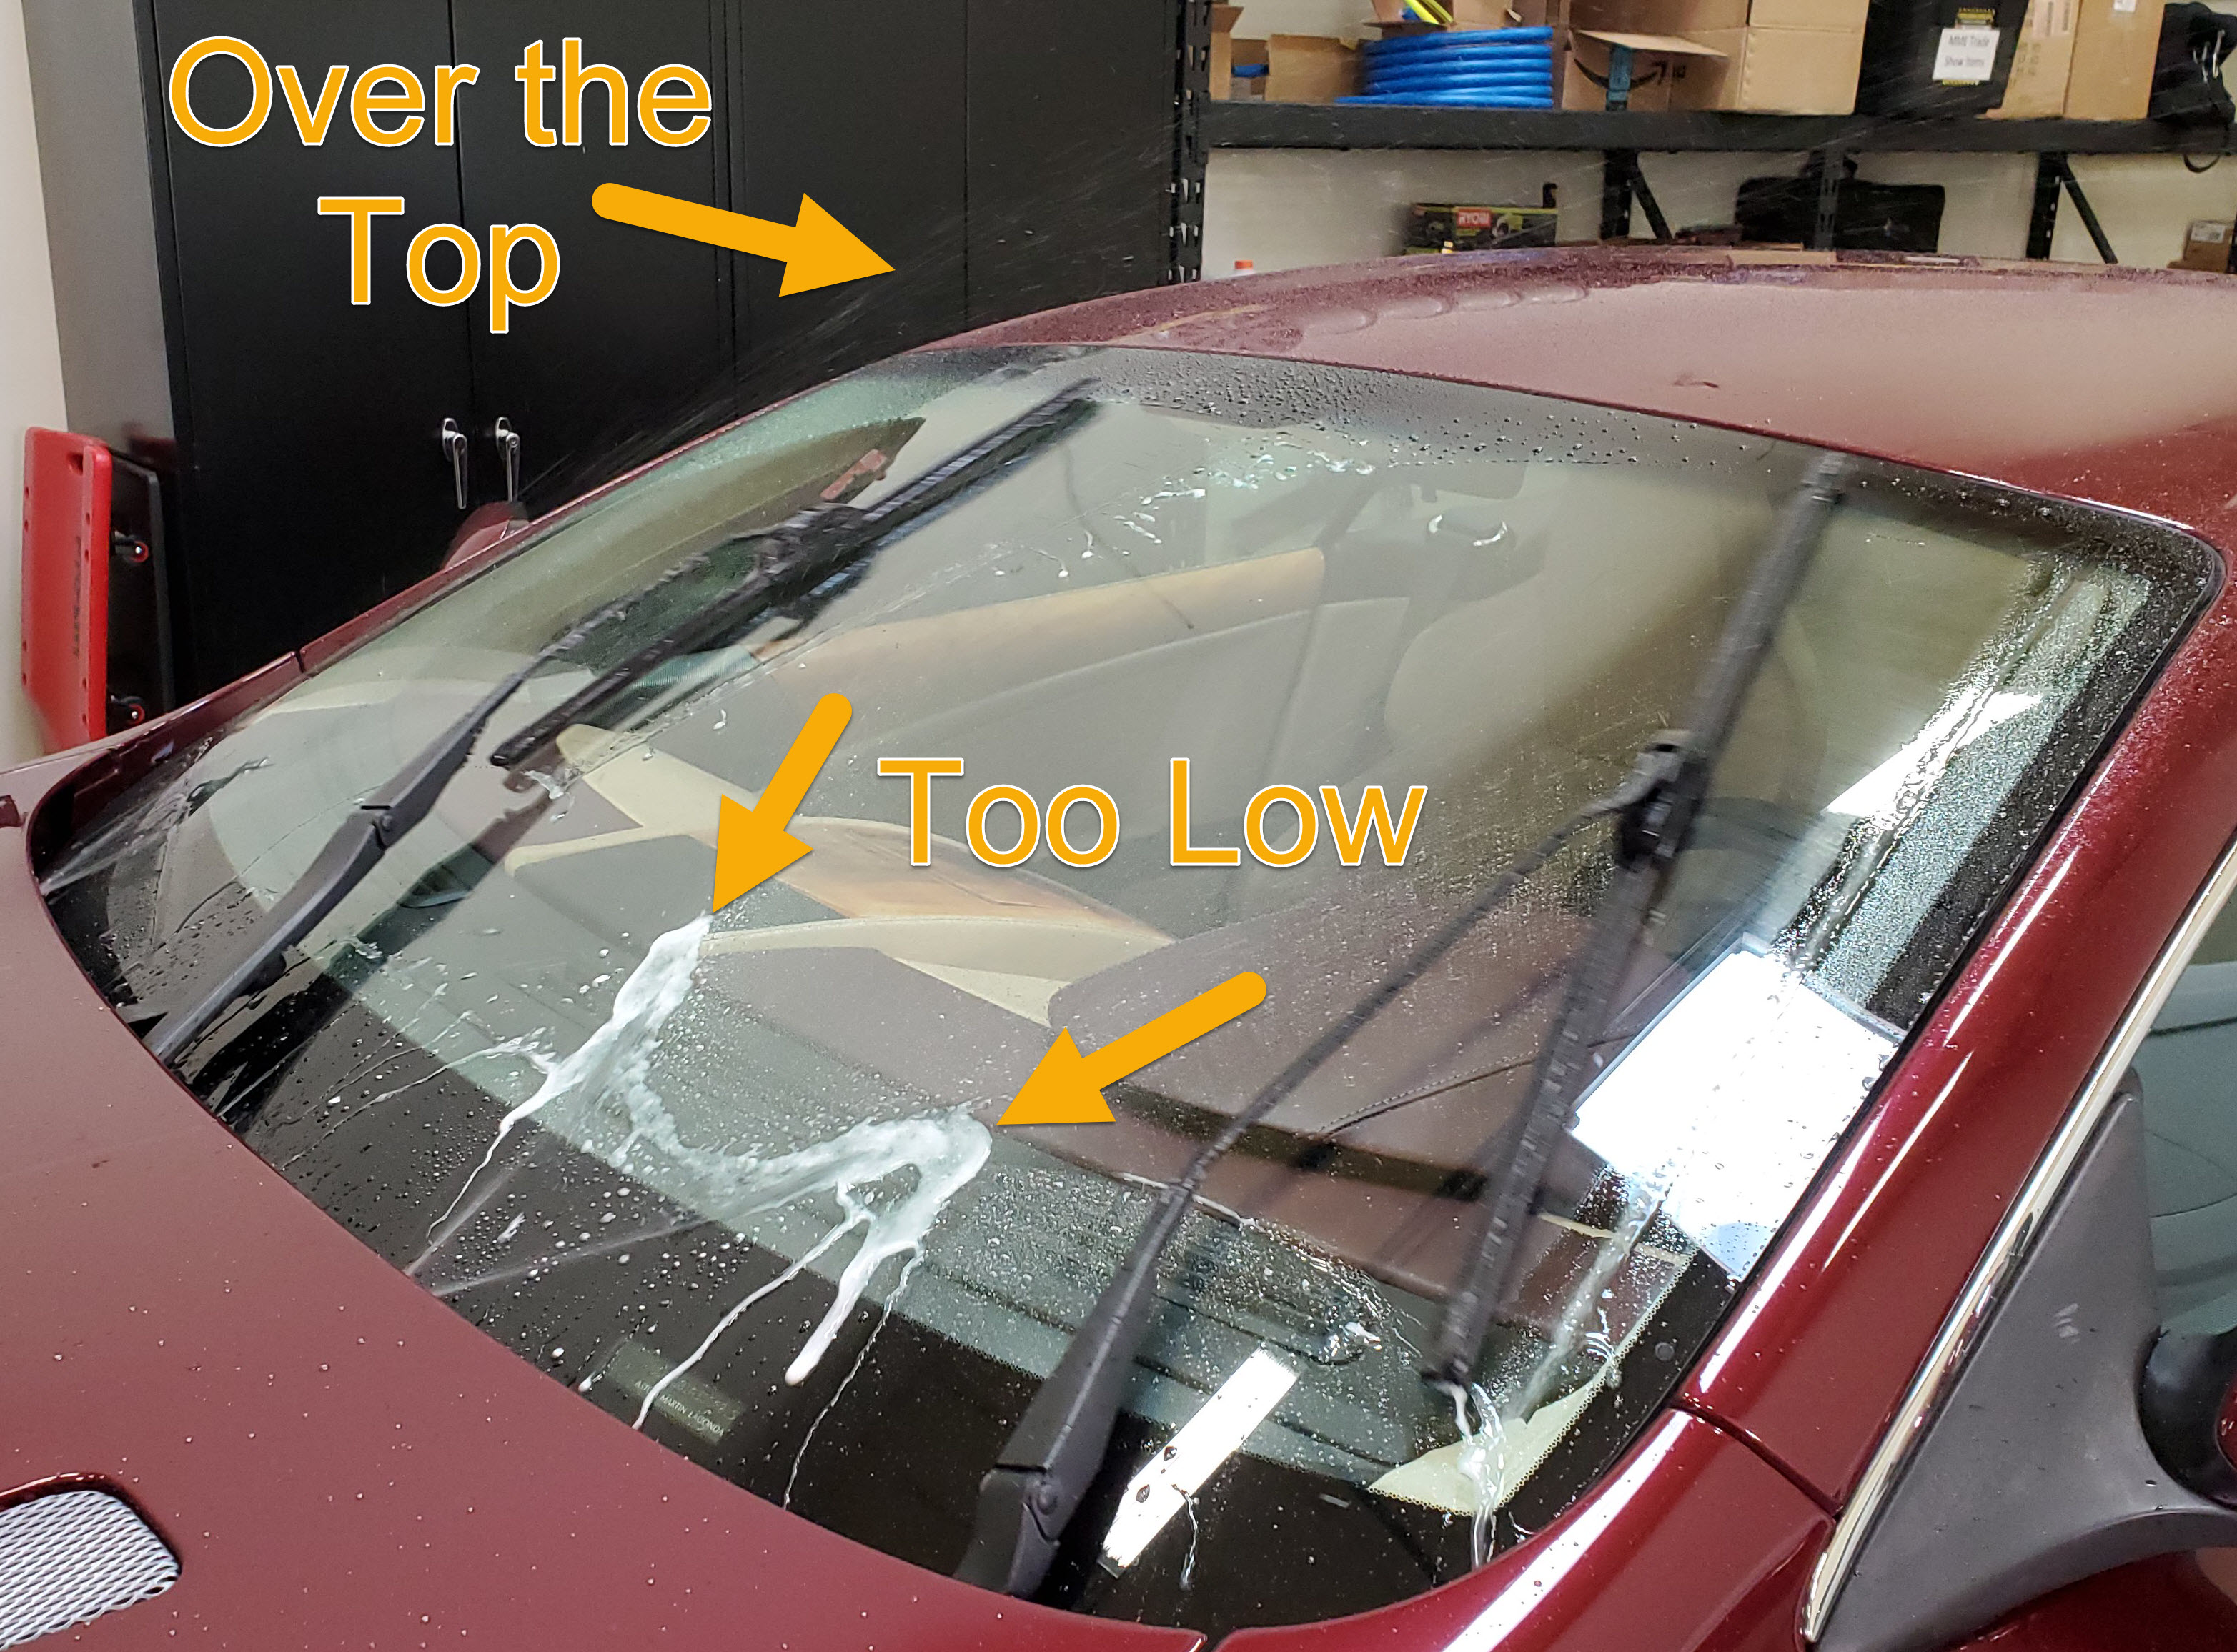
- Inspect your current spray pattern.
- If its perfect on both sides, you have nothing more to do.
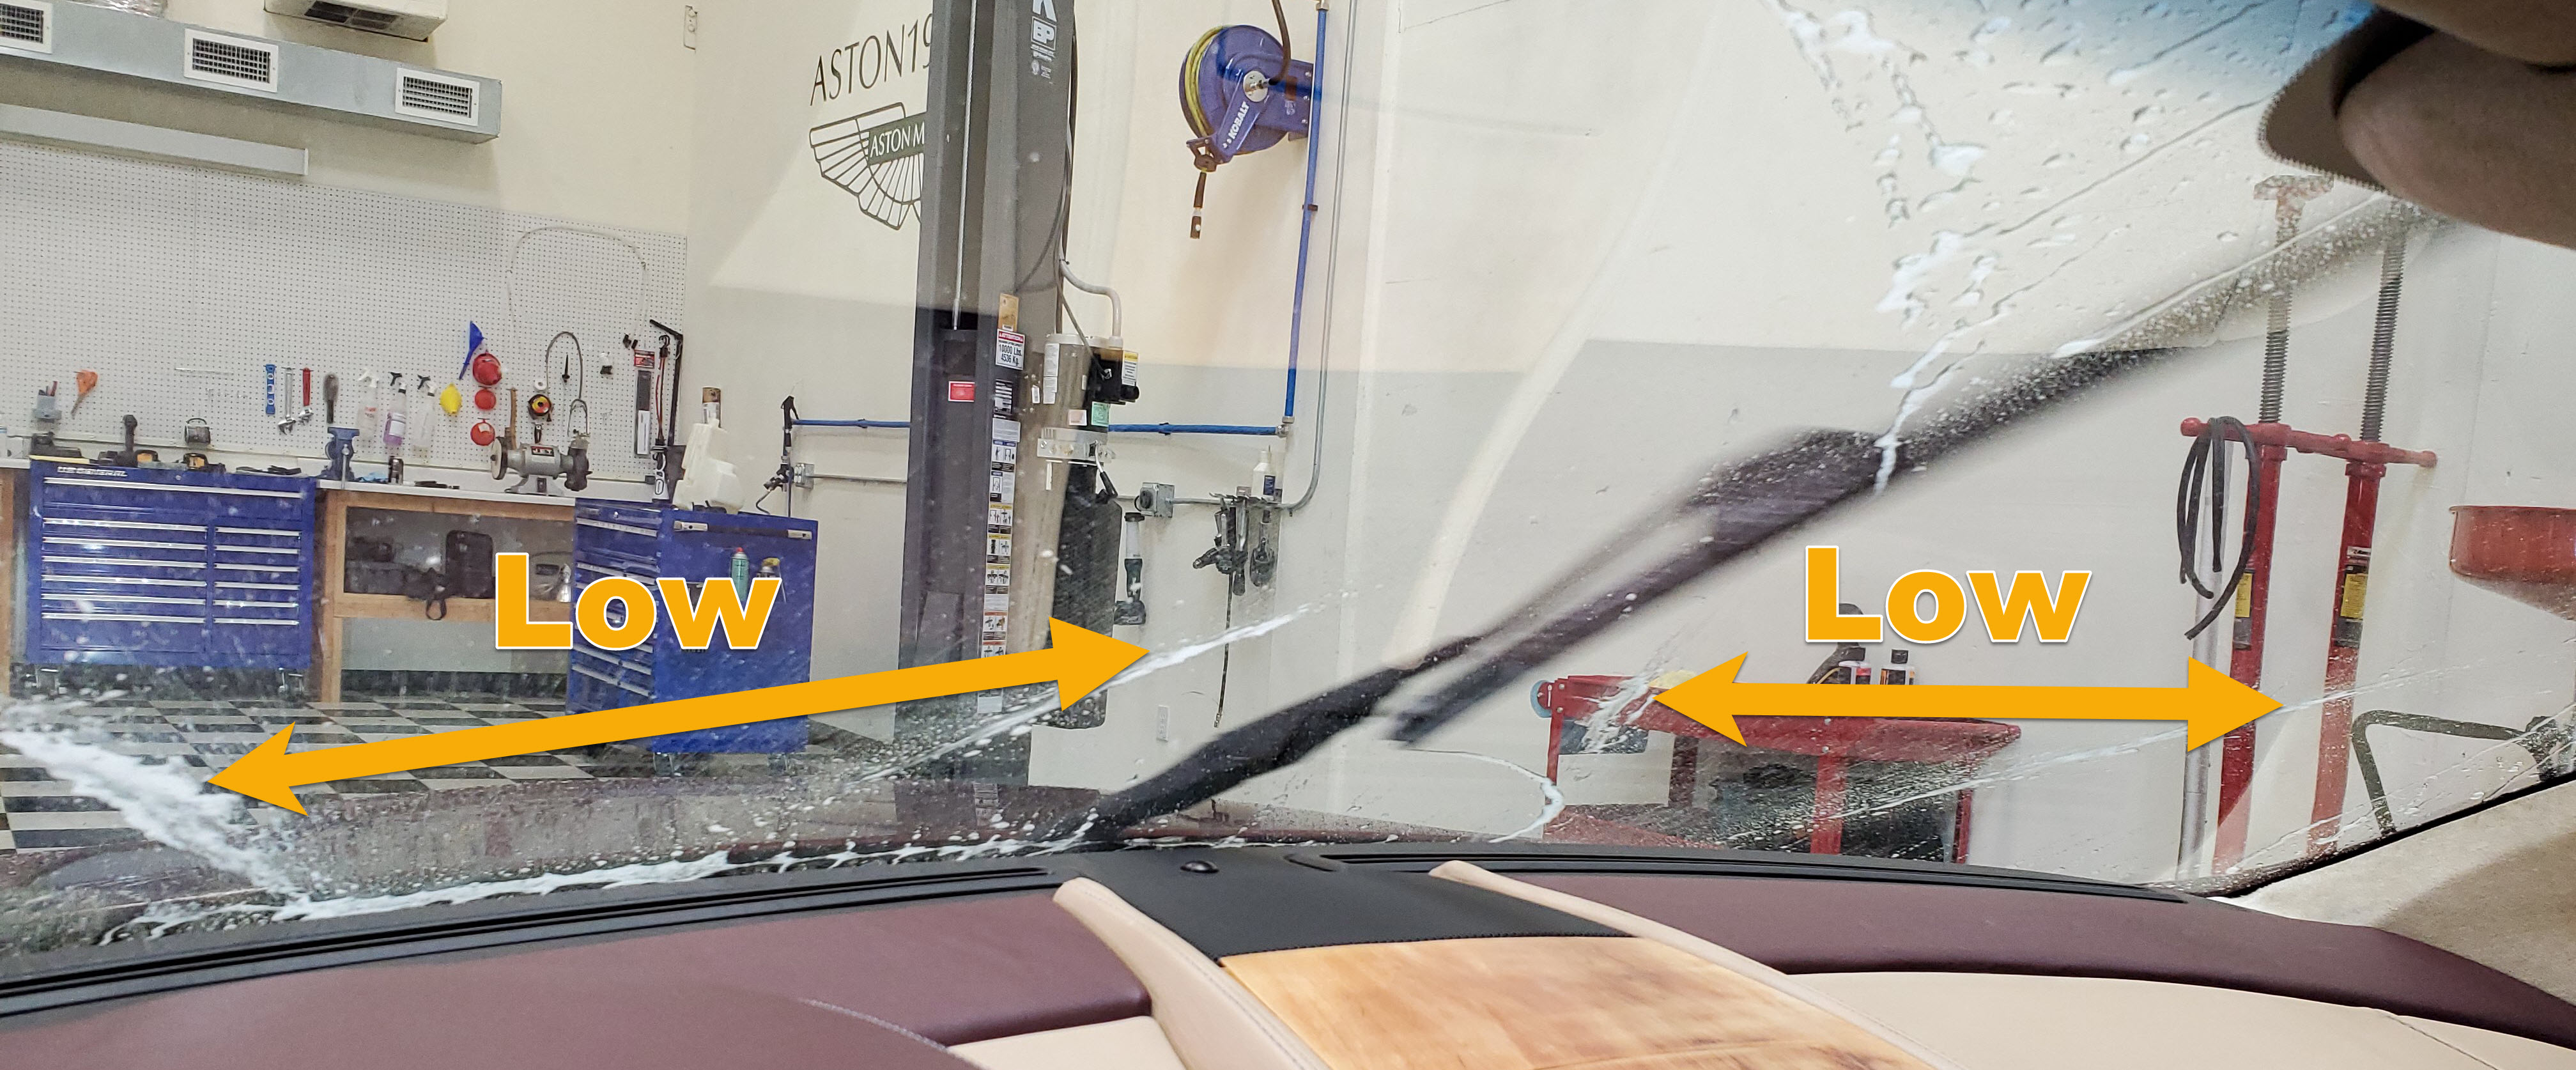
- Here is my spray pattern seen from outside and inside.
- The drivers side is very low. The passenger side is just the opposite, overshooting much of the windscreen.
- If one or both are misaligned, read on.

- Locate the two Washer Jets on the under side of the rear edge of the hood (bonnet). They are tucked under just an inch or so to make them less visible. You can always find them by giving the washer stalk a push and just watch for where the jet originates from.

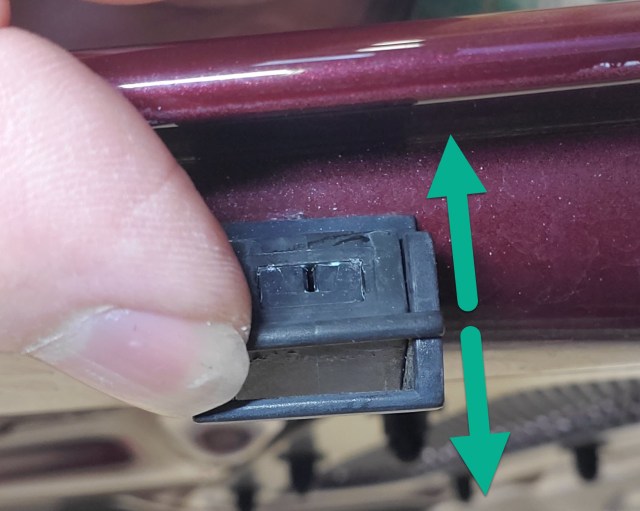
- Have a peer in at them, and you should see the plastic washer jet. It has a horizontal plastic bar on it, and you’ll also see the small ‘I’ shaped opening.

- Inspect the opening as best you can to make sure its not clogged with debris.
- Tough to do with my 50+ year old eye sight and it hidden under the hood, so I used my camera phone and just took a closeup picture. Easy. Zoom it in as needed. You can see here in my picture that the ‘I’ shape of the opening is clear.
- I’d avoid using a pin or pick to adjust the jet like you do in many other cars with a small circular metal jet opening. The Aston ones are plastic and your pick/pin could damage the shape of the ‘I’ and cause an odd spray pattern. Only use a pin to carefully clean out any debris if any is actually present.

- Figure out where your target is.
- The DB9 windshield is huge, and laid back on a steep angle. Outside the car I found my ideal spot just below 1/2 way up and put a mark.
- Inside the car I was surprised because the mark seemed further down than I expected. Optical illusion a bit. Helpful to have the mark then since I will be in the car testing each spray realignment.
- Sit in the car, press the washer stalk, and note whether each jet is high or low of your ideal spot.
- Be realistic – this isn’t a laser beam. Just look at where the spray is most intense, and choose to align that.
- The horizontal plastic bar on each jet is your adjustment lever.
- You’ll just put your finger on it and slide the jets aim up or down to make it perfect.
- Make adjustments in small increments. A tiny bit of movement on the plastic jet moves it inches on the glass.
- There is no Left-Right adjustment, just Up-Down.
- I suppose there might be a little left right adjustment by twisting the entire black plastic washer jet assembly where it snaps into the hood. A little slack in the opening, allowing a little wiggle.
- I suppose there might be a little left right adjustment by twisting the entire black plastic washer jet assembly where it snaps into the hood. A little slack in the opening, allowing a little wiggle.
- Adjust each jet in the desired direction, hop back into car an press washer stalk, review spray pattern again. Repeat this process several times until perfect (enough).

After the first adjustment attempt. Closer, but not perfect. - At the end my spray pattern looked like this. Even on both sides and the main contact area between 1/3rd and 1/2 way up the windshield.


Simple enough right?
One final tip. Remember to top up your washer fluid reservoir afterwards.
Video
I shot a short video to show you how to tackle this. Check it out here.

Thank you very much, Steve! 👍
LikeLike