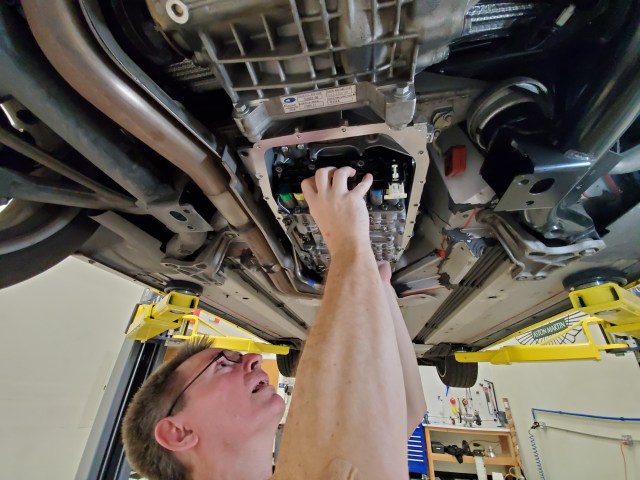
![]() The Mechatronic Unit is responsible for the Shift By Wire magic in the ZF 6HP26 6-speed Automatic Transmissions fitted to most Aston Martin DB9s, DBS and Rapides from 2004 to 2014. If you’ve already removed you Mechatronic Unit for some servicing work (I was changing the Mechatronic Valve and Bridge Seals – check out this video), you’ll need to get the unit properly reinstalled afterwards. There are some specific procedures to follow and let me share those with you here.
The Mechatronic Unit is responsible for the Shift By Wire magic in the ZF 6HP26 6-speed Automatic Transmissions fitted to most Aston Martin DB9s, DBS and Rapides from 2004 to 2014. If you’ve already removed you Mechatronic Unit for some servicing work (I was changing the Mechatronic Valve and Bridge Seals – check out this video), you’ll need to get the unit properly reinstalled afterwards. There are some specific procedures to follow and let me share those with you here.
Preparation
To get to the point where you need to put it back in you’ve already done a lot of work. Just in case you are interested here are all my articles to get you to this point, including how to change those seals I mentioned.
- Get your car up level on Jack Stands (as high as possible)
- Remove the rear undertray
- Remove the rear subframe crossmember
- Remove the right rear exhaust heat shield
- Draining the Fluid from the Sump
- Remove the Thermostatic Control Valve
- Remove the Oil Pan/Sump
- Remove the Electronics Sleeve
- Remove the Mechatronics Unit
- Changing the Mechatronics Valve and Bridge Seals
Tools Required
You only need a few tools and supplies. I’ve covered them in detail (along with where to purchase them) in another article for the overall transmission service process (find it here), but here is the subset needed for this step.
- T40 Torx Socket
- 3/8″ ratchet
- 6″ extension
- Torque wrench capable of a very low 8 Nm. I used my 1/4″ torque wrench with a 1/4″ to 3/8″ adapter for the socket.
- Side cutters to snip a cable tie
- Inspection Light
- Drip Tray
 You are going to make a mess, so rather than fluid dripping all over your garage floor or onto cardboard that’s going to get soggy, I sought out a better solution
- I purchased a dog kennel plastic tray/liner that was perfect for the task. One that was 35″ x 22″ was only $16 USD on Amazon with free shipping.
 Pig Mat absorbent towels
- When the mess happens you are going to need to be able to soak up the spills. Pig Mat isn’t just ordinary paper towel, it can absorb a ton of fluid and just one or two sheets is all I needed.
- You can pickup a 50 ft roll on Amazon for $24 USD.
- Alternately you can just use a ton of regular paper towels.
 Shop Rags
- Your hands and tools are going to get oily. Have a good supply of lint free shop towels on hand.
- I get a bag of 100 for about $25 USD from Amazon.
 Disposable gloves
- You are going to get your hands covered in fluid, so a few pairs of disposable gloves would be handy to have.


It’s going to be messy, so don’t wear your Sunday best to do the work. Time to put on your ‘garage clothes’.
Procedure
The process will take about 10 minutes once you have all the preparation steps done.
 Aston Martin actually have included a section on this in the official Aston Martin Workshop Manual. Section 7.01 Automatic Transmission covers this. What’s amusing is that they didn’t bother to make one unique to Aston, they just pilfered content from ZF and actually just show pictures of a transmission removed from the car flipped over on the bench (if only it was that easy).
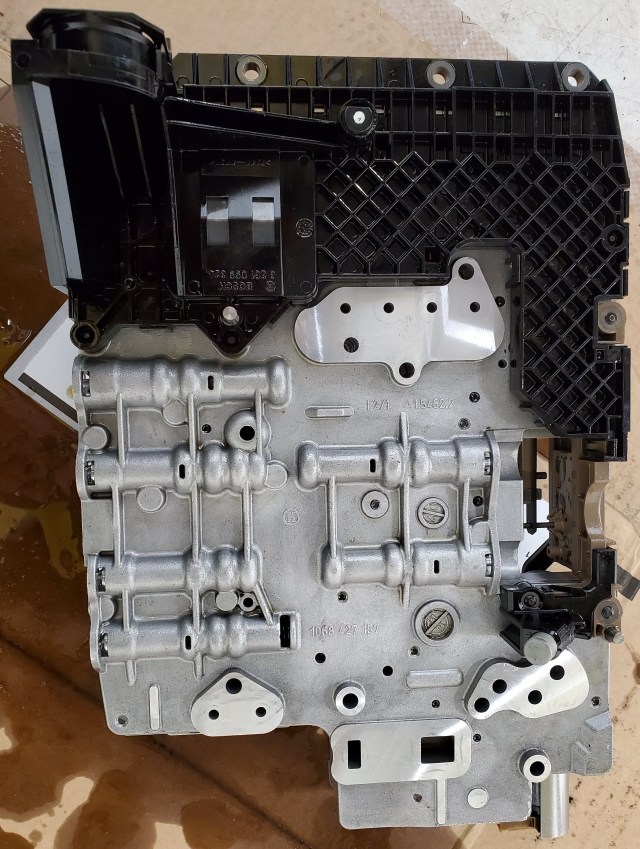
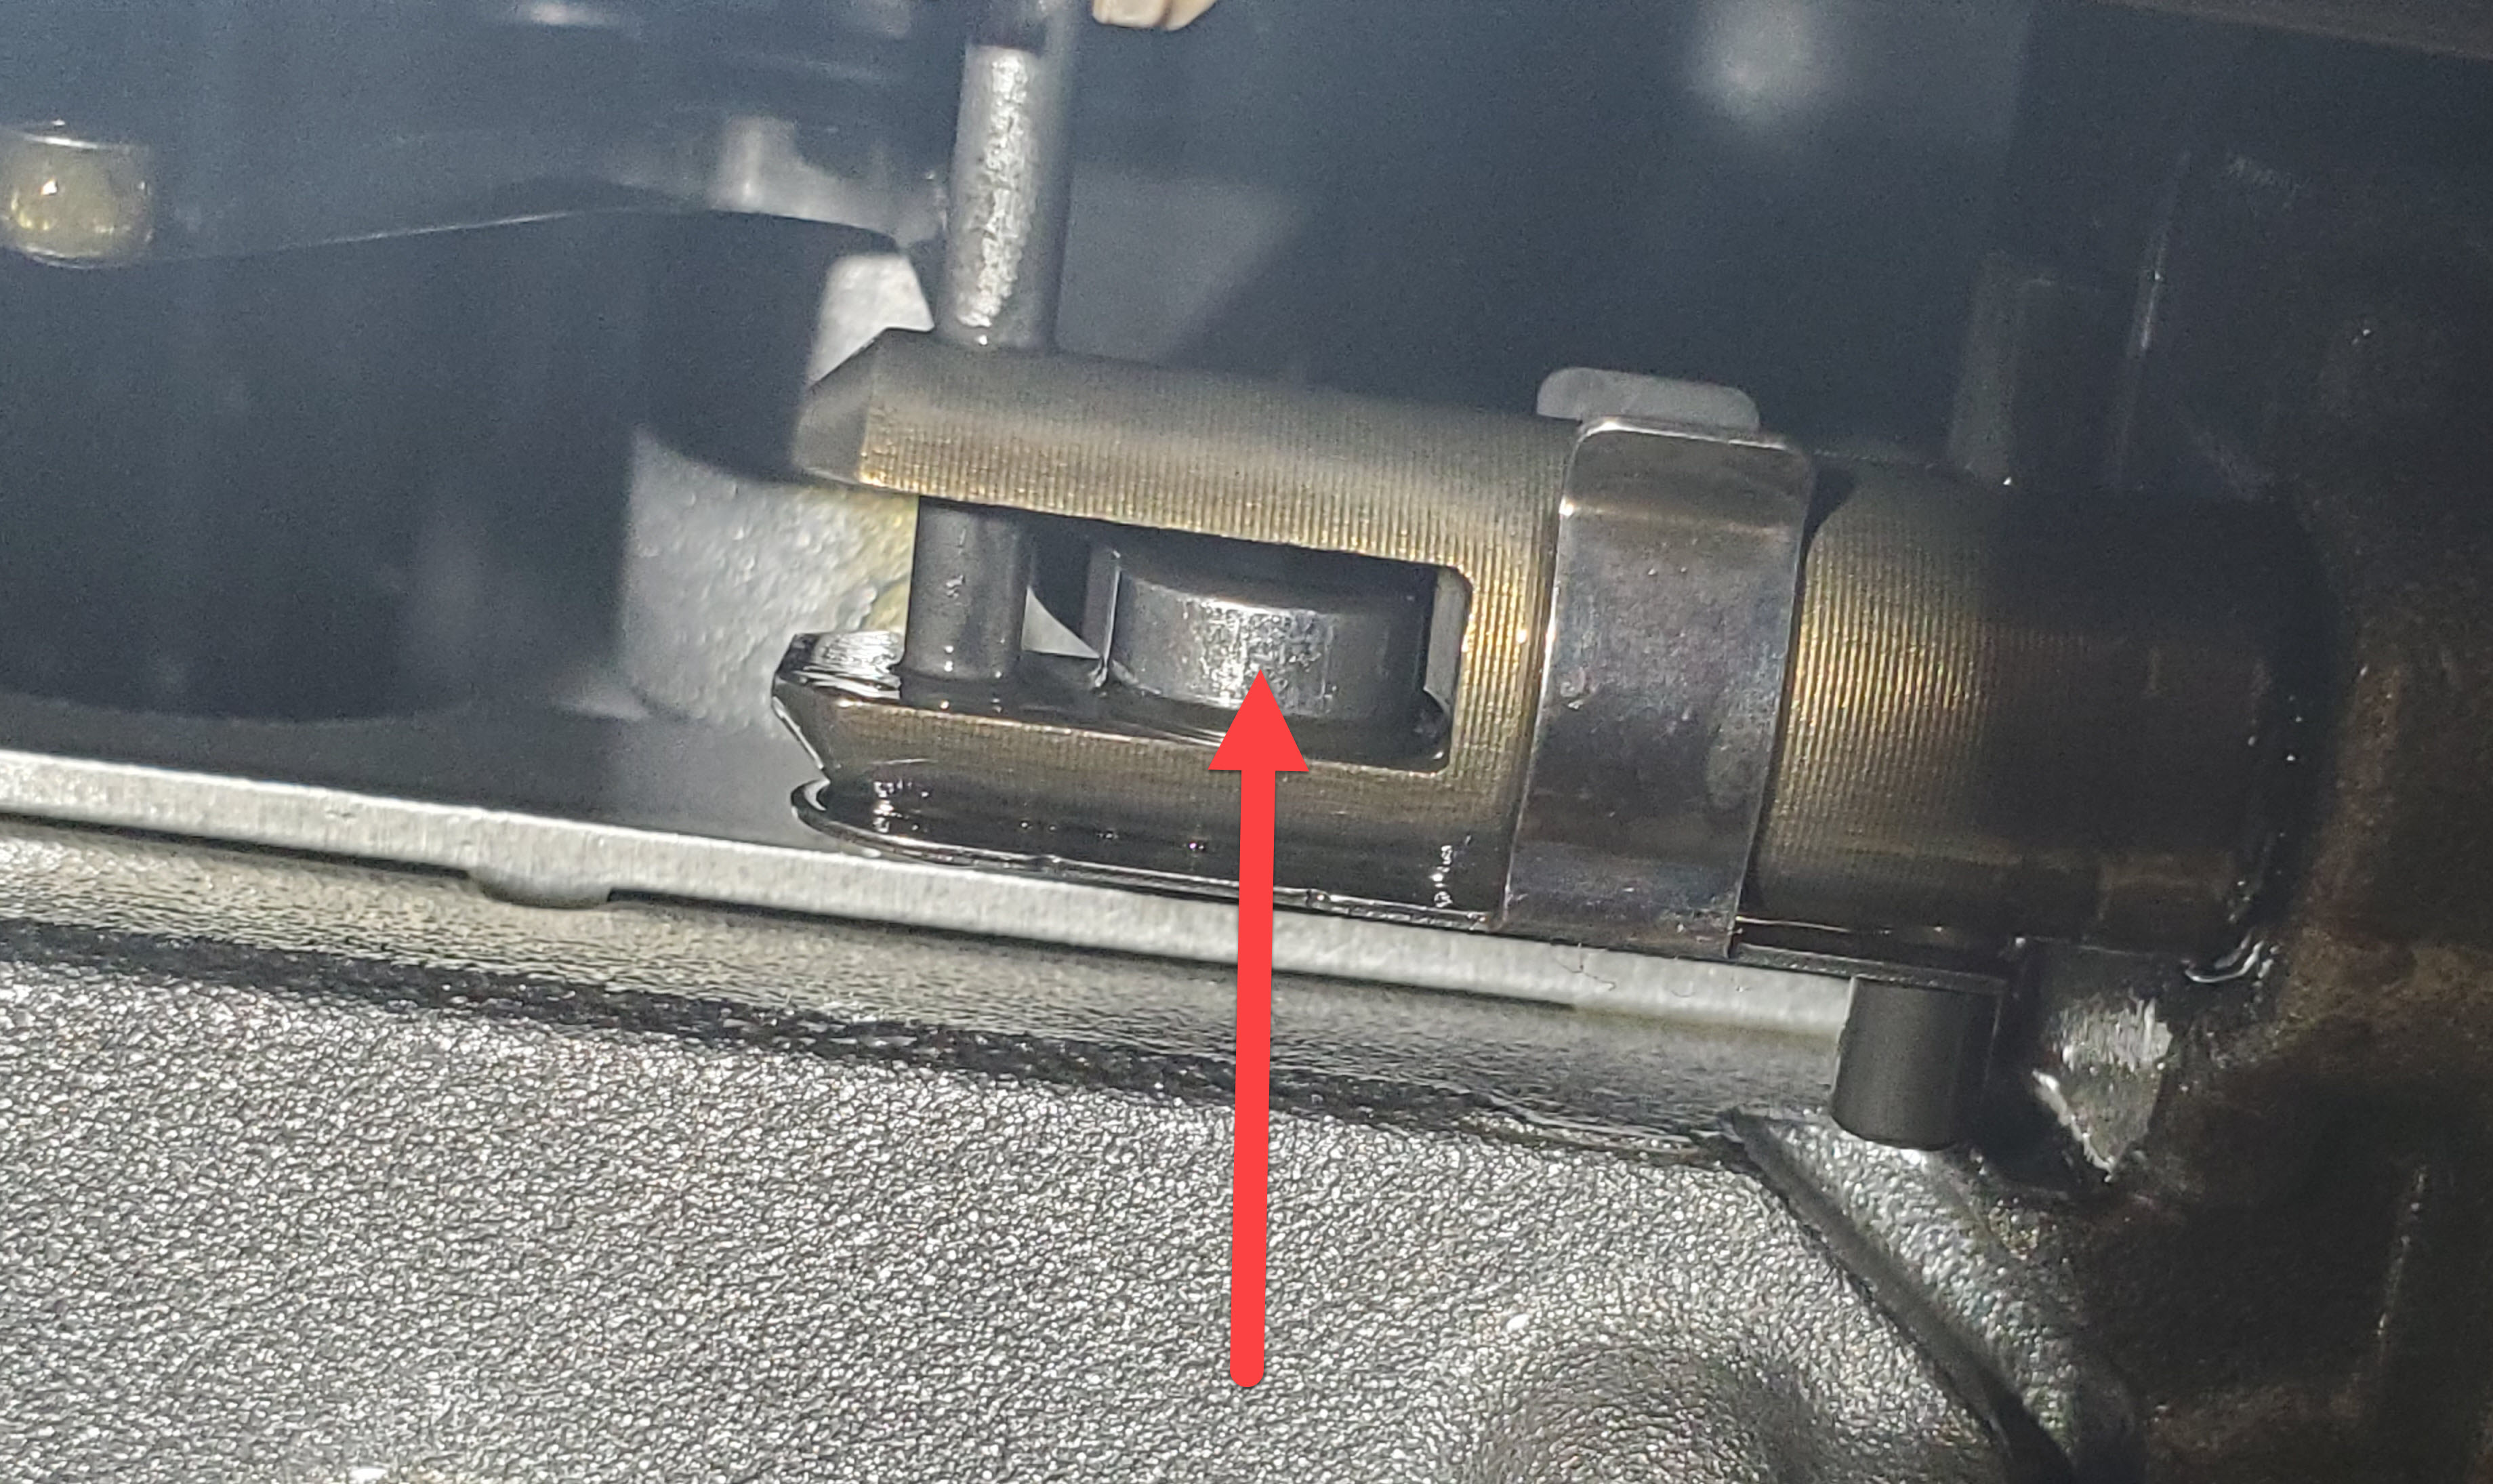
![]() I managed to track down a ZF service technician training presentation that looks like something a trainer would be using to train new ZF service technicians (just like me – and you!). You can find a copy of that here. What matters most in that guide for now is the specific bolt tightening/loosening sequence. This is to ensure the Mechatronic doesn’t get warped during the process. Here is that pattern.
I managed to track down a ZF service technician training presentation that looks like something a trainer would be using to train new ZF service technicians (just like me – and you!). You can find a copy of that here. What matters most in that guide for now is the specific bolt tightening/loosening sequence. This is to ensure the Mechatronic doesn’t get warped during the process. Here is that pattern.
![]()
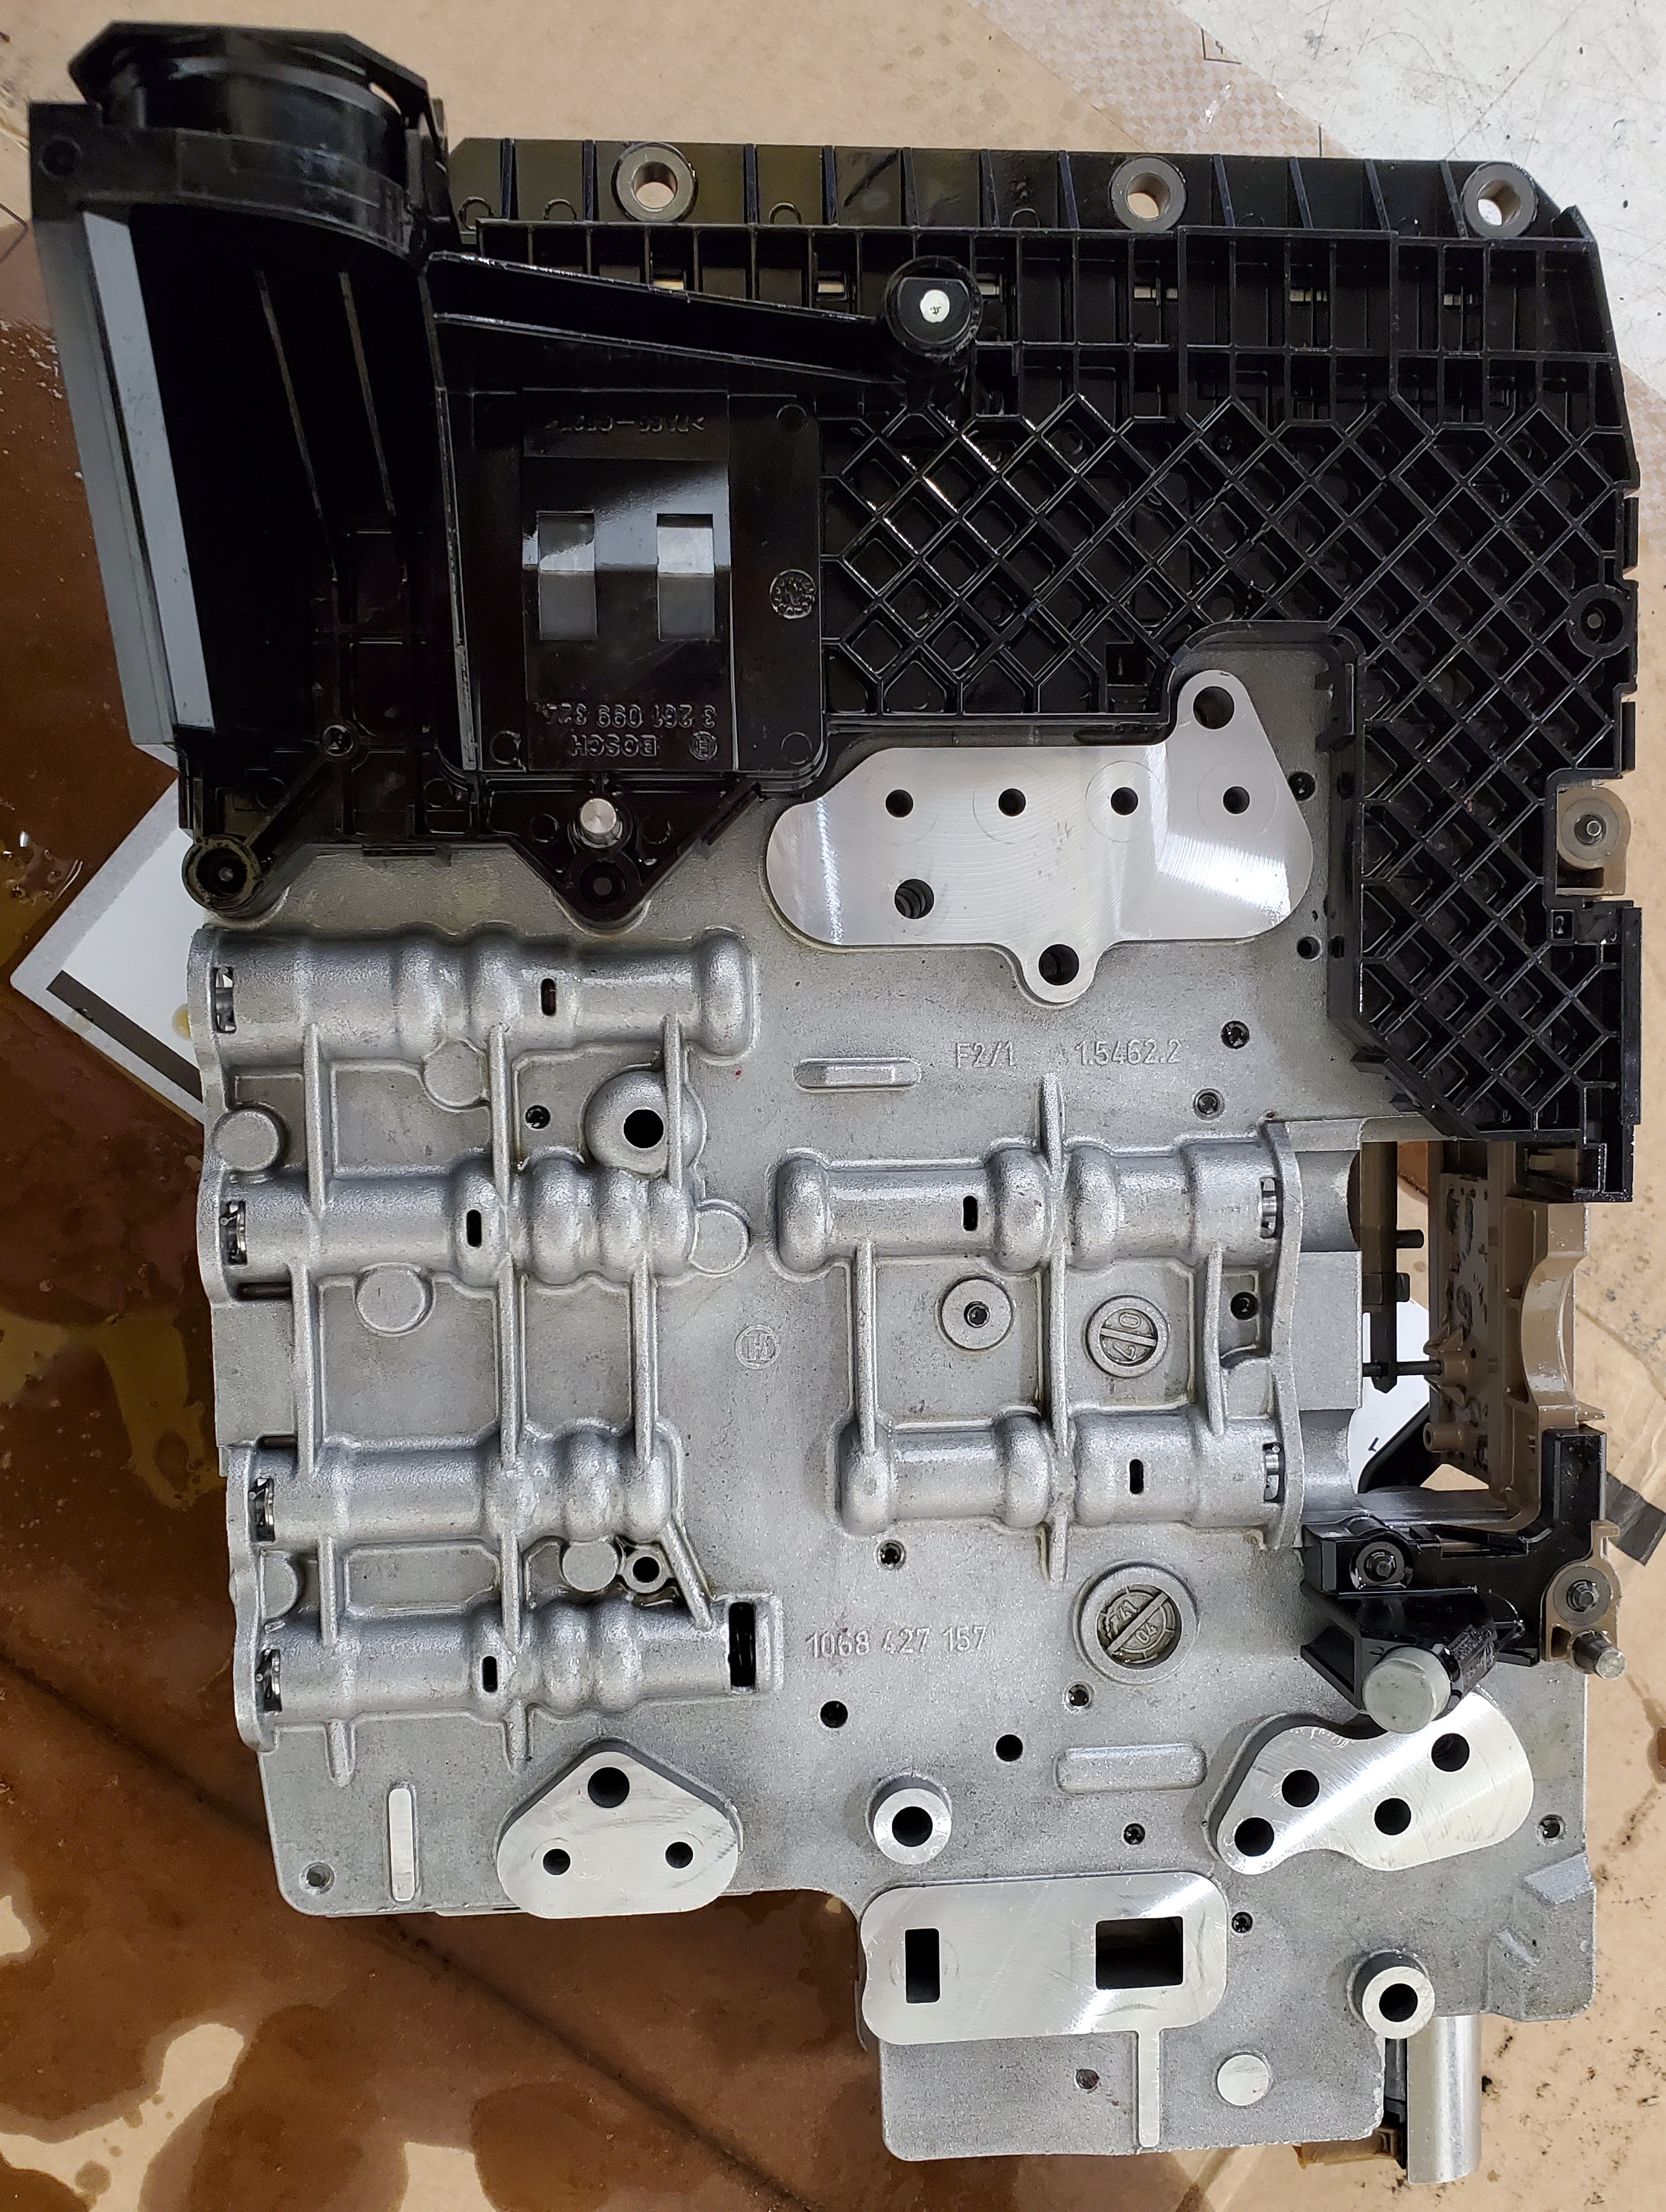
- Tidy Up of the Mechatronics Unit
- When it was removed it was covered in fluid, but looking clean overall.
- I resisted the urge to use ANY form of cleaner on it. Spraying it with degreaser or cleaner serves no purpose (it sits submerged in fluid) and I was worried that any cleaners could hang around and mess up the new fluid and seals, so I didn’t clean it with anything at all.
- I used a lint free rag and wiped how the machined mating surfaces on the back side just to get rid of any dust or debris that might have got on the surface while I had it removed. It should look pristine prior to installing.
- I gave the 10 bolts a quick wipe down to have them ready to refit.

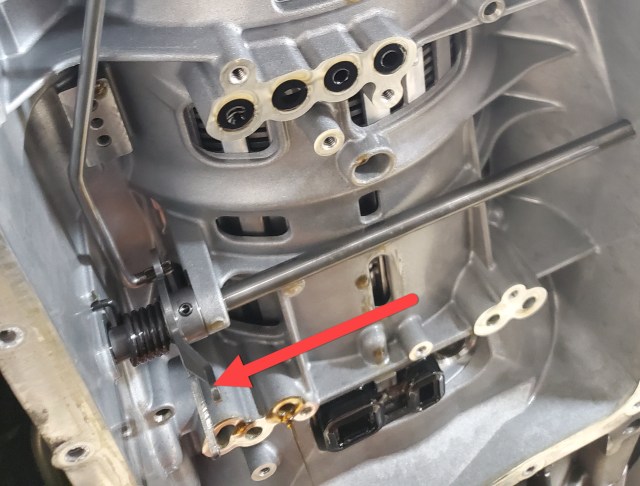
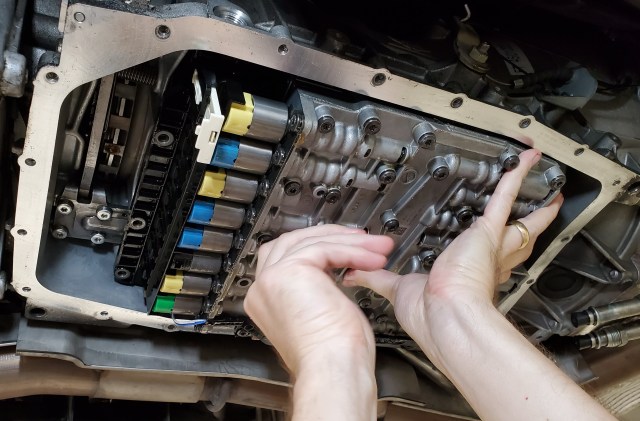
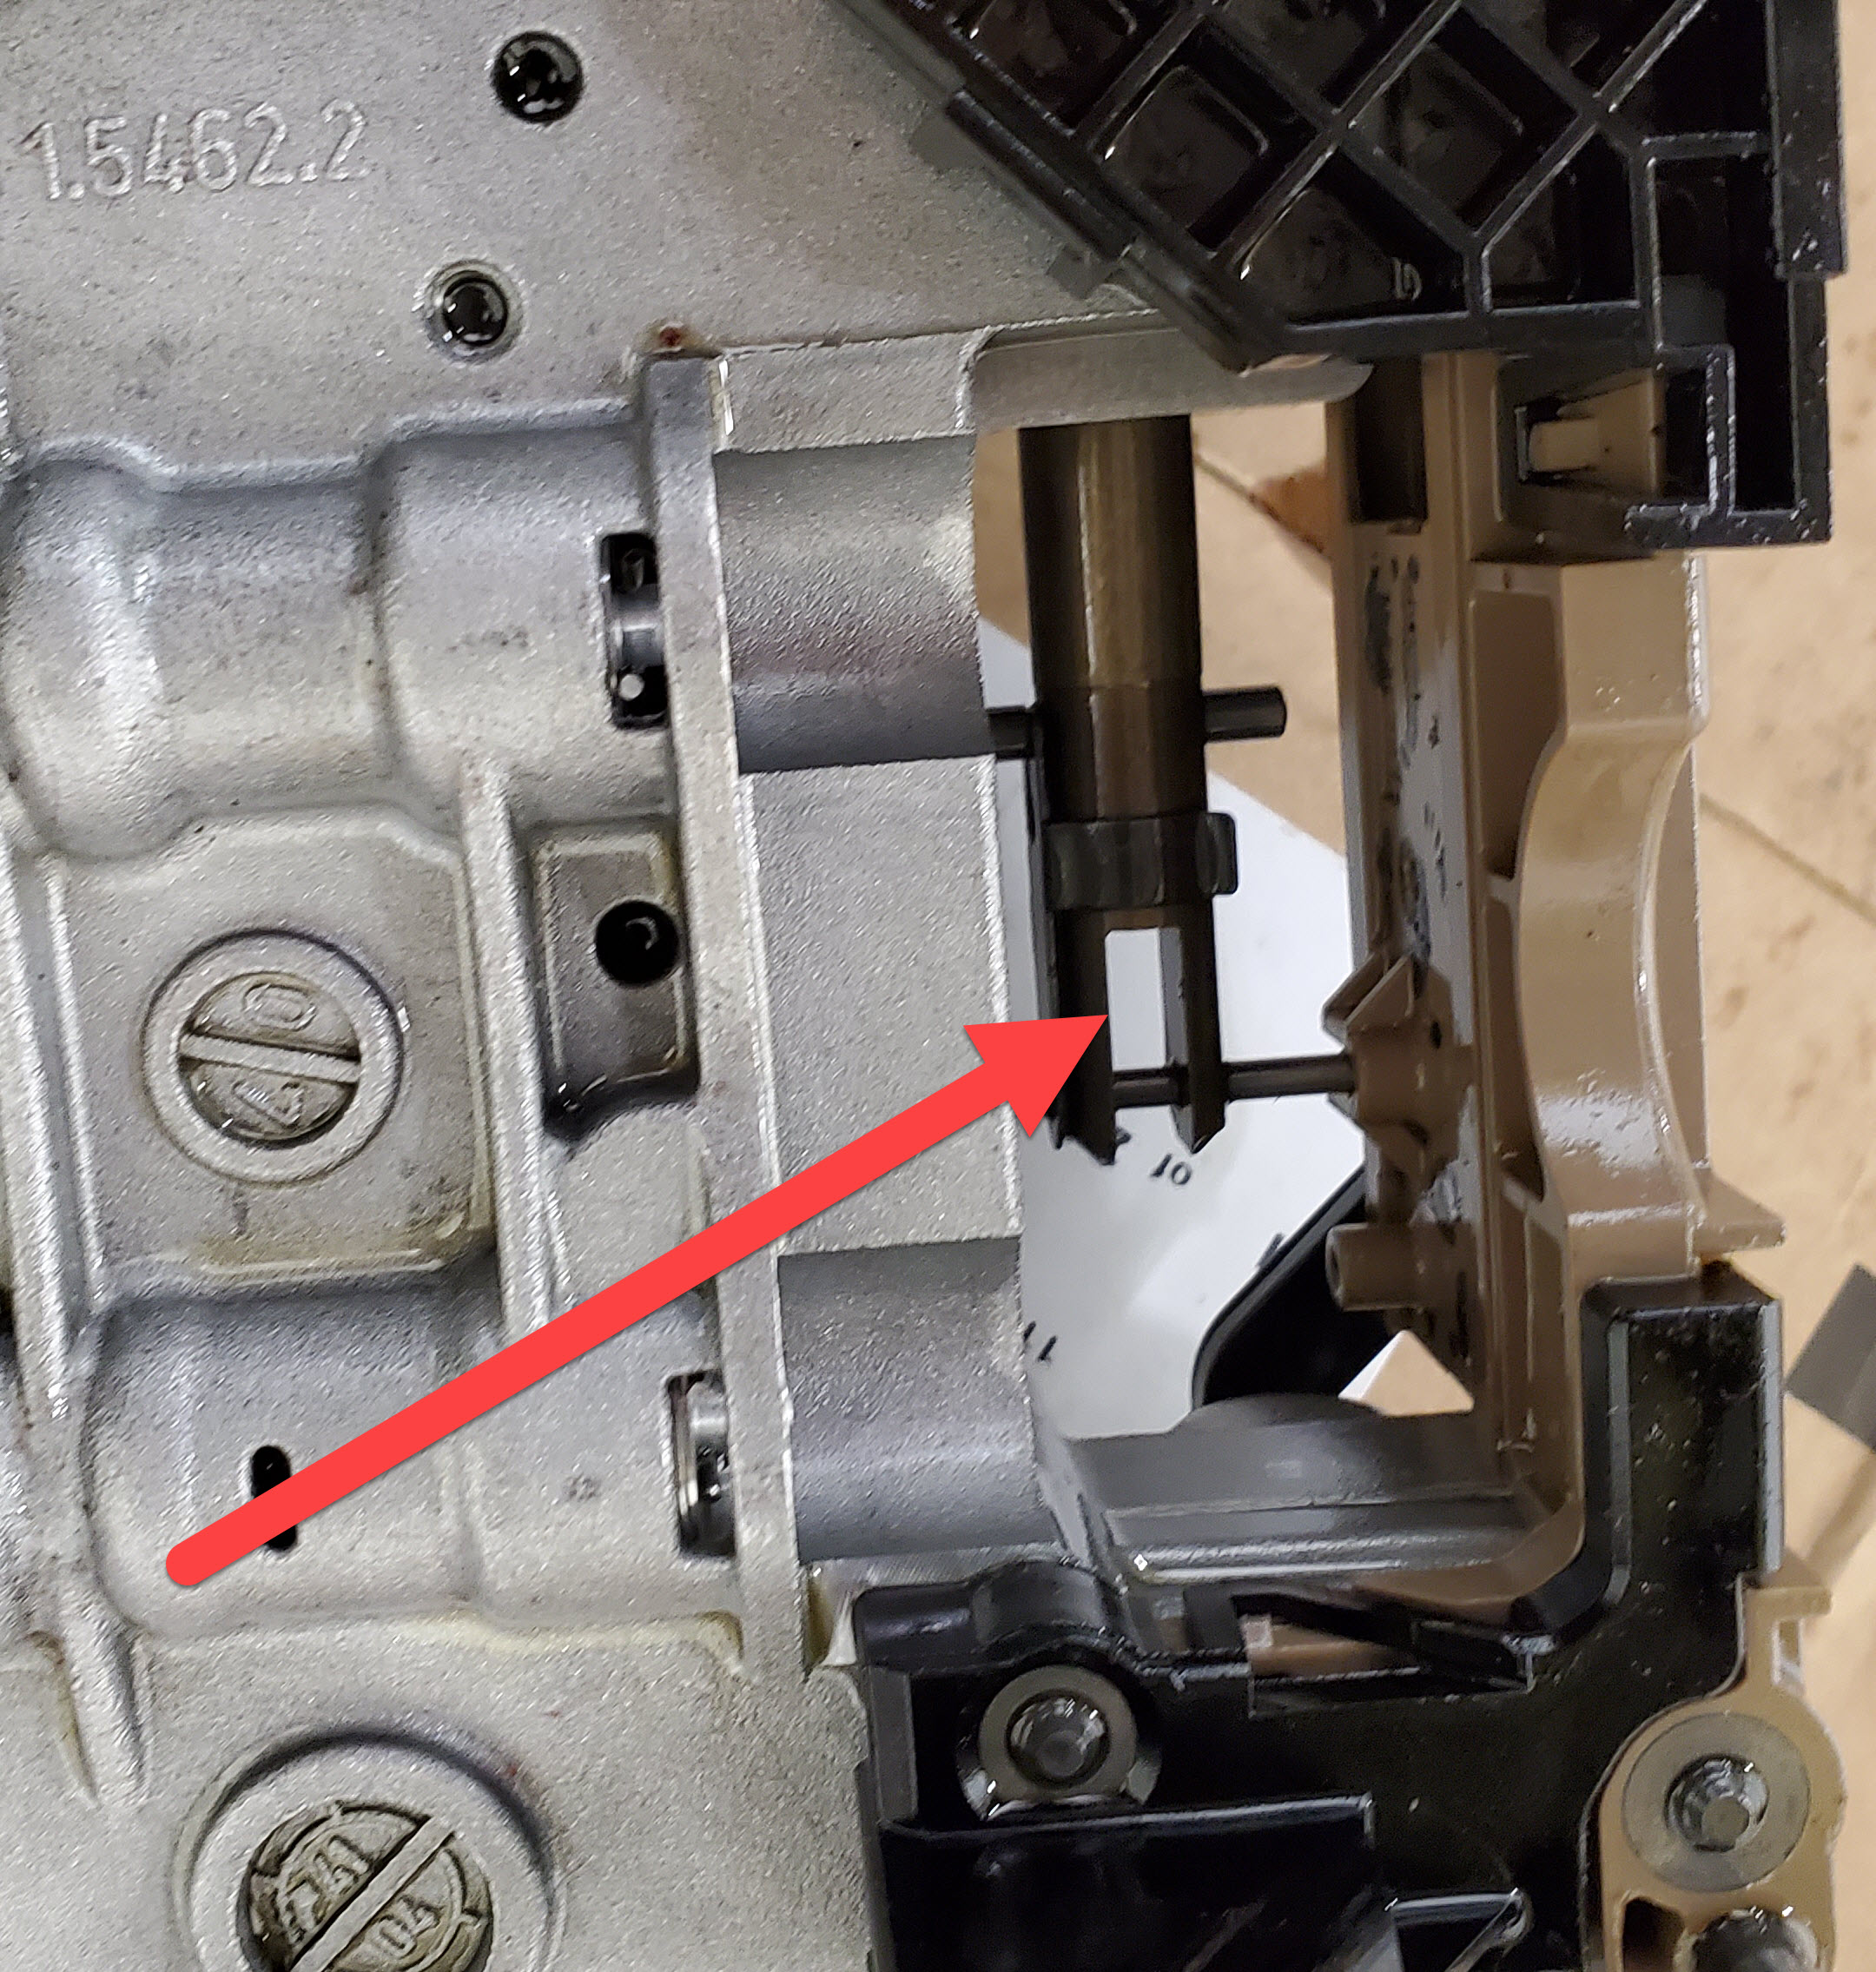
- Align the Mechatronics Unit over the Park Override Fork
- You’ll recall I pointed out the fact that the Park Override lever has a fork that engages with the Mechatronic unit in a very small slot.
- As you lift the Mechatronic Unit back up into place your first priority is to make sure that fork aligns and drops back into the same slot as it was before. Easy to do, you just have to be looking up carefully at it as you position it.


- Loosely fit the Mechatronic Unit Bolts
- After aligning it with the Park Override Fork, hold the unit up into place and loosely start bolts 1 and 4 from the diagram.
- These are central to the unit and are ideal to take the initial weight so your arms can get a rest.
- Make sure they get at least 3-4 turns before you let them take the full weight. You don’t want to strip them out with only a half turn in place.
- Do NOT tighten them yet.
- With 1 and 4 taking the weight now finger fit the other 8 bolts and get them all well started.
- After aligning it with the Park Override Fork, hold the unit up into place and loosely start bolts 1 and 4 from the diagram.
- Snug up all 10 bolts in the right order
- Use ONLY hand tools for this, no electric drill drivers. You can too easily over tighten a bolt or strip it from the aluminum housing. Just put in the time and do it by hand.
- Use the T40 Torx, extension and ratchet
- Snug up bolts 1 and 4 first.
- Alternate a few turns on each going back and forth from bolt 1 to 4 as it gently lifts up the body of the unit making contact with the seals.
- Keep going as it compresses the seals, you’ll feel the resistance increase slightly
- You’ll feel it finally mate up metal to metal and then stop just leaving them slightly snug at this point. Do not tighten.
- Now snug up the rest of the bolts following the pattern in the diagram above.
- Torque the bolts in the right order
- Set your Torque wrench to 8 Nm
- Torque the bolts in order of the diagram.

- With the Mechatronics unit fully installed now, we have one last task of releasing the temporary zip tie we installed the on the Park Position Override Lever that was holding it in the position we needed to remove and reinstall the Mechatronics Unit.
- All we need to do is snip the zip tie and remove it so the the Park Override Lever is back in its normal resting position.
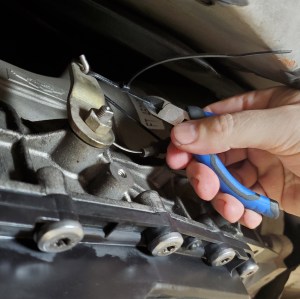
- Note that the ZF Guide above has a specification that the cable should have at least 1 to 2 mm of free play in it. It should NOT be bow string tight on the level. They want to be sure its not ‘close’ to engaging while at rest. On my car, the cable was a little loose and floppy, but not about to fall off. Check it out in the second video below.
- All we need to do is snip the zip tie and remove it so the the Park Override Lever is back in its normal resting position.


That’s it. Pretty simple once you know how. Now you are ready to reinstall the Electronics Sleeve and carry on with getting your transmission put back together and the fluid filled. Check out my entire series of articles on the process here.
Video
You can watch me align the fork and follow the rest of the process in my video here starting at the 2:29 mark.
You can see me release the Park Override Lever and test its functionality at the 24:04 minute mark:

Hi Steve,
My DB9 is a 2005, with about 15,000 miles.
I decided to change the transmission fluid. This would be the first time it’s ever been done.
Following all your steps, I’m currently finishing draining the old oil. Just finished blowing the lines out ( I used nitrogen). I only drained a little over 8 liters total.
Didn’t really measure the quantity of oil in every step, I know I got slightly over 1liter when I blew out the system.
Don’t exactly remember what I got when I removed the plastic pan, but remember thinking it wasn’t as much as you got out it.
I know I didn’t spill much, few drops here and there but nothing major. I even left the drip pan under the car for about 24 hour, after the Mechatronics was removed. ( that collected about 2 cups)
Any thing to be concerned about? Do you think is possible the transmission was short of oil to start with? I know I didn’t have any leaks .
Thanks for the help,
As always great instructions and info.
LikeLike
Hi Michael. I wouldn’t worry if you didn’t get the exact same amount as I did in my video. As you mentioned you could have been low a liter, etc. Regardless, you’ve purged all you can and even 80% change is vastly better than just a simple drain and fills 40%. I suspect you nailed it. You’d also get a sense on the refill. If you drained 8, but got 9 back in, it was low. Glad to see the video series has helped a few people!
LikeLike
Hi Steve,
I’m well on the way to finish up the transmission service.
Interestingly, I only drained about 8 liters, but filled it up with about 9.
I got to the point where I need to measure the fluid temperature and fine tune the fluid level. As you recommended I picked up the Foxwell 510. ( Amazon was out of stock, but Foxwell had a direct deal $139.00 with free shipping)
When I ordered it from Foxwell, they had you select the language and car type, so I was hoping they would send the unit all ready to use on my DB9.
Not so, did you have any problems setting it up? The instructions are not very friendly,. Wondering what your experience was like with them.
Thanks as always for the information and help.
LikeLike
I recall the same experience, I needed to do some registration step and choose Aston Martin as my one manufacturer. The company is in Asia somewhere, but I recall it went OK. It was too many years ago to remember verbatim. Probably a good topic for a future article.
Sounds like you might have been a liter low, great that you did the service and discovered it. Imagine how many of the cars are in a similar state.
Good luck with the rest of the service work!
LikeLike