Most Aston Martin DB9’s, DBS and Rapides between 2004 and 2014 were fitted with a 6-speed Touchtronic II Automatic Transmission (if you have a manual shift, you are a lucky duck). I’ve already written a few times that this transmission is really a ZF model 6HP26 that was fitted to many other cars of the era including Rolls Royce, Bentley, Jaguar and BMW (to name a few). The transmission features Shift By Wire (SBW) meaning that there is no lever or linkage doing the shifting, but rather a set of electronic solenoid valves inside the transmission (the Mechatronics Unit). When you push the shifter buttons on the center console, they are really just sending electronic signals down to the transmission control module (located inside the transmission).
![]() If there are electronic signals, then there must be wiring that plugs into the transmission somehow. This is done with a large multipin electronics connector that twist locks into something called the Electronics Sleeve. The Electronics Sleeve’s job is to create a leak free ‘tunnel’ through the transmission casing allowing the electronics connector to mate up with the mechatronics unit.
If there are electronic signals, then there must be wiring that plugs into the transmission somehow. This is done with a large multipin electronics connector that twist locks into something called the Electronics Sleeve. The Electronics Sleeve’s job is to create a leak free ‘tunnel’ through the transmission casing allowing the electronics connector to mate up with the mechatronics unit.
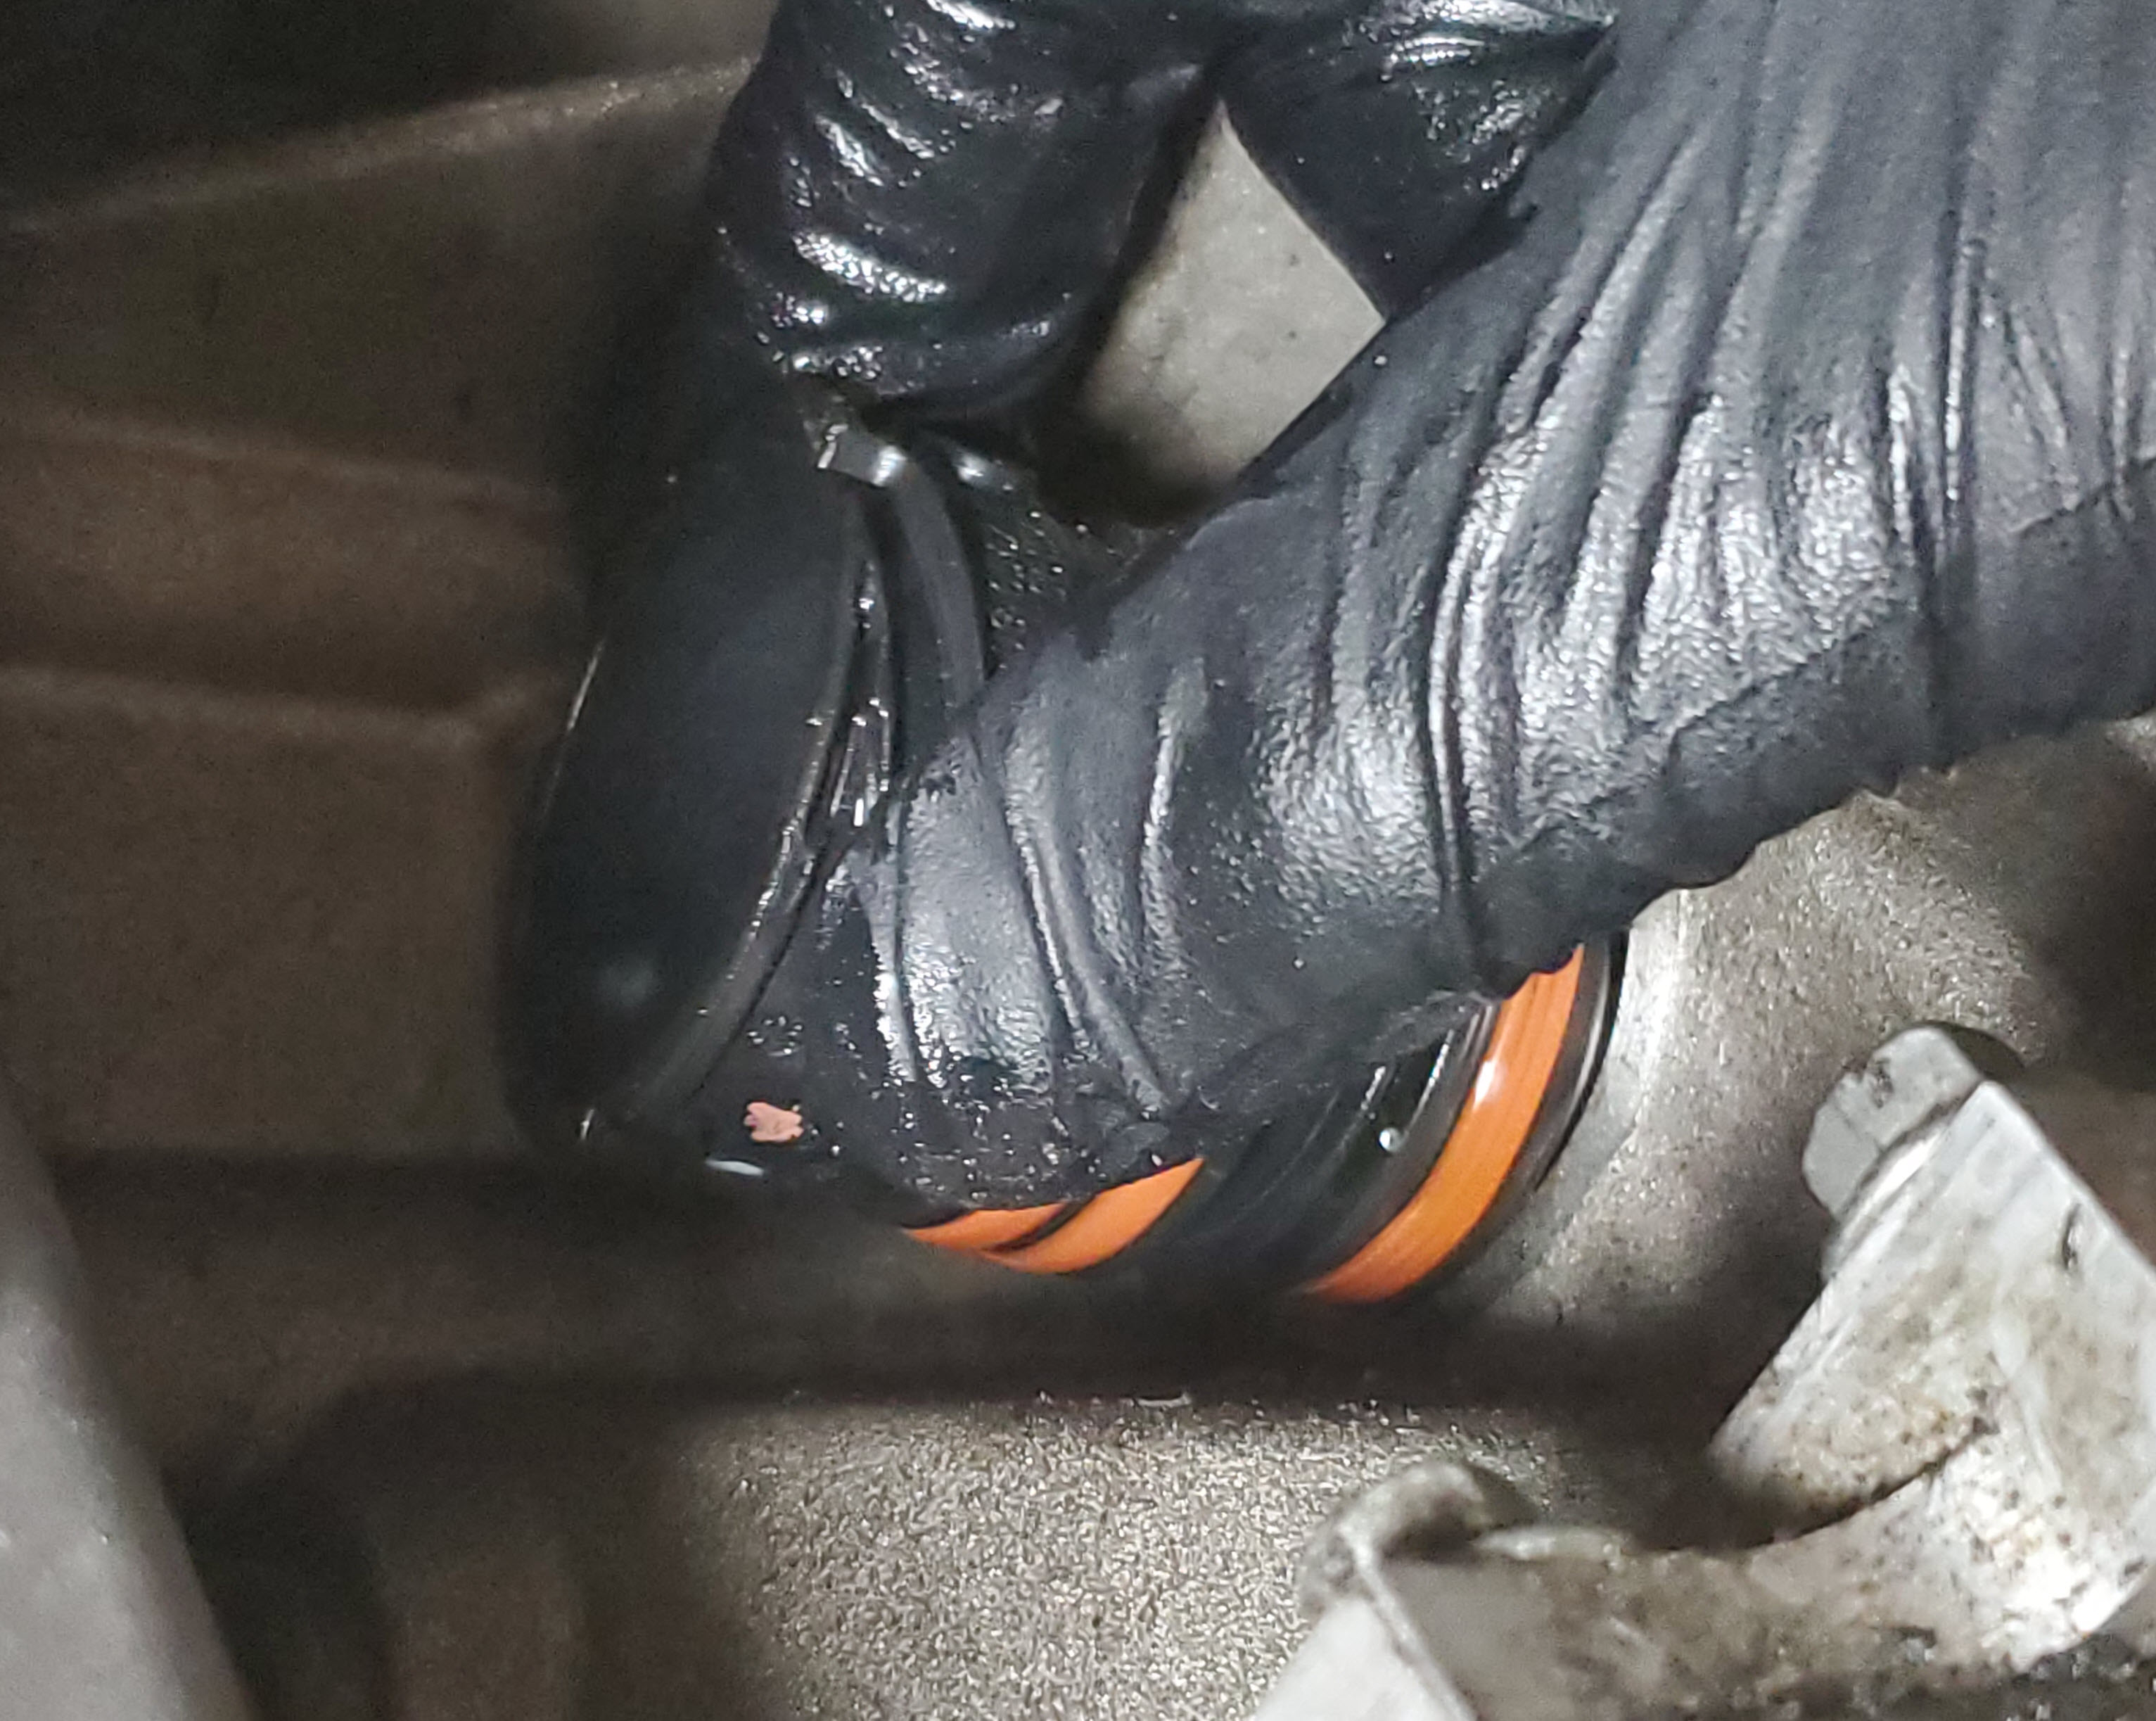
The Electronics Sleeve is known to leak. It has two large O-rings that seal it to the transmission casing, and these O-rings start to flatten out over time in all the heat of the transmission (see photo below). My car had this issue and you can see some signs of a ‘weeping’ oil leak that then blows back over the casing and the differential.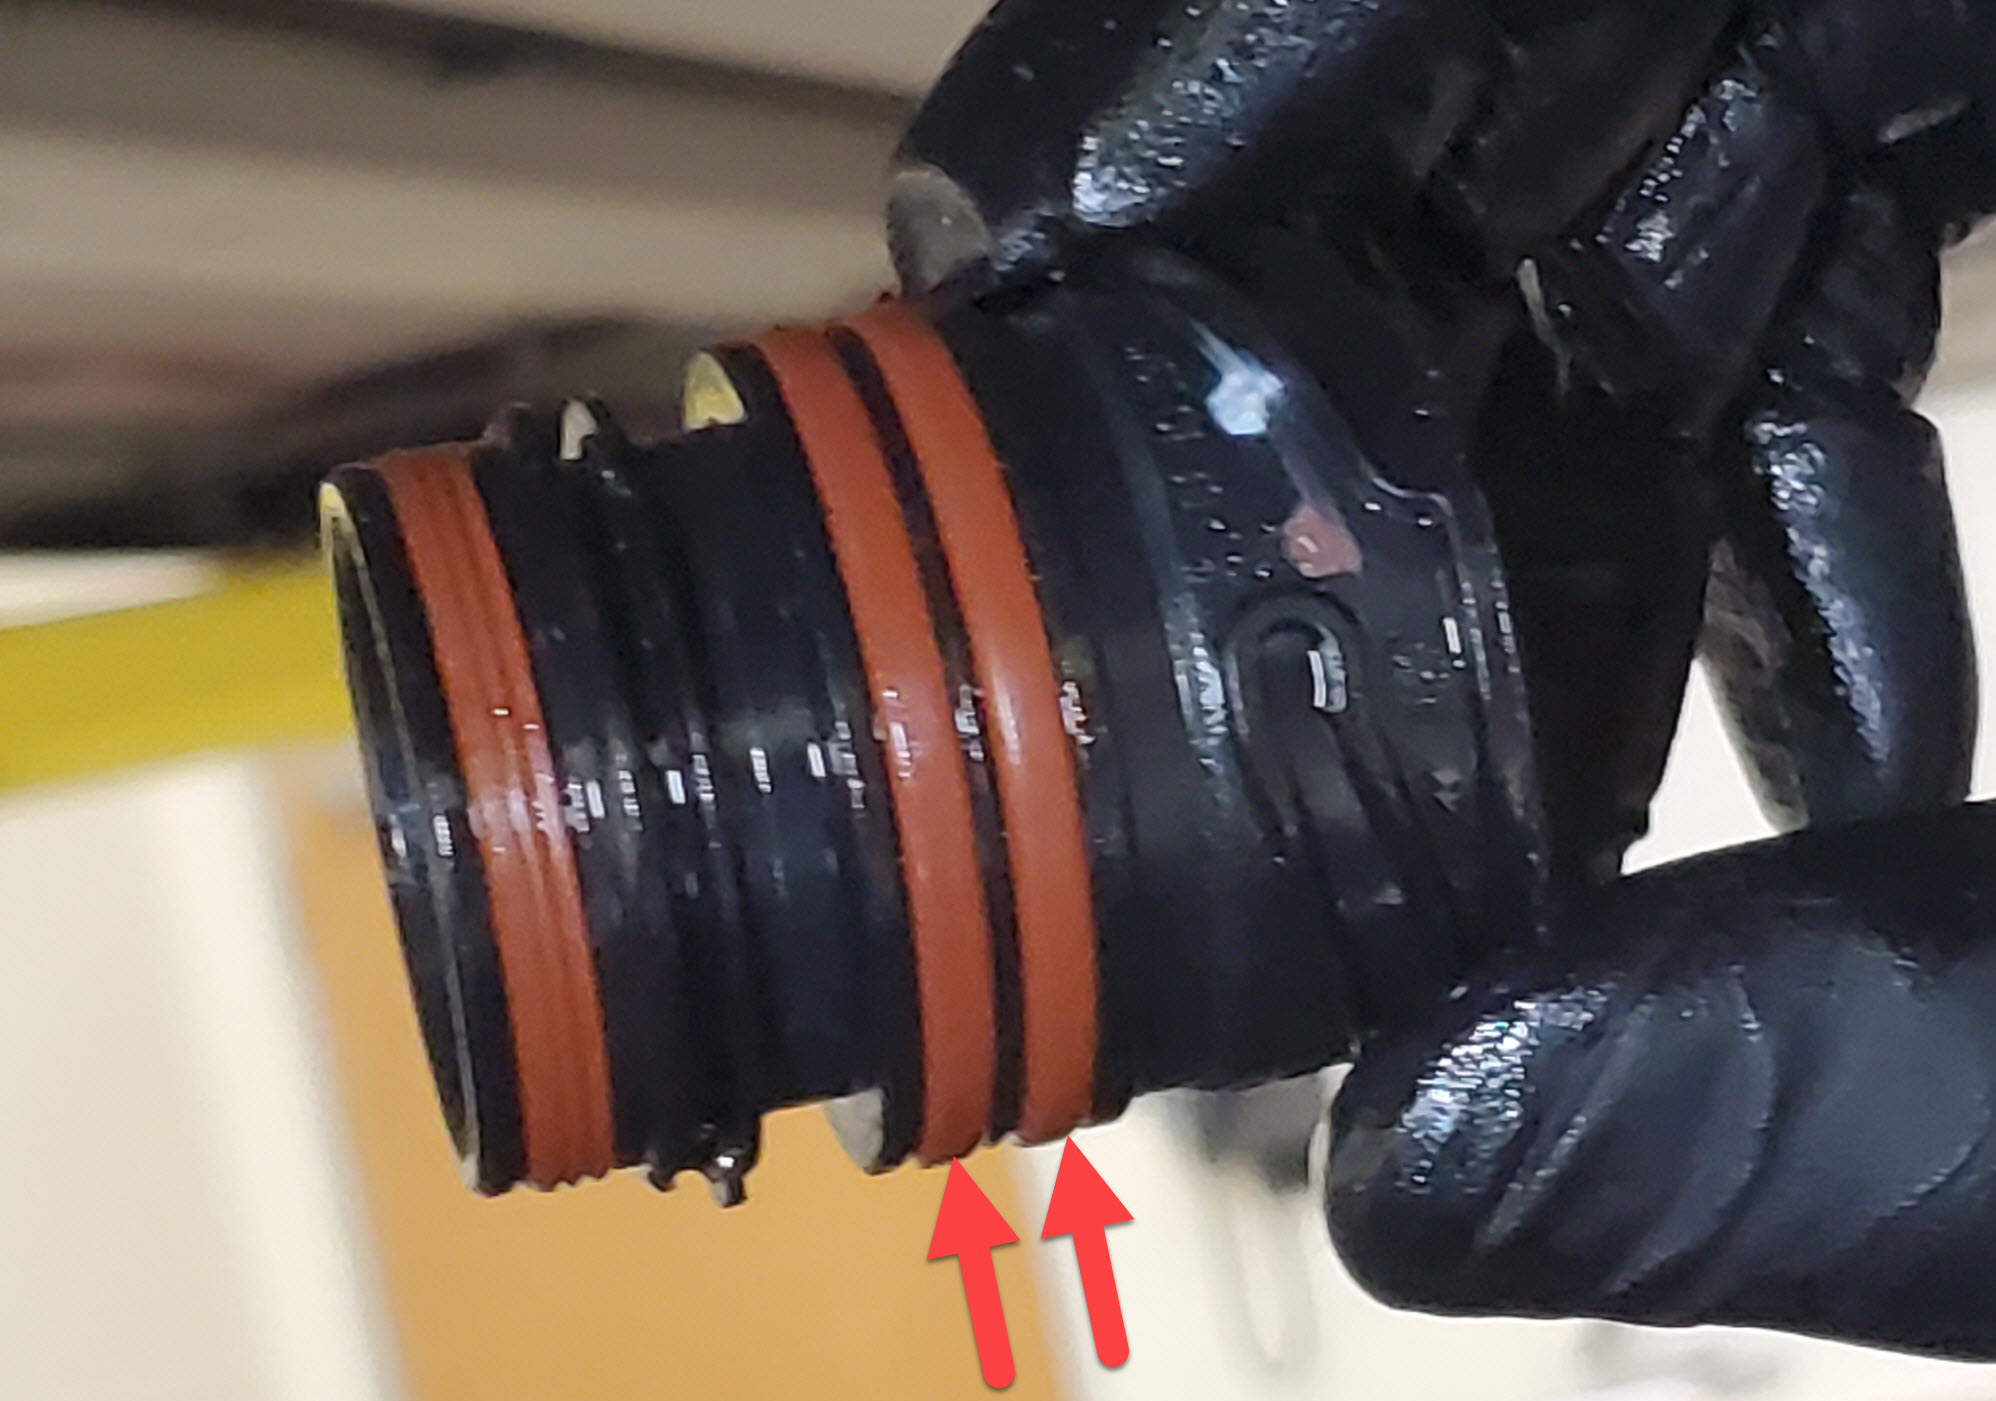

Removing (and replacing) the Electronics Sleeve isn’t particularly difficult (or expensive), and I replaced mine as part of doing a full transmission fluid, filter and seals change. I’ve created an extensive series of articles on this process that you can check out here. Let me show you how to remove the Electronics Sleeve.
Tools Required
Strangely (for a change) you need nothing more than your hands for this activity. You will probably want to have a few shop supplies handy:
- Drip Tray
- You are going to make a mess with the oil pan removed, so rather than fluid dripping all over your garage floor or onto cardboard that’s going to get soggy, I sought out a better solution
- I purchased a dog kennel plastic tray/liner that was perfect for the task. One that was 35″ x 22″ was only $16 USD on Amazon with free shipping.
 Shop Rags
- Your hands and tools are going to get oily. Have a good supply of lint free shop towels on hand.
- I get a bag of 100 for about $25 USD from Amazon.
 Disposable gloves
- Your hands are going to get covered in fluid and grit so a pair of disposable gloves would be handy to have.


It’s going to be messy, so don’t wear your Sunday best to do the work. Time to put on your ‘garage clothes’.
Preparation
You need to do a bunch of preparation work to get to this point, and I’ve created articles on how to tackle each of these steps:
- Get your car up level on Jack Stands (as high as possible)
- Remove the rear undertray
- Remove the rear subframe crossmember
- Remove the right rear exhaust heat shield
- Draining the Fluid from the Sump
- Remove the Thermostatic Control Valve
- Removing the Oil Pan/Sump
With those steps out of the way we can get on with it.
Procedure
The process will take about 10 minutes once you have all the preparation steps done.
You might be thinking right now “Why do I need to do all those crazy prep steps? Can’t I just pull the sleeve out?”. Nope. You must pull an interlock release lever on the Mechatronics Unit, so you have to get the plastic oil pan/sump drained and removed to get access to it. Just follow my articles above and you’ll be fine.
The Electronics Sleeve and Connector are tucked up in a hard to reach location. In my photos below I’ve removed my right hand exhaust pipe so that we could get better photos. You’ll need to reach your arm up and over the exhaust pipe, and contort some. It’s doable.
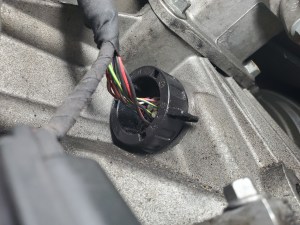
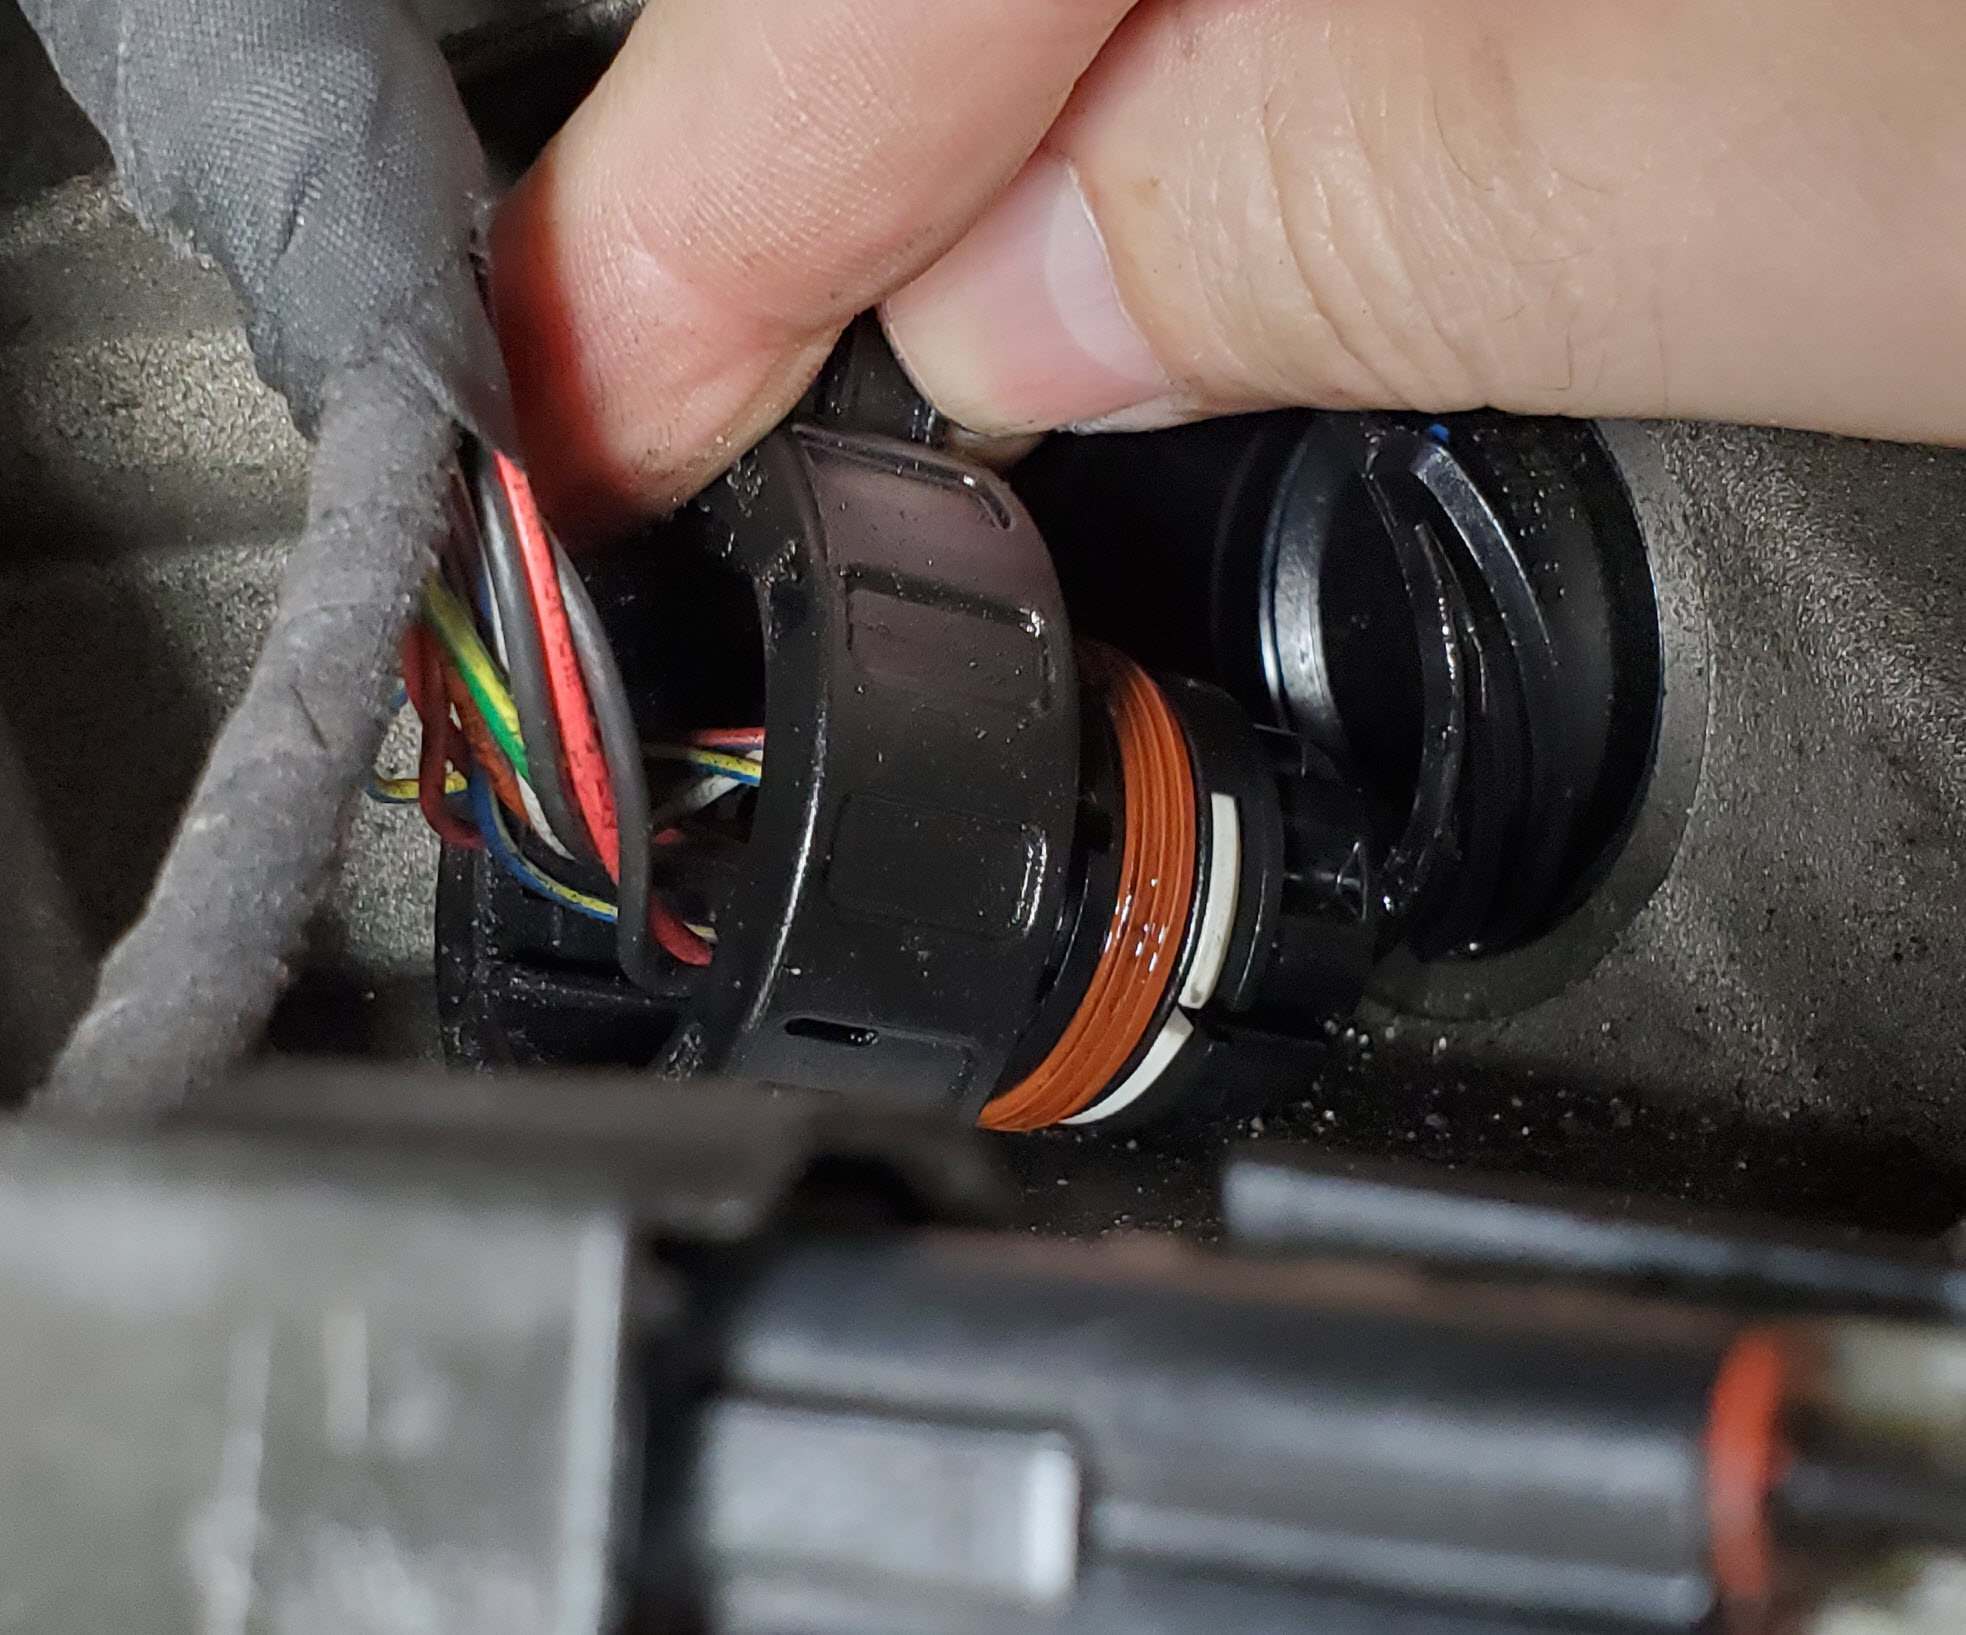
- Disconnect the Electronics Connector
- It is a twist lock connector that plugs into the electronics sleeve
- It has two big ‘tabs’ at about 4 o’clock and 10 o’clock that are easy to grip it even with just a few fingers of one hand.
- Turn the connection 1/4 turn counter clockwise to release it.
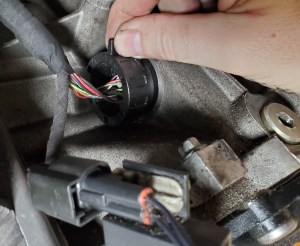
- It will come out a little bit as you turn it.
- Pull the electrical connector free of the electronics sleeve.

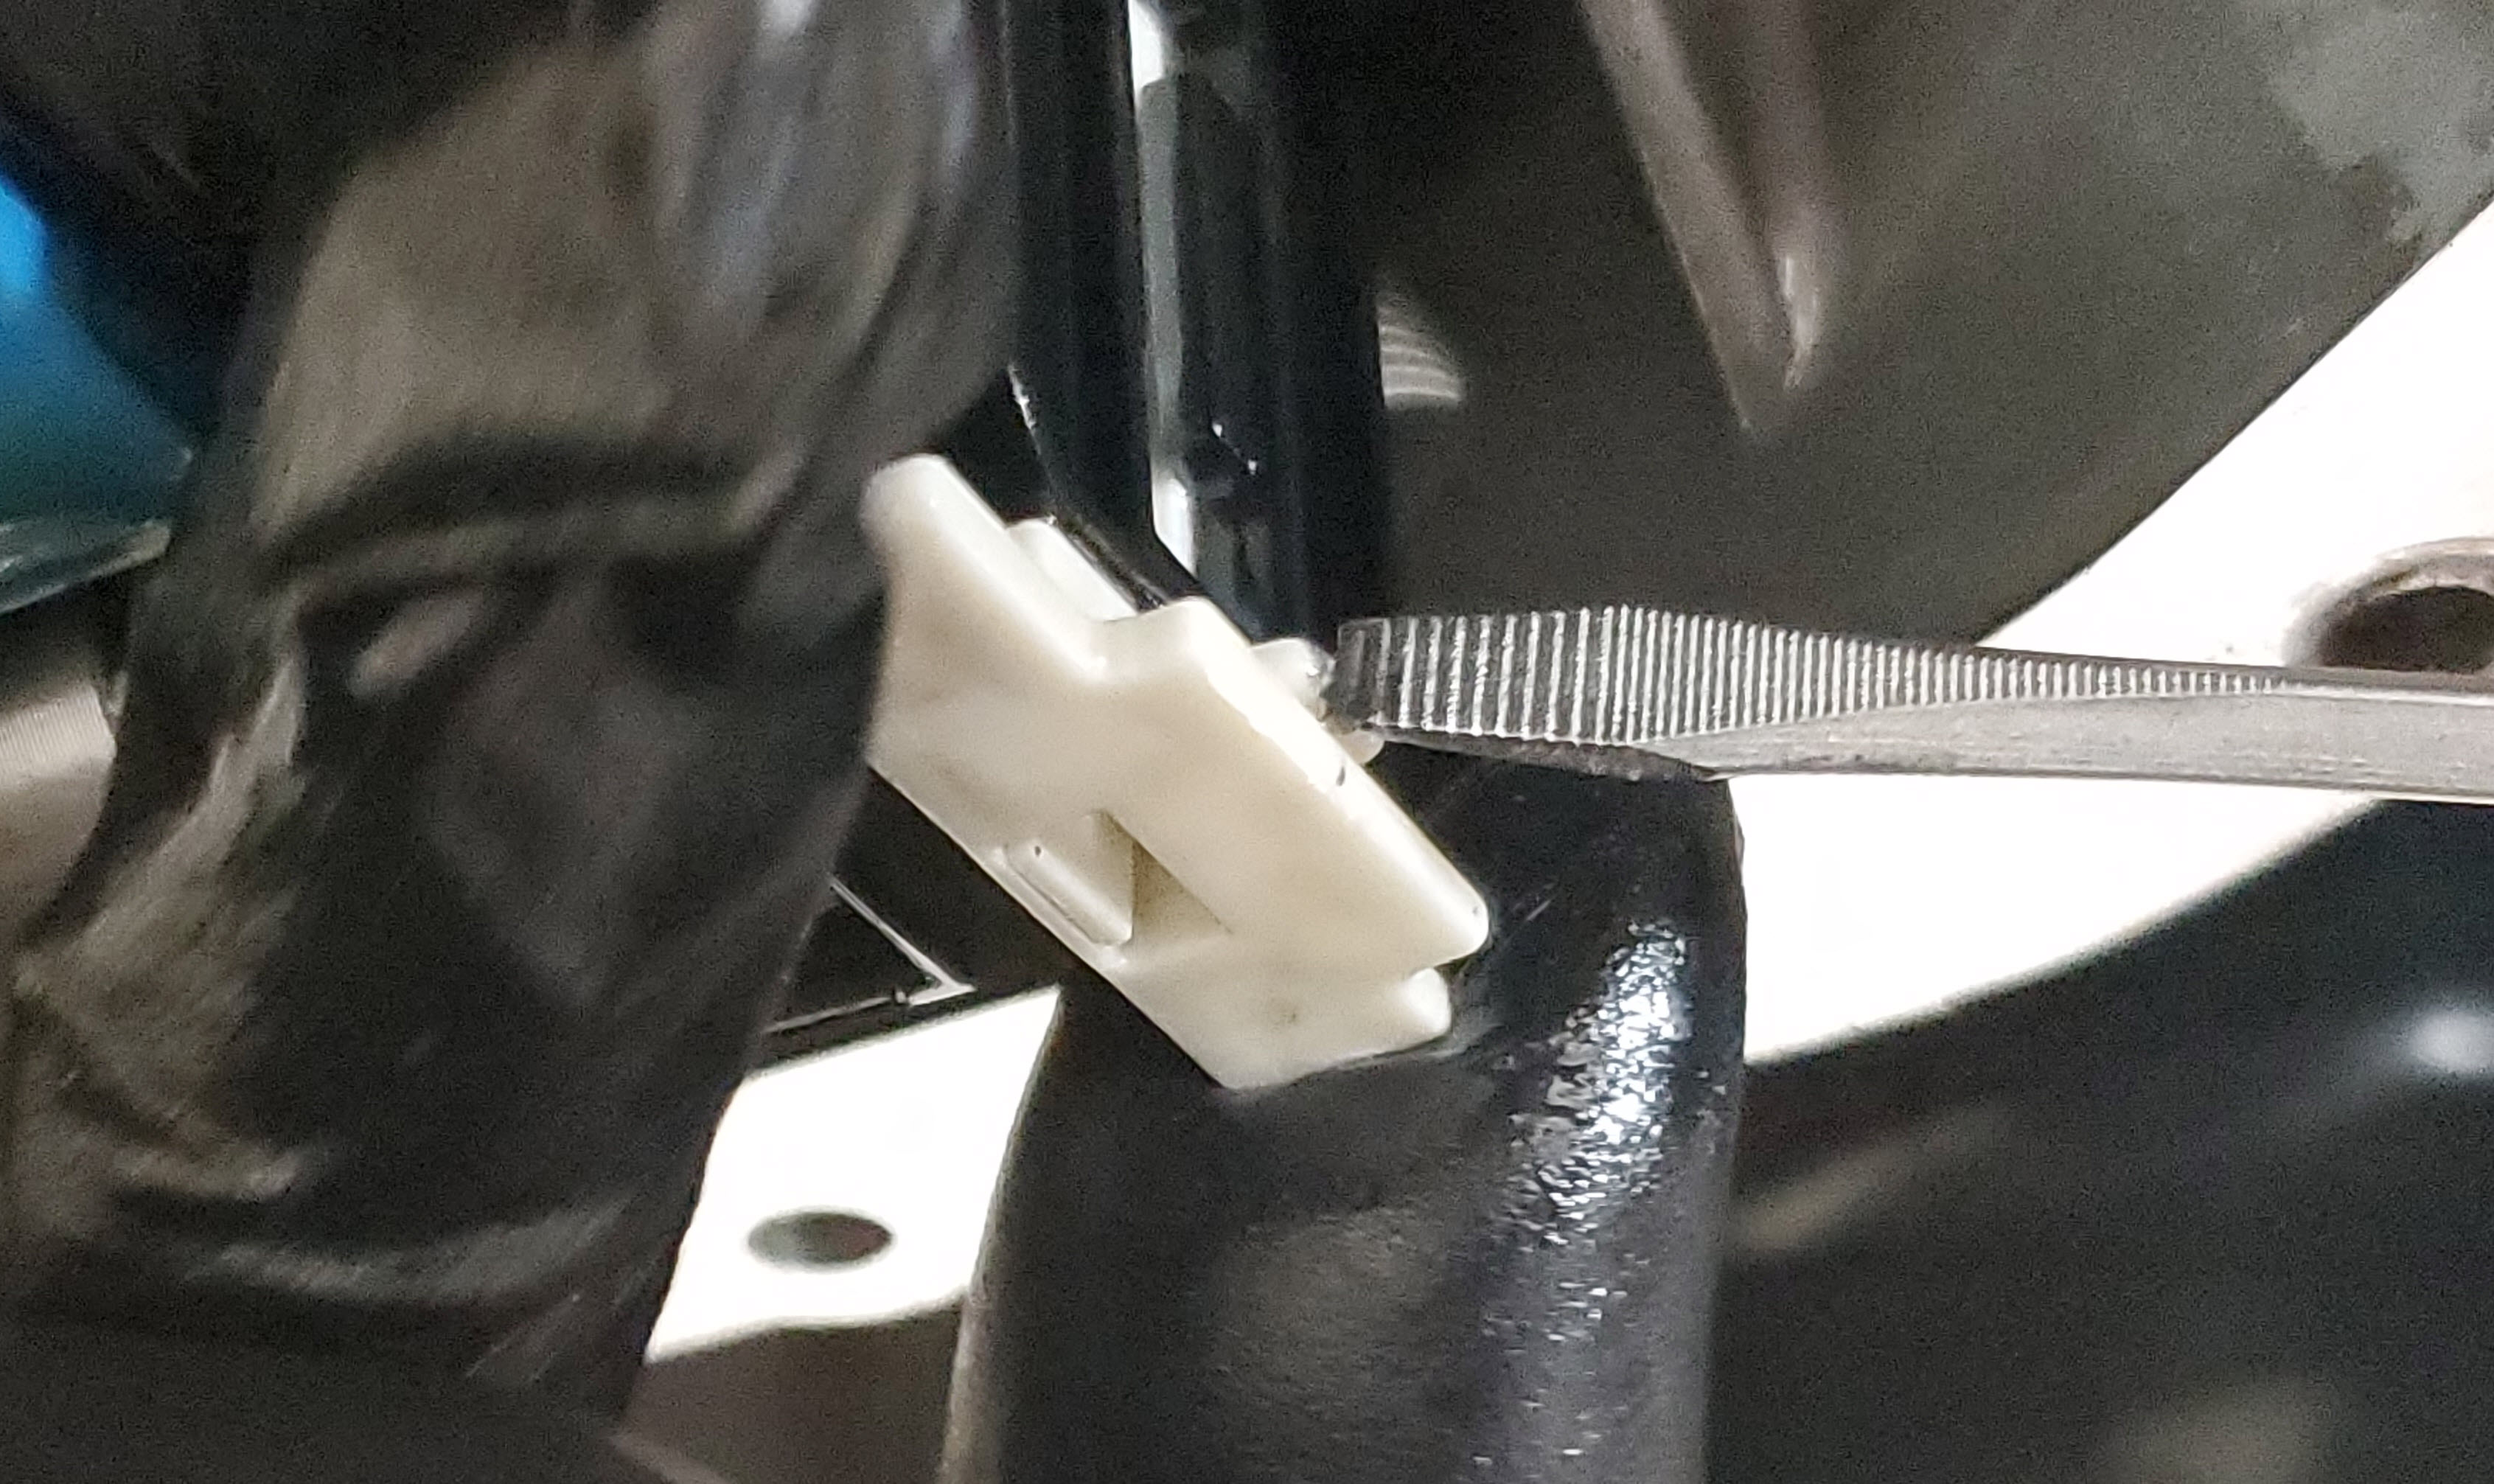
- Release the Mechatronics interlock
- The electronics sleeve is linked to the mechatronics unit.
- On the right rear corner of the mechatronics unit you will see a white tab that is the electronics sleeve release lever.
- In the center of the level there is a small nub/tab that prevents it from accidentally undoing.
- Press the nub/tab in gently (all of this is plastic, so be gentle)
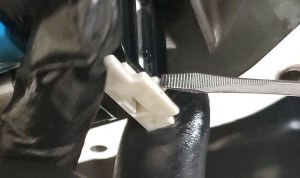
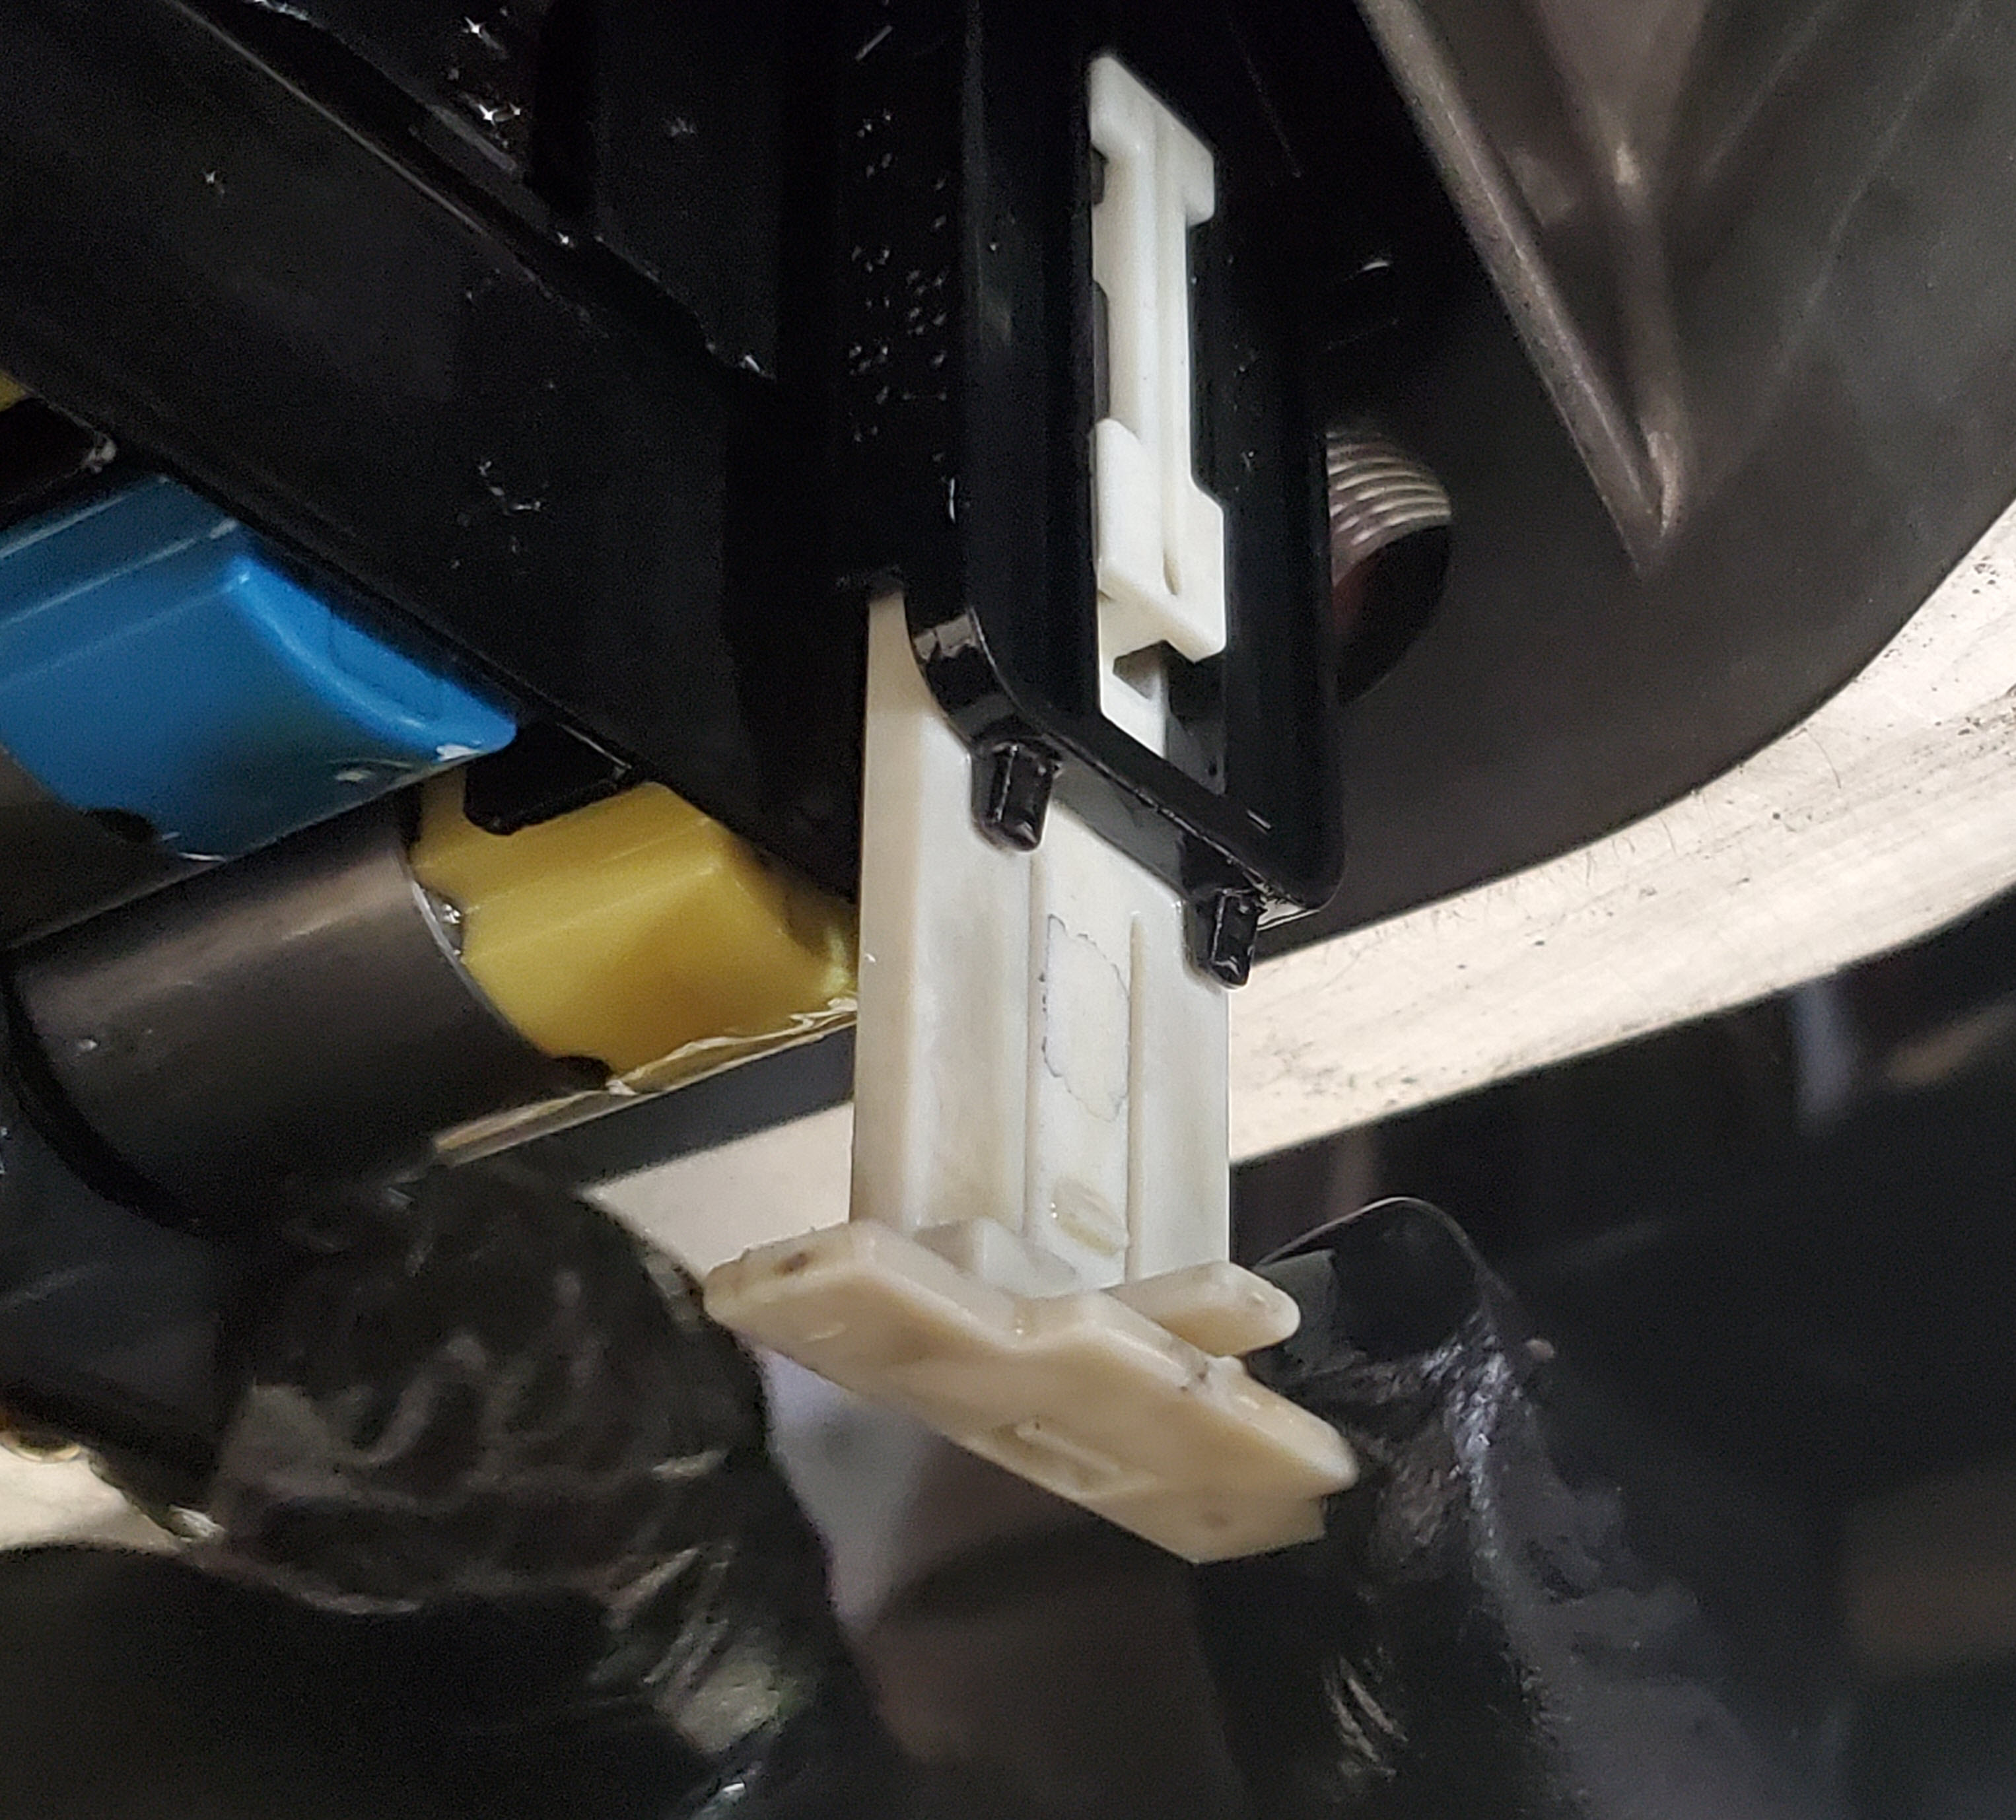
- Simultaneously pull the interlock lever straight down.
- It should move easily. If it doesn’t, don’t yank on it. Double check you have the nub/tab pressed in far enough to release it.

- It should move easily. If it doesn’t, don’t yank on it. Double check you have the nub/tab pressed in far enough to release it.
- Once its pulled down, that’s it, you’ve released the interlock.
- Remove the Electronics Sleeve
- With the interlock released, the electronics sleeve should be free to pull straight out.

- If the O-rings were ‘fresh’ there might be a little resistance. Mine were crap, and the sleeve pulled straight out with very little effort.
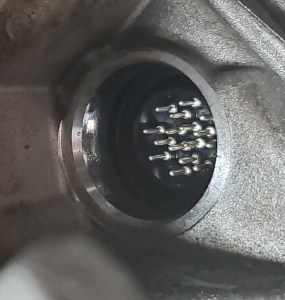
View of the electrical pins for the Mechatronics Unit after the Sleeve is removed
- With the interlock released, the electronics sleeve should be free to pull straight out.


That’s it – the sleeve out. Now you can get on with whatever is next in your project. Perhaps replacing the sleeve or doing the full Mechatronics Unit removal to replace the seals. Check out my article on how to remove the Mechatronics Unit here.
Video
You can see exactly how I removed the electrical connector and sleeve as part of my video on draining the fluid from the transmission. You can see me disconnecting the electrical connector at the 6:03 mark of the video:
You can see me releasing the interlock and removing the sleeve at the 22:00 mark.
