
If your DB9 needs it’s Positive Crankcase Ventilation (PCV) Valves replaced due to oil buildup in the Intake Manifolds (see my full article on this) then you need to track down the right parts to get it serviced – and that’s what this article is all about.
My enthusiasm for the task led me into trouble (and I can save you from the same mistake if you read through this article). I wasn’t sure what parts a dealer would normally replace to deal with the oil build up, so I asked the parts manager Rob Sims at HMV England whom I was dealing with. He promptly sent me the parts diagram, and a list of bits he said they typically serviced. What I failed to consider was ‘context’, the dealer may be rebuilding an engine and PCV system outside the car, and I was just a newbie trying to do this under the hood on a weekend.

The actual PCV valve is just a small Ford part [probably why it is problematic] and you need two of them. BUT, it’s actually part of an octopus collection of pipes and hoses that comprise the routing for the gases. In my background article on this (really, give it a quick read) I go into this in detail, but the short version is that crankcase gases are sucked into the air intake system vacuum to be burned, and fresh filtered intake air is supposed to be allowed to be drawn back in to the crankcase replace it. The PCV valves job is to be a one-way valve to only allow crankcase gases to flow out, and it can wear out over time.

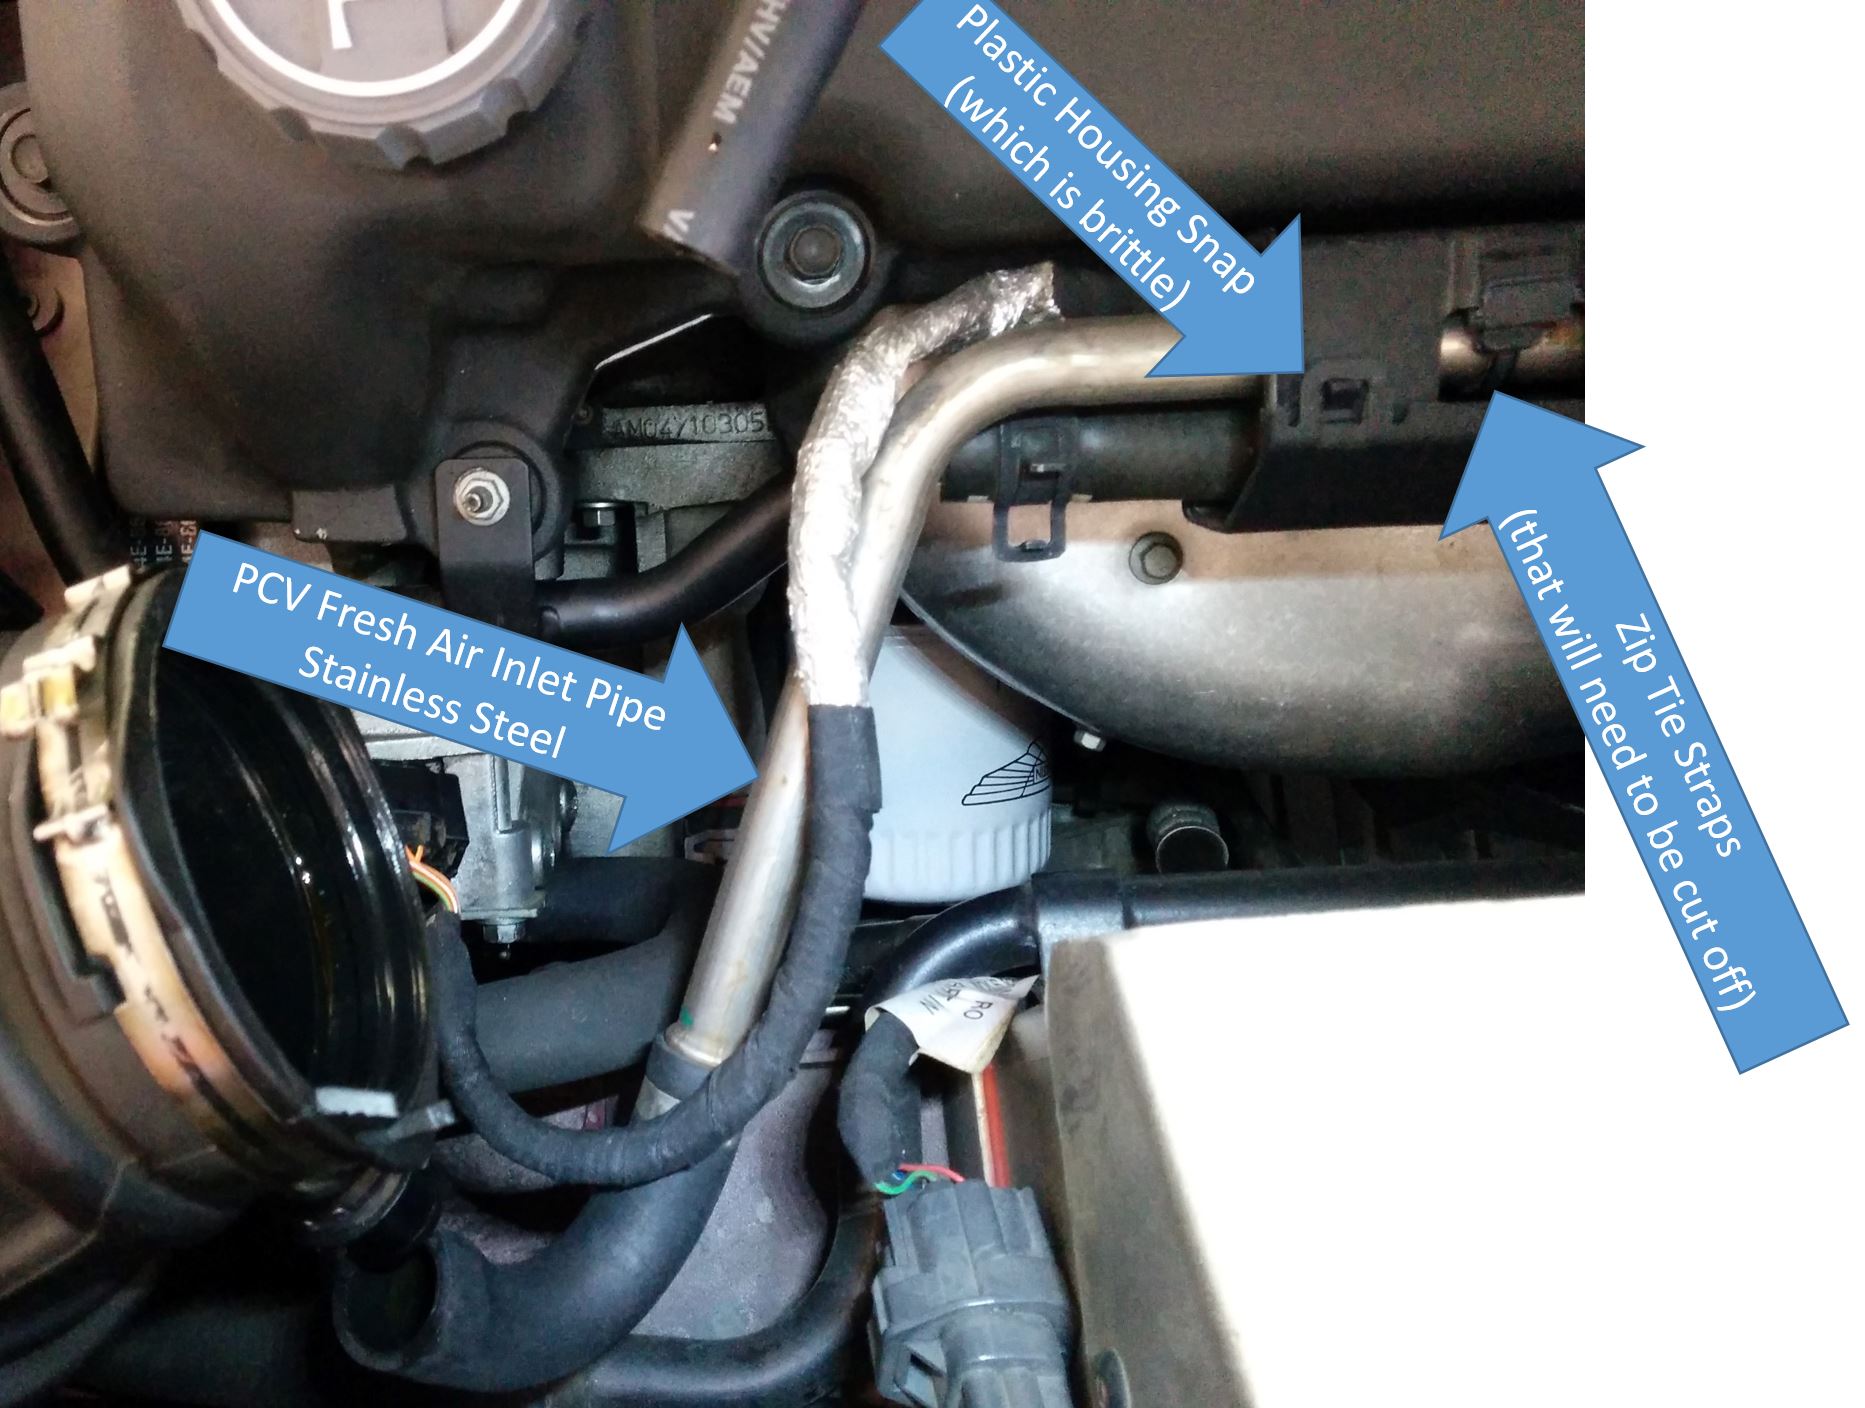
Back to the Mistake. I bought ALL the pipework, gaskets and valves (I’m talking about 10 separate parts for several hundred dollars). I figured if I was going to all the hassle to get into the guts of the engine, I might as well replace all the bits now to be sure. Rookie mistake [that you will now avoid]. You can’t even service some of the parts without removing the cylinder heads! For example, you can’t remove the Oil separators in the V of the engine block without removing at least one cylinder head, and there is probably no need since they are just cans. To replace the fresh air inlet pipes that run along just above the exhaust manifolds is a quagmire. You’ll need to open the heat shield ducting (and the clips are plastic and feel brittle and I was afraid to pop them open for fear of breaking the assembly), chop some special tie-wraps with clips (which I didn’t have), and basically mangle a bunch of expensive bits to replace a stainless steel pipe that’s likely just fine. My suggestion is don’t bother unless one of yours is broken [and if you do need them, contact me since I have them left over and for sale!].
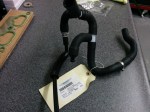
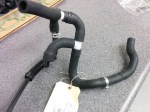
What I did replace was the center octopus bit. Essentially two large Vacuum Harness assemblies and a clamp. These two assemblies made up what I think matters, and INCLUDED the simple little PCV valves. So, I had ended up buying the PCV valves separately and as part of the assemblies. Yeesh! So, I am going to recommend the slightly more expensive (but simpler) route of changing the two assemblies (Option 2 below), but if you were suitably motivated you could remove your octopus, cut the clamps, pryse out and replace the simple PCV valves, reassemble the octopus and add some new clamps. Anyways, sorry for this ragged description, but check out the photos below to see what I mean.
The Parts
Option #1 – Just replace the PCV Valves

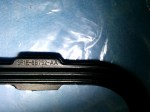
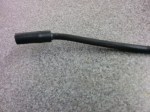
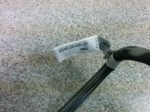
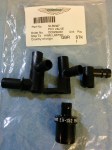
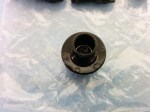
This is just the valve, and you would buy these if you planned on taking apart your octopus assembly (as noted above) and just replacing the PCV valve bodies. If taking this path, you DON’T need the assemblies below (in option 2), but you will need the hose clamps since I can’t see how you could possibly change these in the car, and you’ll be forced to remove the existing octopus assemblies by cutting out the crimp clamps.
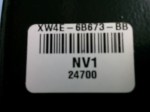
You need a quantity of two (2), and they are Aston Martin part number 34-85327, and can be found online for about $51 USD each. If you contact Rob Sims of HWM England they should cost about $31 USD each (let him know you read about it here).
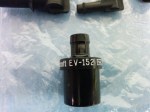
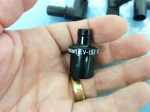
Honestly, if you are going this route I’ve discovered you’d be nuts to buy them from Aston Martin. This is just a Ford Motocraft part EV-152 (you can see it embossed right on the valve). You can get it from Amazon.com for a mere $12 USD with free Prime shipping. Save the money and buy them from Amazon.
Note: Each PCV Valve comes as a kit with three plastic fittings. You won’t use these, they are just generic Ford adapters.
In my next article I will show you how to change just the PCV Valves out (on a work bench).
Don’t forget, if you are going with Option 2 below, you DON’T need to buy these separately!
Option #2 – Replace the PCV Vacuum Harness Assemblies (my recommended method)
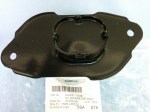
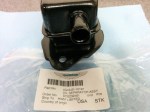
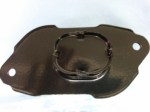
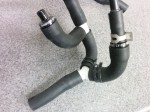
If you want to replace the entire octopus of rubber hoses and plastic pipes that has been baking in the engine area, you need just three parts. This method is simpler and more thorough I think than option #1 above, but costs about $100 USD more.
Part 1
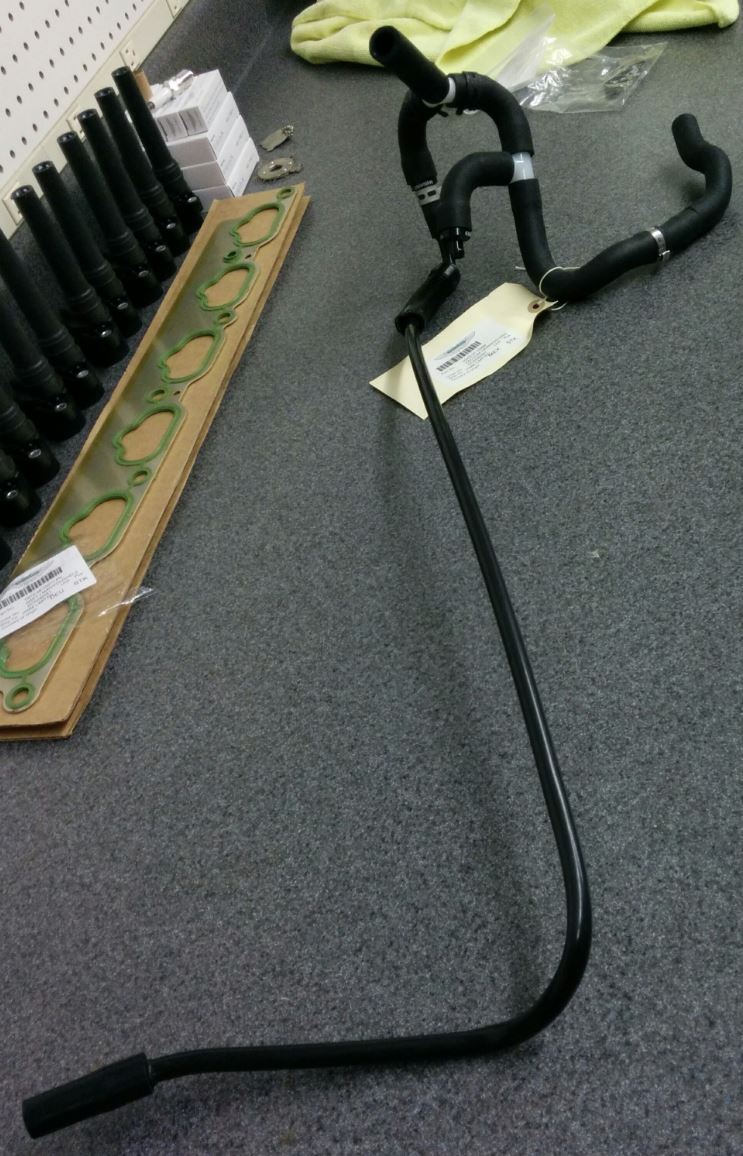
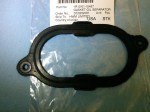
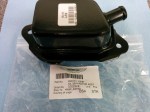
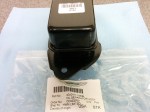
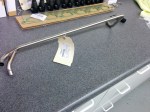
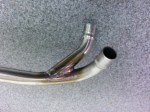
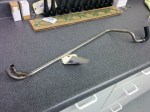
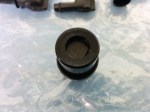
What I call the main octopus chunk, comprised of a series of hoses, the 2 PCV valves, and some rigid plastic tubing. See the detailed close-up photos below for more detail.
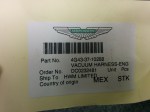
This is Aston Martin p/n 4G43-37-10288 and it can be found online for about $170 USD. If you contact Rob Sims at HWM England you can save a bunch of dollars and get it for about $96 USD.
Remember, this assembly includes BOTH the PCV valves already installed.
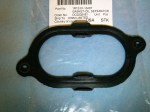
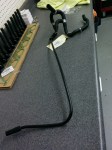
Part 2

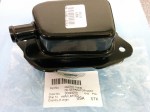
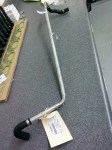
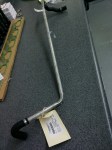
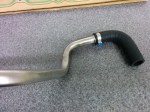
Since the octopus part above includes the left side plastic suction line to the intake (just behind the throttle body on the intake manifold) I opted to replace the right side plastic suction line as well. This plastic line ‘bakes’ between the intake manifold and cylinder head all the time. See the more detailed close-up photos below.
This is Aston Martin p/n 4G43-37-10291 and it can be found online for about $53 USD. If you contact Rob Sims at HWM England you can save a bunch of dollars and get it for about $30 USD.
Strictly speaking this does not need to be replaced and could be reused from your previous one.
Part 3

The final part is just a simple 1” diameter hose clamp to replace the one on the right side you have to cut off to remove the old octopus Part 1. The one from Aston Martin is a fancy crimp style Oetiker Clamp (which I purchased not knowing it was so special), but I have neither the correct tool, nor do I believe there would be space to use the tool where the clamp needs to be tightened in place.
If you want to use this style it is an Aston Martin p/n 702828. Available online for about $0.71 USD, or a little cheaper for $0.42 USD each from Rob Sims at HWM England.
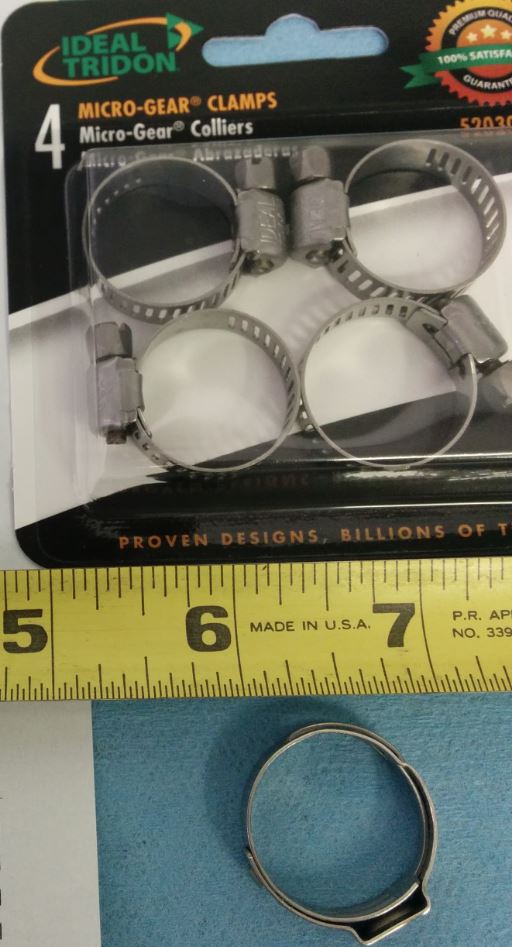 I went out to the local auto parts store and bought a 1” diameter easy to install band clamp, and this should suffice fine since this hose is a low vacuum air line. I purchased a four pack from my local Pepboys store for about $2.49 USD (about 62 cents each).
Up Next
I have NOT prepared videos for the PCV change in the car. I didn’t really know how to do it at the time, and wasn’t prepared to shoot a competent video segment essentially until I had finally figured it out already on the car (while I was changing my Coil Packs and Spark Plugs), and lacked the drive to tear it all apart again and shoot video. But, I did take a copious set of photos and will describe it all in detail.
[Updated: An avid reader of the site Mike Potts took it upon himself to shoot some video while he was doing the work on his car following along with the instructions. He was kind enough to share it with me, so there are now videos to go with the articles. Thanks Mike!]
In my next articles I will explain how to change out the parts from both Option 1 and Option 2.
- Removing the PCV Valve Vacuum Harness Assembly
- Changing the PCV Valves
- Installing the PCV Valve Vacuum Harness Assembly
Video
Here is a video taking you through the various parts and piece:
Bonus Feature
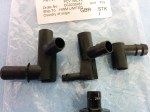
Since I had purchased ALL the parts and had them on hand anyways, I’ve take high resolution photos of them all. Someone always asks about one of the parts, so here they are in all their glory. Hope this helps.


Is there a method to determine whether or not your valves are defective?
LikeLike
I think I mentioned it, but two approaches. Check your intake manifolds for oil build up, and once you have your valves remvoved, you can try blowing through them in both directions. One should blow easily, the other should plug entirely. If air goes both ways, then the valve is worn out. But, since you’ve done all the work to get to it, might has well change it since its so inexpensive.
LikeLike
Steve,
2 thoughts come to mind:
1- Are the duck bill valve hoses included in parts for option #2? If not do you have part #s to replace those?
2- If catch can is installed, does that basically replace/improve the separators or the PCV valves?
Mike
LikeLike