
In previous articles I’ve described how engine oil can build up in your intake manifolds of your Aston Martin DB9 due to malfunctioning PCV valves (made by Ford of course) and how the PCV system is supposed to work. In another article, I have covered what parts you would need to order to deal with this, and it included two (2) options; Option 1 is the lowest cost and just swaps the PCV valves themselves, and; Option 2 is my recommended option that swaps the Vacuum Harness Assembly, which happens to also contain the PCV valves. This article will cover both options.
How Aston Martin Says to Do It
The official Aston Martin Workshop Manual section 3.08 covers the emission system. They describe how the system is supposed to work, but has absolutely NOTHING about how to change the PCV Valves (or service it in any way). It has a great diagram, and at least you can see where they are (vaguely).

I also checked out the Parts manual page 030800-E1 on the Engine Emission Systems, which give a nice exploded view and the part numbers (which helps to understand what chunks are serviceable). If you are interested, in Option 1 we are just swapping out the PCV Valves shows as item 2 on the diagram, and in Option 2 we are swapping the whole vacuum harness assembly shown as item 1 on the diagram.

Since Aston hasn’t told us how to do the service work, on with my versions….
Option 1 – Manually replacing the individual PCV Valves
This option just replaces the $12 valves and reuses all the other vacuum harnesses and pipes. This is certainly the cheapest path, but is more work since you have to remove the existing harness and then pryse them out.
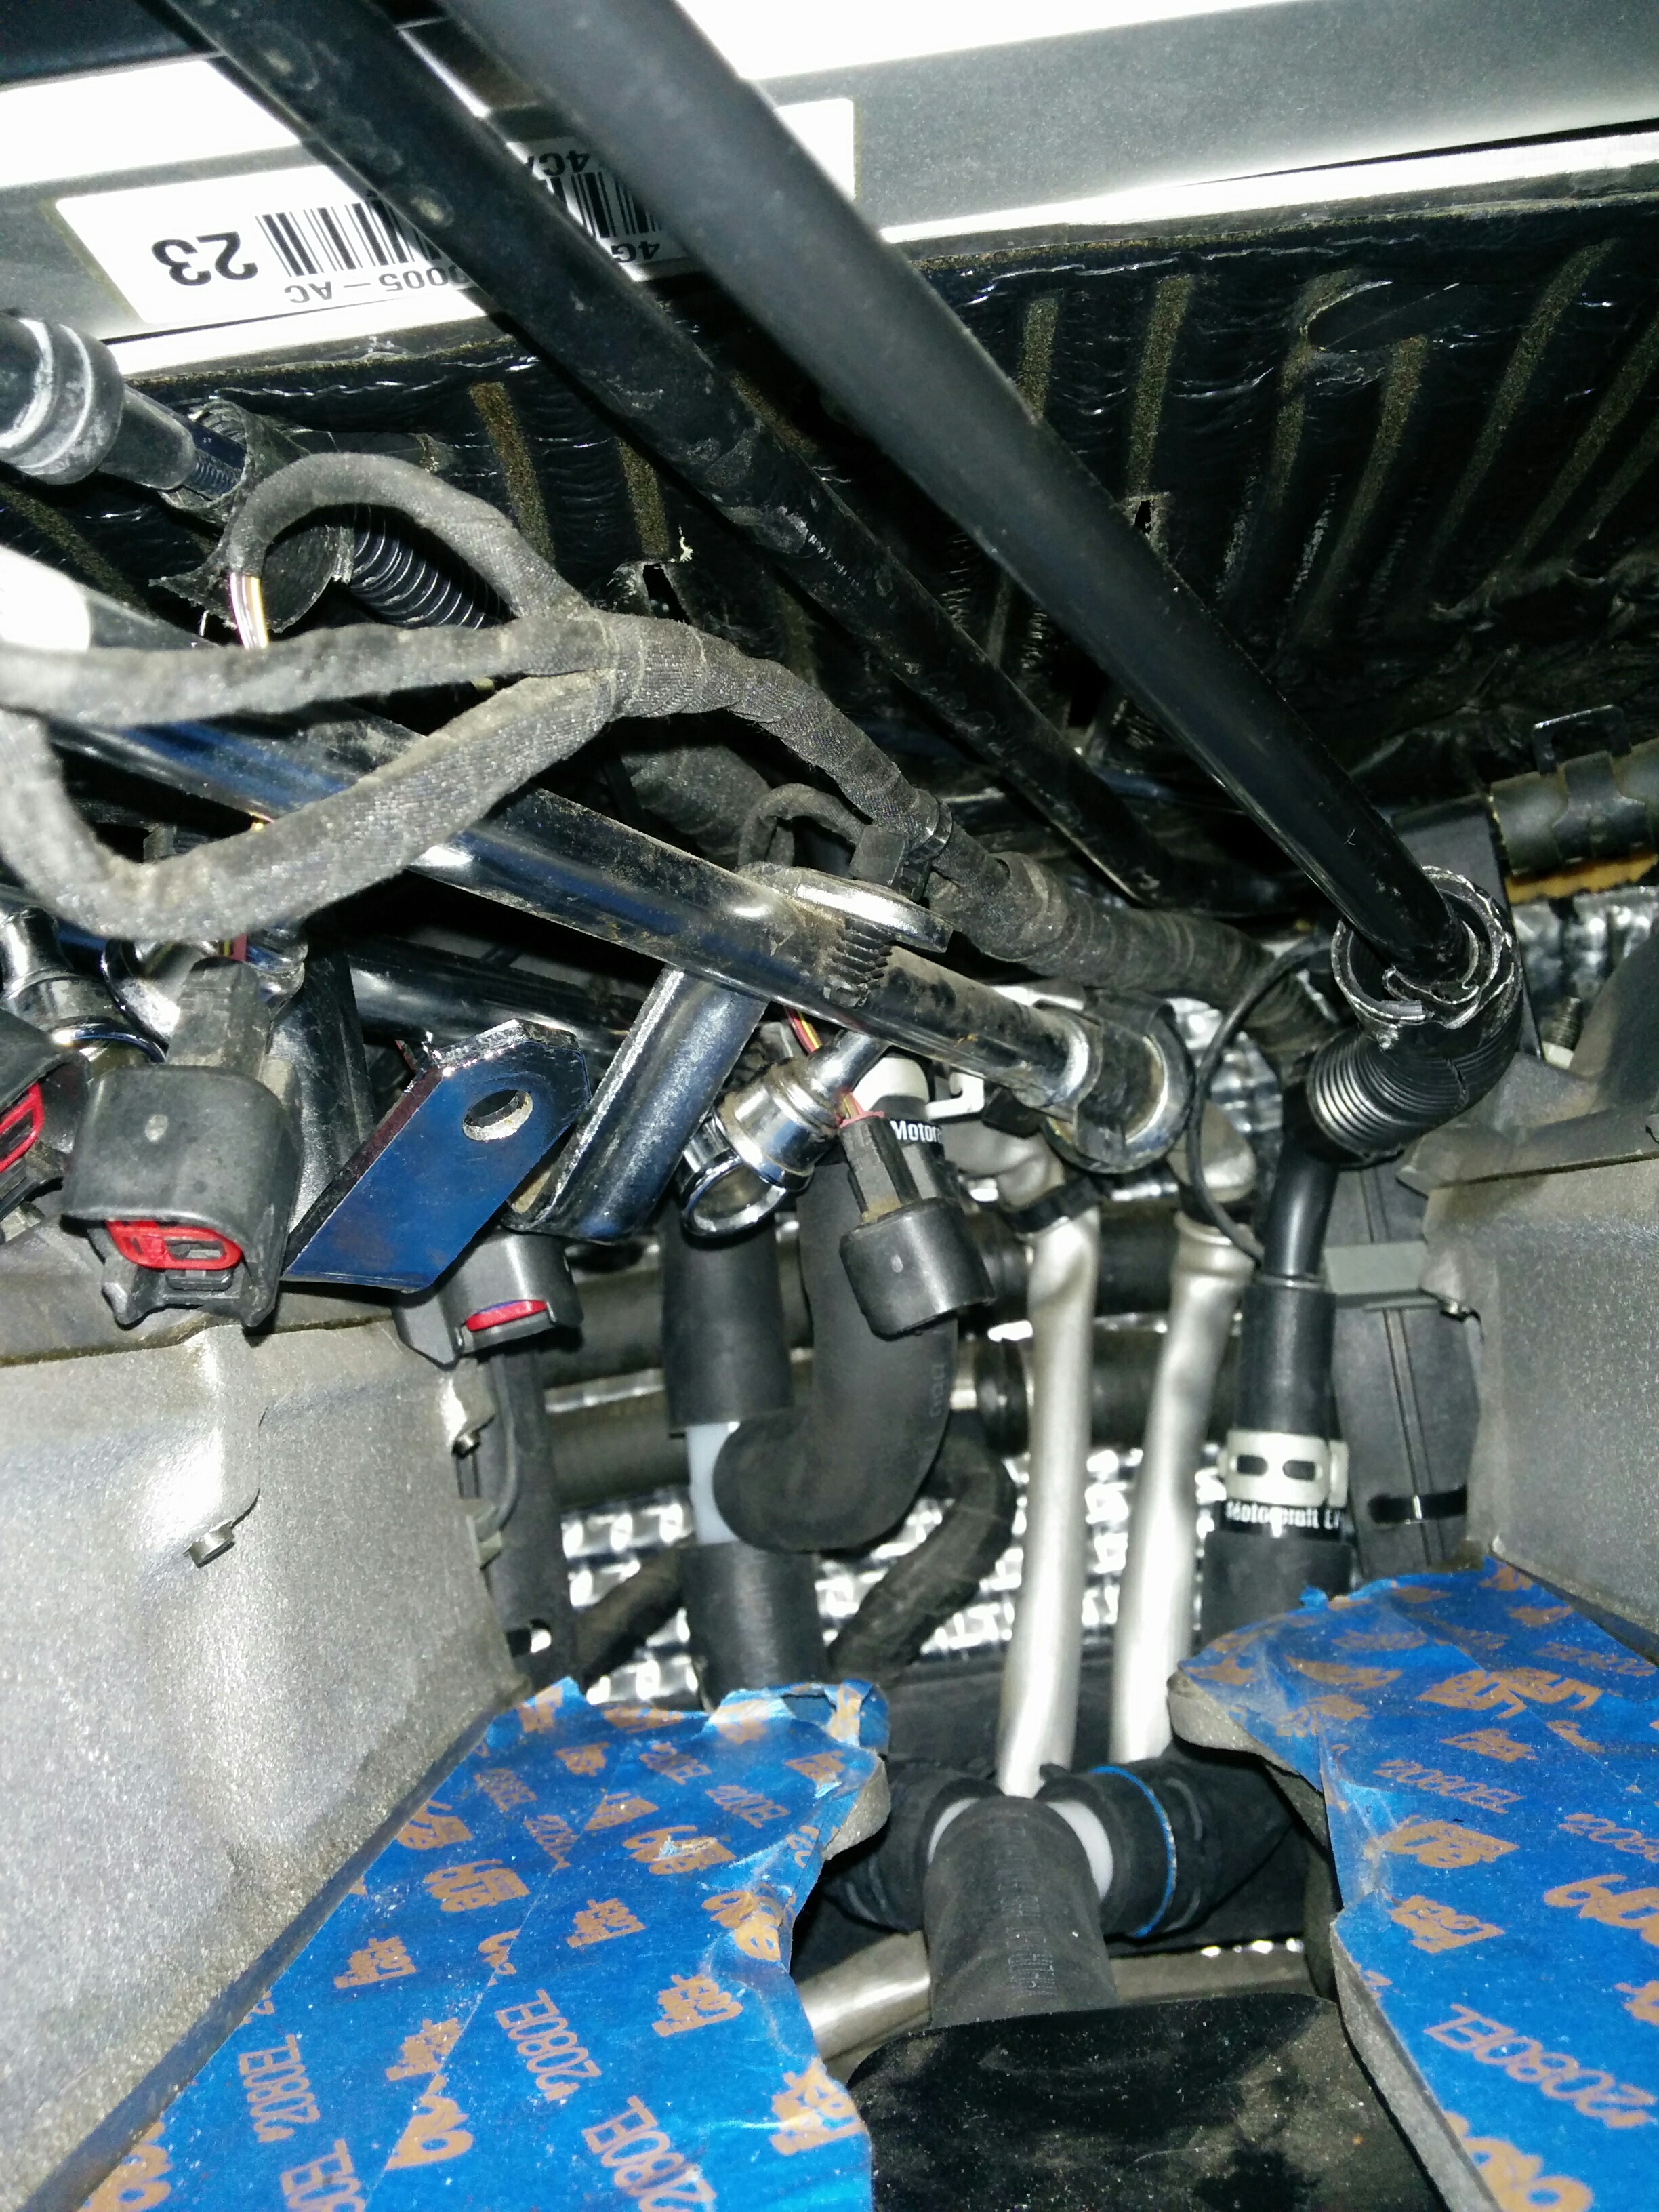
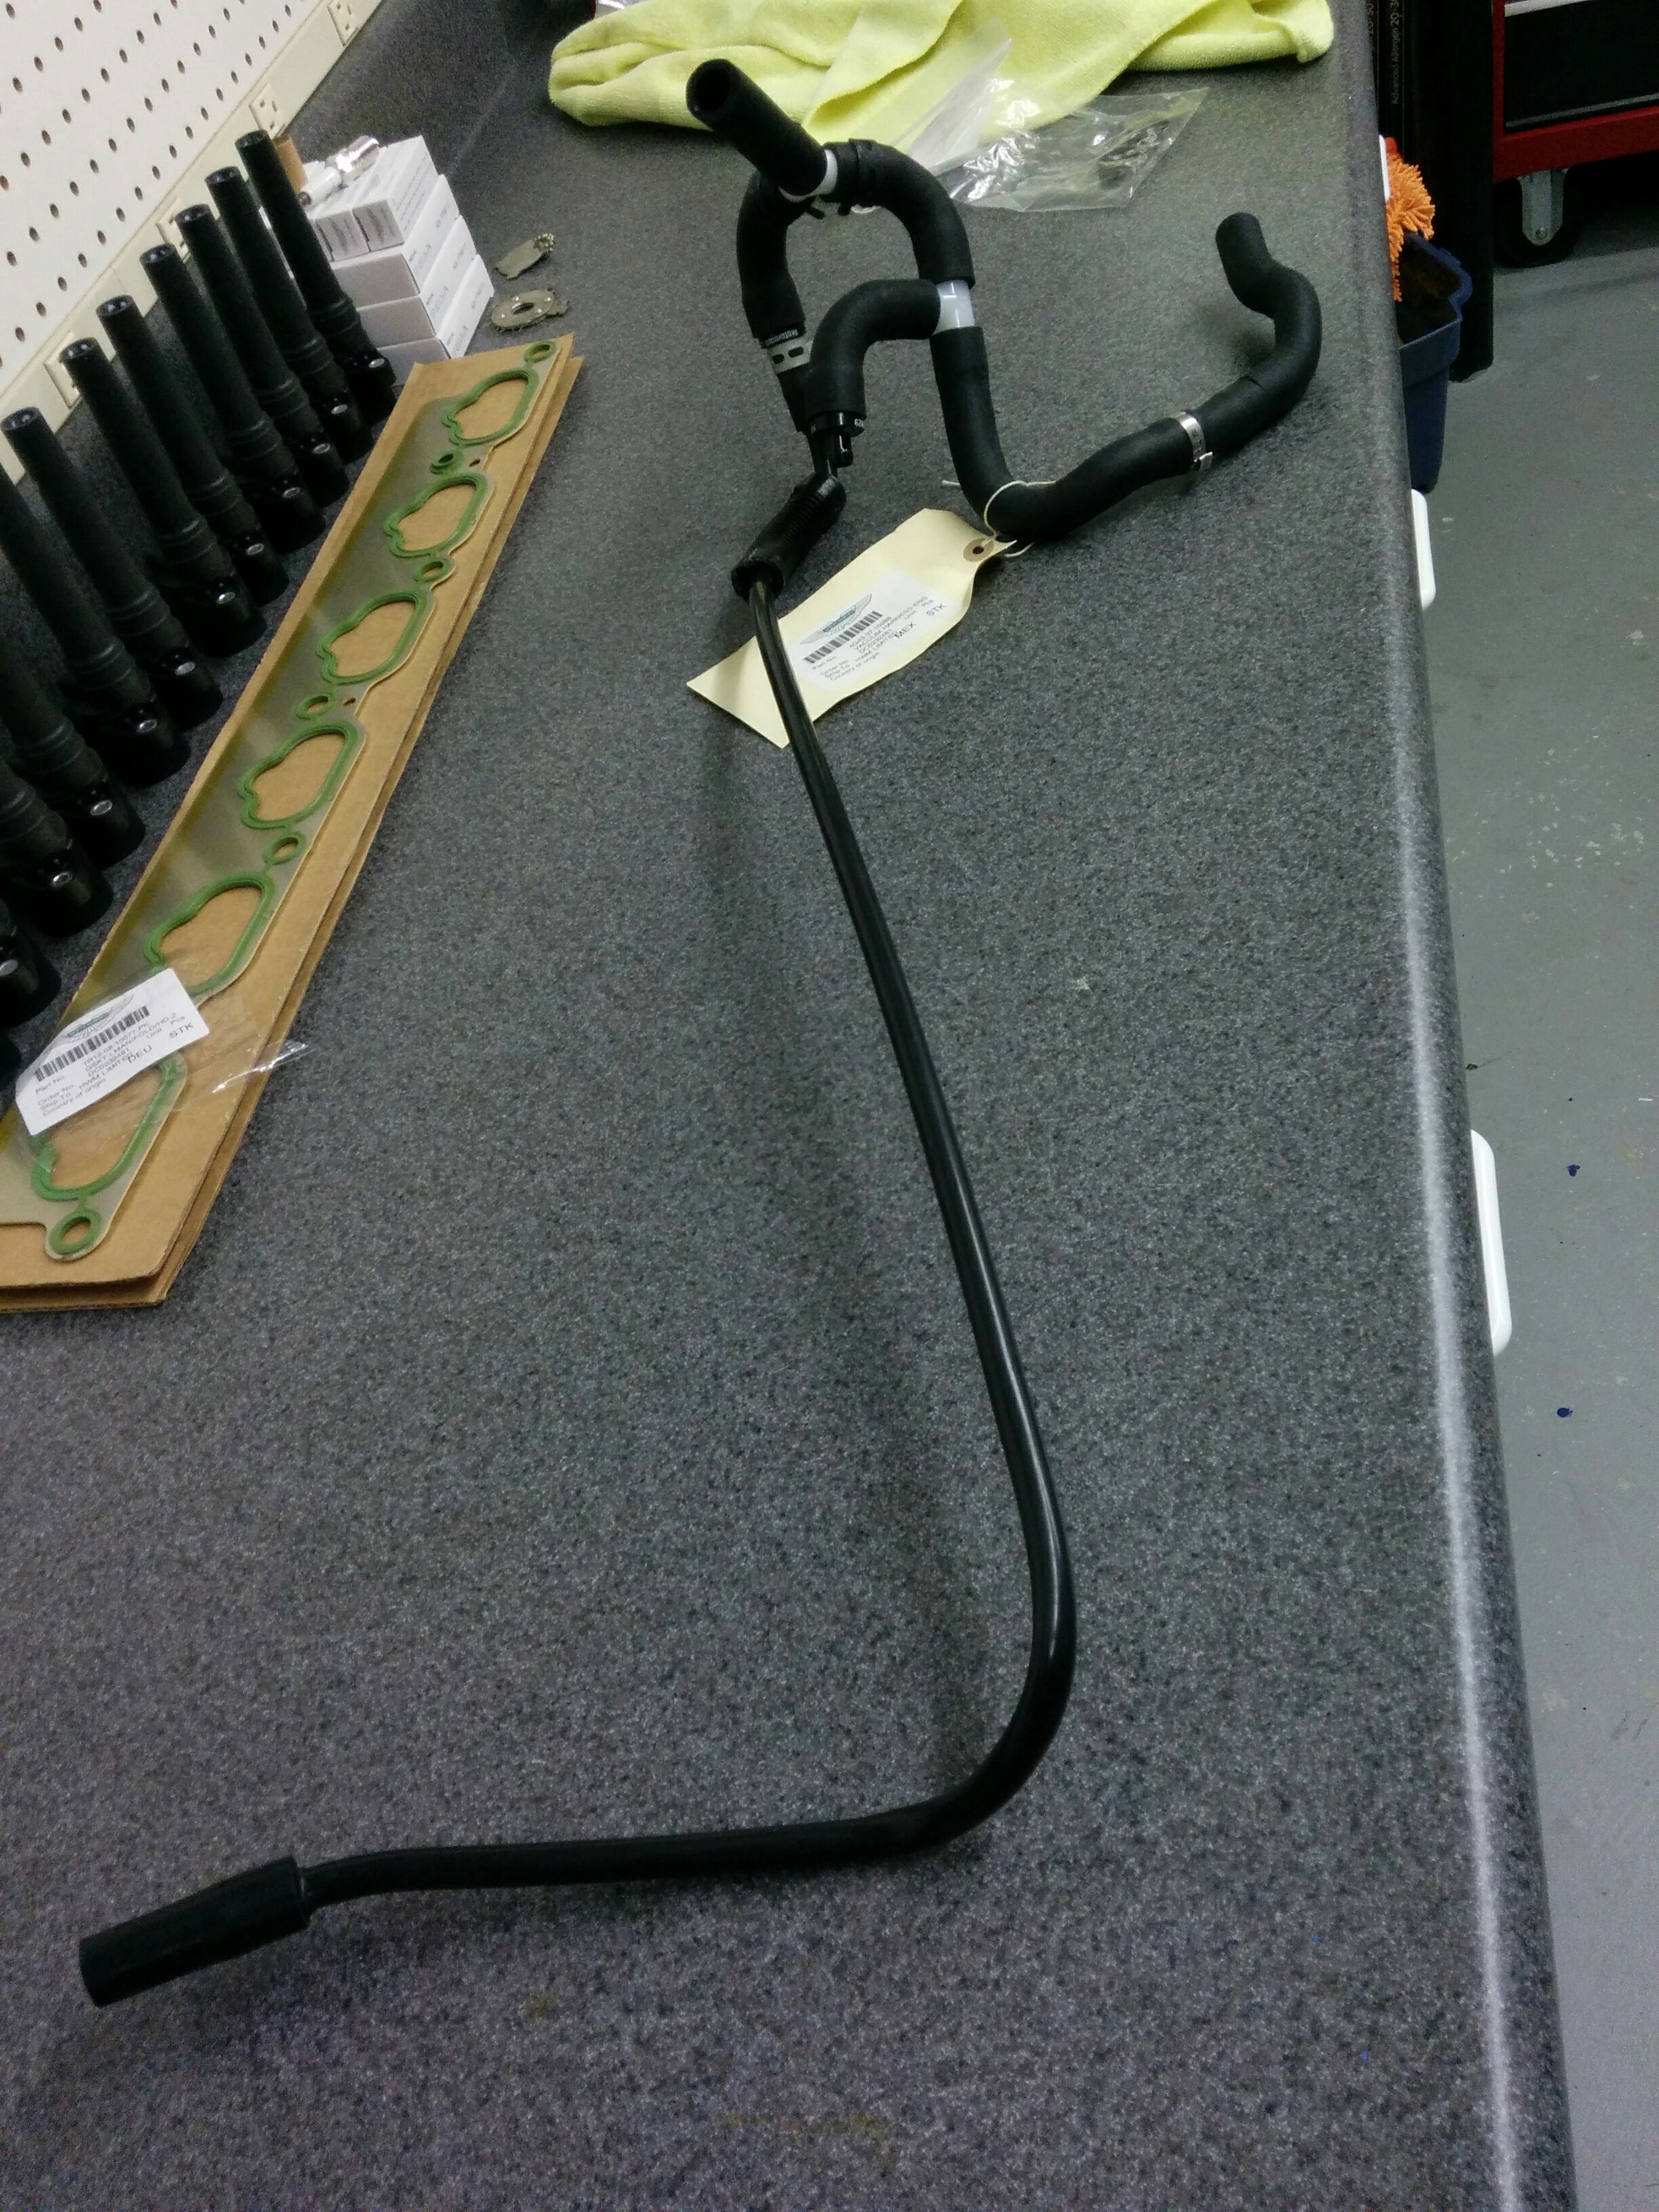
Doing this in situ is mission impossible. Here is a photo of where the valves are, buried 8 inches (20 cm) back underneath the cowl. I think the only reasonable chance of doing this is to remove the entire Vacuum Harness (the part I am describing in Option 2), and then replacing the valves on the workbench. Here’s how.
Tools Required
 To change out the PCV valves in your existing Vacuum Harness all you will need is:
- Medium Flat blade screwdriver
- Pliers
- Gasket sealer
- Rag
Procedure
I’ve glossed over the fact so far that there is a ton of work to get into the area where the PCV valves are kept. I was doing this at the same time as changing my coil packs and spark plugs. If you are just servicing your PCV valves you’ll still need to do ALL of the following procedures before getting to the PCV valves:
- Purchase your parts
- Access the Cabin Fusebox
- Depressurize the fuel system
- Disconnect the battery
- Install Fender covers
- Remove the engine bay cross braces
- Remove the intake manifold center brace
- Disconnect the fuel rails and remove the fuel injectors
- Disconnect the ancillaries connected to the Intake Manifolds
- Remove the Intake Manifolds (including the dreaded rear bolts)
- Remove the PCV Valve Vacuum Harness Assembly
With the Harness assembly that contains the two PCV valves now removed from the engine and sitting on the bench, we can commence with changing them out.
Remove the Valves
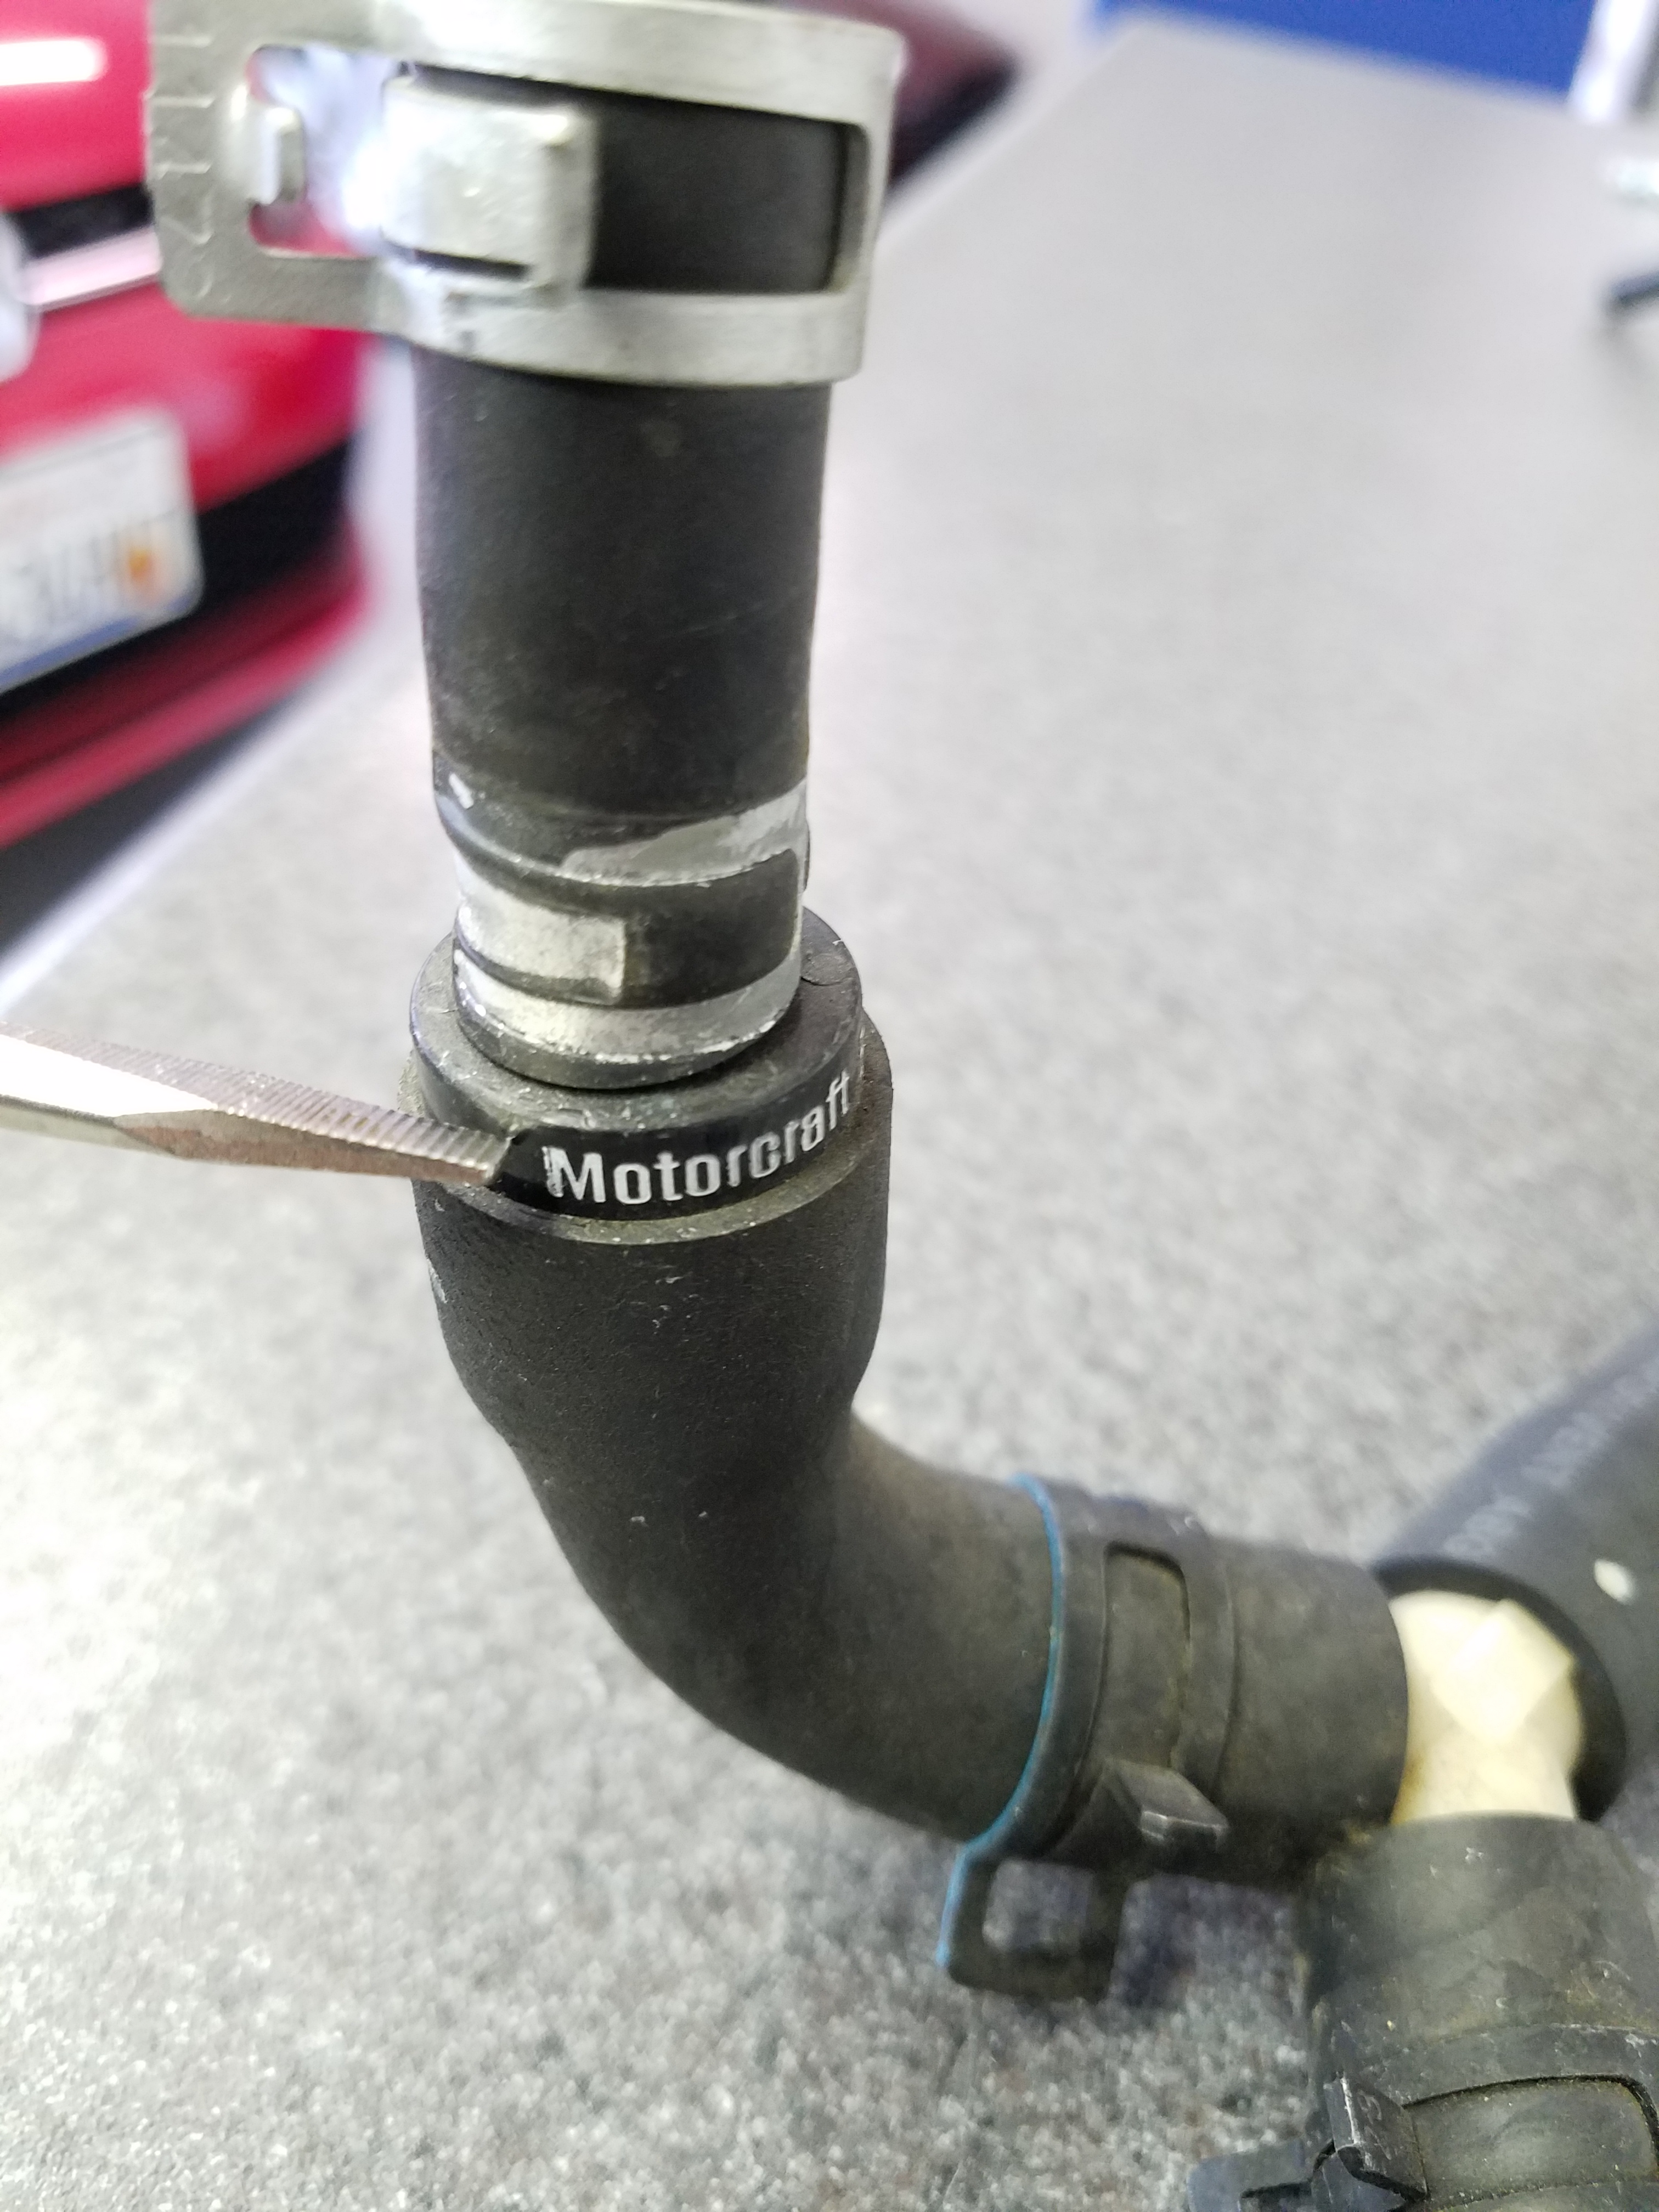
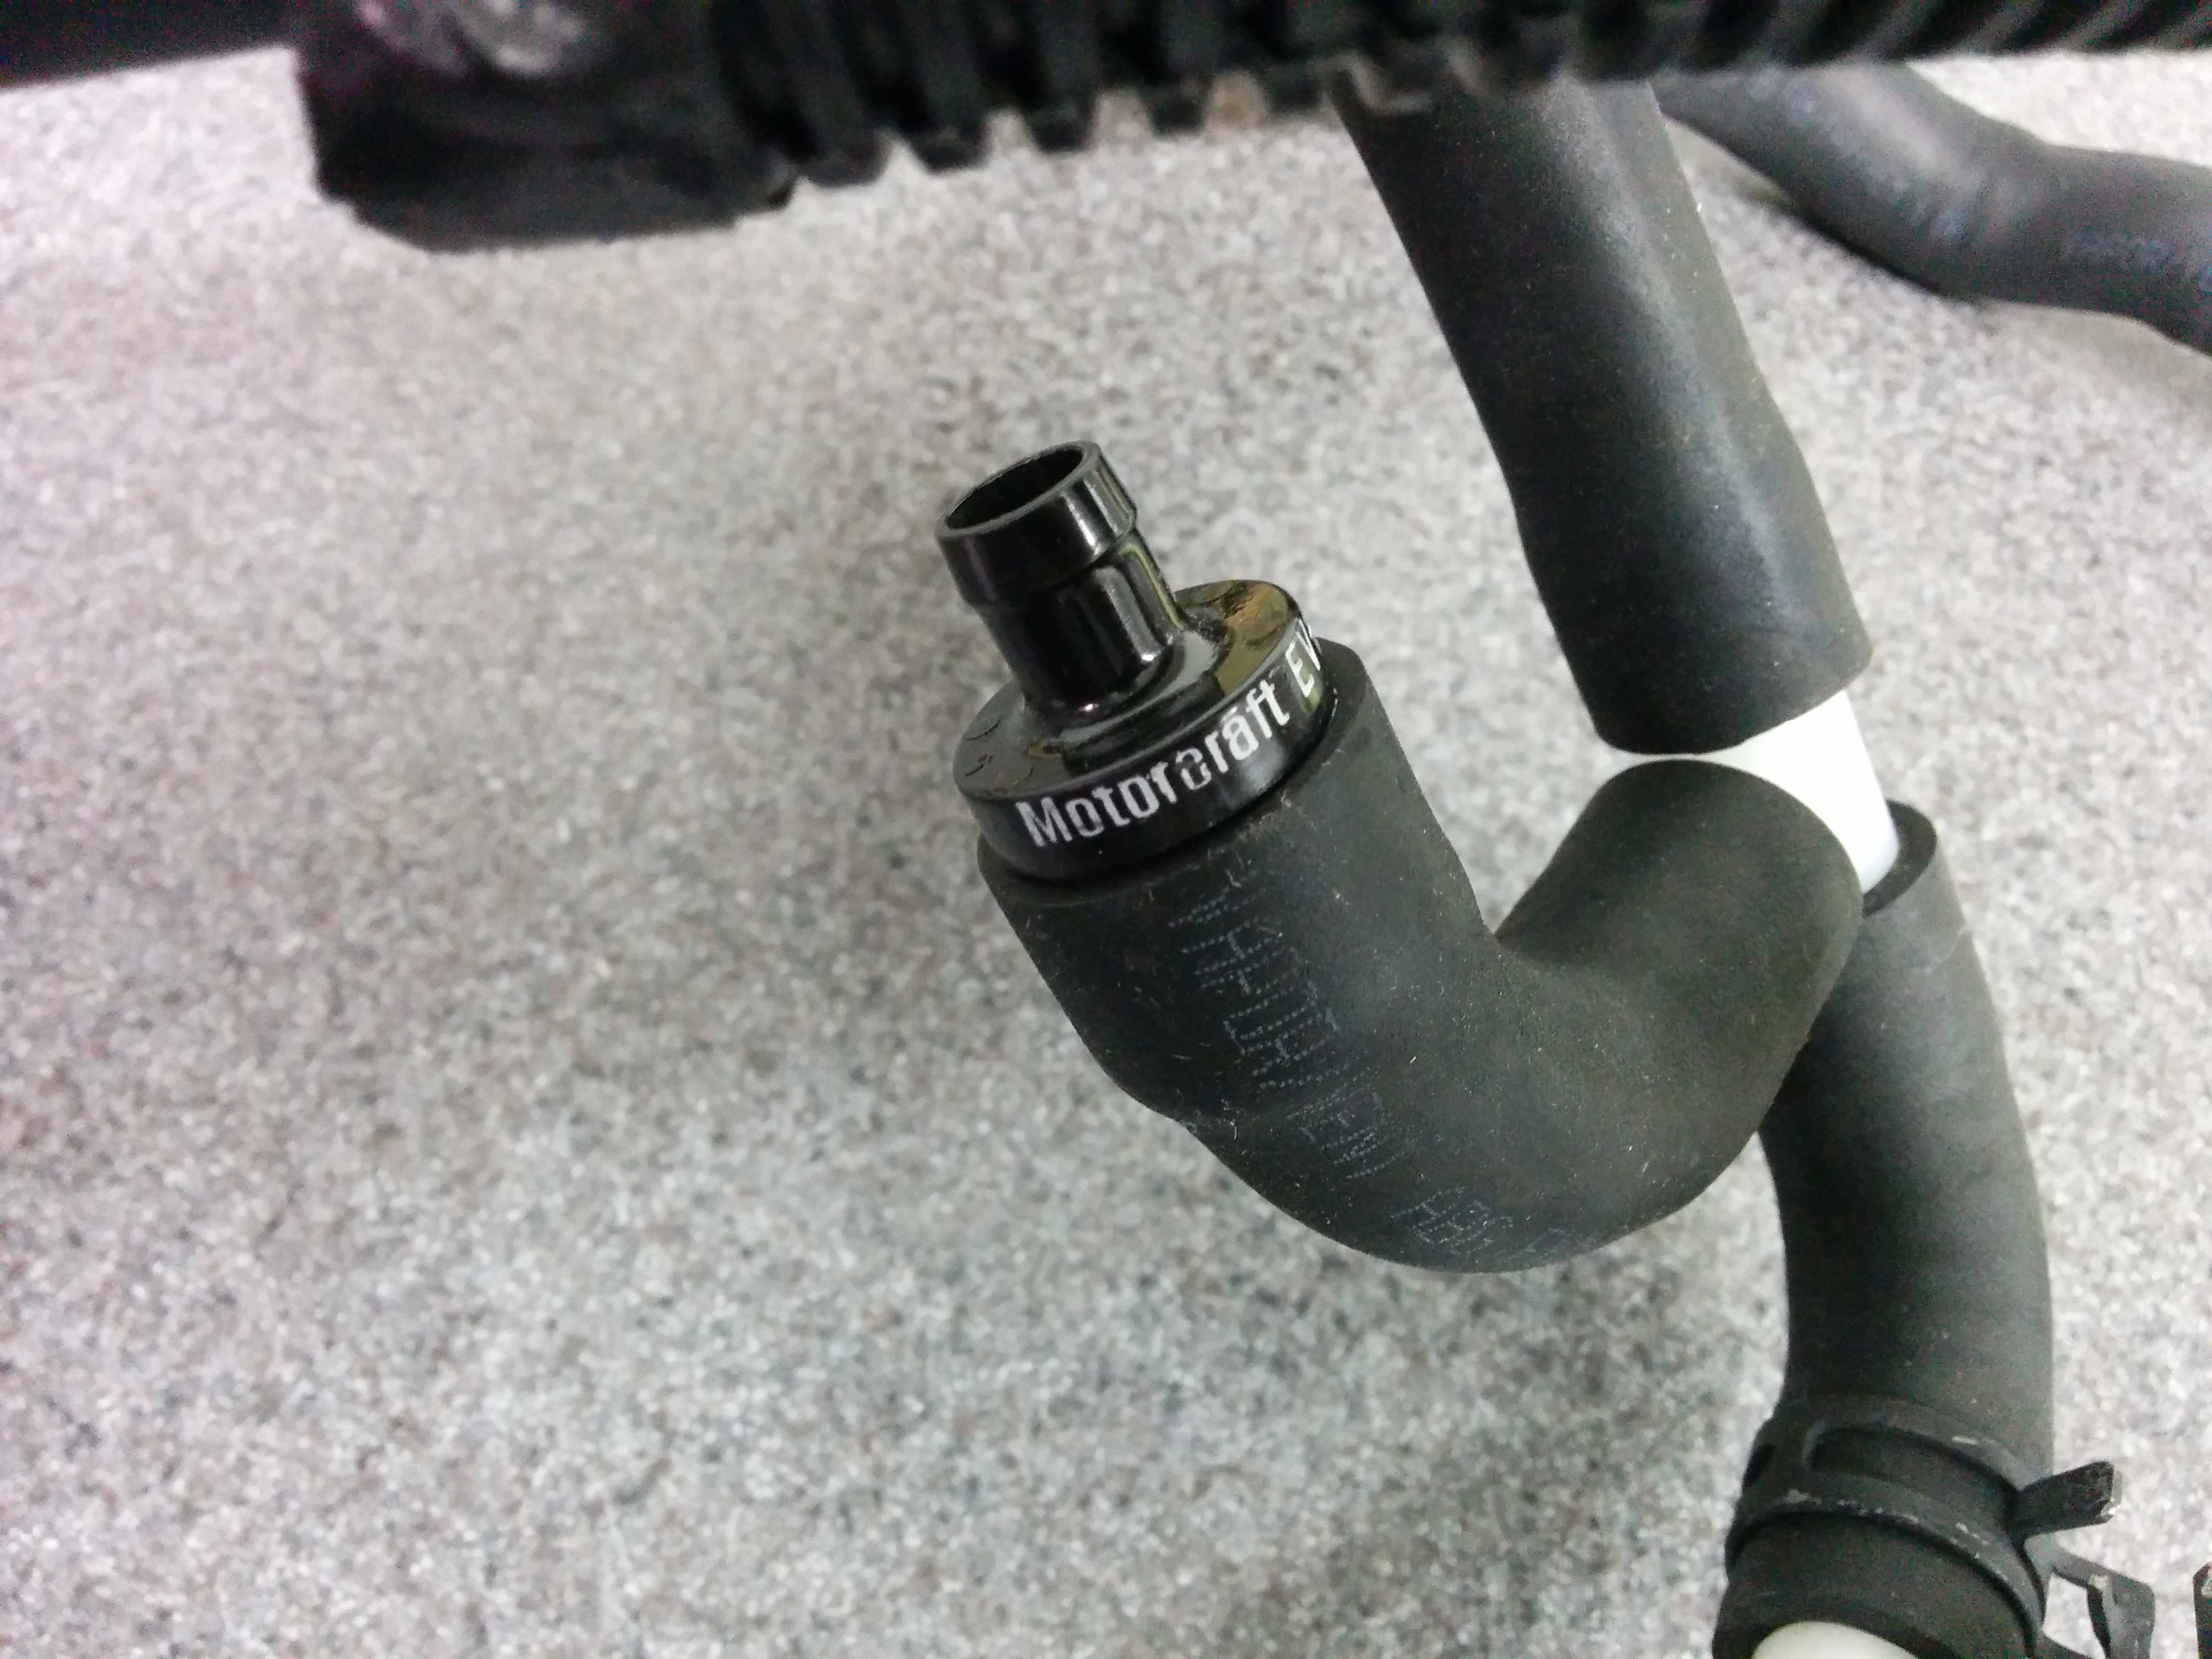
- Identify the PCV valves in the harness, they are wedged in between an upper and lower hose connection.

The PCV Valve is sandwiched between and upper and lower hose - Using your pliers, compress the spring clamp on the upper hose connection and move it an inch or two up the hose away from the valve.

Use pliers to move the clamp up and out of the way - Remove the upper hose connection from each valve by wiggling the hose off.
- It may be very tight, and I suspect they might have applied a light coating of gasket sealer to the connection as they assembled it in the factory, now acting as glue.
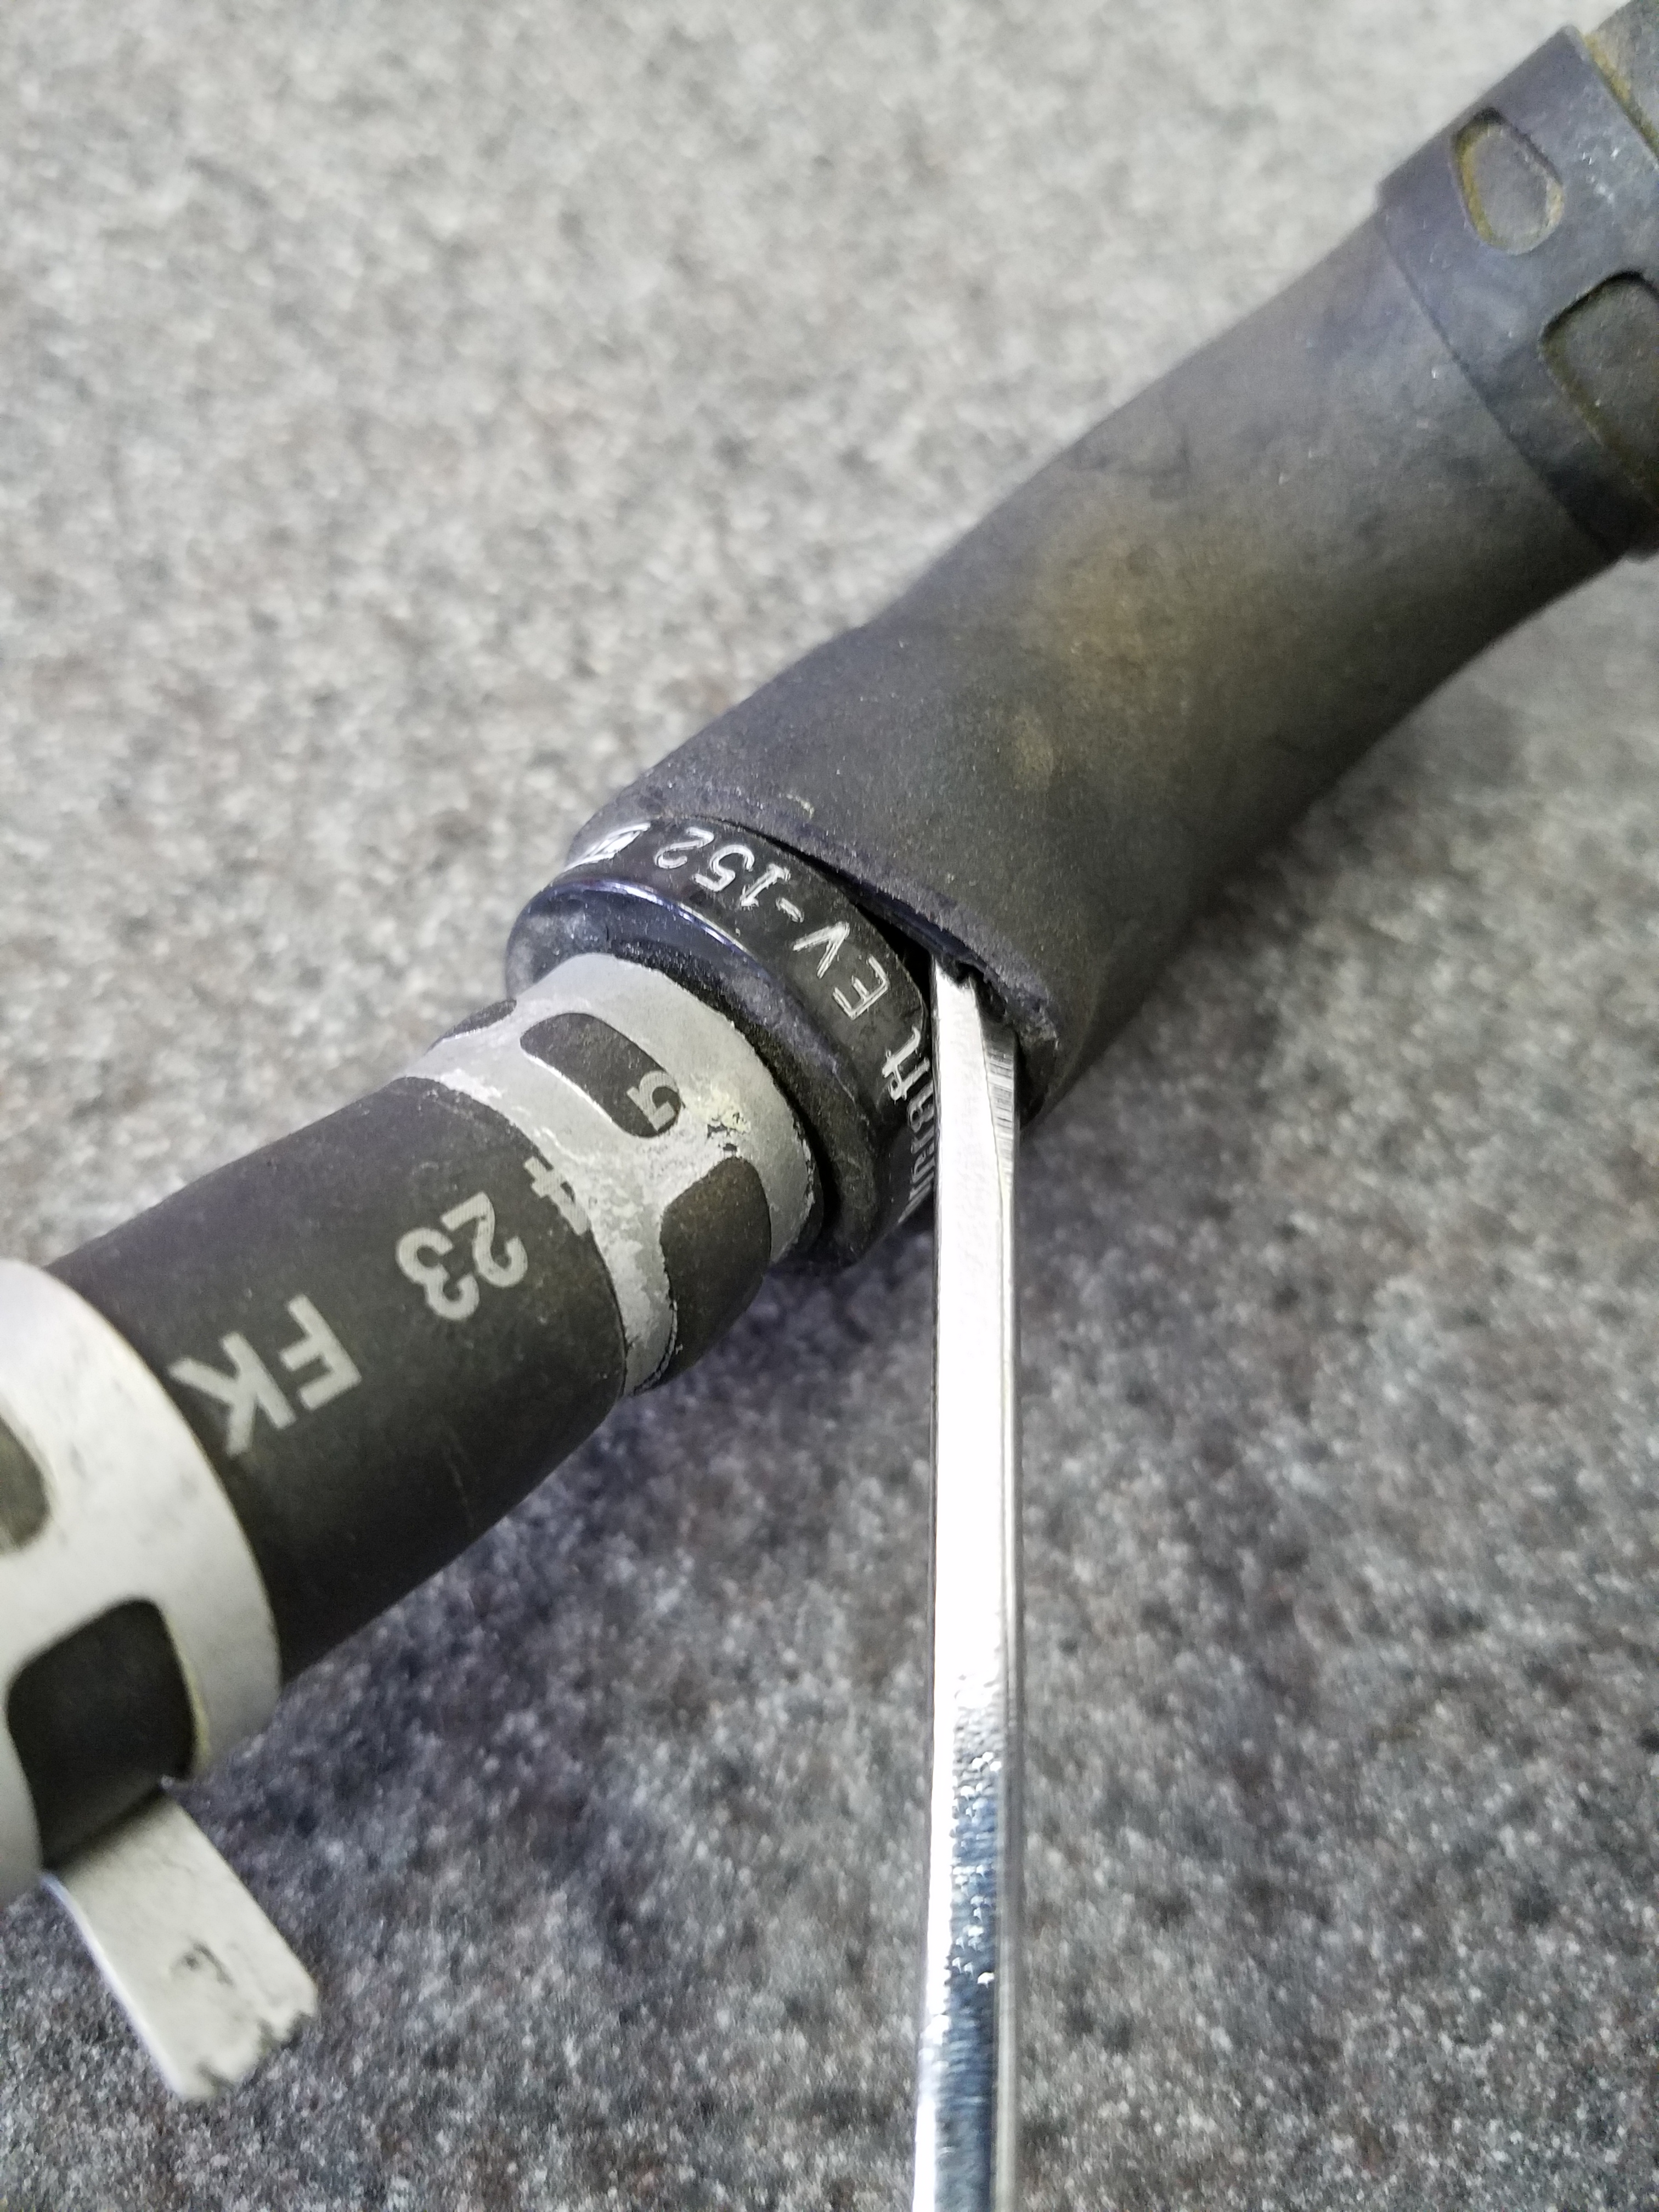
- If necessary, you can work a small flat blade screwdriver in at one spot then ease it around the hose to break the seal. It won’t take much, then you can just twist and pull the hose off.

Carefully pryse the hose off the upper connection
- The lower hose connection (which is the larger end) isn’t held on with any clamps. We need to pull the PCV valve out of the hose (which isn’t easy).
- Again I used the flat blade screwdriver and worked it in between the hose and the valve body on one side breaking the seal, then I eased it around until I could finally pull the PCV valve out.

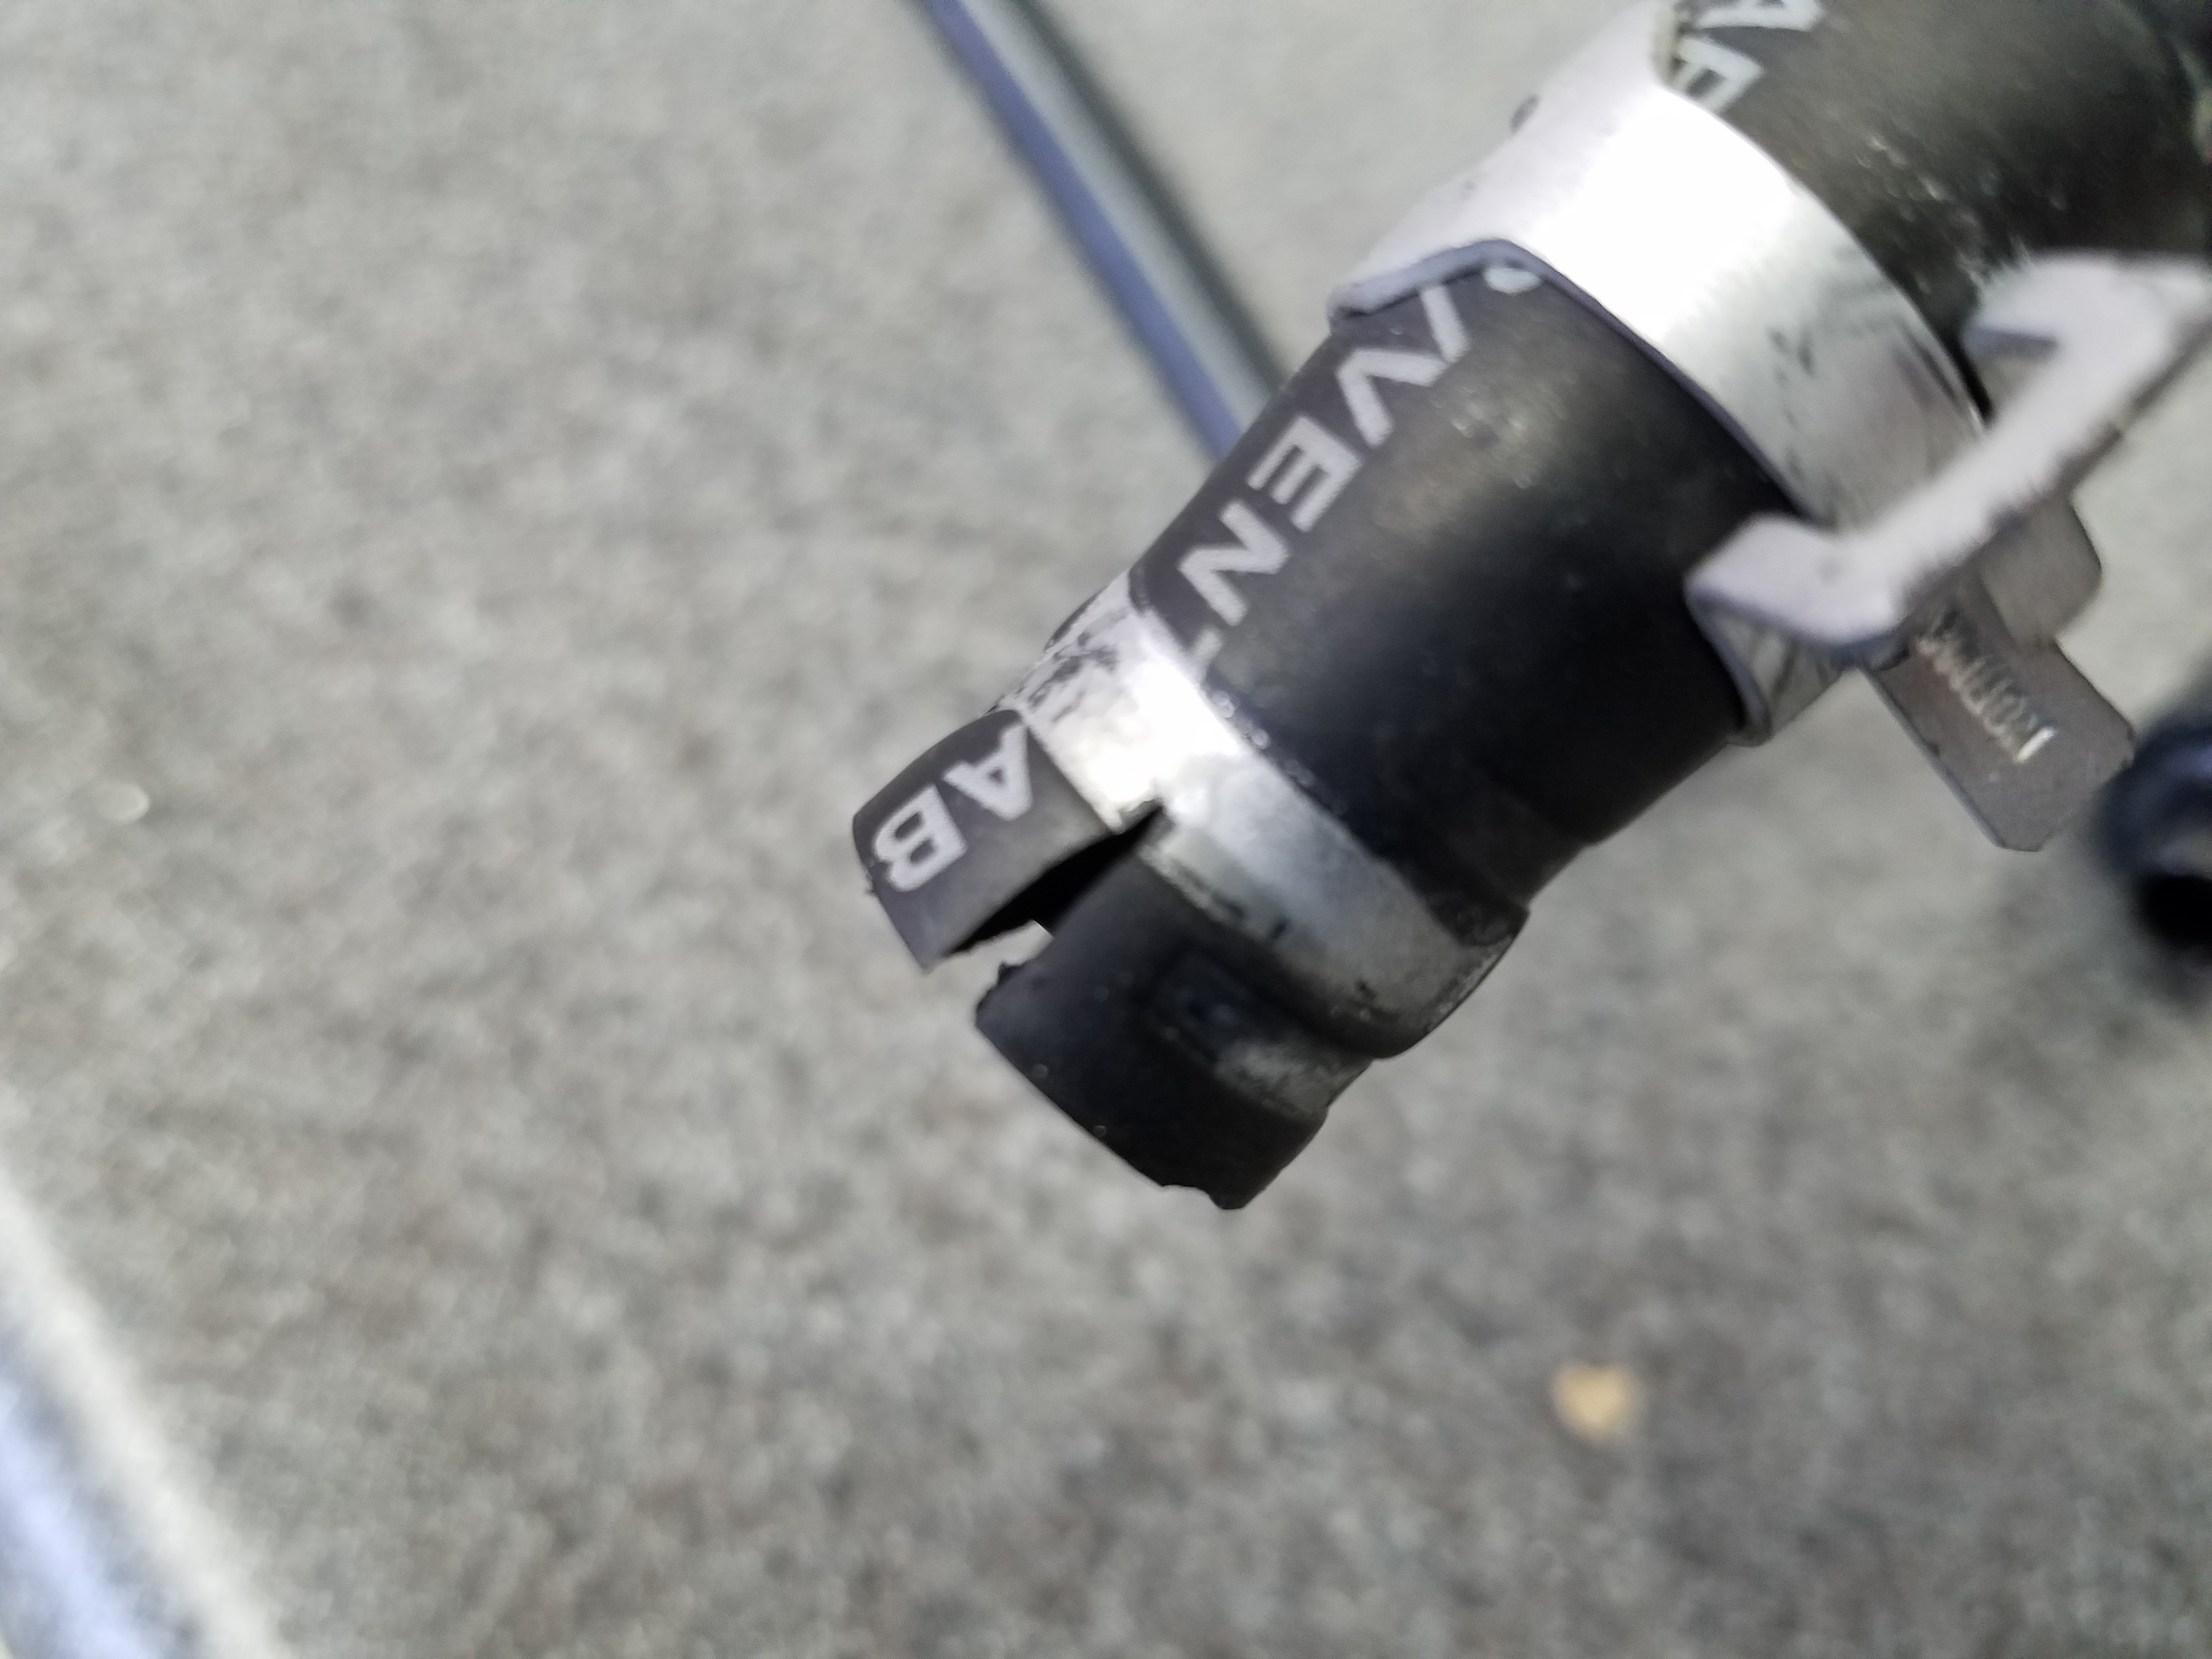
Carefully pryse the hose off the lower conection - Mine was absolutely glued in with gasket sealer. You can actually see some leftover of it in this photo, it’s the reddish brown coating.

Factory gasket sealer visible on removed valve body
- Again I used the flat blade screwdriver and worked it in between the hose and the valve body on one side breaking the seal, then I eased it around until I could finally pull the PCV valve out.
- Follow this procedure to remove both PCV valves.


Inspecting your Old Valves and Hoses
If you want to ‘Test’ your old PCV valves to see if they have perished, you just need to blow into the smaller diameter top end of the valve and see if air can pass through. It’s a simple one way valve, so air should be entirely blocked blowing in from the top, and flow completely freely if you blow in from the bottom. [Of course, the valve is greasy and has just been sitting in an engine for 10+ years, so I will leave it to you if you want to pucker up and give it a blow]. When you shake the valve up and down, you should hear it rattle (a valve can become stuck). Do the same to the new valves for a comparison.
For me, the result was disappointing, it appears as if both valves were working properly, so I’m not convinced it’s the valves malfunctioning that is causing the intake manifold oil build up like everyone says. But I’ve come this far and it can’t hurt.
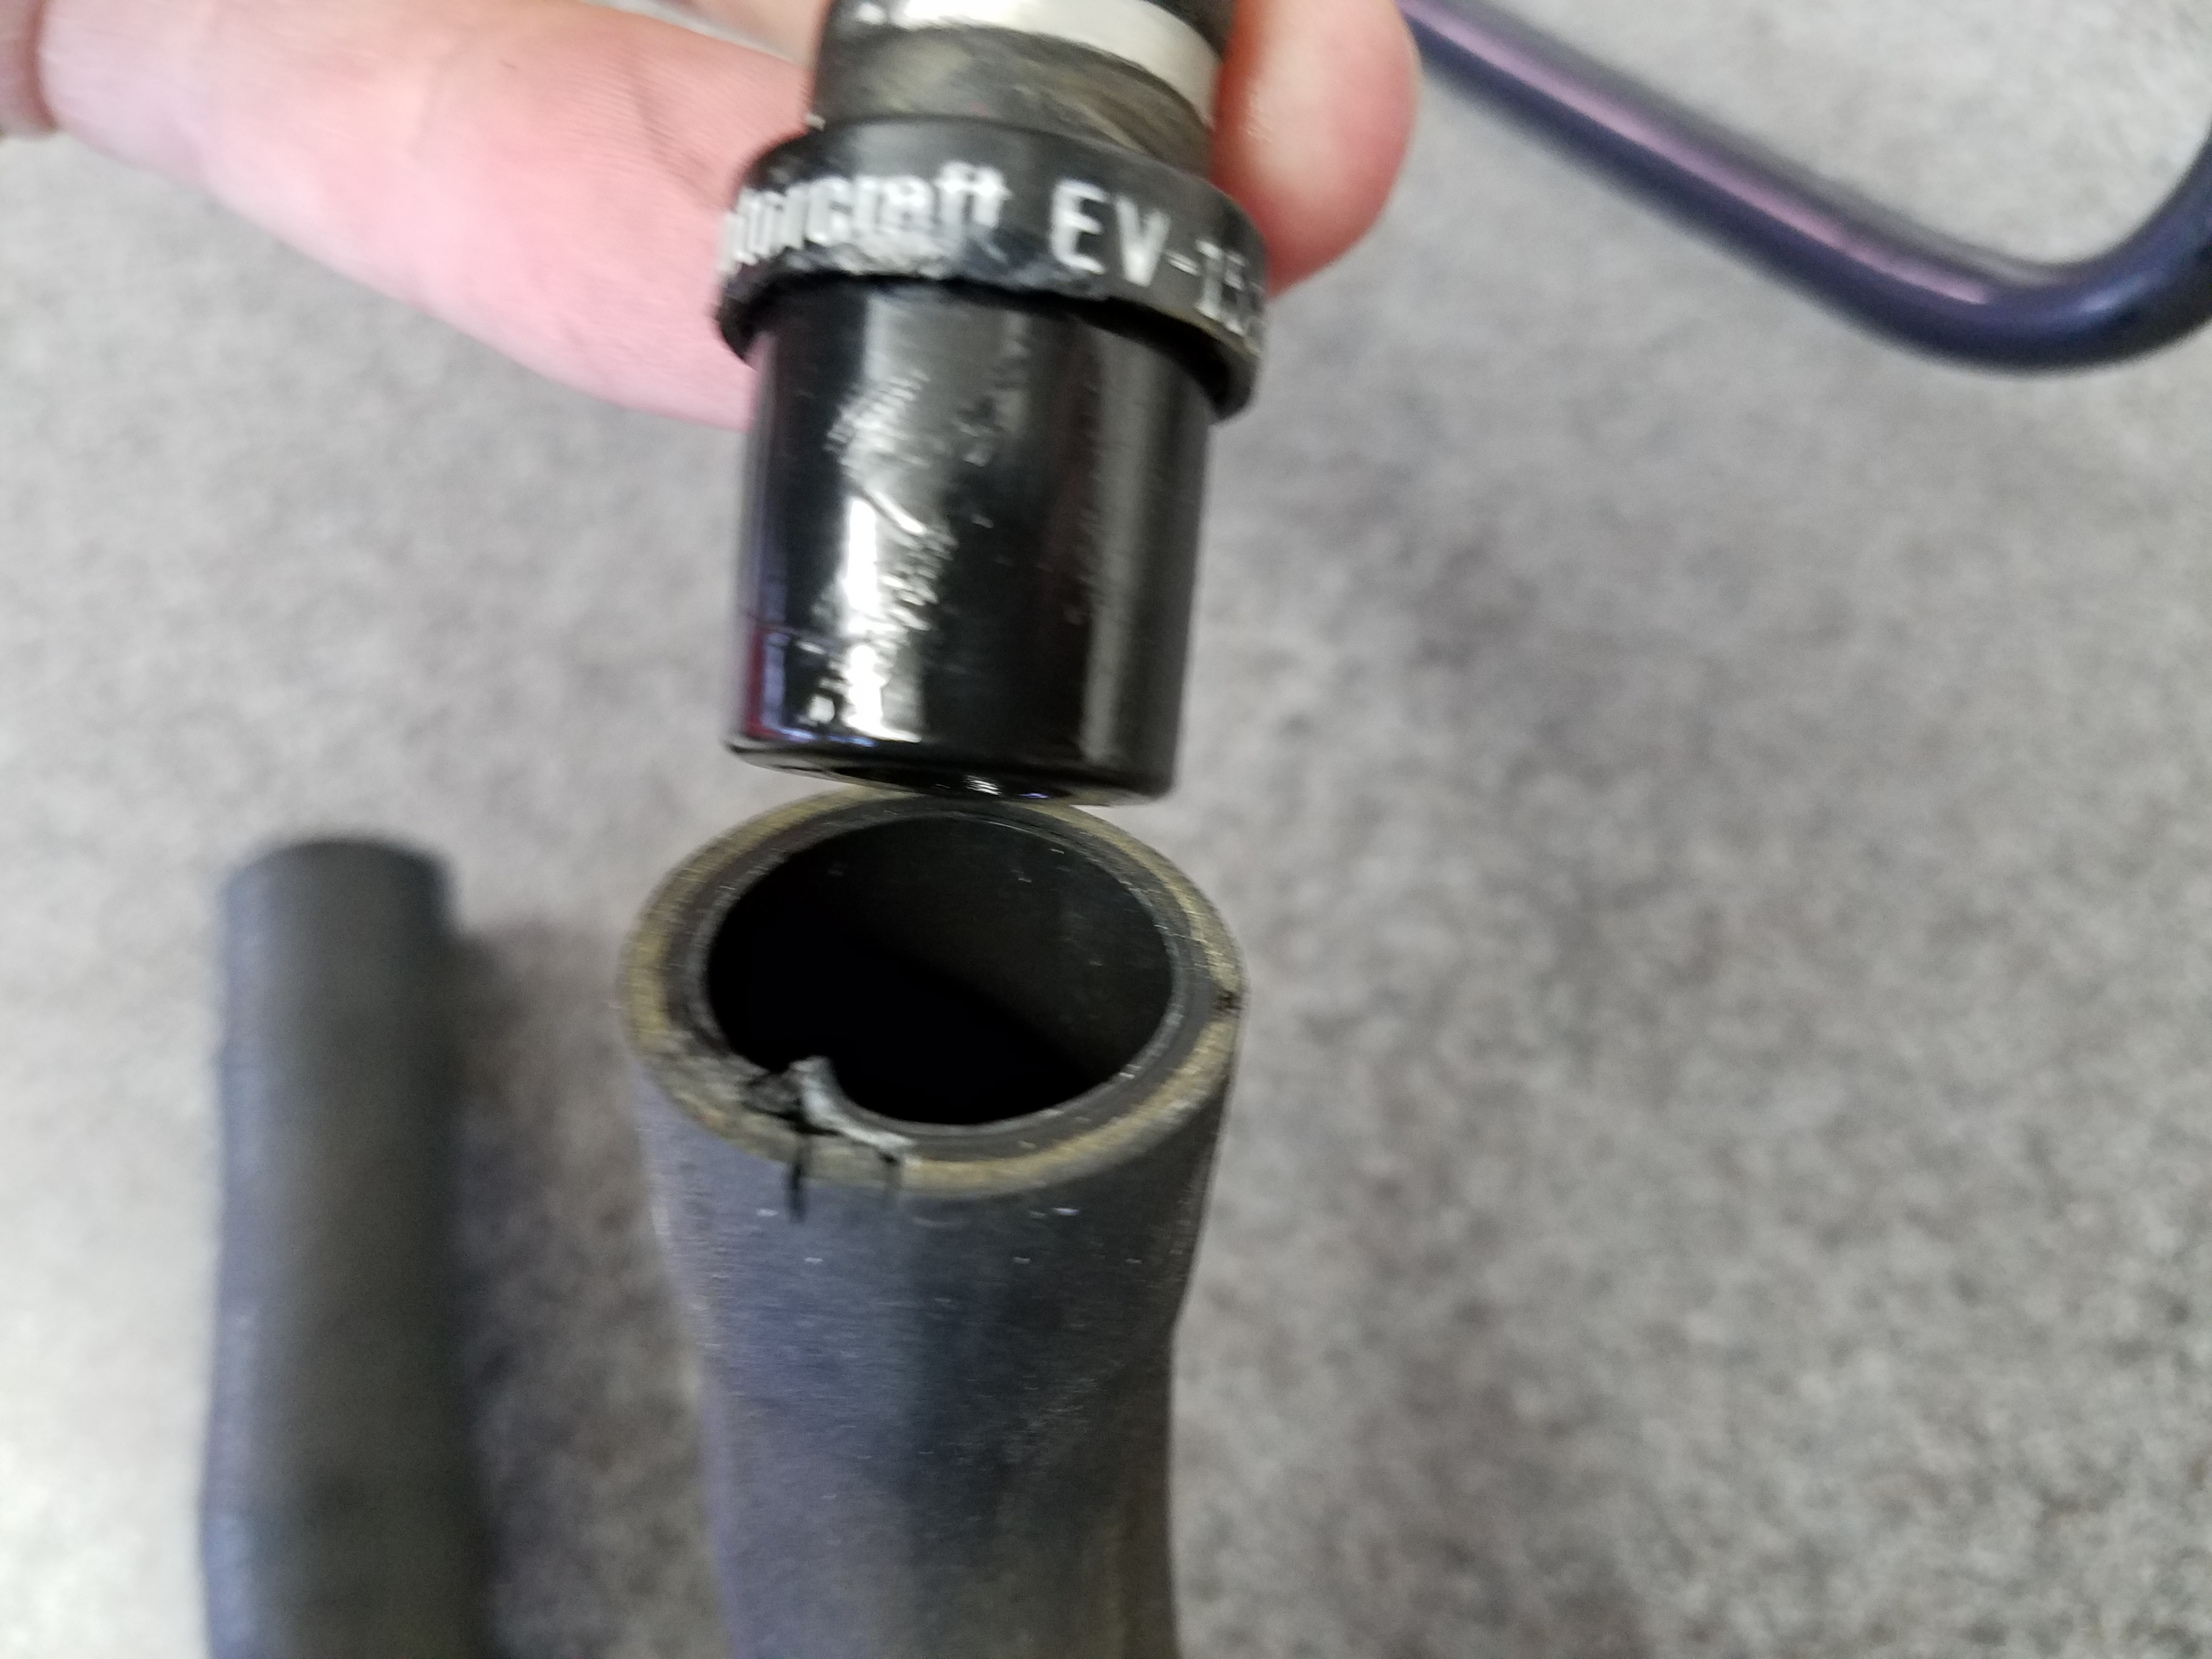
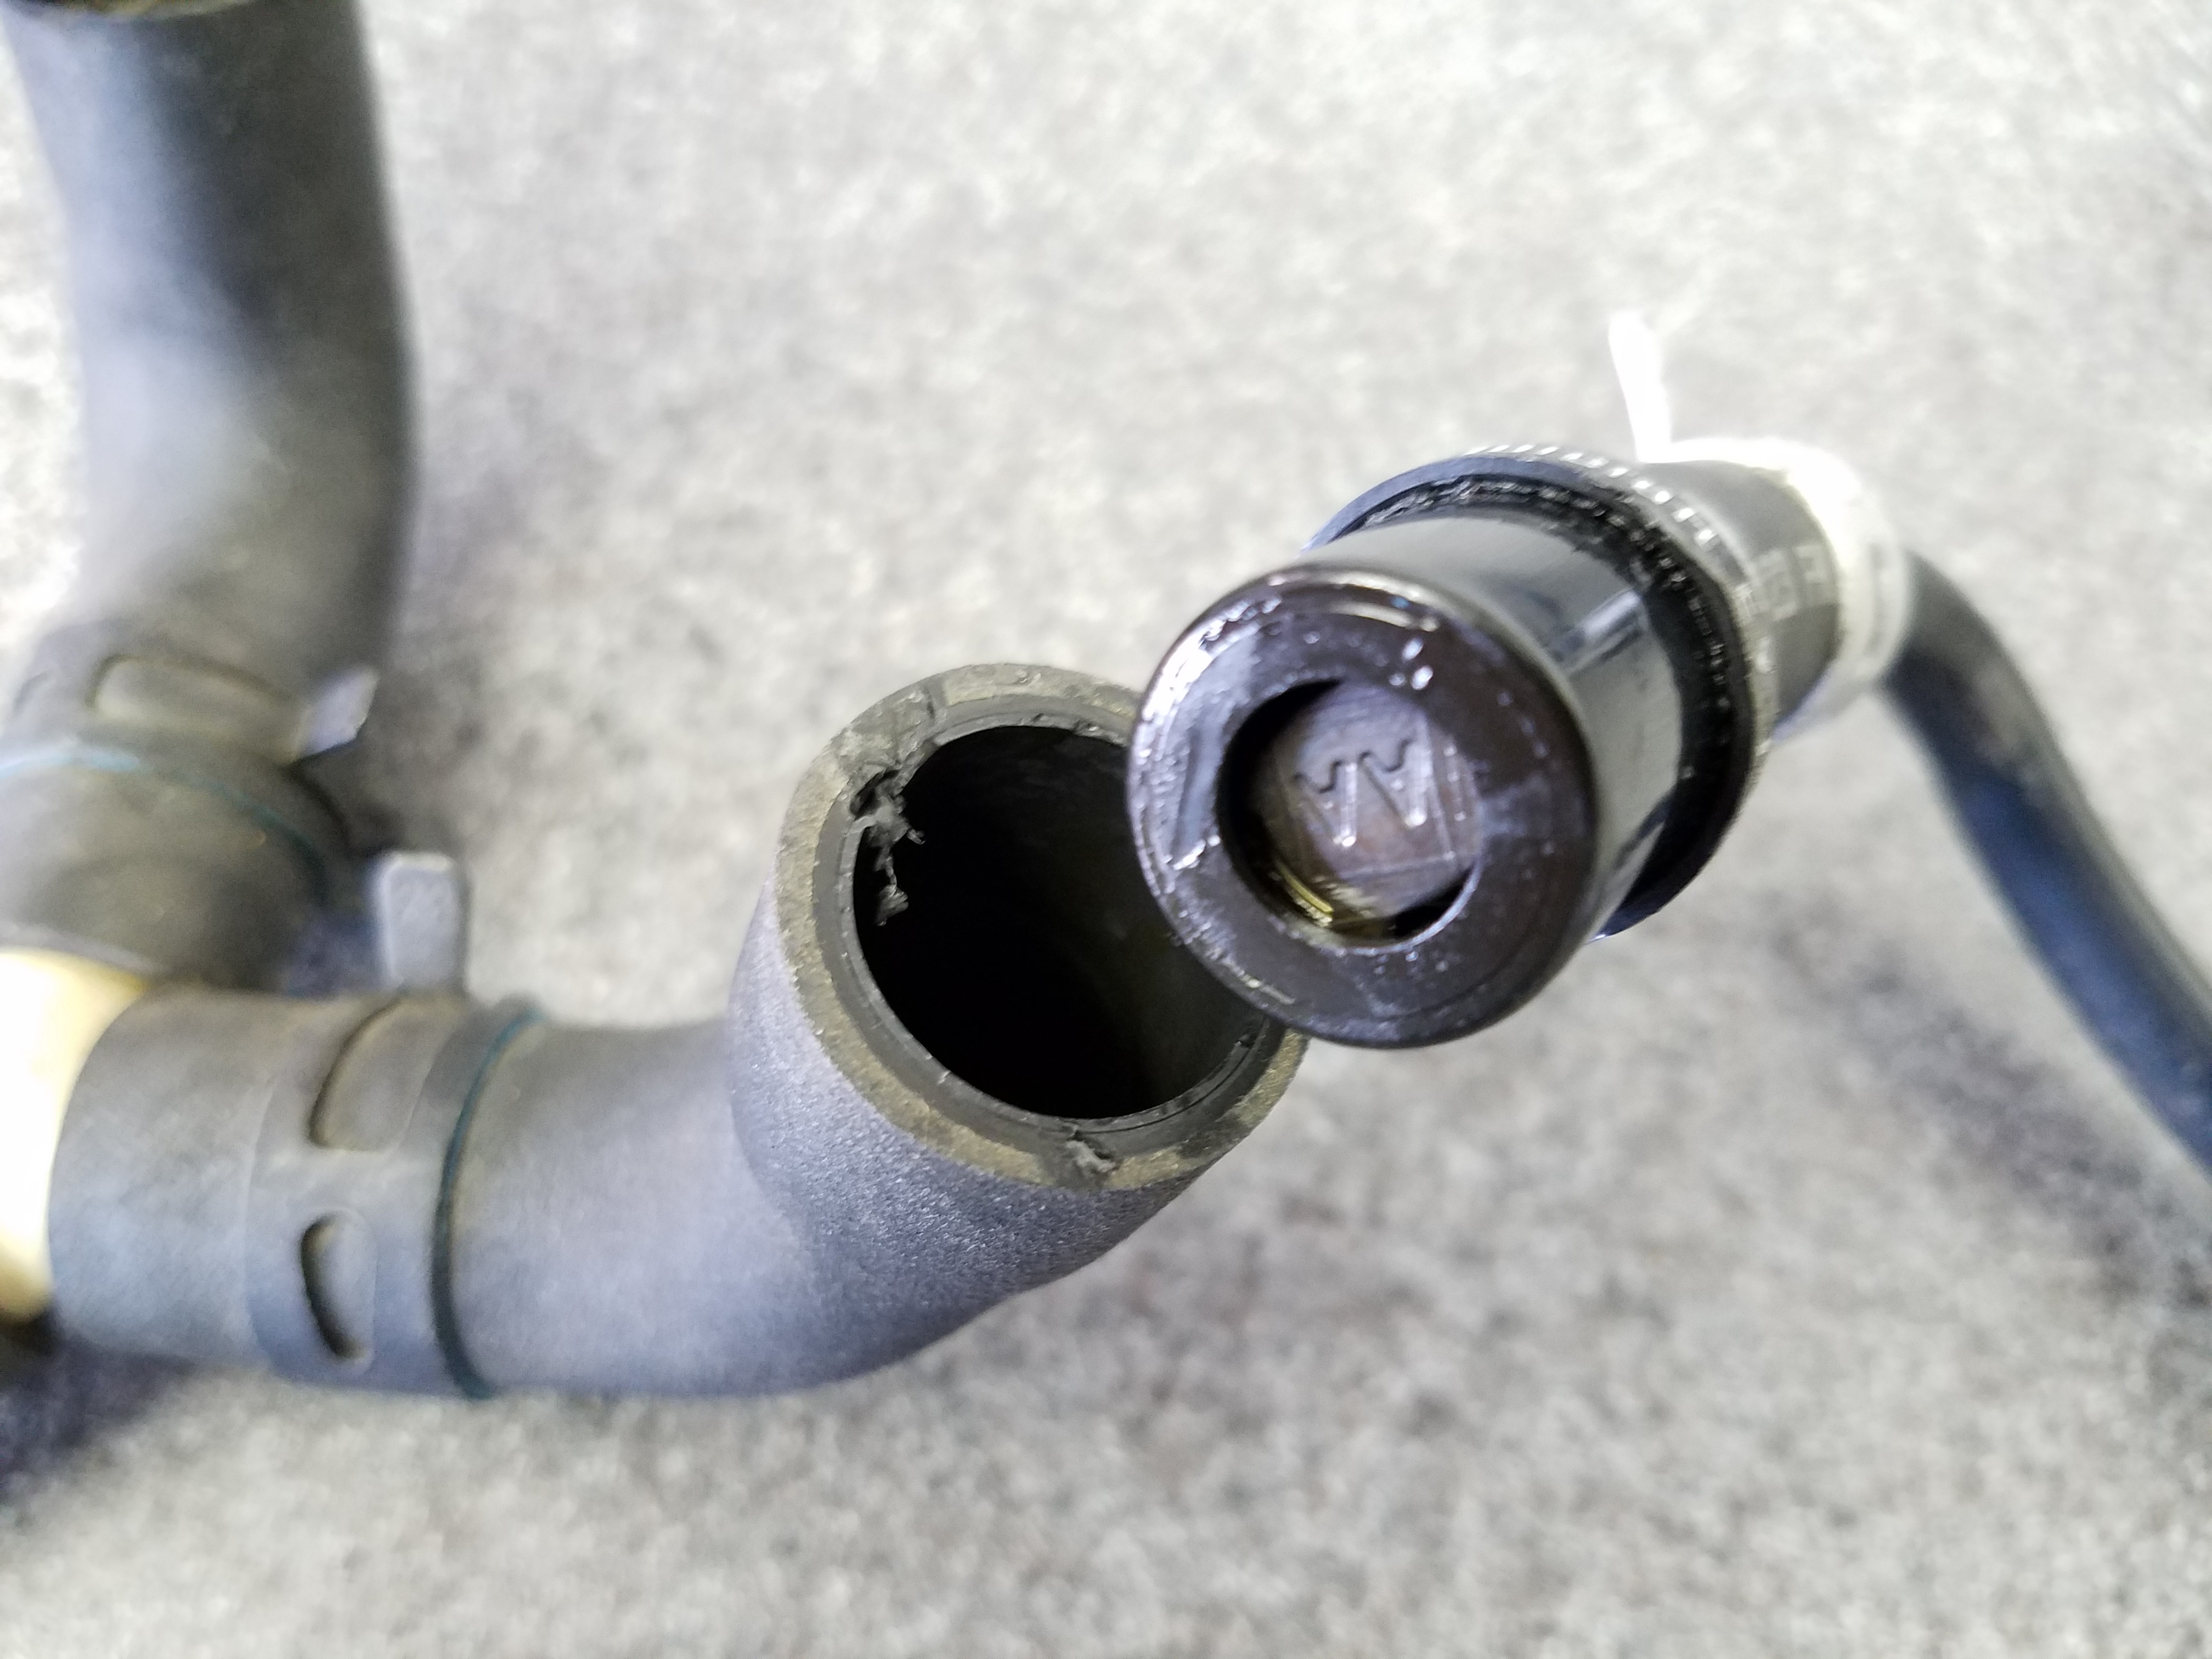
Now at this point you should inspect your upper and lower hose connections. If you were like me and had to dig in with a screw driver to break the seals between the hoses and valve, you may have damaged the hose. The hose has been baking in the engine bay for 10+ years along with the valve, and the rubber wasn’t that resilient anymore. I damaged all four pieces of hose just a bit. Here are some photos of the damage, you can see the tear where I dug the blade in originally on each hose. Maybe you can be more gentler with yours and prevent the damage now that this article has forewarned you to the upcoming issue.

Fortunately, both pieces of the upper connection hose are short sections and I think you could source them from an automotive supply store. You can usually purchase a foot or two of bulk “Vapor Emission System” vacuum hose for just a few dollars, and then cut yourself a replacement piece. The two chunks would be:
- 0.375” (3/8”) inside diameter hose – approximately 1.5” long
 I found this high quality Goodyear Fuel/Emission hose on Amazon.com for about $9 USD (check out this link) You only need 3 inches, and this link is for 60 inches. You might be able to buy a smaller amount at your local auto parts supply store.
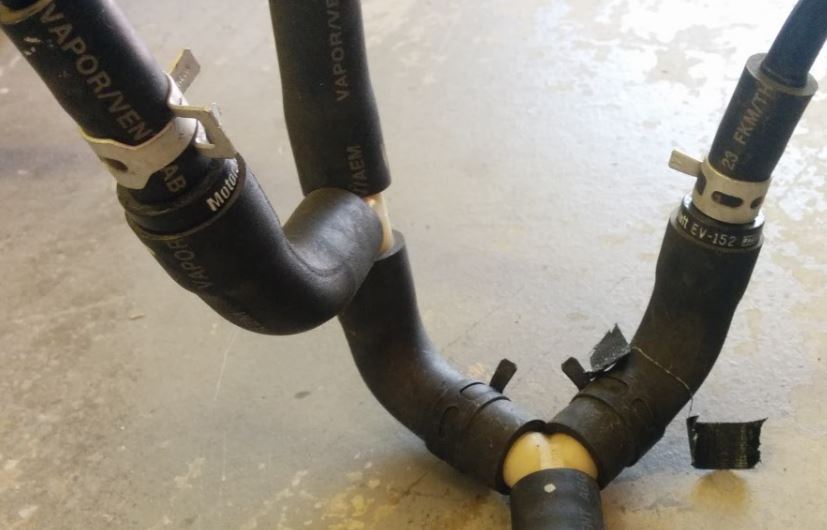
The lower connection hoses are larger, and are not simple straight connections. They are a curved custom molded hose. As far as I am aware this hose is not available by itself, only as part of the Vacuum Harness Assembly detailed in Option 2 below. It would be best to use a molded host to match, but if forced you could probably use a piece of straight hose and bend in (which may tend to crimp it off a bit). The hose is:
- 0.5” (1/2”) inside diameter hose – approximately 6” long
Note: Vapor Emission System Vacuum hose is designed to survive a long time under vacuum conditions with harmful petroleum vapors running through it. Don’t just use some other kind of random hose, it will likely deteriorate and collapse under the vacuum closing off the breather system and this would be bad for your engine.
One final thought on the hose damage. It was pretty minor, and since it will be under light vacuum, and the upper connection has a clamp, and if I use some gasket sealer as well, I really doubt that the small amount of damage would lead to any leak. I think I could have just reused the hose. But, your car is an Aston Martin and you can decide for yourself what standard of excellence to follow.
You should also inspect the rest of the rubber vacuum hoses of the harness. If any are cracked or damaged, I’d just suggest replacing the whole harness since it’s an indicator all the rubber is shot.
Installing the PCV Valves
With your hoses inspected (and damaged bits replaced if necessary) its time to install the new PCV valves.
 Open the package, and you can discard all the plastic adapters that Ford/Aston shipped them with. These are for applications in other Ford cars/trucks, so we can toss them.
- We should mimic the factory process and coat the lower PCV valve connection with a very light coating of gasket sealer.
- Most any gasket sealer would probably work, but if you are looking for style points this Permatex 85409 Ultra Rubber Gasket Sealant and Dressing designed for use with rubber is a good bet. A small 1 oz. tube is just $5.49 USD on Amazon here.
- Put a small dab on your finger and smear it around the body that will insert into the large lower hose connection. No globs, just a very light skim coating is all that is needed.
- BE CAREFUL NOT to get any sealer into the valve itself, this will seize up the valve mechanism and wreck the valve.
- Press the valve into the lower hose connection giving it a twist on the way in to help smear and seal the connection.
- Wipe off any excess sealer.
- To make the upper connection, I didn’t add any sealer and merely pushed the connection back on aligning the pipework in the same orientation as it was when we removed it.
- Squeeze and put the spring clamp back in position over the upper connection.

That’s it, pretty simple overall if you can manage it without damaging the hoses. Check out the video below to see me follow this simple process on the work bench. Option 2 is even simpler ….
Option 2 – Replace the PCV Valves by replacing the Vacuum Harness Assembly
As I’ve mentioned a few times already, if you purchase the Vacuum Harness Assembly (Aston Martin p/n 4G43-37-10288 for about $96 USD) it includes the two new PCV valves already factory installed. Can’t get any simpler than this step, nothing to do, just spend the few extra dollars and save all the hassles that come along with Option 1.
The additional cost for me was about $72 USD, so you can judge for yourself if its worth it. I went this route specifically so I could renew all the hoses that have been baking in the engine bay for 10+ years, and the new valves come along for the ride.
Putting it back together
Regardless of which option you followed, at this point it’s time to reinstall the Vacuum Harness Assembly (either the one refitted with new valves from Option 1, or your brand new one from Option 2). You can learn how to reinstall it in this article.
Video
Here is a video on the steps to replace the PCV Valves in the Vacuum Harness described in Option 1.

Doing your own oil changes is completely false economy. You`ll piss the dealer off and he`ll sting you hard for any repairs you have done. As you have been. 15hrs and $5000 labour for the timing-case oil leak was a stitch-up. Nobody would work on a timing case for 15hrs! Life`s too short! That was a “Bench Rest”!
Give them ALL the work and create a good relationship, then when repairs are needed, they remember. That`s my philosophy. Over several years it works out about the same. And fewer repairs are needed because the car gets inspected regularly. The timing-case would probably never have leaked badly with regular inspections. They would have spotted it much earlier before it got bad and it would have been done for free. Probably.
Trust them, just pick up the phone and keep your hands clean, like a good Aston owner! How do you think they see you? If you are tinkering? With “their” car? They love the car too! Do they pick up and deliver? Do they wash `n vac. it for you? Do they always have a courtesy-car? If my dealer dosen`t have one I get the director`s car!
I get SERVICE. They call me MR! They know me by my voice. It`s nice.
LikeLike
Thanks for the feedback Paul. I agree I’ll skip the timing cover issues, but I enjoy turning the wrenches so some of this is fun for me. If a dealer would really sting you later for doing the work properly yourself, then that to me is a deterent to use them in the first place. If they are willing to help regardless, that’s the kind of place I am looking for. Thanks for commenting!
LikeLike
I was going to chanage my PCV valves when doing the coil packs, but couldn’t get the old ones out from behind the block. (I did have oil carry over in my throttle bodies). I made my own “fixed orfice” PCV modification instead of changing them. I made a plastic plug to fit inside the hose connector at the throttle body and drilled a .030 hole to allow a restricted vacuum flow into the throttle body. This allows crankcase ventilation without the excessive volume of crankcase atmosphere that flows through a defective PCV valve that will cause carryover. Worked great and cost only about $2.00 for the tiny drill bit.
LikeLiked by 1 person
Hi Gary, could you share some before and after pictures and some ‘how to’ instructions together with what parts are required.
Thanks
LikeLike
Recently bought a 2011 V12 Vantage with 30k miles. While replacing the coils, figured might as well do the PCV valves. I used a right-angle pick from Harbor Freight and gently massaged between and around the hose ends at the fittings (without damaging the hoses at all) and removed just the short right-angle hose sections with the PCV valves from the car, leaving all the rest of the plumbing in place. Did not see much if any glue in these joints, which might be due to an improvement on these later cars. It also helps to have a spring clamp tool with bowden cable. Makes it possible to get to the clamps with the plumbing harness in place.
LikeLike
Hey Steve, As you said that you found your old PCV valves seemed to be operating correctly once you removed them, would you recommend replacing them? Have you noticed less oil in your throttle bodies or elsewhere since changing it out?
LikeLike
Steve, looking at the diagram, if your having oil issues getting to MAF tube, would not inspecting/replacing the 2 oil separators (#12) in the PCV system? Second curiosity is part # 1, why does this exist? Simply to safeguard the other parts getting plugged or air flow exceeds orifices capacity and giving it a “bypass”? Otherwise it appears that all the air might bypass -least path of resistance- to PCV valves and not really vent anything of block and heads. Obviously they engineered it and it must work, but I have not seen systems with the #1 pipe connected directly from the fresh air side to the suck/dirty air side of the PCV. Most other systems require all the fresh air to travel thru the heads and block to the PCV-seems very strange. There are also 2 valves on the cam covers, that should be checked/cleaned when servicing the system. Not sure if these are just orifices(LS engines are) or actual valves, but given they are almost horizontal, I would guess just an orifice to meter air. Maybe just a thin piece of wire to make sure they are open. The #12s likely have some mesh/baffles in there to knock down the oil mist and should be cleaned as well, assuming the are accessible when doing the coil/plugs/PCV with intakes off? I do like your oil catch can idea!
LikeLike