

I’ve already explained why you might need to change the Positive Crankcase Ventilation (PCV) Valves in an Aston Martin DB9 in a previous article (usually because engine oil is showing up in your intake manifolds), and what parts you might need (check out this article). In this article I will explain the process of how to remove the existing PCV Valves along with their harness assemblies.
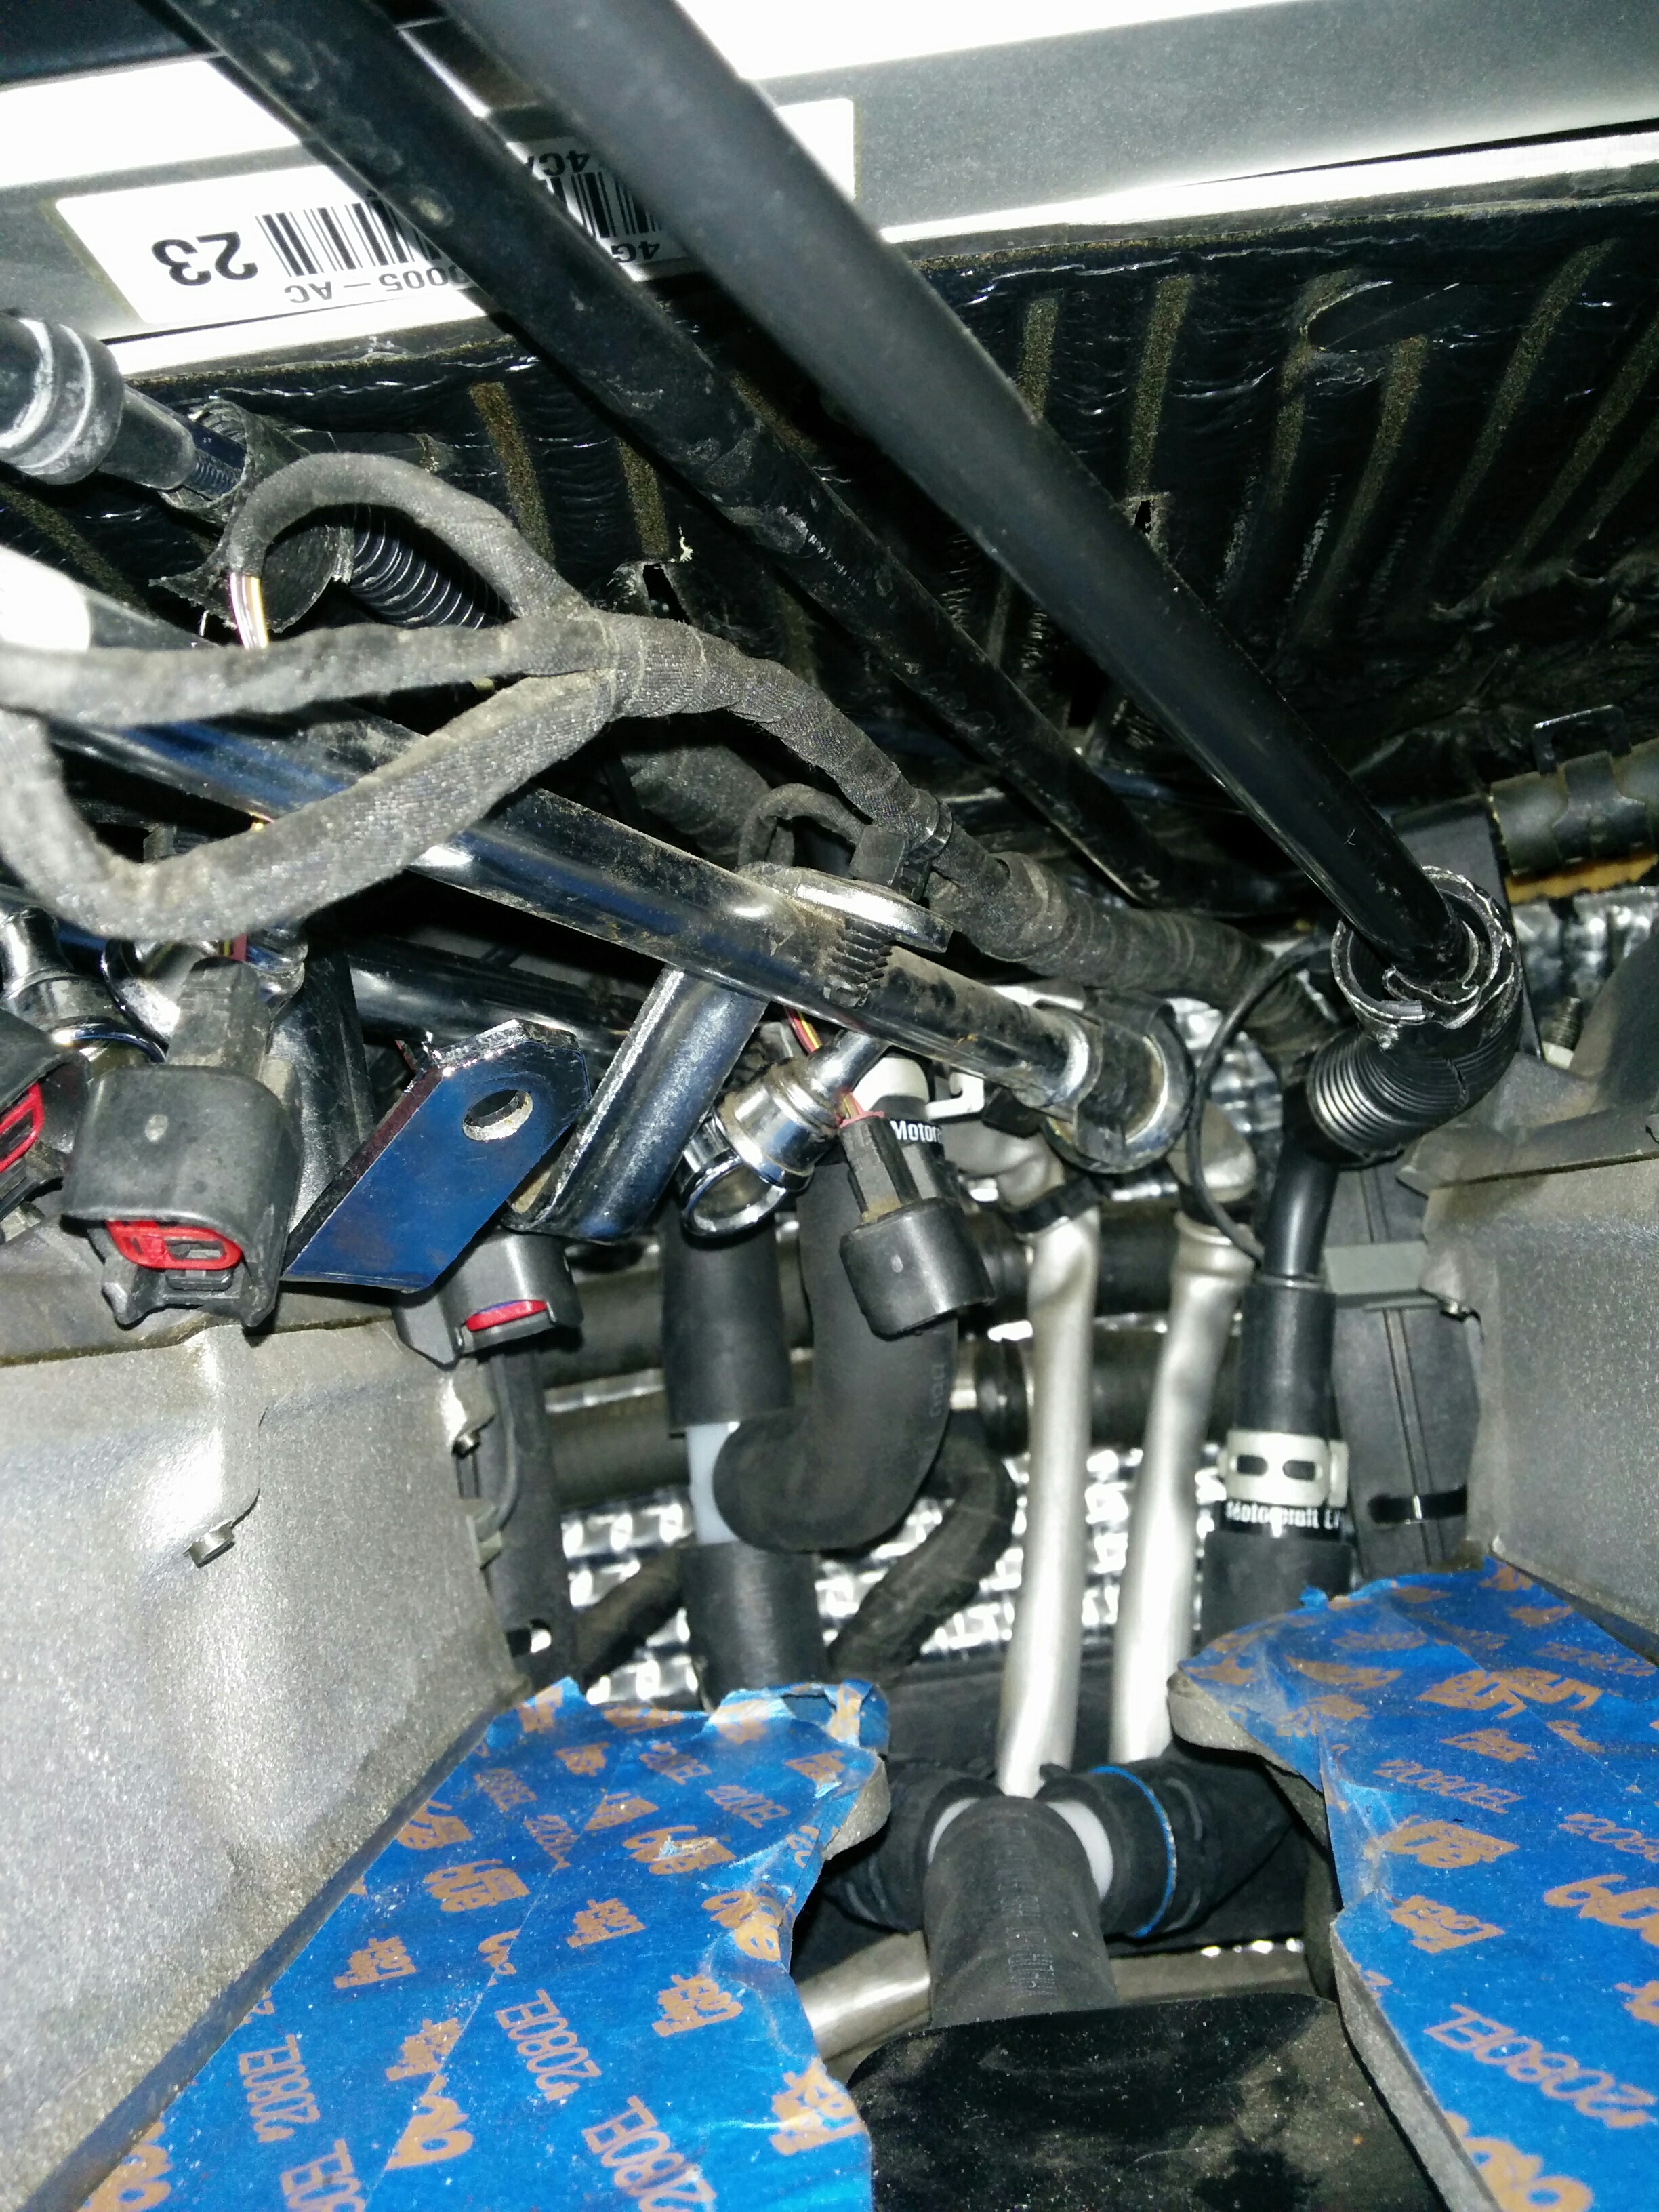
Why remove the assemblies and not just change the valves in place? Access. You can see in this photo that both of the PCV valves sit in the harness assemblies well back underneath the engine cowl. To even get this photo I am shooting under the cowl and have the intake manifold system removed. To make matters worse, I think the PCV valves are factory press fit into the hoses coated with a smear of gasket sealer, so they are glued in good and tight. I can’t imagine anyone successfully changing them in the car unless you are the size of a Keebler Elf. The good news is that the extra steps of removing the harness aren’t that hard once you have the manifolds out of the way (which is hard).
I will apologize in advance – no video for this article. When I tackled this for real, I really wasn’t sure of the process, and meddled through it to the best solution. I didn’t take the time to dismantle my car just to get the video footage. I do have a good set of photos below, so hopefully this will suffice.
[Updated September 2017: An avid reader of the site Mike Potts took it upon himself to shoot some video while he was doing the work on his car following along with the instructions. He was kind enough to share it with me, so there are now videos to go with the articles. Thanks Mike!]
Tools Required
 Hardly any tools are required:
- Side Cutter pliers strong enough to cut through a small hose clamp
- Flat blade screwdriver to push off a hose
Preparation Steps
Essentially you need to remove the intake manifold system first to gain access to the PCV harness assemblies. This is a big complicated deal, and needs parts of its own. When I was doing this project I was in the process of changing my Coil Packs and Spark Plugs, so this was just something extra I tackled at the same time. If you are doing all this work ‘just’ for your PCV Valves, you might want to do the Coil Packs and Plugs anyways since you are most of the way there. Complete the following steps in advance:
- Depressurizing your fuel system (so you don’t start a fire)
- Disconnecting your Battery (also so you don’t start a fire)
- Covering your fenders (so you don’t screw up your paint)
- Removing the Engine Bay Cross Braces (because it’s in the way)
- Removing the Intake Manifold Brace (because it’s in the way)
- Disconnecting the Fuel Rails and removing the Fuel Injectors
- Disconnecting all the other ancillary components attached to the manifolds
- Removing the Intake Manifolds
Procedure
In the preparation steps you have already disconnected the two long glossy black plastic vacuum pipes that attached to each intake manifold. They will be flopping around still with the fuel rails in the center of the engine area.
There are two other hose connections and a tie-wrap/zip-tie we need to disconnect before we can wriggle the whole assembly out of the engine bay.
 Disconnect the PCV harness assembly from the rear air/oil separator canister. In the V notch of the engine you will see the two air/oil separators, a front and a rear. The harness assembly has a black hose connecting to the rearmost connection of the rear separator. There is NO clamp, it just pushes on. I found it was easy to disconnect by just using a flat blade screwdriver to pryse and push the hose rearward and off.

The harness hose disconnected from air/oil separator -

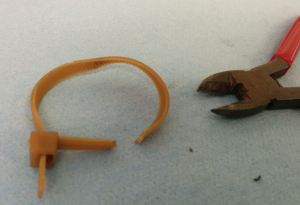
Zip-tie linking the Fuel Rail to the PCV Valve Harness Assembly In my car the right hand bank PCV valve harness assembly was zip-tied to the fuel rail. Definitely see the photo here, and take a few of your own so you can put it back the same way later. The factor also cleverly laced the zip-tie through the spring clamp, so pay attention. We need to cut this zip-tie to free the assembly.
 The final connection is a hose clamp on the right hand side near the rear of the valve cover. The line crosses over behind the engine from the PCV valves in the center V block area, and then connects to the stainless steel piping that runs forward to the filtered air inlet pipe. Take some clear photos of the area so you can weave the hose around the same obstacles when you re-install it.
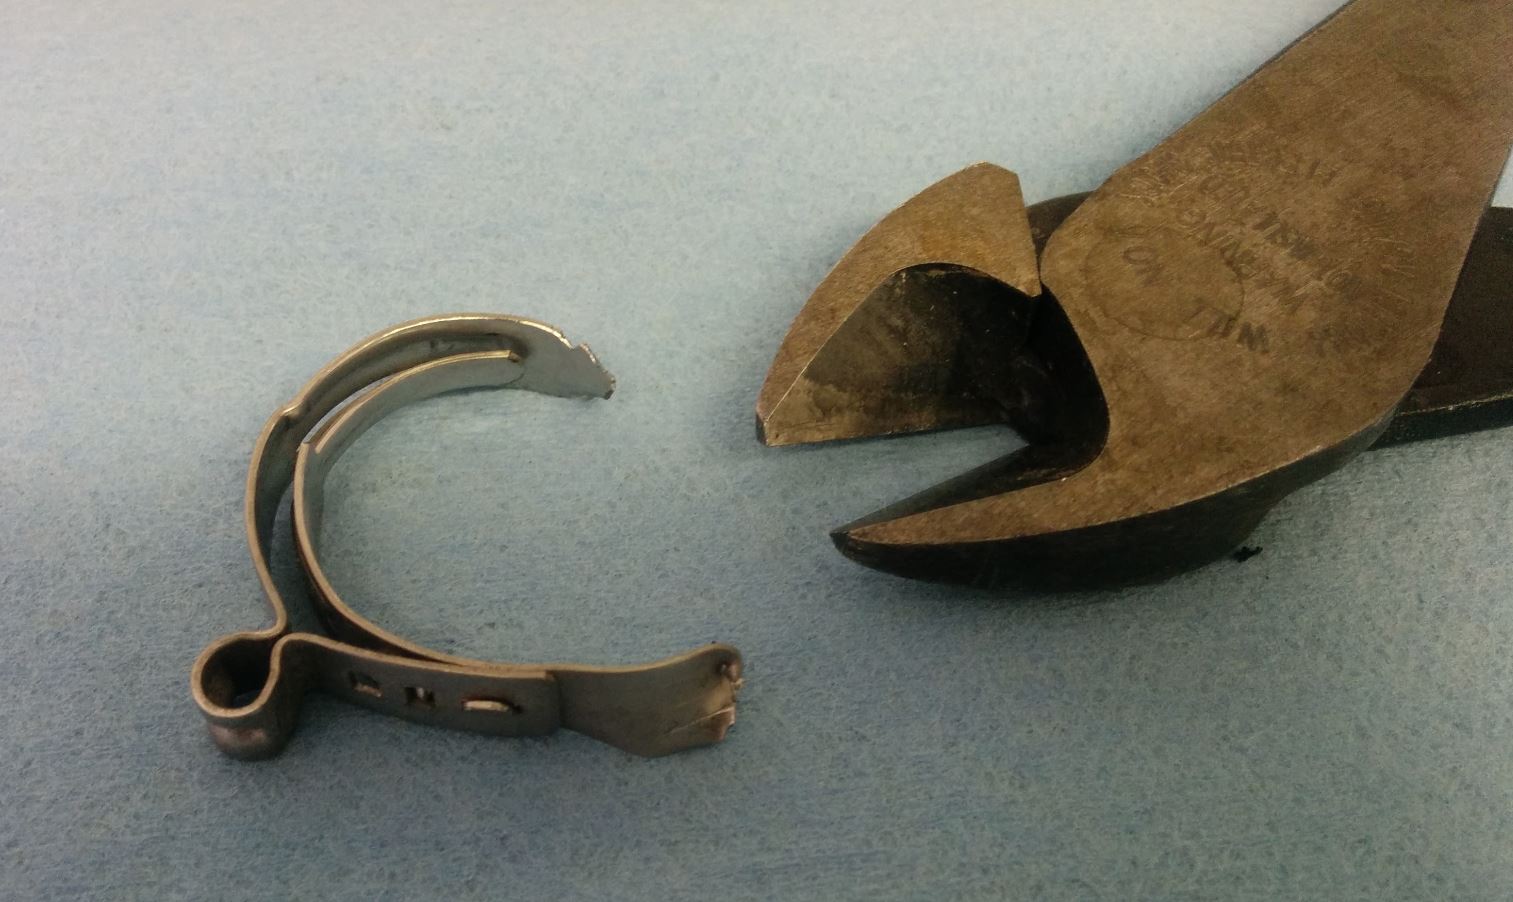
- It has an Oetiker clamp, and if you happen to know how to release it, go for it. I didn’t, so I used a pair of side cutters and snipped the metal clamp off. Make SURE you are cutting off the clamp on the correct hose. See my photo.

- Once the clamp is removed, I used a flat blade screwdriver to pryse/wiggle the hose off the pipe.

- Carefully pull the hose back towards the center of the engine area paying close attention to how it weaves around and under the other hoses. Take pictures and make sure you see how it goes.
- It has an Oetiker clamp, and if you happen to know how to release it, go for it. I didn’t, so I used a pair of side cutters and snipped the metal clamp off. Make SURE you are cutting off the clamp on the correct hose. See my photo.
- The entire harness assembly should now be disconnected, and you just have to lift it up and forward out of the space. when you get it out, it should look like this:

PCV Valves and Harness Assemblies Removed


Next Steps
With the PCV Valves and harness assemblies now removed from the car, you can carry on with one of the replacement options detailed in this article.
Video
Here is the video of how to tackle these steps performed by Mike Potts.
