

There may be a few reasons that you need to remove the Glove Box and surrounding dash panels on your DB9, but the most likely is that you are trying to change the Cabin Air Filters as part of a 2 year / 20,000 mile service and this step is necessary to access the filters.
The process is not difficult once you see how it’s done, and I encourage you to watch the short video below to bolster your confidence before you start reefing on panels willy-nilly. I know I wish there was a video when I started on this. Some of my background came from this AMOC post.
Tools Required
Not many tools are needed:
- A Phillips head screwdriver
- A small inspection light (optional) to help you see the screws
- Your hand to pull on stuff
- Small amount of courage
Procedure
The entire process will only take about 5 minutes.
- Move the passenger side seat as far rearward as you can to give you the most space possible in the foot well.
- Open the Glove box and remove any contents (such as the owner’s manual) and then close the glove box.
- Next you need to get into the foot well so you can look up at the Glove Box hinge, and take the inspection light and Phillips screwdriver with you. No elegant way to do this, just stuff yourself in lying on your back with your body twisted out the door (hoping your wife doesn’t take the opportunity for a well-timed photo and Facebook post with some comment about your sanity).

Glove Box Hinge Screw and Alignment Pin - You will find three small black pan head Phillips screwsalong the bottom edge of the Glove Box door assembly – fairly obvious (see photo). One on the left edge, one center, and the last on the right. Remove these screws and keep track of them (you don’t want them rolling around with the possibility of them scratching the leather in the next steps).
- With the lower hinge loose, the Glove Box is only being held in place by the latch since the box is still closed. While supporting the Glove Box with one hand, push the Glove Box release button. The Glove Box should release and come free in your other hand, but still have a retractable tethered cable attached (that is used to assist in closing the glove box). Lower the Glove Box to the floor, essentially hanging off its side tethered to this cable. Looks awkward, but resist the urge to disconnect the tethered cable as many forum posts say that it’s a PITA to get reconnected, and it’s OK to just leave it this way.
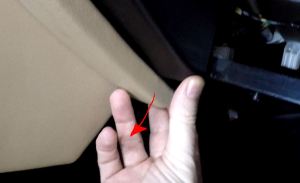
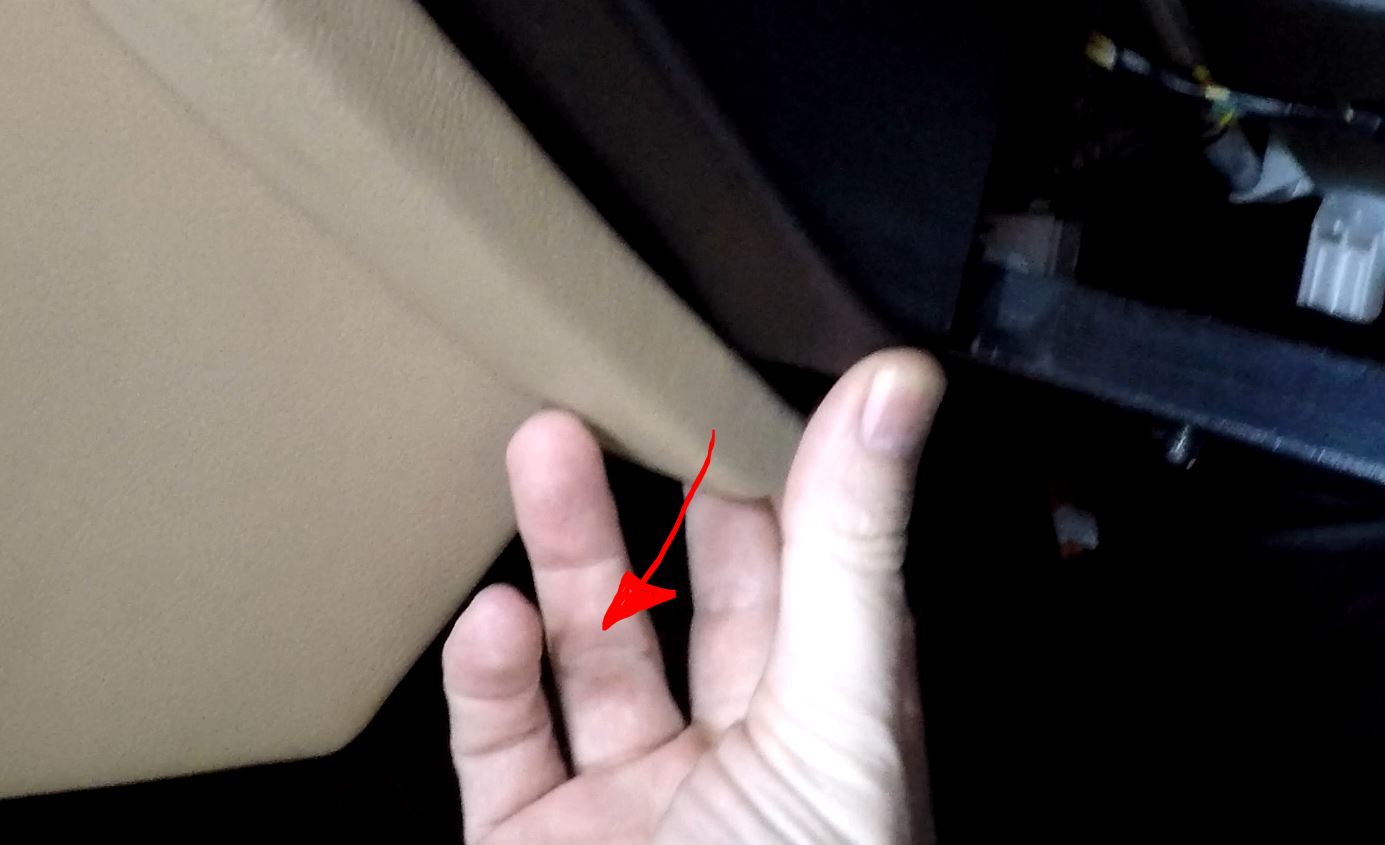
Pulling off the Leather Glove Box Surround - Now for the scary bit. You need to reach down and grab the lower edge of the leather covered panel surrounding the Glove Box on the side toward the center of the car. Give it a firm tug directly out perpendicular to the surface. You should feel the panel disengage from the snaps. Don’t go gung ho and try and rip the whole panel off by pulling from just this one spot, just pull this section loose. Really – watch the video below to see how this is done – you’ll get a sense of comfort.
- Using only your hand (I didn’t want to use any pry tools lest I mar the leather surround) move your hand around and gently tug the panel disengaging each of the five (5) snaps until you’ve got the panel completely loose. Hold it up once you get the last snap loose.

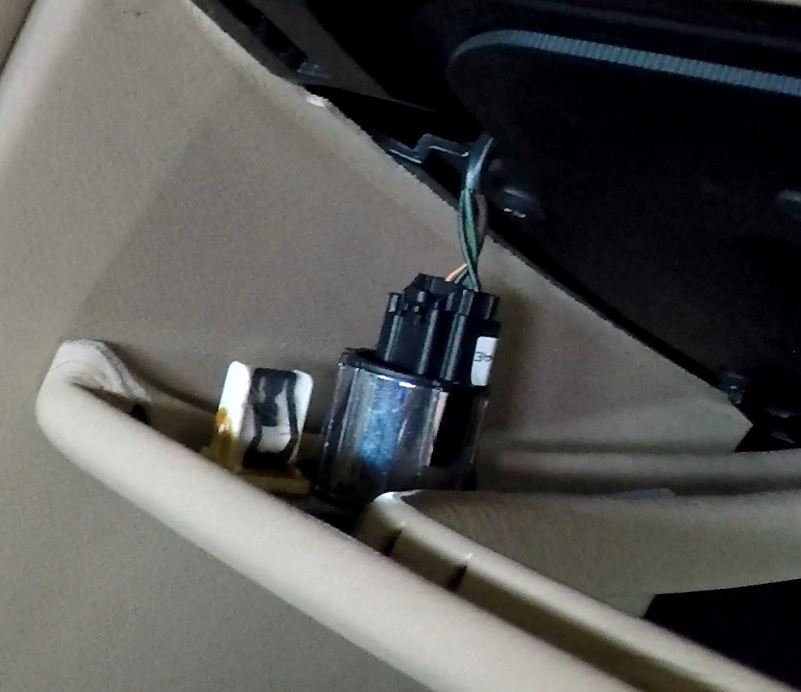
- The panel will still be tethered by the electrical connection that plugs onto the back of the Glove Box open button. Carefully squeeze the connector and disconnect it from the Glove Box release button.
- Now you should be able to remove the panel and place it someplace safe out of the way.
- With the panel out of the way, and the Glove Box itself hanging off to the side, you have access to the black plastic housing that the Glove Box fits into. We need to remove this housing since the cabin air filters are located just in behind it.

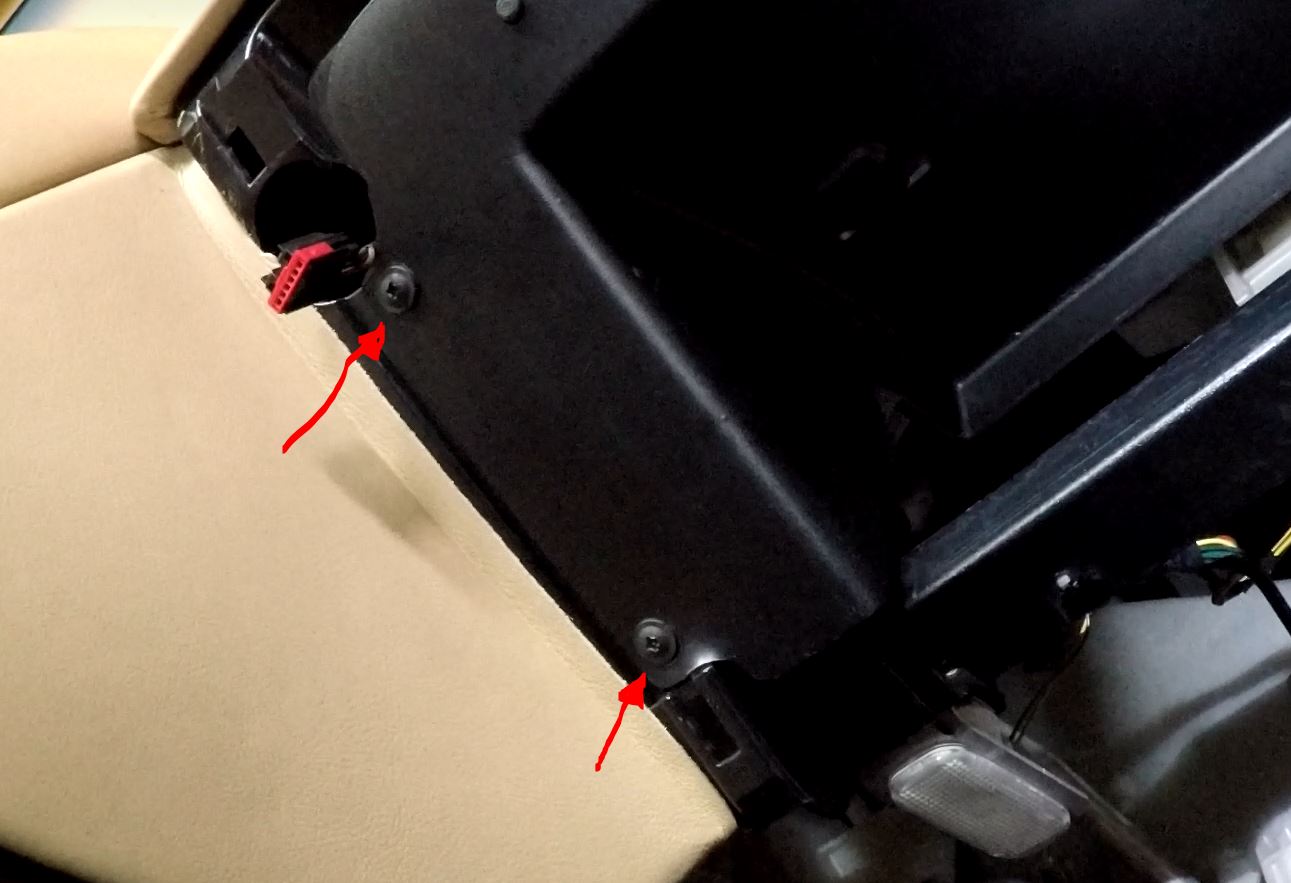
Screws to Remove on the Glove Box Surround - Remove the four black pan head Phillips screws that hold it in place. I’d suggest starting with the upper two (since the small plastic ‘Tab’ along the top edge will hold this end in place while you still have both hands free to remove the bottom two screws. Once the four screws are removed, the plastic housing should easily disengage from the ‘Tab’ and can be removed, left hanging with the Glove Box. Again, keep track of the screws so they don’t scratch the leather.


That’s the removal process, and you should have clear access to the blower motor and cabin air filters compartment. I will cover changing the filters and reinstalling the Glove Box in other blog posts.
Check out this short video to see the process described about in action, it will make a lot more sense than reading it.

Thanks for your video and instructions. I changed my cabin filters today and went through this process on my 2007 DB9. There are some differences between my car year and yours, and few parts have changed…the hinge screws are tougher to get at as their is a new trim piece apparently, and the glovebox shell that I removied after the trim panel removed is a different part shap now with screws located differently. all went well except the attachement finger that the retractor cable attaches to broke off so now the retractor cable has no place to attach too. Everyone…be really really careful of that retractor cable attachment point!
LikeLike
Thanks for the update. Would be good to see a few pic’s of the changes if you have any so I could at least reference the variation in the blog. Others have reported the unfortunate snapping off of the retractor cable. I was very careful to not attempt remove it, and on how I handled the box as it was dangling. Sorry to hear about the broken bit. I have heard of others that had the same problem create a new attachment point using a small bolt/screw with 2 nuts, and potentially using an adhesive zip-tie mount and customizing it.
LikeLike
excellent info, I have to replace the actuator for the glove box on my DB9, and info on that? the screws holding it on look all but impossible to get to..
Mike
LikeLike
Good luck Mike, I’ve not messed with the actuator. Let me know how it goes.
LikeLike
Steve, after just changing the cabin filters on my 2009 DB9, I found the procedure and locations to be identical to that on your instruction video for your 2005 DB9. Not sure what Warren’s issues were with his claim that his 2007 Aston was a little different? BTW on my car the glove box metal surround says jaguar!
LikeLike
Do all 2007 vantages have the 30 pin connector in the glovebox? I have the 07 but can’t find any connector like others describe.
LikeLike
Hi Marc. I’m not sure. I’m not a Vantage expert, and this may be one of the differences between it and the DB9. Is it the OBDII connector you are looking for?
LikeLike
Hi Steve – I only need to remove the airbag cover as the leather towards the dash appears to be coming unglued. Do I still need to remove the glovebox surround? I assume you removed it for the purpose of getting to the cabin filter and not necessarily to remove the airbag cover?
Thanks
LikeLike
You do need to remove the surround. Its necessary to remove the glove box. You need to undo the three bolts that hold down the airbag panel. Its in the articles and video on removing the passenger side interior panels. Good luck!
LikeLike
Thanks for the info. Once the weather changes I am going to take on the challenge, I can’t open the doors fully in my single car garage.
LikeLike
Hello Steve. My tether line broke at the loop as I let the glove box door down. I thought I would never see it again. Surprise!! It retracted about 3 inches. I grabbed the end and pulled gently. It seems to be at the end of retraction. I didn’t have time to try to fix it so I buttoned everything up. I’ll come up with a solution since I can reach line. Without the tether, the door slams open. The tether assists in the opening and closing of the door. I am looking forward to removing/replacing the 3 screws on the bottom hinge rail. NOT…..
LikeLike
Hiya Bob! Much like you, my tether broke as well. Rather, the tether metallic clip broke and the tether cord unlooped. I was able to find it only a meer couple inches up and used an electrical crimp and applied that to the loop, keeping the coord taught. Then you can hook it back into the plastic clip on the glove side. Voila!
LikeLike
My tether had unlooped as well. Guess the crimp got loos over time. I tied a loop in the end of the string, and given that I used up some string making the knot, I looped a tiny zip tie in to make the loop which went on to the glovebox. I attached it prior to screwing the glovebox door back on. Pretty easy to do thank to the video!!! Mine is a 2009 DB9 Volante. Instructions matched perfectly. Thanks again.
LikeLike
hi I have same issue, my loop cord snapped at the metal piece where the loop meets. I made a loop on the existing string and then tried connecting another small loop to the existing one to make it far enough to reach (couldn’t connect it with the original cord too many things in the way). I did this but the door still slams open, perhaps I used too long string to connect to the original loop? Should I try a small ziptie to connect the original loop to the glovebox?
thanks
LikeLike