
If you are doing your own 2 year/20,000 mile service on your DB9, one of the required service items is to change your cabin pollen filters. Like anything on a DB9 this isn’t particularly simple, but can be done by just about anyone. The process will take about 5 minutes once you see how.
Parts Needed

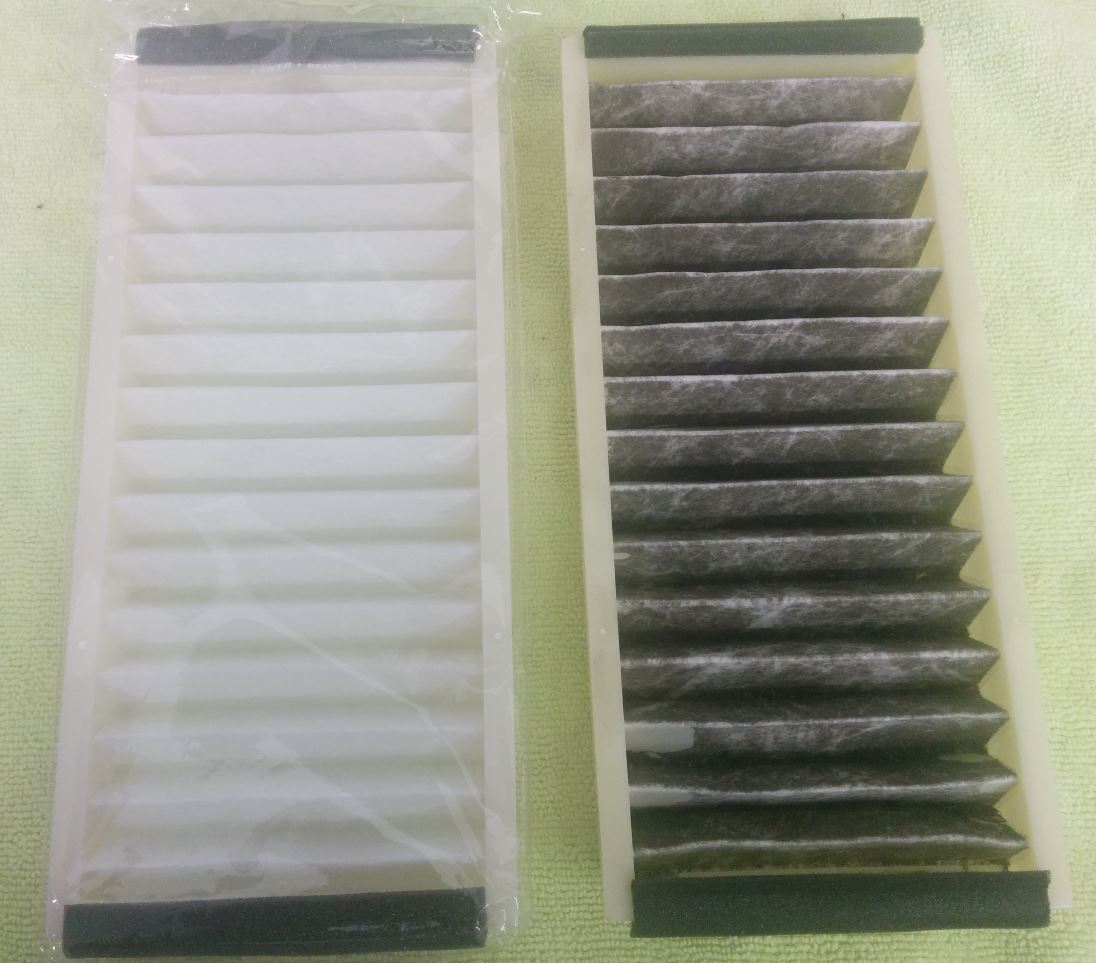
You will need a pair of replacement filter elements. You can either purchase new filters from Aston Martin, or consider upgrading to aftermarket ATP Activated Carbon Air Filters that will add the benefit of odor removal as well as being better at pollen and dust removal. I have another blog post on just this topic, and it have all the details on both the factory and aftermarket parts, so check it out.
Tools
Just your hands and a small inspection light to better see under the dash.
Procedure
To be able to access the filter compartment, you will need to first remove the Glove Box. Check out my other post and video on how to do this.
Once the Glove Box is removed:
- Look up into the cavity behind where the Glove Box used to be.

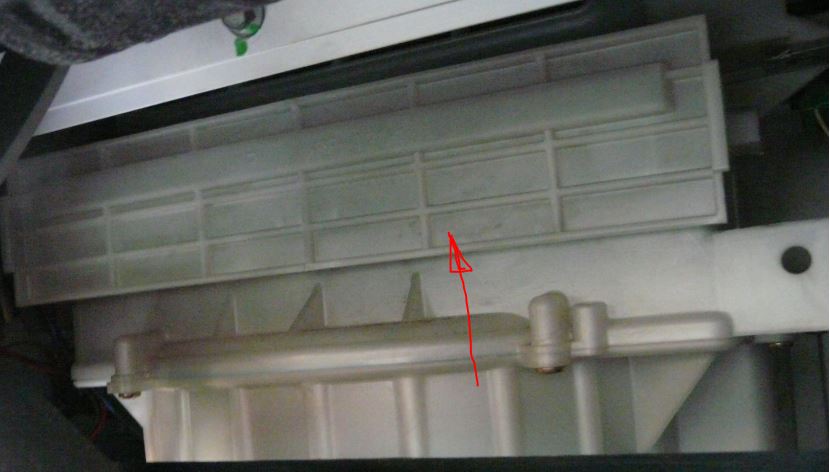
White Plastic Access Cover You should see the white blower motor assembly. On the front of it (facing you) towards the top you will see a white plastic rectangular service access panel.
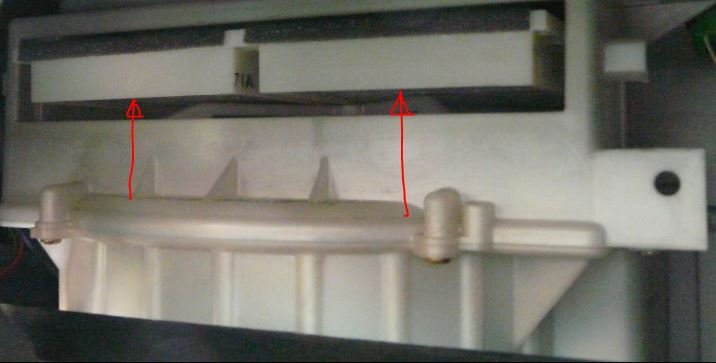
- The access panel is held in place by prongs on both left and right sides of it [is “prongs” even a real word?], and we need to reach up and spread the prongs to release the panel.

Prongs to Spread to Release Access Cover I’d suggest starting on the left side (that is most accessible) and figure out how to spread and release the prongs when you can actually see it. I strongly suggest you check out my video below to see how it’s done.
- Next do the same procedure to release the clip on the opposite side (you can’t see this one while you do it). The access panel will simply come loose and lift it away.
- Now you can clearly see the ends of the two existing filters. Just reach in and pull them out one at a time (the two sit side by side in the slot). They might be pretty dirty so I’d suggest keeping them faced up so the pine needles or debris doesn’t drop out on your face or carpeting.
- Set the old filters aside, and unwrap your new filters.
- Insert your new filters one at a time.

Cabin Air Filters In Position with Access Cover Removed The foam on the filter should be face up as you insert it (same orientation as the ones you removed). Don’t worry too much, they won’t fit if you have them upside down. I’d suggest putting the outboard one in first, then slide the inboard one in next snuggly. Make sure they sit all the way into the slot so they are flush on the front.
- With the new filters firmly in place it’s time to replace the access panel. Note the embossed ‘Up’ on the front of the access panel to help orient it. This is much easier than the removal, just be careful to get the prongs back over the mounting posts and firmly press it into place until the prongs fully engage and hold the panel tightly in place. Give it a firm wiggle to be sure its snug (you don’t want it rattling about with only one side engaged).

That’s it, your filters are changed. Now you’ll need to reinstall the Glove Box and surround properly, and I cover that in this other post.
Check out this short video of the process above, it will make more sense.

Great info – thanks. Everyone says to leave the box hanging by the damper cord….mine pulled the loop through the clamp that forms the loop though and effectively broke it 😦
LikeLike
Sorry to hear about that. So the tension on the cable essentially broke the loop at the end of the cable? We you able to re-tie the loop somehow?
LikeLike
I had a go using a crimp from an electrical connector, squeezed hard to try to re-form the loop but it immediately failed. To be honest the glovebox is useless (it has a blower motor in it!!!) and so never gets used…but I will fix it one day!
LikeLike
I performed this replacement yesterday – ’09 DB9 Volante – 35K. Everything was straight forward except that that two bolts/screws for the ends of the glove box hinge were T20 Torx. I never was a contorionist, and at mid-80’s, I’m even less than I once was. So, some frustration trying to get my Phillips screwdriver to engage with those two machine screws (center fastener which i removed first was Phillips head).. Used correct tool, and everything worked out well. I threw those two Torx bolts away and installed Phillips head screws in all three locations.
Previous filters were very dirty. Had been in for 17K miles and 3.5 years. Next time, I’ll be able to do this all by feel, without ever having to get my head under the dash!
THANK YOU Steve for another great assist in maintaining our car – named Princess!!
LikeLike
Hi Gary. Sound like someone substituted Torx screws on their own at somepoint. Yes, its a contortionist move for sure. But, hopefully worth it if the old filters were past it. I’ve been just doing them every 2 years with the major service since they aren’t too expensive. Another princess – Awesome!
LikeLike
The glovebox on my 2010 Rapide has the same fixing arrangement as Gary had encountered. The centre of the 3 is a Philips pan head screw and the two outers are both T20 machine screws with a captive washer.
So it would seem that it has been a running change made at manufacturer level as opposed to it being someone having used a pair of Torx instead of Phillips screws.
LikeLike