
 What the heck is a ‘Slam Panel’? When you have the engine compartment open in your DB9 and you gaze with amazement at the V12 engine, the slam panel is the large panel right in front of you that covers the area between the front bumper and the front of the engine itself. It has the cool little plaque listing the name of the final inspector at the factory that signed off on your car (thanks Paul!).
You may find that you’ll need to remove the slam panel if you are undertaking some other task for items concealed below it. Under the panel you’ll find a lot of things:
-

Paint Code Sticker Location Hidden Under Slam Panel The official Paint Color sticker
- The radiator
- The air conditioning radiator
- The ambient air temperature sensor
- The air intake ducts for the air filters
- The engine oil cooler
- The transmission oil cooler
- Access to the grill support assembly
- Access to the hood latch assembly

The slam panel is also structural. It helps bind all the wiggly bits of the front clip together and anchors them to the frame structure (that’s why there are so many bolts).

It gets it name by theoretically holding the ‘bump stops’ that the hood ‘slams’ against when you close it. There is a left and right rubber bumper protruding up. But the keen observer will notice they opted to stupidly mount those to the top of the PLASTIC front grille surround, where they are prone to cracking the plastic. But that’s another story. Anyways, in most cars this panel area is called a slam panel.
Removing the panel is a quick and easy process anyone can do.
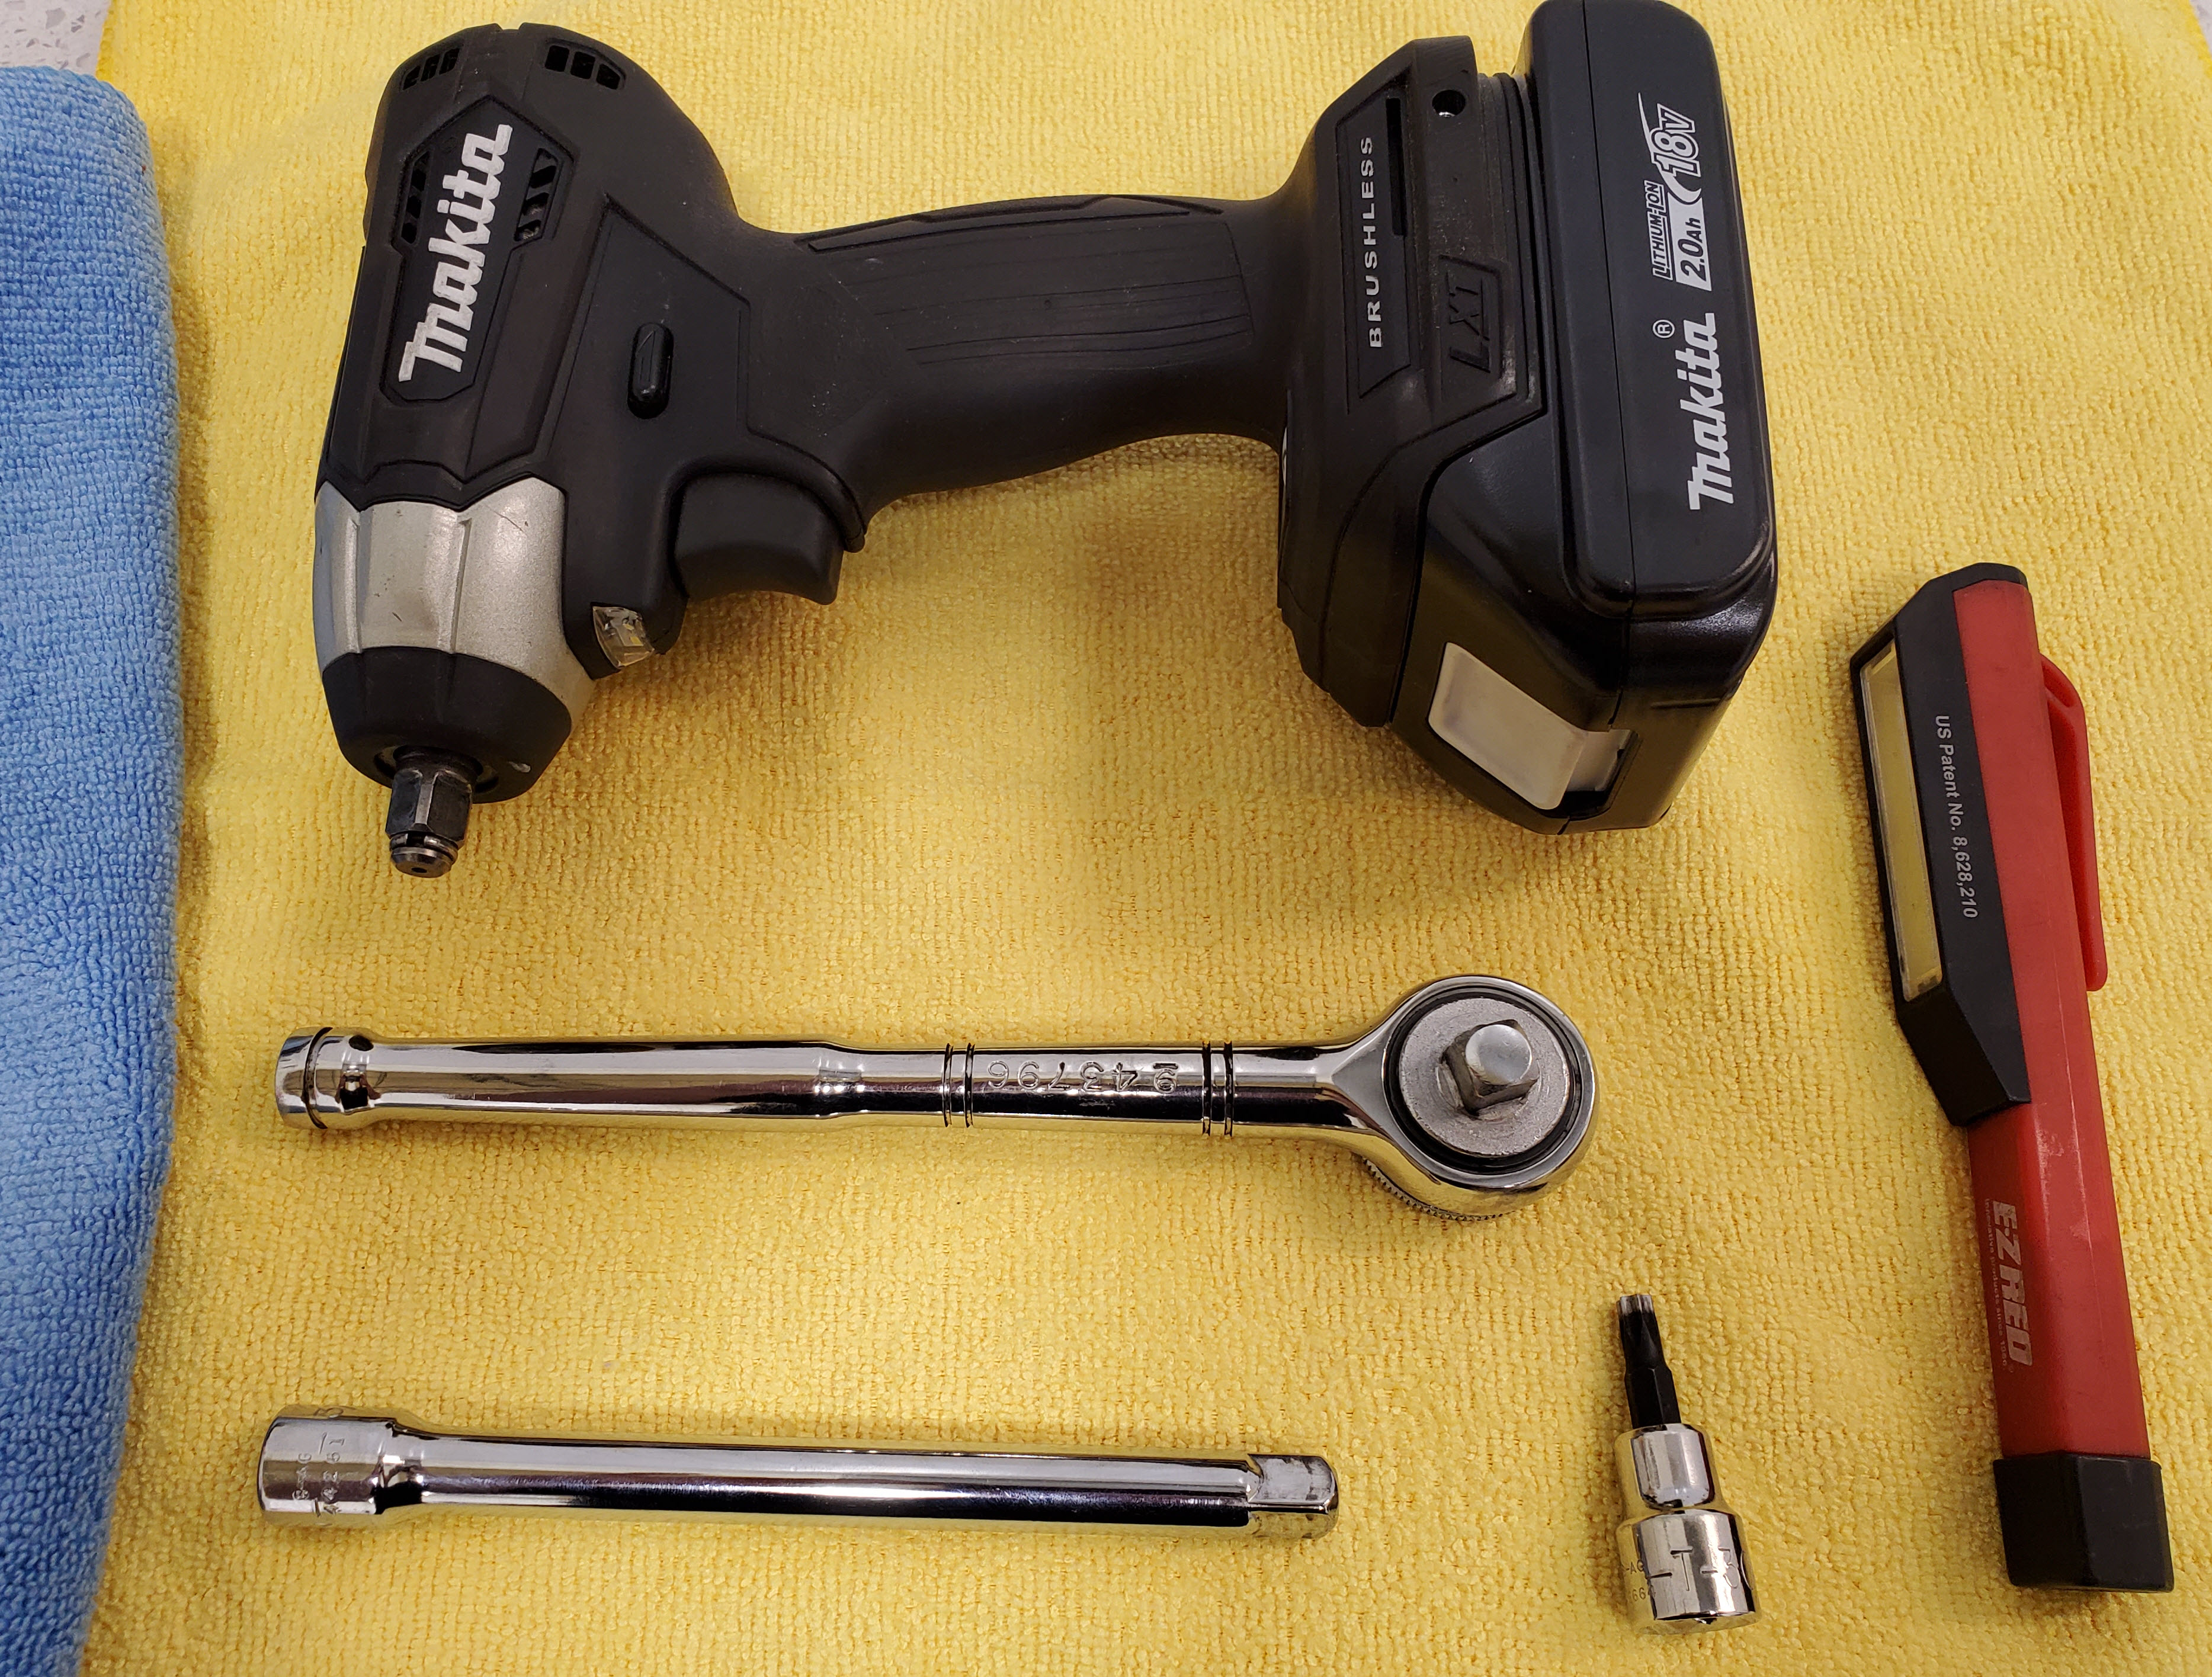
Tools Required
You only need a couple of tools:
 Torx T30 Socket
- Ratchet and extensions to use with the socket
- A nut driver handle or an electric or air driven ratchet may save you a bunch of time. You have a 18 bolts to remove.
Procedure
The official Aston Martin Workshop Manual doesn’t actually have a section on how to do this. Its mentioned as a step in various sections “Remove Slam Panel” it’s just assumed you can figure it out.
Removing the panel will only take 5 minutes or less.
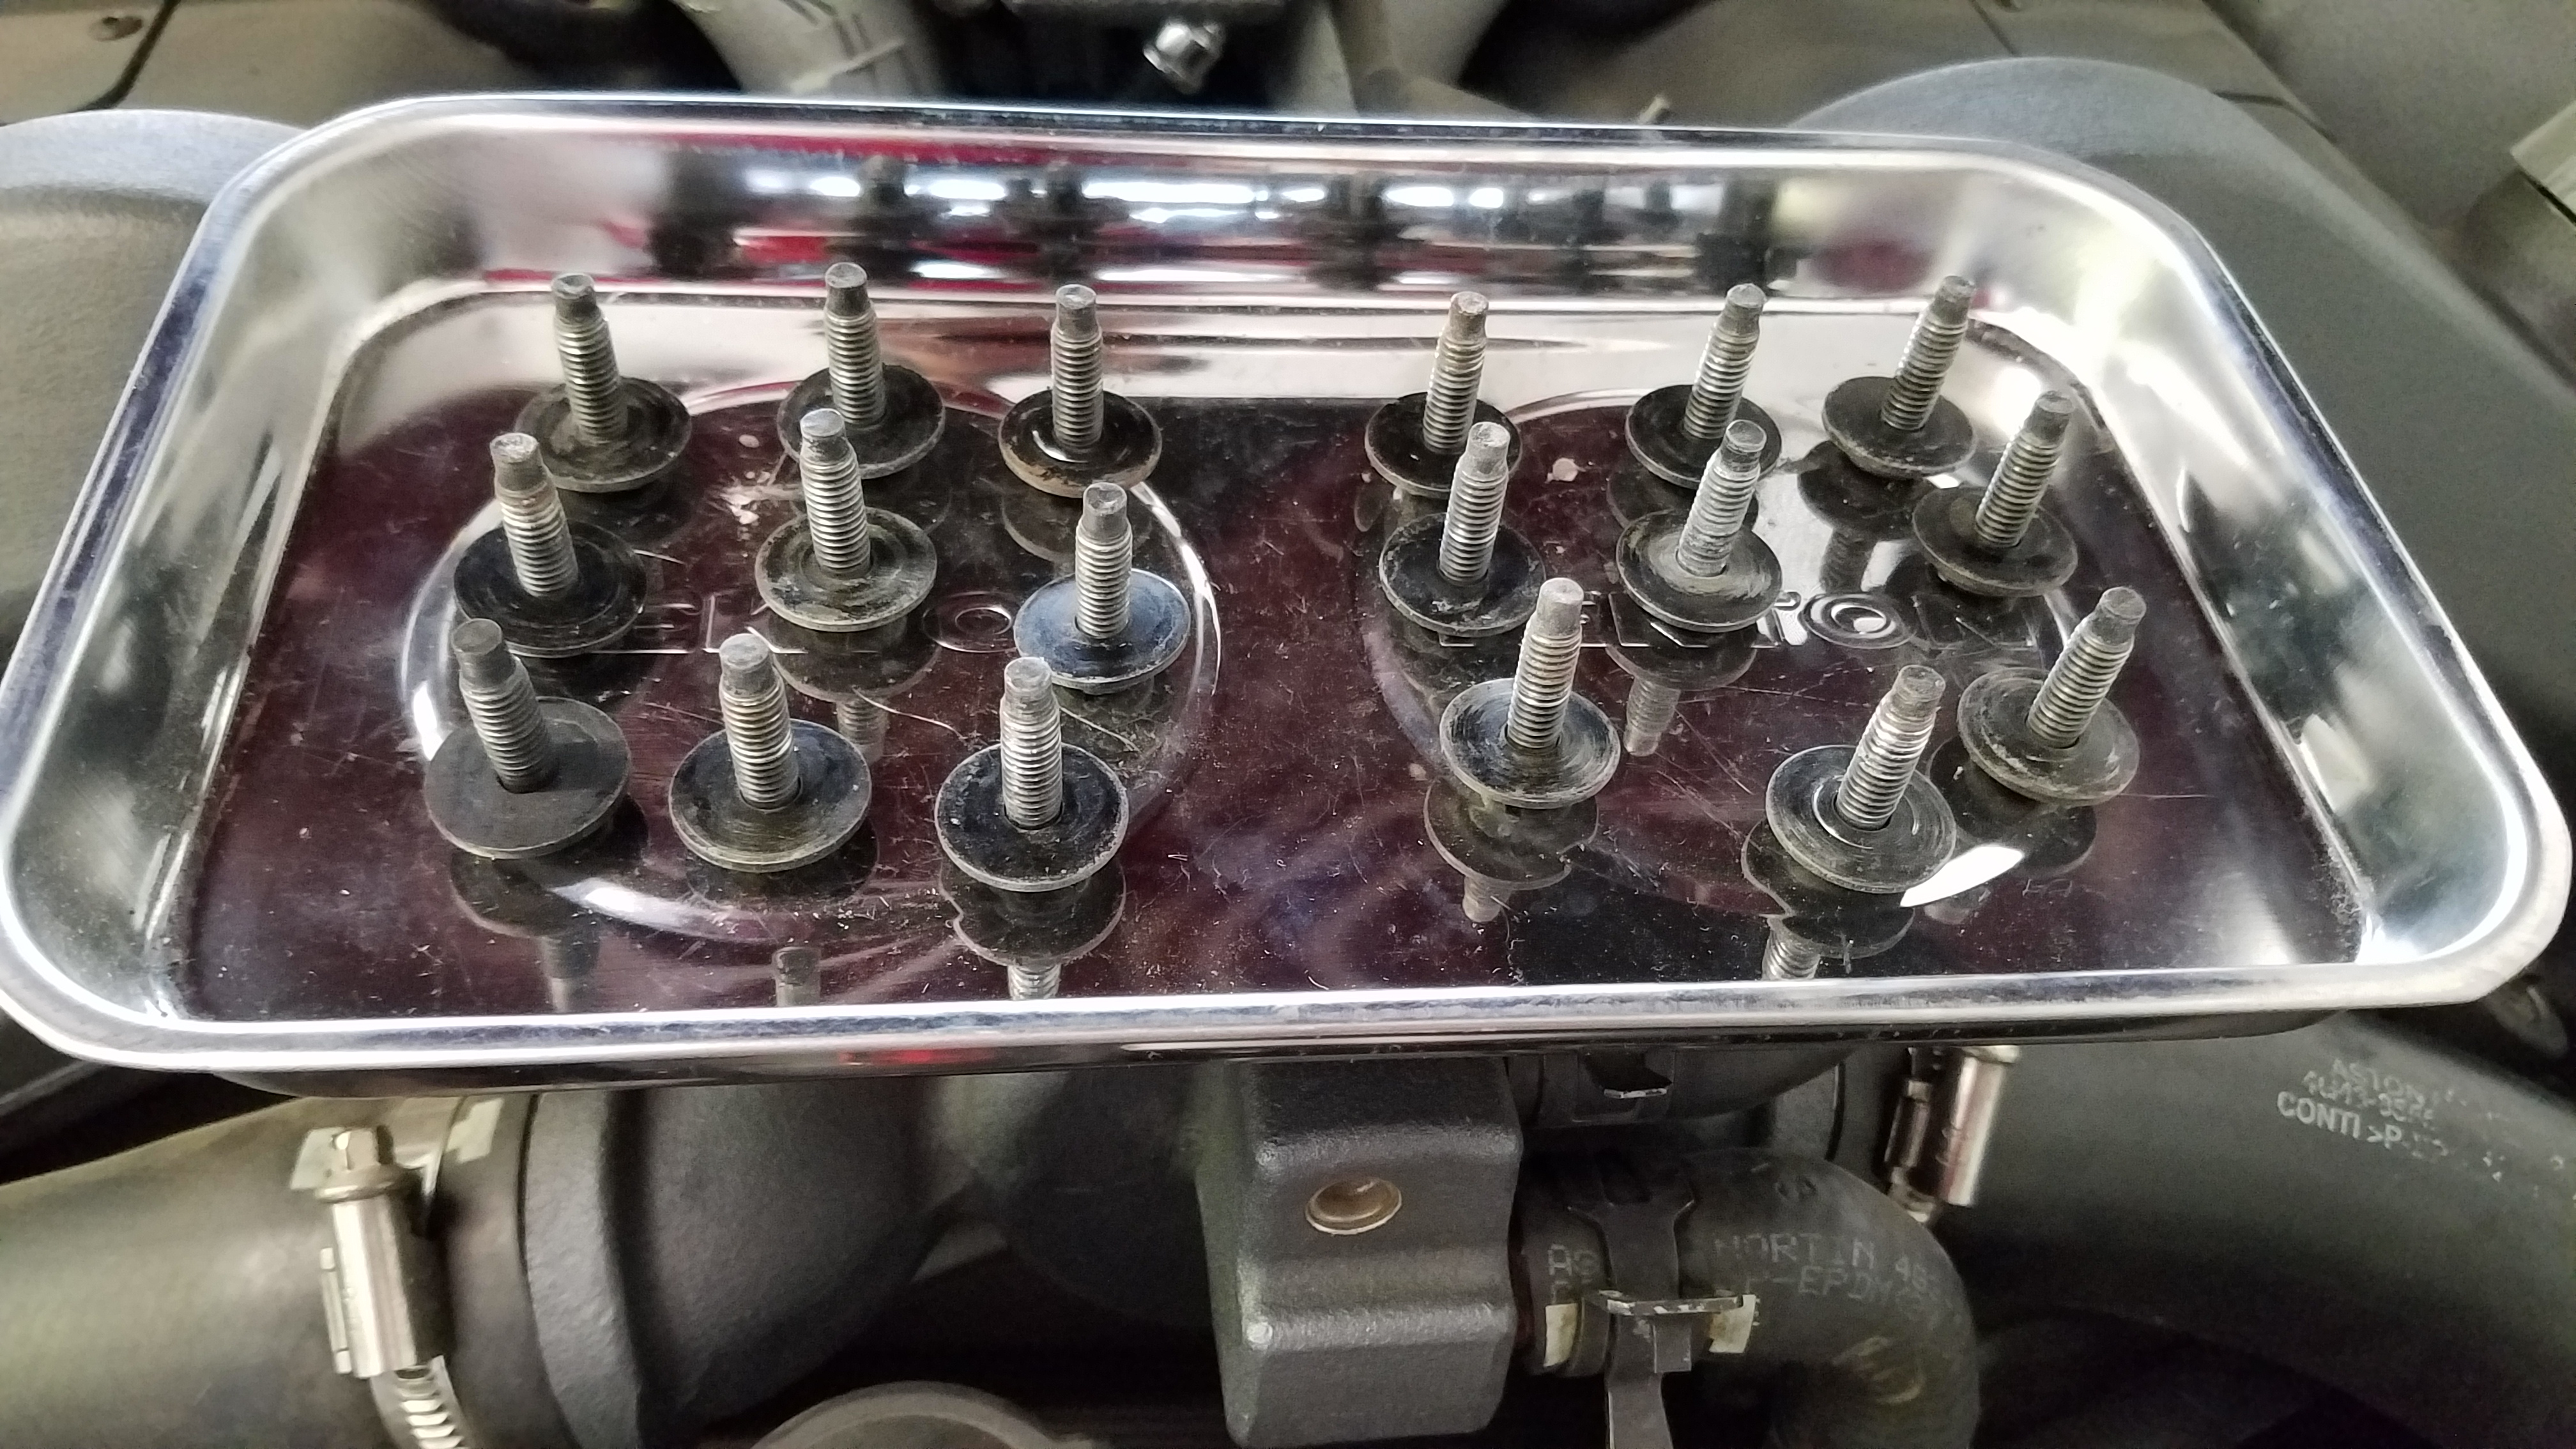
- There are 18 T30 Torx bolts to remove.

- There is no magic to the order. I usually just start at the rear left and work around clockwise.
- Be careful not to scratch the painted finish of the slam panel itself. Its paint, not powder coat. It scratches easily. If you drop your tool across it the paint will probably scratch.

- All the bolts are the same.
- Use a little caution and common sense when using an electric or air driven tool. If the bolts are seized or cross threaded and you crank on the power of your tool, you could risk breaking them off. I’d recommend you hand loosen them 1 turn each with the ratchet to be sure they are turning smoothly and then switch to the power tools for the tedious bit.

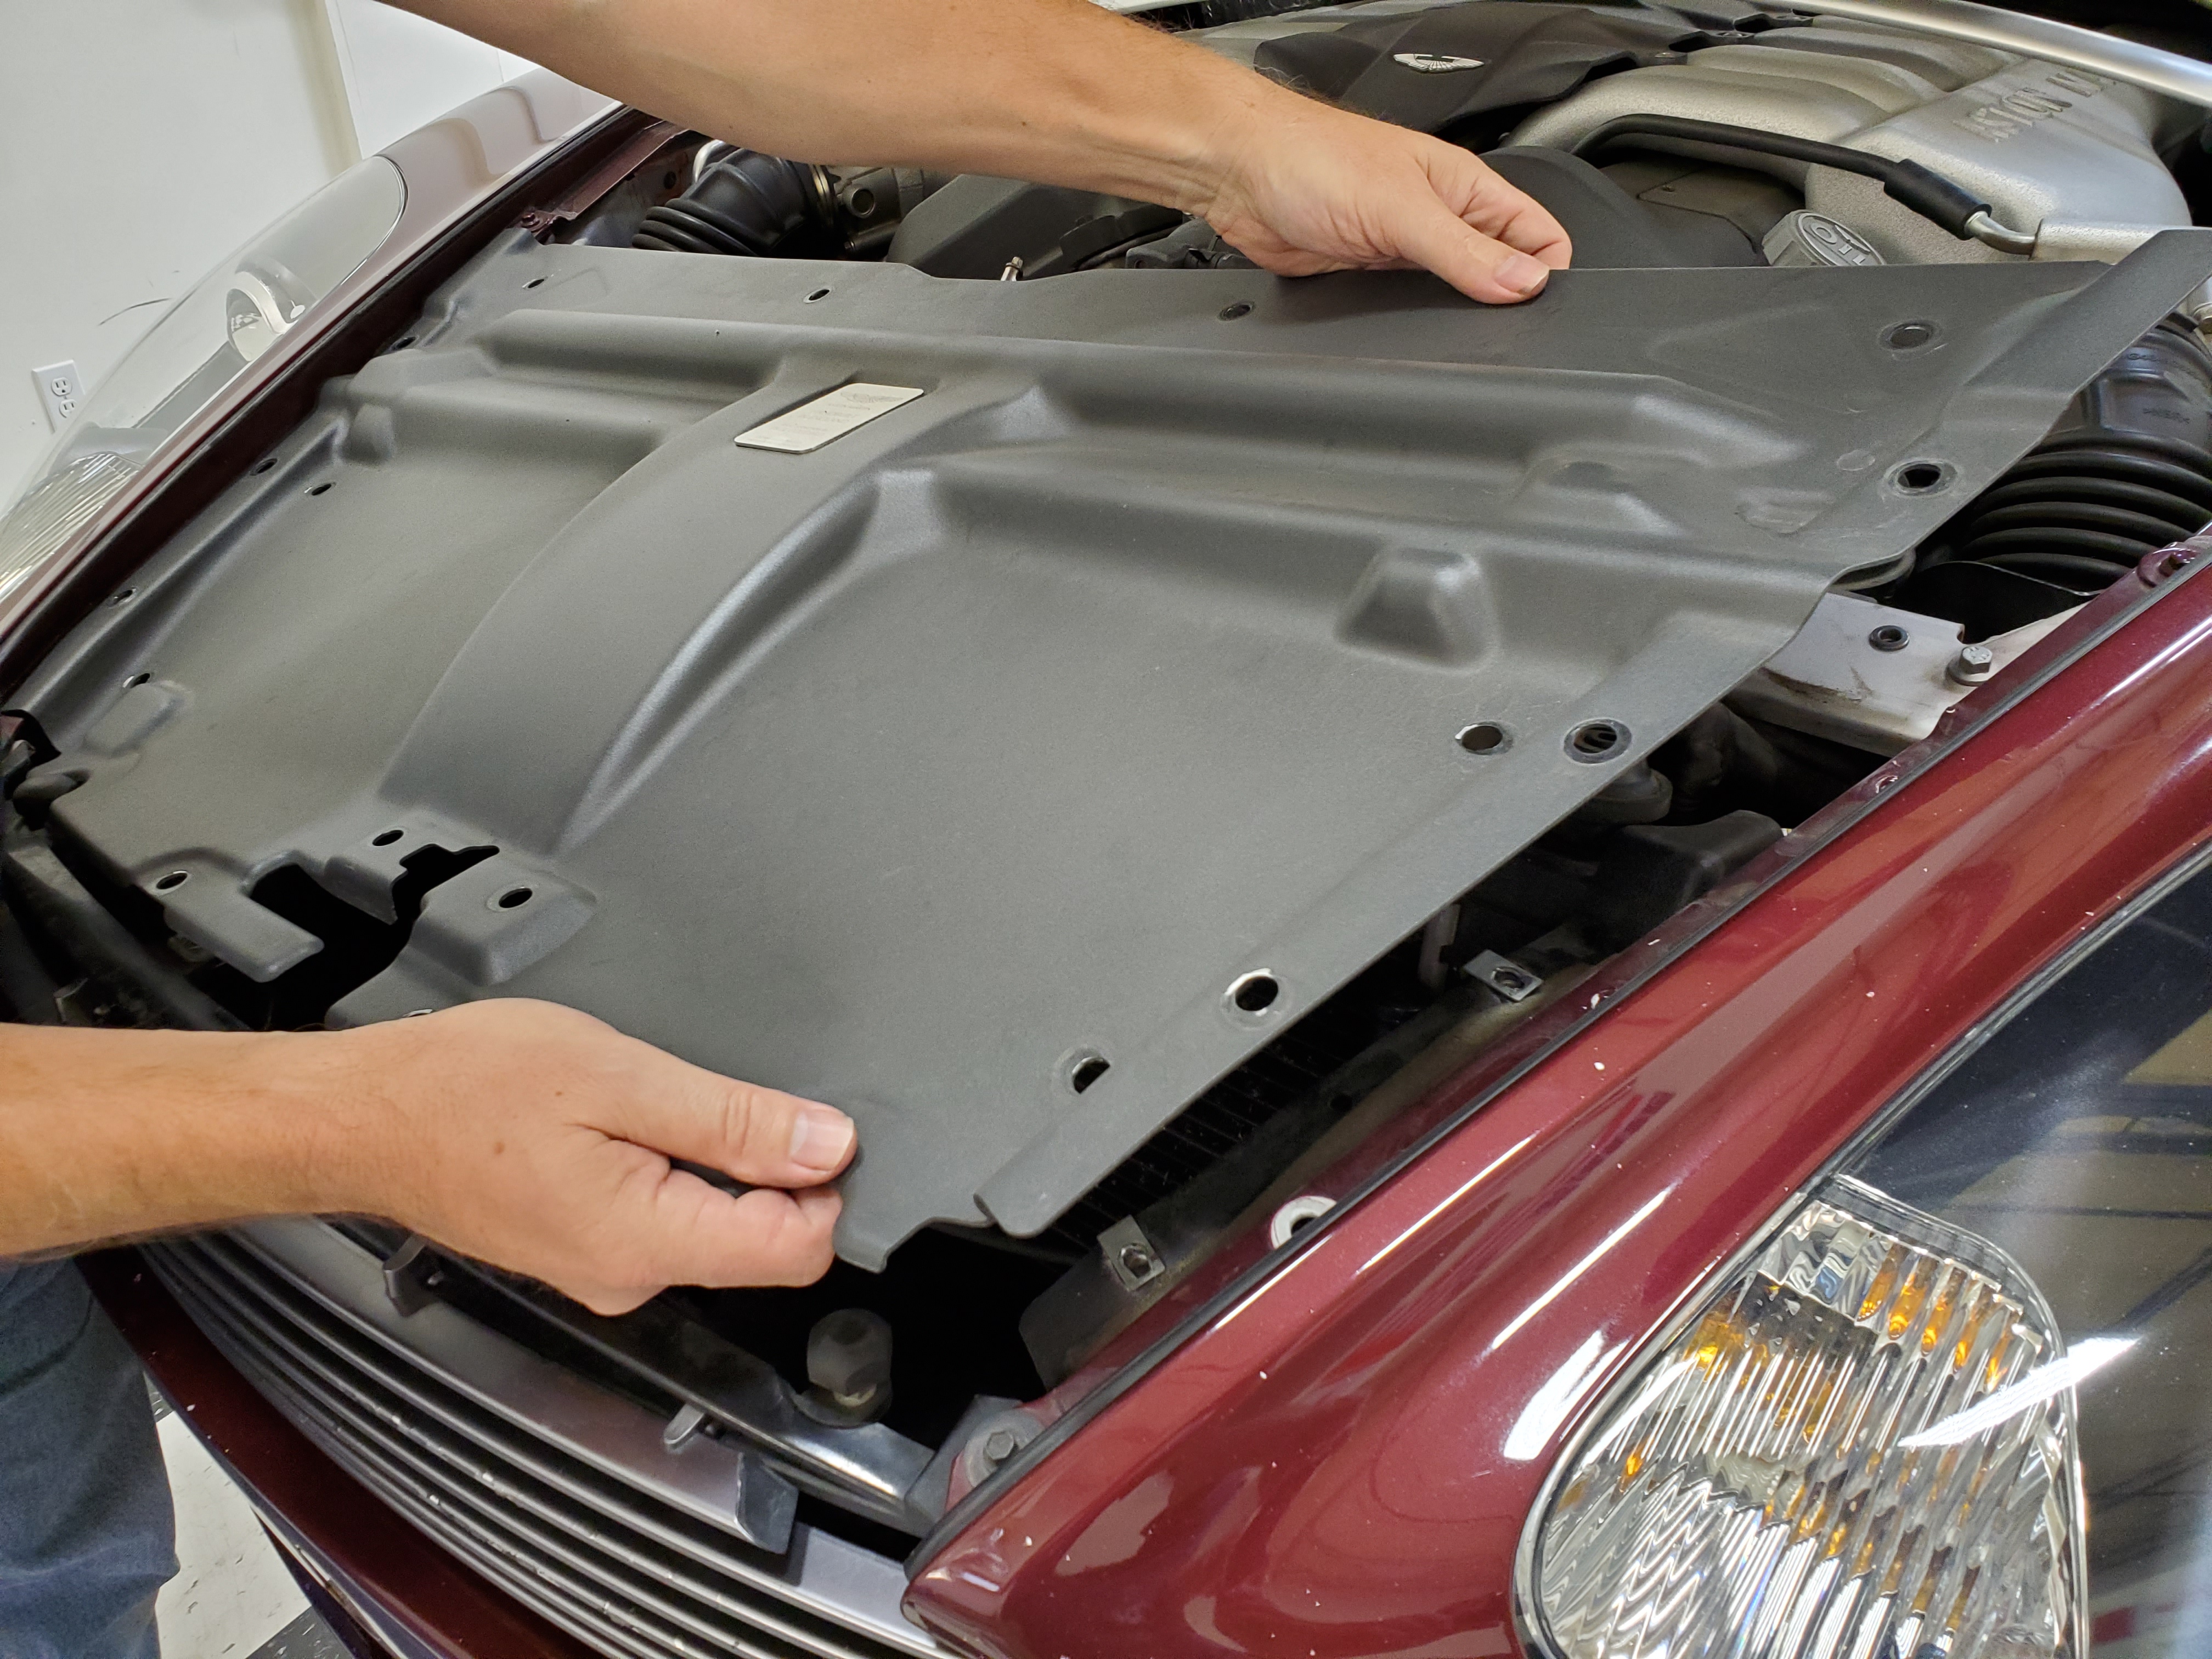
- Once all the bolts are removed its time to lift the panel straight up and out. I usually lift one side and tip is up gently to clear the rubber gasket of the hood seal. Then I pay close attention and lift the panel up and clear.
- You are lifting a big piece of metal up right next to your beautiful painted fenders. Don’t let a moment of inattention allow it to wander over and scratch the precious paint. Just pay attention and be careful is all that is needed.

- You are lifting a big piece of metal up right next to your beautiful painted fenders. Don’t let a moment of inattention allow it to wander over and scratch the precious paint. Just pay attention and be careful is all that is needed.


That’s it. Now you should be able to access whatever bit you are after underneath it.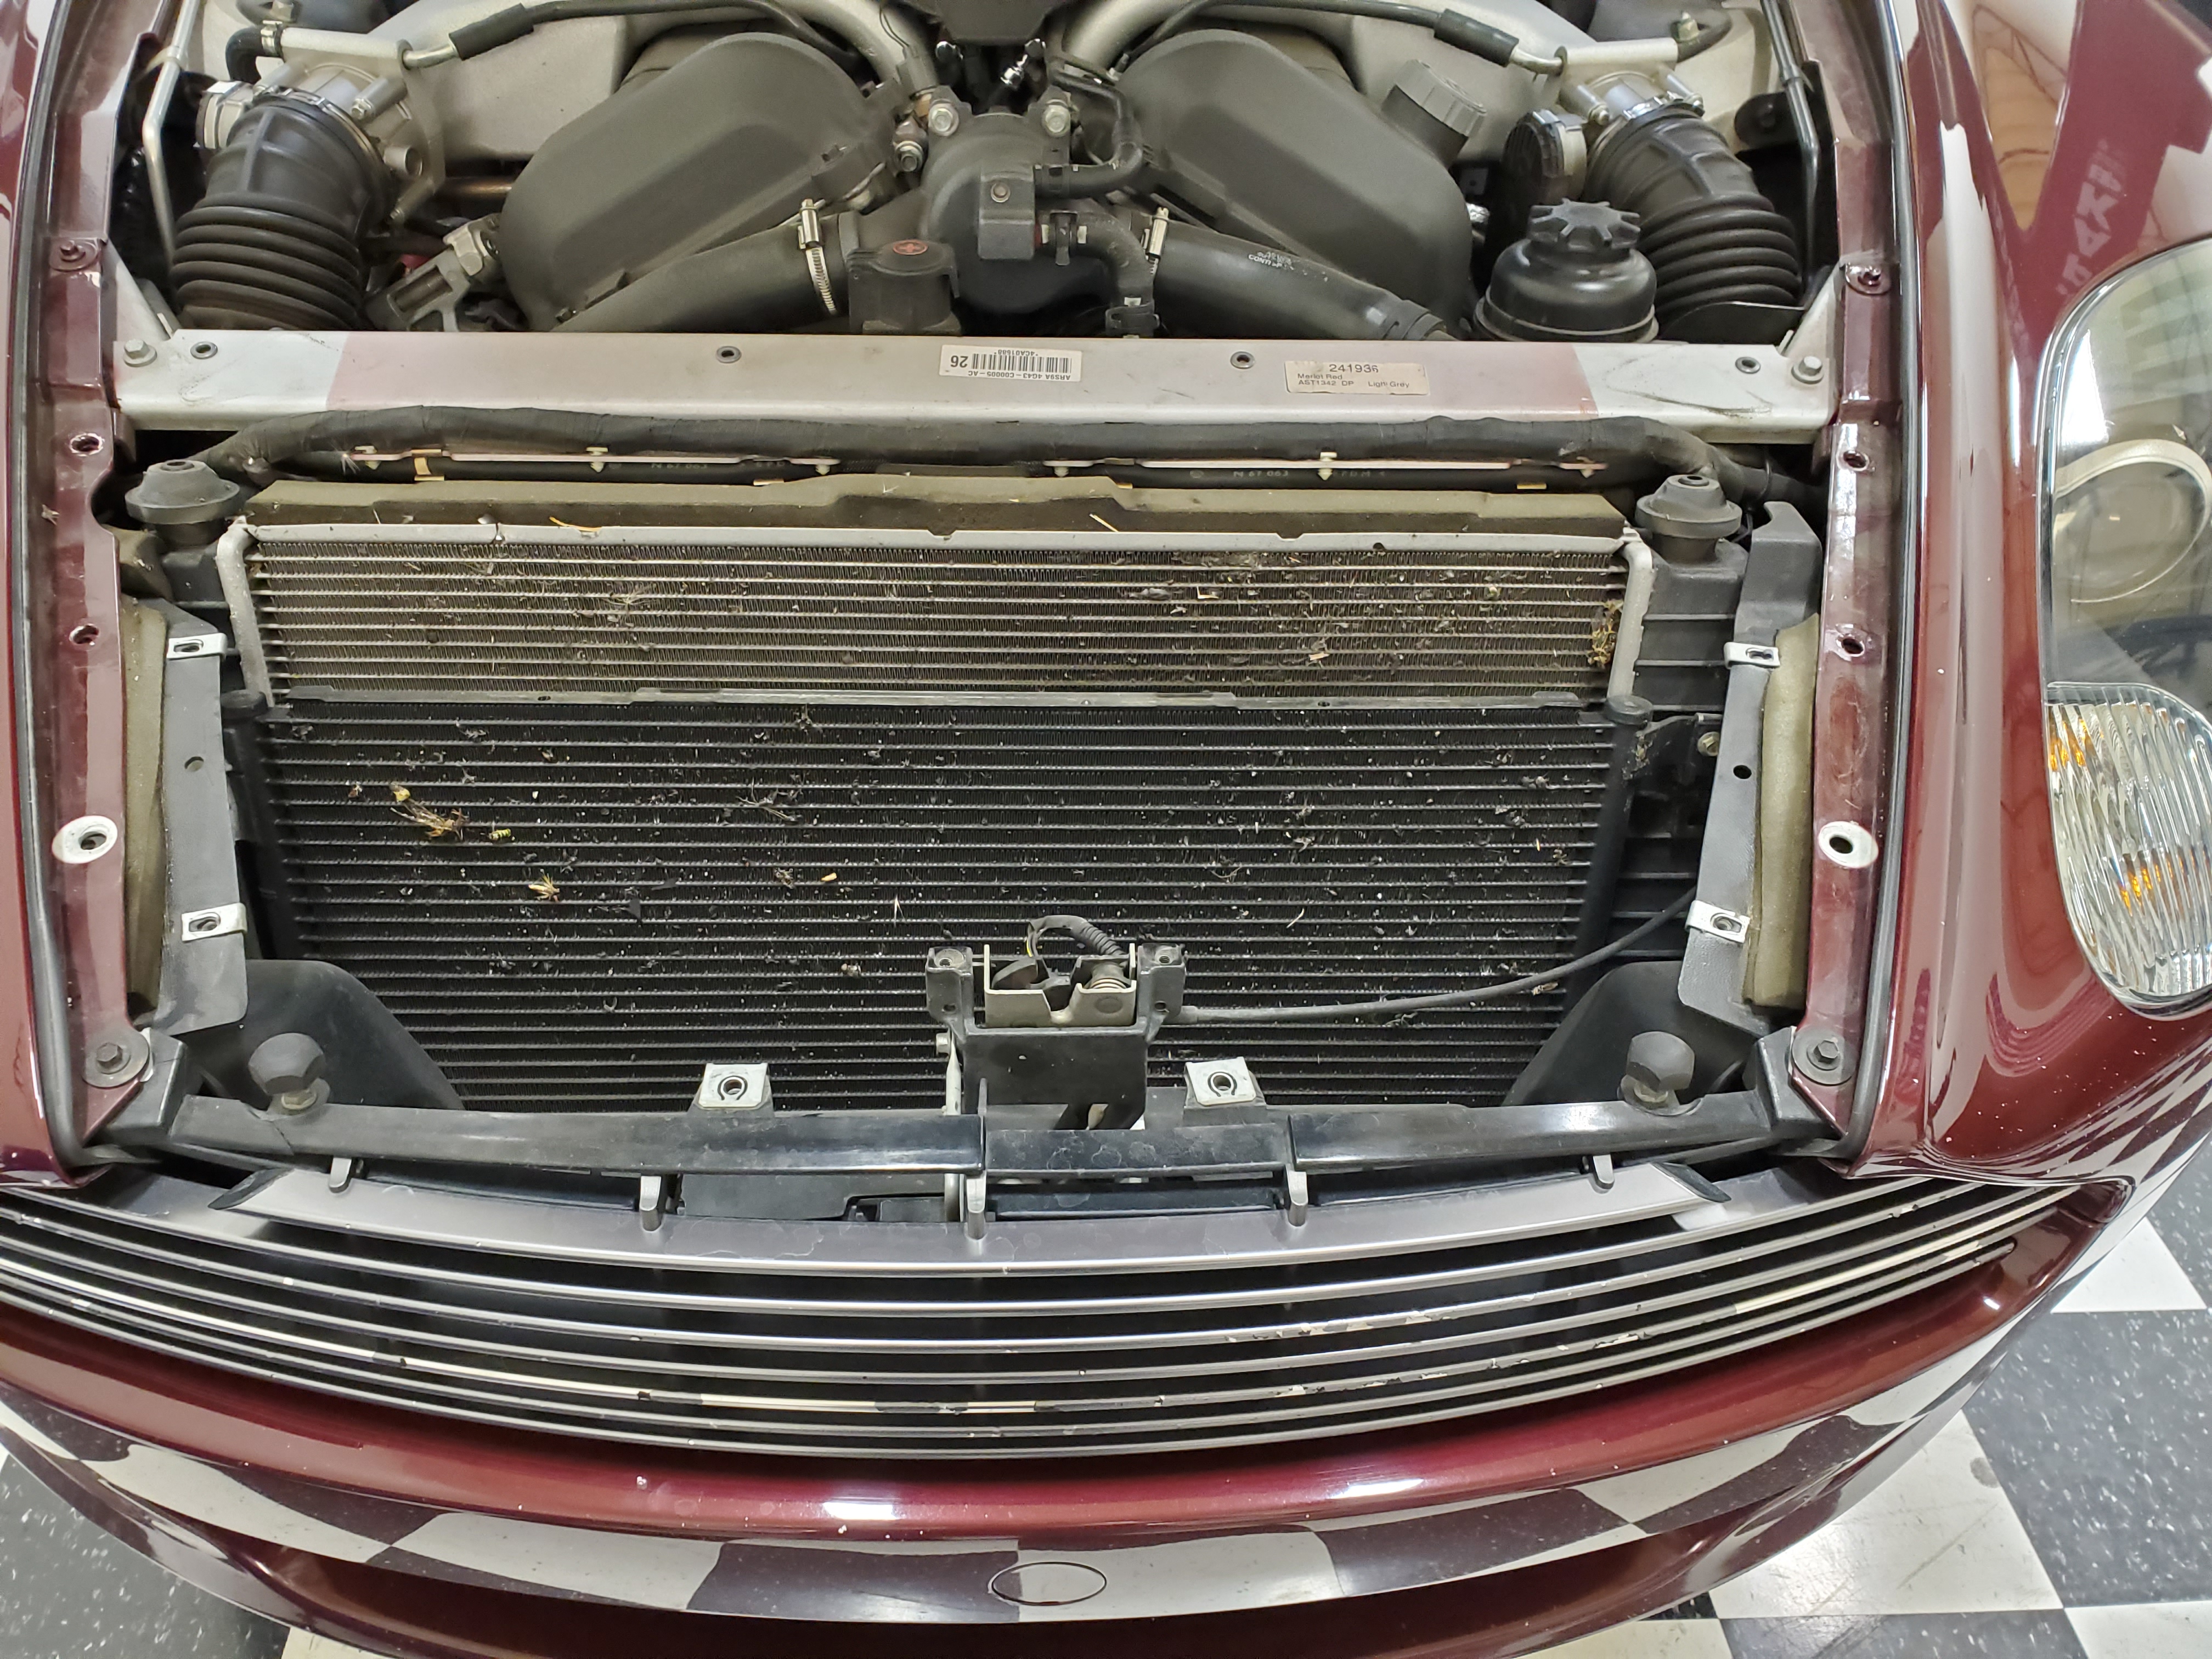
When its time to put the panel back, check out my other article and video that shows you how and includes the torque specs for the bolts [Coming Soon].
Video
Here is a short video of the process, and you might be interested in seeing how to tip it up and up and what’s under it.

Hi Steve, do you know how to replace the ambient air temperature sensor? Reading piston heads forum it looks like mine has failed (ambient air temp is showing as way too high) and setting off an emissions system fault code too. Would like to try my hand at DIY replacing it. Thanks in advance,
LikeLike