
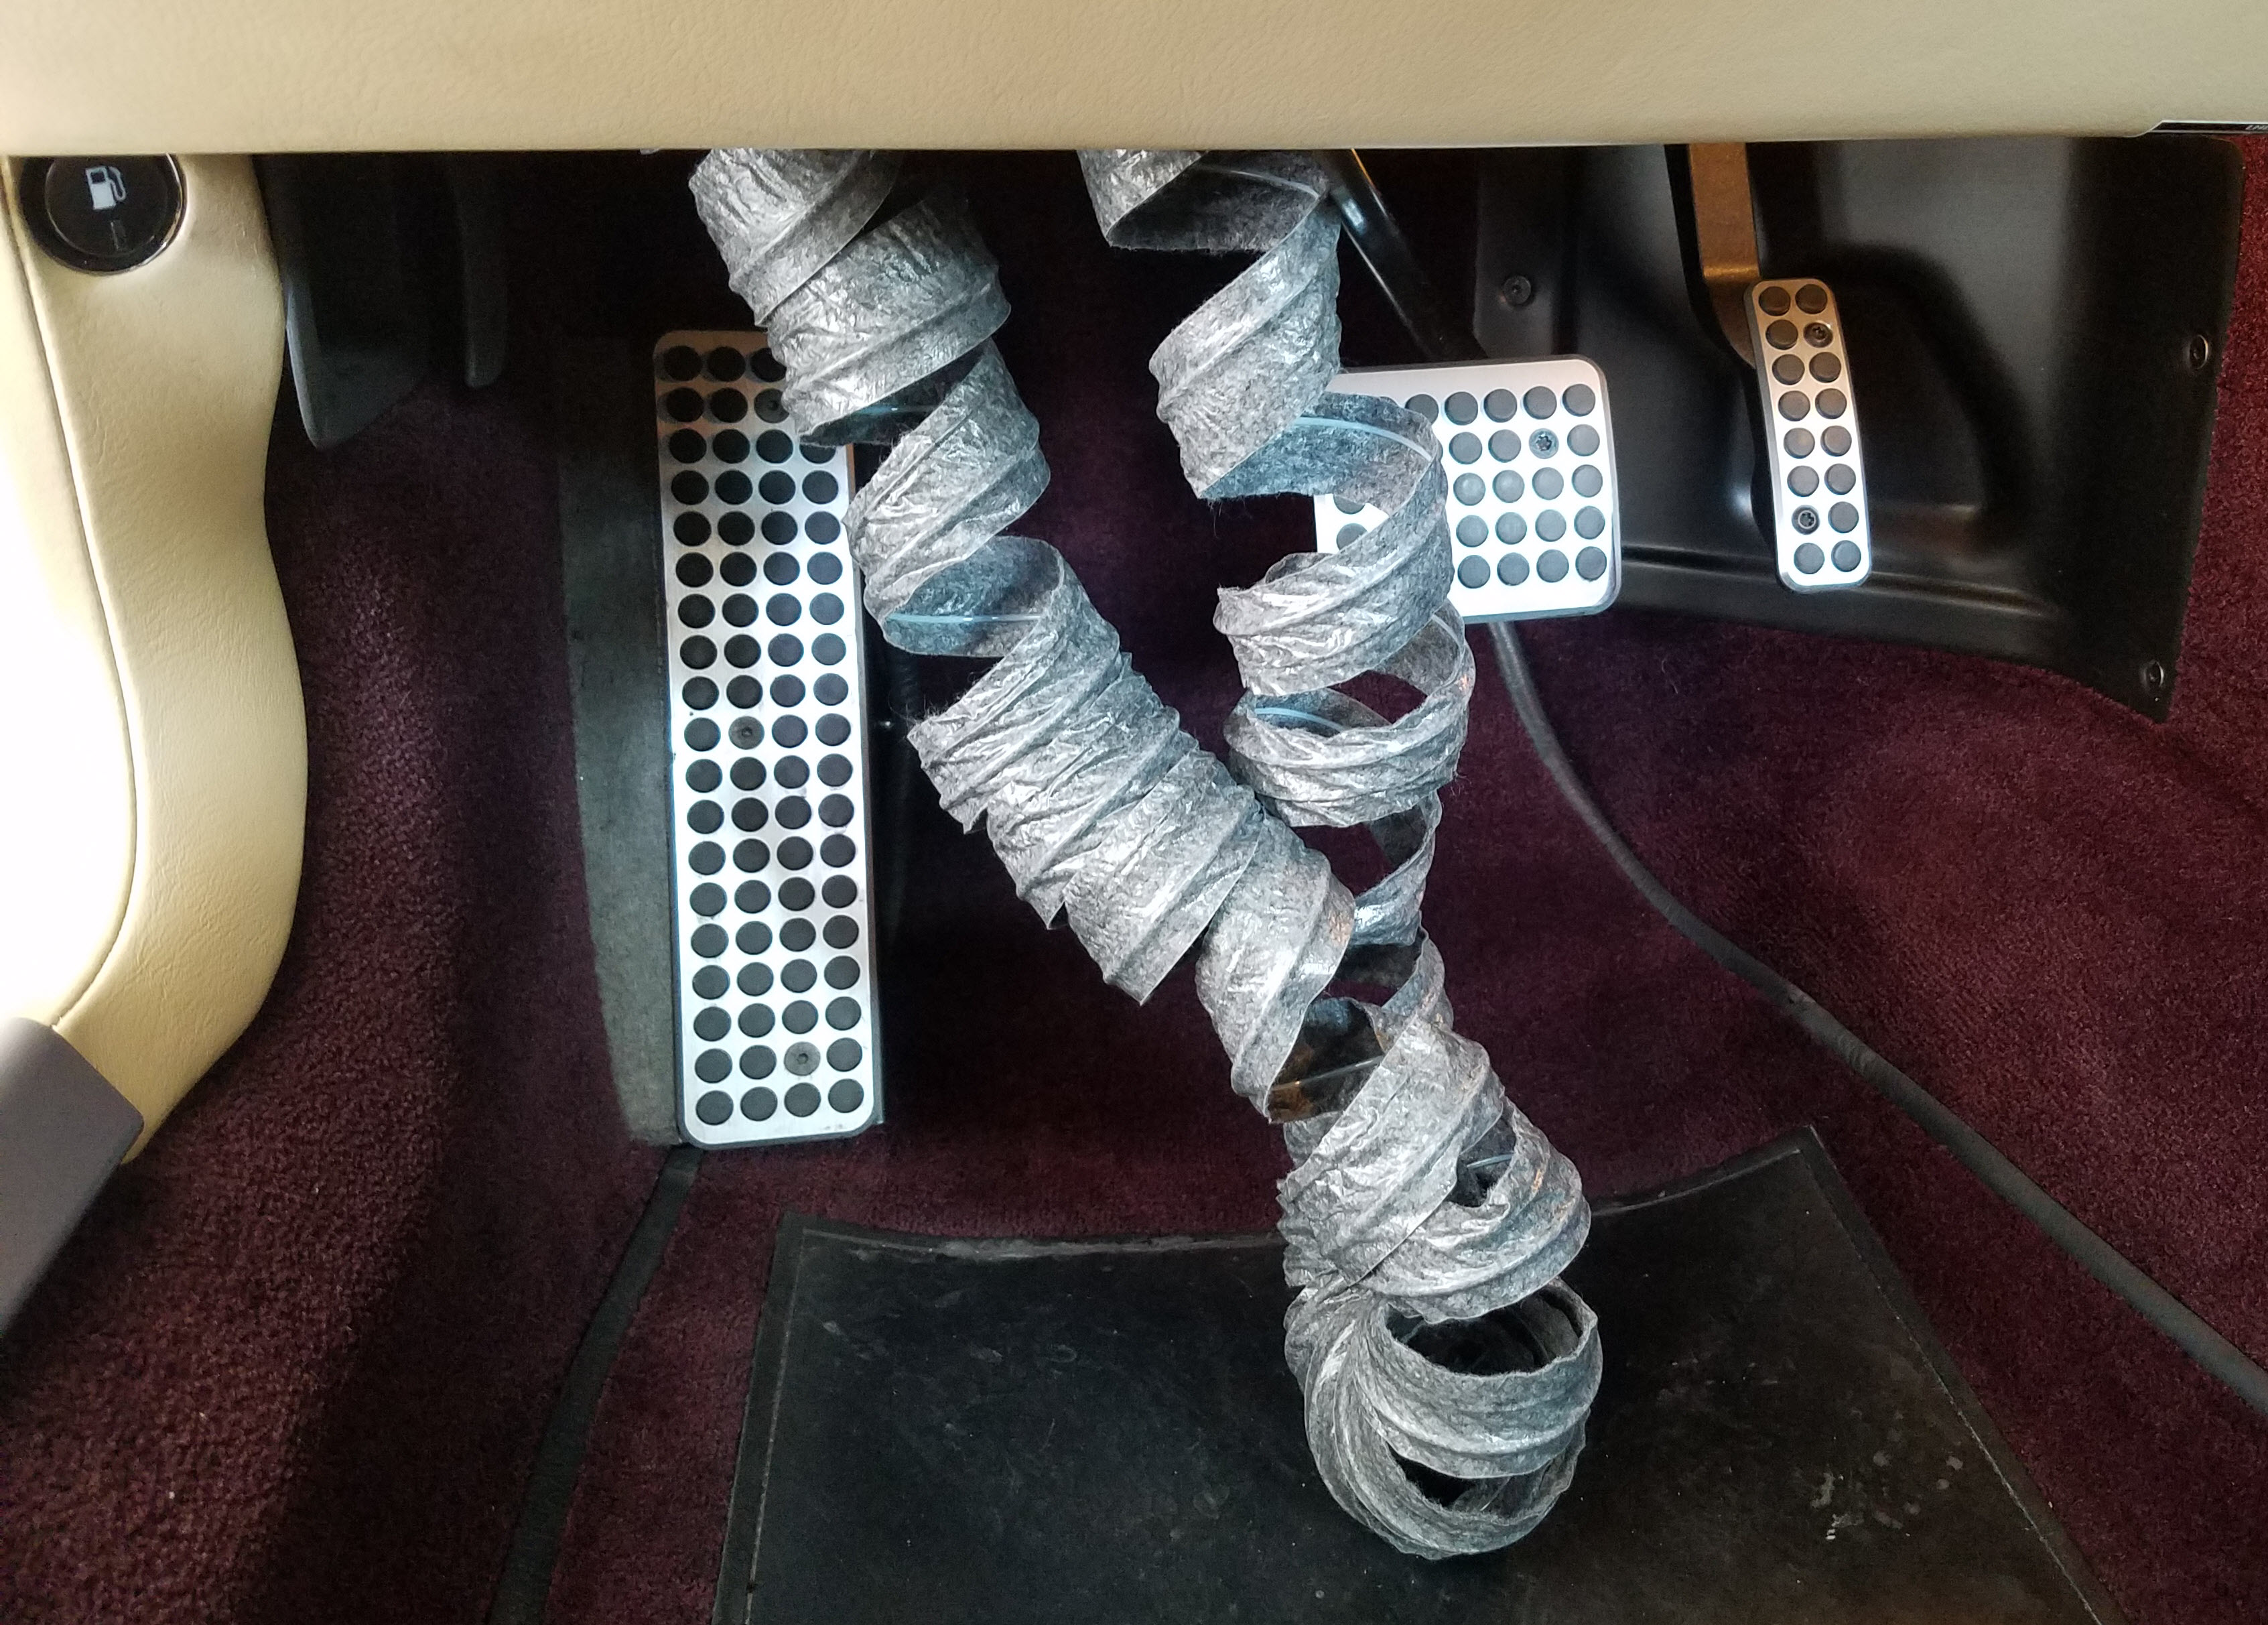
 Heat destroys cars. I live in the central valley of California, and where the summertime average temp is 92°F or more. The sun & heat attacks the paint, the plastics, the wood, the leather and in particular kills the adhesives used to glue the parts together. One day when I was washing my baby I opened the drivers door only to see what looked like her intestines hanging down in the foot well. Ugh. Upon closer inspection I found this was the remnants of Air Conditioning side window demister hose. The spiral wound hose had completely delaminated and was now dangling like an old slinky from under the dash. Fortunately it wasn’t very expensive to repair, and you can easily tackle it yourself. Let me share a few tips on how.
 Aston Martin fitted this demister tube to connect the air flow going to the Windshield demister vent to also blow air up the side windows inside near the rear view mirrors. This will keep your view of the mirrors clear, and that’s good for safety sake.
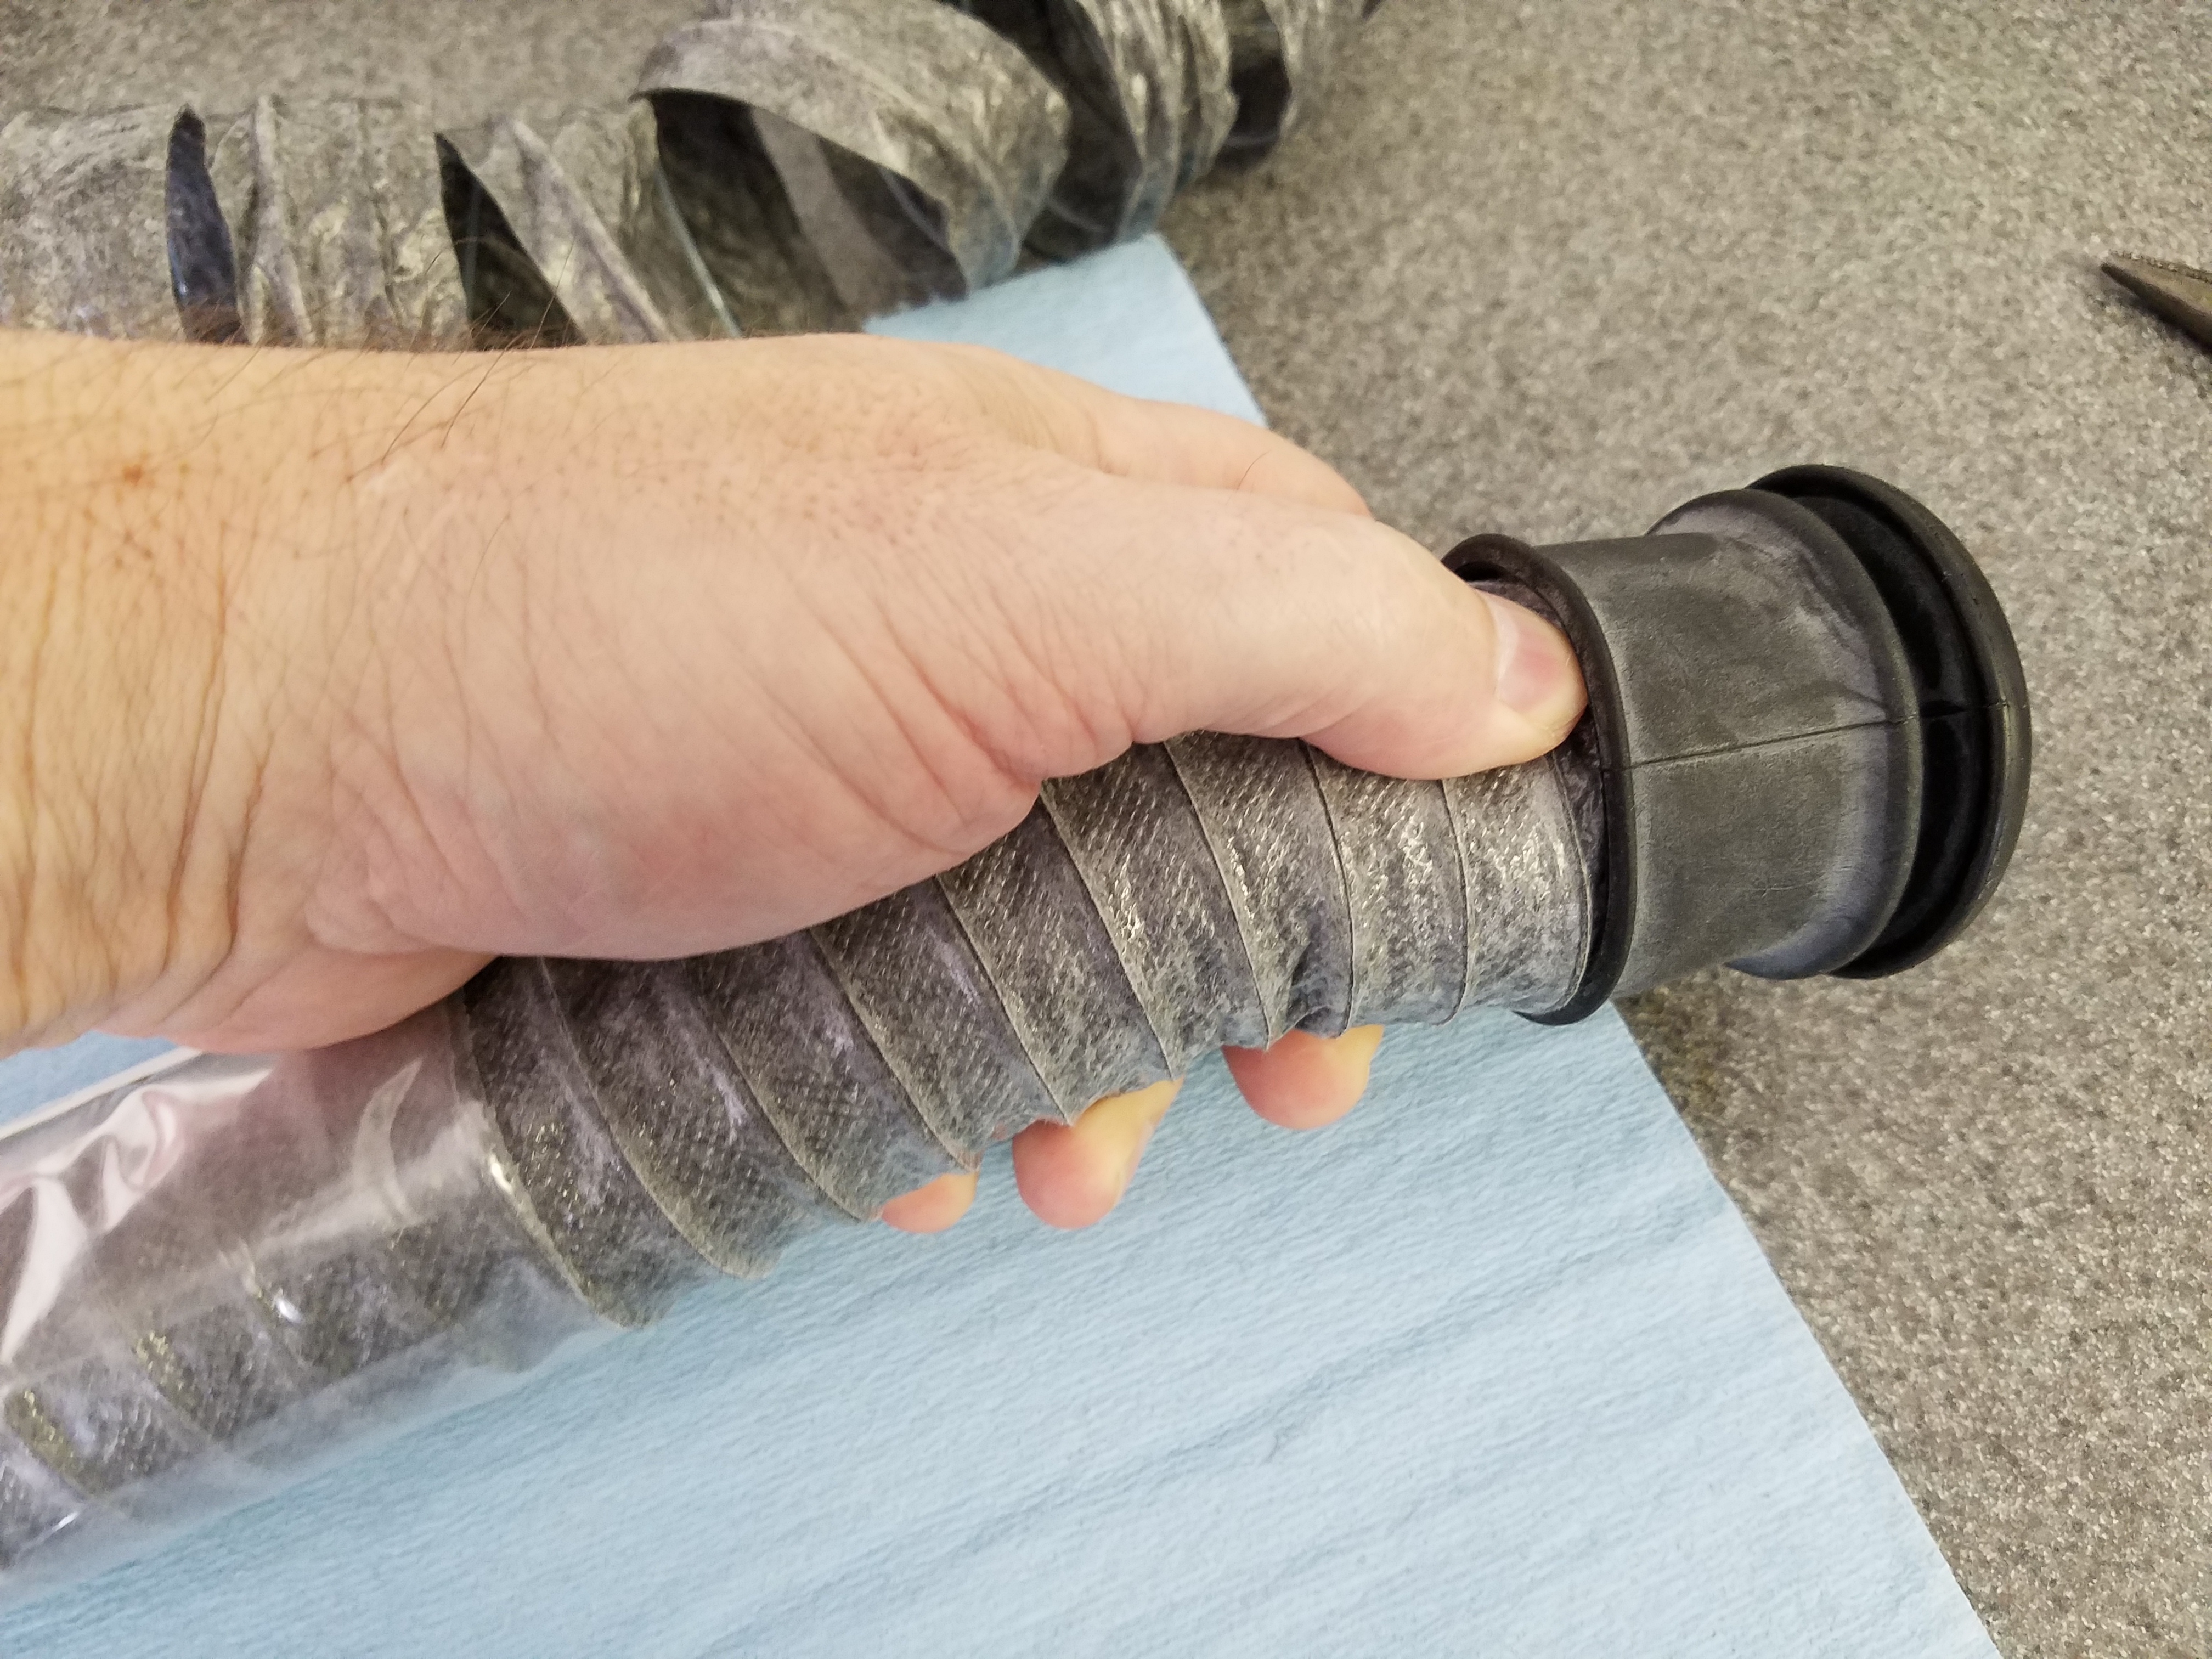
The tube itself is a spiral wound deal of a wool like interior material and a plastic exterior skin. The material is overlapped and glued, and its this glue that completely failed on my car, not a single inch of it was intact when I removed the dead one.
Parts
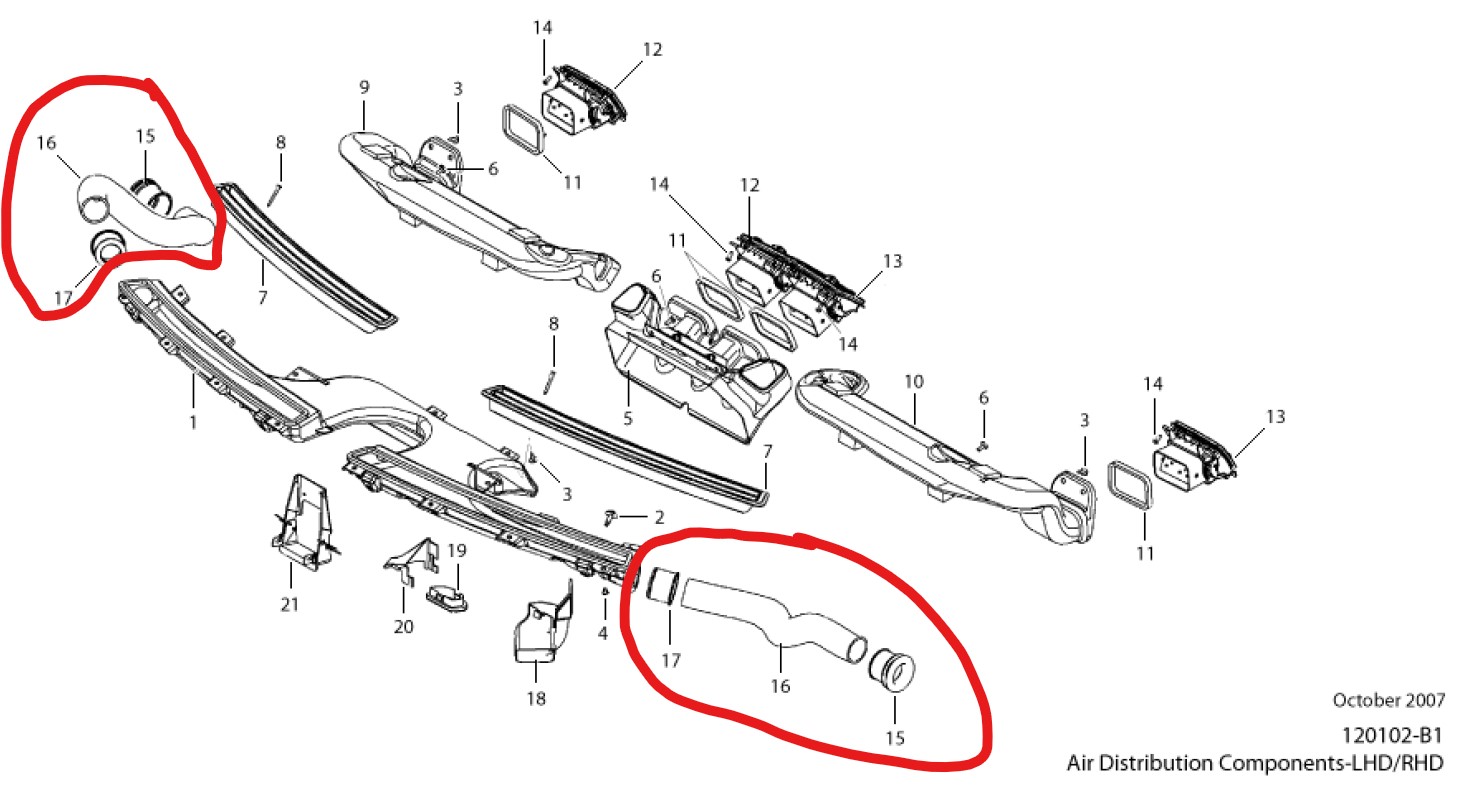 You only need one part. A replacement demister hose. As far as I can tell they are the same part number for both the left and right side of the car.
I source the Drivers side hose for my LHD car from HWM in England. The offical Aston Martin part number is 4G43-19E658-AC and it cost me about $38 USD. If you reside in the UK or the EU you can reach out to the parts team at HWM and ask them to hook you up with a good price, don’t forget to mention you learned about it here on Aston1936.
You can also find the part online from ScuderiaParts.com here for about $41 USD. If you live in the USA or Canada this might be a cheaper source than your local Aston dealership (if you even have one).
The tube I received was about 19″ long and about 2″ in diameter.

Tools
You need only the most basic tools:
- Needle nose pliers
- Small flat blade screw driver
- Inspection light
- A Tissue if you want to run the test on both sides

Test Your Car
I suspect the condition was progressive. It didn’t all fail instantly the same day, but rather gave up and began splitting over time. I hadn’t even notice it had stopped demisting the side window.
You can test your car to see if yours has developed the issue and perhaps the hose just hasn’t fallen out, or failed to the same degree.
 The test is simple:
- Turn your ignition on
- Adjust your climate control vent setting to defrost
- Set your fan speed to maximum
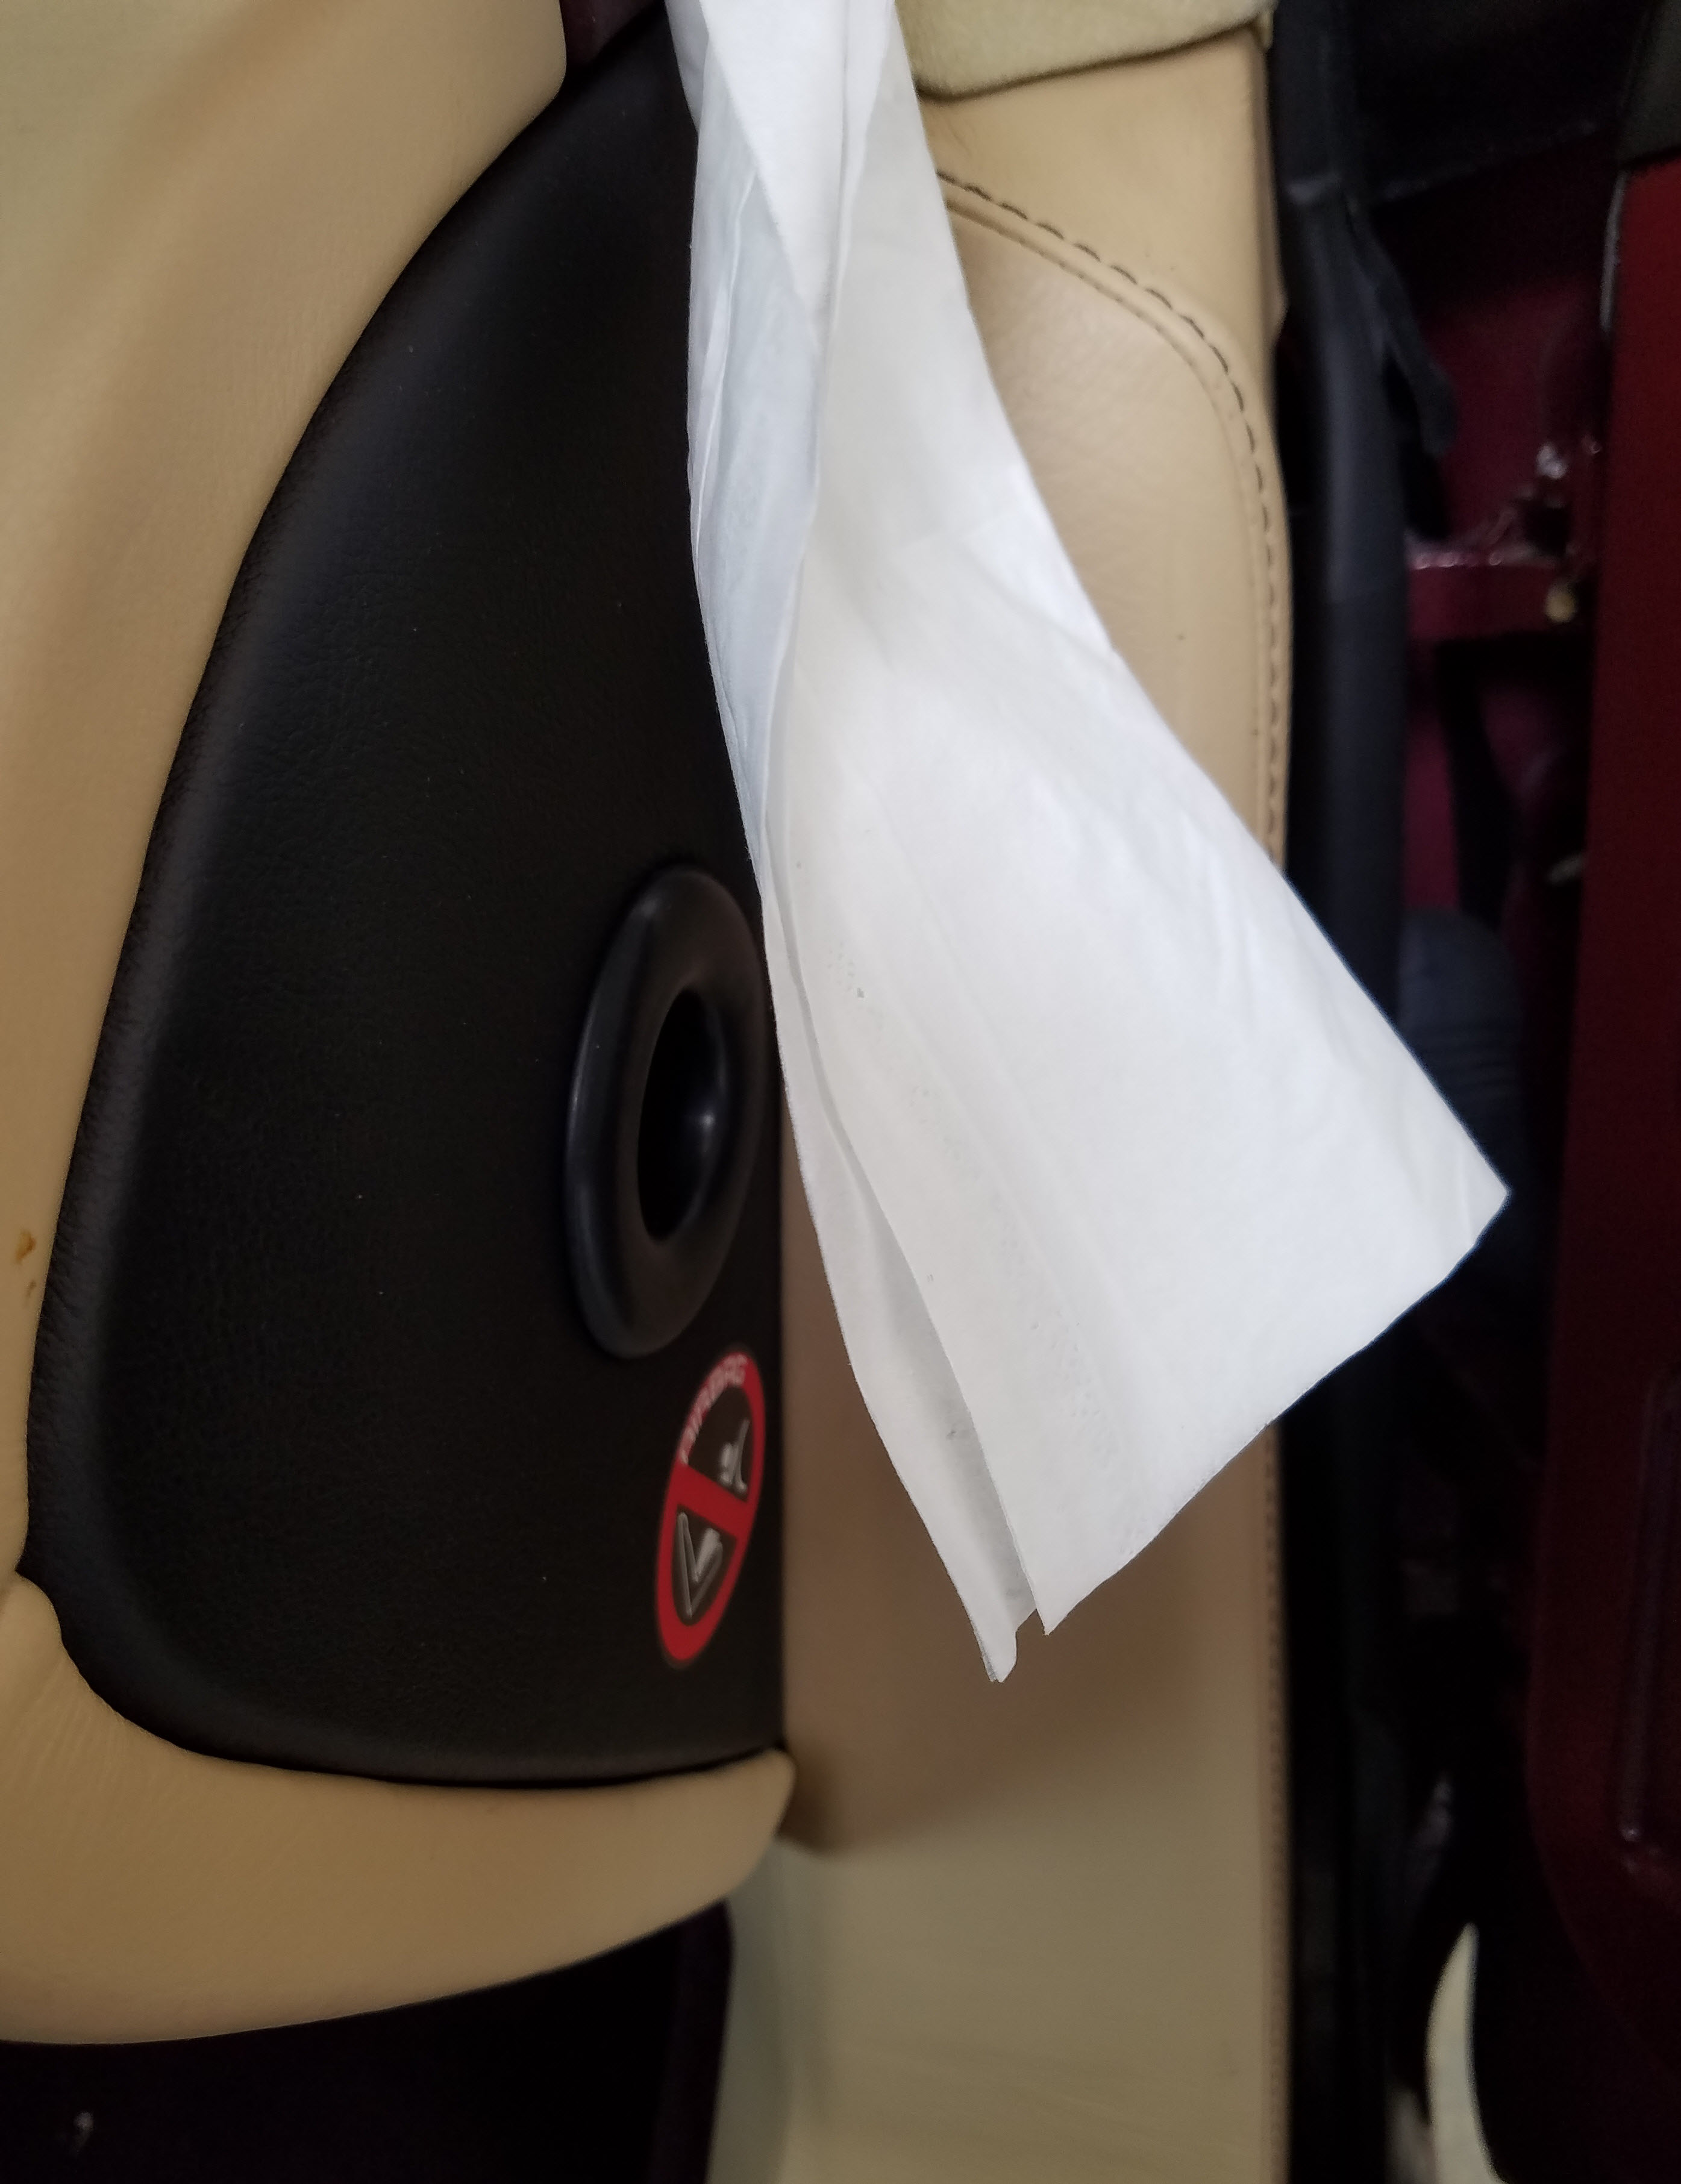
- Open your door and place your hand over the outlet port on the side of the dash that normally mates up with the door. You should feel a significant breeze blowing out. If you check out my video below, you’ll see it able to blow a tissue around.
If your car isn’t generating this level of breeze, your hose it probably failed and you should consider making this repair.
Installation
The official Aston Martin Workshop manual is devoid of any process on how to change this. Fortunately its not that hard, just a little fiddly since its located in a very awkward spot to work. You can do the swap in about 30 minutes, most of that time is spent contorting under the dash.
Removal of the Old One
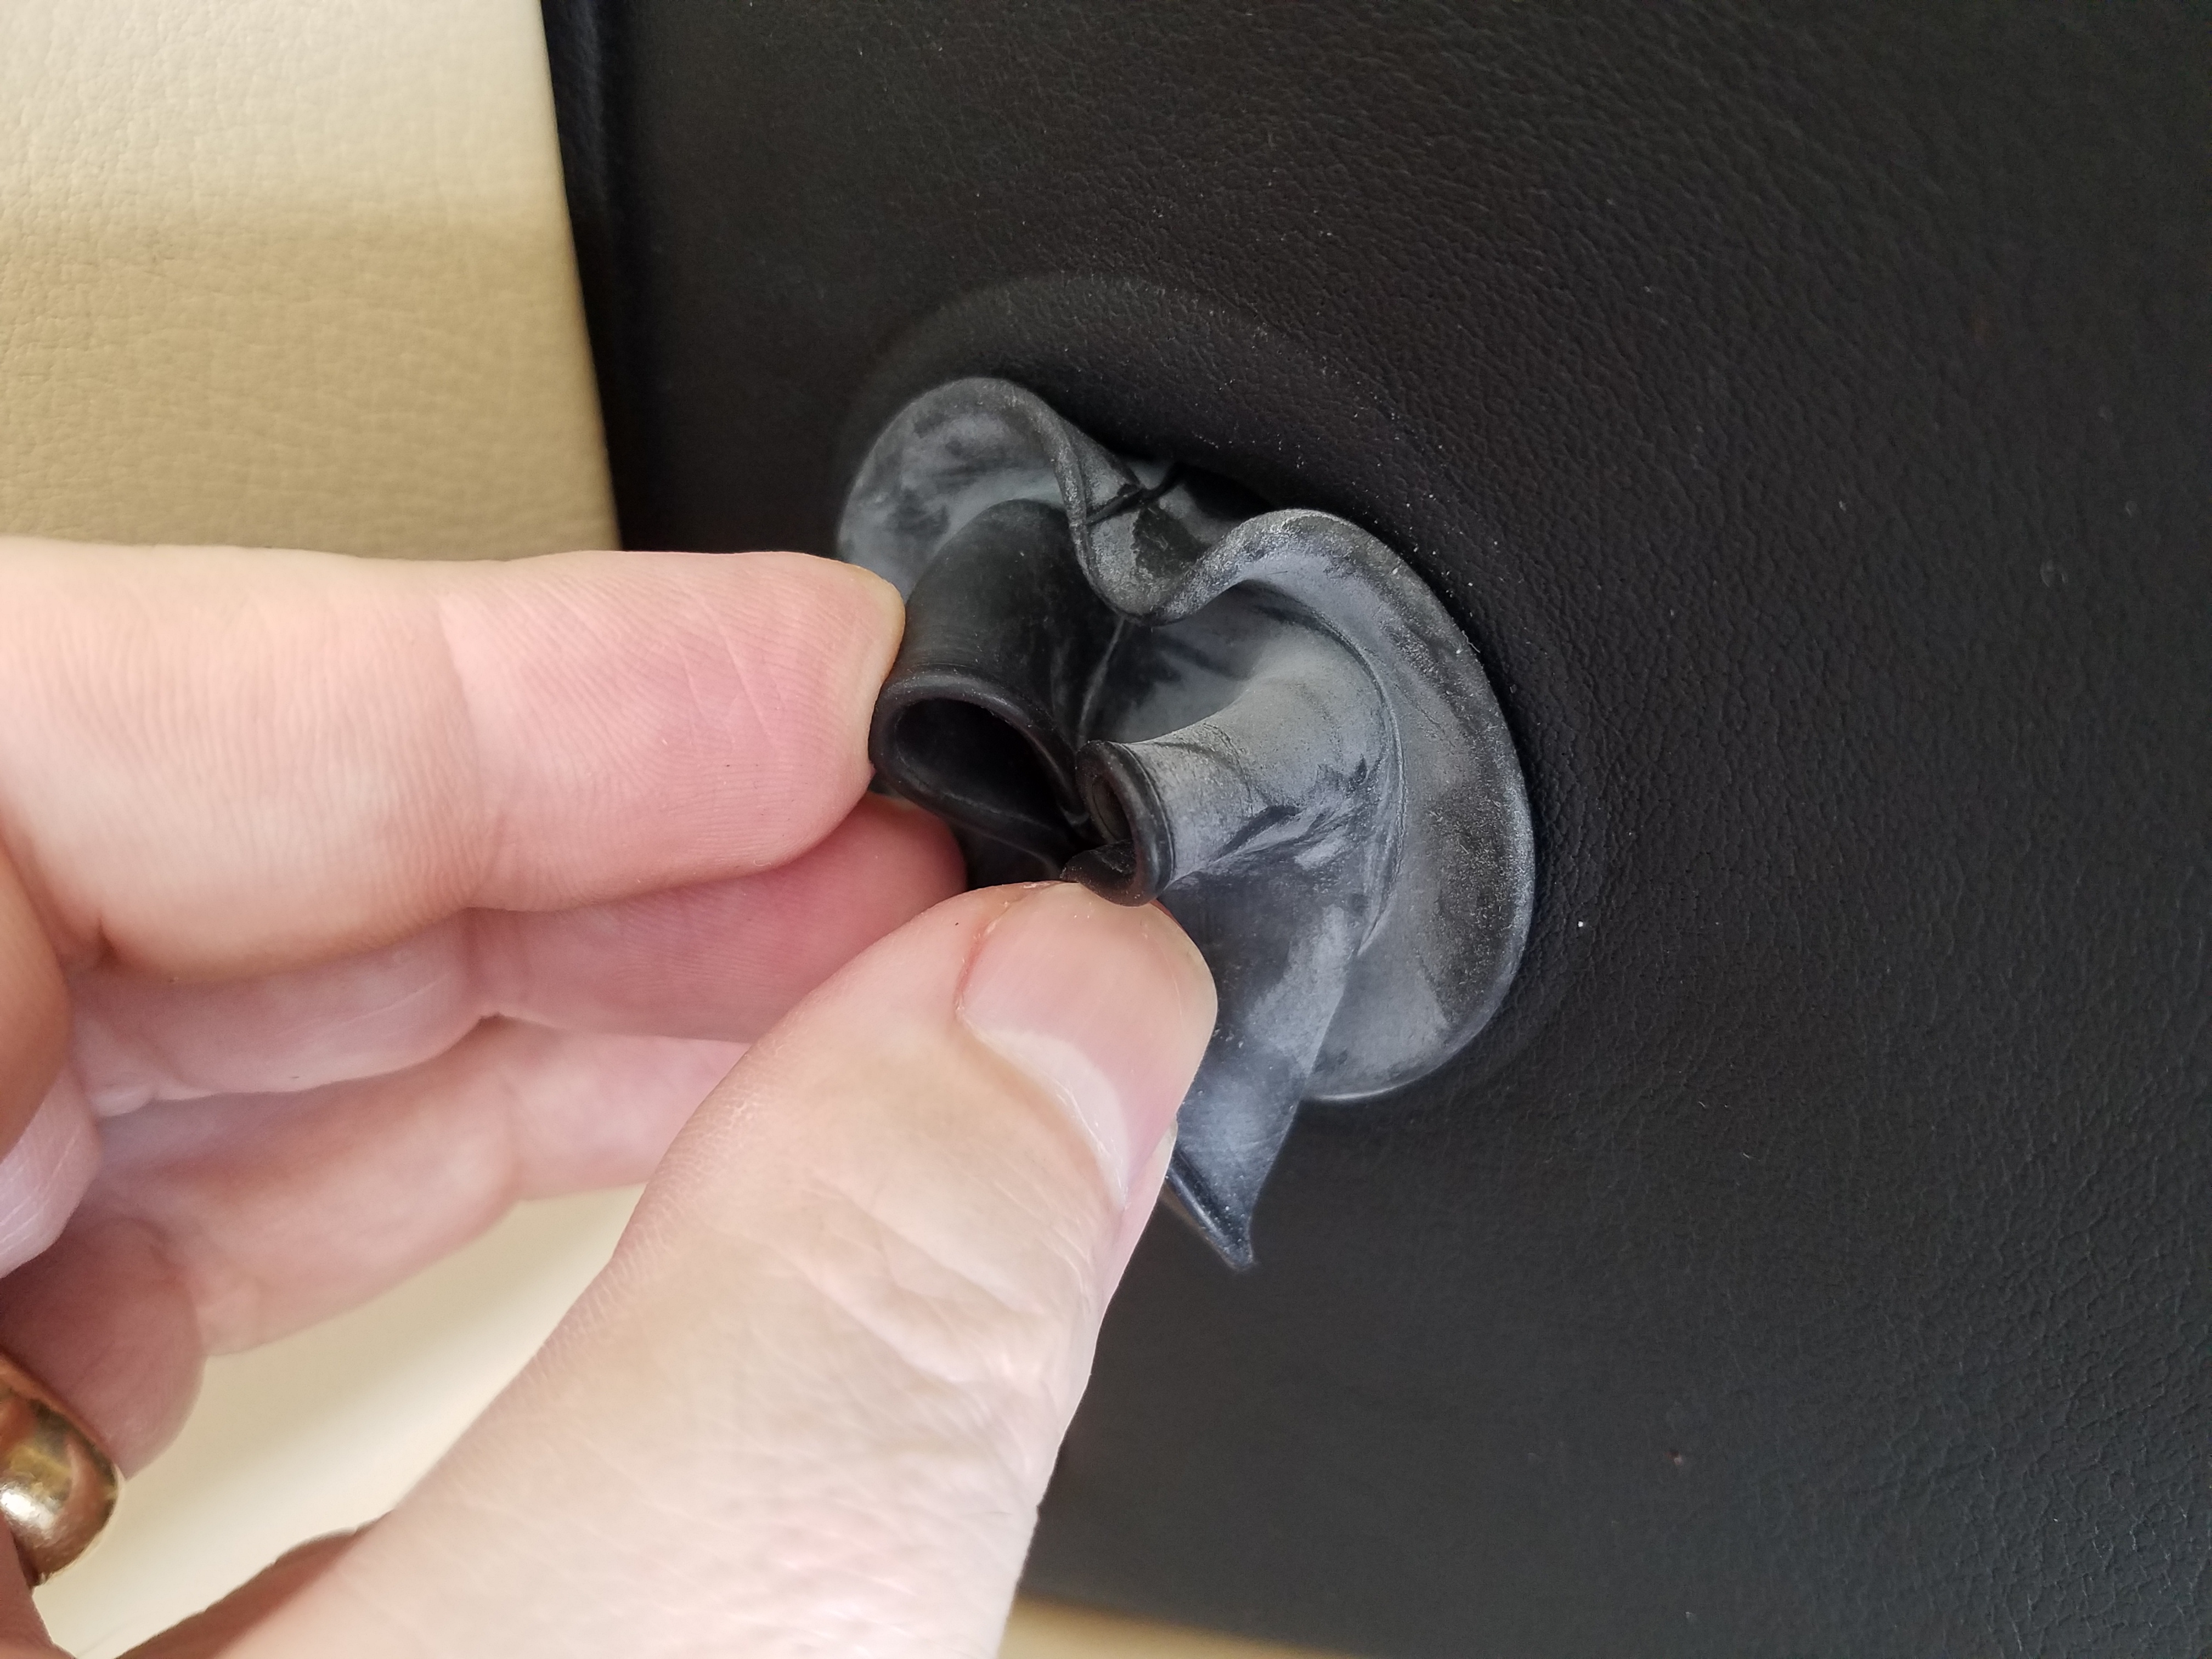
The first step is to remove the old tube and its two rubber end fittings.
- On the side of the dash, tuck the circular rubber ‘lip’ inward towards the center of the tube, and push it into the dash. Just use your fingers and mind the leather. This is very easy to do.

- Reach up and under the dash and you should be able to retrieve that end of the hose and fitting. Let it hang down.
- Move your seat all the way down and to the rear to make as much room for yourself as possible to lay in the foot well.
- Lay on your back, wiggle into the footwell, and take your inspection light with you.
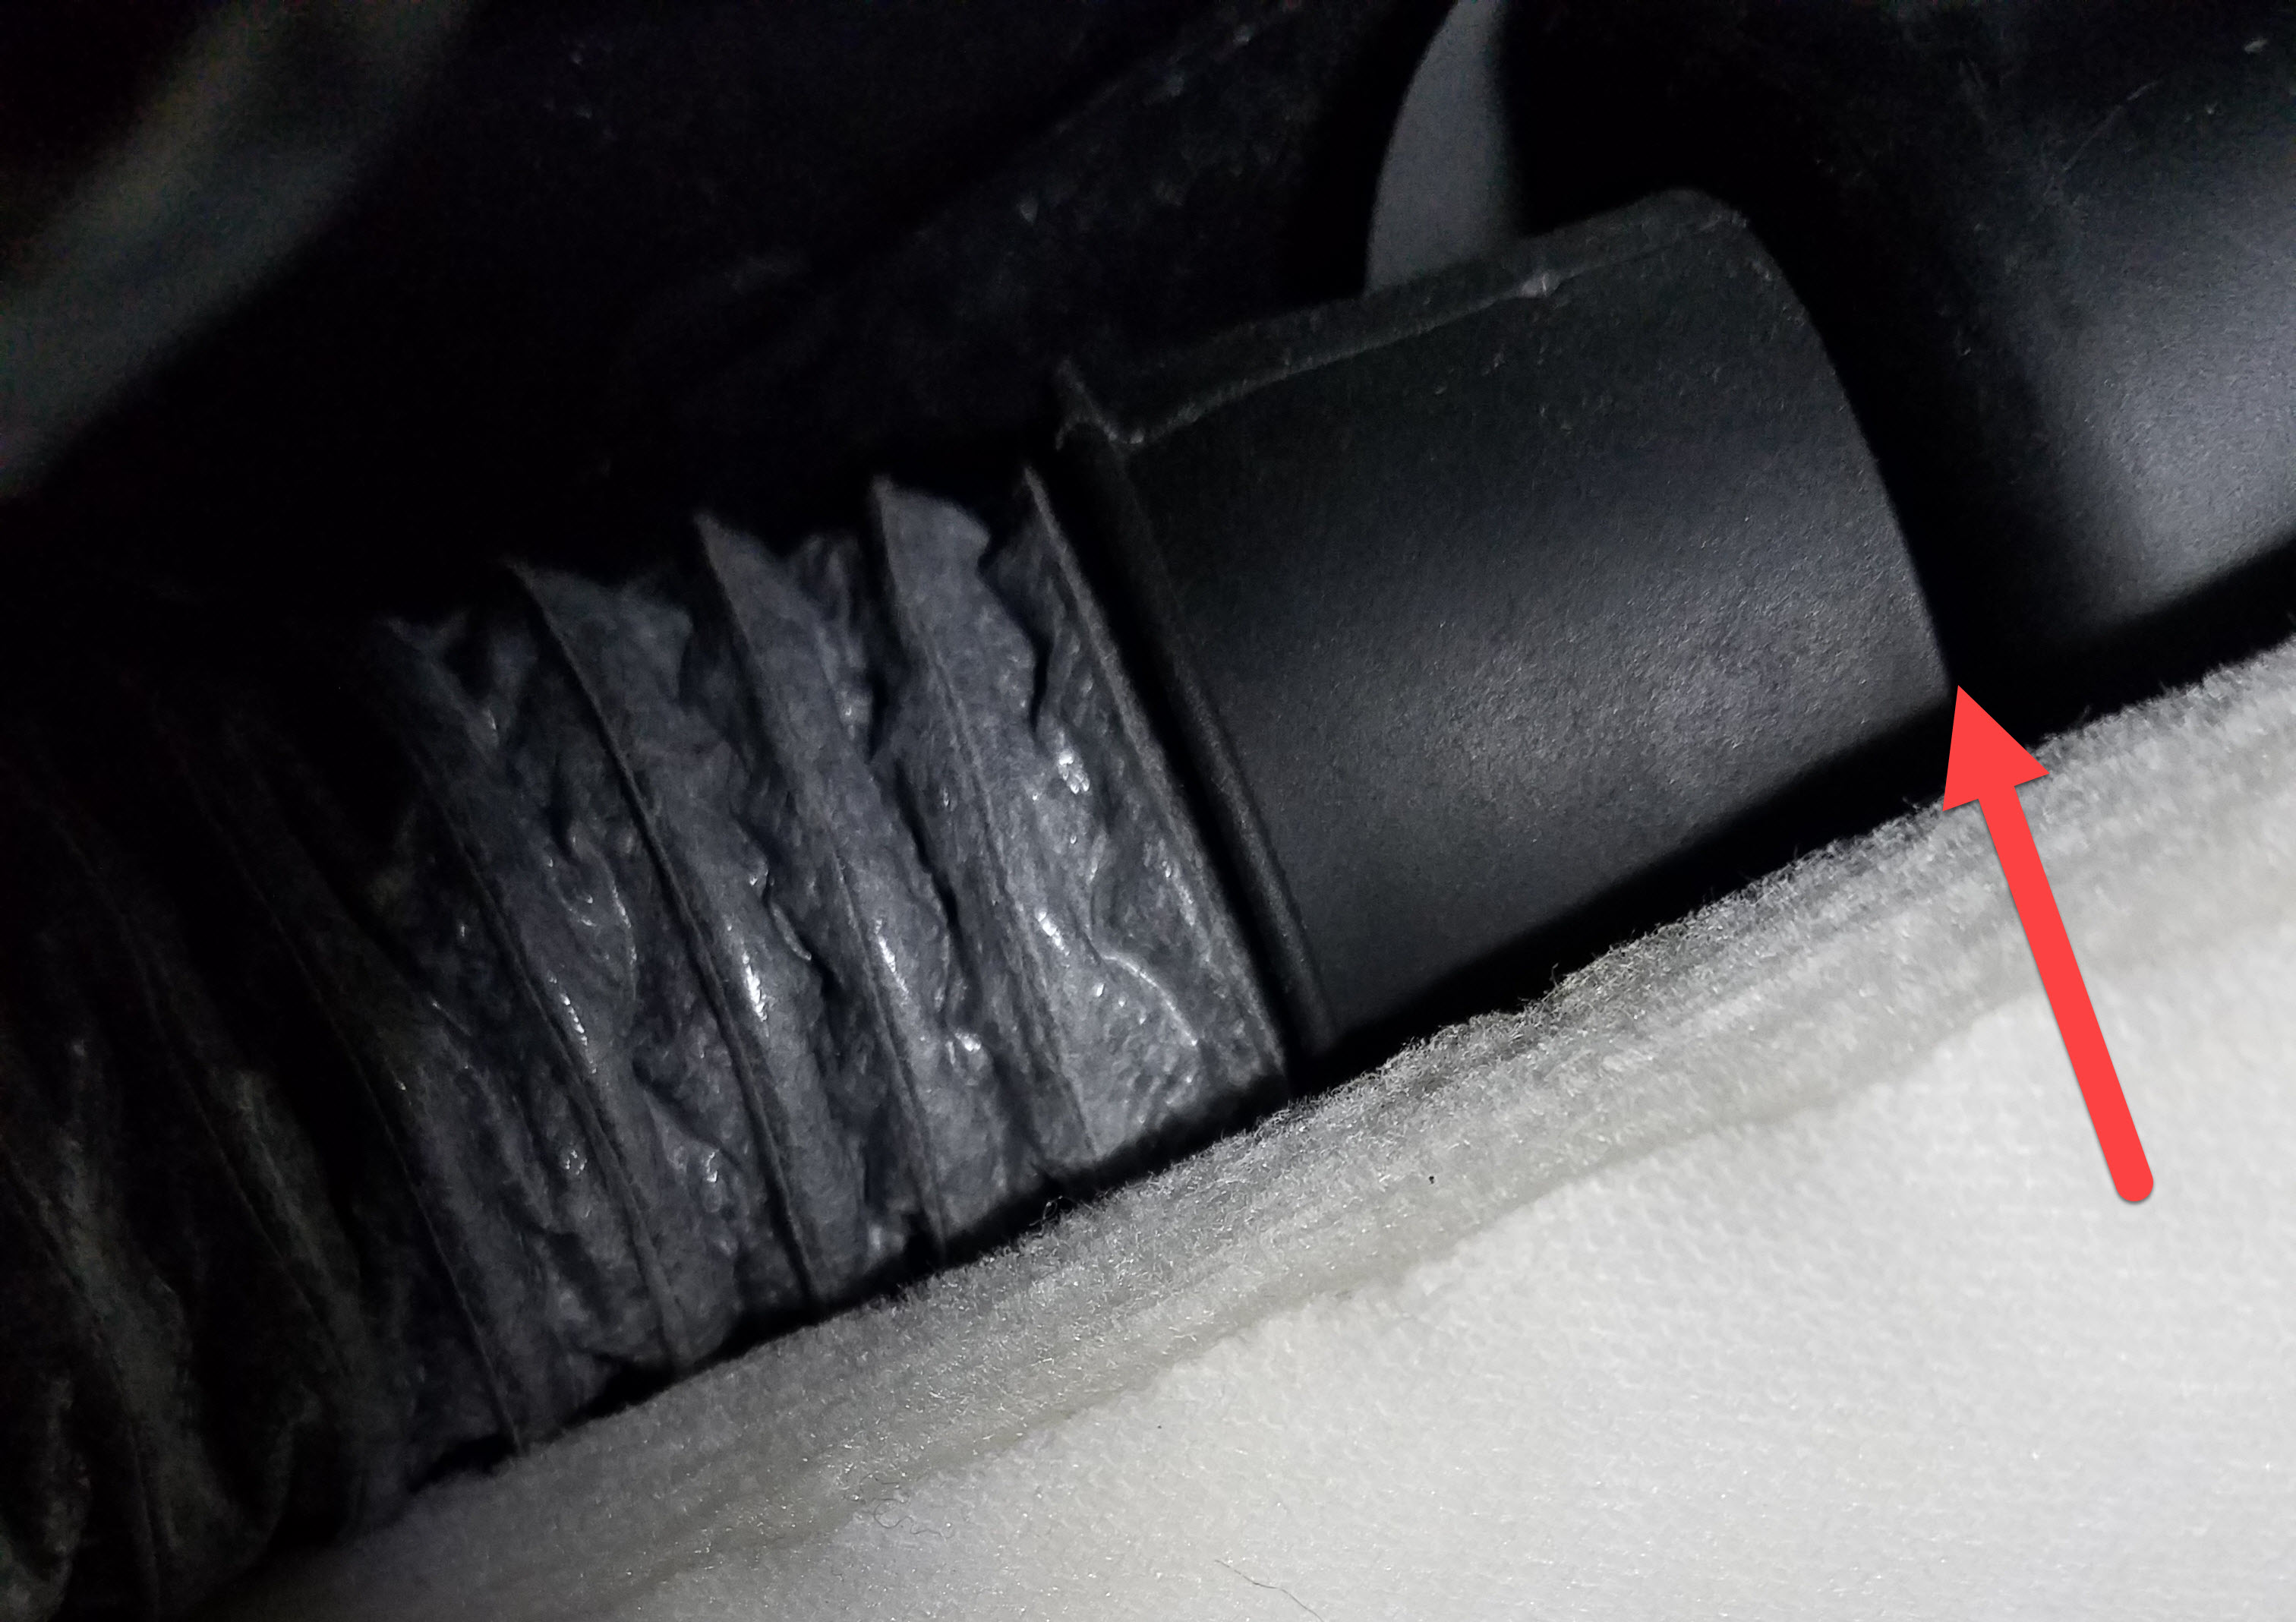
- Follow the old tube up to where it ‘plugs into’ the windshield demister plastic housing.
- Using your fingers, pinch/collapse the rubber fitting while pulling it out gently to disengage its rubber flange from the circular hole in the plastic box. Easy enough to do once you can get a hand waaay up in the dash.


Transfer the Rubber Fittings
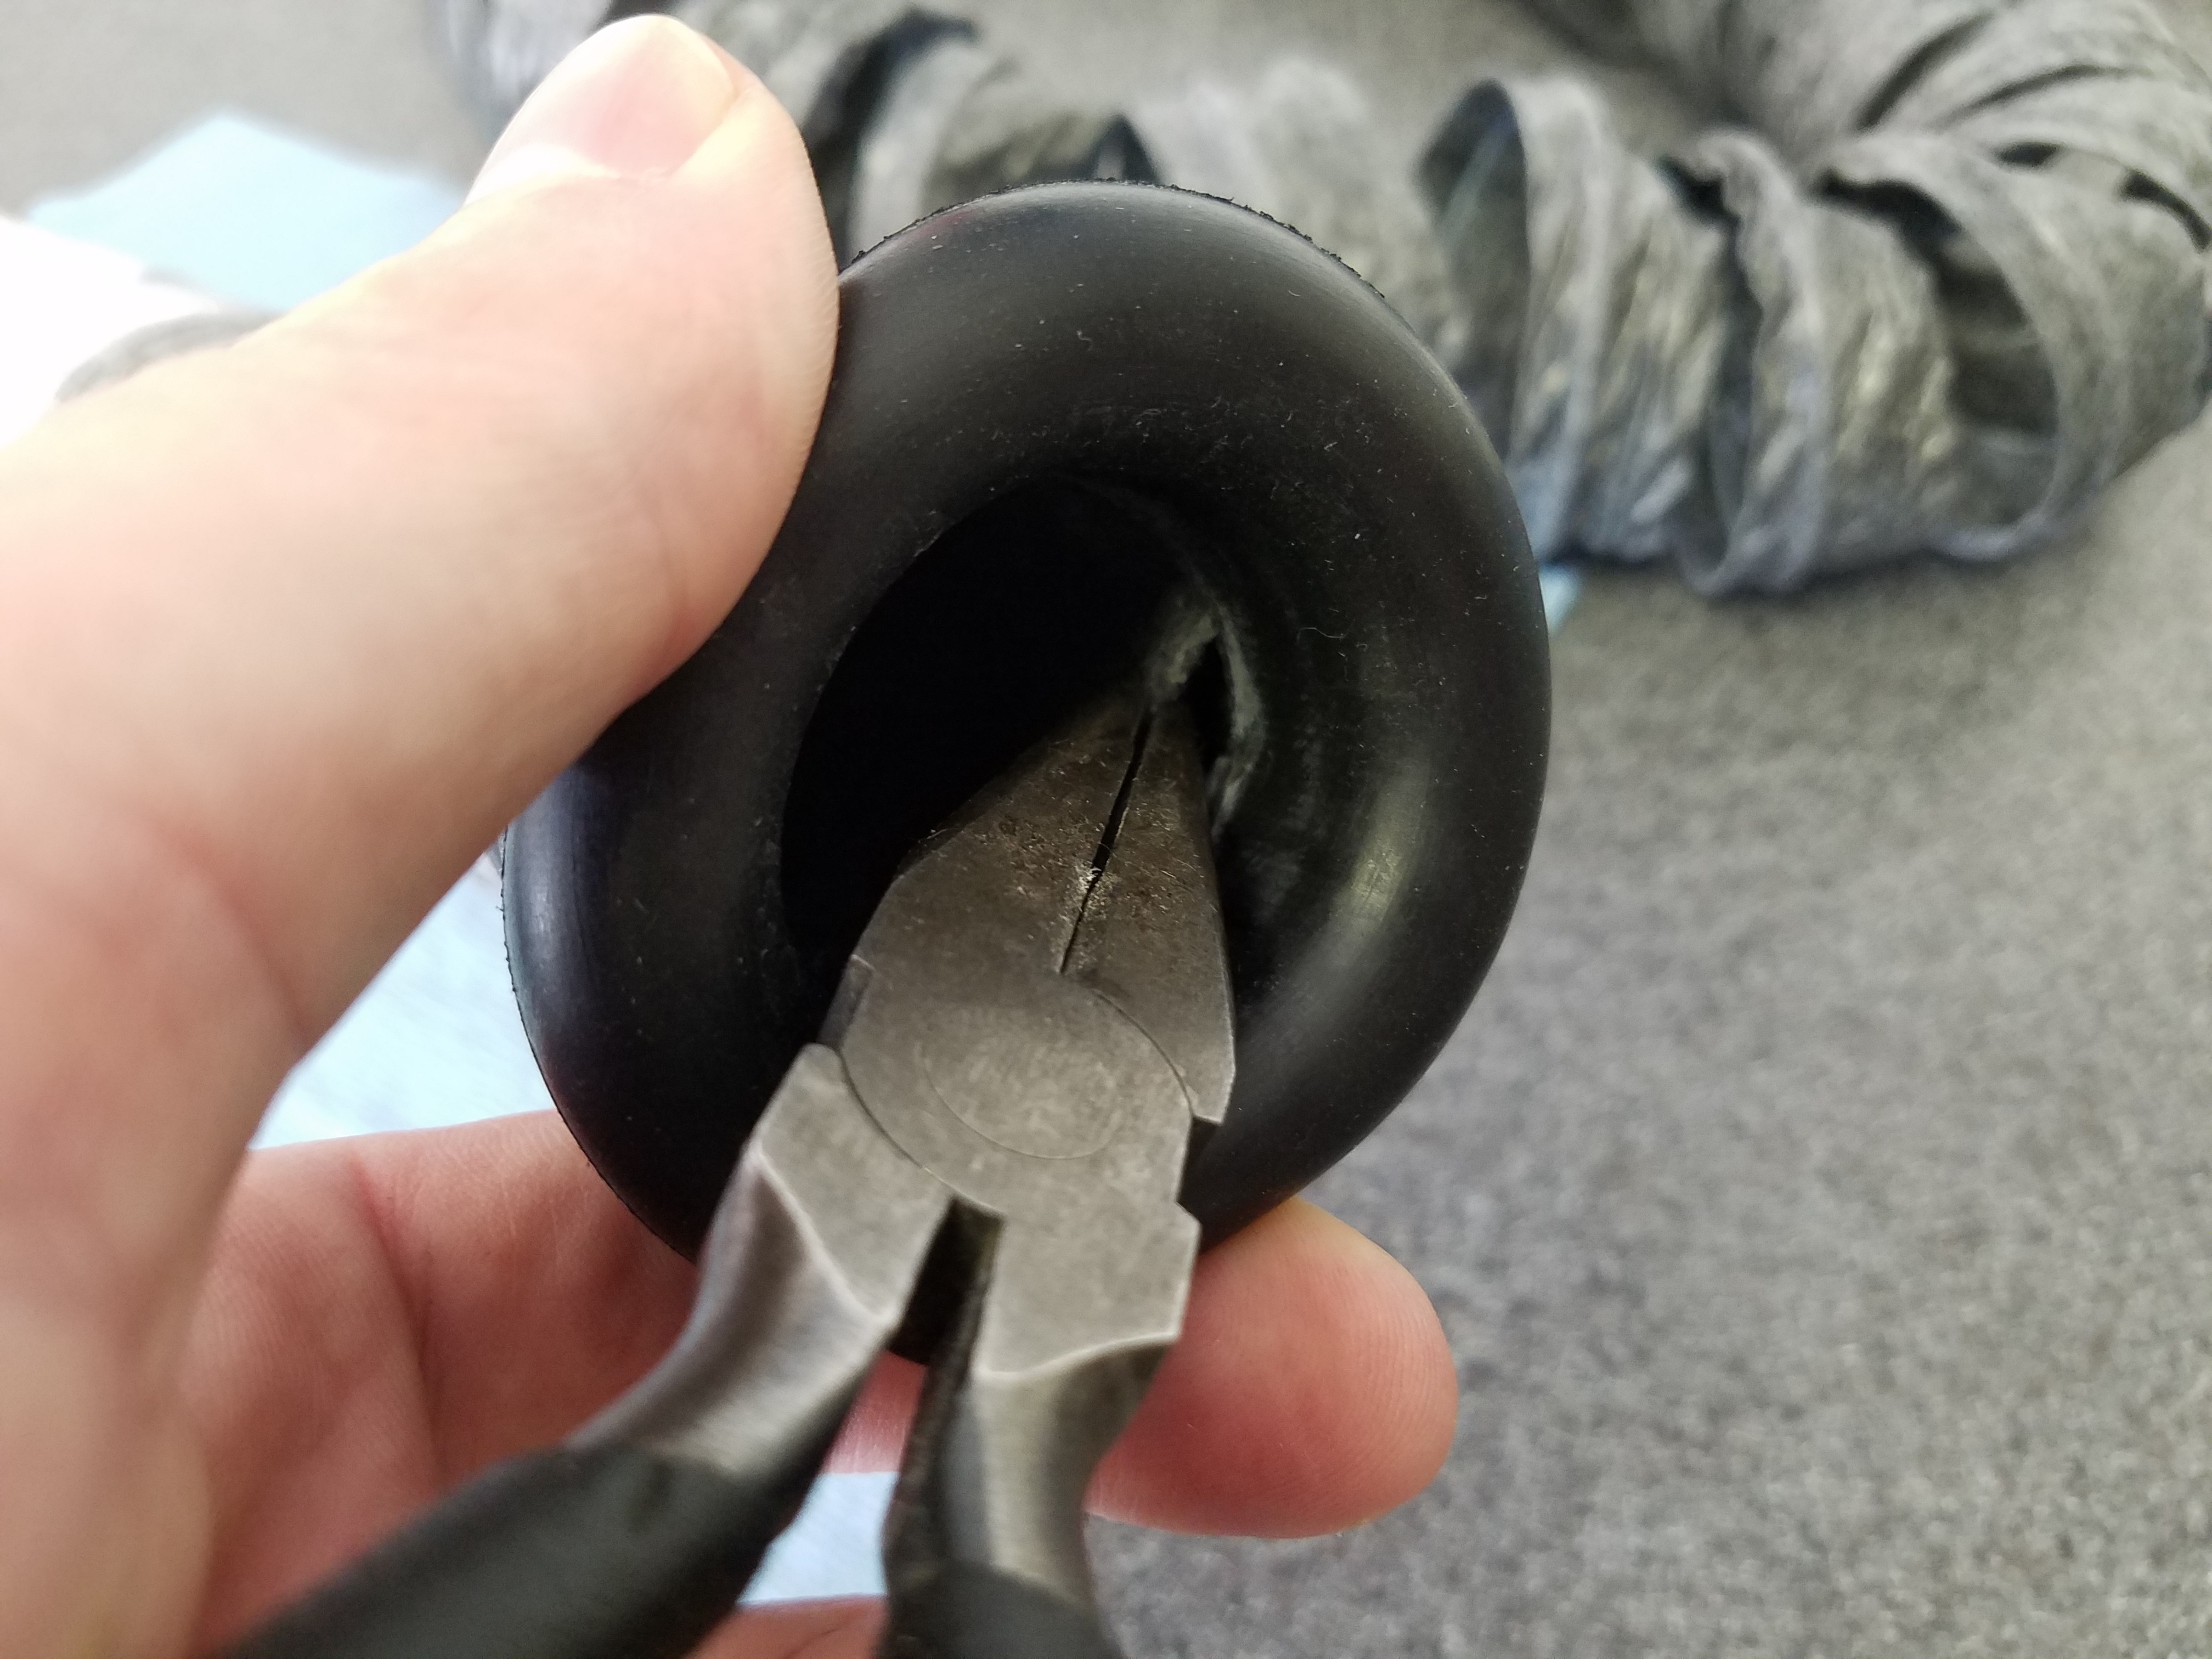
The next step is to transfer the rubber end fittings from the old hose to the new one.
- Grab the rubber fitting on one end of the assembly and gently pull/tug the old hose free from it. There should be no glue, just a friction fit.
- Repeat the process for the other end.

- Time to fit the new hose to the old fittings
- Start by carefully pushing/working the new hose end into one of the fittings. The old saying “You can’t push on a rope” factors in here. It will only start to go in a short distance.

- Use your needle nose pliers and reach in through the open end of the fitting and grip/tug the hose along in small amounts, working your way around as you do it. Isn’t hard, just do it carefully in small steps so you don’t rip or tear the hose.

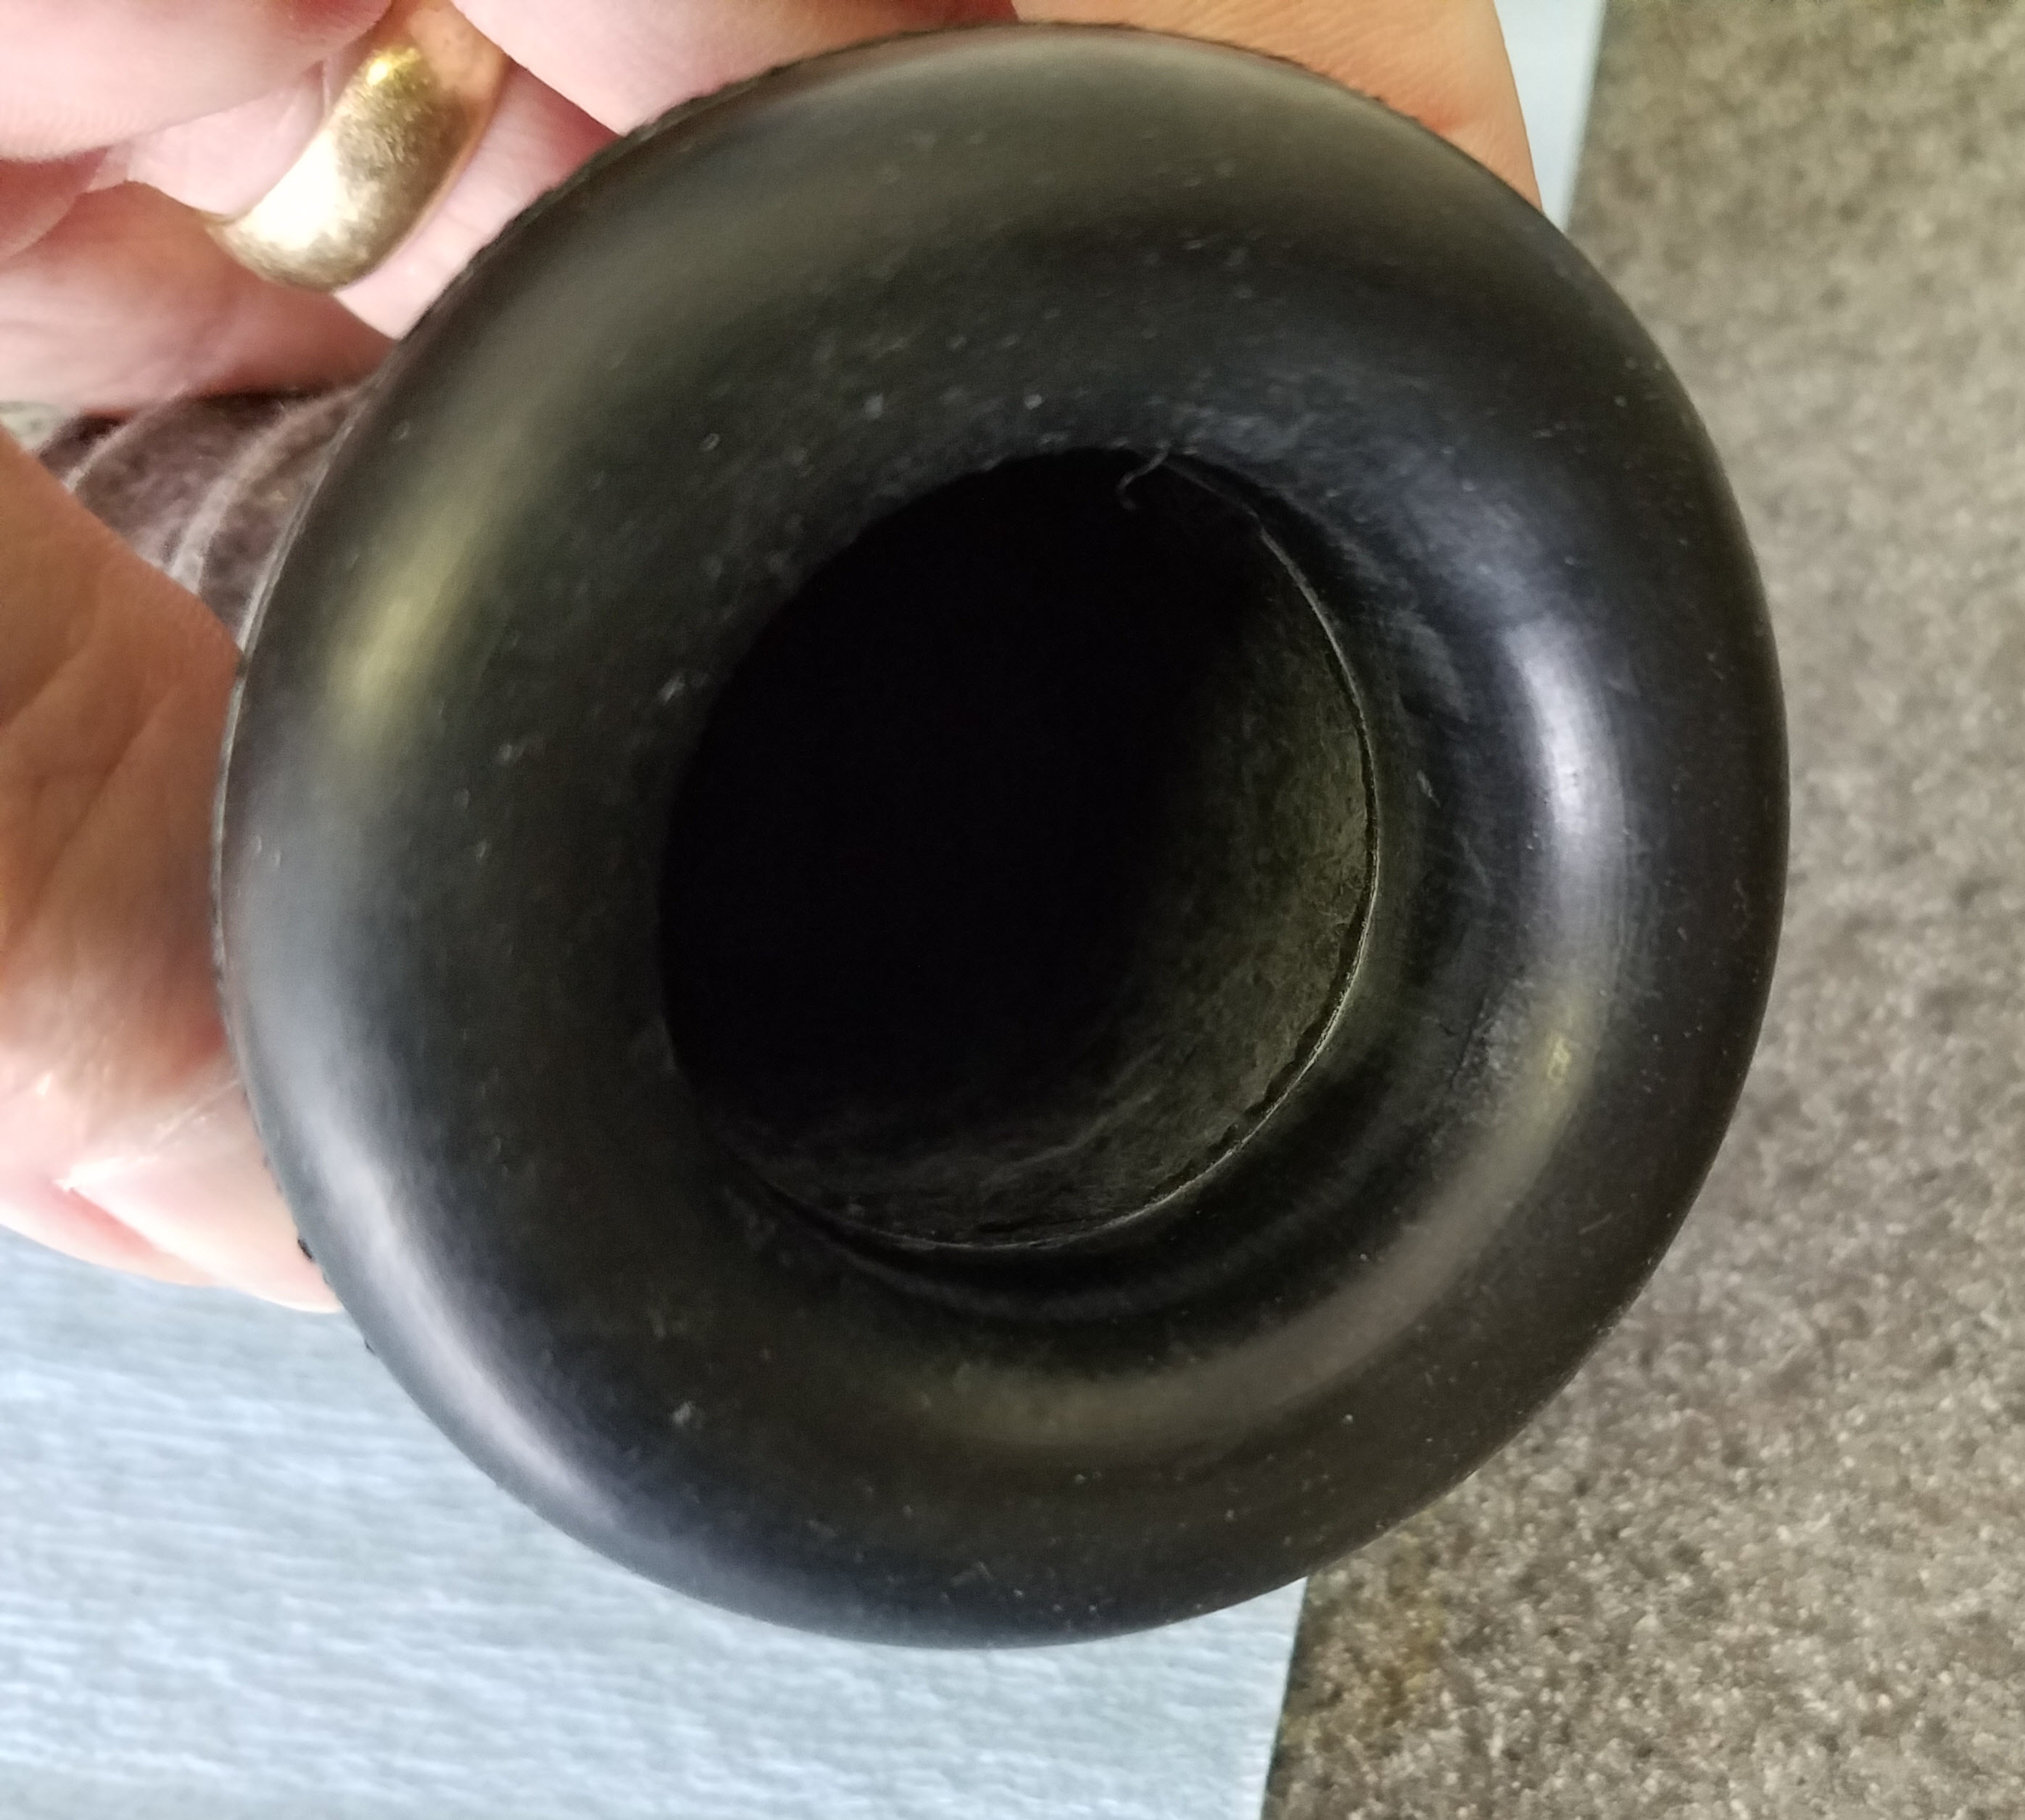
- It should pull into completely flush on the interior of the rubber fitting.

- Repeat the process for the other end.

Two Tips
Here are two tips I learned:
- Pre-Scrunch the hose. The hose when it arrived was actually quite rigid. It needs to be supple so you can bend it around under the dash. Just compress it all the way and it almost instantly became nice and compliant.
- Pre-tuck the lips into the end of the hose on the door end. I folded them into the hose center in about 1/3rd sections. It stayed folded in and out of the way.


Install the new Hose
- Crawl back into the foot well with your new hose, inspection light, and small screwdriver.
- The hardest part will be re-engaging the upper end of the hose to the plastic box for the Windshield demister. Access is tough, so its all one handed work.

- Do your best to work the narrow lip flange of the rubber connector back into the circular opening in the plastic box. I managed by gliding the far side in, then using the small screw driver to tuck/fold the remaining lip/flange into the hole. It was a dexterity test. Just be patient. When it lands home, you’ll see it suddenly fits close and flush up to the plastic box.

- Route the remaining hanging hose behind the wiring harness and make a J loop towards the opening in the side of the dash.

- Roughly poke the remaining end out the dash hole, and now you can crawl out from the foot well. You’re back will be happy.
- Carefully tug the flanges out of the side dash hole until its mostly out.

- Flip the tucked in ‘Lips’ out, and it should just pop into position.
- Use your fingers just to make sure its evenly seated in the circular opening.


That’s it! For fun you can redo the air flow test and you should see that you now have a nice stream of air coming out of the hose.
Video
I’ve done my best to capture this process on a short video. Check it out, it may ‘demystify’ [pun intended] a bit of the process for you.

Thank you for sharing! Great documentation!
Jose M. Pi
>
LikeLike
Thank you Steve – I always appreciate and enjoy reading through your procedures knowing my car is probably next being that it is also a 2005!
– Keith
>
LikeLike
Thank you Steve for once again your valuable videos and knowledge – I would like to clean and detail my 2005 DB9 engine…. any pointers or videos regarding the hazards of washing, de greasing our engines.
Keep up the good work – From Canada…Here’s to Green Lights and Blue Skies.
Regards – Caryl
LikeLike