
 You may have had the front under tray off on your DB9 performing your annual service or some other exciting service task. Eventually it’s time to put it back on.
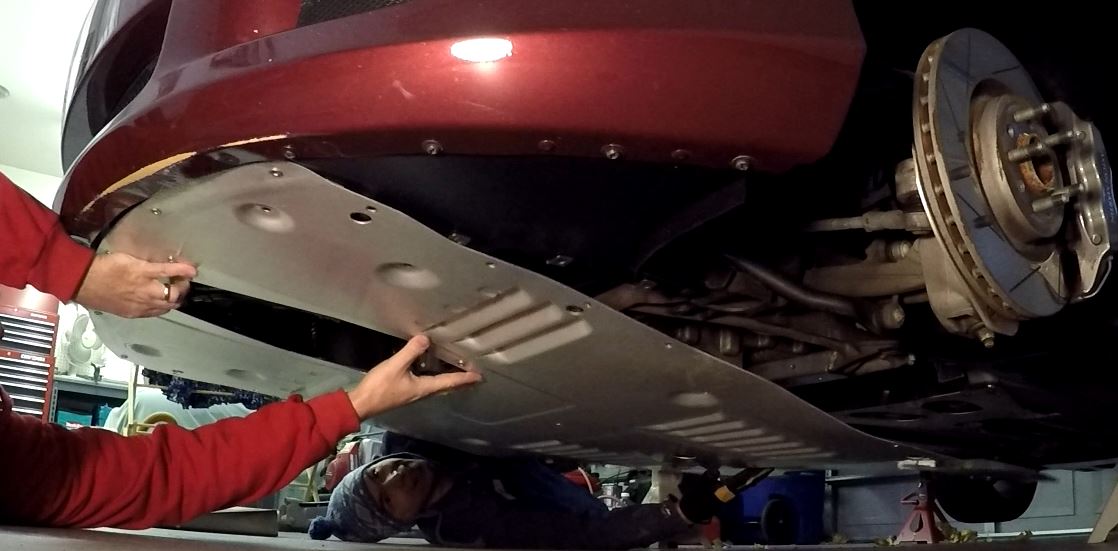
I found that it’s pretty much the reversal of the removal steps (check out my post on how to remove it), but I did learn a few things along the way when I did it. You essentially have one really large sheet of aluminum to hold up while you install about 40 bolts. Challenging to maneuver, and tedious to replace all those bolts.
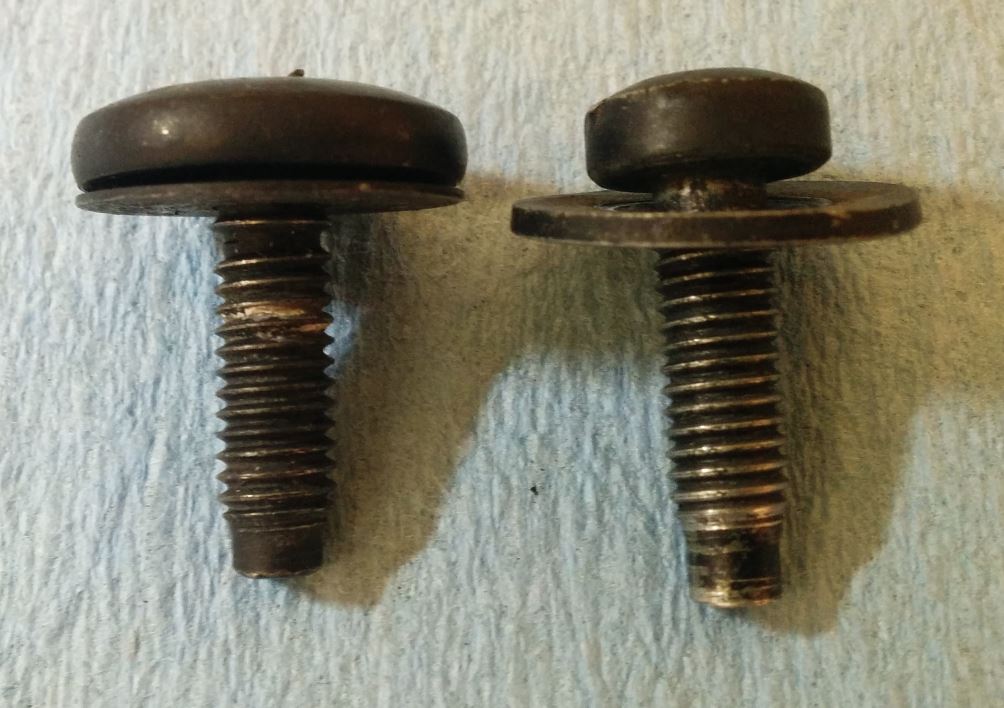
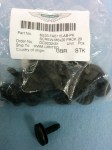
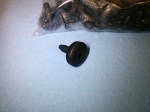
Speaking of bolts, you’ll note that there are TWO kinds of bolts, and in my case I had 31 of one kind, and 9 of another with larger heads. They have the same threads so they work in any hole, but the large head bolts are 3mm shorter. Specifically:
- Qty 31 – T30 Torx M6x20mm (with a large flat head)
 Replace with Aston Martin P/N 6G33-FA0115-AB available for about $0.29 each online if you’ve lost one. You might splurge on a 20 pack (P/N 6G33-FAO115-AB-PK) available for about $5.21 USD (just 26 cents each) by contacting Rob Sims and HWM in England.
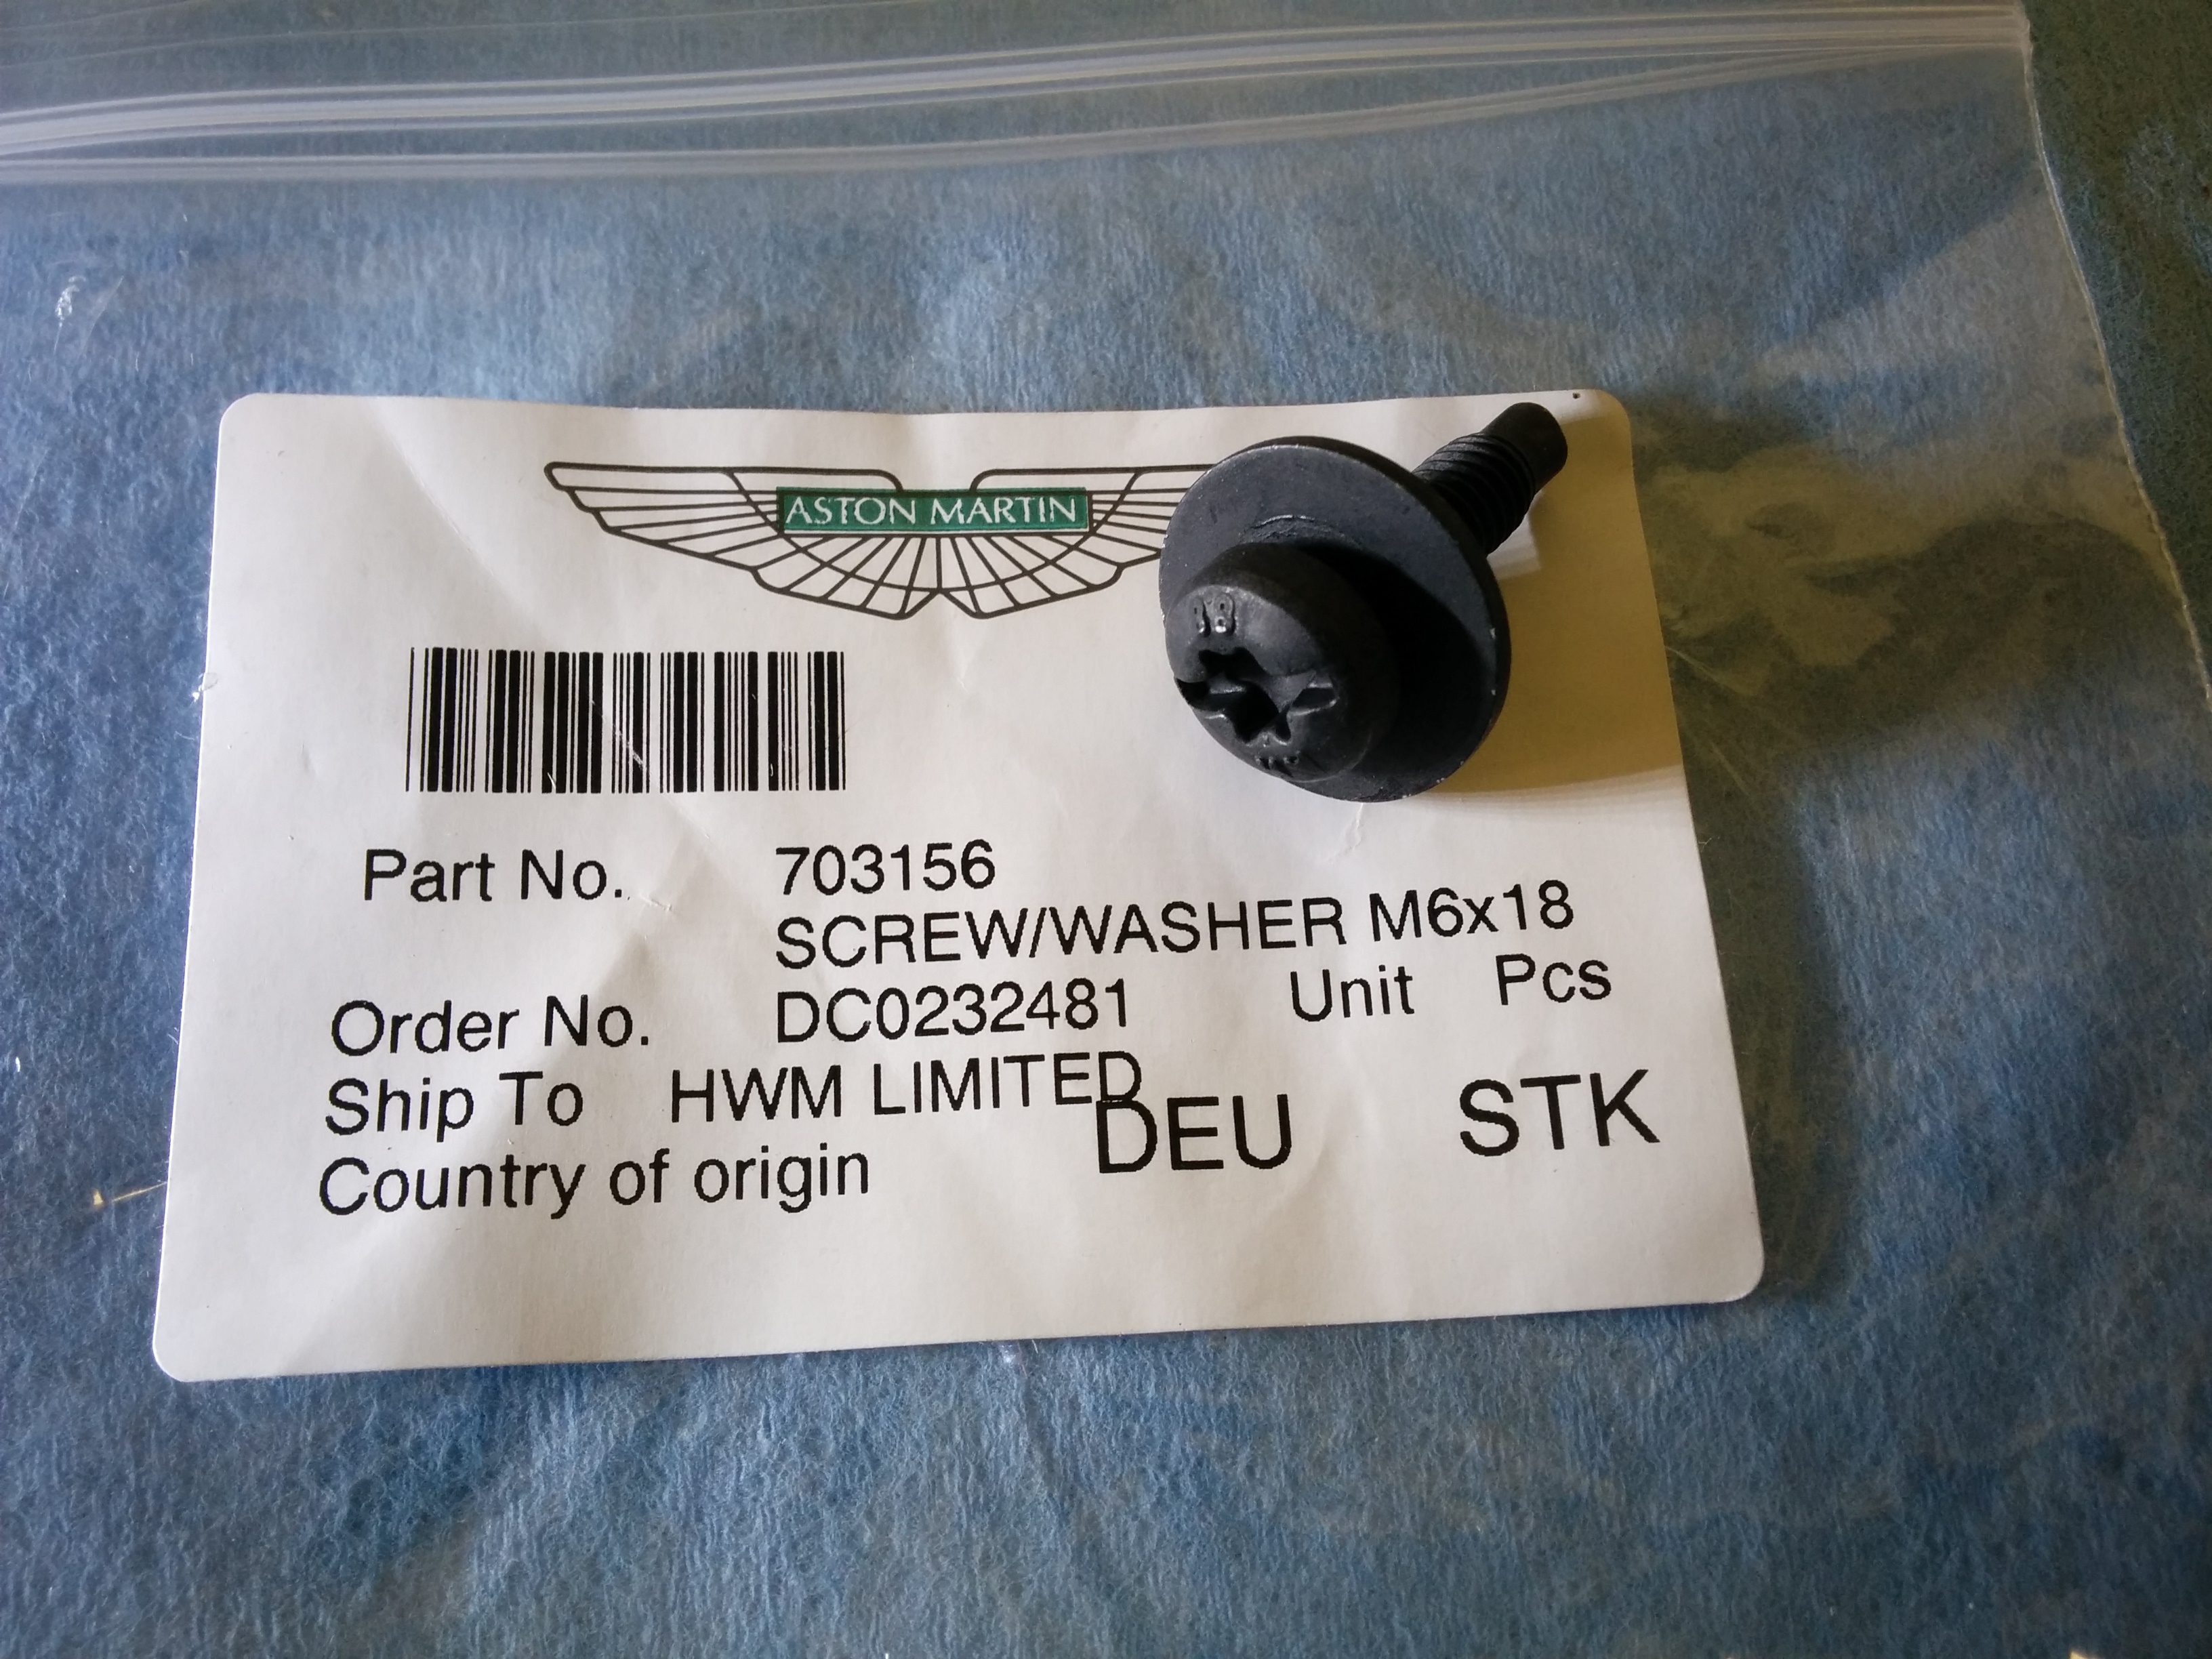
 Qty 9 – T30 Torx M6x18mm (same as used all over the car)
- Replace with Aston Martin P/N 701433 available for about $0.32 each online if you’ve lost one. You can also get these for about 28 cents each from Rob Sims at HWM in England.


When I removed the under tray for the first time (check it out in this post and video) I found 5 of the large head bolts all holding the leading edge to the air dam, and 4 holding the NACA duct. I’ve since learned by reviewing the parts diagram that the large head bolts are supposed to go in the positions where the cupped depressions are in the under tray (see the diagram above and my photo here). Of course, I learned this AFTER I shot the video, so you will see me incorrectly say they belong in the air dam. I went back and swapped the screws around after I learned this. Does it matter? I don’t know, but its simple to just put them in the right holes now that I’ve shared this tip with you!
Tools Needed:
 You don’t need many to complete this task:
- T30 Torx Bit Socket
- Torque Wrench (optional)
- And an extra pair of hands from a helper is nice, but it can be done solo.
Preparation
 I thoroughly cleaned the under tray before reinstalling. It was covered with dust and some oil drips, so I wanted it clean so I can tell if there were any new leaks. A $5 can of Gunk engine degreaser and a pressure washer did the trick for me. After I pressure washed it clean, I let it dry completely before I started putting it back on so it wouldn’t be dripping all over me.
The under tray had a few slight bends along its outer edges in a few places (presumably from previous service work and handling while off the car). I just carefully worked the aluminum with my hands and rubber mallet (flat on the garage floor) to smooth them out again like new.
Installation
It’s pretty much just put it back up the way you took it off, but here are a few tips:
- Start by holding the front edge up in place and sliding into place along the air dam. This is the most fiddly step, it’s all flopping around. A good time for help from your assistant.
- Go through your bolt pile, and look for hopefully at least 6 of them that have paint on them that matches the air dam. Use these six along the air dam edge.
- Get one of the center bolts on the air dam in place first to hold the leading edge. It’s all easier from here now.
- Before you do any more, slide under and get one of the center row bolts in place near the oil sump drain plug. This will now take most of the weight and hold up the center section while you slide around underneath.
- Don’t tighten up ANY of the bolts yet. Just get them started finger loose in all nearly 40 holes first. You want there to be some slack as you wiggle and jiggle it to align all those screws. Surprisingly, this wasn’t that hard.
- Make sure you fill all the holes. One bolt in every hole.
- Be sure to put the large headed bolts into the cupped depression (as noted above)
- After all 40 are started, now start tightening them down. I worked from the back to the front, one row at a time. I just snugged them up.
- Finally I went back over them all one last time and torqued them up. I couldn’t find a specifically listed torque spec in the Official Aston Martin Workshop Manual (there is no section on installing the under trays surprisingly since its referenced at least 20+ times), but in the back they listed the generic torque for an M6 screw (which these are) as 5 Nm (44 inch-lbs). I used my judgment and went with firmly snug. [See my editorial post install note below – I should have torqued them]
Now all that’s left is to reinstall the wheels and get the car down off the jack stands.
Here is a short video on the process, worth watching to see how to wrestle it into place and get the bolts all started.
Post Install Note
After following the procedure above and finally driving the car, I noticed I had an odd ‘creak-squeak’ noise that was new. I wondered if some of the screws had worked loose, and opted to check under the car again. What I discovered was that the under tray was rattling, easily, if I even slightly tapped on the large flat areas to the left or right of the NACA duct opening. The screws weren’t loose – just a natural vibration of the large open expanse of the under tray, and it was rattling where it touched the large cross member under the sump. When I had removed the under tray, some pieces of neoprene foam fell away, and I now surmise that they had been attached to the cross member to stop this exact rattling/creaking. I had some simple foam tape, and I applied a square on the cross member where the contact was happening. I had to remove the NACA duct (to reach in)and then one of the other screws in the center of the cross member to get enough gap to install the foam tape squares (at least I didn’t need to take the whole tray back down).
I then tightened all the bolts up again (double checking all 40), and while doing so noticed one had fallen away completely from the under tray directly below the drivers seat (rattled out over just a few days).
So, I suggest you check for this vibration noise by tapping with your fingers before you finish up your install just in case, and go to the trouble of using a torque wrench to ensure all of the bolts are properly tight. After I did this, my noises were gone.
Bonus Feature – Detailed Photos of the two types of Screws
I took high resolution photos of the two different screws used for the under tray. Some of mine were damaged, so I ordered some new ones, and this is what the bags and brand new ones looked like. I know, who would care? Somebody on the Internet ;>)


Hi Steve, thanks for this write-up. Do you remember what size foam tape you used for the cross member? I suspect I am getting the same vibration/sound.
LikeLike
Hello, I have recently bought a DB9 with manual transmission and your website is amazing and really helpful! Thank you for your passionate job
LikeLike