
![]() If you’ve been accessing some of the components on the right hand side of the 6-speed Touchtronic II automatic transmission fitted to most Aston Martin DB9s, DBS and Rapides between 2004 and 2014 you’ve probably had the right hand rear exhaust heat shield removed. For me, I was working on changing the Transmission fluid, filter and seals (of which I’ve done a complete series of articles on that you can find here). The exhaust pipe is very close, and Aston fitted a heat shield to protect the transmission. Once you have your other work done, you can reinstall this heat shield. Let me show you how to get it back installed properly with the least amount of cursing.
If you’ve been accessing some of the components on the right hand side of the 6-speed Touchtronic II automatic transmission fitted to most Aston Martin DB9s, DBS and Rapides between 2004 and 2014 you’ve probably had the right hand rear exhaust heat shield removed. For me, I was working on changing the Transmission fluid, filter and seals (of which I’ve done a complete series of articles on that you can find here). The exhaust pipe is very close, and Aston fitted a heat shield to protect the transmission. Once you have your other work done, you can reinstall this heat shield. Let me show you how to get it back installed properly with the least amount of cursing.
Prerequisites
If you have the heat shield off already, you’ve already tackled any pre-requisites. Essentially you’ll need to be under the car and have clear access to the area. Here is my article on Removing the Heat Shield.
Tools Required
This list is pretty simple, one 10mm combination wrench.
You can make your life considerably more easy if you have a fancier bendy ratcheting style box end wrench like the one below. You’ll be working in a tight space at an awkward angle, so this helps.
An inspection light will help as well.

Procedure
This is easy and will take just a few minutes once you have access to it.
CAUTION – Be careful that the exhaust pipe might be very hot depending on what you’ve been doing. Don’t burn yourself.
Once we get the shield repositioned there are just two small 10mm bolts to install.
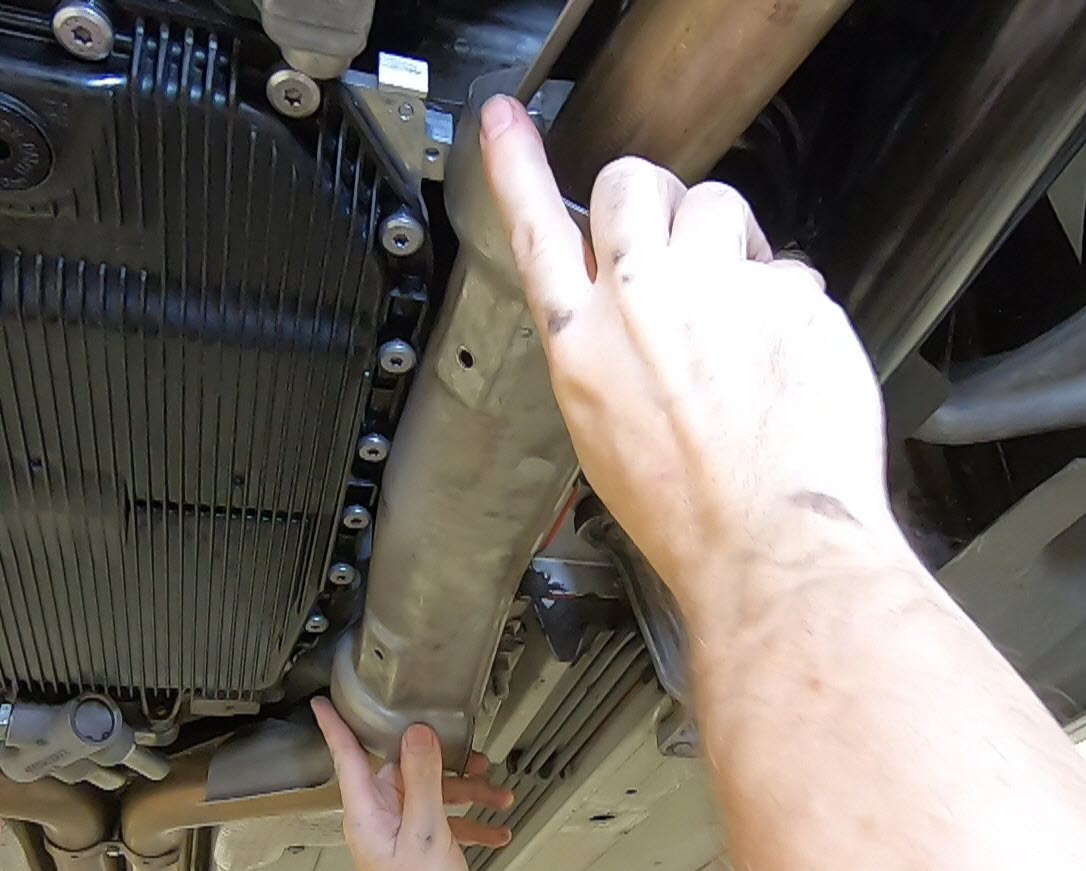
- Slip the Heat Shield back up into position.
- In the video below you’ll see me ‘roll’ it up into position over the exhaust pipe and adjacent heat shields
- Loosely position it over the two mounting brackets for the bolts.

- To make your life easier I’d suggest giving each bolt a spritz with oil like WD40. This might help it thread in by hand.
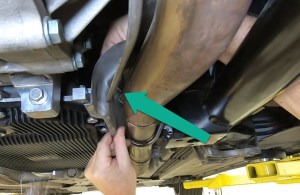
- Starting with the rear most bolt work your arm up over the area by reaching in and through the right hand rear suspension arm area.

- Starting the bolt is the tricky bit. It’s a finger tips job, and I was able to manage with one hand from above and the lower hand positioning the shield over the mounting hole. Just be patient, get the bolt through the heat shield and lined up in the hole, and then get a thread started.
- Try and thread it in as far as possible with your fingers, its faster than the wrench.
- Leave it a bit loose at this stage until we have the front bolt installed.
- Starting the bolt is the tricky bit. It’s a finger tips job, and I was able to manage with one hand from above and the lower hand positioning the shield over the mounting hole. Just be patient, get the bolt through the heat shield and lined up in the hole, and then get a thread started.
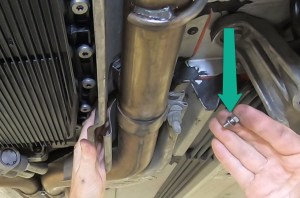
- Install the Front Bolt
- Also tricky as you’ll find you have even less access than the rear bolt.
- I got one hand up over the pipe from the right side. I had to pinch the bolt and washer between two fingers and slip it along the shield until it went through the hole. I then forced my other hands finger tips up to help. And I dropped the bolt a few times trying. Just be patient and it will eventually line up.
- As with the other bolt, try and thread it as far as you can by hand.
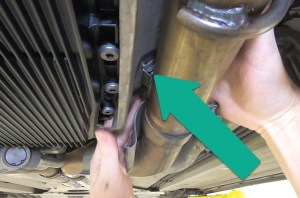
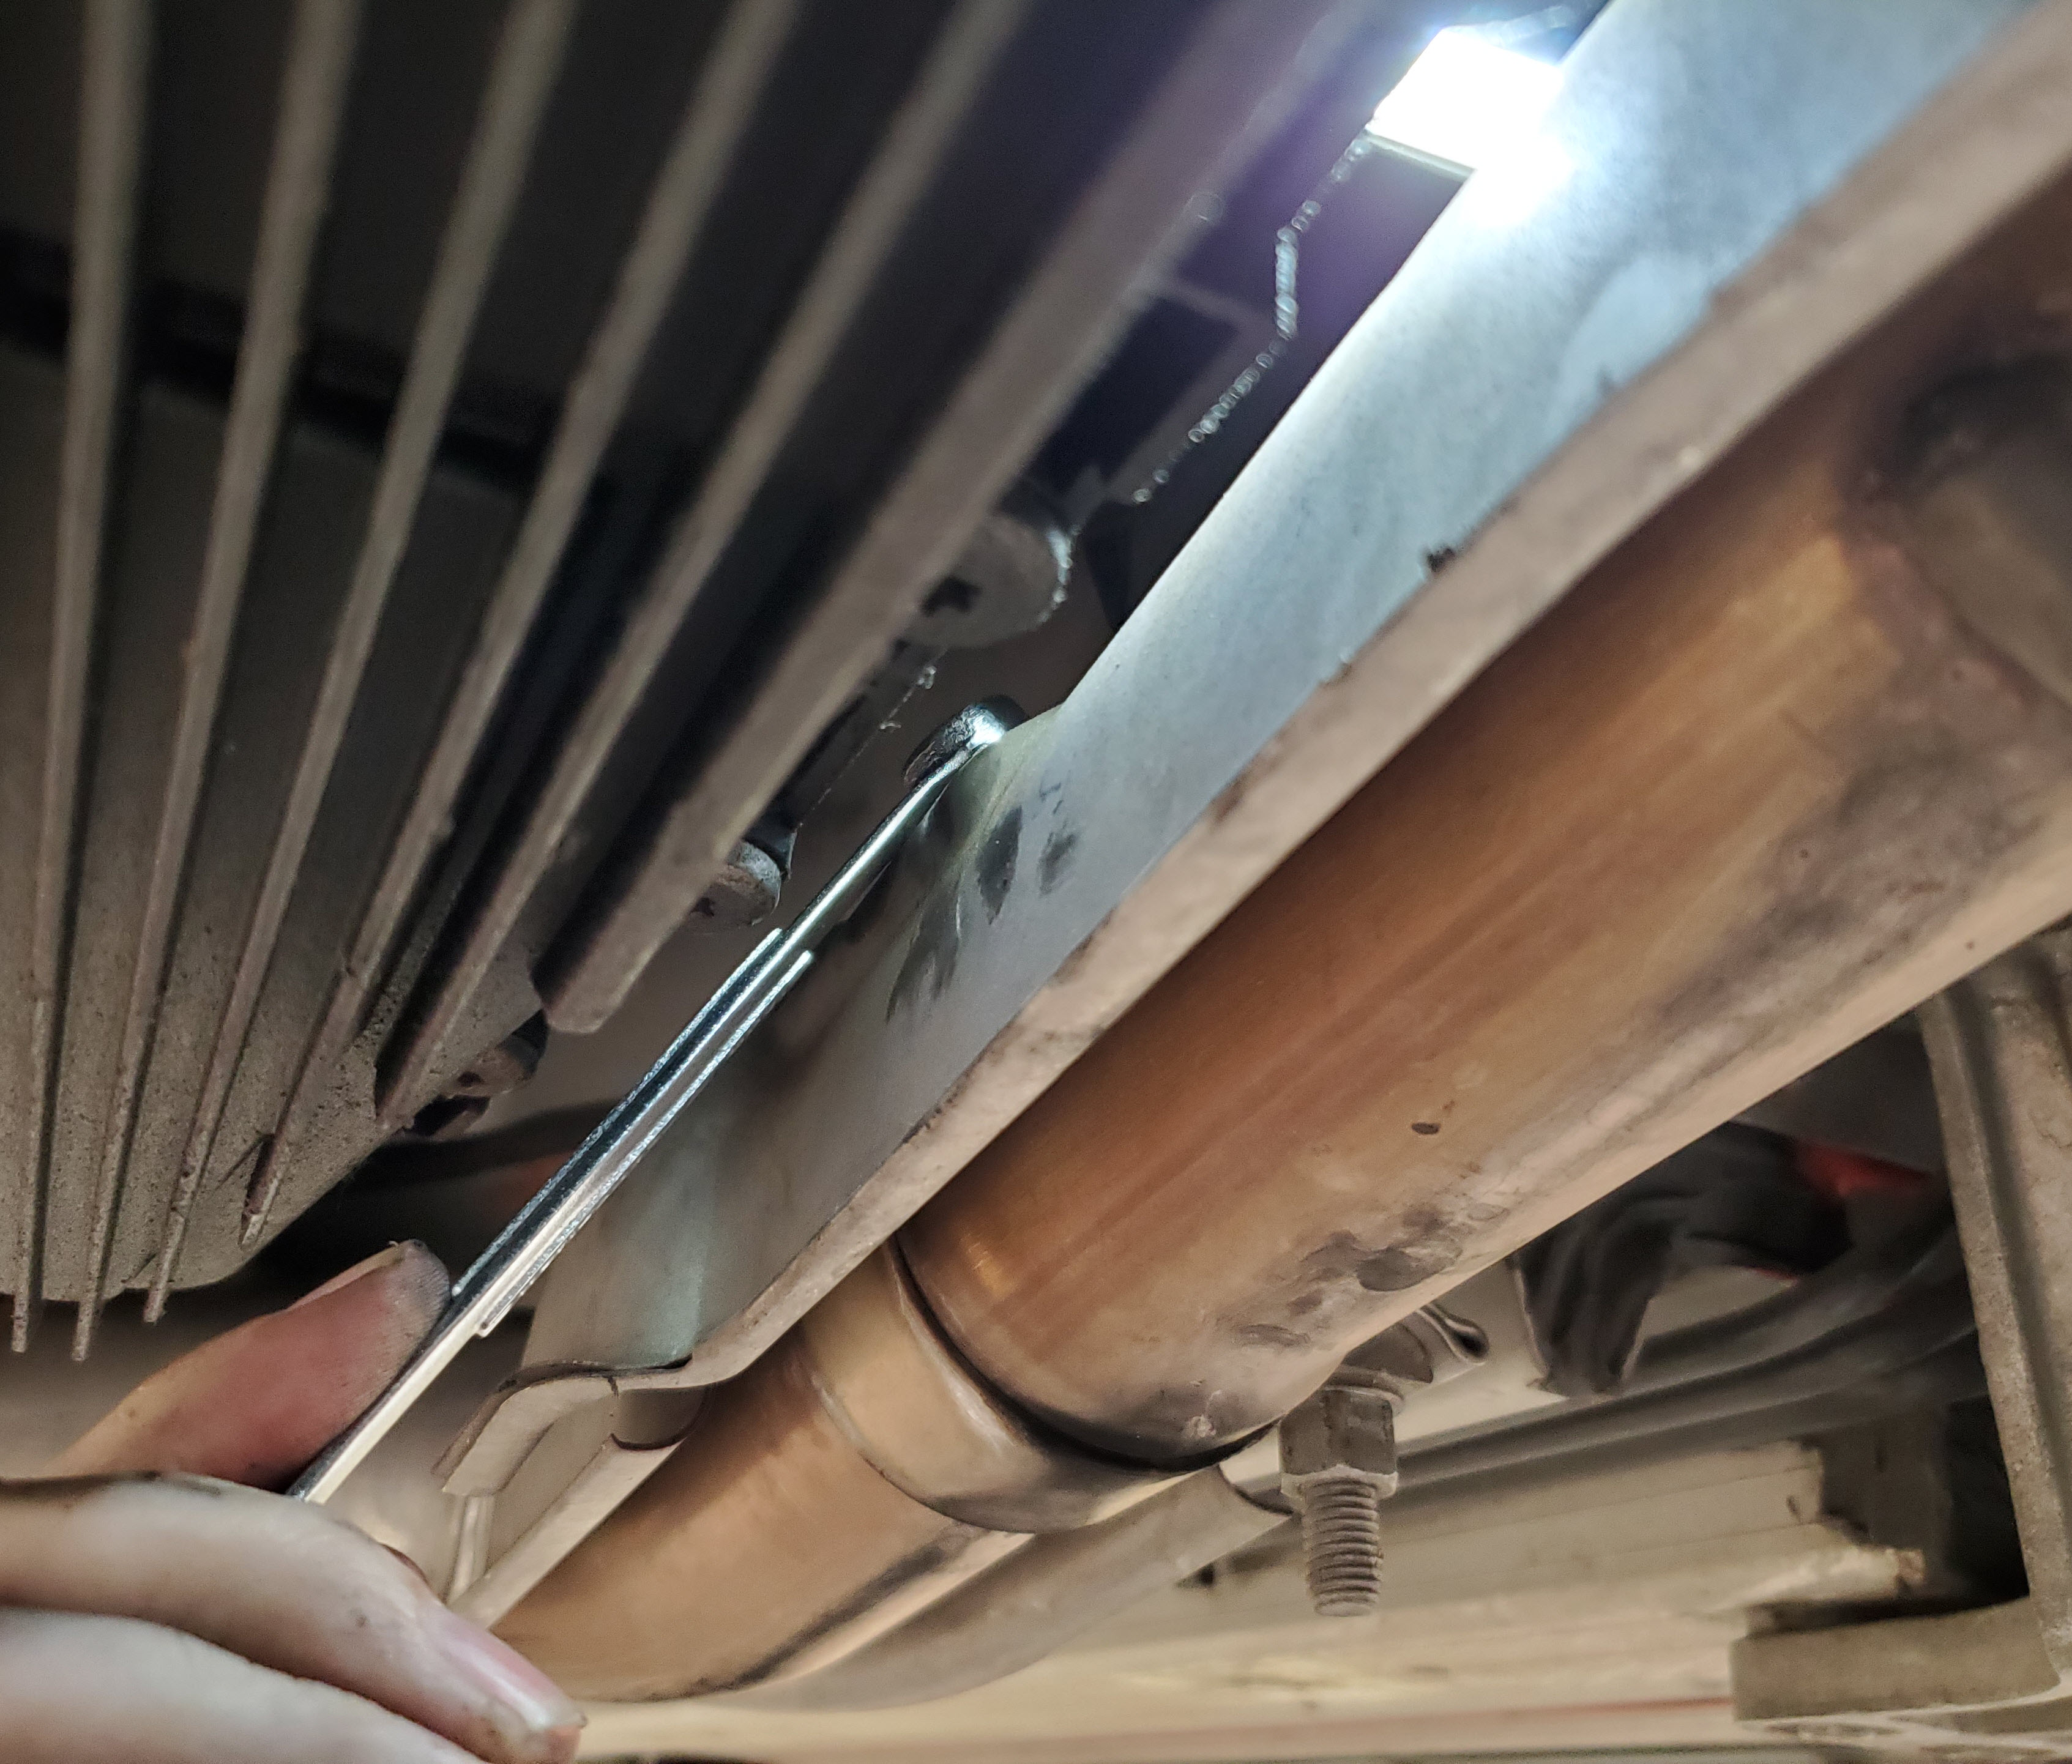
- Tighten up the Rear Bolt
- You should be able to blind fit the box end of the wrench to the bolt and get about 1/8th of a turn each time.
- There is a torque spec of about 10 Nm, but I have no way of fitting the Torque wrench. I just made the bolt firmly snug.
- Tighten up the Front Bolt
- You can use your bendy ratcheting box end really well here.
- Visibility is at least good for this one.
- Just reach up into the gap from below and snug it up same as the rear.


That’s it. If you are buttoning up your car, the final two steps are likely reinstalling the rear subframe cross brace and then reinstalling the rear undertray.
Video
You can see me removing the heat shield as part of my video of Checking the Transmission Fluid Level (at the 34:19 mark). Here is a link to it:
