If you’ve had your fuel injectors out as part of a larger project (like me dealing with a Lumpy Idle situation) or maybe you are just changing one (or more) of them, you need to know how to properly prepare and install them. Your tasks will include getting them properly mated up with the fuel rails again, plus making all the electrical and vacuum connections. Needless to say – I have a few tips to share.
To get to the point where I was ready to install the fuel injectors I had done a lot of work already. Check out my other post and video on Disconnecting the Fuel Rails and Removing the Fuel Injectors.
Parts Required
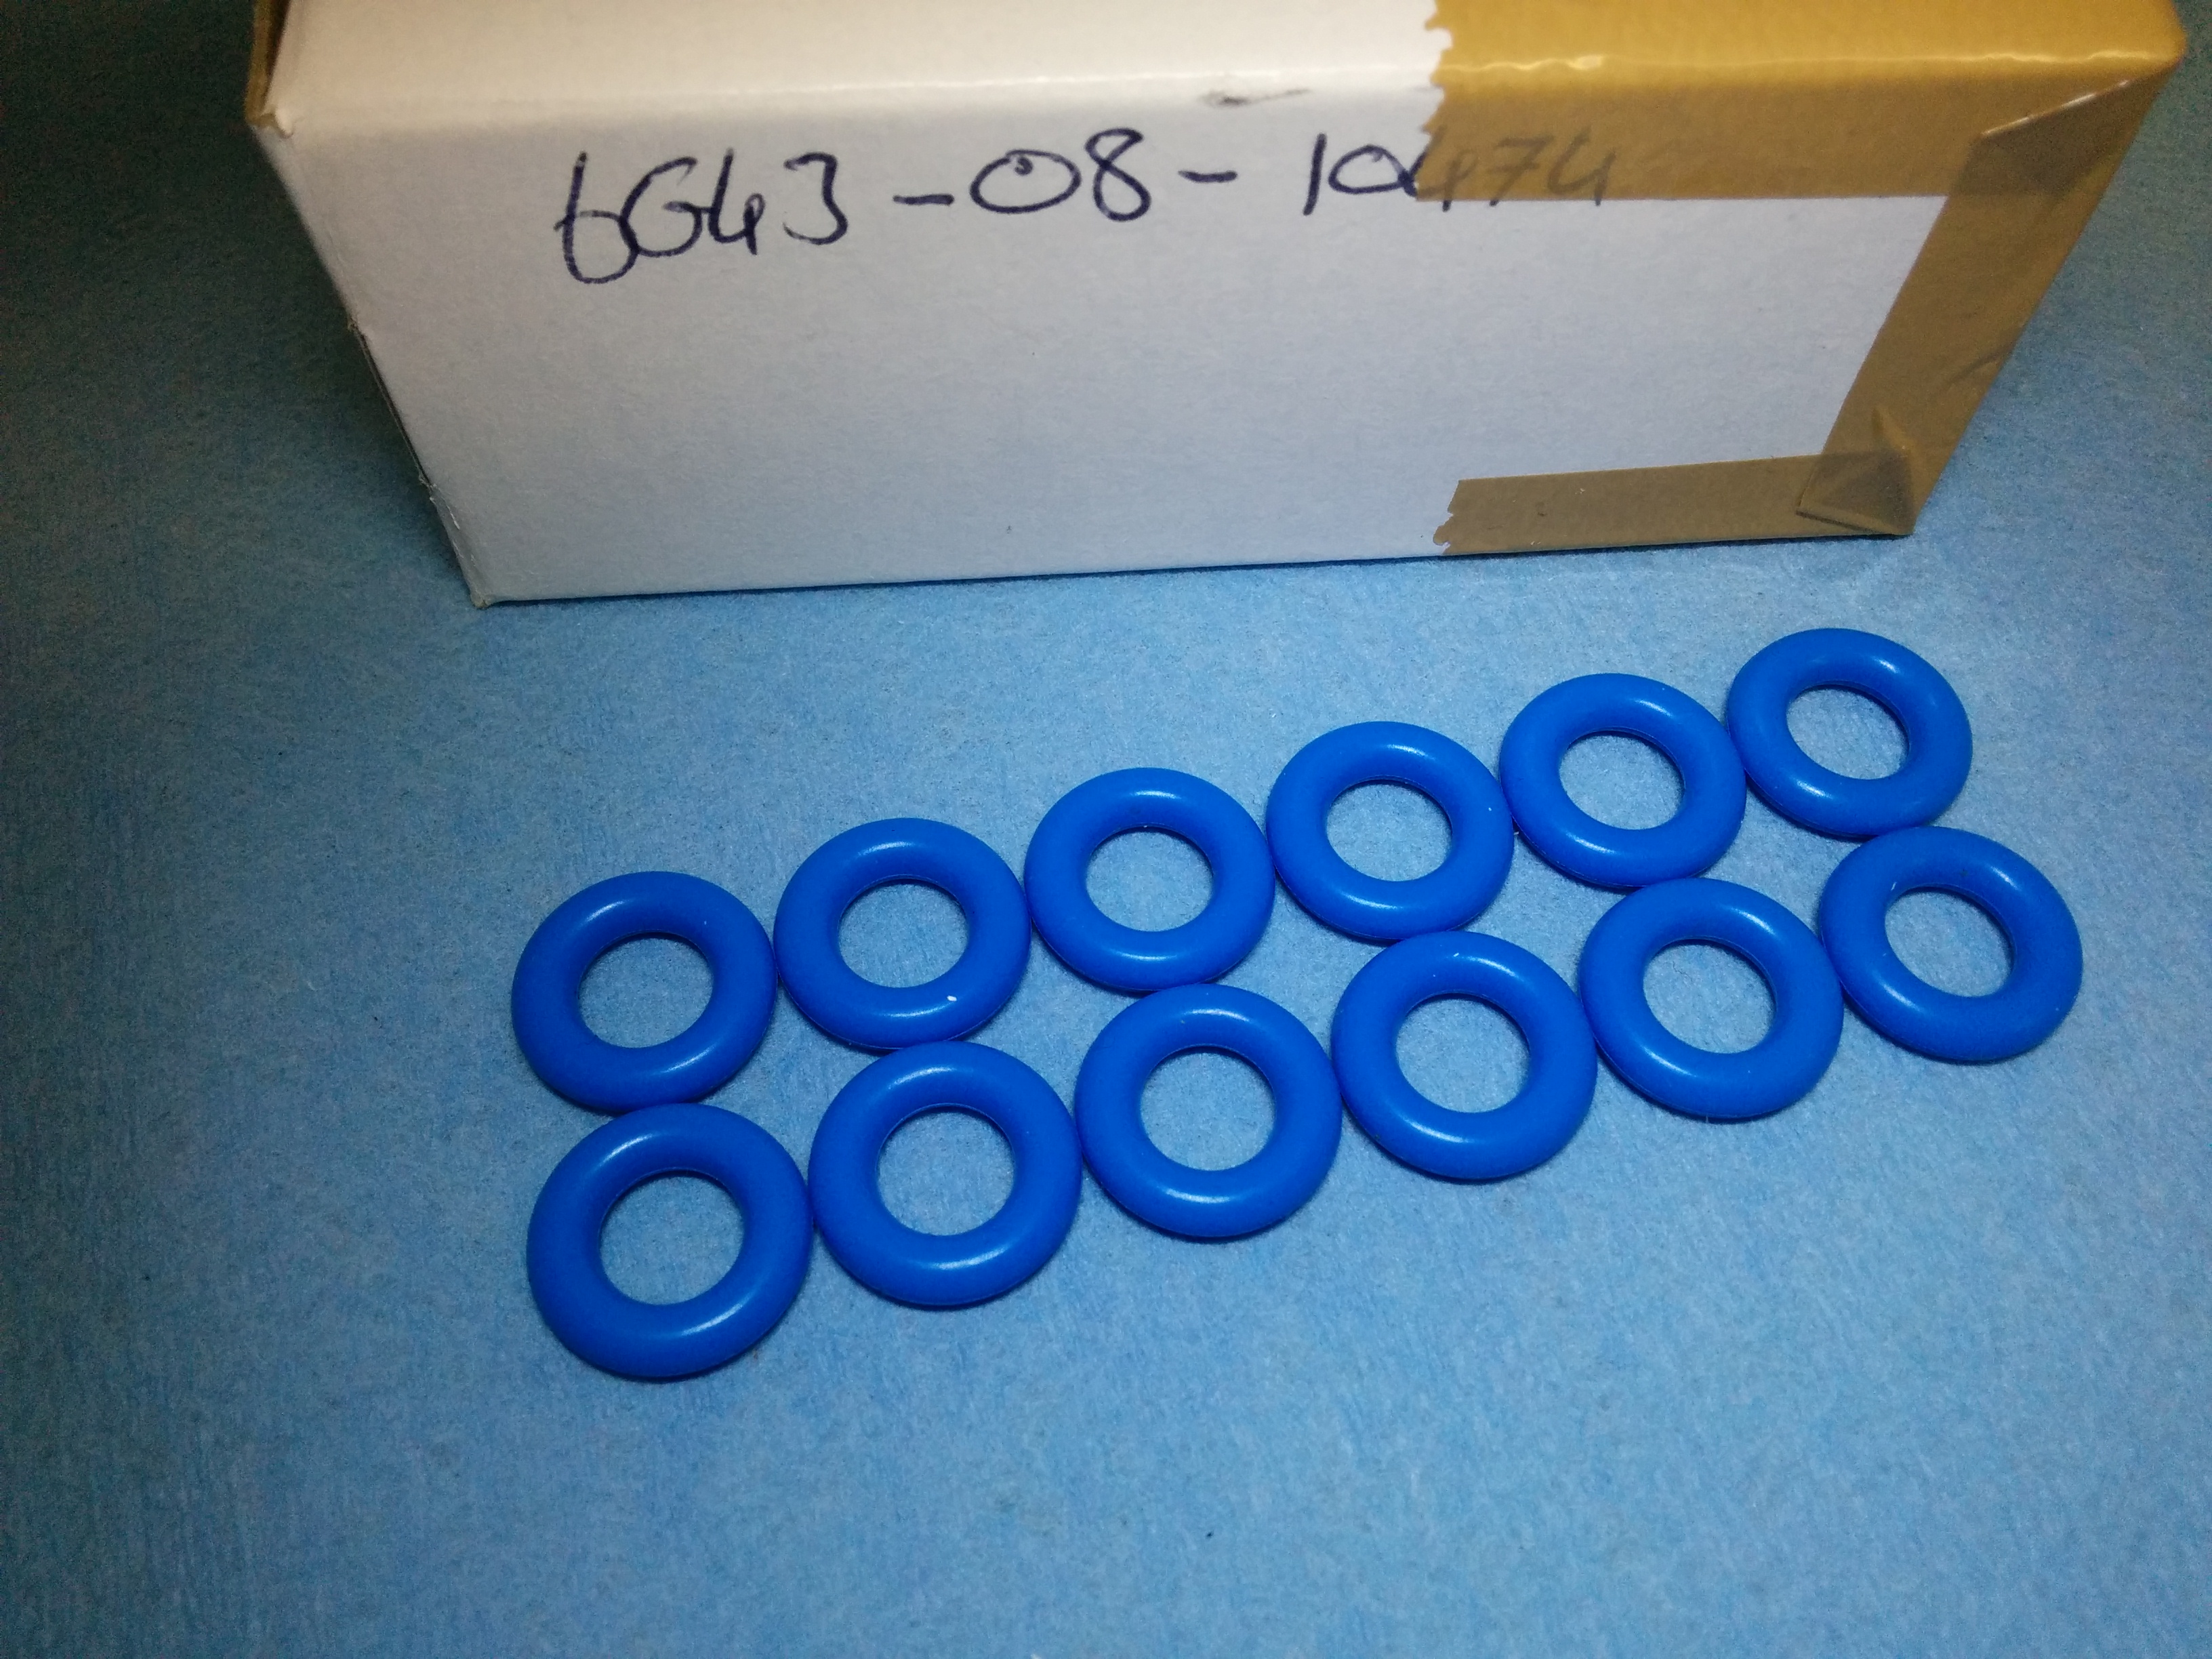 If you are reinstalling your existing fuel injectors you need to replace the upper and lower O-rings. The old ones get stiff and crispy due to the heat. I’ve already covered this in great detail in my post on Parts Needed to Change your Spark Plugs and Coil Packs. Basically you need Qty. 12 Blue Upper O-rings (Aston Martin p/n 6G43-08-10474) and
 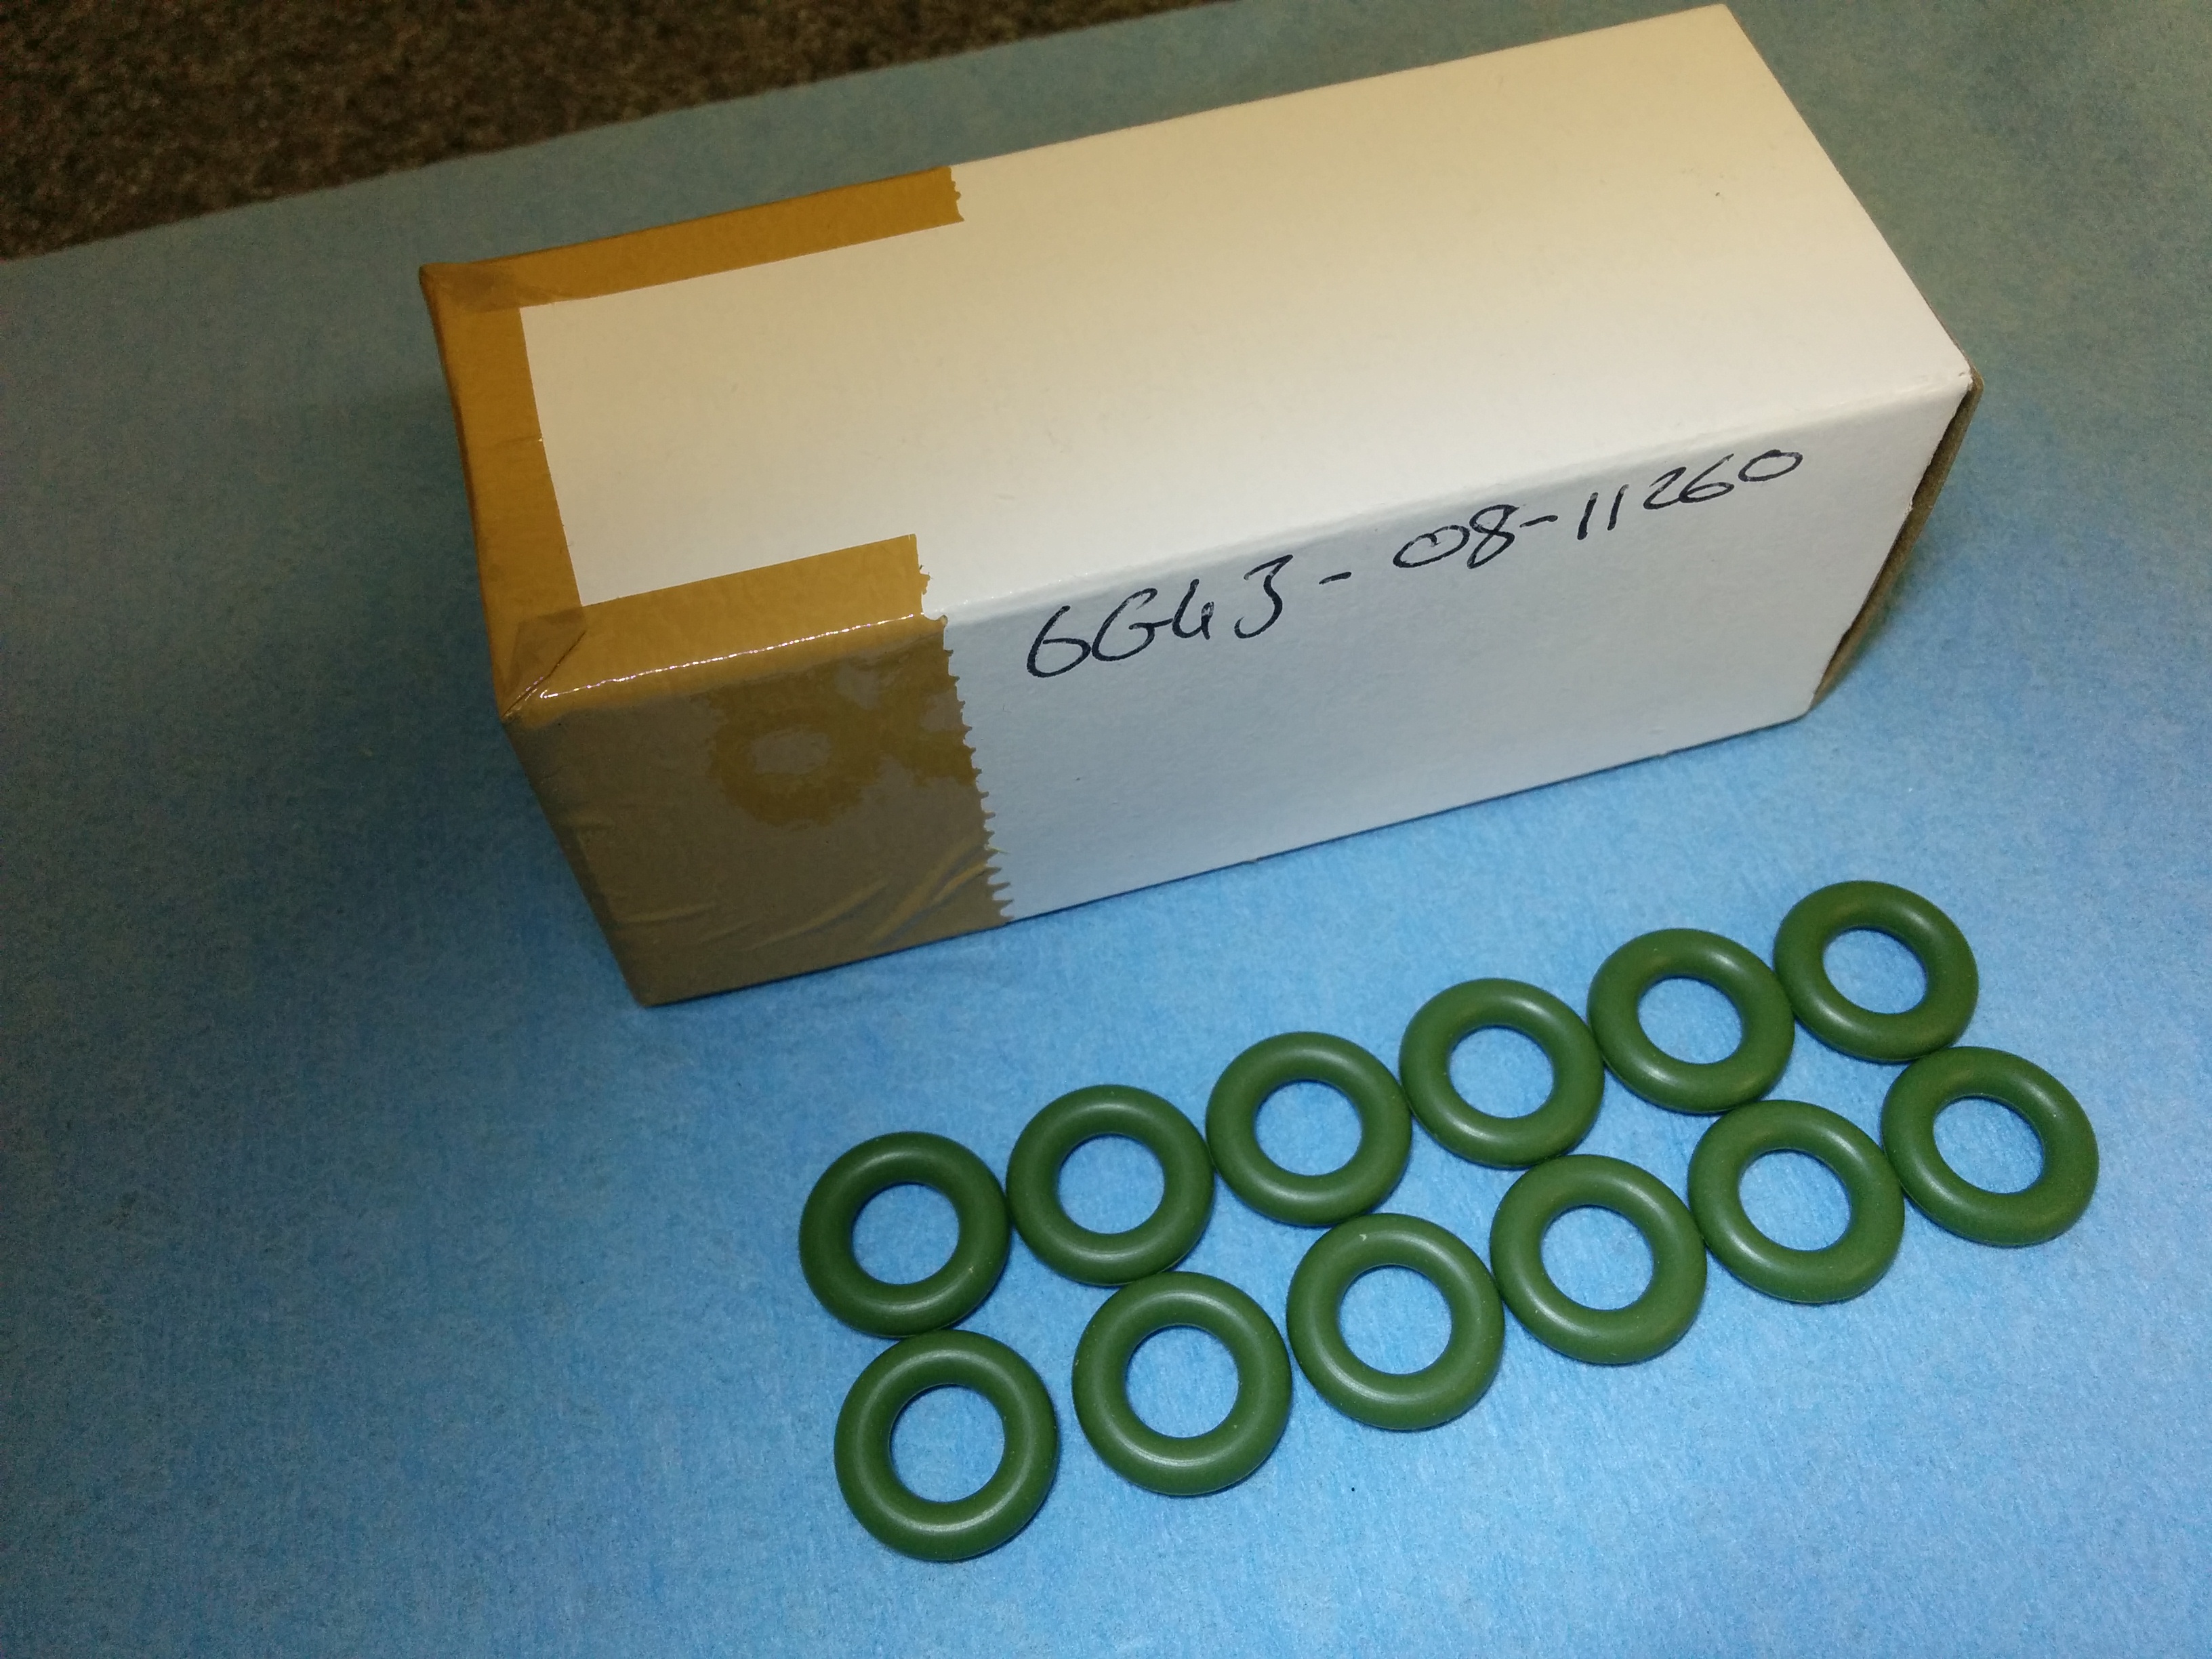 Qty. 12 Green Lower O-rings (Aston Martin p/n 6G43-08-11260) available from HWM for just under $3 USD each.
If you are installing new fuel injectors (Aston Martin part number 4G4E-9F593-A6A for Model Years 2004-2008) you can find them online for about $38 USD or for a little cheaper ($32 USD) by contacting Rob Sims at HWM in England. Note: The new fuel injectors include new O-rings so that’s one less worry.
For later model cars – The fuel injectors changed for MY09-12 and are Aston Martin p/n 5R13-9F593-AB available online for about $55 USD or for $46 USD if you contact Rob. They changed again in MY13+ to Aston Martin p/n CD33-9F593-AA available for $27 USD if you contact Rob. Personally, I’d suggest you contact Rob to be sure you get the right bits – my articles are focused on the MY04-08 cars.
Tools Required
You only need a few tools:
 8mm 6-point socket
- 6″ long extension (3/8″ drive)
- Universal Joint (3/8″ drive)
- Nut driver (1/4″) to make some of it go faster
- Torque wrench capable of 10 Nm
- Small flat blade screwdriver
- An oiling can with clean engine oil
- Lint free rag to wipe down the injectors
- 409 All Purpose Cleaning Spray

Preparation
 I was reinstalling my original fuel injectors so I wanted to get them cleaned up and serviced before I reinstalled them.
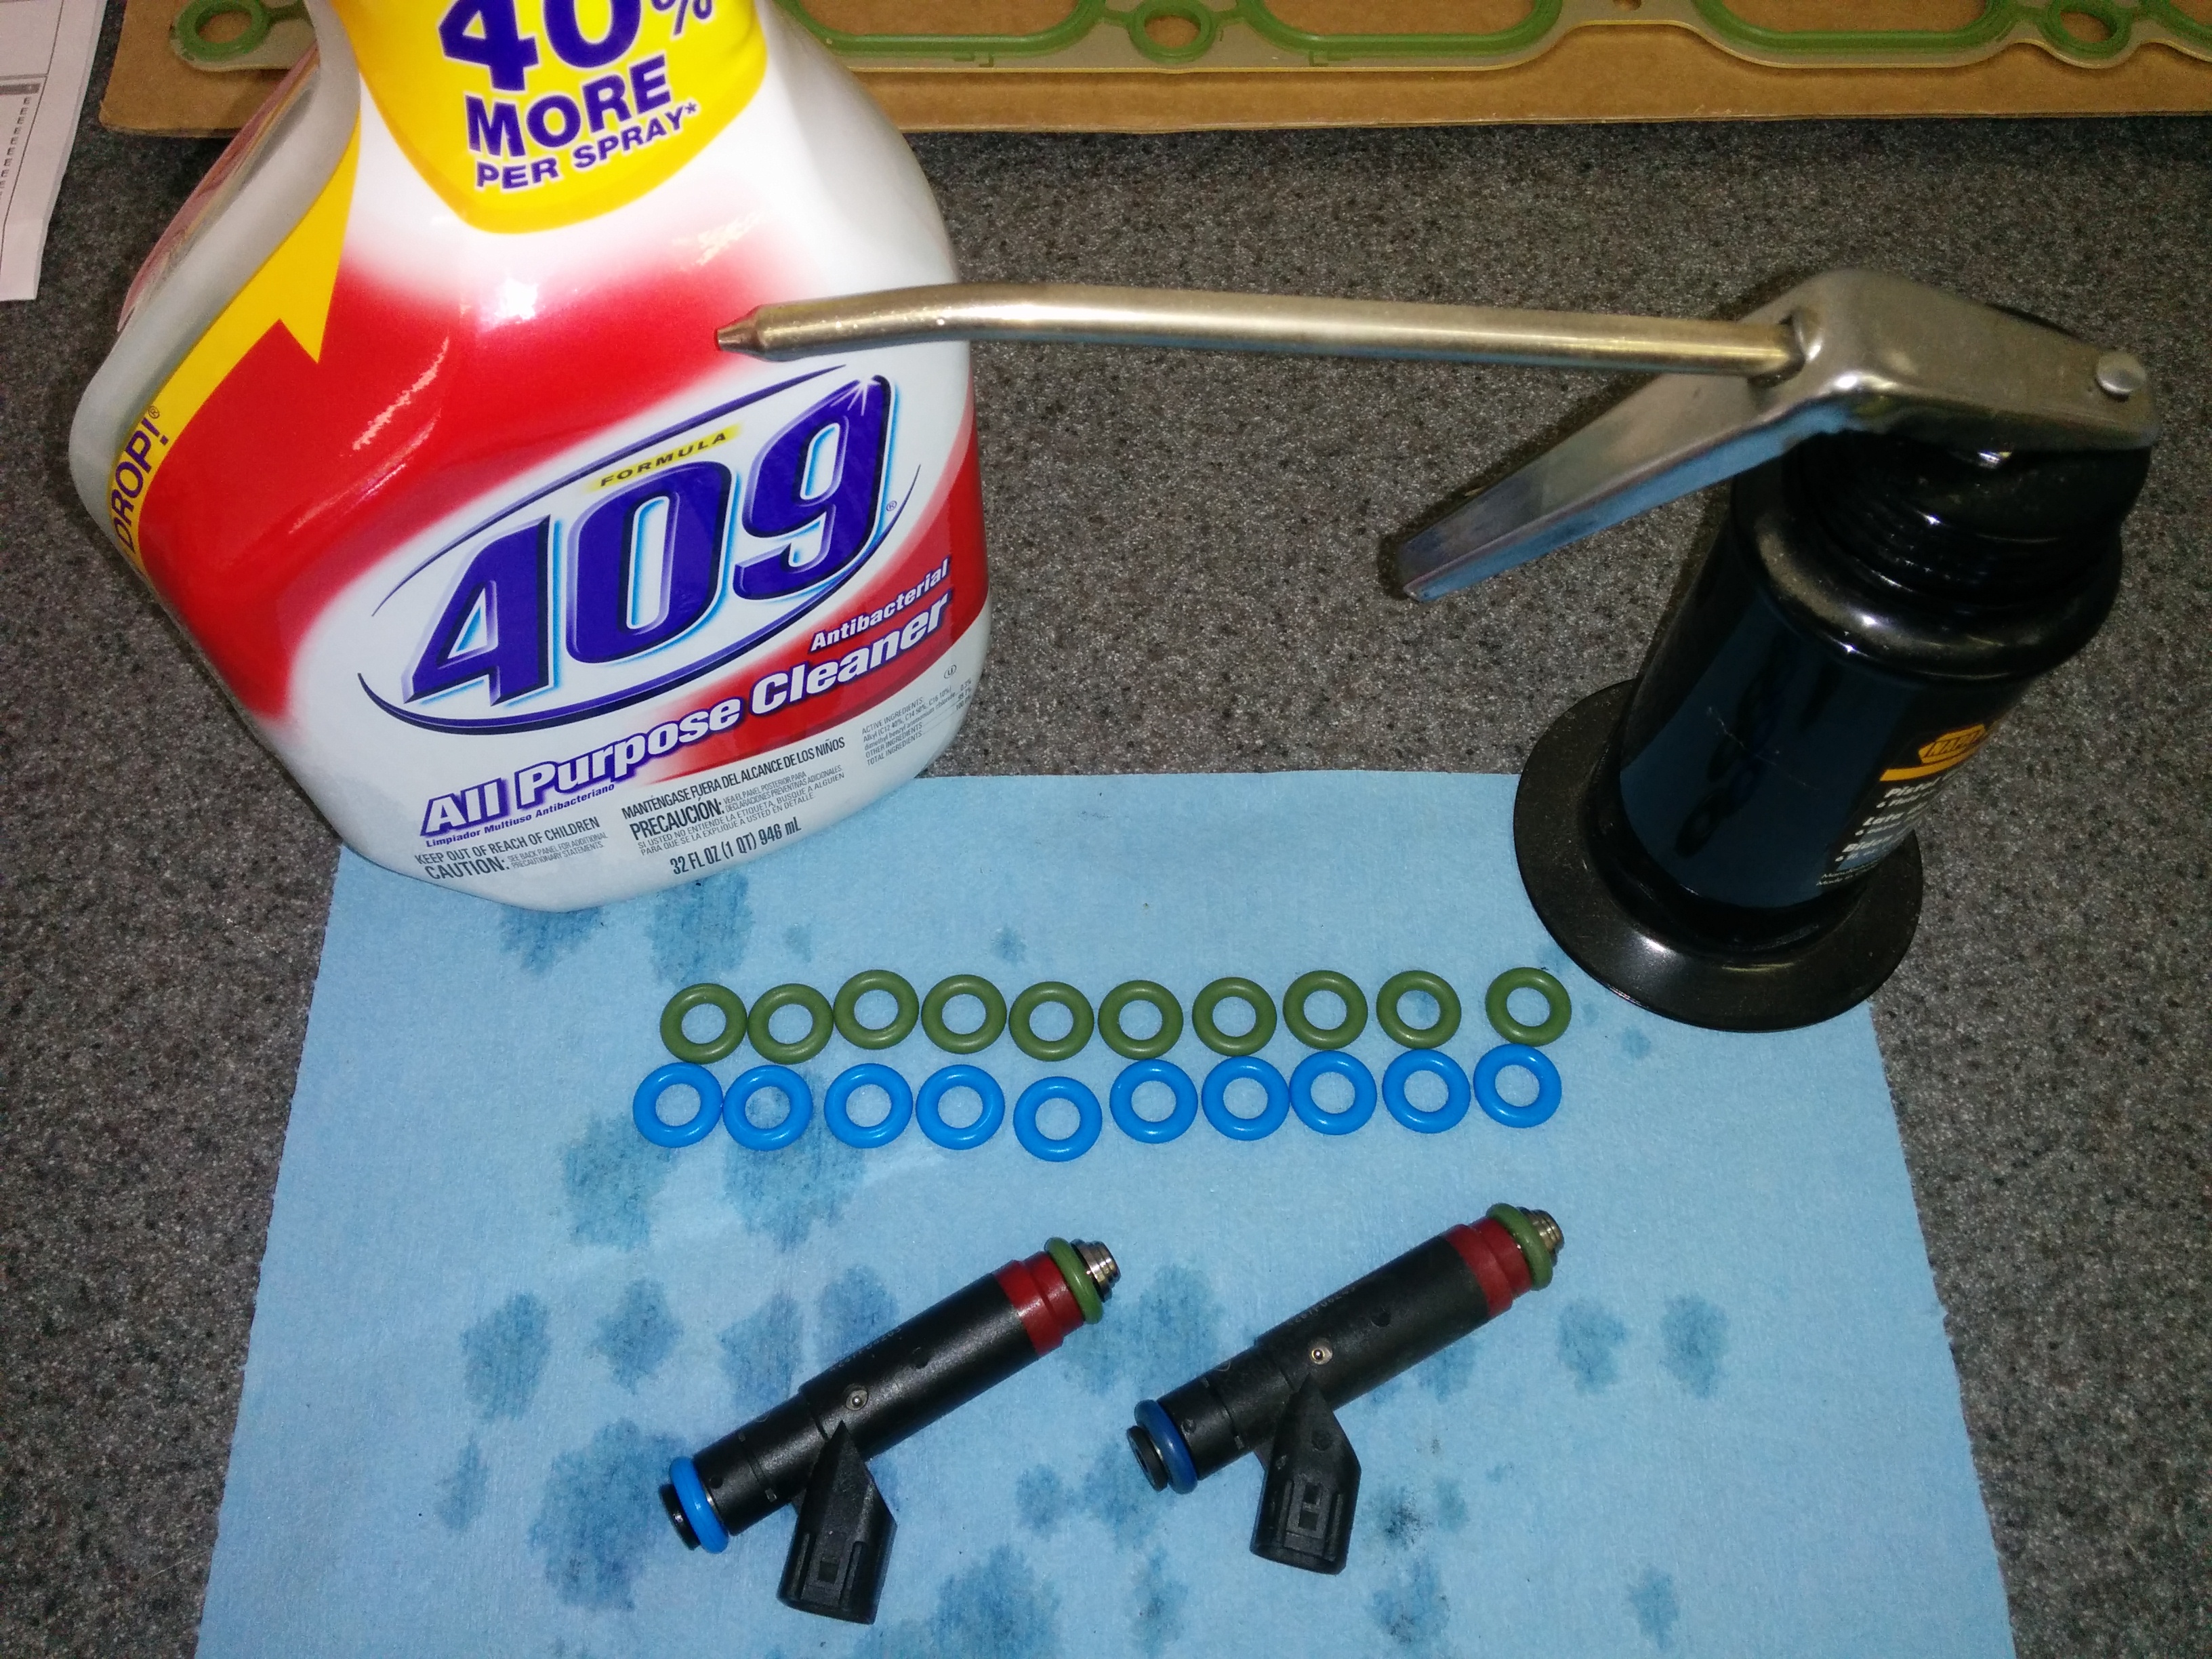
I started by removing the old upper (blue) and lower (green) O-rings. I merely used my fingers to roll the old O-ring off the end of the injector. If needed you could use a small flat blade screwdriver to carefully pryse under the old O-rings and pop them out of the groove.
I used the 409 Spray and lint free rags to wipe down the injector to make it clean and shiny like new.
 Time to install the new O-rings. I used a dab of clean engine oil on my finger tip and lubricated the ends of the injector to aid in slipping on the O-rings. I then eased the Green O-ring into the lower groove, and the Blue O-ring into the upper groove. After they were in the grooves I smeared a light coating of clean oil over the O-rings to help with installing them in the manifold later.
 The final step was to check that the six (6) fuel rail mounting bolts were clean and undamaged. I lubricated the first few threads of each both with a dab of clean engine oil so they will thread in smoothly later.
Procedure
 The Official Aston Martin Workshop Manual section 3.04 on the Fuel Charging System covers it in just a few steps (including the steps 3 & 4 which I skipped since we didn’t disconnect the fuel rails from the fuel supply lines). I will be a bit more verbose below.
Overall preparing and installing the injectors and fuel rails might take you 30-45 minutes and is an easy procedure.
- Ensure that the injector ports in the Intake Manifold are clean and free of debris. Use your pinky finger tip in the opening to be sure.
- Gently insert the bottom of each fuel injector (Green O-ring) into the port on the intake manifold.
- Wiggle it in with gentle pressure. Be sure to bottom it out. It should take a bit of effort since the O-ring is making a seal.
 Tip: When I removed my old injectors I kept track of which cylinder they were for so I could replace them in the same position. Not required, but old mechanics habit. If you are using new injectors this won’t matter.
- Installing the rear most injectors is a PITA since the access is more limited. Just be patient!
- You want to align the injector with the electrical connection pointing straight up.
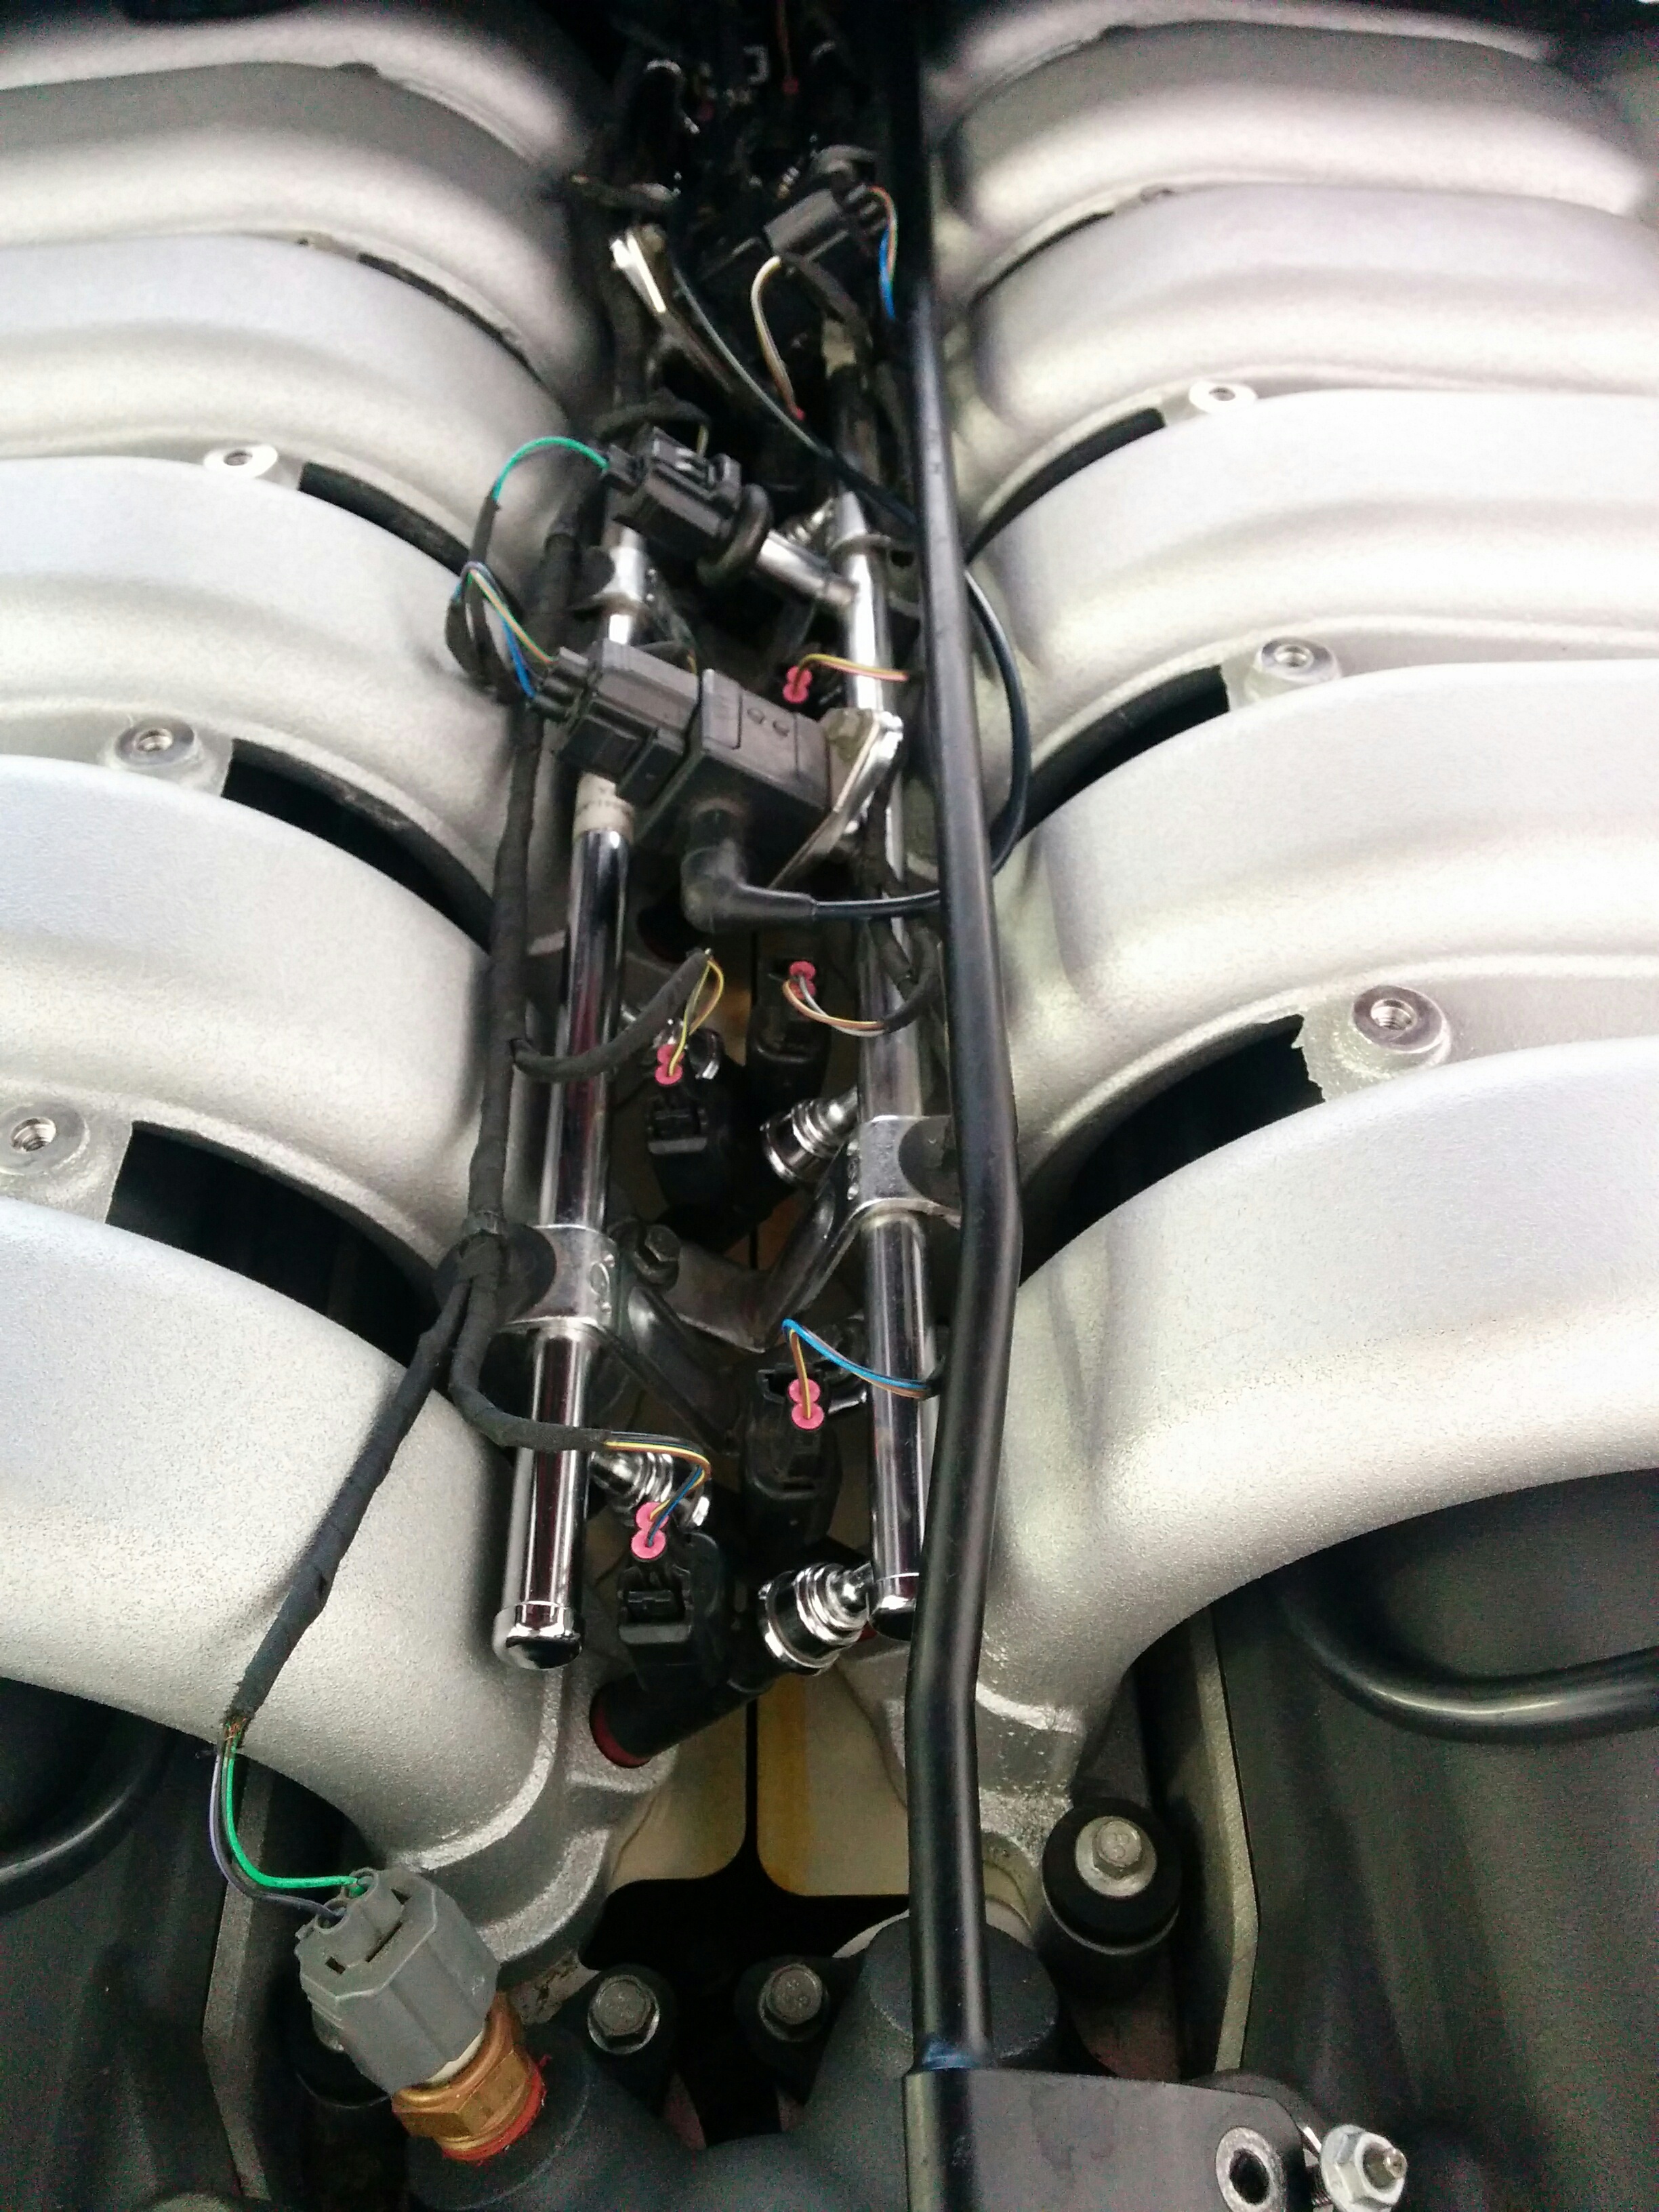
 Now carefully position both the left and right fuel rails over the tops of the injectors.
- I started at the rearmost injector on each rail as it is tied down to the fuel supply pipes at the back.
- They may not immediately line up since the injectors have some ‘play’ where they can wiggle around. Line up the top of each injector with the matching ‘cup’ in the fuel rail.
- Make sure you have your electrical and vacuum lines loosely in position and not trapped under the rails, etc. Take your time with this, think about each connectors position and untangle them now (they are likely wound up a bit since you’ve been batting the fuel rails back and forth out of the way).
- With the rails loosely in position, use a little pressure and work the rails down a bit over the blue O-rings at the top of the injectors. You’ll be doing this over six (6) O-rings at once so it takes a bit of force, but nothing serious. It probably won’t go all the way, but you’ll use the bolts to finish this up.
- Check that the fuel rail mounting brackets are now in line with the threaded holes. Rotate/align as needed.
- Insert the three (3) mounting bolts for each rail and use an 8mm 6-point socket to just snug the bolts into position, ‘pulling down’ the fuel rails over the injectors.
- You want to do this evenly as you are locking down all the injectors and O-rings. I snugged the center bolt first, then the front and finally the rear.
- You can use the nut driver to make the process go faster on the front and center bolts.
- To reach the rear most bolts you will need to use the 6″ extension and universal joint since the bolts have limited access under the cowl.
- Torque the Fuel Rail Mounting Bolts to 8-12 Nm (6-9 ft lbs).
- I used my 1/4″ drive torque wrench set to 10 Nm.
- Connect the twelve (12) electrical connections from the wiring harness on the fuel rails to the fuel injectors. Be sure they ‘click’ firmly into place.
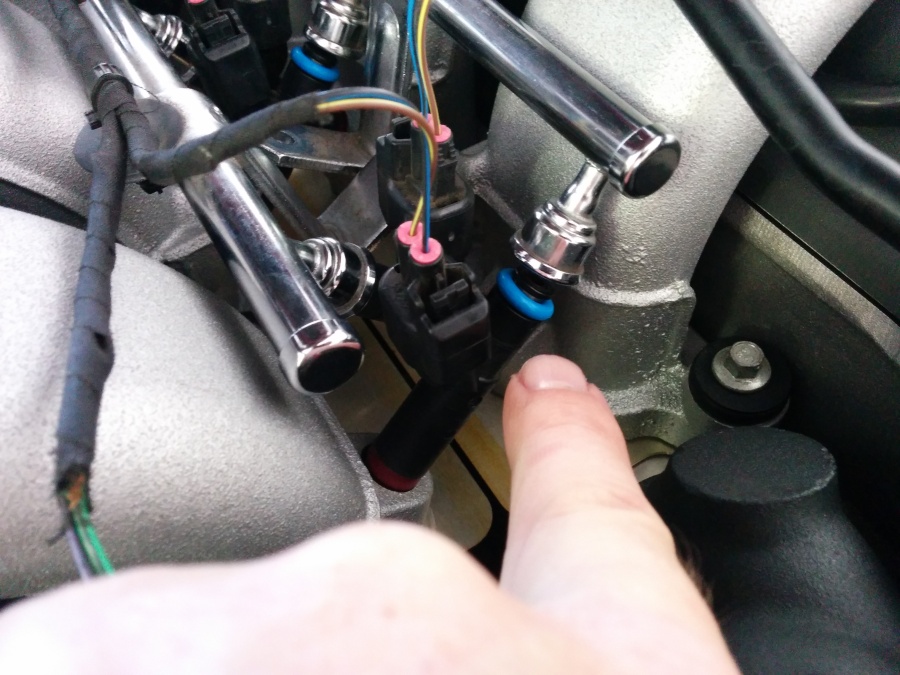
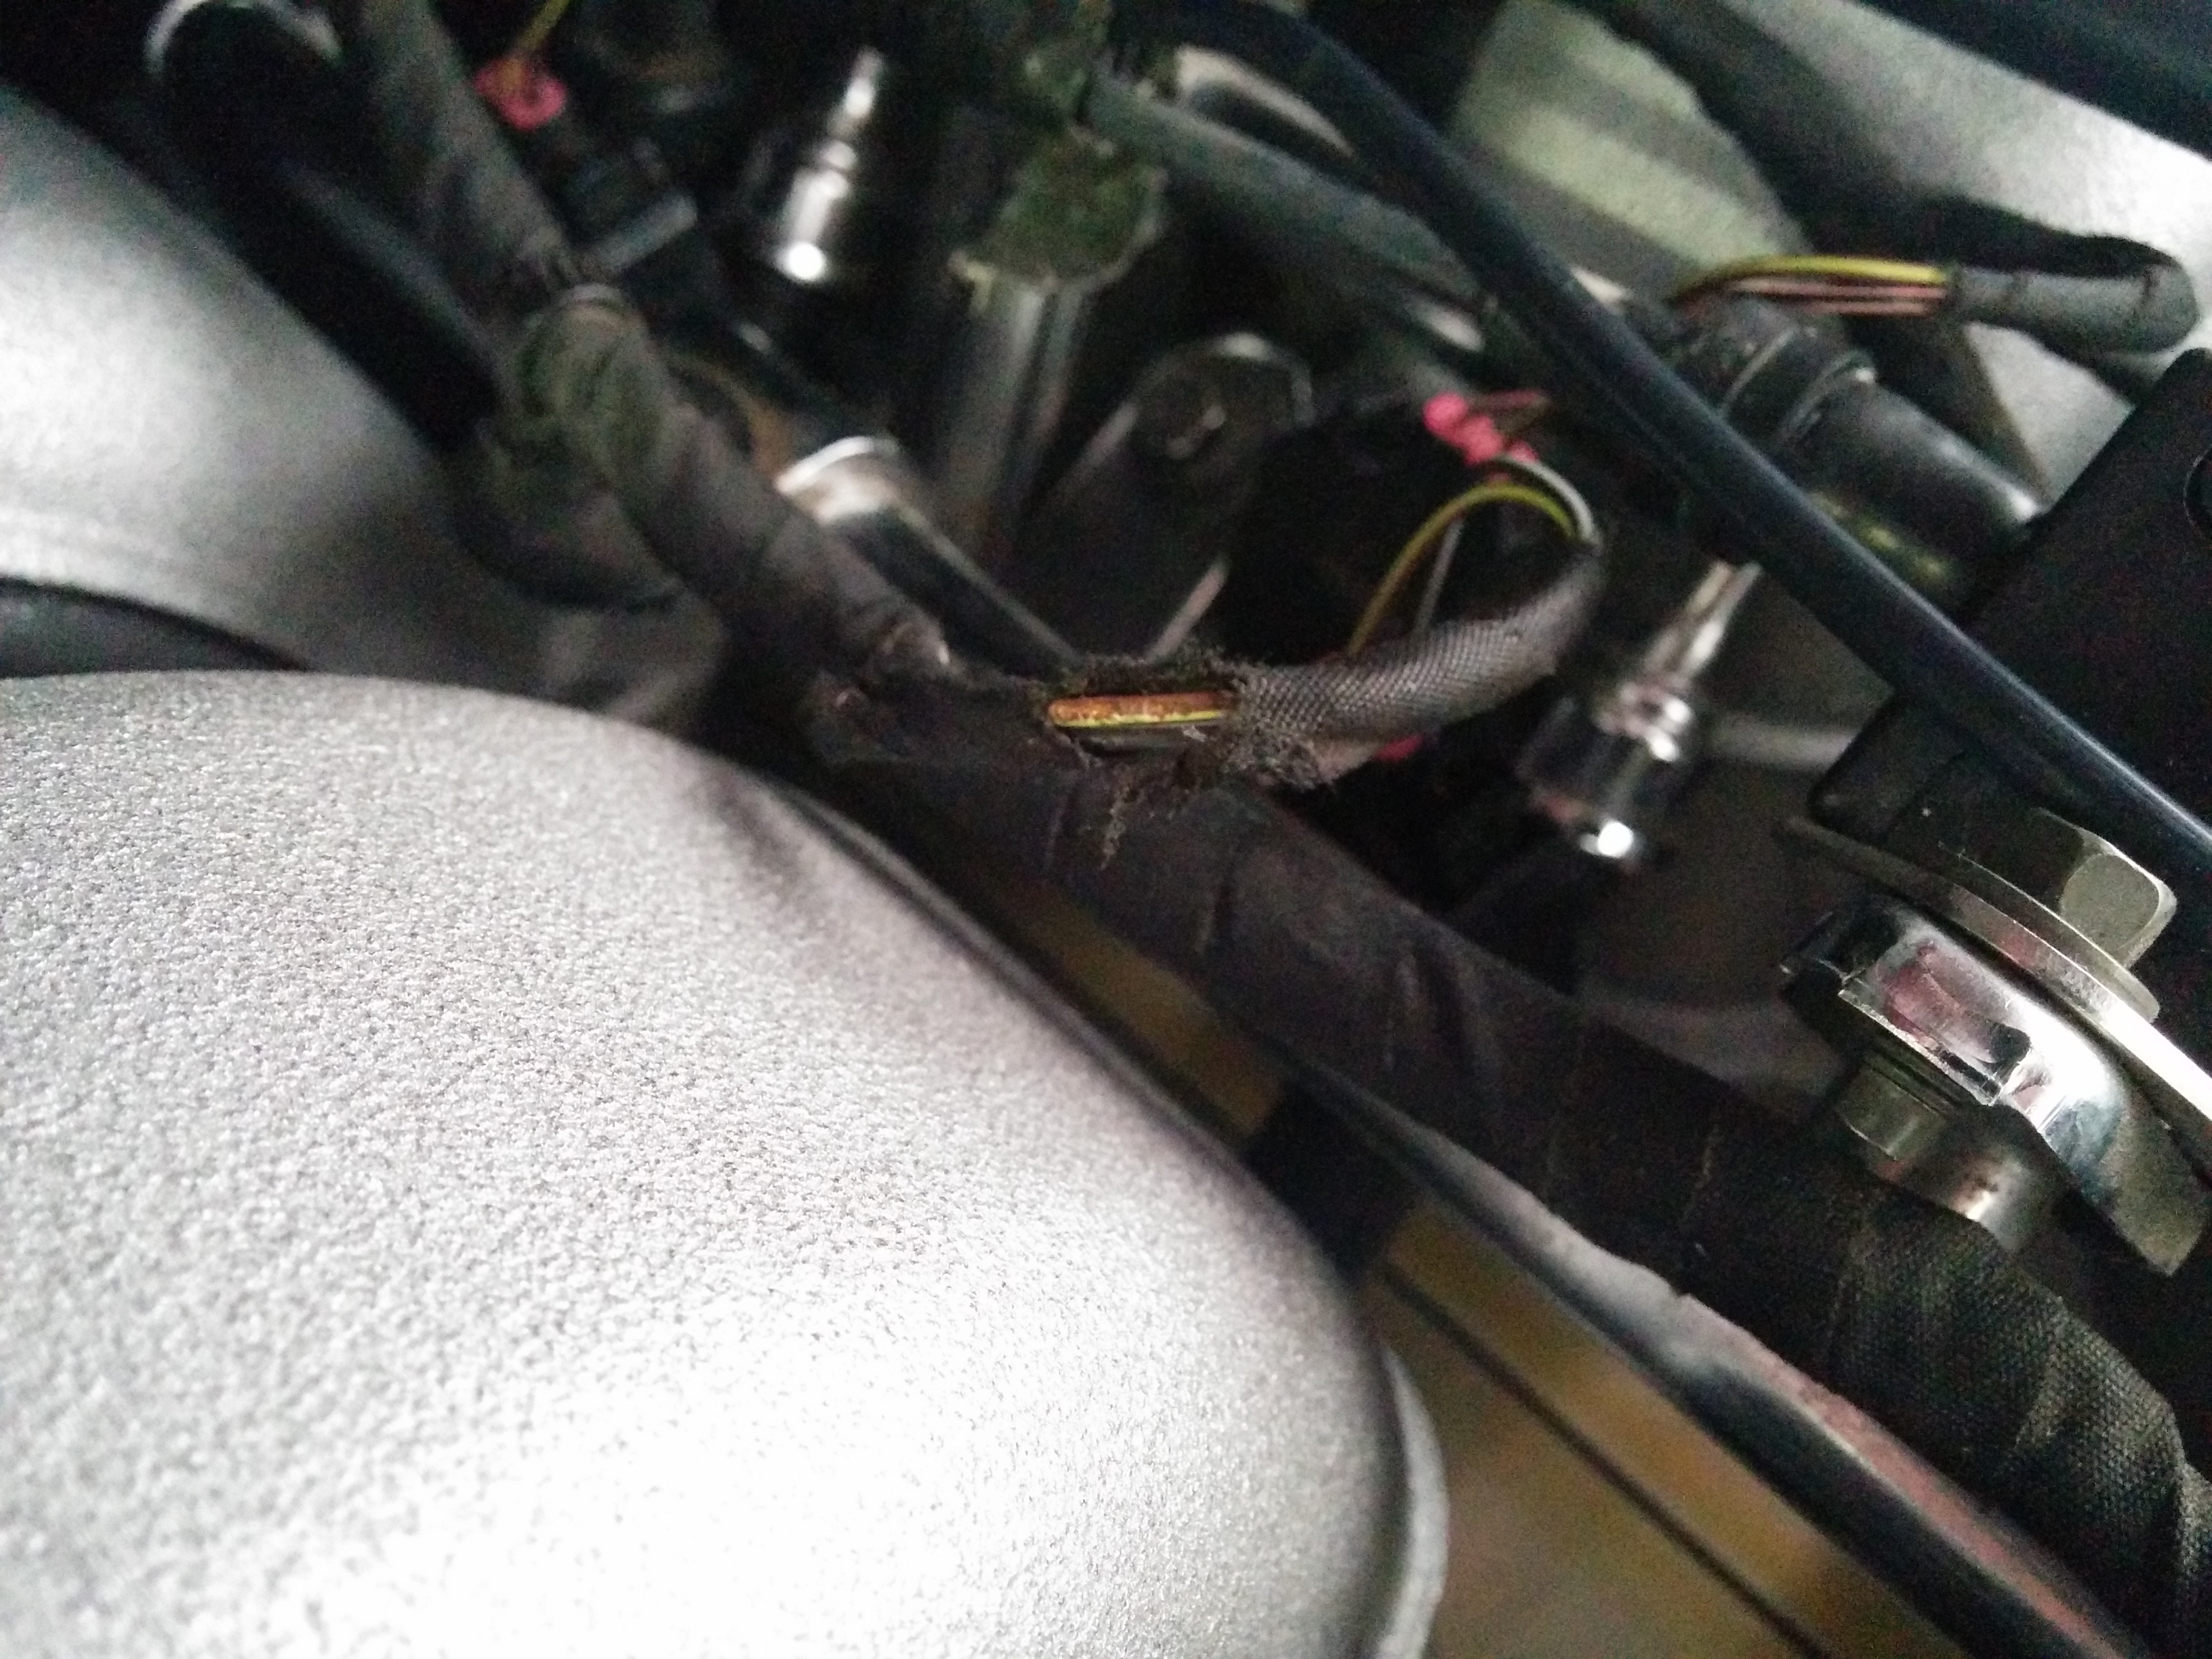
 NOTE: When I was reconnecting mine, I found damage to the wiring loom on one of my cylinders (see photo). It was fairly superficial, so I solved the problem with some electrical tape. But, consider that if this wire frayed through to copper and was grounded out to the intake manifold braces it was rubbing against it may have been dead shorted and preventing the injector from operating (a.k.a. misfire).
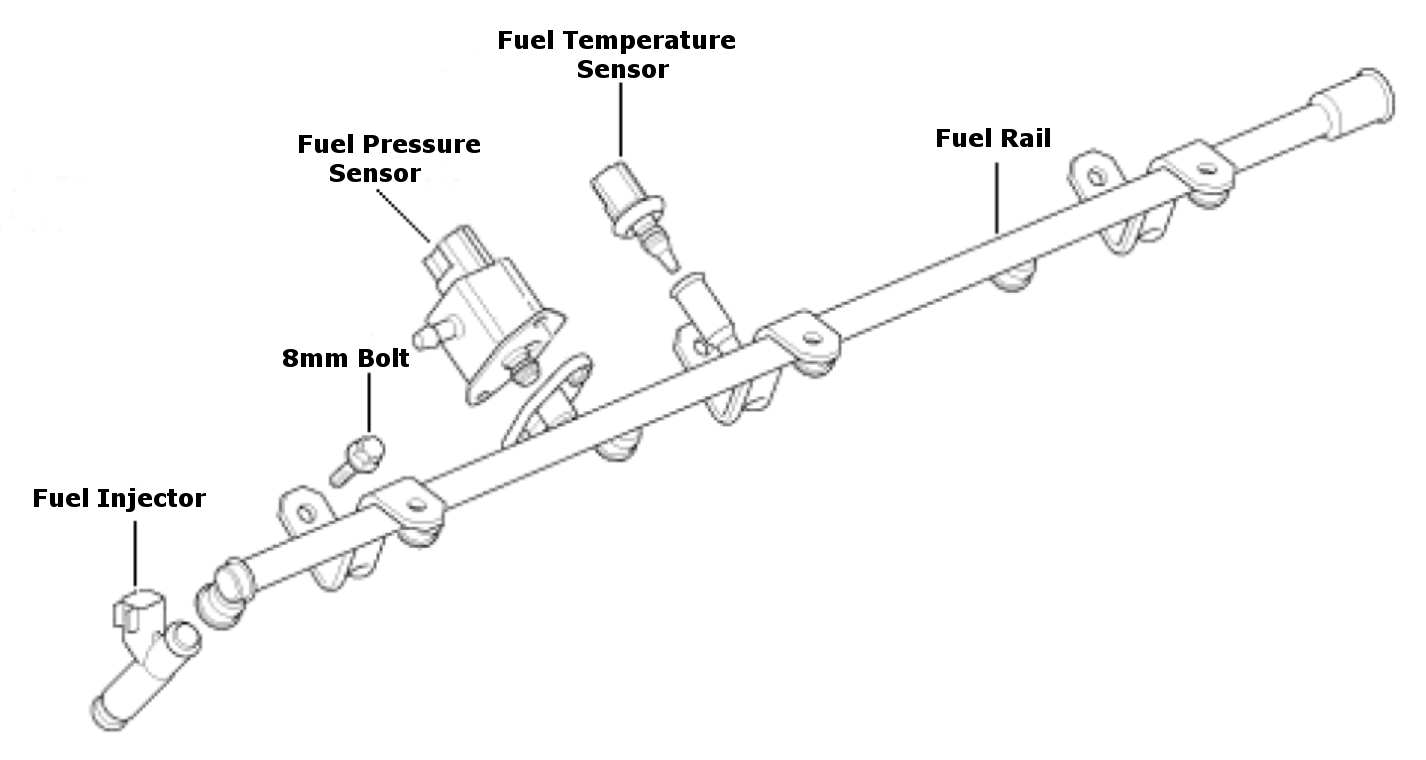
 Connect the two vacuum lines and electrical connectors to each fuel rails pressure sensor.
- Connect the electrical connection to the fuel temperature sensor.
- Connect the electrical connection to the temperature sensor on the water pump housing.


That should be everything reinstalled now. Probably a good idea to double check one last time that all the electrical connectors are firmly seated and the vacuum lines are properly in place, and that nothing is pinched or bent.
I have to apologize now for a filming mishap. The video below is missing the footage of connecting the fuel rails (my stupid production crew screwed up). I accidentally turned the GoPro on and then off (pressed the button twice rather than once) and didn’t notice until now that I only had video footage AFTER I finished (when I pressed the button again thinking I was turning it off, and really turned it on again and got some useless footage of me walking around the garage). Not the end of the world – I’d just suggest you watch the video on removing the fuel rails and you can see the steps essentially (video linked below).
Here is a video on the process I followed preparing the injectors and installing them into the manifolds.
Here is a video on REMOVING the fuel rails and injectors to give you a sense of the process.

Pingback: How to Change the Coil Packs and Spark Plugs in an Aston Martin DB9 – Aston 1936
Hi Steve
Firstly thank you for all the valuable information you provide on the DB9 through your site. Are you able to advise if both the upper and lower injector o-rings are the same size (just different colors) and also do you know the dimensions of these? Thank you
LikeLike
I have the exact model as you and am currently experiencing misses. I will be doing a plug and coil replacement and would like to know whether you would suggest replacing the injectors while the manifolds would be removed.
Thank you for all the years of great advice and “how-to’s”. It has saved me a fortune!
LikeLike
In case you haven’t started yet, I am doing the same maintenance as you and chose to remove the injectors and have them reconditioned. Steve has a newer video on this on his YouTube channel. You get new rings but also get the injectors reconditioned and flow tested – $17 per injector. I felt like new coils, plugs and reconditioned injectors should pretty much guarantee no misfires for awhile. Did the PCV valves too.
LikeLike