
Without a doubt the most difficult part of changing my spark plugs and coils packs (I was dealing with a Lumpy Idle misfire) was removing the giant and beautiful Intake Manifolds. Really it boiled down to the huge PITA it is to get to the rear most bolts, but at the end it was manageable. When it’s time to reinstall the manifolds it would be easy to say “Installation is just the reversal of the steps to remove it”. In many ways it is, but there are all sorts of tips I can share along the way to make the process go easier for you.
I’ve done a lot of work already to get to this point, and you can check out how I got the manifolds off in this article.
Parts Needed

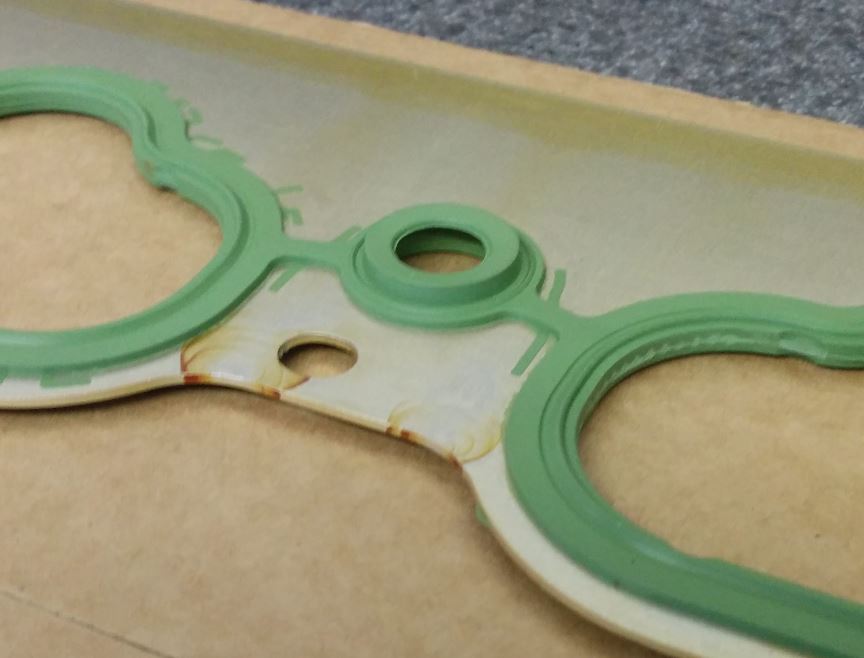
When you reinstall the intake manifolds you need to replace the gaskets. Your old gasket might be temptingly intact since they are made from aluminum and rubber, but you’ve dug this far into your engine and I don’t think it’s reasonable to risk botching the job reusing an old gasket.
The gaskets aren’t cheap, and I’ve already covered them in depth (photos, where to buy, prices) in another article “Parts you’ll need to change your Coil Packs and Spark Plugs”. Essentially you need Aston Martin p/n 1R12-08-10077-PK (which is a 2 pack) available for about $183 USD from HWM.
Tools Required
 You only need a few tools to accomplish this task, namely:
- 8mm 6-point 3/8” drive socket and ratchet
- 6” long 3/8” drive extension
- 3” long 3/8” drive extension
- 3/8” drive universal joint (essential!)
 Torque Wrench (3/8″ drive) that can do 10 Nm
- Oiling Can (with clean engine oil)
- Lint Free Rags
- Gunk Engine Degreaser (or similar)
- Pressure Washer (if you have one)

Preparation

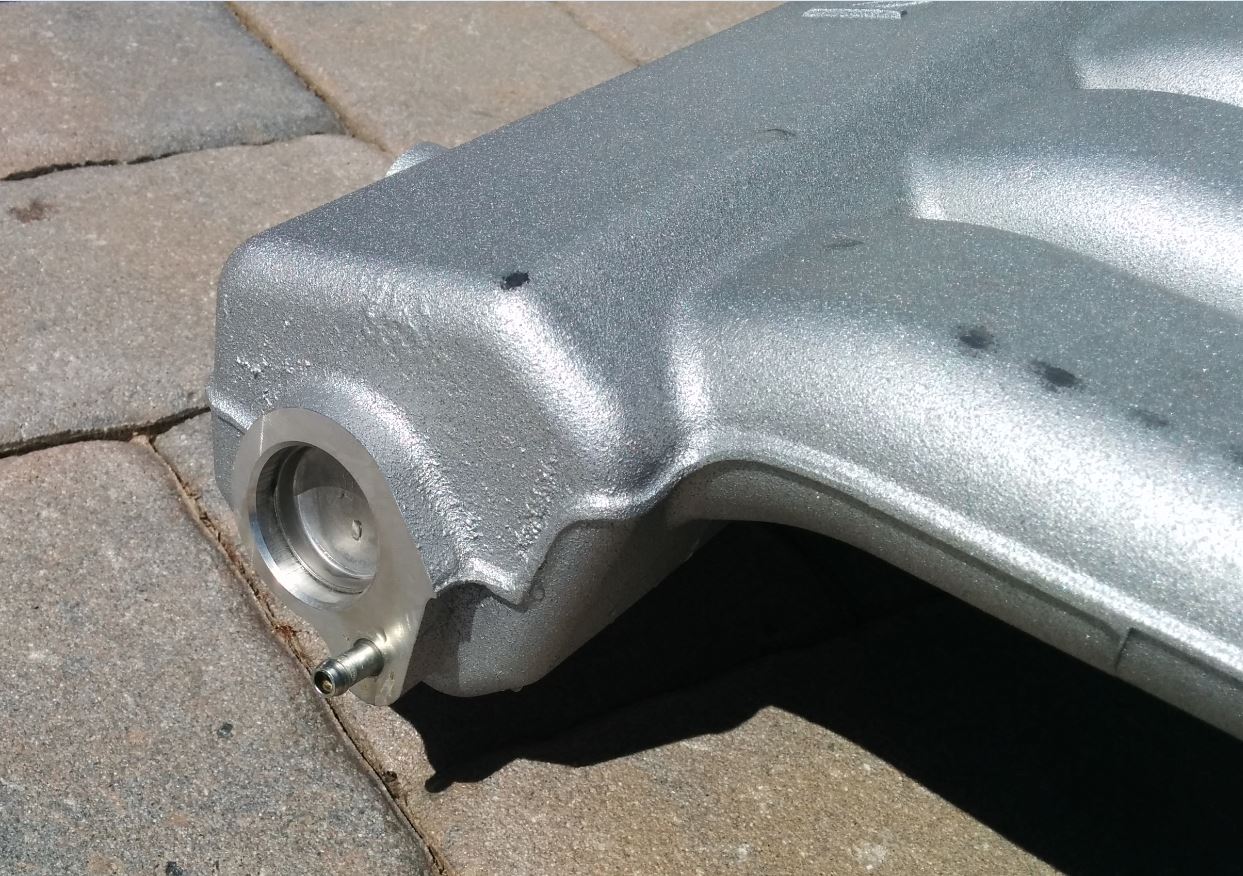
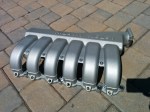
While I had the manifolds off I took the opportunity to super clean them. My PCV valves were shot (a common condition), and I had a significant amount of entrained oil lying about inside the manifolds (see photo). Also the exteriors were dusty with 10+ years of living in an engine bay. I sprayed them with Gunk Engine Degreaser (available for about $4 online at Amazon.com) and let them soak.  While soaking I used a stiff plastic scrubby brush on the exterior surfaces to work the degreaser around and loosen up what dirt there was. Finally, I used my pressure washer to rinse them clean. The result was satisfyingly new looking.
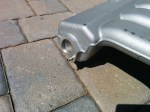
Note: The entire time I was cleaning them I was careful to not damage the machined flat gasket mating surface. The manifold is aluminum and this would be easy to scratch up. Also I was careful of the vacuum nipple on the back of each manifold. This would be easy to knock and bend (or worse).
After cleaning the manifolds, I made sure they were meticulously clean and dry, wanting to make sure I didn’t get a pocket of junk stuck in some area. All this took was a little time with my compressed air hose.
I then ran my hand over the gasket mating surfaces to make sure they were smooth and clean. I also used my fingertip in each of the fuel injector bores to make sure they too were smooth and clean. Much easier to do this now than in the car later.
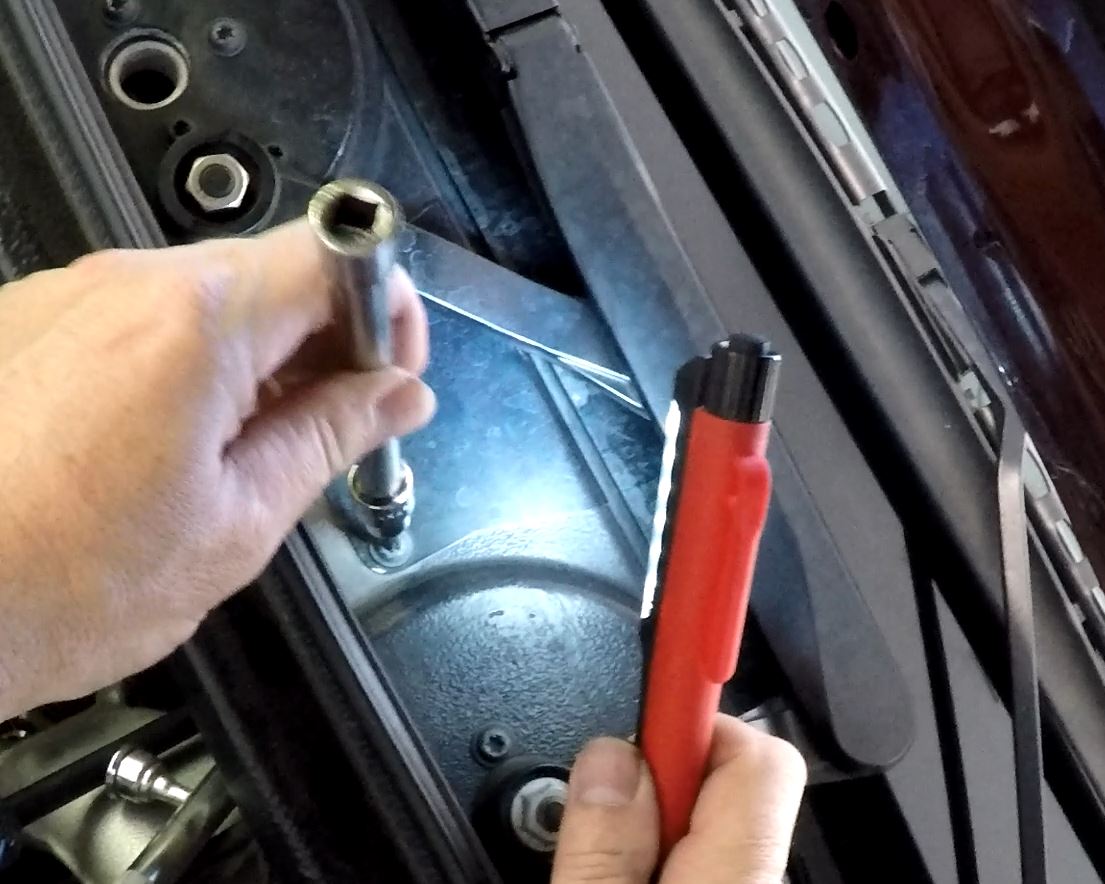
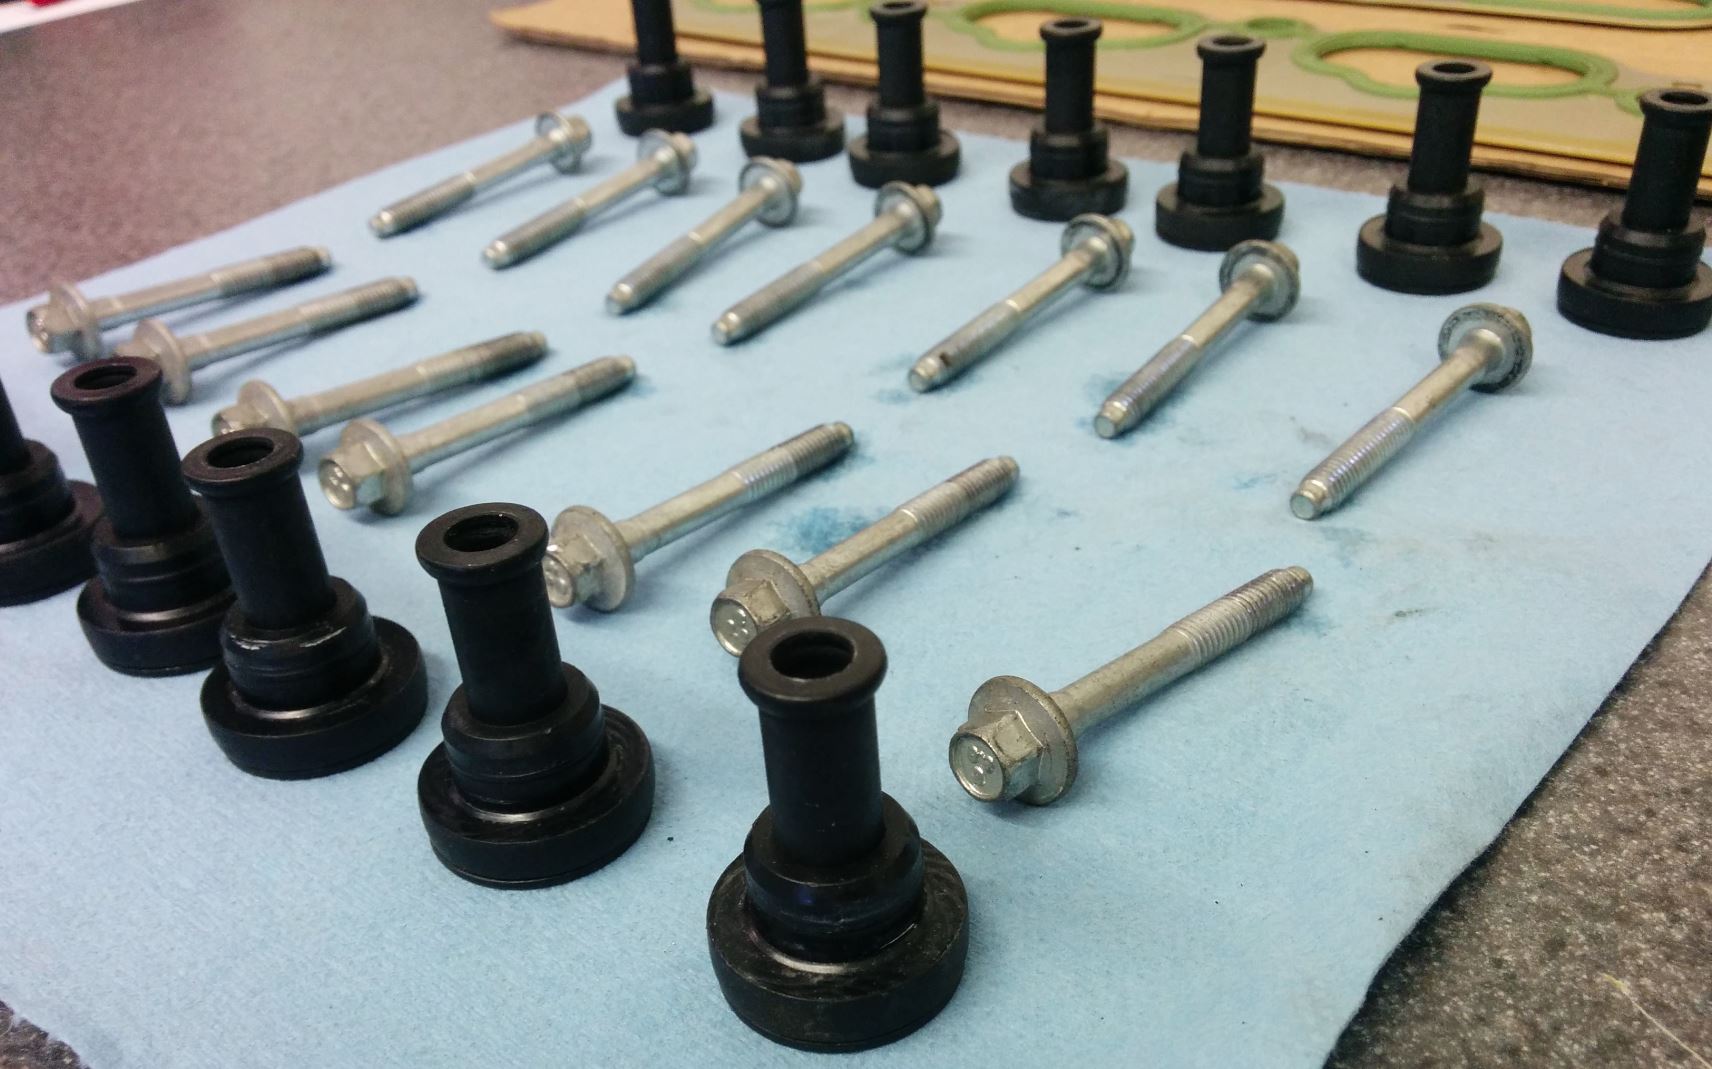 After the manifold had been attended to, I turned my attention to the bolts and rubber isolators. All I did for the isolators was take a look at them to make sure they weren’t damaged, and then I wiped them down with a damp rag to remove any grime. I prepared the bolts by making sure they were clean and undamaged, and then I lubricated the threads by putting a dab of clean engine oil on the first few threads and worked it around. Check out the video on this below.
Now that all the bits are ready, let’s get them installed.
Procedure
 The Official Aston Martin Workshop Manual covers reinstalling the manifolds in Section 3.01. I have a few tips and tricks to add to their process.
The process should take you about 20-30 minutes per side if all goes well.
- Remove the masking tape covering over the intake ports on one bank (I’d suggest starting on the Left Hand Bank since it will be easier and will warm up your skills). Leave the other side taped over for now to prevent something from falling in. You need to be careful on the rest of the assembly to make sure debris doesn’t fall into the open ports.
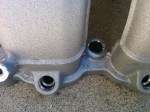
 Place the intake manifold gasket loosely into position on the cylinder head. No need to fuss that it is perfectly aligned, just get it close to start with. Be sure the two raised alignment rings are facing UP.
-

Raised Alignment Ring Tip: You can play with the gasket on the manifold prior to installing them so you can get a sense of how the alignment rings slot into the recess on the mating surface of the manifold. No need to try and tape the gasket to the manifold in order to try and hold it in place as you install them in the car, it’s easy enough to make the alignment in the car later.
-
- Carefully work your intake manifold into the space around all the pipes and hoses. Just roughly position it to start with, and keep it forward towards the front of the car about 8” so you can still reach your hand around back.
- Tip: You’ll see in the video I wimped out and removed my throttle bodies to make this step a little easier. You can do it with them still attached, but removing them provides more room and they are also lighter. Also reduces the risk of banging the throttle body and damaging something. Check out my articles on removing and reinstalling them.
- Tip: Remember there is one PCV plastic pipe that stays under the manifold. See the photos.
- Warning: On the right side bank be careful to not bust off the thermostat housing electrical connection while you are moving the manifold around wrestling it into position. It’s fragile.
- Connect the small vacuum hose to the nipple on the back of the manifold. I made sure I didn’t have the hose all tangled before I connected it, I wanted it to be able to move back smoothly into place as I placed the manifold into its final position.
- Move the manifold back the rest of the way and into position where it’s now resting on top of the intake gasket and roughly in place.
- With one hand lift the manifold up a small amount above the gasket, just so it’s possible to slip the gasket around under it. ‘Feel’ for the moment where the raised alignment rings on the gasket slip into the matching recesses on the manifold mating face. They should now feel securely mated together and peering through the bolt holes you should see them perfectly aligned. Lower the full weight back down onto the gasket, and peer into the bolt holes again and wiggle the manifold into alignment with the bolt holes on the cylinder head. Honestly, this is easier than it sounds writing it up. Check out the video below, it comes across pretty well.
- Insert the rubber isolator in the second bolt hole from the front (this has the alignment ring beneath it), and then insert and start the bolt. Wiggle alignment as necessary. Just finger start it a few threads for now.
- Do the same for the sixth bolt from the front (the rear alignment ring is under this one). Just finger start a few threads to lock in the alignment.
- Now install the rubber isolators and loosely start the remaining five (5) bolts. Access to the rearmost bolts is limited (a.k.a. ‘a bitch’) since they are located under the cowl, but just take your time, lean in and work your one arm into the space as we did in the video on removing the manifold bolts.
- The manifold will still be ‘drooping’ under its own weight with the bolts just finger tight. No worries (just don’t lean on them).
- Next use an 8mm 6-point socket with a universal joint, extension and ratchet to merely snug up but NOT tighten the bolts yet. You are just trying to remove the droop and get them ready to properly torque.
- Access to the rearmost bolt is difficult, and you need to use two extensions and work through access in a removed scuttle plate. Check out the video on removing the manifold for more detail on this.
 Torque the bolts to 8-12 Nm (6 to 9 ft. lbs.). I set my torque wrench to 10 Nm.
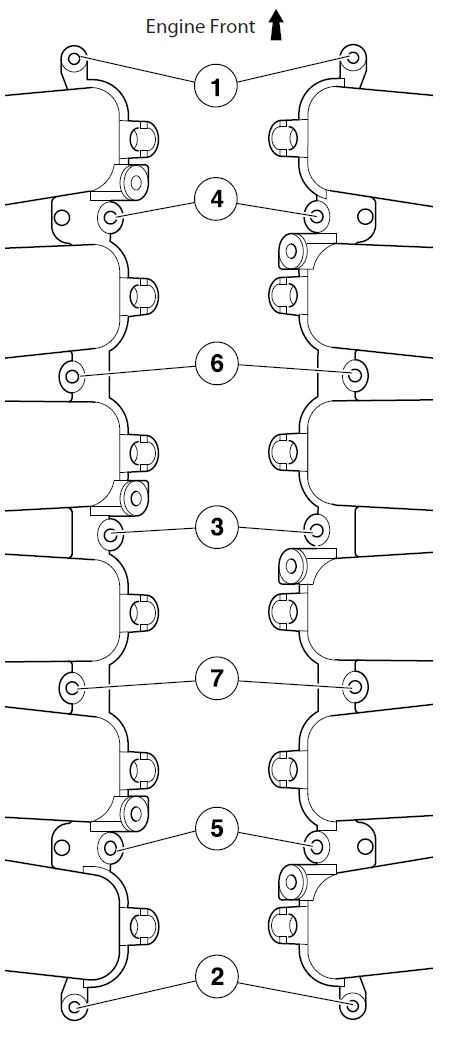
- Tip: There is a SPECIFIC tightening pattern you are supposed to follow. There are seven bolts, and if the front is 1 and the back is 7, the pattern order to tighten them is 1, 7, 4, 2, 6, 3, 5. See the diagram and my video to be clear. (Page 3-1-10 in the manual)
 One side done! Use the exact same process to install the other manifold.
- If you removed your throttle bodies, now is the time to reinstall them. You can check on my other posts on Cleaning the Throttle Bodies and Installing the Throttle Bodies.
- The final step is to replace the scuttle plate we removed in the dash cowl to access the rear most manifold bolts.
-

Reinstalling the Scuttle Plate Make sure to position the thermal insulation flap back in its original position under the cowl opening.
- Place the scuttle plate in position and secure with the two T30 Torx bolts. Snug the screws up (no official torque spec).
-


That’s a major step out of the way and now you can get on with installing your fuel injectors, fuel rails and more!
Here are videos of the process I followed:
Preparation of the Intake Manifolds and Bolts
Installing the Intake Manifolds. My apologies that this is a 20 minute video. I did my best to crop out the crap (including me getting fairly frustrated), but it’s a load of steps and I didn’t want to clip out a segment that might give you a subtle clue to installing your manifold. Hopefully you find it useful.
Bonus Feature
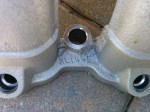
Here are a bunch of High Resolution photos of the Intake Manifolds I took after cleaning them. Maybe one of the photos will solve some mystery for you. You can clearly see the vacuum nipple in one shot. Also, check out the engraved serial numbers on each casting.


Pingback: How to Change the Coil Packs and Spark Plugs in an Aston Martin DB9 – Aston 1936
Invaluable as always Steve . Thank you.
One suggestion that may help others – check the threads of the holes that the fuel rails will bolt back into. the bolts may be OK but the thread may be galled in the manifold. 2 minute job to chase the threads if you have a tap or just to check they are good by spinning the bolt down the hole…. as long as you do it before reinstalling
Sadly I only realized I had a bad thread when I just could not get the rearmost bolt to start by hand no matter what – and of course – with the manifolds already back in the car. The only thing worse than those rear bolts is doing the job twice!…. That really tests your patience.
LikeLike