
The moment of truth is fast approaching. You’ve just spent a considerable amount of time tearing your beloved DB9’s engine apart to change the Spark Plugs and Coil Packs, presumably like me to cure an issue with a Lumpy Idle. If you’ve been following my procedures laid out in this blog, you are on Step 20 sumth’in of many. Hopefully your workbench is devoid of left over nuts or bolts. All that’s left is firing her up to see if your work has been successful. There is a process to this and the few remaining steps.
We’ve done a lot of work to get to this point, and I would point you at the main article of the series “How to Change your Spark Plugs and Coil Packs” to see all the steps.
 Tools Required
Just a few things including:
- Your Ignition Key
- Have a fire extinguisher handy just in case (seriously – you’ve had your fuel injectors out and you may discover a leak).
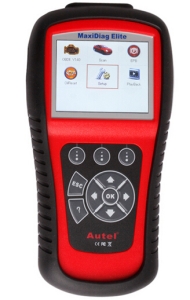
- OBDII Code Reader (see my other post about this)
Procedure
There was no official procedure for this in the Official Aston Martin Workshop Manual.
This will only take a few minutes if all goes well.
- Pressurize the Fuel System and check for a leak
 Turn the ignition key to the ON position, but don’t start the car yet.
- I am assuming you had already reinstalled the Fuel Pump Relay after it was removed at the beginning of the project where we removed it to depressurize the fuel system. You can check out my article and video on this if needed.
- In retrospect, I should have completed this fuel leak check before reinstalling the Intake Manifold Center Brace and the Engine Bay Cross Braces. The reason being that it would be easier to discover any fuel leaks where the fuel injectors mate with the fuel rails. If you are reading this in advance, take advantage of that idea.
- Once the key is turned ON, you should here the familiar click-click-click of the fuel pumps coming to life and the fuel system will automatically re-pressurize to about 280 kPa (40 psi). Use your nose to sniff around the manifold area and smell for any signs of a leak. If you smell fuel, DON’T continue with starting the car, turn the key back OFF and investigate the source of the leak.
- Note – there is no need to ‘purge’ the air from the fuel lines, the system is self priming. I think all that means is that it will burp the trapped air out through the injectors.
 If there is no sign of a leak, go ahead and try to start the car normally. Moment of prayer here please [or a drum roll if you prefer].
- Be prepared to turn the car off if you get any signs of trouble. MIL light, extended rough running, weird noises, etc.
 If your MIL light was on before the start of your service, you can expect it to still be on after until you do the clear codes steps below.
 - It may stumble for just the first few moments (2-3 seconds) as the air is purged from the fuel system.
- Be prepared to turn the car off if you get any signs of trouble. MIL light, extended rough running, weird noises, etc.
- If it starts up and runs smoothly, I’d let the engine idle and then go out and nose around and under the car looking for drips, noises, leaks, etc. You are the quality control inspector, so check it all out as it warms up.
 If things are still going smoothly, your next step is to clear any accumulated P Codes in the engines control computers. They will likely be holding codes for low fuel pressure warnings, perhaps the fuel pumps not running, plus you want to flush out all the old Misfire data since you’ve just changed your coil packs and plugs.
- Check out my other Blog posts related to using an OBDII including
- I’d just suggest to clear out all the old codes without worrying too much about what they are. What you really want to see is if any NEW codes appear after the reset.
- After the codes are cleared, shutdown the car and then restart it again. Using your OBDII reader:
- Check that you have no active codes
 Inspect your misfire count for each cylinder and hopefully you will find them all at zero.
- Check to see if your Misfire Correction Factors are Learned or not. Hopefully they are NOT – and they should have been forgotten when you disconnected your battery at the start of the project.
 You just want to confirm the factors aren’t learned so that you can follow-up with the process now and relearn them with the new Spark Plugs and Coil Packs (a nuisance, but you want/need to do this). Check out my blog article and video on how to do this.


Hopefully you have found zero misfires on all 12 cylinders, you have no leaks and your baby is running smooth as silk – making this effort all worthwhile.  Check out my short video below on the restart and my ‘Jurassic Park’ water test after showing how smooth the idle is now as compared to my original post about my Lumpy Idle [here is a link to the original water test showing the ripples]. And for proof that dumb sh!t happens to everyone, you might want to watch to the very end of this final video below for a special clip.
Thanks for reading/watching and all the feedback on this large project (26 posts over 6 months). I apologize I didn’t have it all ready at once, but hey, I do have a day job and a family :>) Now onto the next projects …. stay tuned!

Steve, great work. I have just had coil packs and plugs done, but pretty sure the misfire correction factor has gone. I see from your text that your ODB SCANNER sees the current status…viz: MP_LRN(Misfire Profile Correction Learned), the value was set to YES. Now I followed your advice and purchased a Foxwell, but I can’t seem to find any reference to Misfire Profile in the live data, any idea? Thanks
LikeLike
Like tackling my trans filter and fluid project, your coil pack and plugs video series was invaluable. Developed misfire on number 11 (idle only) that I diagnosed with Foxwell and immediately knew I had to take care of it. Replaced all coils and new iridium plugs, PCVs, and all new injectors while I was at it. Big job, but you got me through it. One thing: my ‘08 had clips holding the injectors to the fuel rails. Hopefully I don’t have to do it again! Thanks again Steve, couldn’t have done it without you.
LikeLike