
 If you’ve taken out your drivers side instrument dash panels in your DB9 (check out my article on how to do this) you were probably dealing with one of a few possible problems:
- Repairing a sagging headliner (like me)
- Repairing some of the leather on the panels where the glue failed (like me)
- Chasing a dash rattle that might be driving you crazy
Whatever your challenge, once the panels are ready to put back in you want to do it right. This article will cover the details about getting them back into position properly.
Preparation
While I had my panels removed, I tackled a few things:
-

Failed Glue Holding Leather I sent the ones where the glue had failed and the leather was loose along the edges off to an upholsterer for repair (check out the article)
- I repaired two broken dash clips discovered along the way (check out the article)
- I deep cleaned the panels while I had great access to them (check out the article)

Tools Required
 You only need a couple of tools to get this job done:
- Stubby Phillips Screwdriver
- Medium Phillips Screwdriver
- Microfiber towel
You also want to have really clean hands so you don’t muddle up your freshly cleaned leather.
Procedure
 The official Aston Martin Workshop Manual section 1.05 on Interior Trim covers reinstallation in one sentence. “The panels, etc., are best replaced in the order they were removed”. In this case that’s pretty much true, but they don’t convey any of the subtly of the ‘Show me the best way’ that I will try to share below.
This is also one of those tasks where watching the short video I made below.
The entire process should take less than about 10 minutes.
- Before I reinstalled the first panel I took the chance to wipe off any dust accumulated over the years on the sub structure. I just used a damp microfiber and wiped it down.
- I wanted to minimize the chance of rattles and took the oppourtunity to tighten down all the visible screws. I just used the medium Phillips screwdriver and tested all the various screws to make sure they were snugly done up.
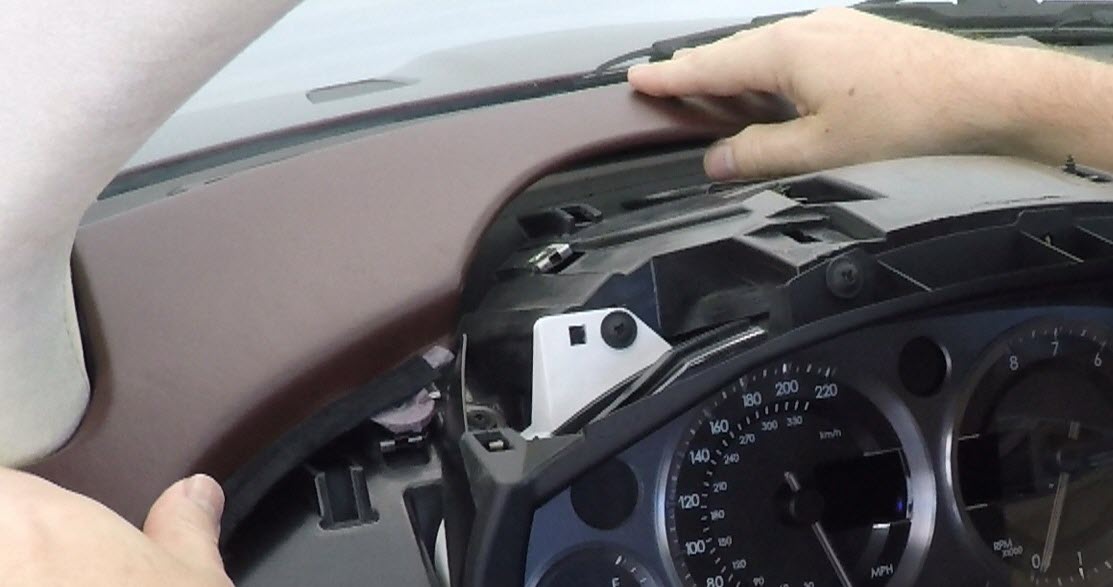
- Reinstall the Upper Instrument Panel. This is the panel that sits closest to the windshield.
- In case you want to know its official name and part number it is the “Cover Assembly Instrument Panel Upper – Drivers Side – LHD” Aston Martin p/n 4G43-C043C54-AHW
- The panel has 4 clips and 4 screws
- Position the panel and align the 4 clips. When they ‘feel’ like they are all in the correct position, press firmly straight down until they snap firmly into place.
- If you sense that something is out of line, don’t keep mashing on them (until they break). Lift it out again, reposition, try again.
- Press firmly where each clip was positioned to make sure it’s entirely seated.
- Loosely install the four screws using the Stubby Phillips screwdriver. Leave them slightly loose to give you a little slack to wiggle the panel around as you start each of the remaining screws.
- Once all four screws are started, then snug them up.

- Reinstall the Right Side Instrument Panel. This is the panel between the instrument cluster and the center console.
- In case you want to know its official name and part number it is the “Panel Assembly Instrument Upper – Drivers Side Inner – LHD” Aston Martin p/n 4G43-C04634-BCW
- The panel has 5 clips
- Note that the clips are mostly horizontal.
- Position the panel slightly in front of the 5 clips, again ‘feeling’ the alignment to get them into the correct position.
- Press firmly forward (horizontal) on the lower edge clips to start with and the whole panel should then snap into place firmly.
- Press firmly where each clip was positioned to make sure it’s entirely seated.

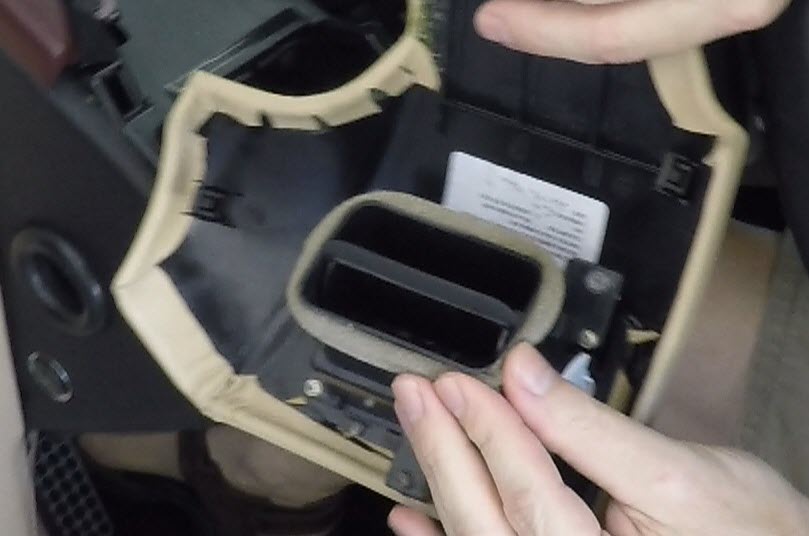
- Reinstall the Left Side Vent Panel. This is the panel between the Instrument cluster and the drivers door and contains the vent outlet.
- In case you want to know its official name and part number it is the “Panel Assembly Instrument Upper – Drivers Side Outer – LHD” Aston Martin p/n 4G43-C04634-ACW
- The panel has 4 clips
- Note that the clips are mostly horizontal.
- Check that the Foam Strip meant to seal the panel to the vent outlet in the dash is still firmly applied and in its proper place.

- Position the panel slightly in front of the 4 clips, again ‘feeling’ the alignment to get them into the correct position.
- Press firmly forward (horizontal) on the lower edge clips to start with and the whole panel should then snap into place firmly.
- Press firmly where each clip was positioned to make sure it’s entirely seated.

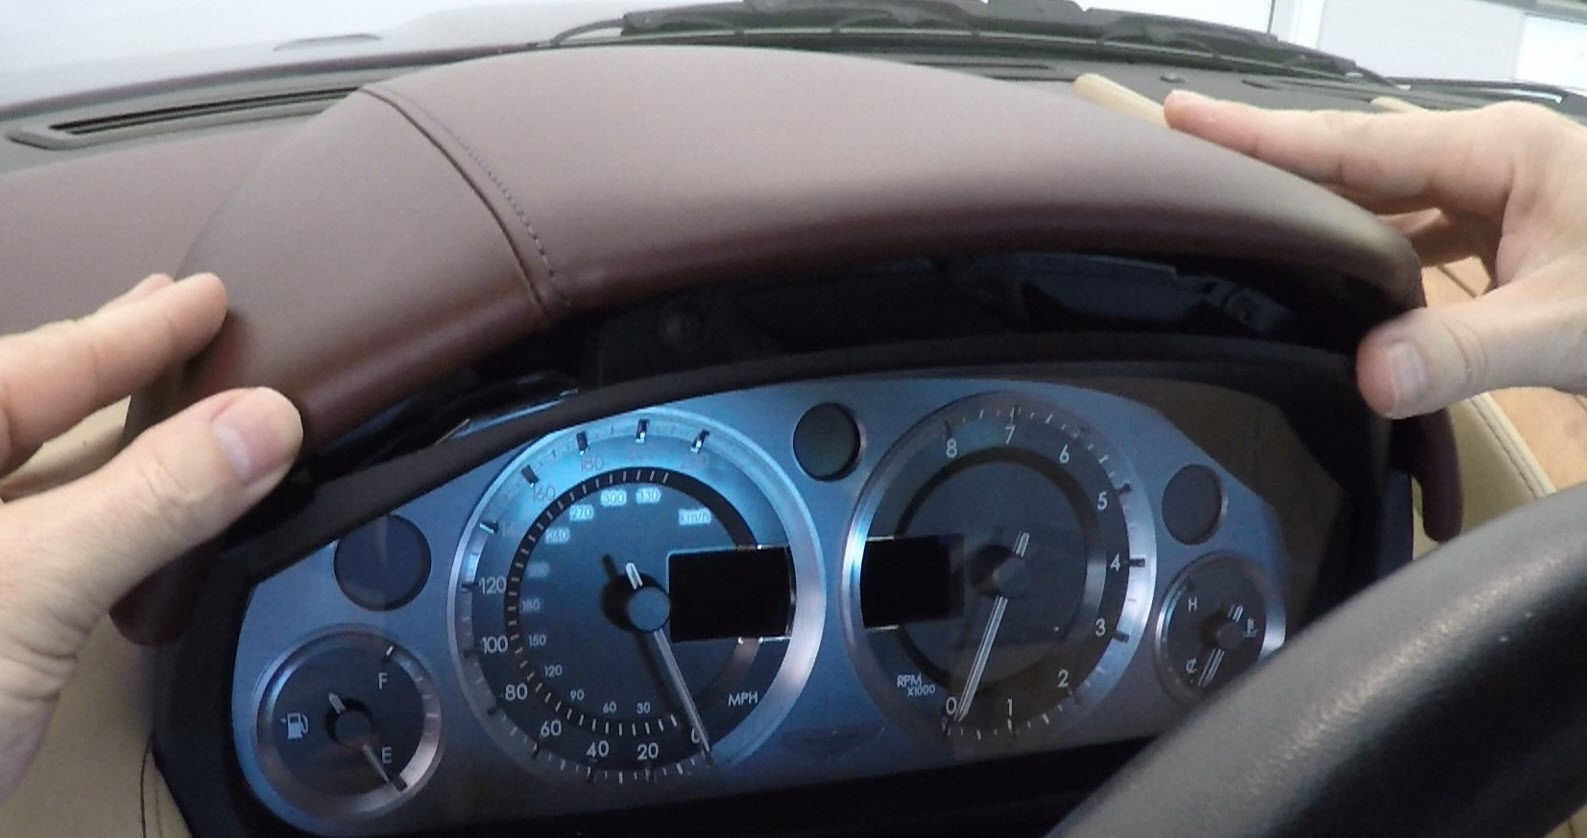
- Reinstall the Instrument Pod Cover. This is the curved piece that sits over top of the instrument binnacle.
- In case you want to know its official name and part number it is the “Hood Assembly Instrument Cluster” Aston Martin p/n 4G43-10862-ALW
- The panel has 6 clips and a safety strap.
- Attached the safety strap using the medium Phillips screwdriver and single screw.
- Position the panel over the 6 clips, again ‘feeling’ the alignment to get them into the correct position.
- Press the panel straight down until the panel snaps into place.
- Press firmly where each clip was positioned to make sure it’s entirely seated.

- Reinstall the Lower Instrument panel. This is the large panel below the others right in front of your knees.
- In case you want to know its official name and part number it is the “Panel Assembly Instrument Lower – Drivers Side – LHD” Aston Martin p/n 4g43-C04325-AEW
- The panel has 7 clips and no screws.
- Position the panel in front of the 5 clips, again ‘feeling’ the alignment to get them into the correct position.
- Notice there is a dangling sensor projecting from the lower dash that lines up with a small grille in the panel. This is the Ambient Cabin Temperature sensor. You just want to pay attention that this lines up properly as you snap the panel back in.
- Press firmly straight inward to engage the upper edge clips to start with and then progress to the lower clips until they are all started.
- Press firmly where each clip was positioned to make sure it’s entirely seated


You’ll be very pleased to see your dash back together again now!
Video
Here is a video showing me completing the process described:

Steve
Can you offer instructions on how to replace the center instrument panel. This is the piece that us usually in wood grains? It also has a replacement matching piece for the navigation system
Thank you
Robert
LikeLike
Hi. Is yours starting to fade or peel up? Mine is, and I’ve been wondering about if a factor replacement will match well enough, etc. Let me know what’s up with yours. I’ve not done a series on this yet (have one in the works), but there is a rudimentary one over at Redpants.lol that can probably guide you through the process for now. Doesn’t look too hard
https://www.redpants.lol/lower-console-and-nav-bezel-removal/
LikeLike