
In my previous article I explained how to carefully remove the A Pillar Interior Trim Cover (a.k.a. the Cant Rail) from a DB9. I was doing this as part of the process to repair the sagging headliner. With my headliner repaired and reinstalled, it’s now time to put the A Pillar Covers back in place.
Tools Required
A small screwdriver might be helpful to tease the fir tree clip positions.
 A really clean pair of hands. You don’t want to get grime on the beautiful Alcantara covered panels.
Having a Smartphone with a good camera can be a handy assistant. I’ll describe how below.
Parts Required
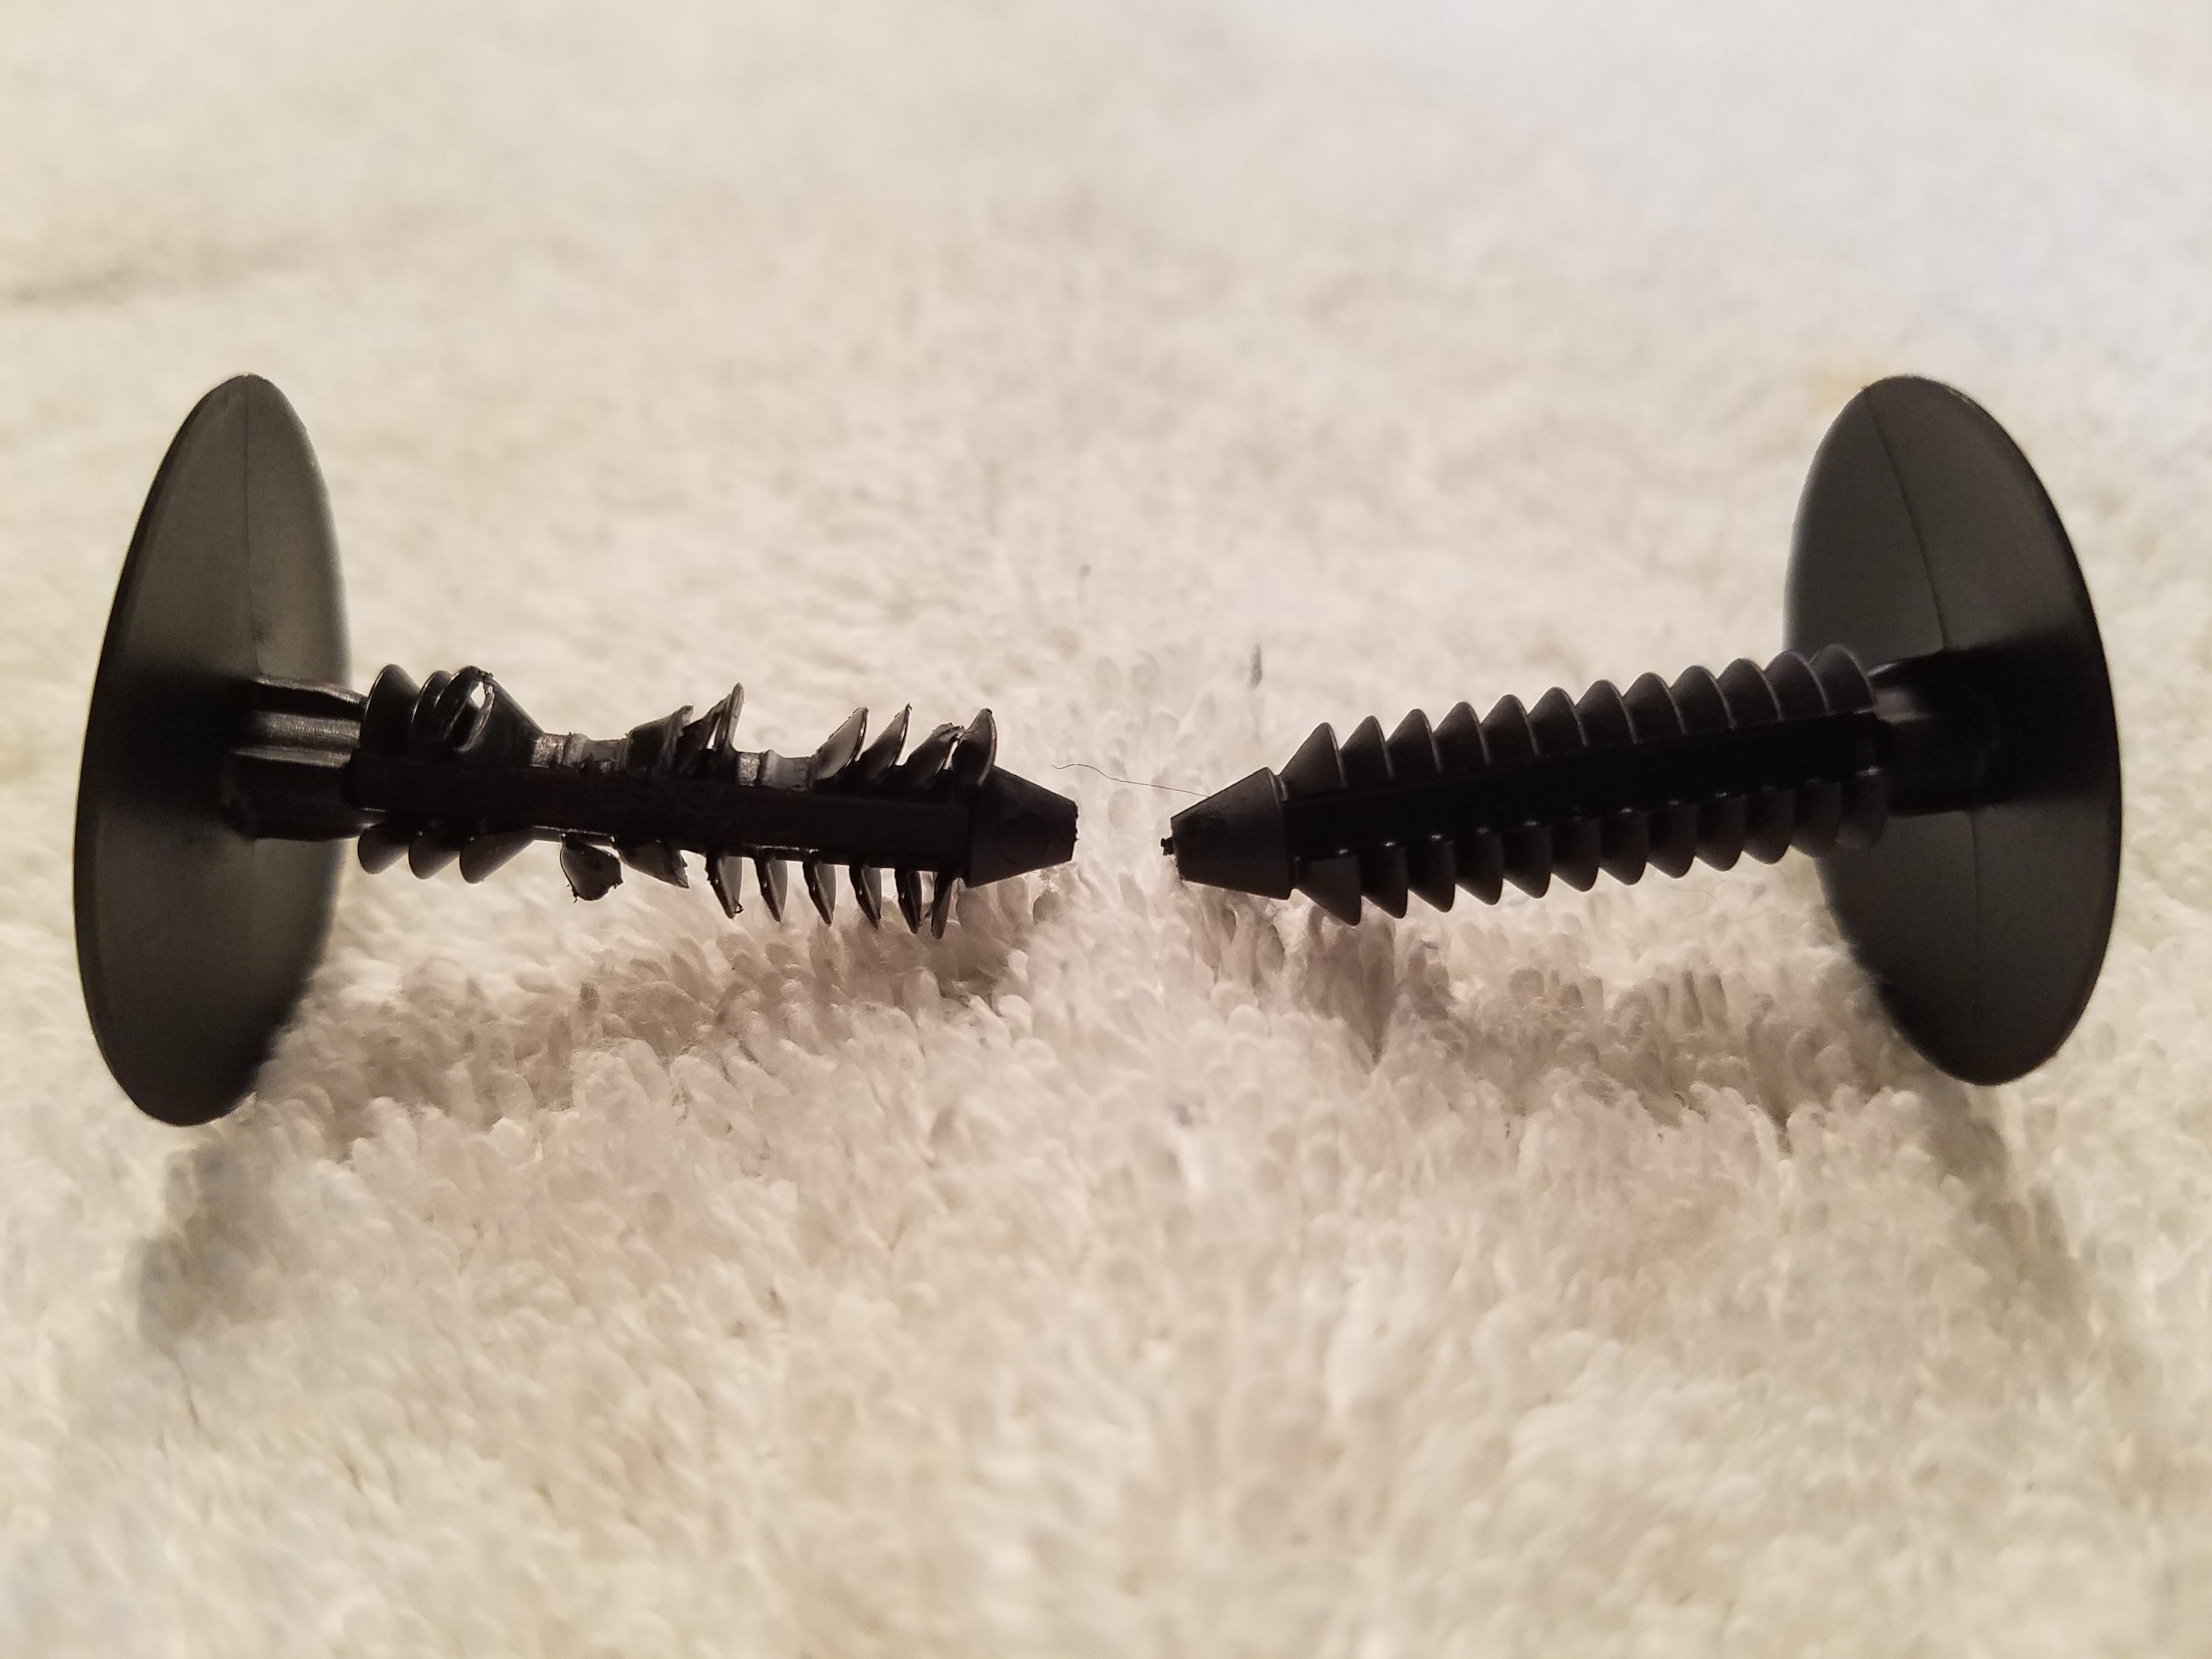
Reinstalling them requires replacing the Fir Tree Clips that were damaged during the removal process. I explain exactly what you need in my other article describing all the parts needed for repairing the headliner (check it out). You should have at least 10 of the new clips on hand.
Procedure
Reinstalling the covers takes about 30 minutes if you go slow and carefully. It’s not difficult. I really recommend watching the short video below to see exactly how its done.
- Replace the old clips with new ones. This is an easy step.
- There are 5 clips per side, 10 total.
- Just slide the old ones out of the slots, and slide the new ones into the same positions. Try to match the location as close as possible to help you later in the alignment process.

- Pick a side to start with. You’ll need to have the front seat tilted way back, and be sitting with your body side saddle out the door to reach the back clips.
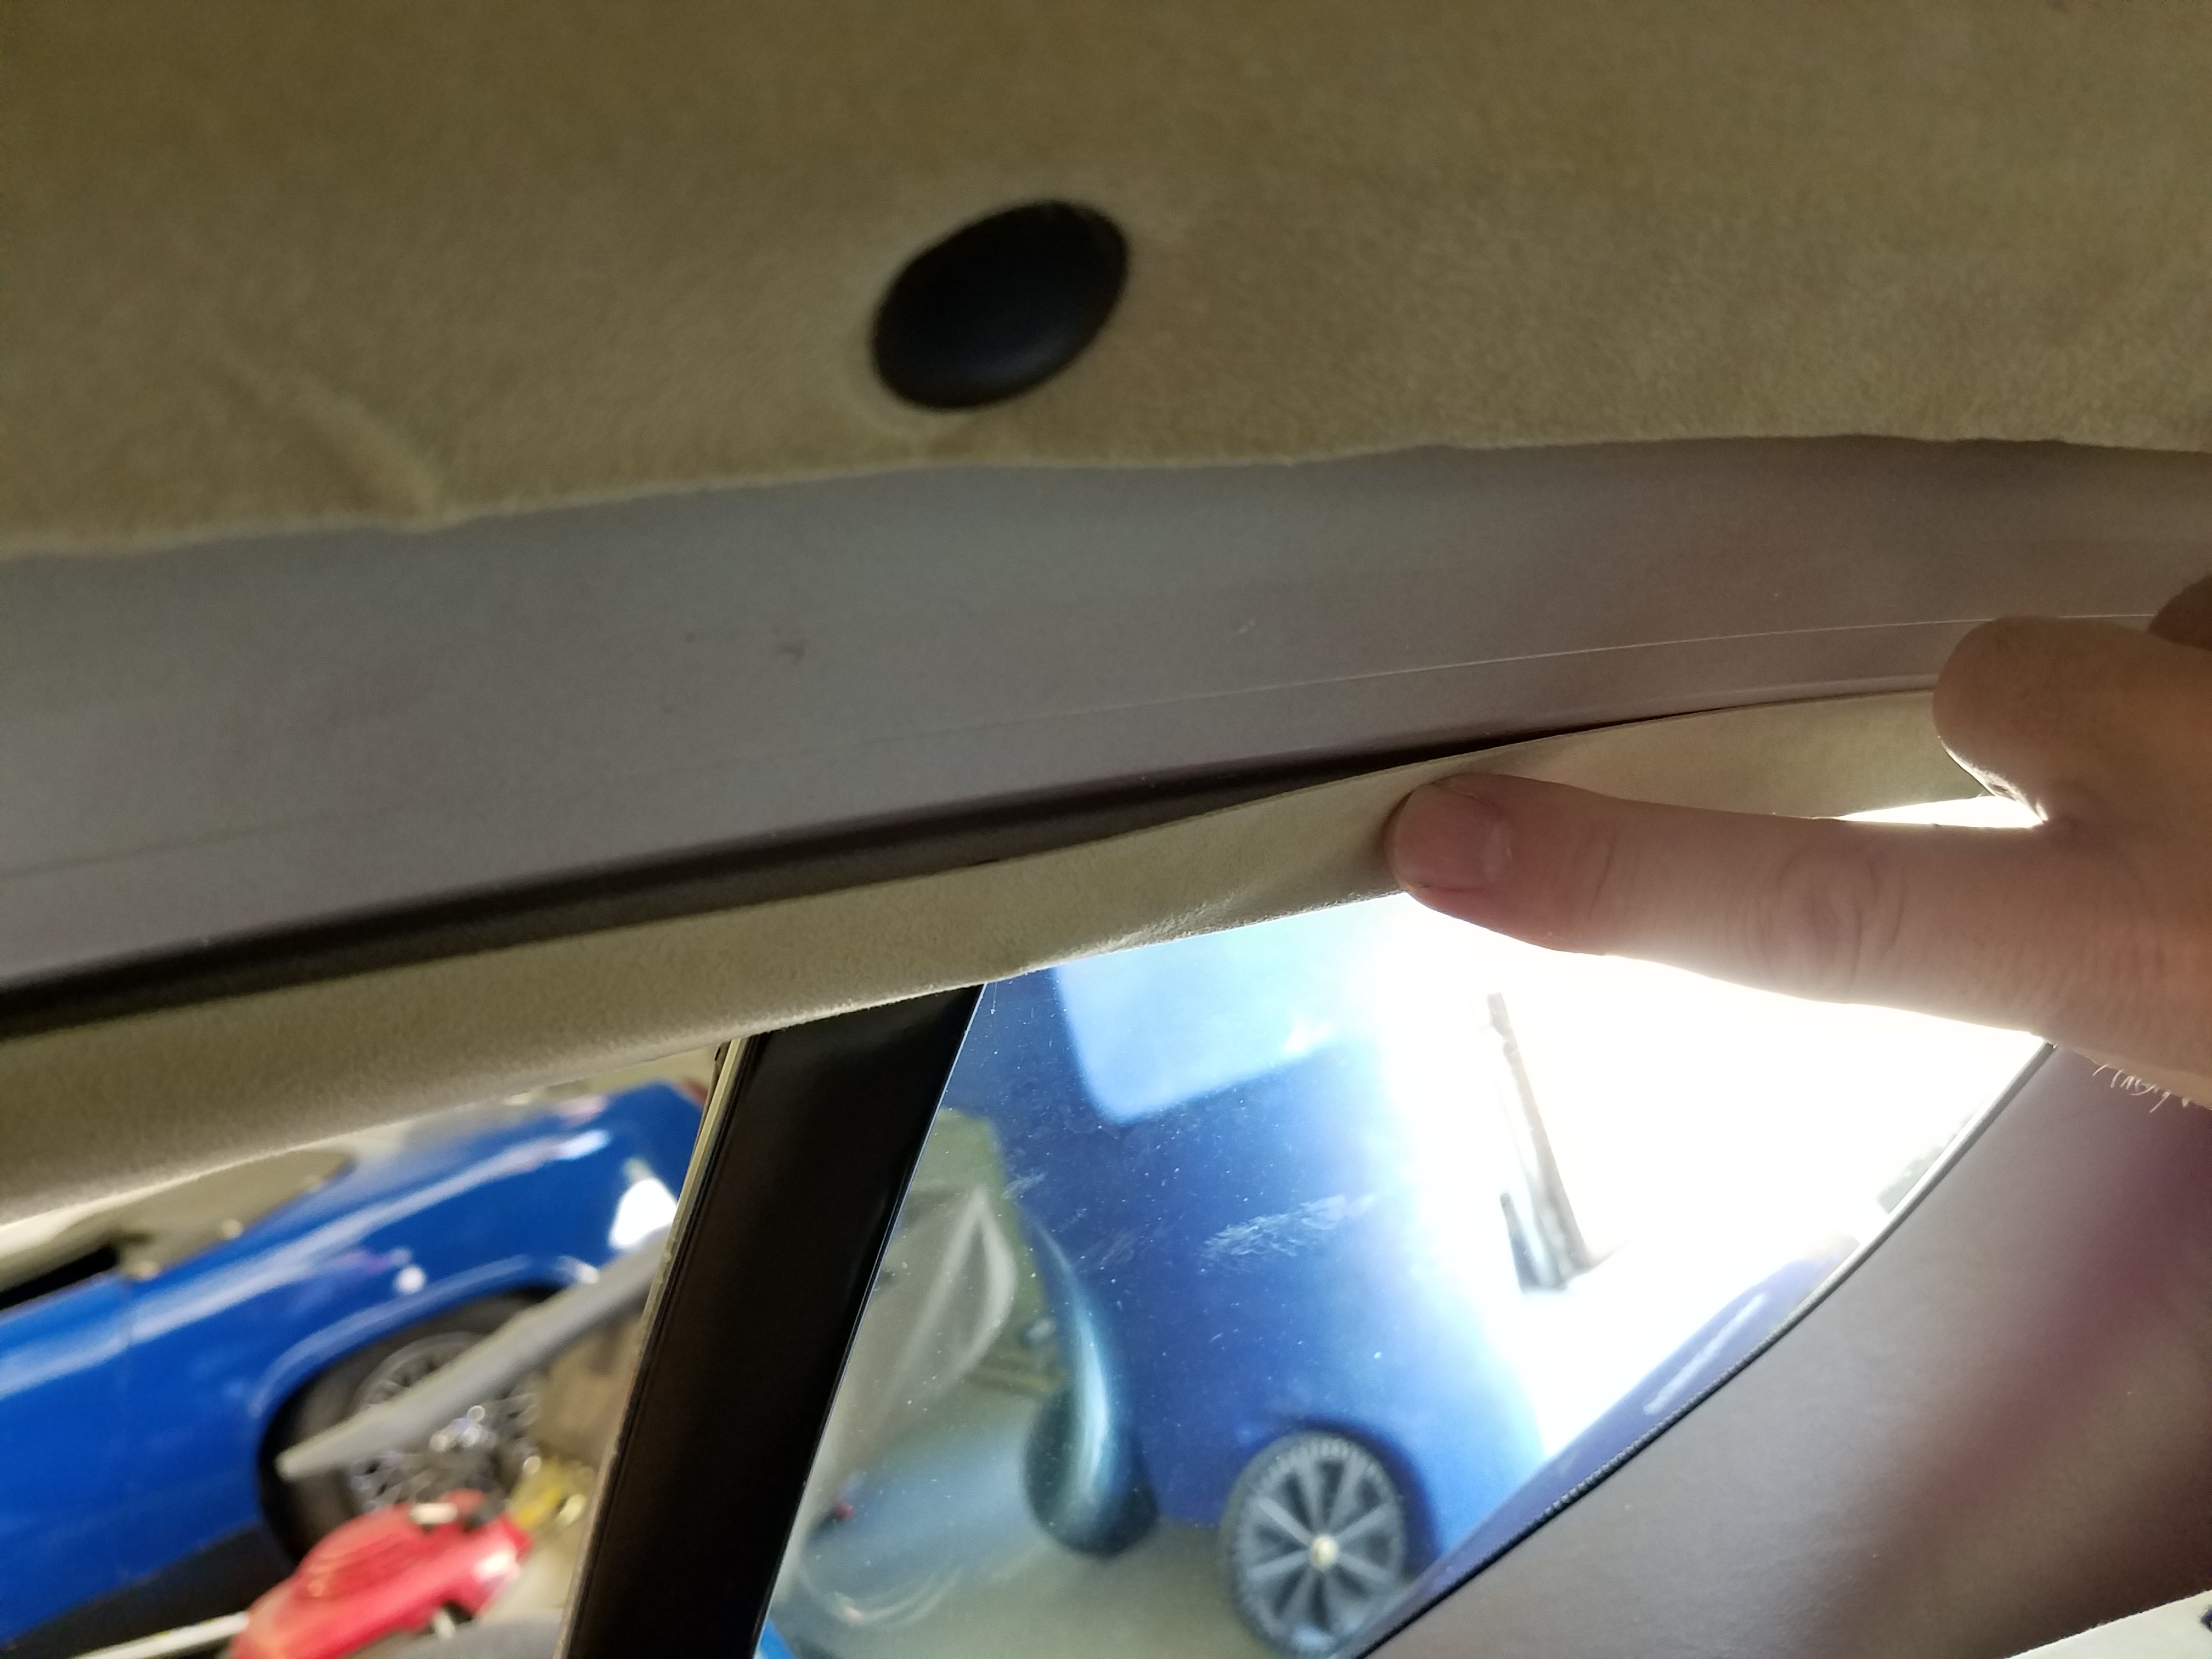
- Not shown in the Video and I haven’t mentioned this anywhere yet, but you’ll notice that along the finished edge of the interior there will be some folded over adhesive backed interior tape that matches the color of the cover and headliner. This is on the outboard side of the surface the A Pillar Cover will seat against.
- On my car this tape wasn’t stuck firmly in place any more, but it was still sticky
- I took my time and pressed it back into place, working carefully from the back of the car to the front

Reseating the Interior Edging Tape
- Re-engage the rear edge of the Cover.
- Just position it back up where it sits normally, but don’t worry about engaging the clips yet.
- You may need to ‘bow’ the cover a bit to get it into position

- Align and insert the Rear most single fir tree clip.
- I started by trying to feel where the tip of the clip and the matching hole in the roof structure was.
- You can ‘skootch’ the clips position around a bit in the slot to get it to just the right spot.
- You can’t see almost anything while positioning this clip. It’s in a spot where you can’t really get your head and body into position to peer into the tiny gap between the cover and the roof.
- I couldn’t get the clip to line up properly and started to get frustrated. Then I had idea to turn on my Smartphone camera and use it to peer into the small gap, and let me see what’s going on in HD. Easy Peesy after that.

- Once the clip is partially started in the hole, then press the cover up firmly. You’ll hear a satisfying ‘click click click’ as the plastic branches on the fir tree clip push in.
- Just press it up part way for now. You want to leave some slack while you are working on the other sets of clips.
- Move along to the Front most pair of clips.
- You want to tackle the front set next (not the middle) since the fronts are tough and if you latch the middles first, you have even less access to align the fronts.
- Follow the same procedure as with the rear single clip.
- These were harder to get aligned and started. This was a bit trickier because you need to get both of the clips lined up and started before you can push them home as a set.
- Even though you can peer in with more ease from outside the car, lining them up was hard for me. It was trying my patience. A few sips of a cold one and a few deep breathes and I dove back into the battle.
- I used the small screwdriver to reach in and tease the positions of the Fir Tree clips in to place. I was able to get them both aligned and then pushed them loosely home.

- Repeat the process again for the Middle pair of clips.
- You have a little better access to peer in and feel around.
- Use the Smartphone camera and screwdriver tricks again as needed.
- Once they are both started, push them firmly all the way home.
- With the middle set fully pushed into place, now you can fully seat the rear and front clips by pressing them snugly up into place. There should be little to no gap now between the A Pillar Covers and the Headliner.

- With the first side done, repeat the process on the opposite side


That’s it. With these covers back in place your interior will be starting to take shape again.
 The next step is to reinstall the rear view mirror. I’ve already covered that in this separate article and video, and you can check it out here.
Video
Here is a short video on the process described above:

I just fixed mine headliner today, I had to take it to the upholster and it costs $400 to reglue the suave but the guy add the thin layer of a foam between the cloth and the board. I wasted my whole day trying to put the pillars back but nothing worked out, the pins I brought from the local AutoZone keep breaking every time I was able to lock it, the headliner is fixed but the pillars are not adjusting to the original position.
LikeLike
Hi Osman. The foam layer would be a nice touch to the finish of the Alcantara.
I can’t really say why your having trouble with the Cant rails. I wasn’t using Autozone fittings, they were Aston Fir Tree parts. Maybe there is a difference there. It was certainly ‘fiddly’ to get them lined up, but the video’s show this pretty well how to deal with it. Is it hung up in any particular spot?
LikeLike