
The most exciting part of fixing the sagging headliner in my DB9 was finally getting to the point where I could reinstall it. The process isn’t difficult if you just undertake it carefully one step at a time.
Preparation
I’ve done a lot of work already to get to this point including:
- Parts needed to reinstall the Headliner
- How to remove the Drivers Side Dash Panels (optional)
- How to remove the Passenger Side Dash Panels (optional)
- How to remove the Rear View Mirror
- How to remove the A Pillar Interior Trim (Cant Rail)
- How to remove the Headliner
- How to repair the Headliner
Tools Required
 The only tools required for this step are a clean pair of hands. You don’t want your sweaty paws to dirty up the newly reupholstered headliner, so wash’em and keep’em clean during the process.
Parts Required
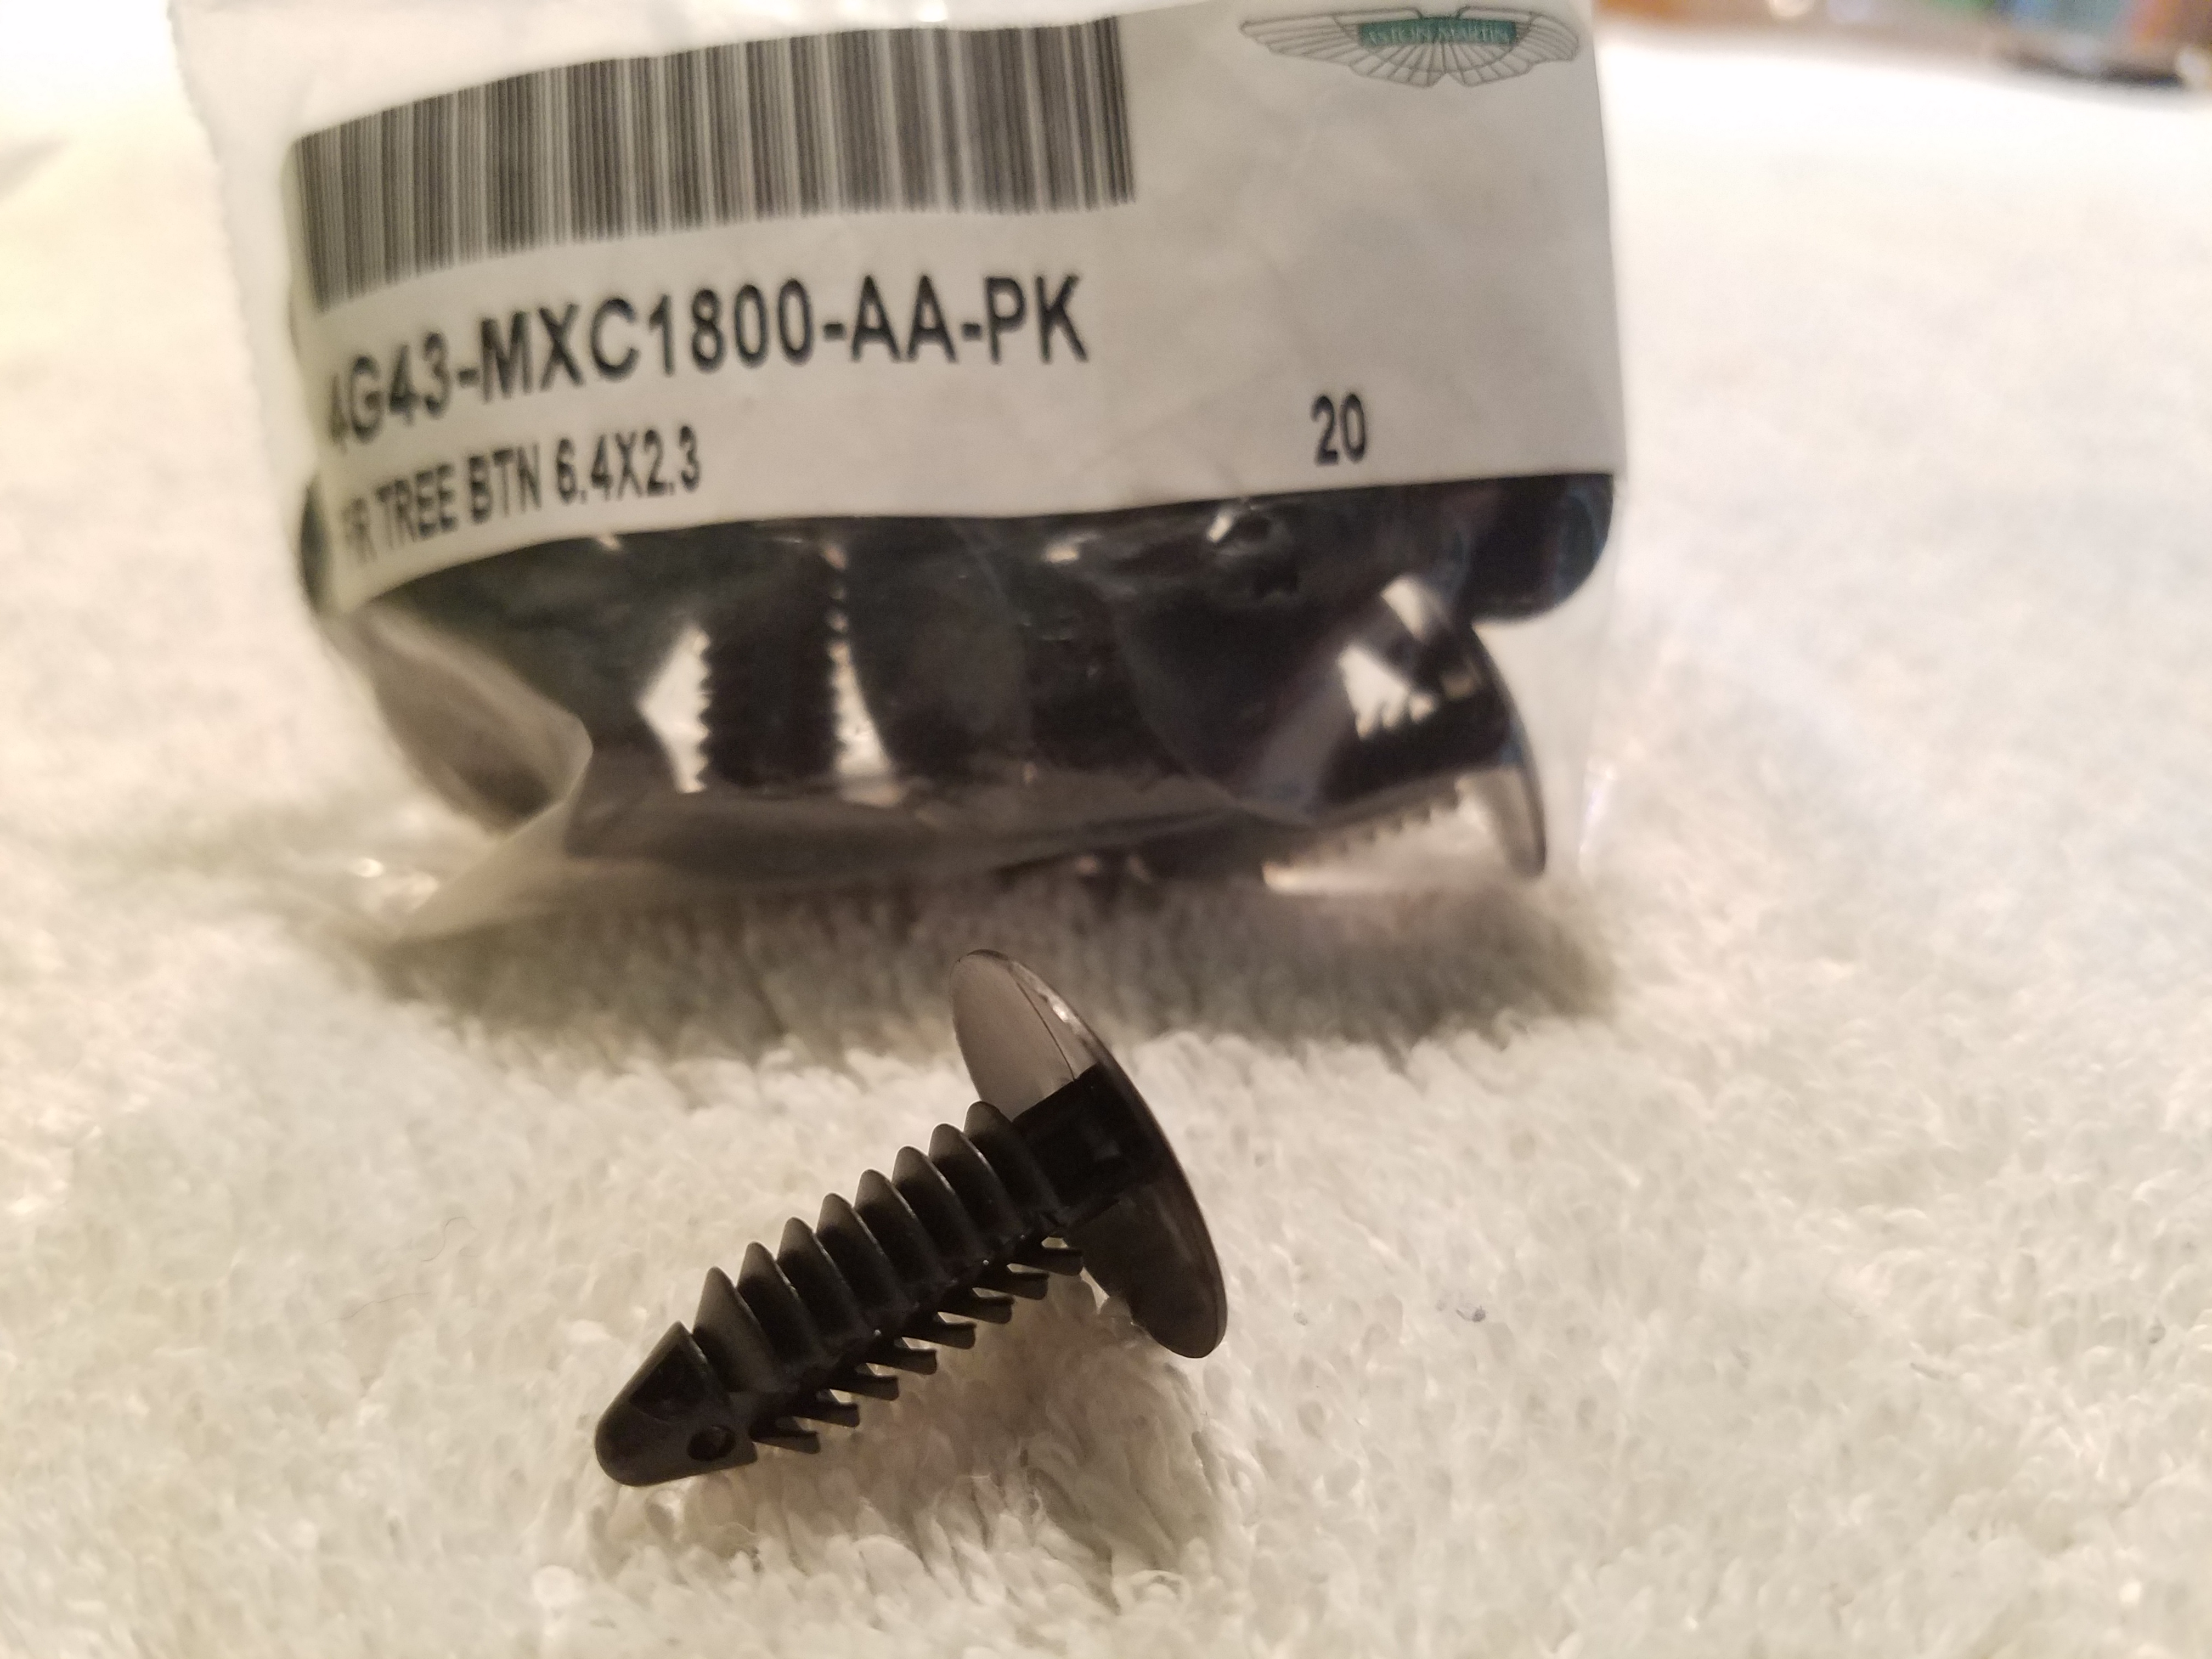 During this process you’ll be using eight (8) of the small fir tree clips I’ve discussed at length in my other article detailing the parts required (check out that article here). Be sure you have new ones on hand, and maybe a few spares.
You may also need to have some replacement Velcro to install depending on the condition of your headliner form and existing Velcro. Also discussed in the parts article.
Oh ya, and you need your repaired Headliner assembly back from the Upholsterer.

Preparing the Headliner Form
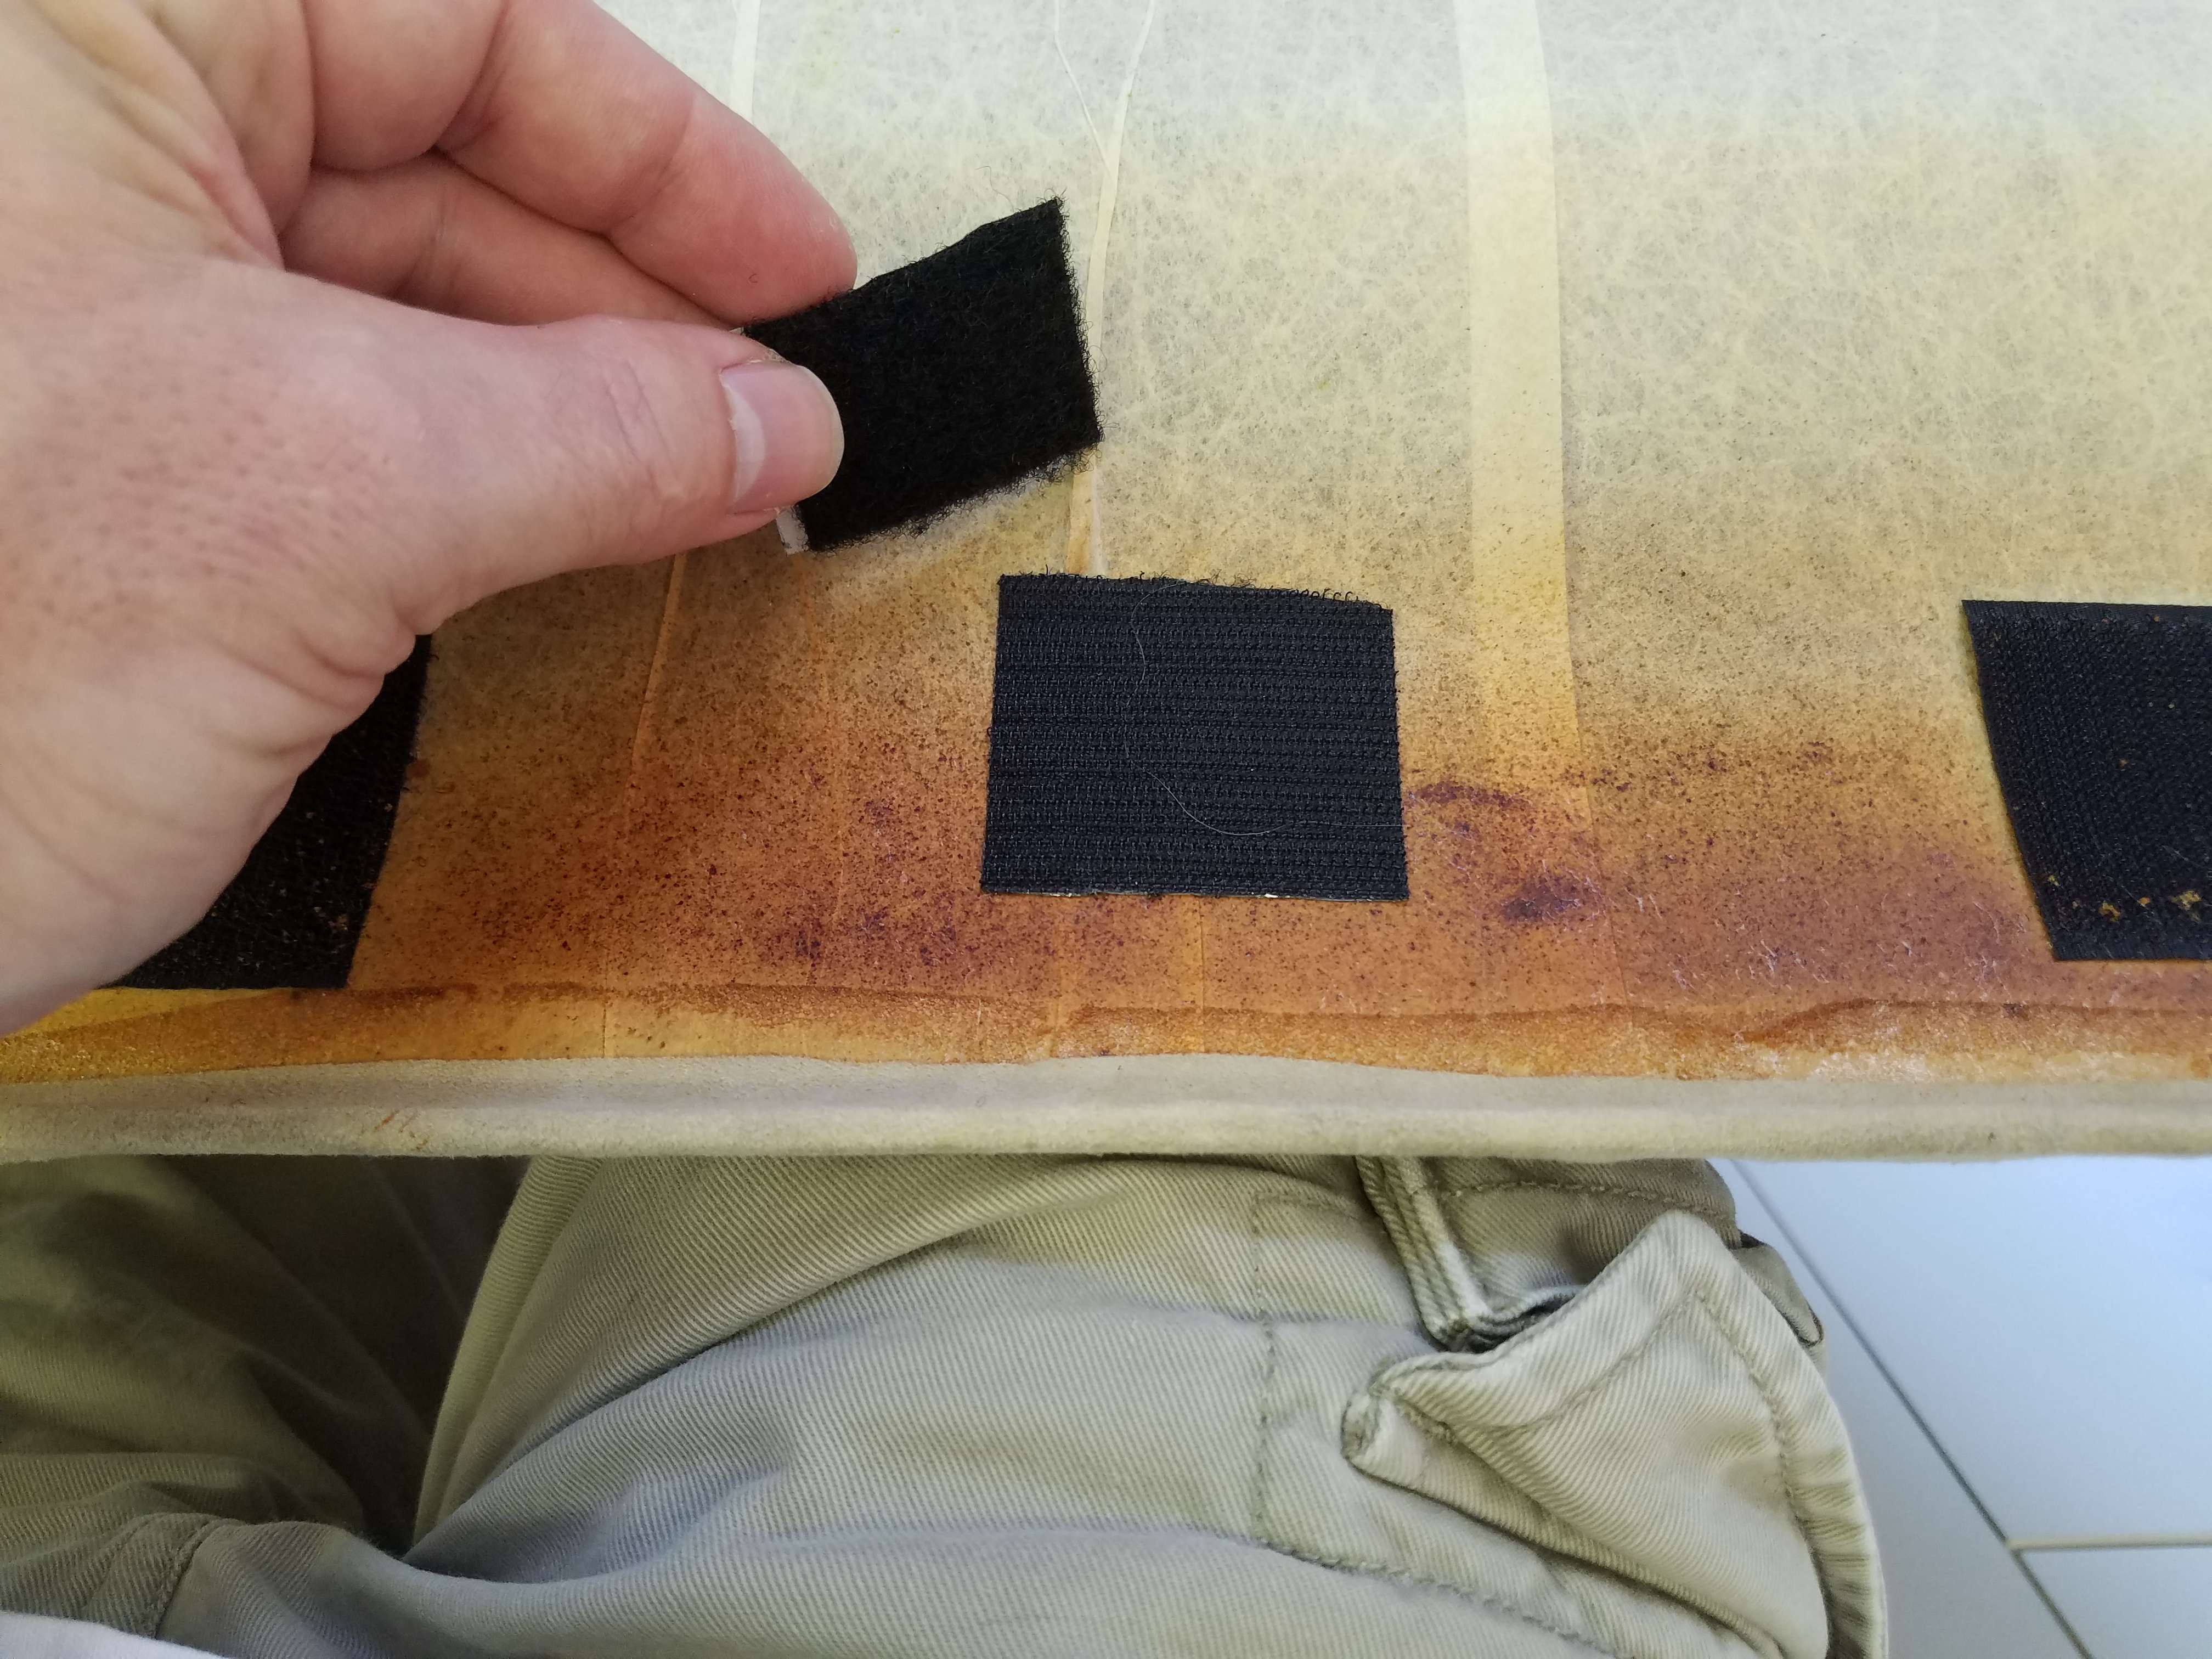
As I noted in my article on removing the headliner, the Velcro strips along the back window edge were wonky. They peeled off the roof rather than separating. In addition, the Center Alignment Tab along the back edge peeled off the form rather than unsnapping from the roof.
All three of these patches needed new Velcro.
 I used two strips of 1″ x 6″ adhesive backed Velcro to replace the original strips to the left and right of the center alignment tab.
- I used a patch approximately 2″ square to connect the center alignment tab back to the headliner form. As I mentioned I couldn’t get the alignment tab to come out of its mounting hole, and I didn’t want to mangle it wrestling it out. So, I opted to reattach it with Velcro rather than double sided adhesive tape.
 Since you can choose which side the hook (scratchy) or loop (soft fuzzy) side of the Velcro goes on, I decided to stick the hook portions to the Headliner form for all three pieces, and put the mating fuzzy portions on the roof structure.
- To figure out where to place them, I peeled the covers off the tape, and very lightly attached the two halves together. I then stuck the strip on the roof structure in the proper spot, knowing that the first time I pressed the form into place it would attach to the exposed glued half.

Once the Velcro is in place, its time to get on with reinstalling the headliner.
Procedure
Overall the procedure isn’t difficult, and will only take about 30 minutes once you have the headliner assembly ready to go back in. I’d recommend checking out the video below as it shows it more clearly than all my wordiness below.
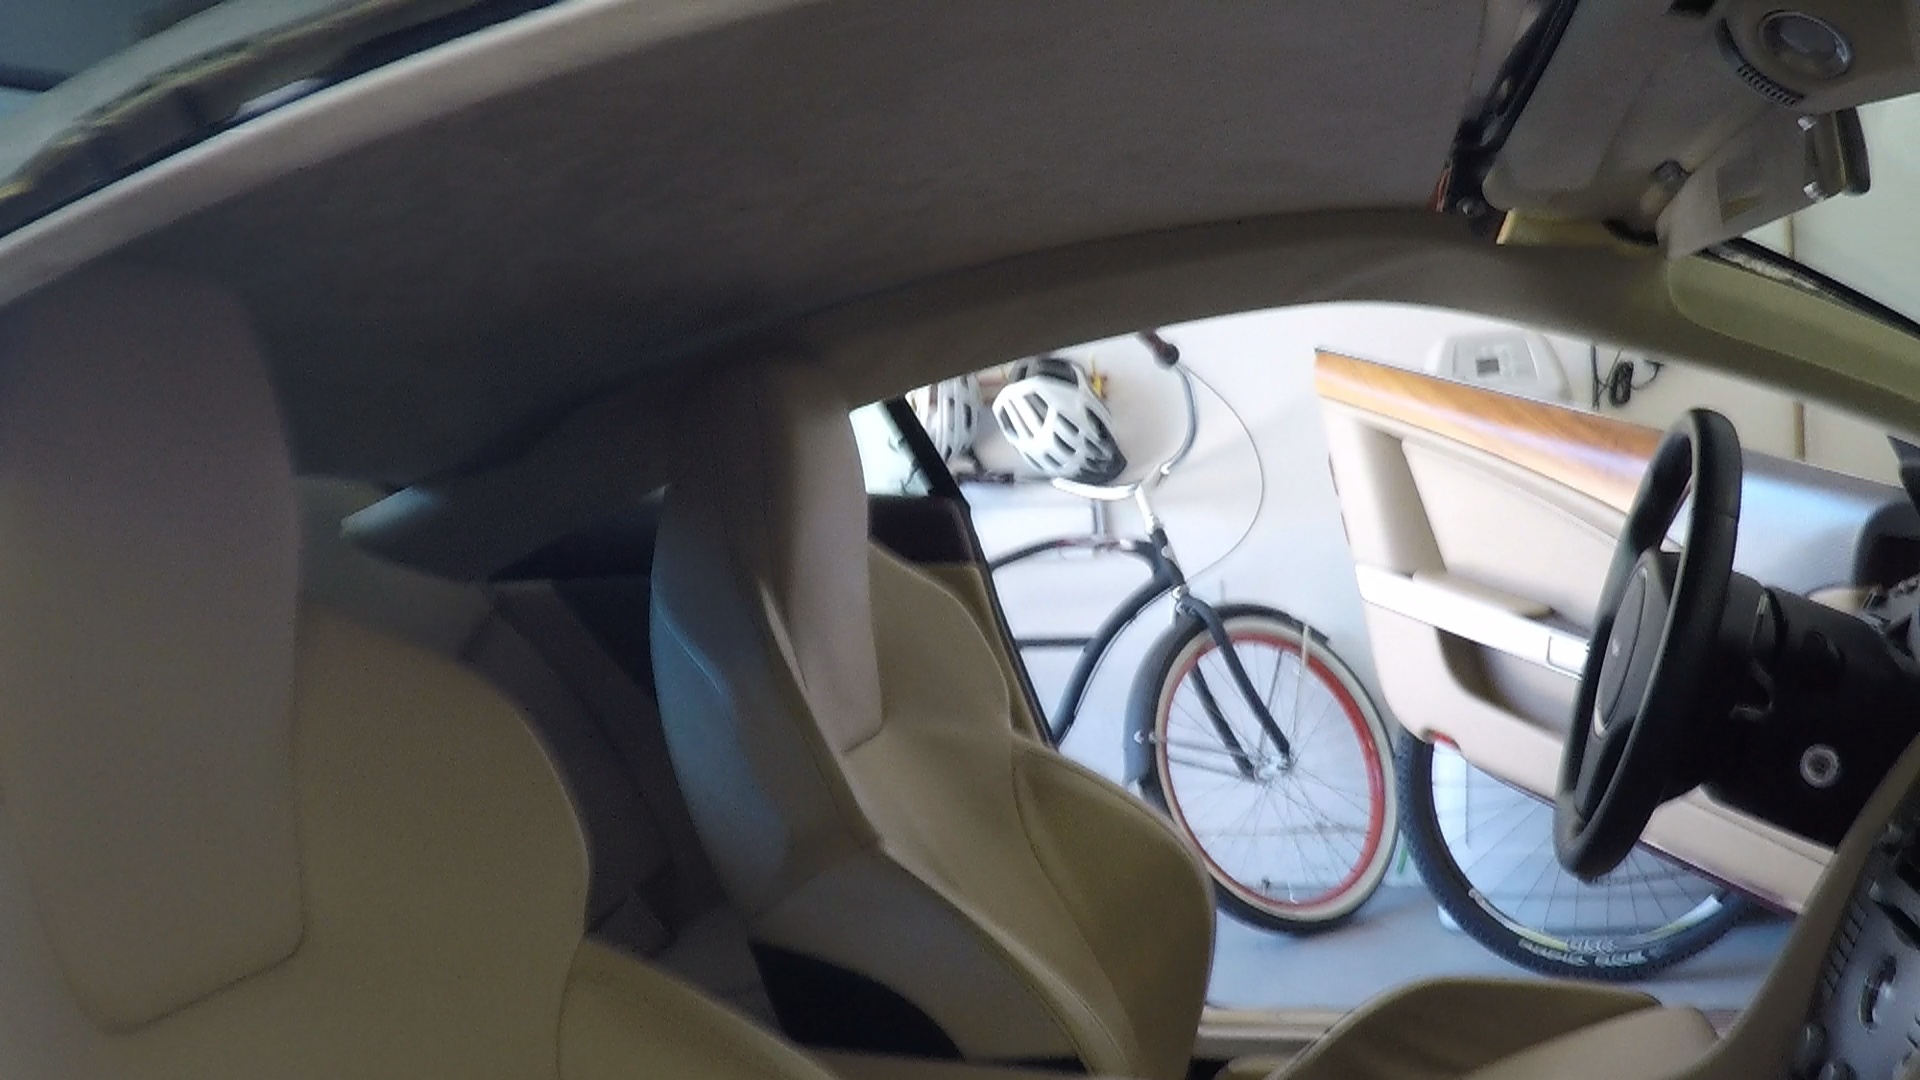
- Wrestle the whole headliner assembly through the passenger side door.

- Lift it up into place and maneuver it around the sagging A Pillar Covers (Cant Rails). Just let it rest on top of them for now.

- Slip the front edge of the headliner up back into place on top of the front headliner rail.

- Next its time to reinsert the small fir tree buttons to pin it into place
- Starting on one side, align the front most hole in the headliner with the matching hole in the roof structure.
- Insert a new small fir tree button by hand, pushing it snugly into place pinning the headliner form up tight to the roof.

- Do the remaining three (3) clips on whichever side you started on by working your way from the front to back.
- Change to the opposite side, starting again at the front, and insert the four (4) additional clips.
- Note: It may be a little more difficult on the final side since you will have to push the form up to the roof a little tighter to get the holes to line up.
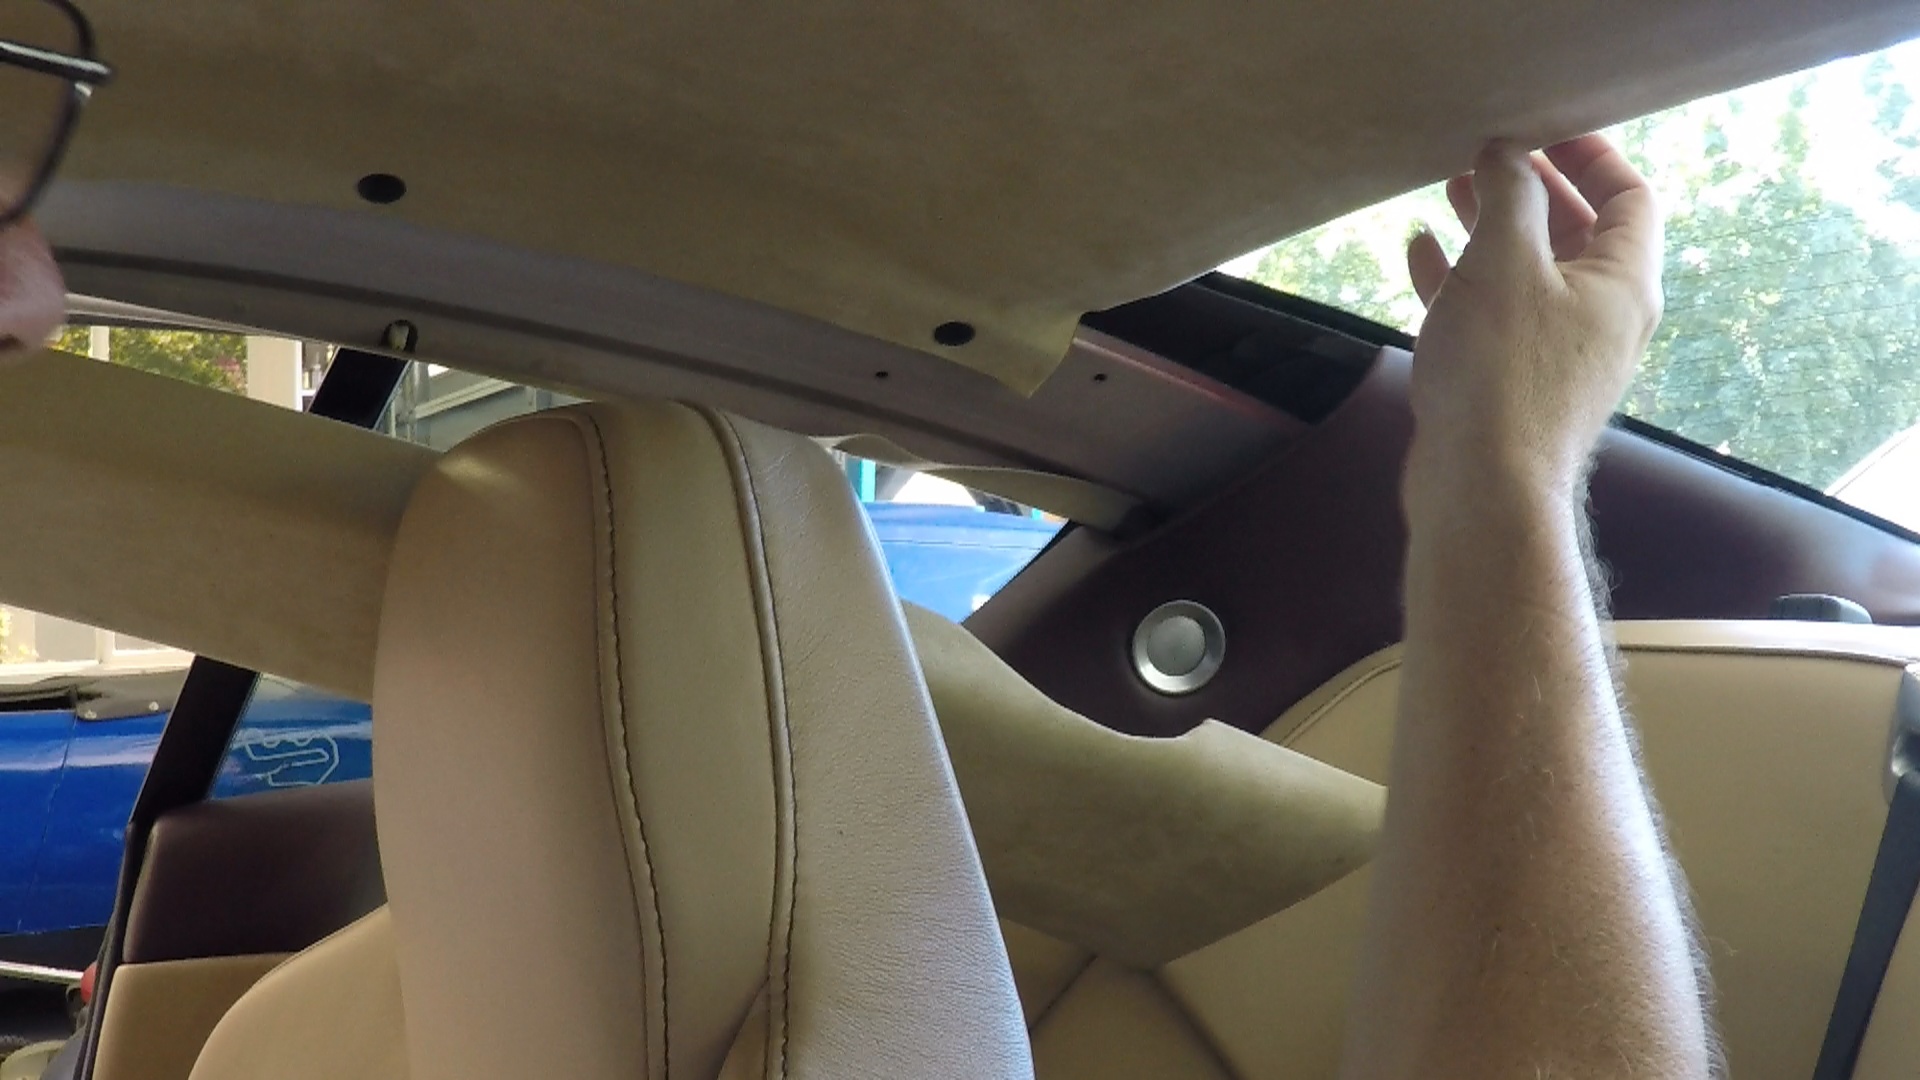
- The final step will be to engage the Velcro patches along the rear edge of the headliner adjacent to the rear window.
- Push firmly up along the area to squash the Velcro patches together so they bite.
- Feel along the back edge to make sure its up tight to the roof along the entire width of the headliner. You can get out of the car and look through the rear window to confirm this too.


Now that the Headliner if firmly back in place the next steps will be to reinstall the A Pillar Covers (a.k.a. Cant Rails), and I will cover that in the next article.
Video
Here is a short video showing the process.
