
 The Brakes are arguably the most important part of your DB9. Our lives depend on them working properly. Inspecting their condition periodically is necessary to catch a developing condition before it degrades braking performance.
If you’ve inspected your Brakes in your DB9 (read my article about this) and discovered that you only need to change the brake pads (your rotors and wear sensors are still fine) the process of changing only the pads is pretty straight forward. I think anyone comfortable working on their car can manage this without needing to take the car to a dealership.
![]() WARNING: This is going to be a standard disclaimer for all the articles in my Brake series. While I believe that anyone with a modicum of mechanic skills can tackle these tasks, it is important they are done right. No shortcuts, no guessing. Your life (and others) depends on the proper operation of your Brakes. If you aren’t confident you can do the job properly I encourage you to take your car to a specialist or an Aston Martin dealership.
WARNING: This is going to be a standard disclaimer for all the articles in my Brake series. While I believe that anyone with a modicum of mechanic skills can tackle these tasks, it is important they are done right. No shortcuts, no guessing. Your life (and others) depends on the proper operation of your Brakes. If you aren’t confident you can do the job properly I encourage you to take your car to a specialist or an Aston Martin dealership.
Preparation
 You need to get access to the brakes, and this requires removing the road wheels. In many cases I’d suggest just putting the car up on four jack stands, but in this case you can just as effectively do it ‘one corner at a time’ just jacking up one wheel at a time. If you are going to do a bunch of other service I’d recommend the jack stands (it will only take about 5 minutes more). Check out these articles for a little help with how:
Tools Needed
You don’t need any exotic tools for this process:
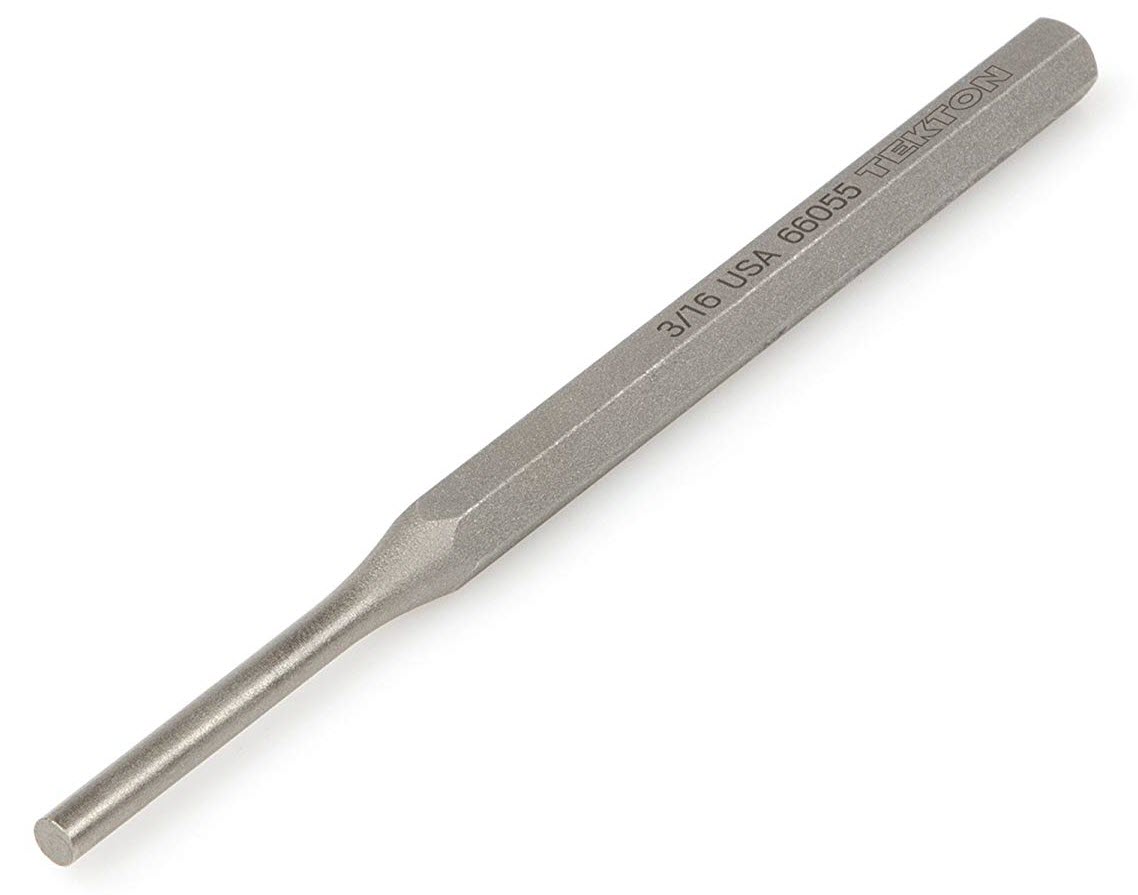
 Small 3/16” diameter drift or punch (even a good strong nail will do). If you need on you can purchase a Tekton model 66055 from Amazon.com for about $4.25 with free Prime shipping.
- Small hammer
- Medium flat blade screwdriver
- Turkey baster (or something similar to suck out extra brake fluid)
 Optional: I got more serious about this knowing that I will be annually bleeding the brakes, and I purchased a Mityvac 6380 Brake Bleeder for $130 USD on Amazon.com. The Mityvac can assist you when it comes time to bleed the brakes (no more need to call my Sweetie into the garage to pump the brake pedal), but it also has a nifty straw attachment that can be used to suck brake fluid up and out of the master cylinder reservoir.
Shop Supplies
 In addition to the tools, changing the brake pads is a dirty job and you might want to have some of these supplies on hand (I consider these standard shop supplies):
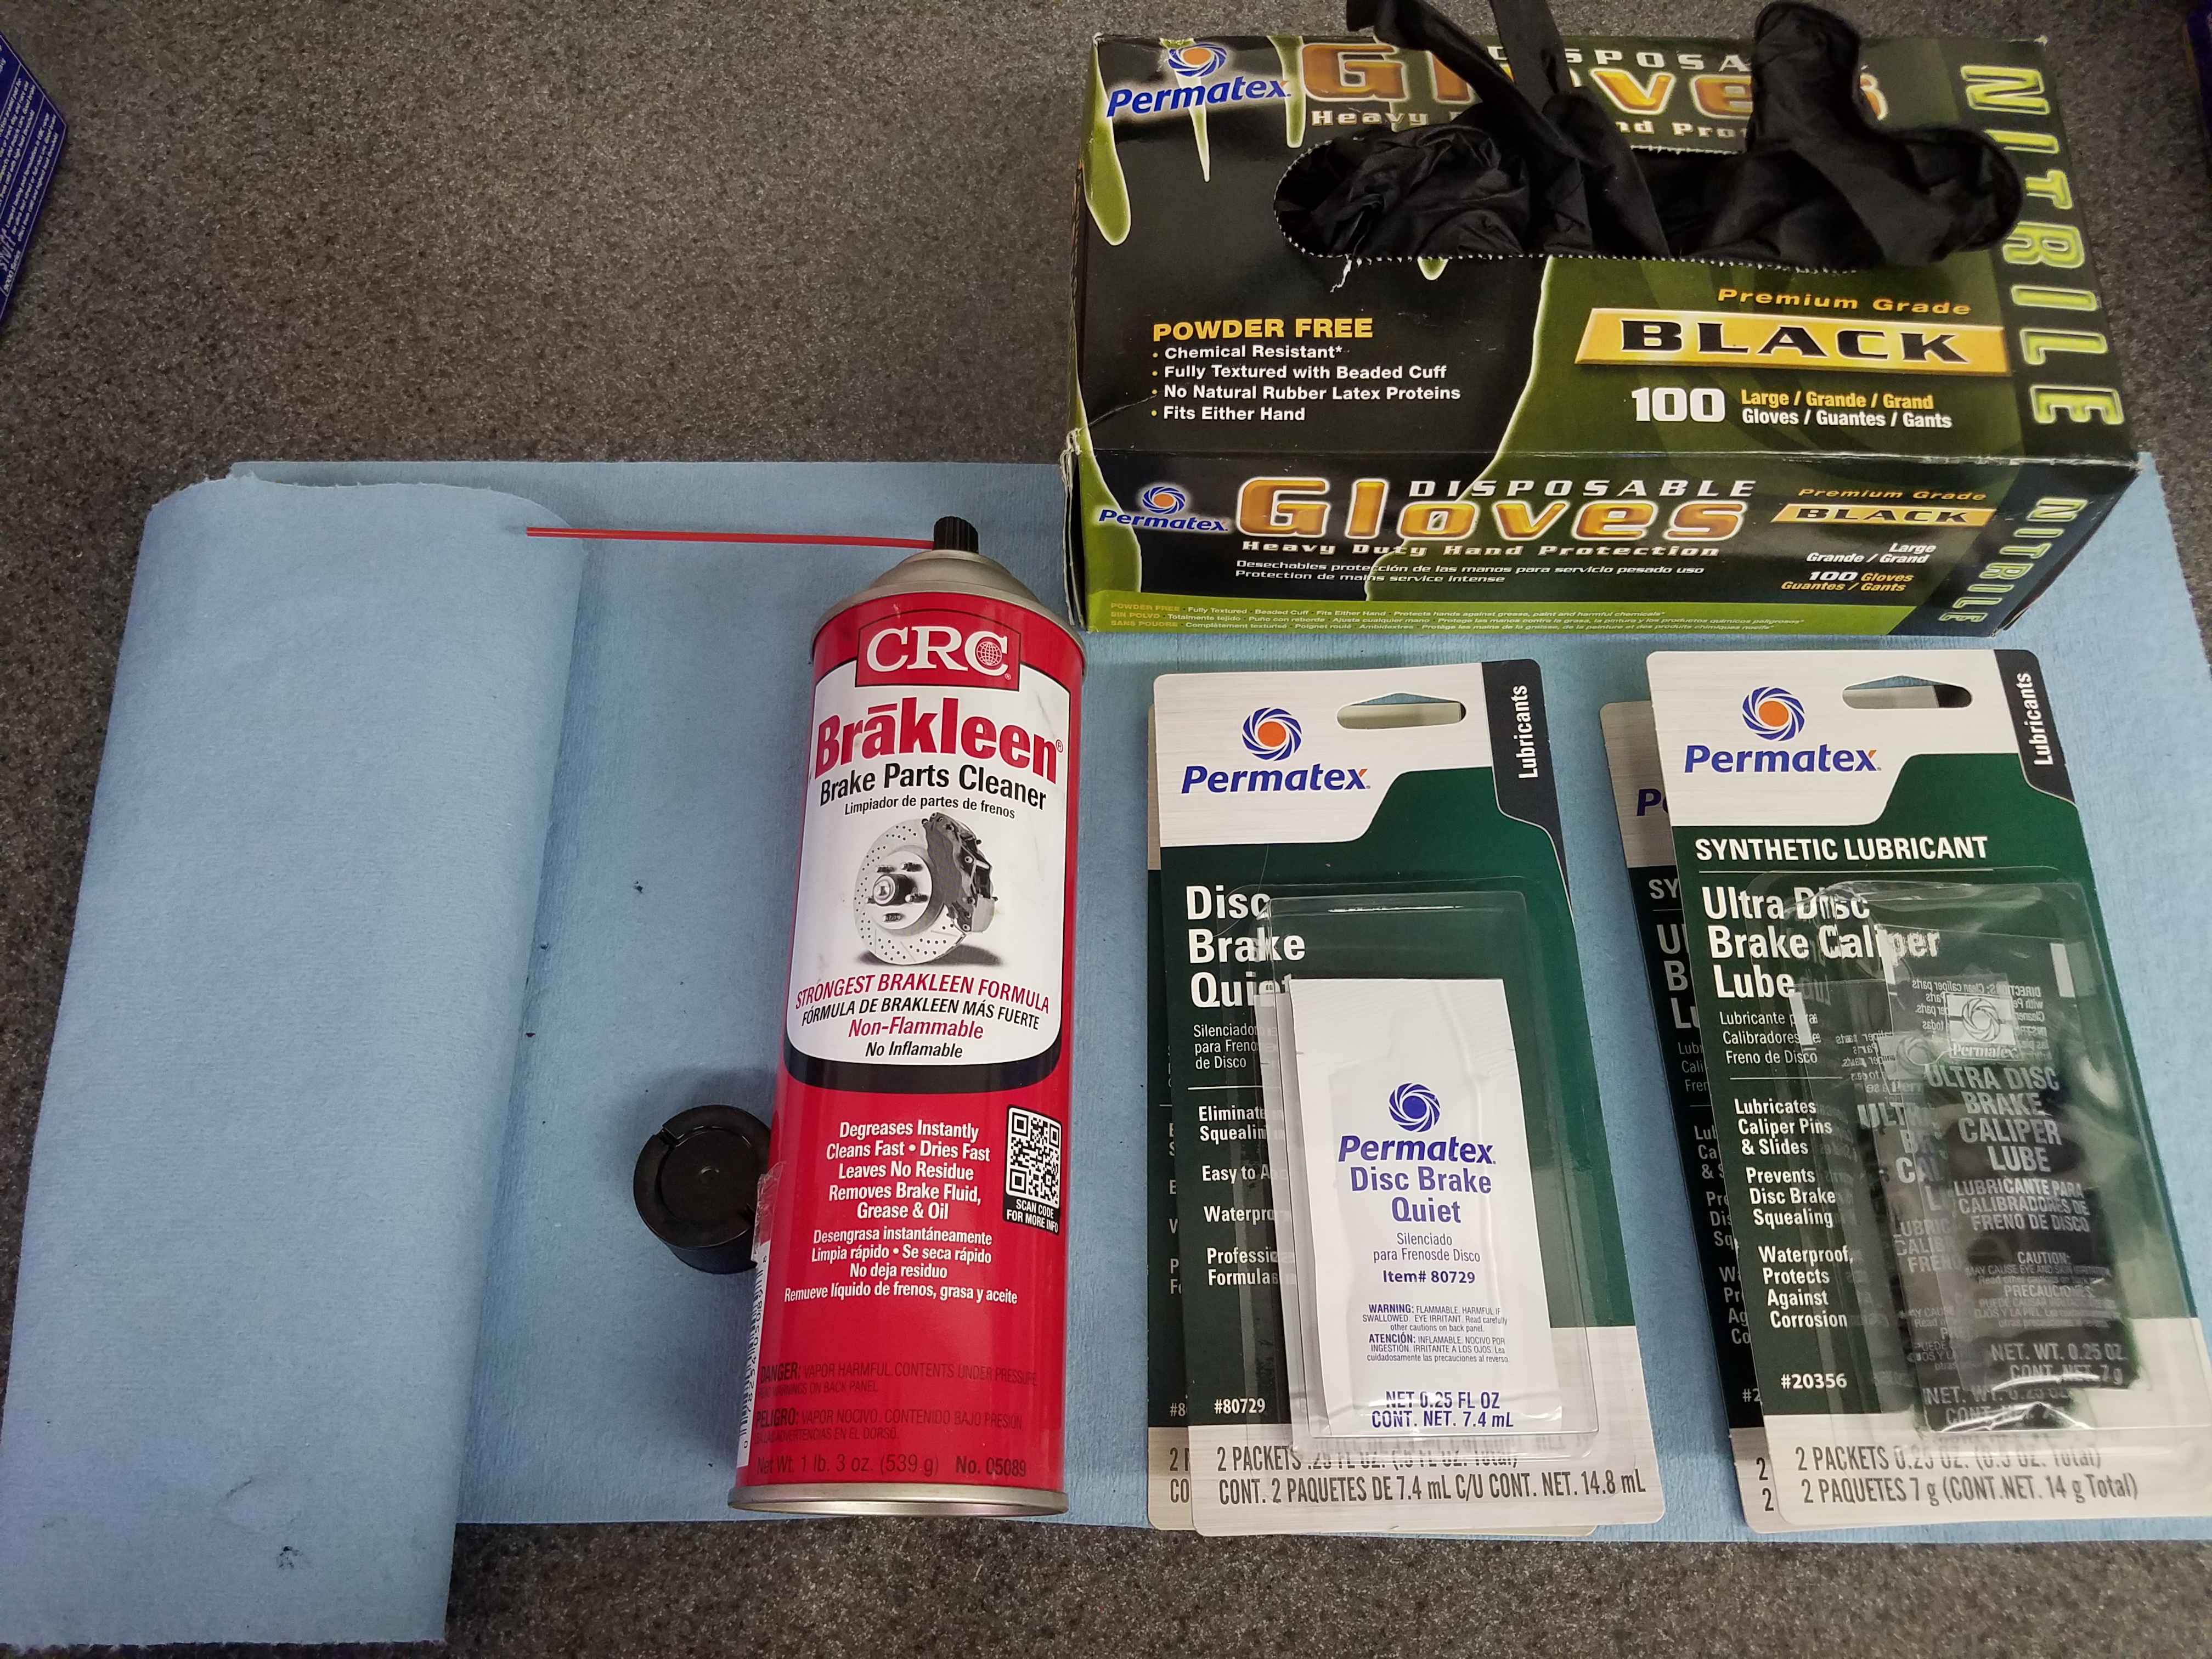
 Disposable mechanics gloves
- While you can source these in many places, I’ve not had much luck with cheap ones purcshaed from local stores.
- I’ve been pretty happy with the Permatex 08185 Nitrile black gloves.
- I’ve been ordering a box of 100 (50 pairs) in size Large for about $20 USD from Amazon.com with free shipping (see the link below).
 Brake grease to lubricate a few parts
- I purchased a disposable 2-pack of Permatex Disc Brake Caliper Lubricant p/n 20356 from my local Pepboys auto parts supply store for about $2.79 USD. Each pack is enough grease to do up to two calipers. You can buy these online for about $7 USD on Amazon.com with free Prime shipping if you’d prefer to pay extra and skip the trip to the store.
- Anti Squeal compound to use with new pads
- Aston Martin Service Bulletin SB-06-0344V2 on “Recommended Brake Maintenance Procedure” goes into detail about applying (literally slathering) anti-squeal compound to the back of new brake pads, even if they are equipped with metal shims.

Brake Pads slathered in Tunap paste They obviously are responding to complaints about squealing brakes. They even suggest coating the inside of the holes for the pins and the ends that are designed to slide. In the Service Bulletin they recommend Tunap brand MP113 Premium Ceramic Brake Paste, but we can’t get that in the US. Readers in the UK can get it from Amazon for about £21.24. [If someone in the UK would be kind enough to purchase a can and ship it to me to try, I’d be grateful]
 I purchased a disposable 2-pack of Permatex Disc Brake Quiet model 80729 anti-squeal compound from my local Pepboys auto parts supply store for $2.39 USD. Each pack is enough coat the brake pads for up to two calipers. You can buy these online for about $6 USD on Amazon.com with free Prime shipping if you’d prefer to spend a few extra dollars and avoid the trip to the local store.
- Aston Martin Service Bulletin SB-06-0344V2 on “Recommended Brake Maintenance Procedure” goes into detail about applying (literally slathering) anti-squeal compound to the back of new brake pads, even if they are equipped with metal shims.
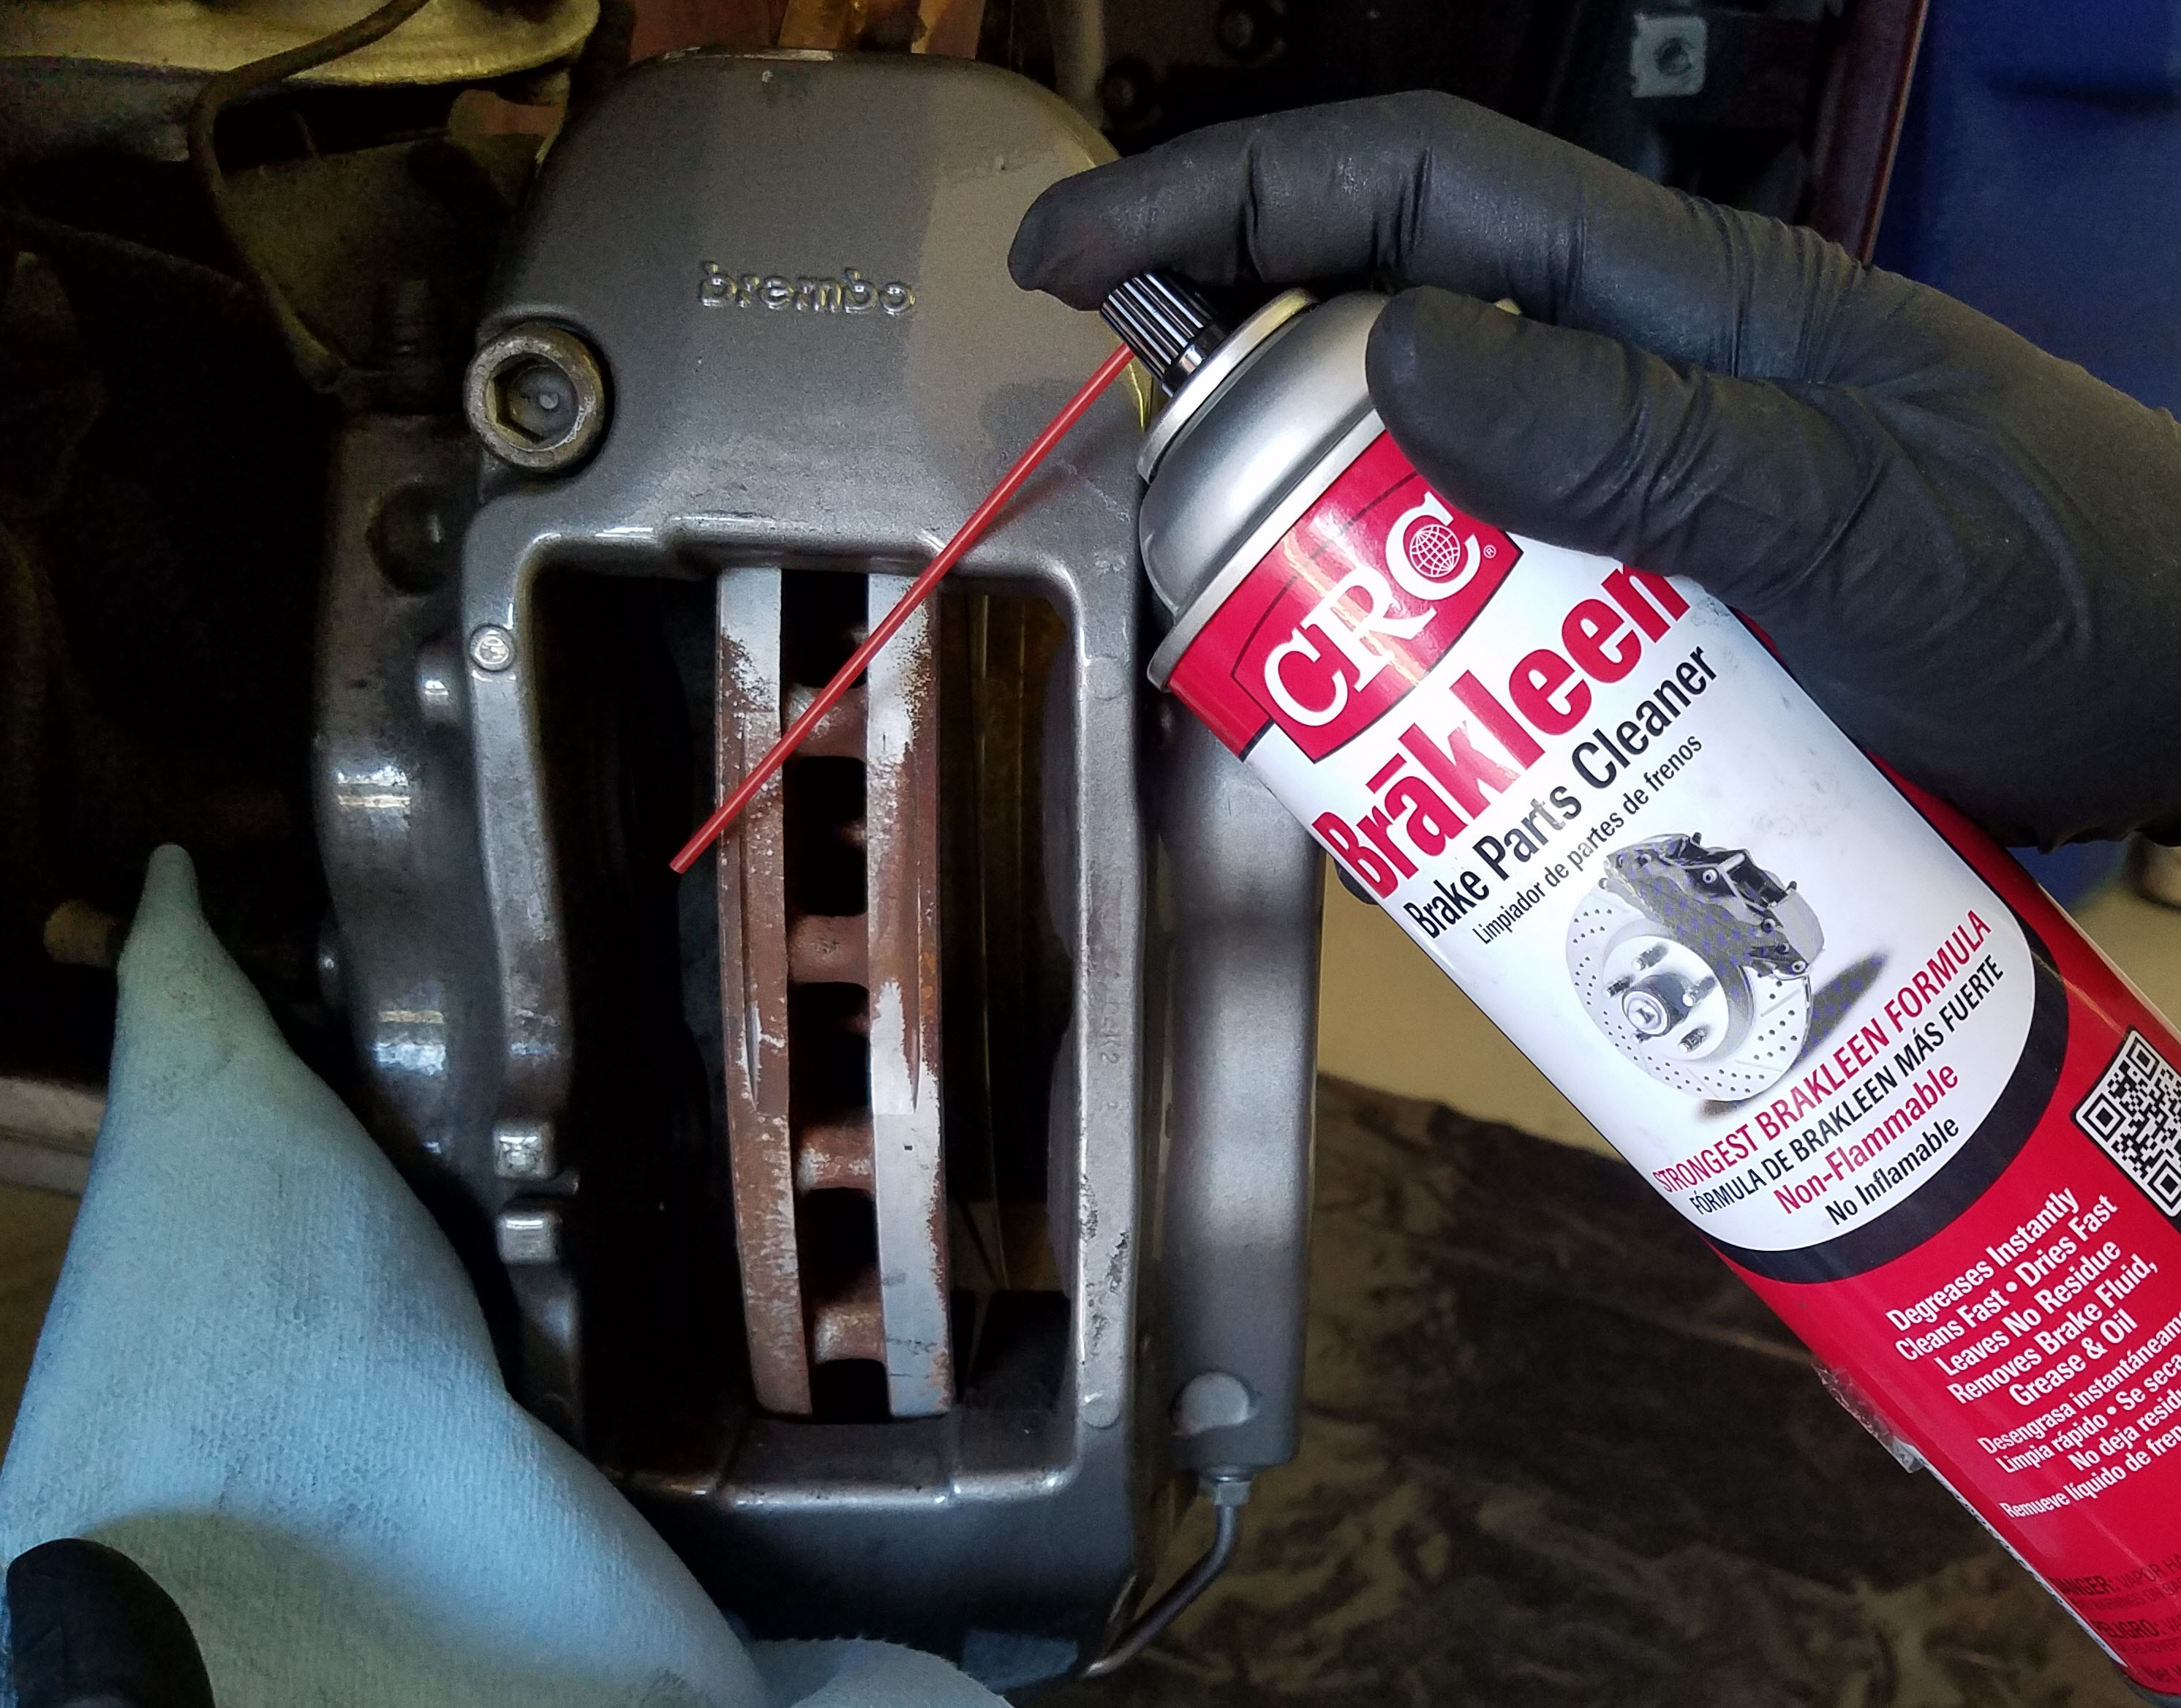
- Brake Clean aersol can for cleaning off components
 I purchased a large can (19 oz) of CRC Brakleen (p/n 05089). You can buy one for about $5 USD on Amazon.com or from your local auto parts store.
- This stuff works amazingly well. You may not be able to buy this everywhere since there are Chlorinated and Non-Chlorinated versions depending on your regional air quality laws. This is the full-test Chlorinated version.
- Shop towels
 You can either use hearty disposable paper ones or cloth ones.
- If you use cloth keep in mind they are going to get seriously dirty with brake dust and grease, and you may not want to toss them into the washer at home afterwards (since your Sweetie will kill you).
- I am fond of the hearty blue Scott Brand shop towel rolls. These towels hold together wiping up grease and grime. You get 55 sheets to a roll. You can pick up a dozen rolls from Amazon.com for about $30 USD.


![]() If you need any of these shop supplies, I’ve organized them onto the official Aston1936 Amazon page so you can find any of the products I mention more easily. Most have free Prime shipping. Check it out here! [Full disclosure – I get a tiny kickback from Amazon if you buy through these links – funds which I use to support this blog and future articles – Thank you for your support]
If you need any of these shop supplies, I’ve organized them onto the official Aston1936 Amazon page so you can find any of the products I mention more easily. Most have free Prime shipping. Check it out here! [Full disclosure – I get a tiny kickback from Amazon if you buy through these links – funds which I use to support this blog and future articles – Thank you for your support]
Parts Needed
Check out my other article on the parts needed [Coming Soon]. Basically all you need is a new set of brake pads along with the shop supplies noted above. Simple!

Procedure
Once you have the wheels off, changing the pads will only take about 15 minutes per wheel (even less if you’ve done it before).
The procedure is exactly the same for the rear brakes as it is for the front other than you can’t get the added access by turning the steering wheel. I won’t be covering the hand brake pads in this article, it will be a separate article [Coming Soon].
 I wanted to check out how Aston Martin says to do it in the official Workshop Manual section 6.03 (you can read it here). I’ve incorporated their process and a few of my own tips together.
- Raise the car and remove the road wheel (see the links above in preparation)
- Fit some Fender Protection to the drivers side fender you’ll be leaning over with Brake Fluid. Simple insurance to protect your precious paint.
- Remove the brake fluid reservoir filler cap. This is necessary as we are about to compress the brake caliper pistons, and the fluid will return to the reservoir.
- Leave the cap sitting loosely on top of the opening. There is a potential of some up-splash burping as fluid returns to the reservoir, and you don’t want it coming out.
- You might want to surround the reservoir with shop towels in case you make a mistake and it overflows.
- Warning: Brake fluid is really good paint stripper. DON’T get this on your body work. Be careful.

Remove the cap and leave sitting loosely over opening
- Work on ONE wheel at a time, start to finish. This is my own experience talking. If you start to do them all in parallel, I think it raises the chances you’ll forget something.
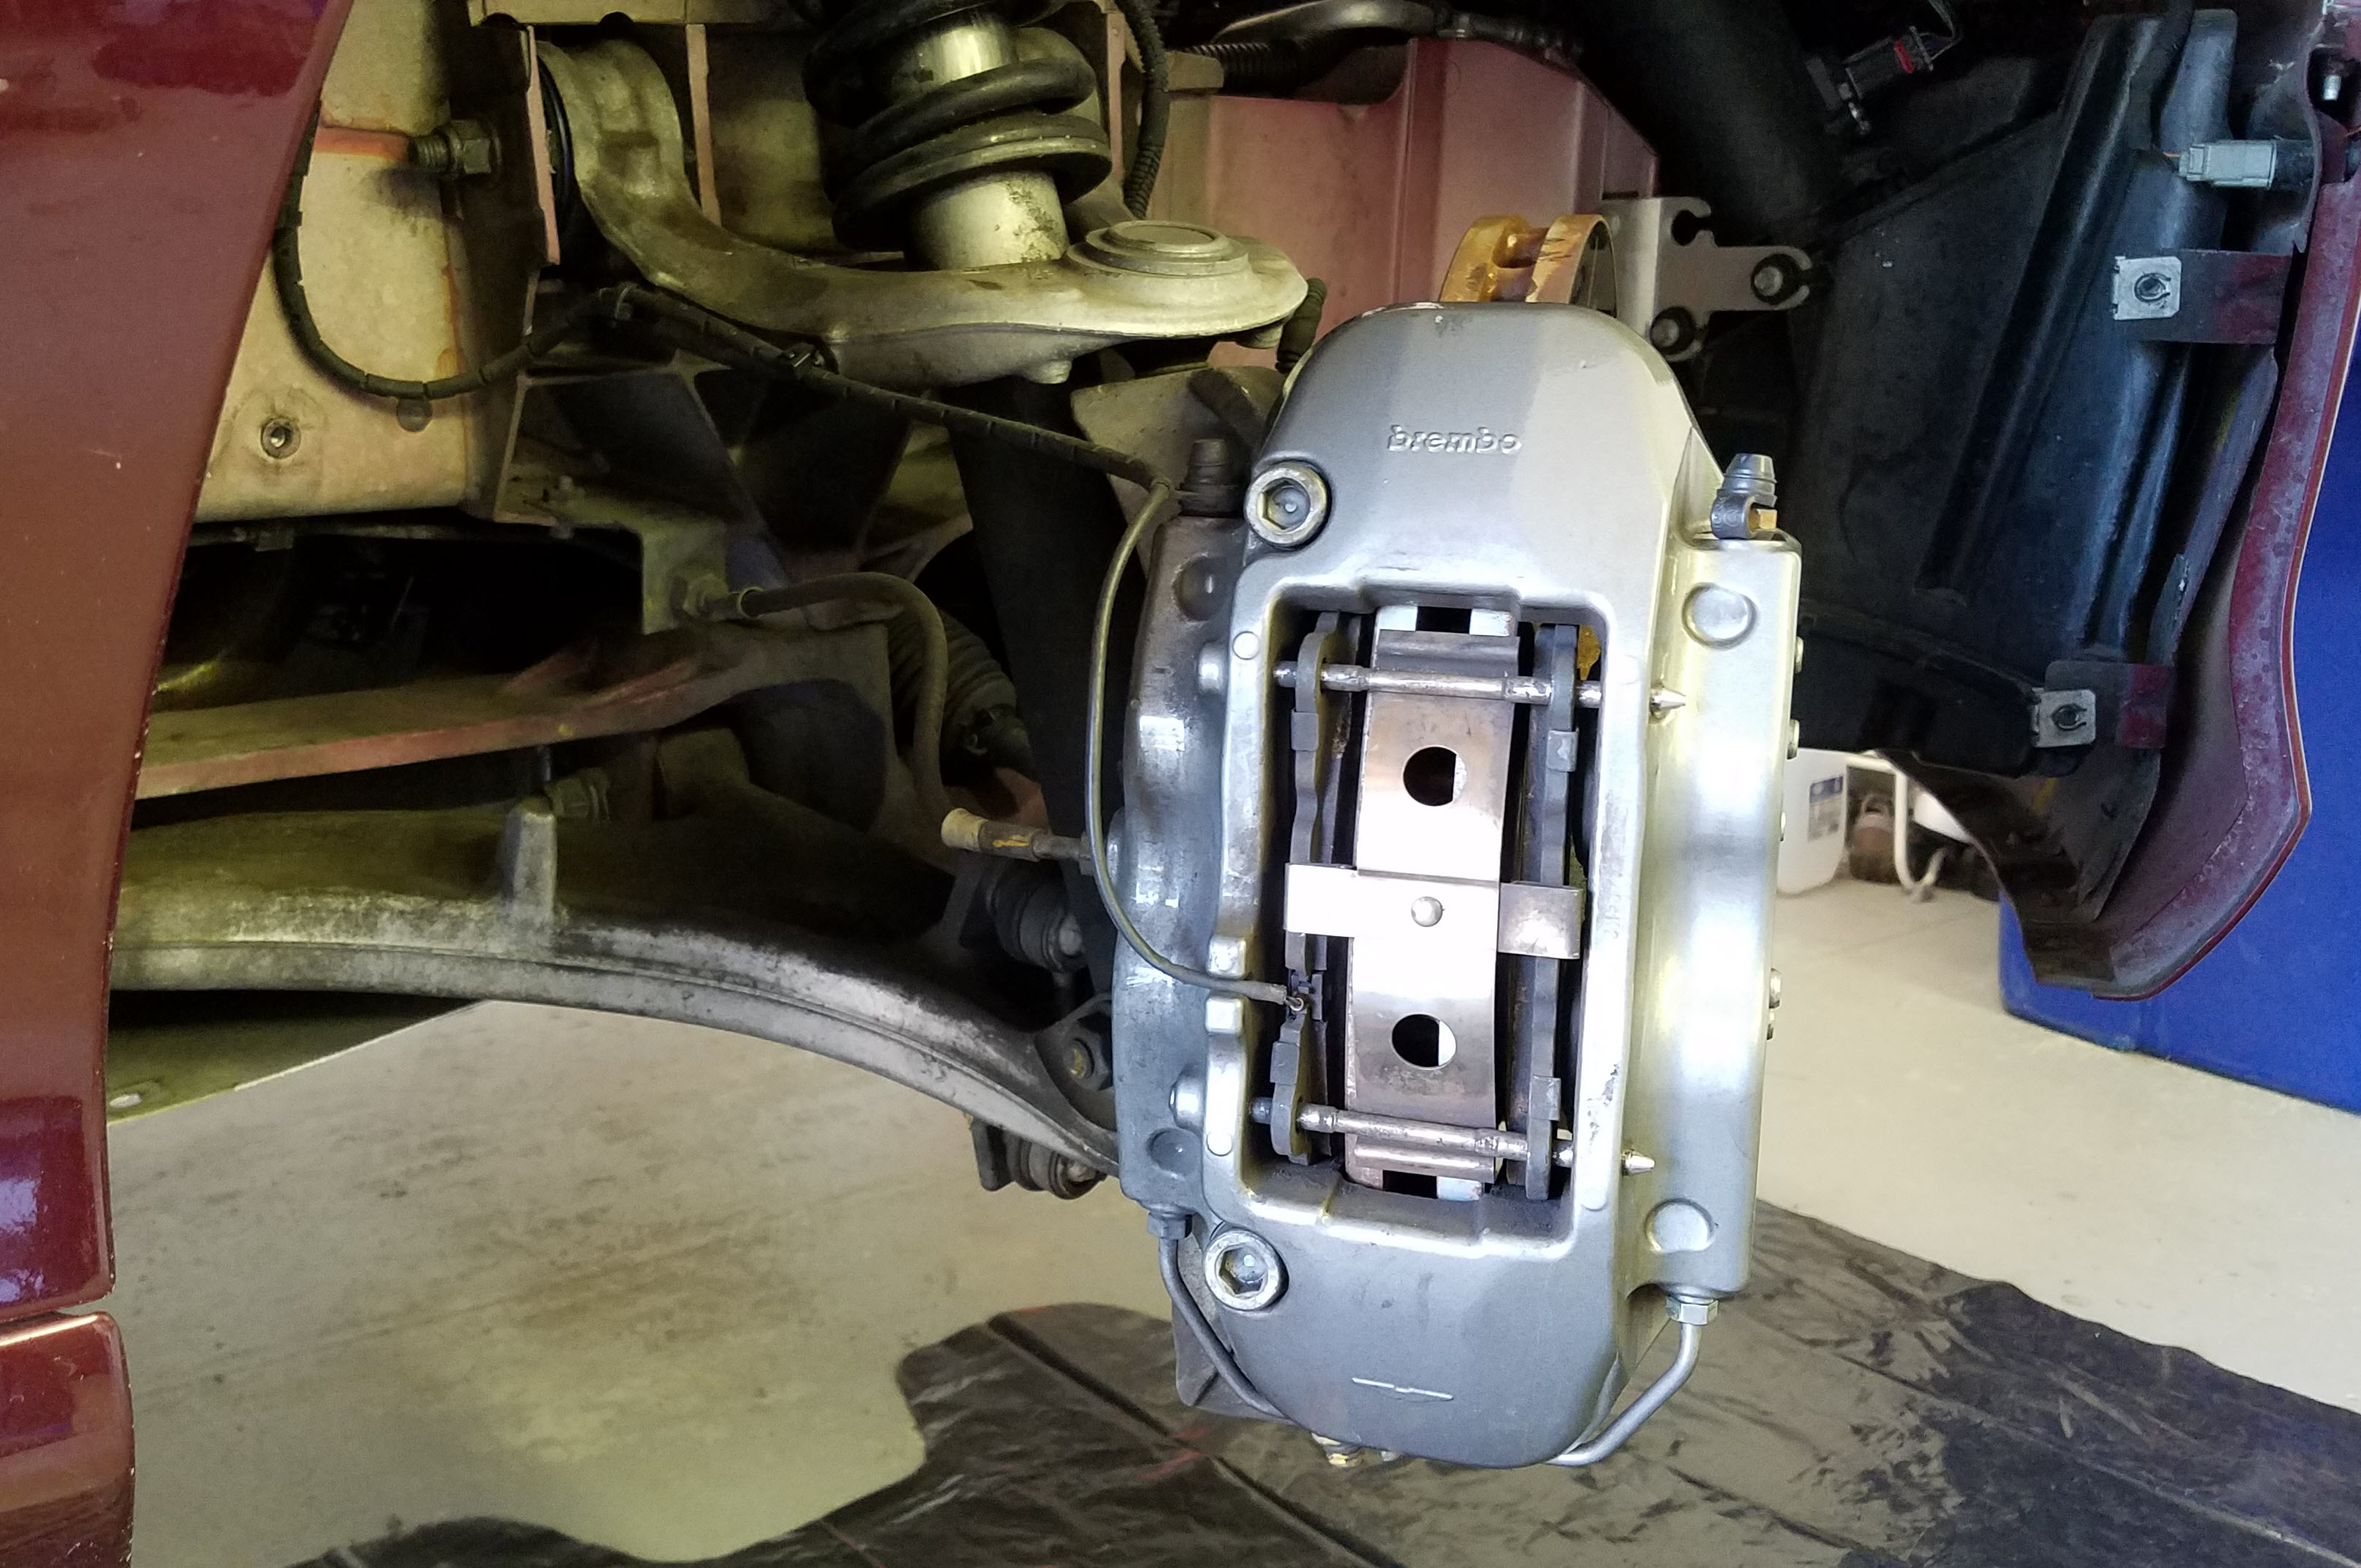
- For the front wheels, turn the steering wheel all the way to swing the brake caliper out for easier access.
- i.e. Turn the steering all the way to the left when working on the right front, and vice versa.

Steering turned full left to get better access to the right Caliper.
- i.e. Turn the steering all the way to the left when working on the right front, and vice versa.
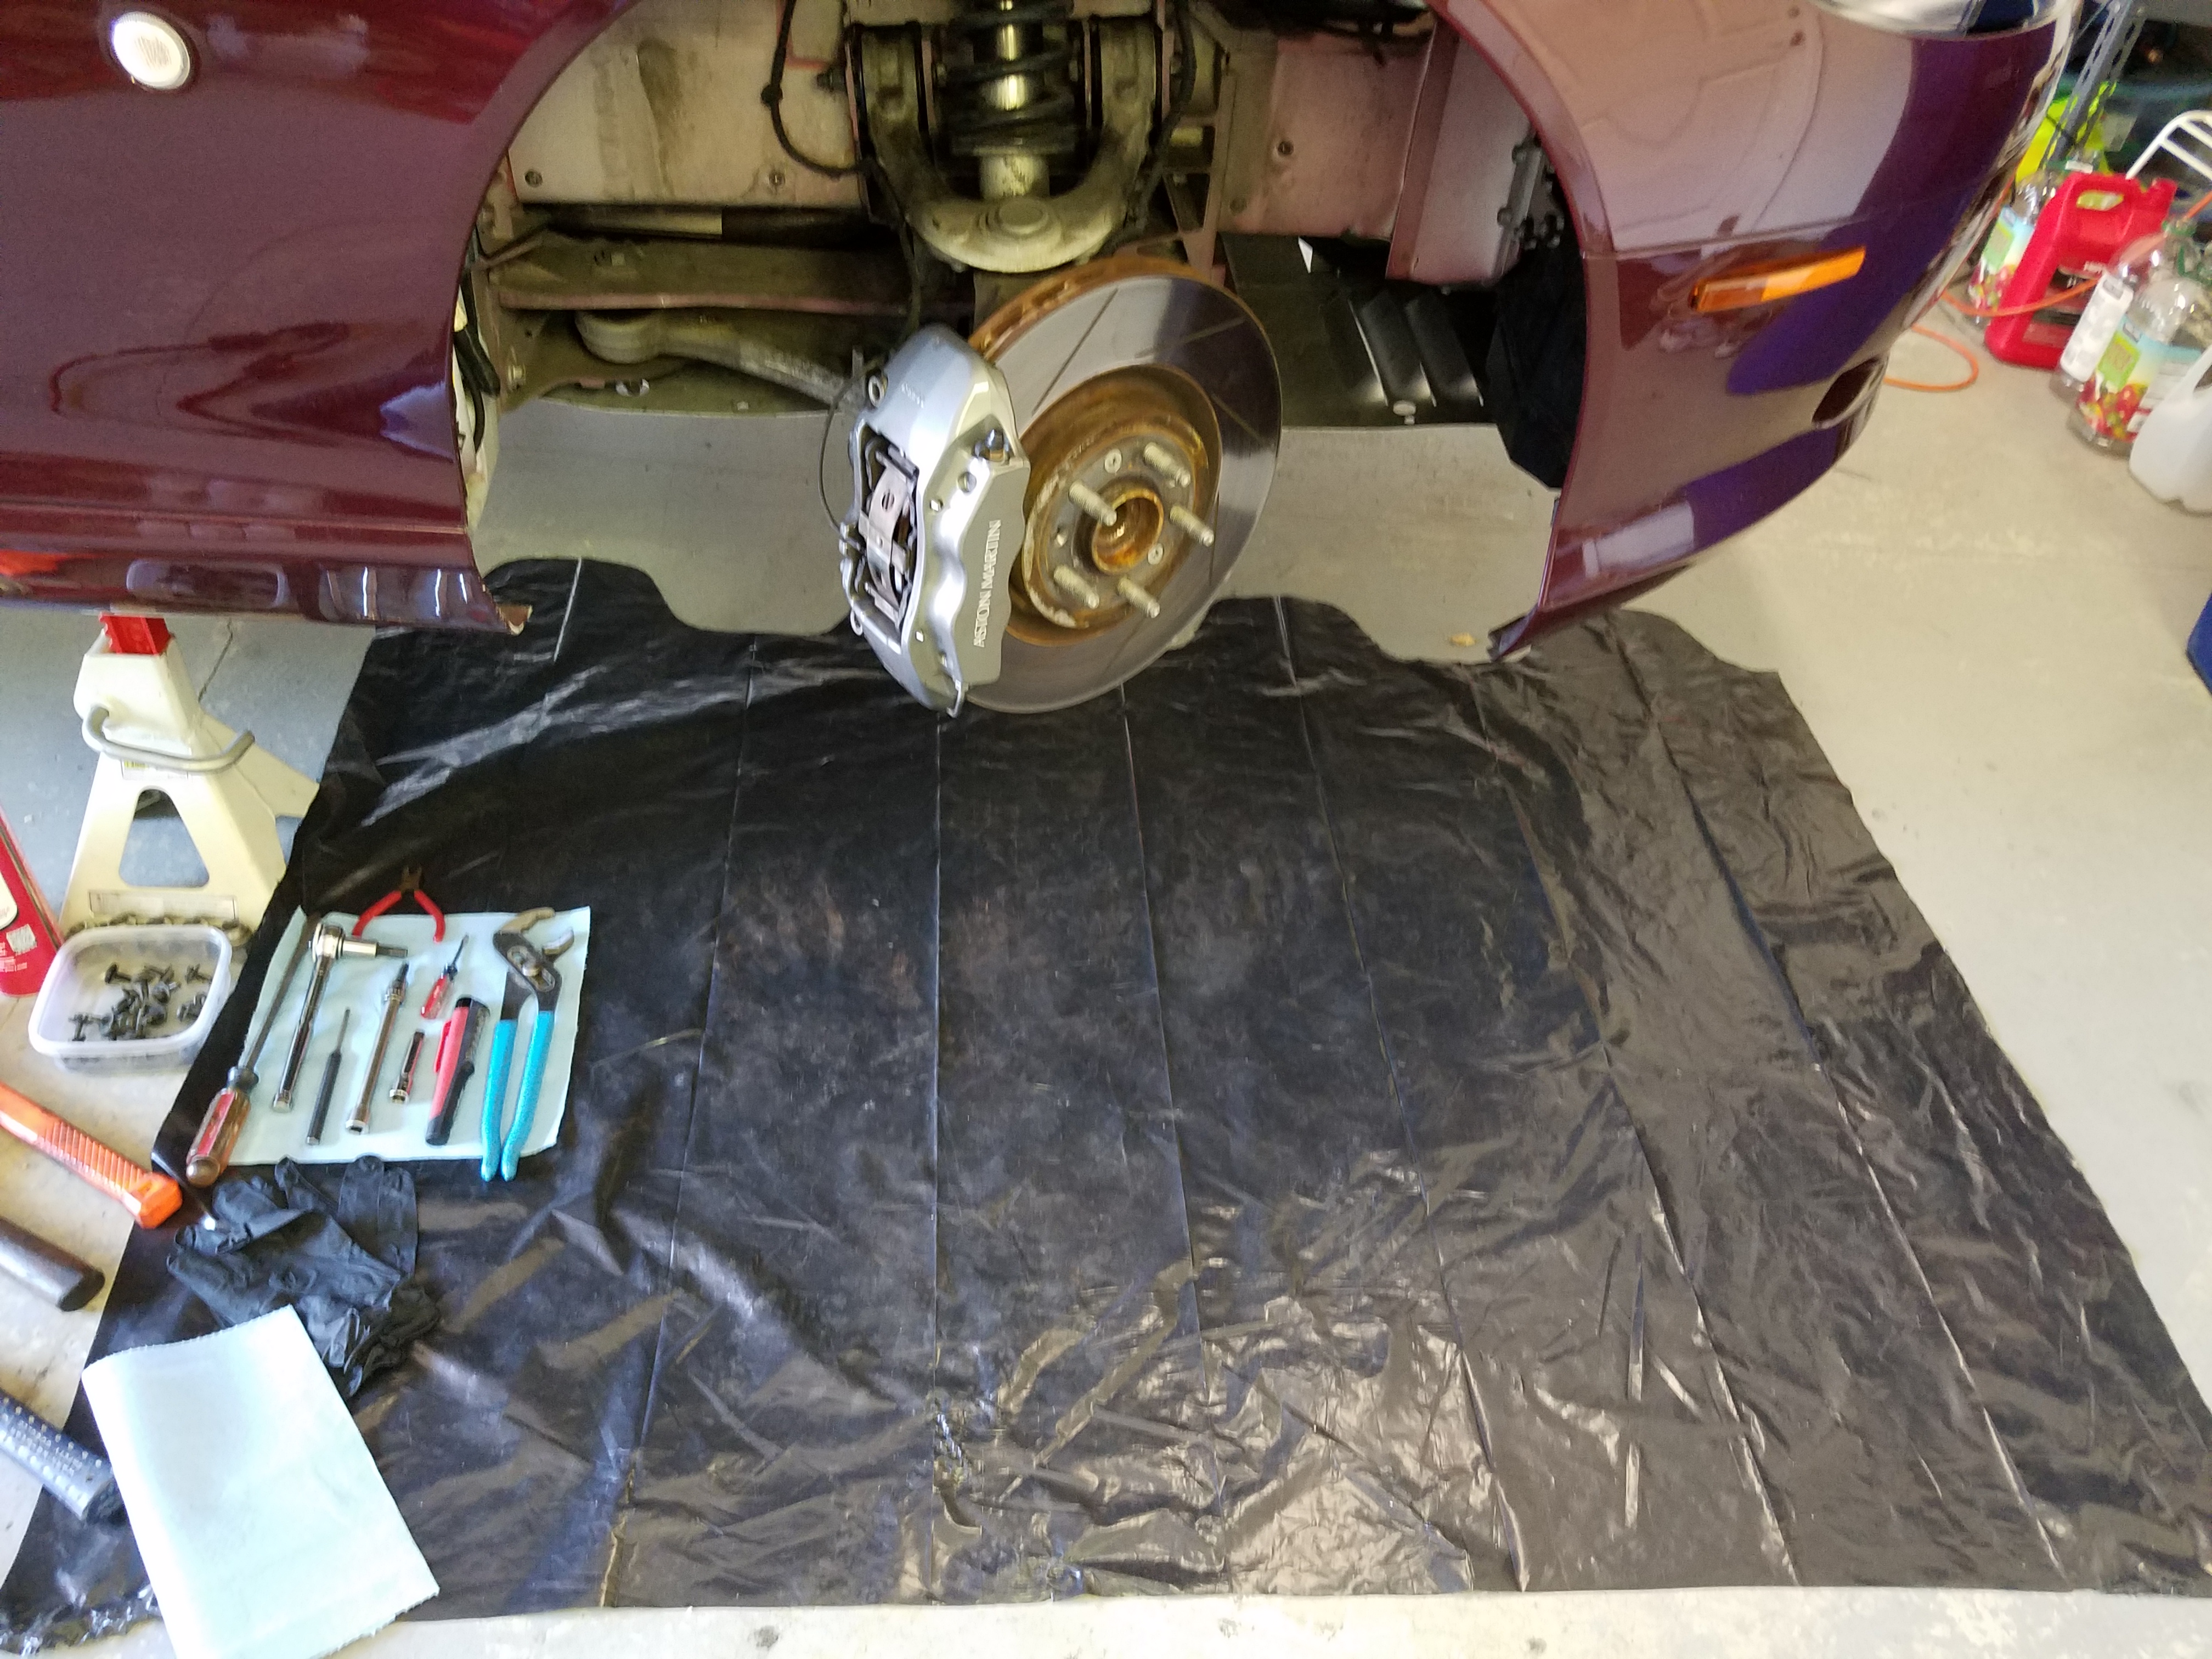
- Optional – you might want to lay down some protection on the garage floor. Brake dust, overspray from the brake cleaner, general debris that will drop out. I’ve found brake dust is like carbon and is tough to wipe off the floor (if you care). My solution is to take a large yard waste plastic garbage bag and split it at the seams and lay it down like a drop cloth. Cheap and easy to toss at the end.

Using a plastic bag as drop cloth - Remove the two brake pad retaining pins and spring plate
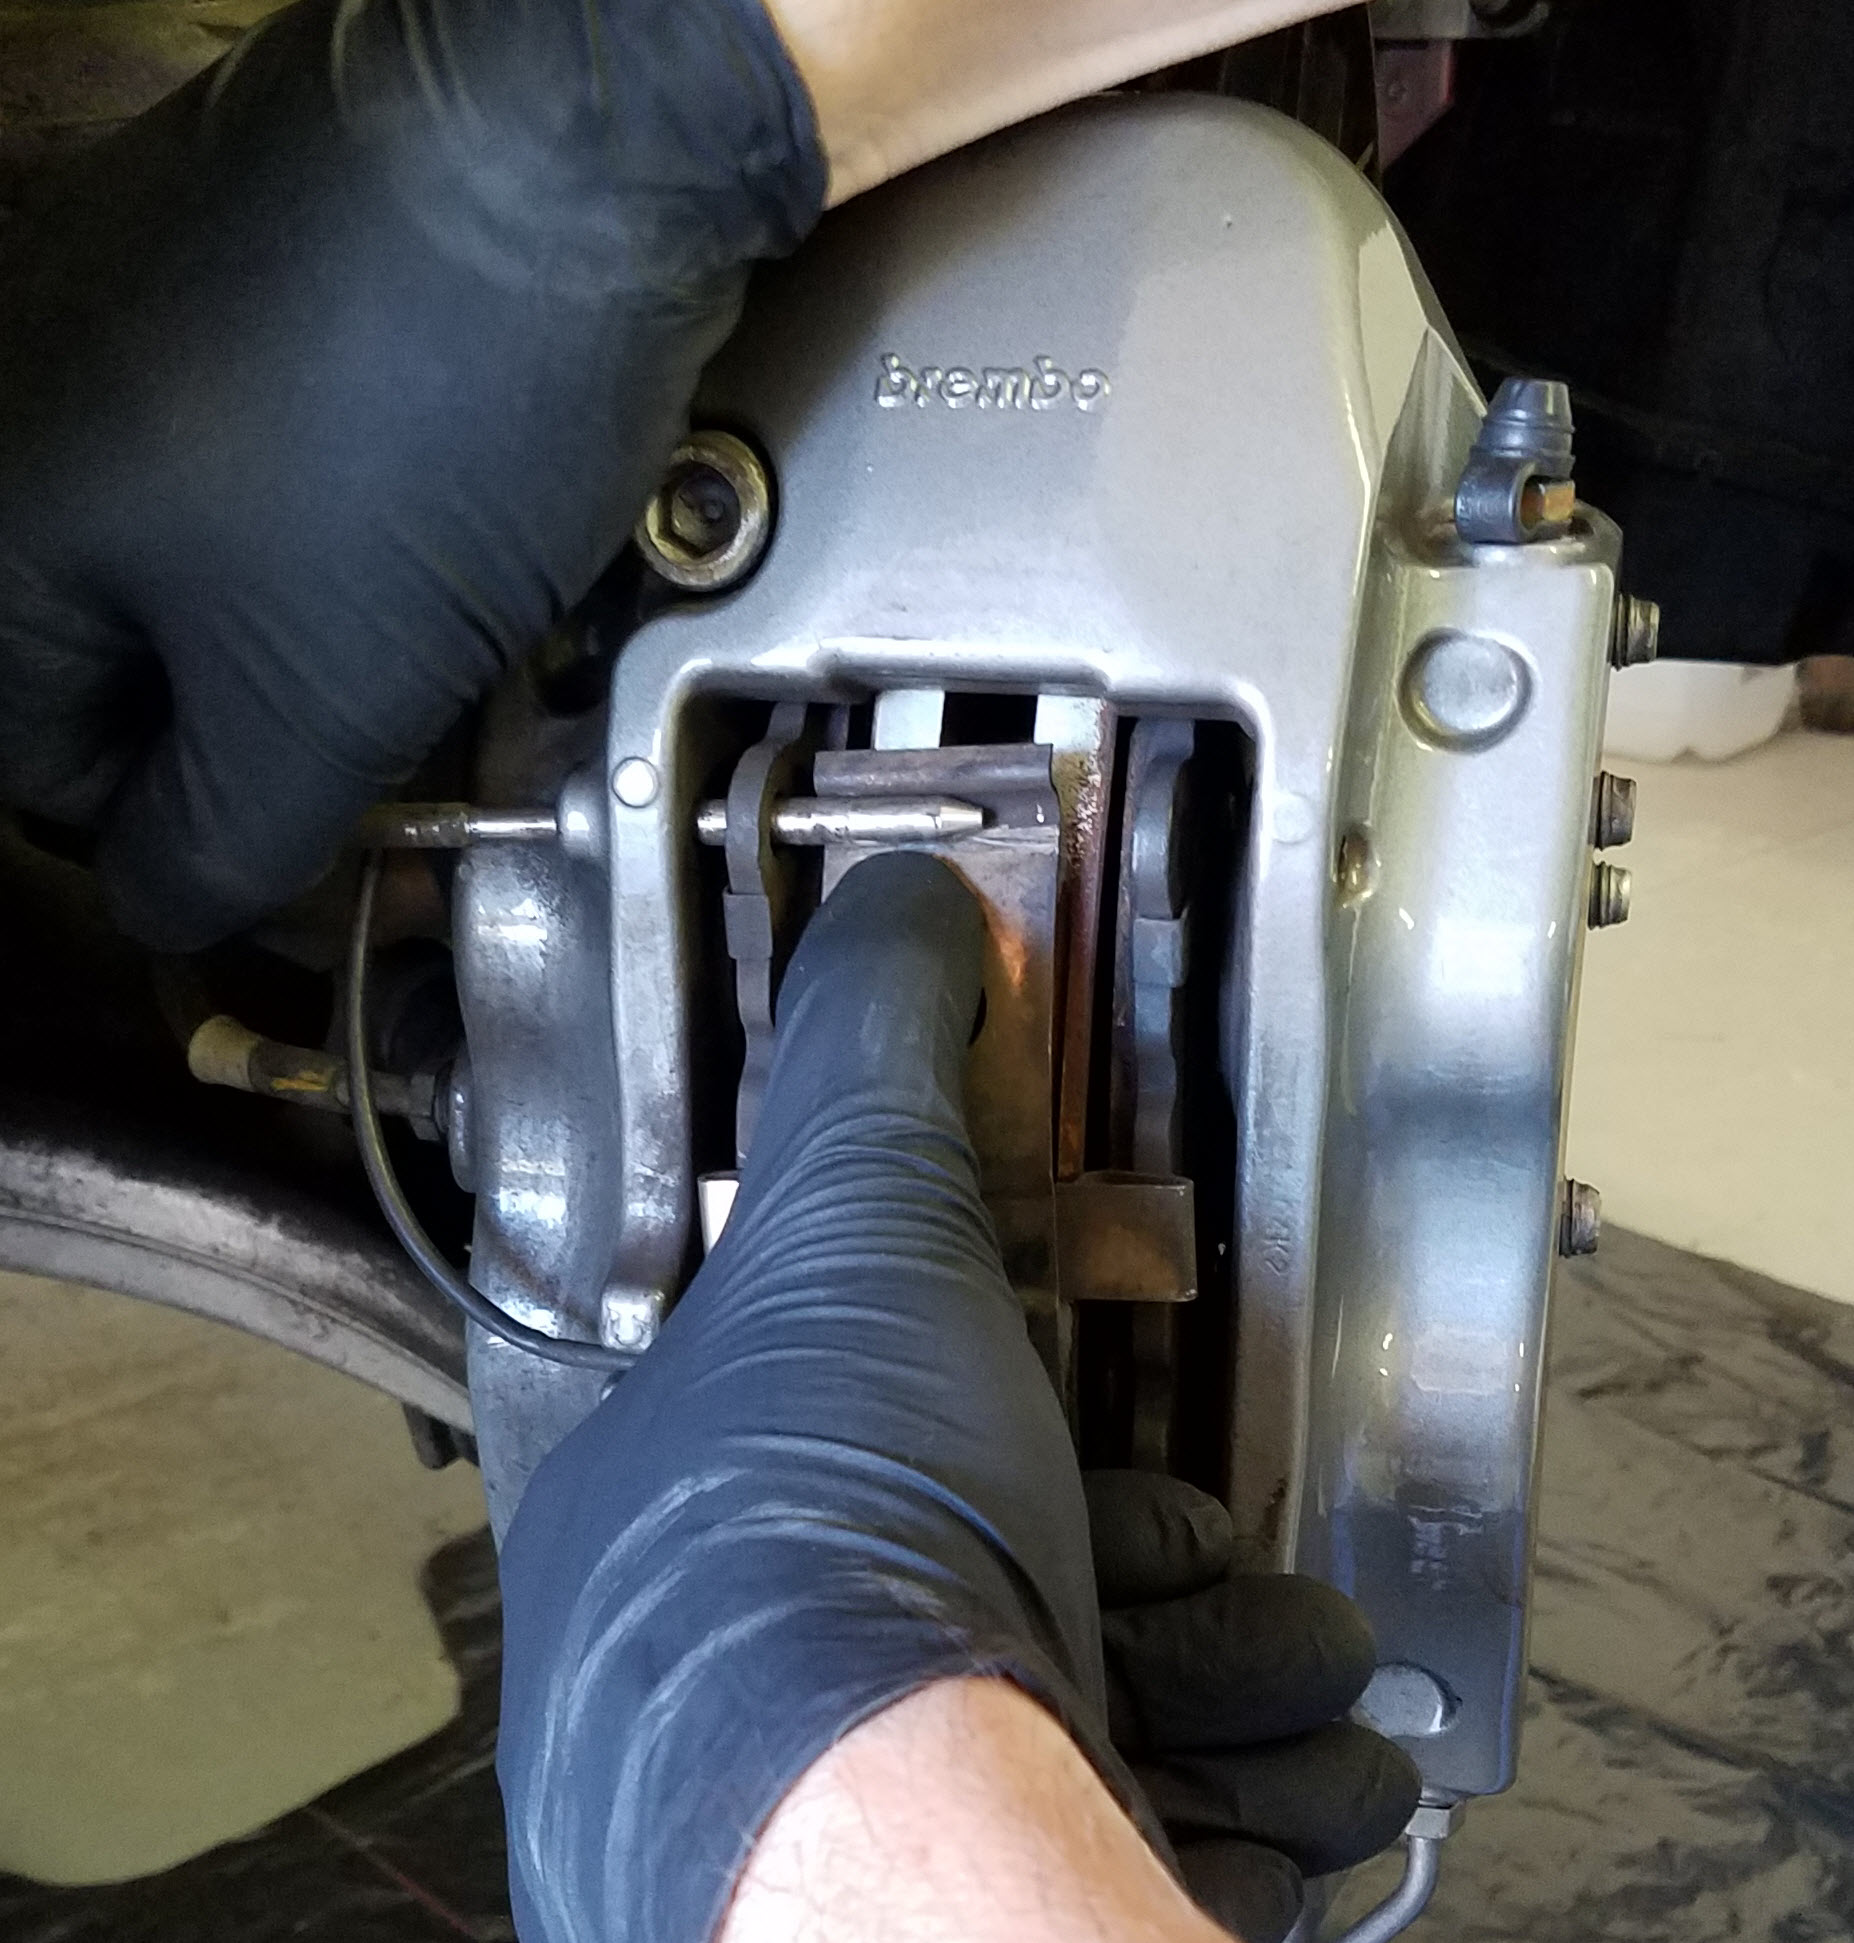
- Start with just one of the pins (I usually do the top).
- Tap the tip of the pin with your 3/16” diameter drift to keep tapping it through. It should go quite easily.

Drive the top retaining pin out half way - Once its through the first portion, it should become easy enough to pull it out the rest of the way by hand. You may need to press the spring plate out of the way with your thumb as you extract this pin.

Press in the spring plate and pull out pin - Regardless, keep one hand on the Spring Plate as it will go ‘Sproing’ and fly around your garage as the pin is finally free of it.
- The spring plate should be able to lift away by hand now.
- Remove the other pin. This should be even easier since the spring plate is now removed.

Remove the Spring Plate and Pins
- Compress the inner and outer pistons back into the caliper.
- You can do this with various creative measures, but I’ve found simply using a screwdriver in the appropriate places can get the job done well.
- I usually gently leverage between the old brake pad and the rotor with a screwdriver. Since I am about to replace the pads, I am not too worried about dinging them up, but I don’t want to damage the rotor.
- Press the pistons all the way back into the caliper to the point where the old pad is sitting ALL THE WAY FLUSH against the caliper body. You’ll need all this space to fit the new pads.
Be careful not to damage the rubber boots surrounding the pistons.
Compressing the Caliper Pistons Back In
- Periodically inspect the fluid level in the brake fluid reservoir to see if it’s about to overflow. As you compress the pistons back into the calipers, the fluid behind the piston returns to the reservoir, and it could overflow.
- If the level is close to overflowing, use your turkey baster (or similar device) to suck some of the fluid out of the reservoir.
- In the Video you’ll see me using my MityVac brake bleeding tool, and using the straw tip of it to suck out the fluid quickly and cleanly, storing it in the Mityvac reservoir.
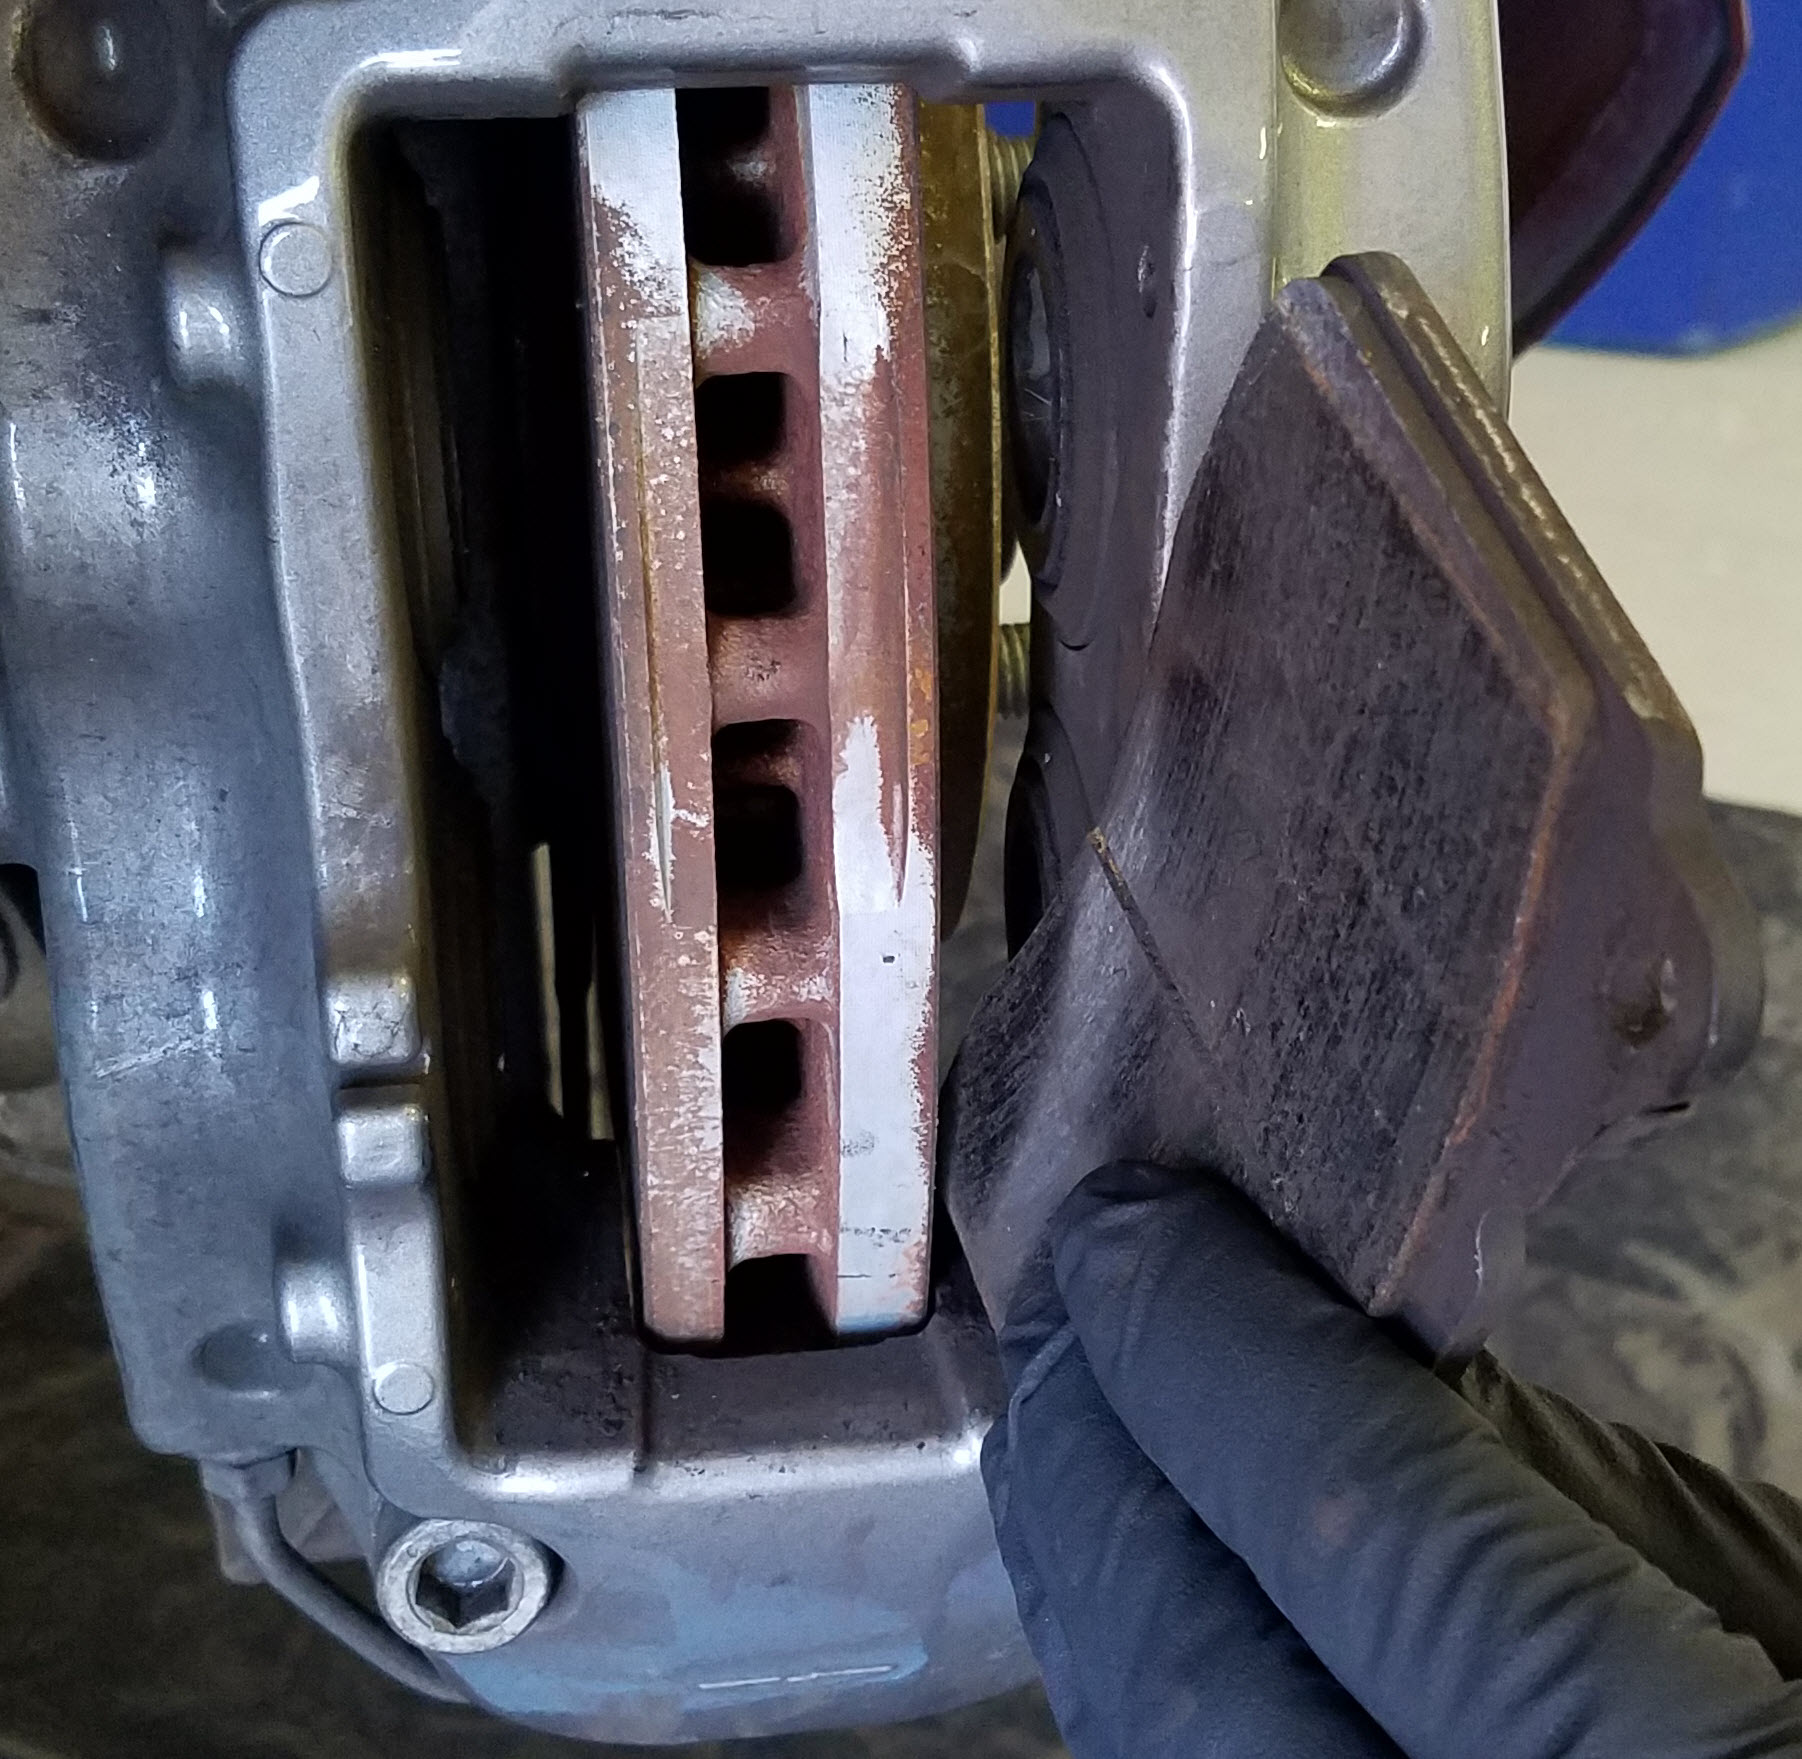
- Remove the brake pads and shims
- With the pistons retracted and the pins now removed, the brake pads should now slide easily straight out of the caliper.
- On the inner pad of each caliper there will be a brake wear sensor attached in a slot.
- As you extract the pad, you’ll need to carefully pryse the sensor head along the grooves and out of the slot. If there is a lot of dust and debris in the slot, you might opt to use some brake clean spray to make this easier.
- I usually pry the sensor along using a flat blade screwdriver.
- You need to be really gentle with this sensor. It’s plastic and you can crack it (trust me, I know). It’s been baking in the heat from the brake system for years, so it may have turned brittle. If you break it, you’ll need to replace it.
- Watch for any ‘shims’ that may be on the back side of the pad between it and the piston. Remove the shims too.

Remove the Inner Brake Pad and detach the wear sensor 
Remove the Outer Brake Pad
- With the pistons retracted and the pins now removed, the brake pads should now slide easily straight out of the caliper.
- Clean the Caliper body, pins and spring clip
- With the pads removed we now have better access to the surfaces inside the caliper body. The pads ‘slide’ along a surface of the caliper, and brake dust and road grime can combine to gunk this up making it difficult for the pads to slide properly.
- NEVER use compressed air to blow the brake dust off the caliper. This stuff is bad mojo for your lungs (it doesn’t contain asbestos anymore, but the dust is very fine and you don’t want to be inhaling it)

Carefully clean off brake dust and grease from the Caliper - Use a combination of your shop rags and brake clean aerosol to wash up the caliper surfaces, the two guide pins and spring clip.

Clean the retaining pins and spring plate - If your guide pins are corroded you might take some time and give them a polish. Emery paper or a wire wheel can do the trick.

Buffing corrosion from Retaining Pins
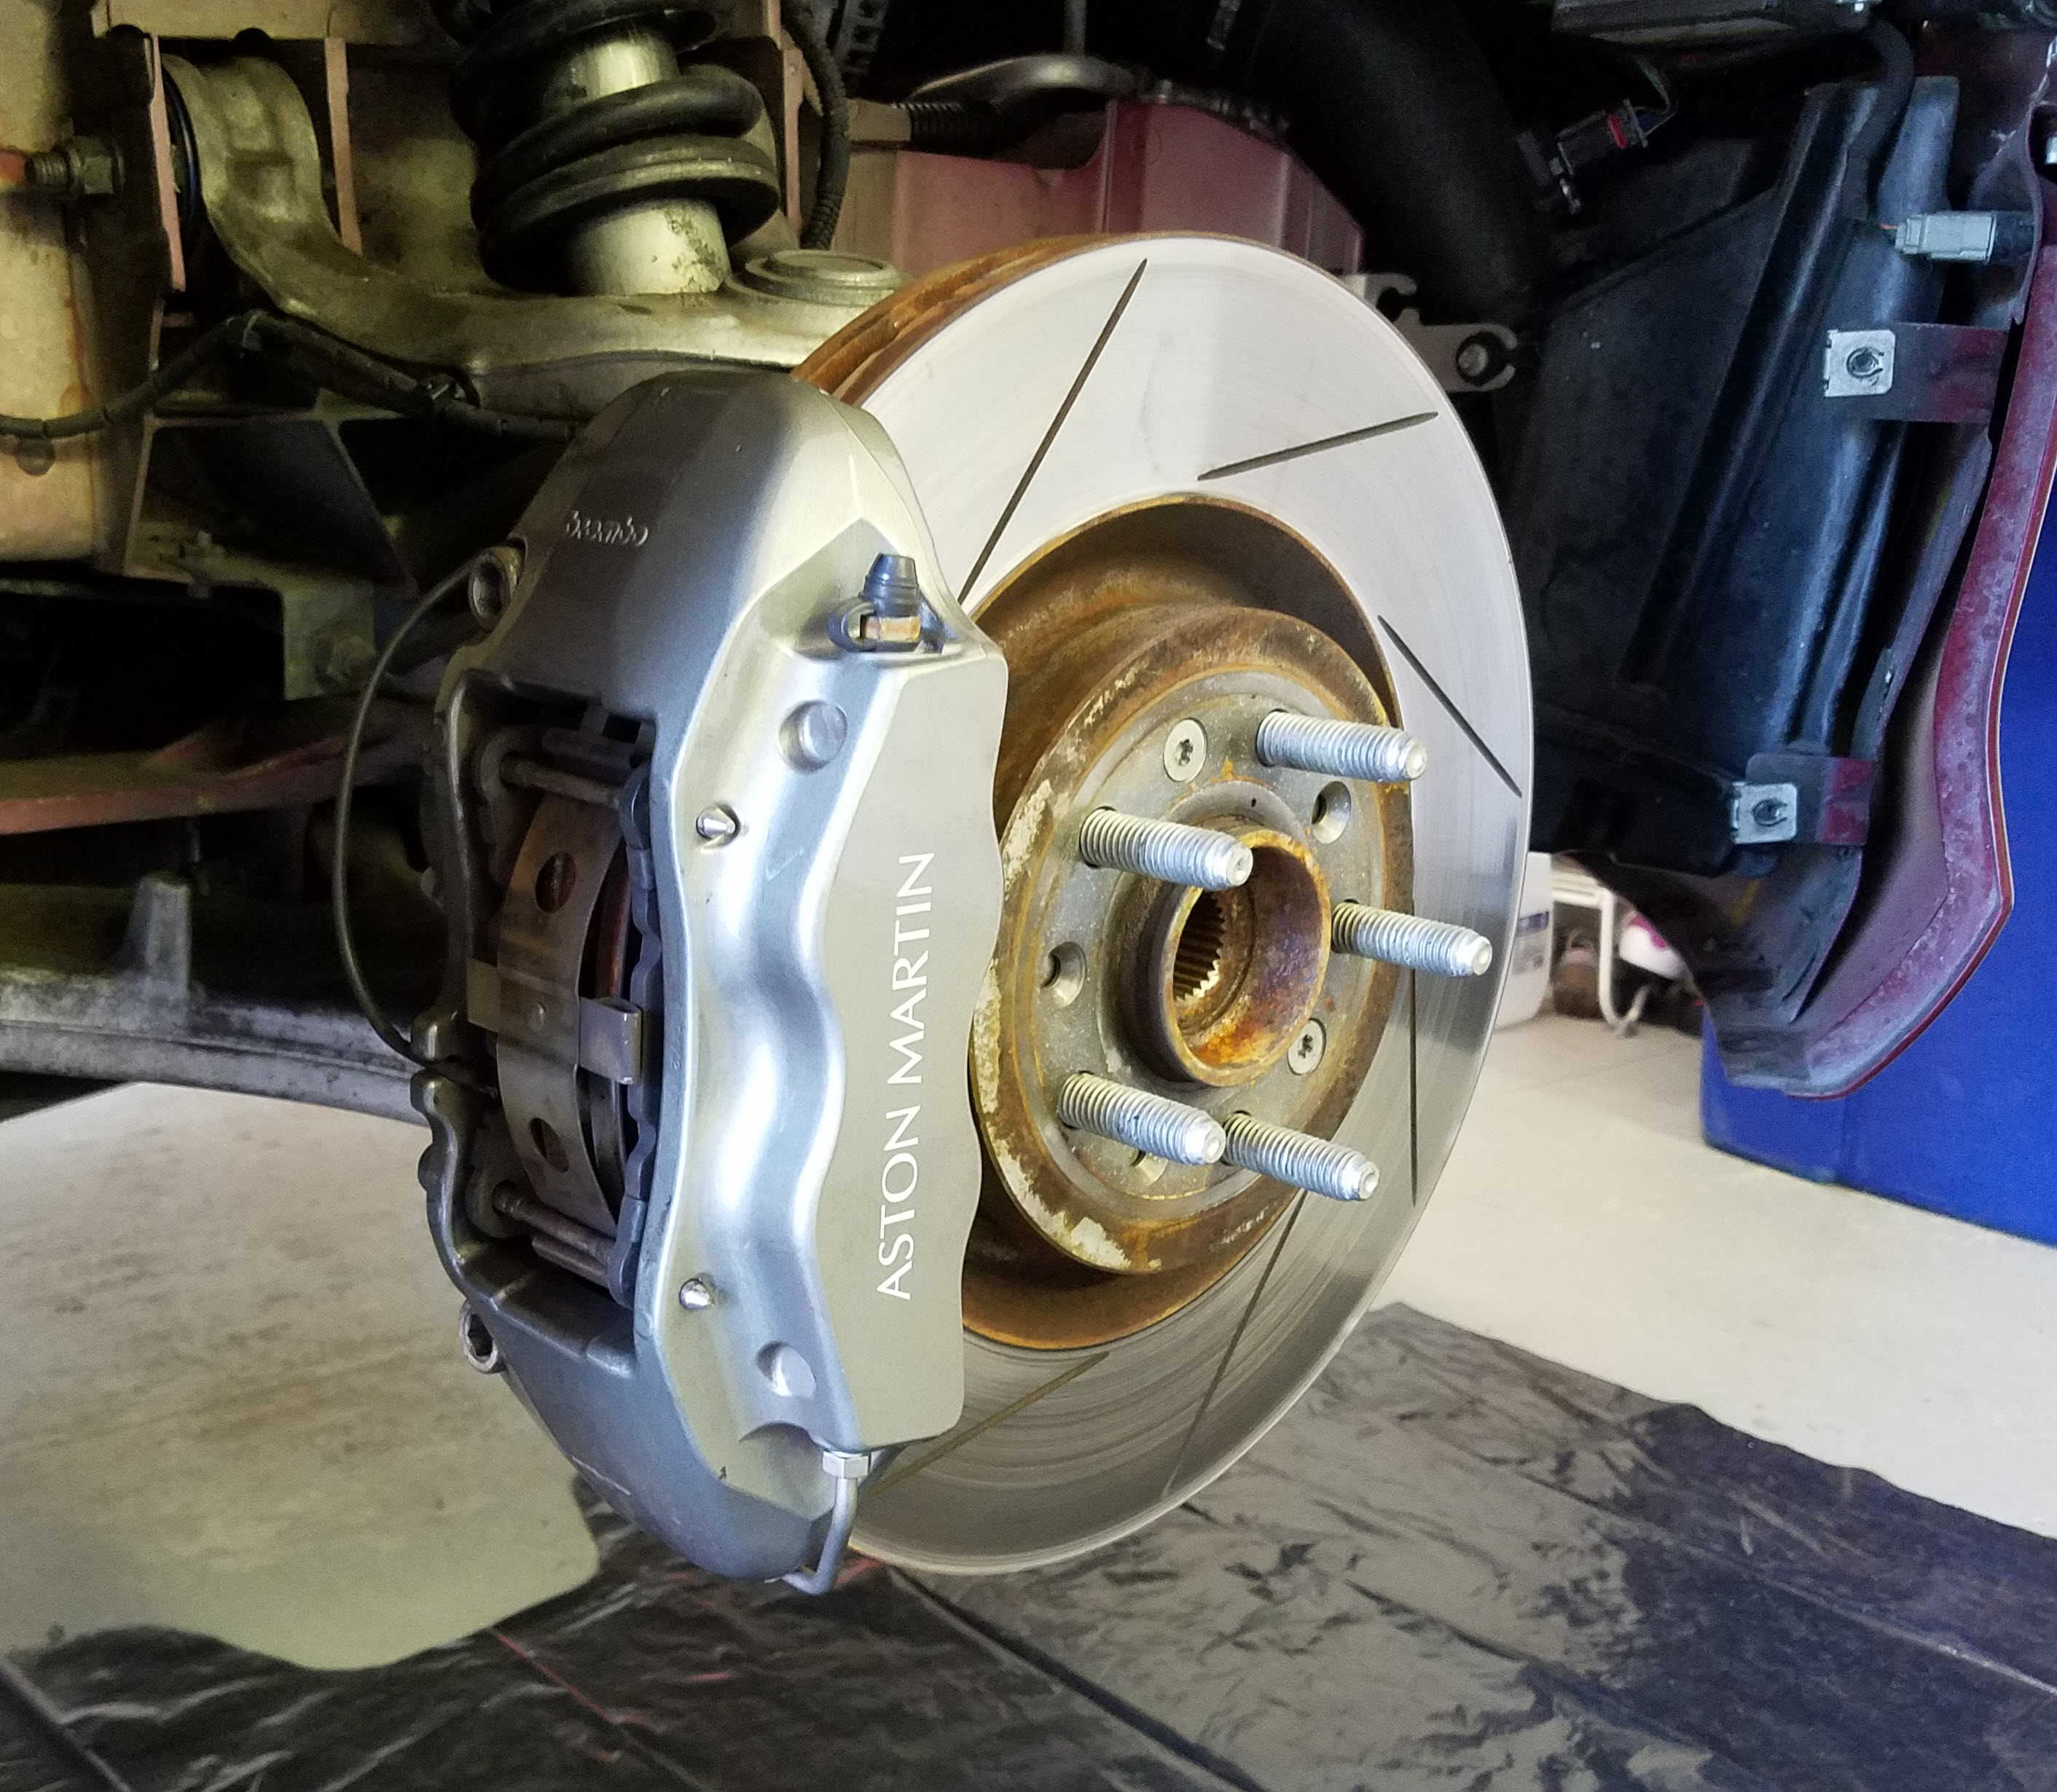
- Inspect the caliper
- With the pads removed and the caliper now clean you can do an even better inspection of its condition. Use your inspection light to get a good look.
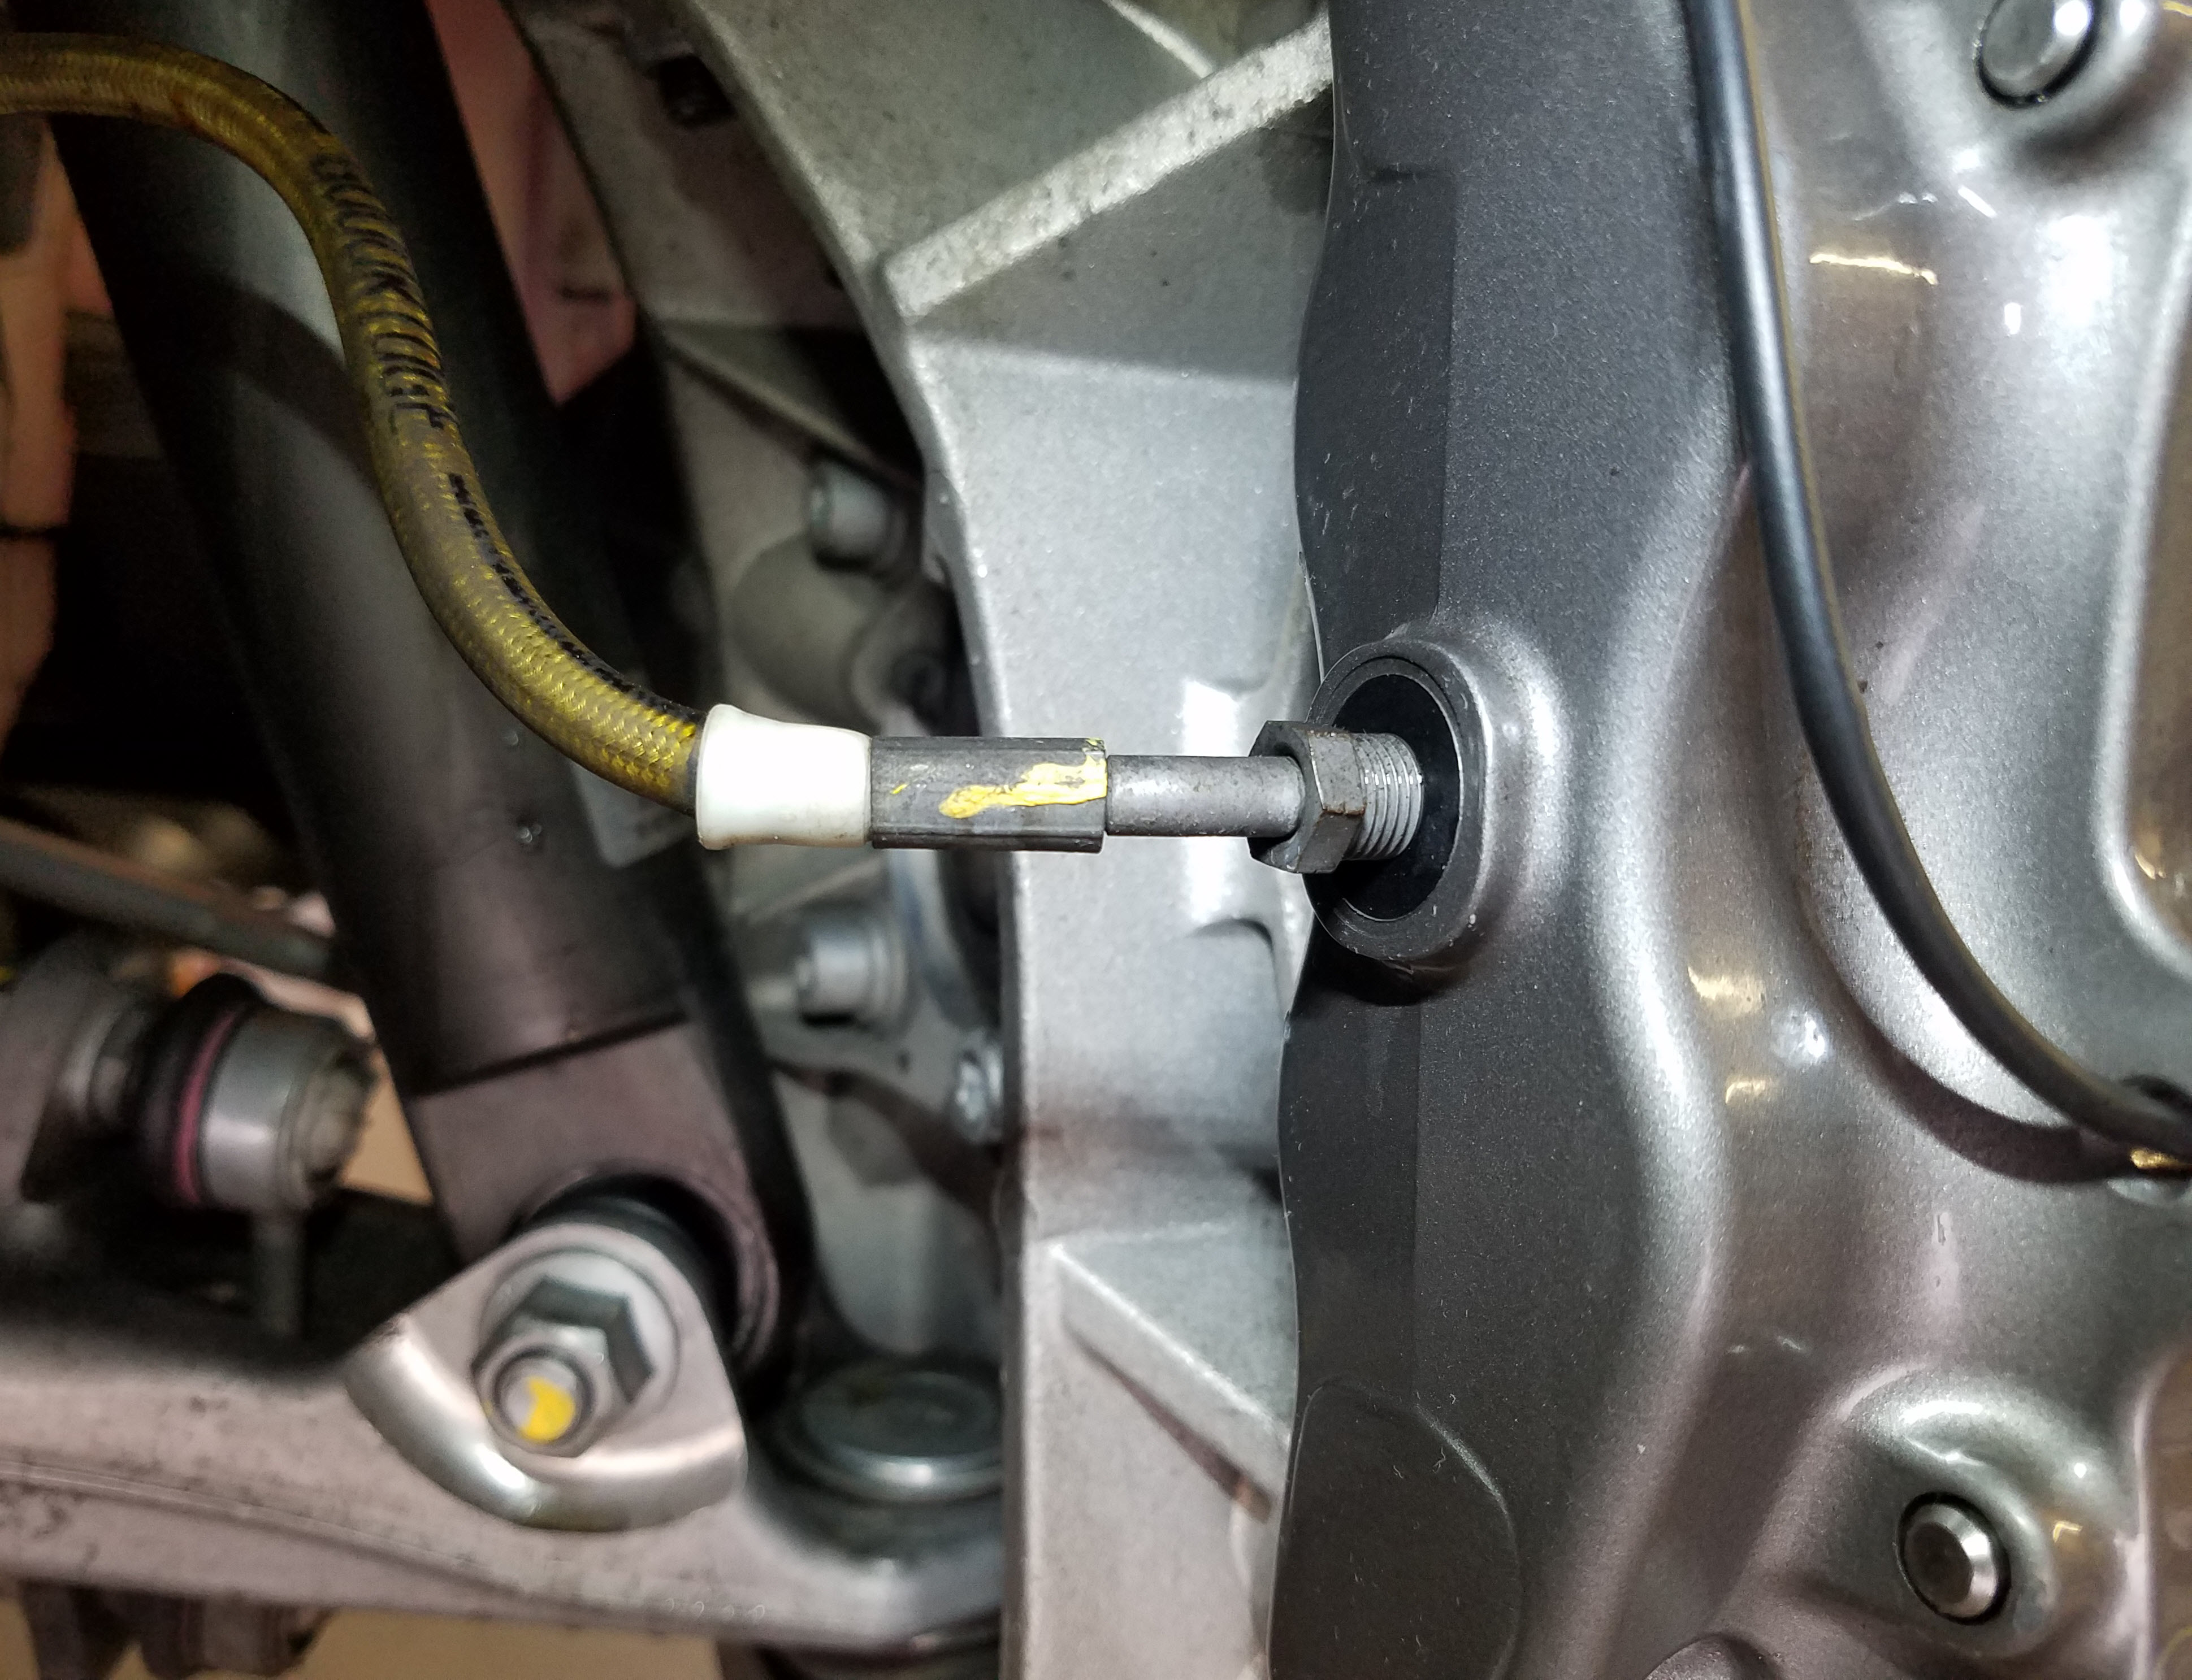
- Check for cracked or torn rubber boots around the pistons. If you find any, you’ll need to service the caliper.
- Check for leaking brake fluid around the pistons or fittings. If ANY amount of fluid is visible, this is bad news and the caliper needs to be serviced.

Inspect the brake line union and caliper piston boots for any signs of leaking
- With the pads removed and the caliper now clean you can do an even better inspection of its condition. Use your inspection light to get a good look.
- Lubricate the slide rails and guide pins
- In preparation for inserting the new brake pads apply some high temperature specialty brake grease (not regular grease!) to the slide rail surface of the caliper and guide pins. We want the pads to be able to slide easily on the pins and caliper contact surface.
- There are four contact surfaces in the caliper, a lower and upper for each pad. Be sure to apply a thin layer of grease to all four surfaces.

Lubricate the Brake Pad Resting Surfaces (Yes – I am cheating and have the Caliper Removed in this photo so I can show you more clearly) - Be careful to NOT get brake grease onto the surface of the rotor that will be just millimeters away. If you do, this isn’t the end of the world, just rotate the rotor a quarter turn to expose the contaminated area, and use the brake clean spray and rags to remove it. Check the inner and outer faces of the rotor!
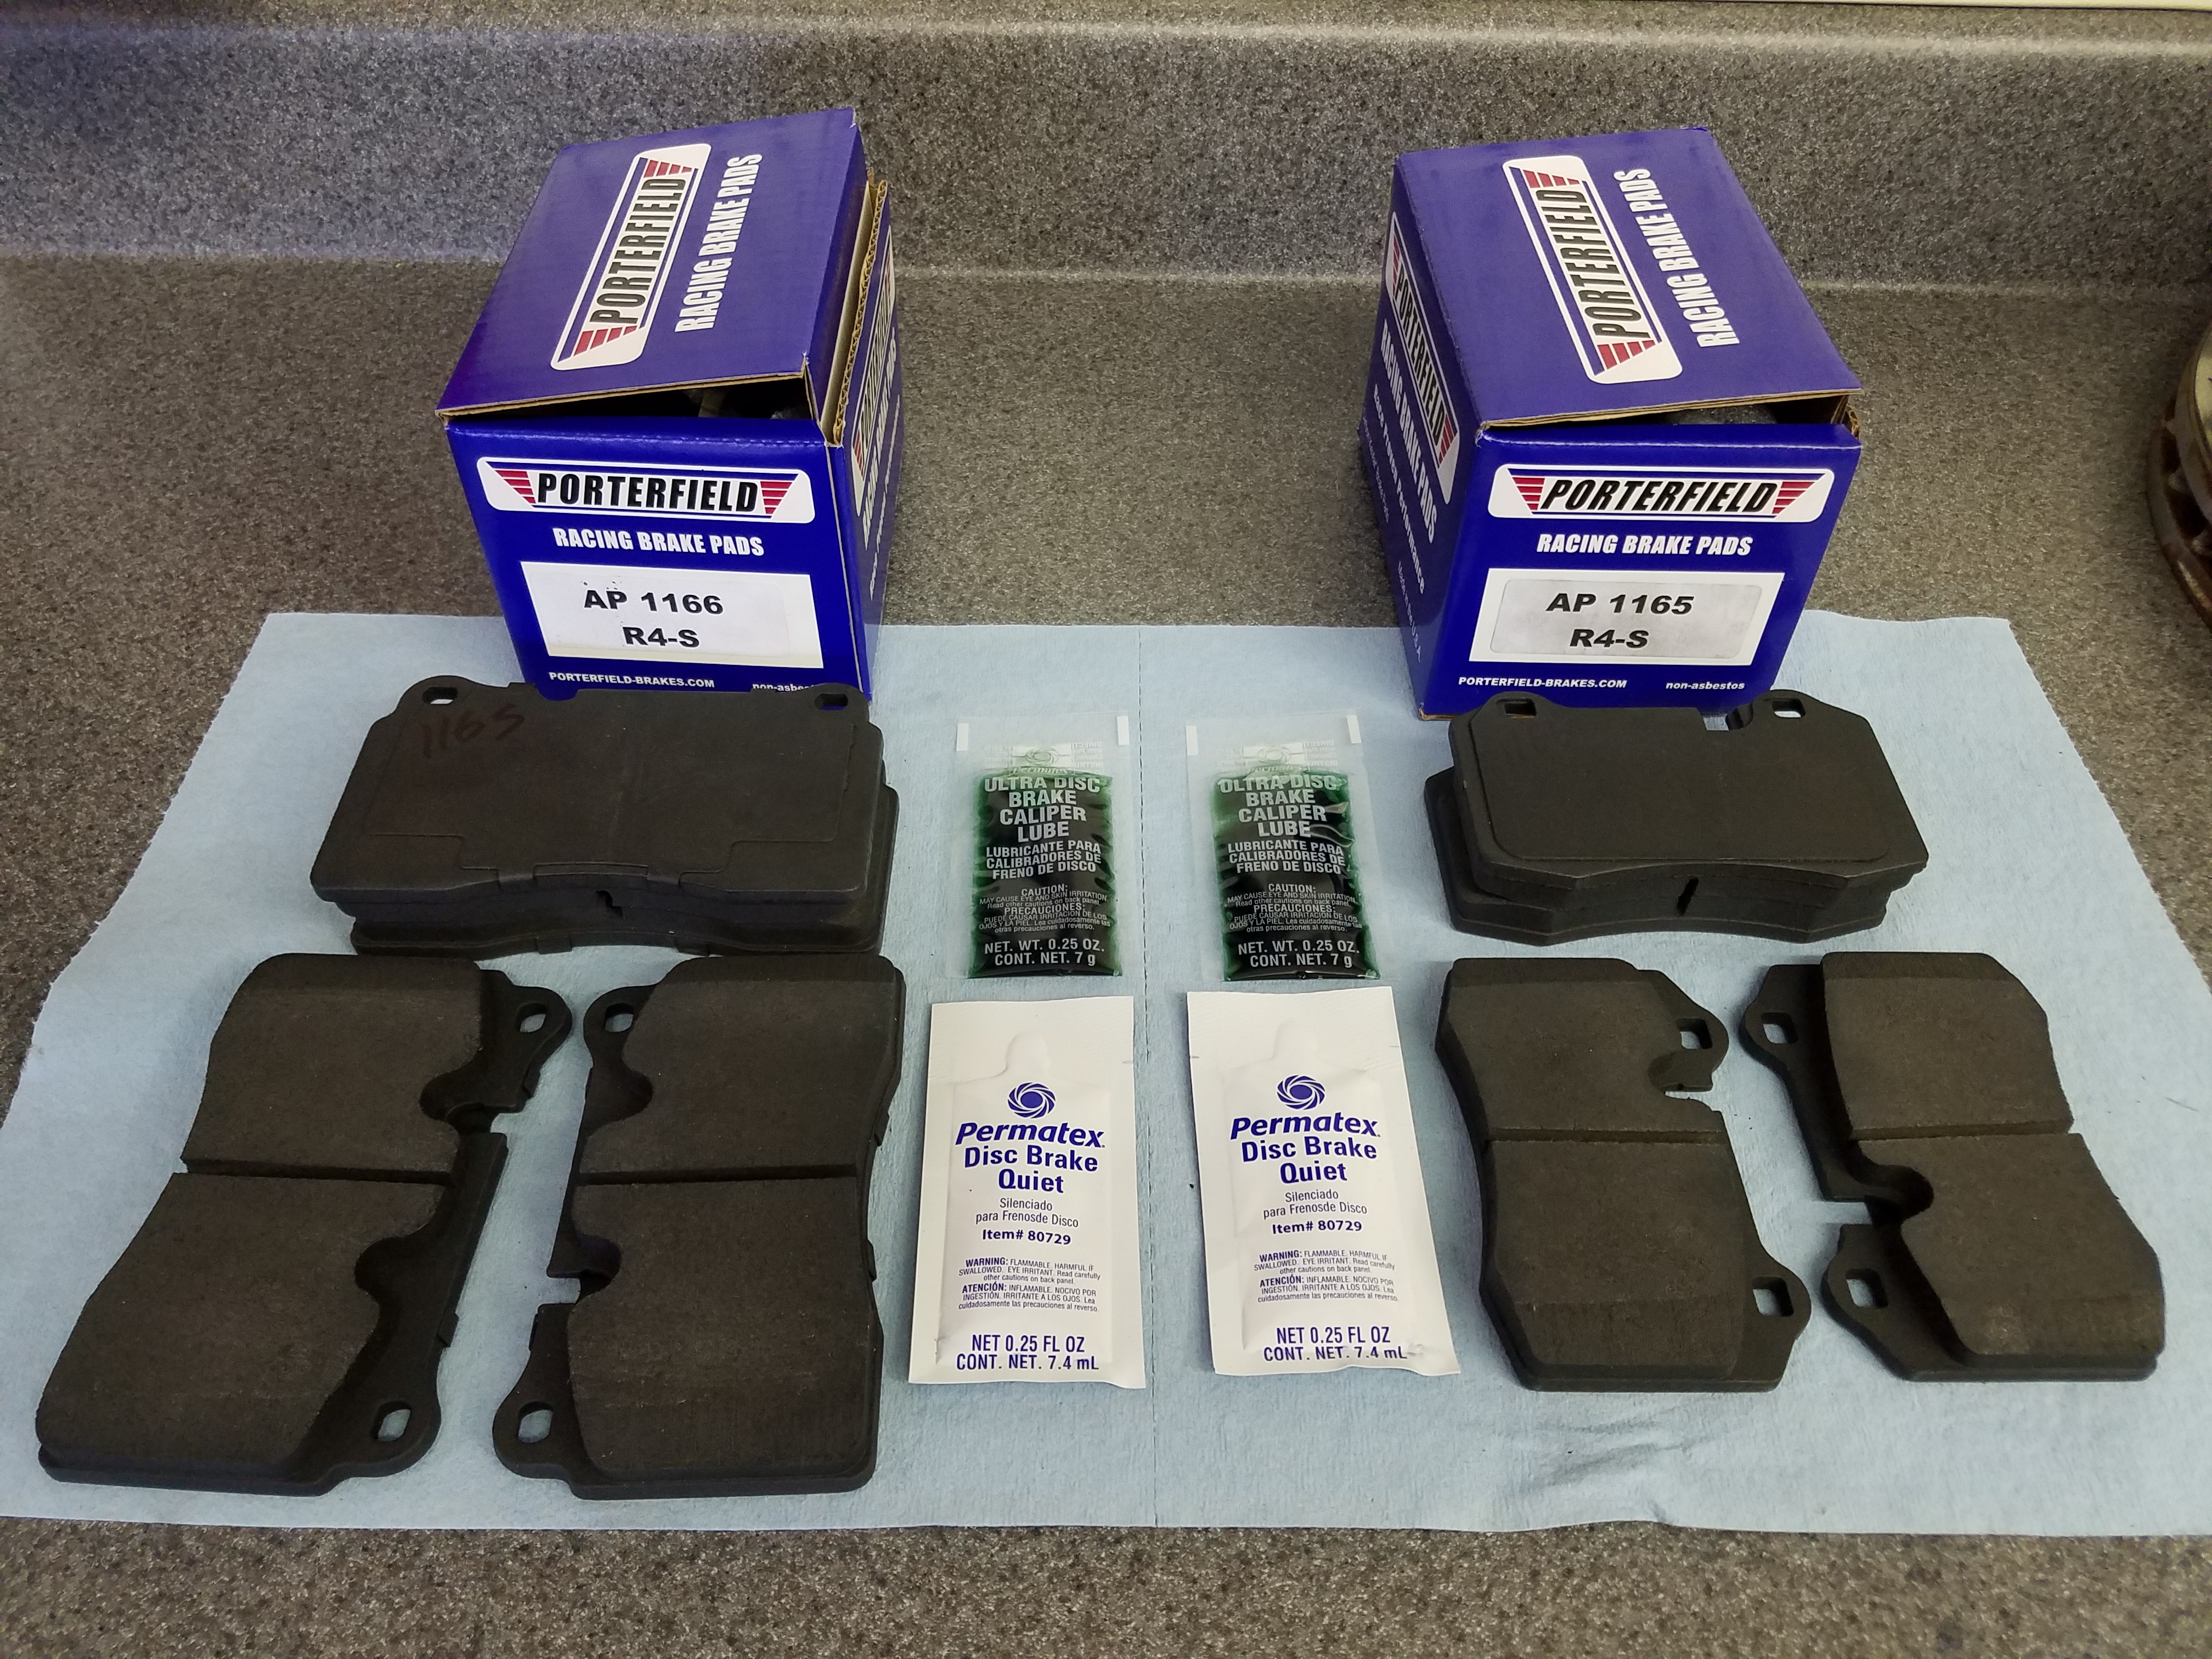
- Prepare your new Brake Pads before we install them.
- I’ve had trouble with aftermarket pads (like the Porterfield and EBC brands) properly fitting with the brake wear sensors. Generally the slots have been fractionally too small for the sensor, and have needed some fettling with a flat file first to remove any burrs or excess paint for the sensor to slot in properly. It is MUCH EASIER to do a test fit of this before you apply any anti-squeal compound to the pads (they get gooey). If you have a spare wear sensor, you can do this on the work bench. If not, just take one of the pads over to the car and try it with the sensor in place. Adjust as needed. Remember you only need to do this for one pad that will be the INNER pad, the outer doesn’t get a sensor.

With an aftermarket pad be sure to test fit the Brake Wear Sensor and fettle as needed - Fit the anti-squeal shims to the pads. If your new pads came with new ones, great, use them. If not, transfer the shims from your old pads (just be sure to clean them and make sure they fit snug).

Fit the Anti-Squeal Shims to the back of the pads - Coat with anti-squeal shims with anti-squeal brake paste. Aston Martin’s Service Bulletin SB-06-0344V2 recommends to slather the whole rear face, edges and retaining pin holes. Personally I think its only necessary to coat the area where the pad contacts the piston cups. The purpose of the paste is to act like a rubber buffer, so applying it elsewhere serves no purpose. The piston cups press on the shim, so if you just coat the entire back of the shim you can be assured you have it done right.

Apply Anti-Squeal Paste to the back of the shim - Let the paste dry according to the instructions for the brand of anti-squeal paste you are using. For me, it was about 5 minutes.

Pads ready to install
- I’ve had trouble with aftermarket pads (like the Porterfield and EBC brands) properly fitting with the brake wear sensors. Generally the slots have been fractionally too small for the sensor, and have needed some fettling with a flat file first to remove any burrs or excess paint for the sensor to slot in properly. It is MUCH EASIER to do a test fit of this before you apply any anti-squeal compound to the pads (they get gooey). If you have a spare wear sensor, you can do this on the work bench. If not, just take one of the pads over to the car and try it with the sensor in place. Adjust as needed. Remember you only need to do this for one pad that will be the INNER pad, the outer doesn’t get a sensor.
- Install the new brake pads
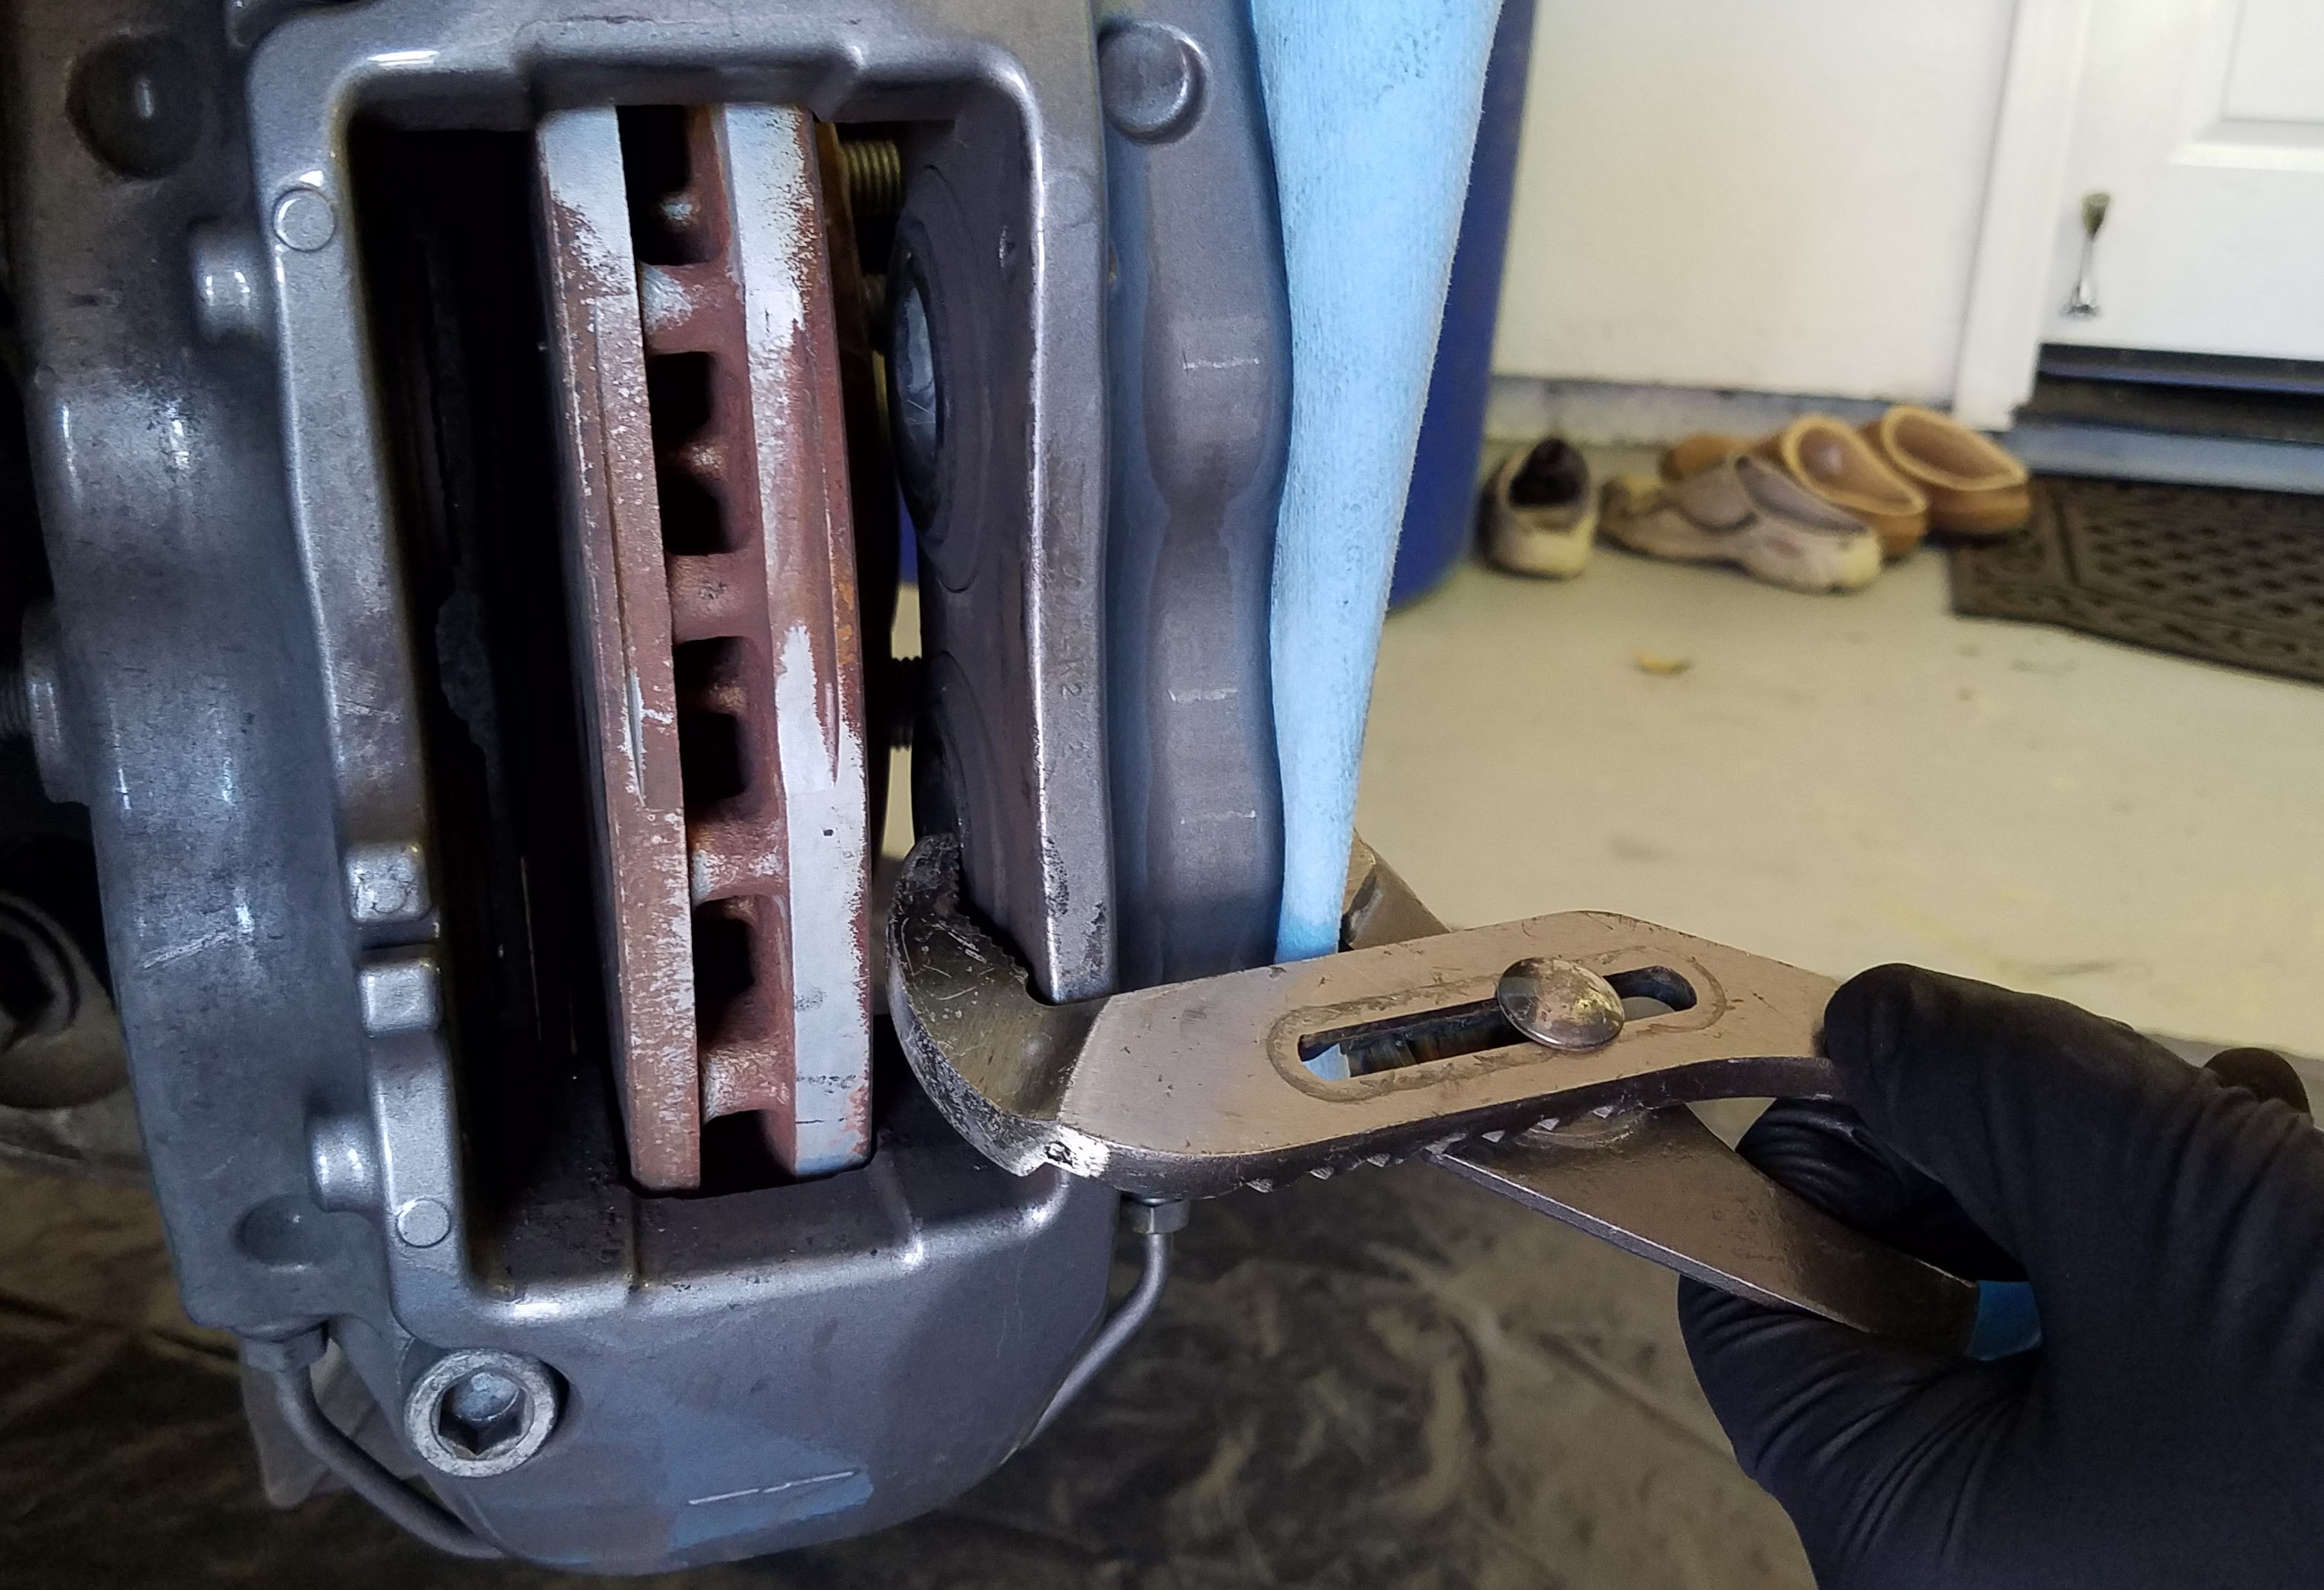
- Check that your Caliper Pistons are still fully compressed. They need to be pushed in completely flush to the Caliper face. If they still need to go in a little further, you can fiddle around and lever them with a large screwdriver, or perhaps use a large pair of pliers and carefully squeeze them in (protect the caliper paint from the pliers with a rag, etc.). The pistons should move easily, but you might have to play a bit of ‘whack a mole’ as you squeeze in on piston, another might come out a bit. Keep at it until all four pistons are fully flush.

Using Pliers to carefully compress the Caliper Pistons - Connect the Brake Wear Sensor to the inner brake pad. Partially install the brake pad, and while you still have easy access slide the wear sensor fully down the slot until completely seated. TIP – choose the correct brake pad that has the slot that aligns next to the cable passage notch in the caliper body. The first time I fitted one I kept wondering why the cable wouldn’t reach and was flopping around. Use the other pad!
- Slide the Inner and Outer pads carefully into place. Push them in until the retaining pin holes line up with the holes in the caliper body.
- Install the lower retaining pin first. Carefully push it through the inner caliper hole, then across through both pads and finally tap it into place until you hear it solidly bottom out. The tip should be all the way through as in the initial photo up above.
- Install the spring clip. Start by dipping the end of the spring clip under the lower pin you just installed so it properly rests in the groove. Then stand the clip upright so it starts to press against the pads. Hold it here until you tackle the final pin.
- Install the upper pin. Like the lower pin, push the pin through the inner caliper hole, then the inner pad. At this point use the thumb of your other hand to press the spring clip in and push the pin the rest of the way across and through the outer pad and caliper hole. Tap it firmly into place until it bottoms out.

Upper Pin and Spring Plate Installed - Finally fit the brake wear sensor cable into the notch of caliper and that it is folder out of the way.

Everything refitted and in its place.
- Check that your Caliper Pistons are still fully compressed. They need to be pushed in completely flush to the Caliper face. If they still need to go in a little further, you can fiddle around and lever them with a large screwdriver, or perhaps use a large pair of pliers and carefully squeeze them in (protect the caliper paint from the pliers with a rag, etc.). The pistons should move easily, but you might have to play a bit of ‘whack a mole’ as you squeeze in on piston, another might come out a bit. Keep at it until all four pistons are fully flush.
- Check both the inner and outer face of the brake rotor to be sure you don’t have any grease or debris on it. Don’t skip checking the inner face – get your inspection light and crane your head around in there to see. Use the brake clean spray and a clean rag to wipe away anything that got on the rotor during the servicing.
- Now repeat the process on the other wheel(s).

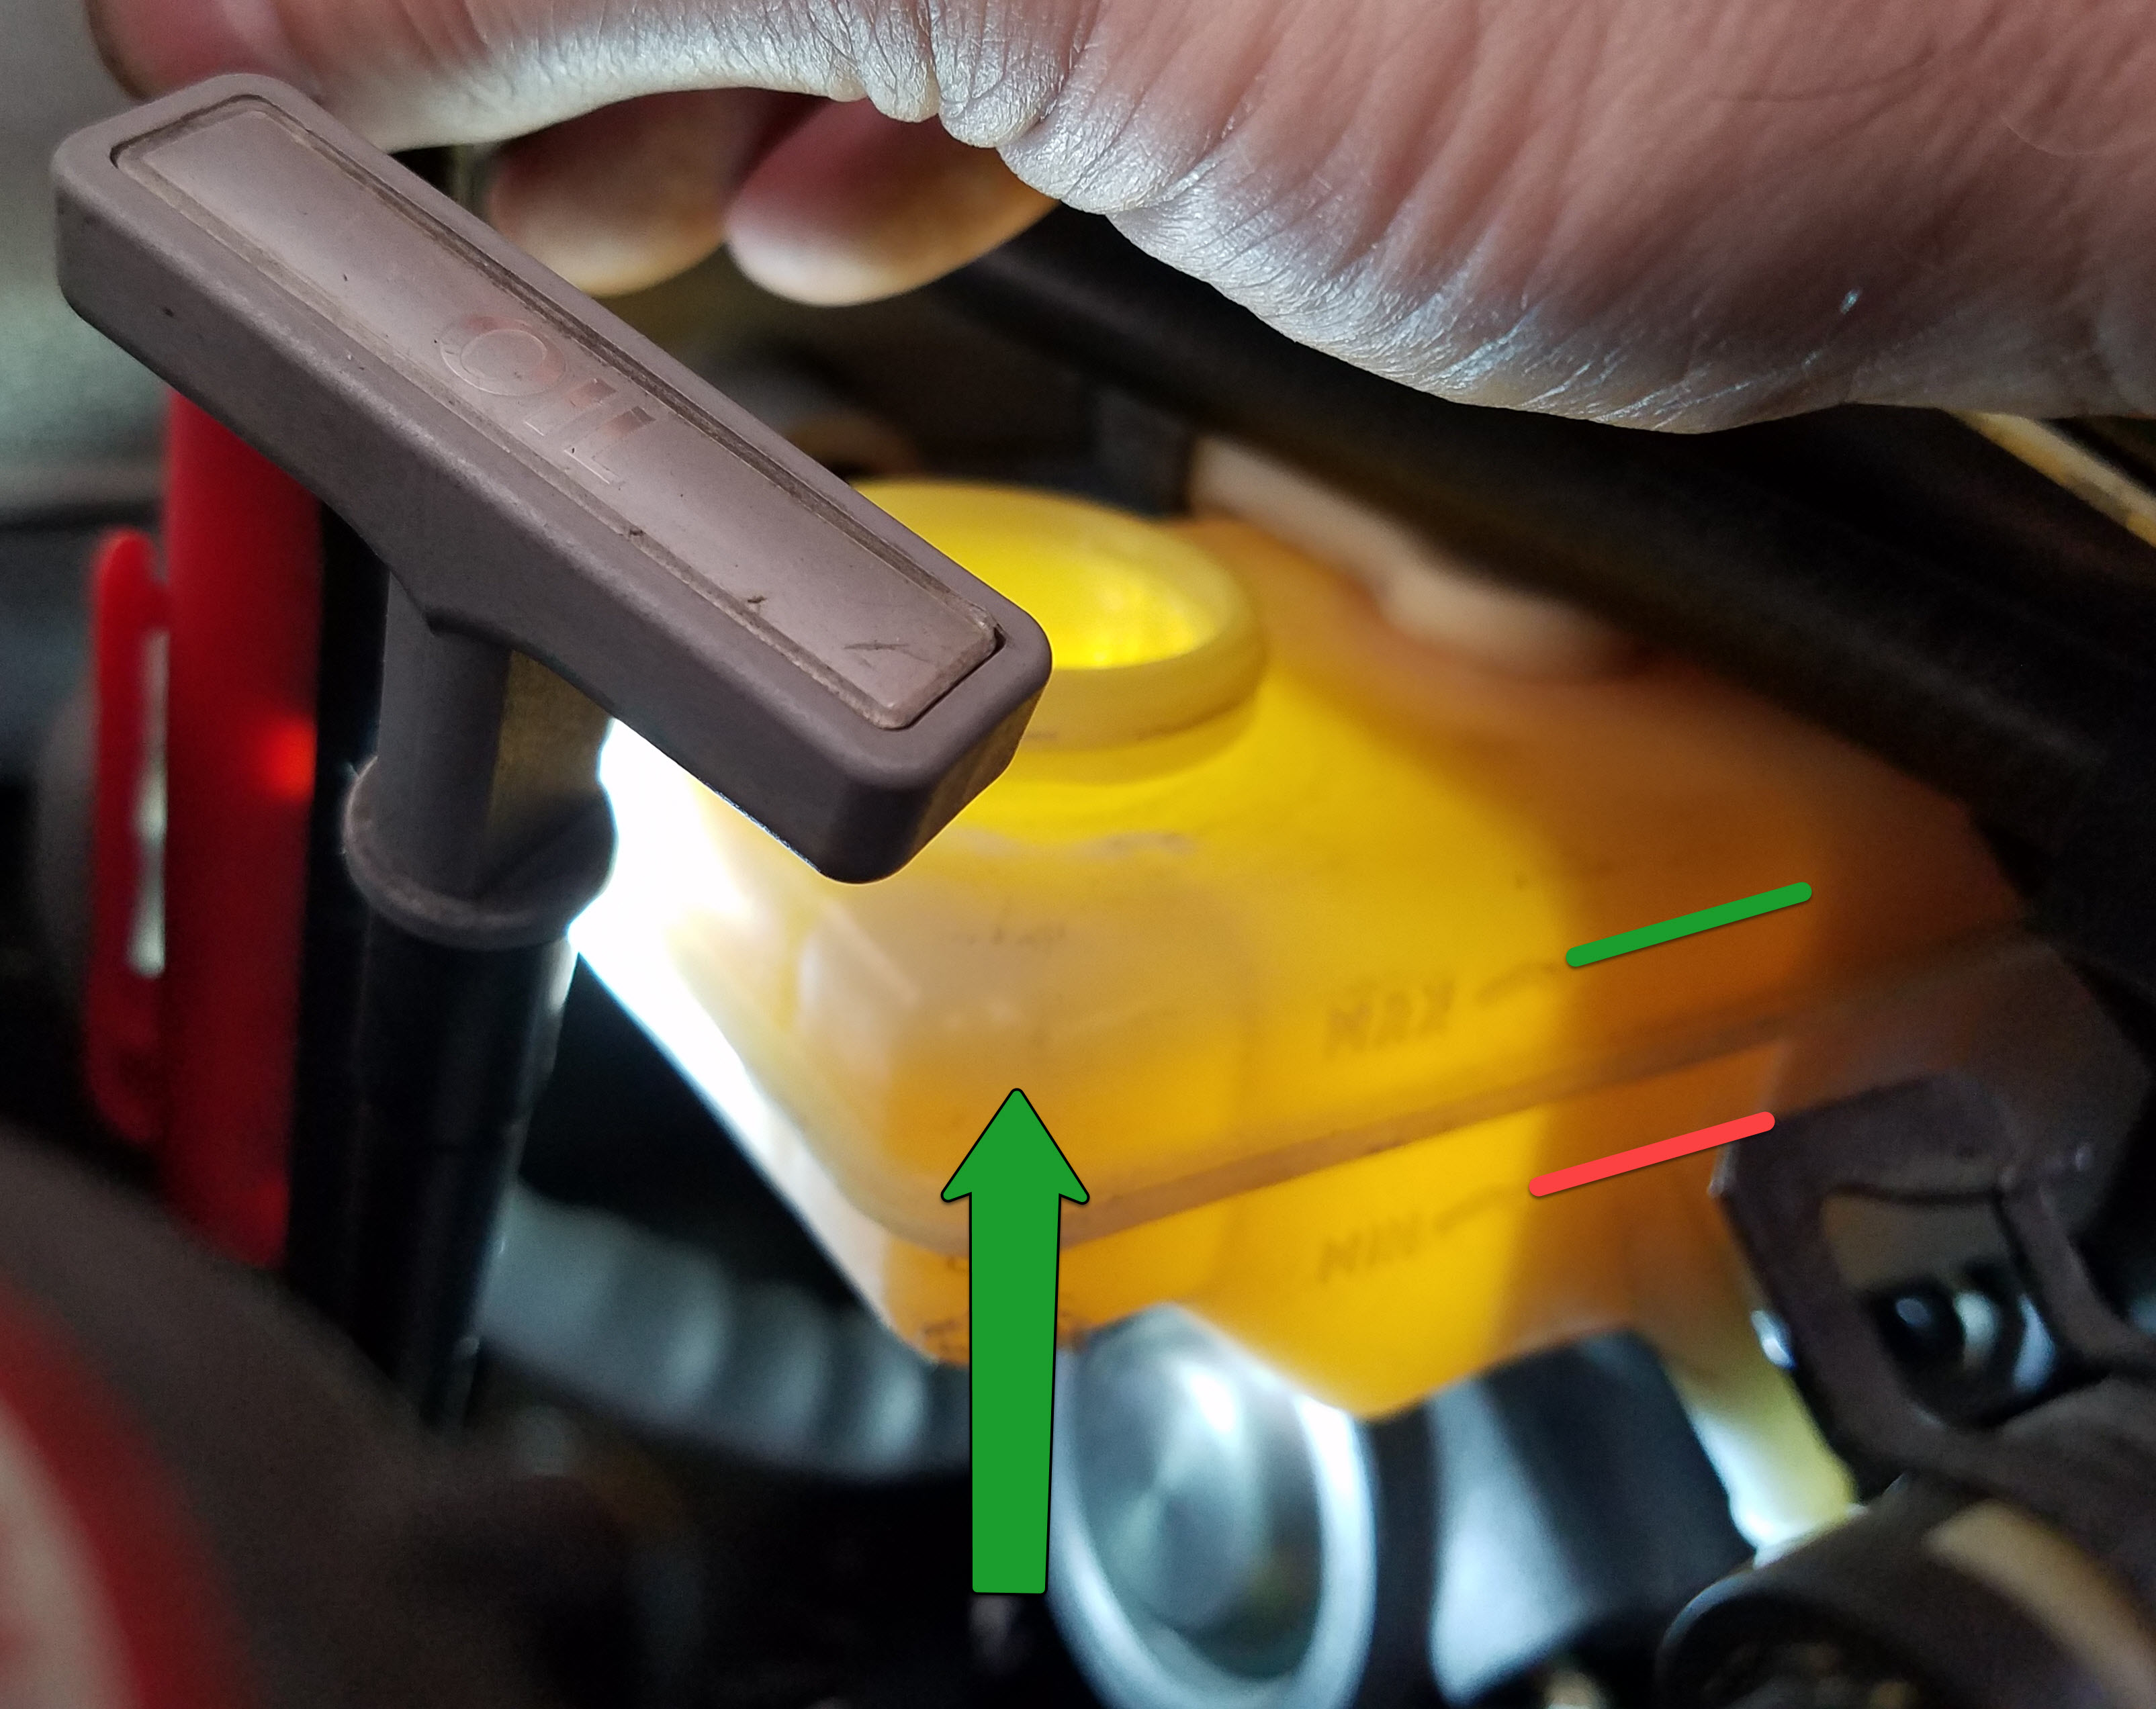
Job Done! - Remember after you are finished with the last wheel to check the fluid level in the Brake Fluid reservoir. It will have crept up with each caliper piston you squeezed in. Use your inspection light to properly view the level, and your turkey baster or Mityvac to suck out excess fluid until it is set exactly to the maximum line.
- Reinstall the cap firmly and remove any rags and fender protection afterwards.

Set the Brake Fluid Level to Max
- Reinstall the cap firmly and remove any rags and fender protection afterwards.


The final steps are to get the wheels back on and on the ground. I’ve already created these other articles about properly lowering the vehicle and torqueing the wheel nuts. Check them out:
- Cleaning the Wheels (now is the best time when the rims are off the car)
- Installing the Wheels
- Lowering your car off Jack Stands
- Torqueing the Wheel Nuts
That’s it – you’re done! Well, almost. Anytime you change the brake pads or rotors you will need to perform a final step after the car is on the ground and driveable. You need to ‘Bed In’ the brakes. This process is essential to marry the pad material to the rotor surface. Until you do this you’ll likely suffer from brake squeal and poorer braking performance. Do Not Skip This Step! The bedding-in process isn’t difficult (and a little bit fun actually). I have created three separate bedding in articles depending on which brake pads you chose:
- Bedding in Aston Martin OEM Brake Pads (made by Pagid)
- Bedding in Porterfield R4-S Brake Pads
- Bedding in EBC Red Stuff Brake Pads
Video
Here is a video showing the entire process I described above.

Hi Steve, great write up! I’m curious what kind of mileage you were getting out of the Porterfield brakes as opppsed to the OEM pads. I just purchased the Porterfields and I’m planning on putting them on before the winter.
LikeLike
Hi Steve,
Really enjoy reading your posts, even though I don’t have a DB9. (Have a Vanquish).
Has anyone from the UK already sent you the Tunap brand MP113 Premium Ceramic Brake Paste?
Best wishes,
Kevin
LikeLike
Hi Kevin. Thanks for following the posts. Some may be applicable to the Vanquish, many of the articles apply to all the Gaydon era cars. No luck yet with some Tunap paste, still hoping someone will donate a can to the cause at some point. Would be neat to try and compare.
LikeLike
Hi Steve,
I first found your website about 2 years ago, when I had problems with problems with my check engine light. Followed your instructions, replaced all the coils and plugs and the car has been running great since.
Now is the time to replace rear brakes, I just received the Porterfield pads and Brembo rotors. Was going to start the project this weekend, but started thinking, should a also replace the e-brake pads? This is a 2005 BD9 with about 14,000 miles. I had it since 2007 and I don’t think I ever even used the e-brake. But it doesn’t mean the pads are not worn out, what is your opinion? And if I should replace them I guess I should get them from Porterfield to match the other pads, assuming they make them.
What you think?
As always thanks for your help
LikeLike
Hi Steve, awesome instructions. Many thanks for doing these it really helps us non-mechanical guys out heaps. I was wondering where can I find your video on bedding in the new pads you talk about at the end of this video?
LikeLike
Hi Steve, your blog is tremendously helpful, many thanks and keep going! I have a 2007 DB9 Volante and need my rear brake pads replacing. The warning light has come on, so I guess I need to change the sensors too. I have watched your video where you show how to mount the sensor in the brake pad, is the rest of it as simple as following the cable up to the connector, plugging the new cable in and making sure to secure the cable properly? Or is a there anything more tricky to know?
Thanks
Ewald
LikeLike
Hi Ewald. Glad the articles have helped! I believe you are correct, just follow the cable back to their connector, it was nearby and obvious. The strapping to mount it I recall was rubber and part of the cable itself, so no surprises. And yes, if the warning light came on the cable is worn and should be replaced. Isn’t hard. Good luck!
LikeLike
Hi Steve,
Thanks a lot for your great articles that help me to understand my car (2009 DB9) better and give me good arguments in negotiating with my dealer.
Now I’m goin to replace all brake ddiscs and pads. I’ve bought all the parts needed except the anti-squeal shims you show in your advice “replacing the brake pads in an Aston Martin DB9”. On the internet I didn’t find any. Do you know where I can buy the shims?
Thanks a lot
Martin (Germany)
LikeLike