

Why would you want to take the grill apart from your DB9? To refinish it of course. The painted anthracite finish on my grill bars has begun to ‘flake’ off the metal, and it looks terrible. When I approached an Aston Martin Dealer they did what you’d expect – recommended the only solution was to replace it. But, and there is a big ‘but’, the original 7-bar grill is no longer available. The only factory solution is to purchase a later model 5-bar grill and retrofit it. I am sure the 5-bar grill would look fine, but I am also a bit of a purist that struggles with straying too far from original. I prefer factory sport pack wheels compared to full custom after market. I prefer factory color options. I’d prefer to keep my car outfitted with the 7-bar grill, so I decided I’d learn how to remove, refinish and reinstall it.
Preparation
I’ve already completed some work to get to this article including:
At this point you should have your grill out on the work bench.
Refinishing the grill would be nearly impossible in its assembled state and still in the car. The grill is made up of 7 slats that are really formed V shapes of sheet metal. They are held together in a friction fit with seven (7) plastic vertical blocks. The blocks align the spacing and have the mounting bolts embedded in them that attach the grill assembly to the support frame in the car.
The plastic blocks are the Achilles heel of the design. 14 year old plastic that is exposed to the elements gets brittle. While mine are still intact, I am terrified that I will crack/snap/break one during the disassembly process. They are irreplaceable short of buying a whole used grill assembly from a breaker like AstonMartinBits.com or PacificMotors.com.
Read on to learn how I safely disassembled my grill.
Tools required
This one is a bit strange compared to my usual lists of sockets and wrenches. You need:
 Your hands
- Your nerve
- A helper would be nice (extra set of hands just to hold and stabilize things)
- And finally some form of support blocks to closely brace the plastic blocks while you push the slates out of them.


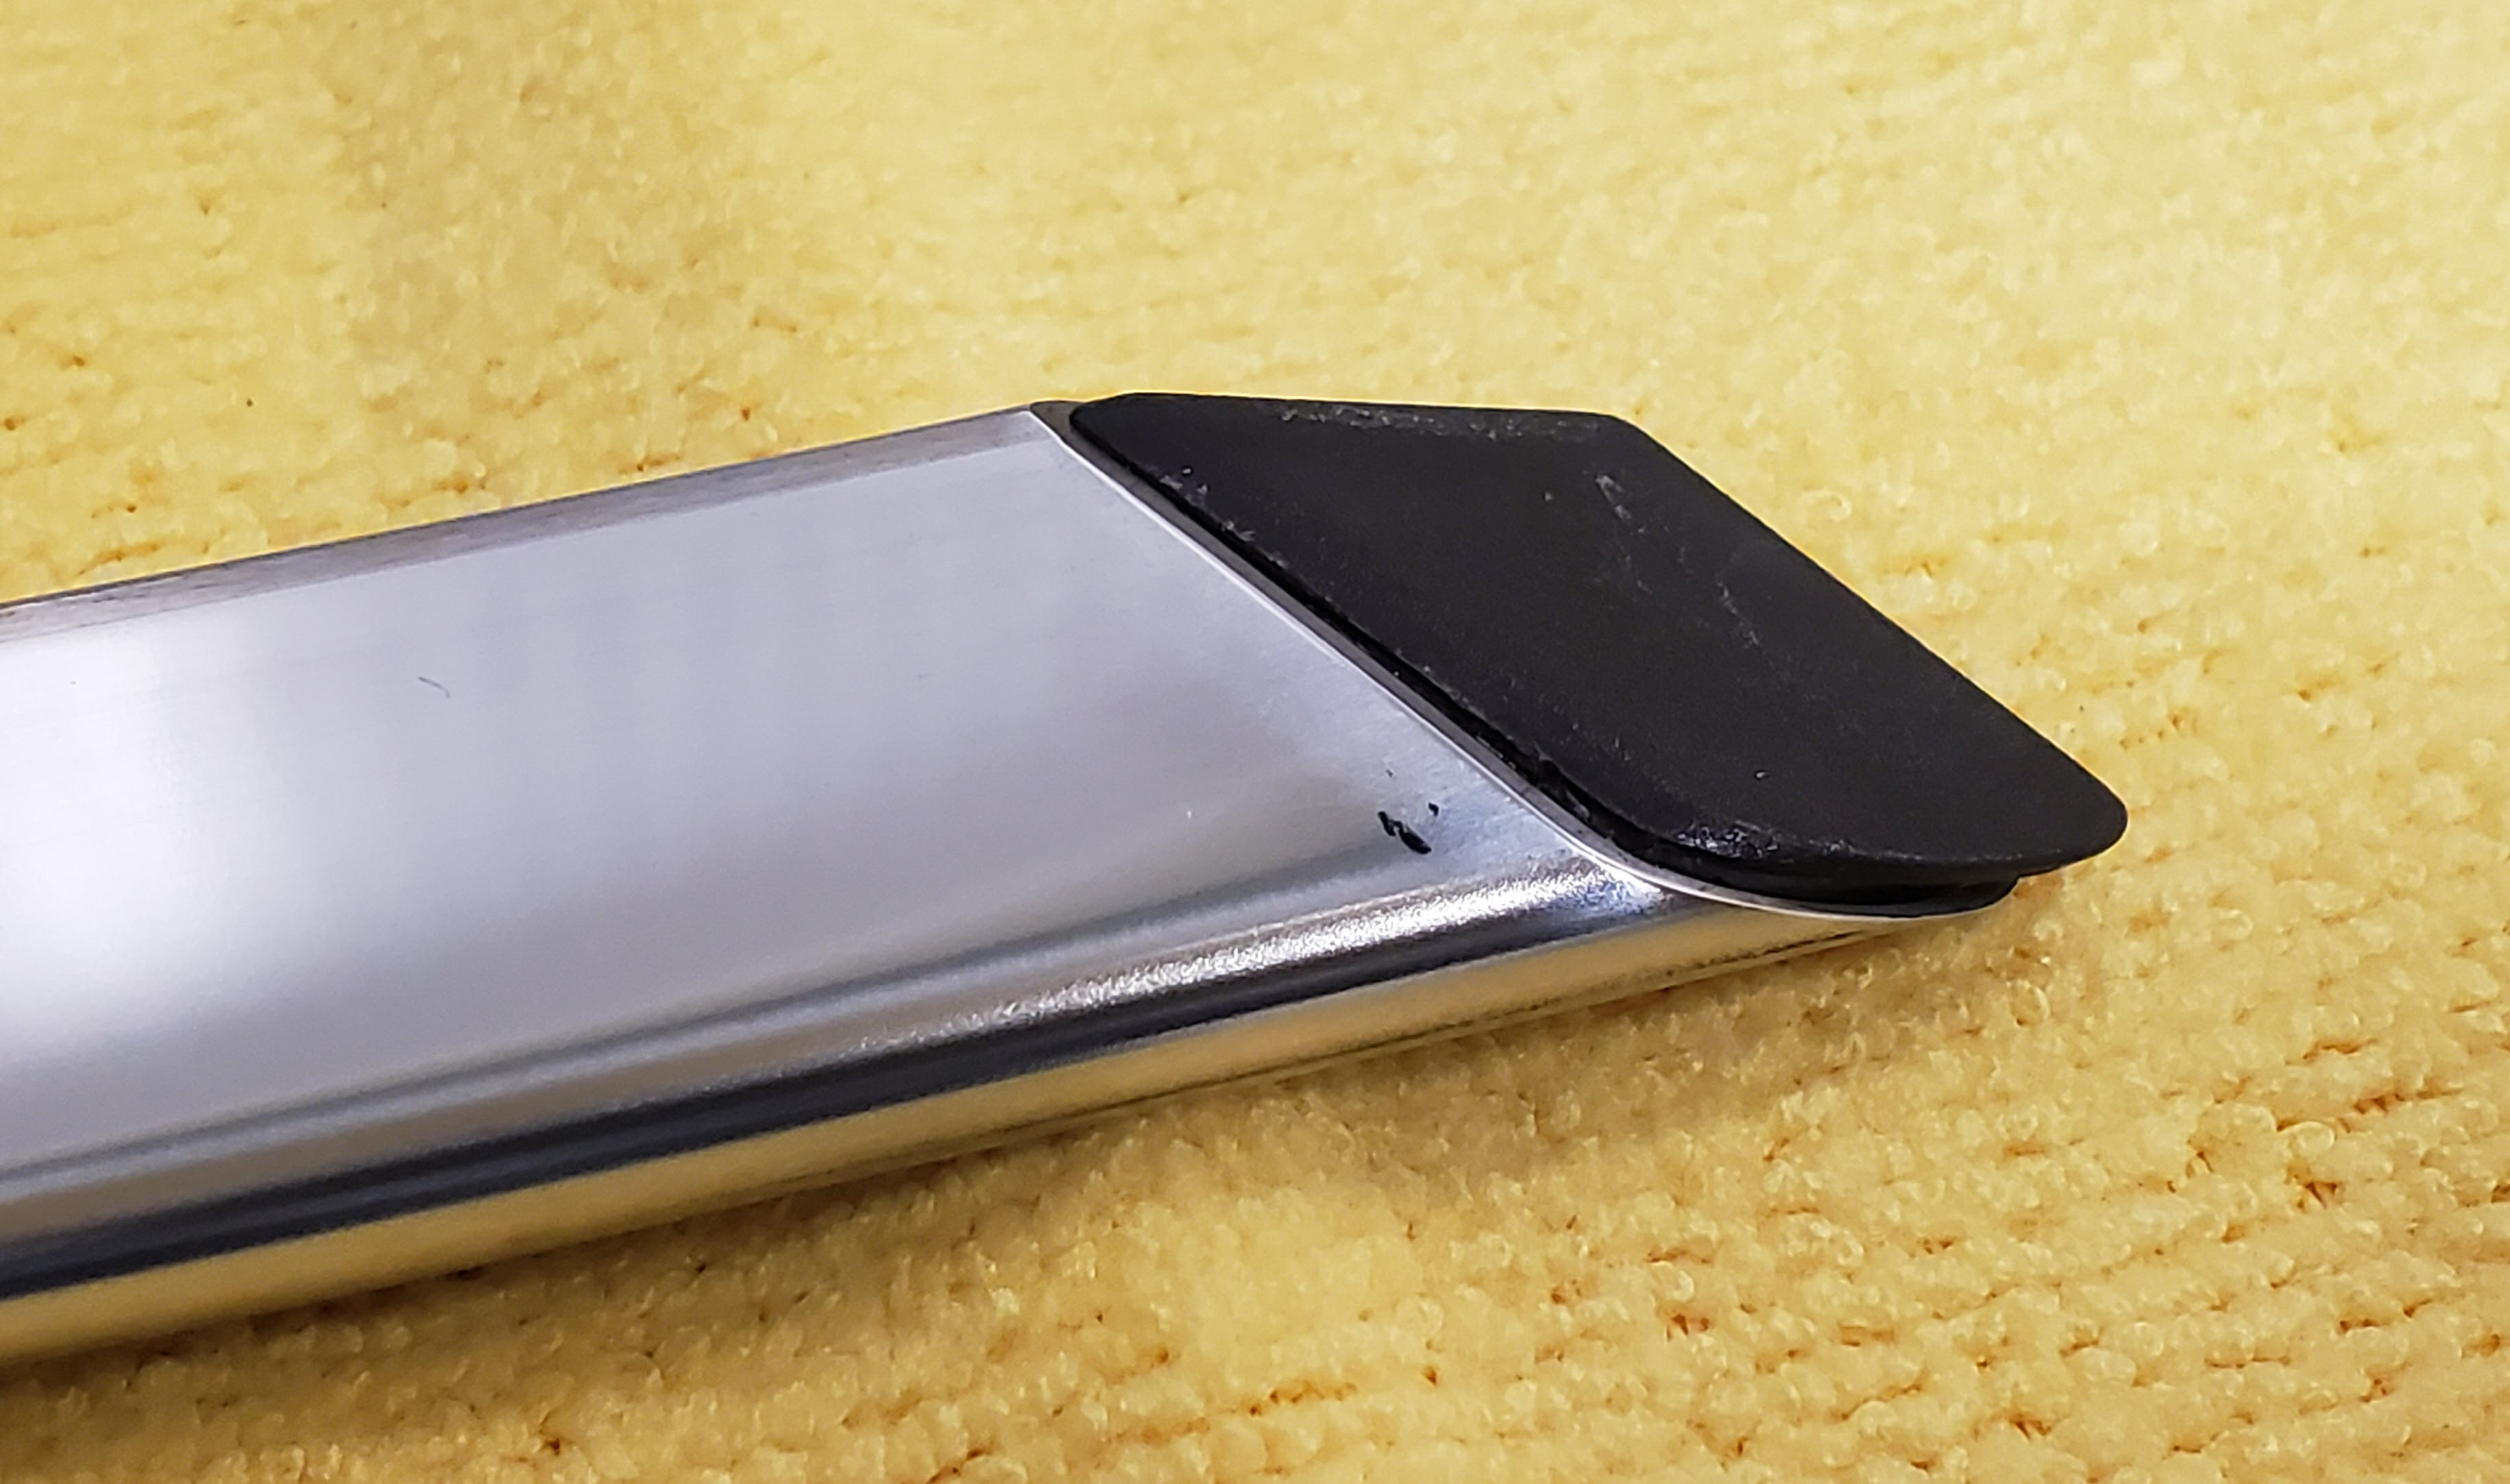
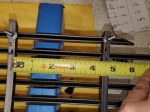
This last item can’t be had from your local hardware store. I pondered a while to come up with the safest manner to separate the slats from the plastic blocks. Check out this close up photo of how the slats insert into the plastic block.

You can see the V shape of the slat wedges into the notch in the plastic block, and then engages with the two plastic tines in the center of the notch. Remember the block, including the lock tines are plastic.
At first I thought about just gripping the slat and pulling it up out of the blocks while ‘bending’ the blocks a bit to pop them loose from the tines. The plastic blocks can bend easily, too easily. They felt ready to crack almost immediately and I chickened out.
The slats are locked into all the plastic blocks, so pulling them out without tweaking the whole assembly is awkward.
What I came up with is the idea of bracing the nose of the plastic block firmly immediately on both sides of the slat to be removed. Putting them on stilts essentially, so I then could apply a steady even force to the single slat and push it out carefully with enough force to disengage the tines.
To do this I tried two things. First I used the butt handle of two narrow plastic interior trim removal tools. Set on their side, they were just tall enough to slip in between the slats and keep the slat off the bench top. Problem was it was wobbly and trying to keep everything supported and aligned while I was pushing the bar out was tricky.
So, I decided to make a simple tool for this out of some scrap lumber, and old 2” x 4”. My garage (probably like yours) has bits of scrap lumber in it. I know this may be putting you off this project, but stick with me.
I took a 9” long piece of 2×4, and used a saw to slice seven (7) ½” wide slots in it spaced evenly every 0.8333″ so that all the slats could sit in the tool, cradling the plastic block. I cut the slots 1.25” deep to provide enough space for the slat and room to push it out. Since I was making one, it was just about the same labor to make two so I did. Here is what it looked like: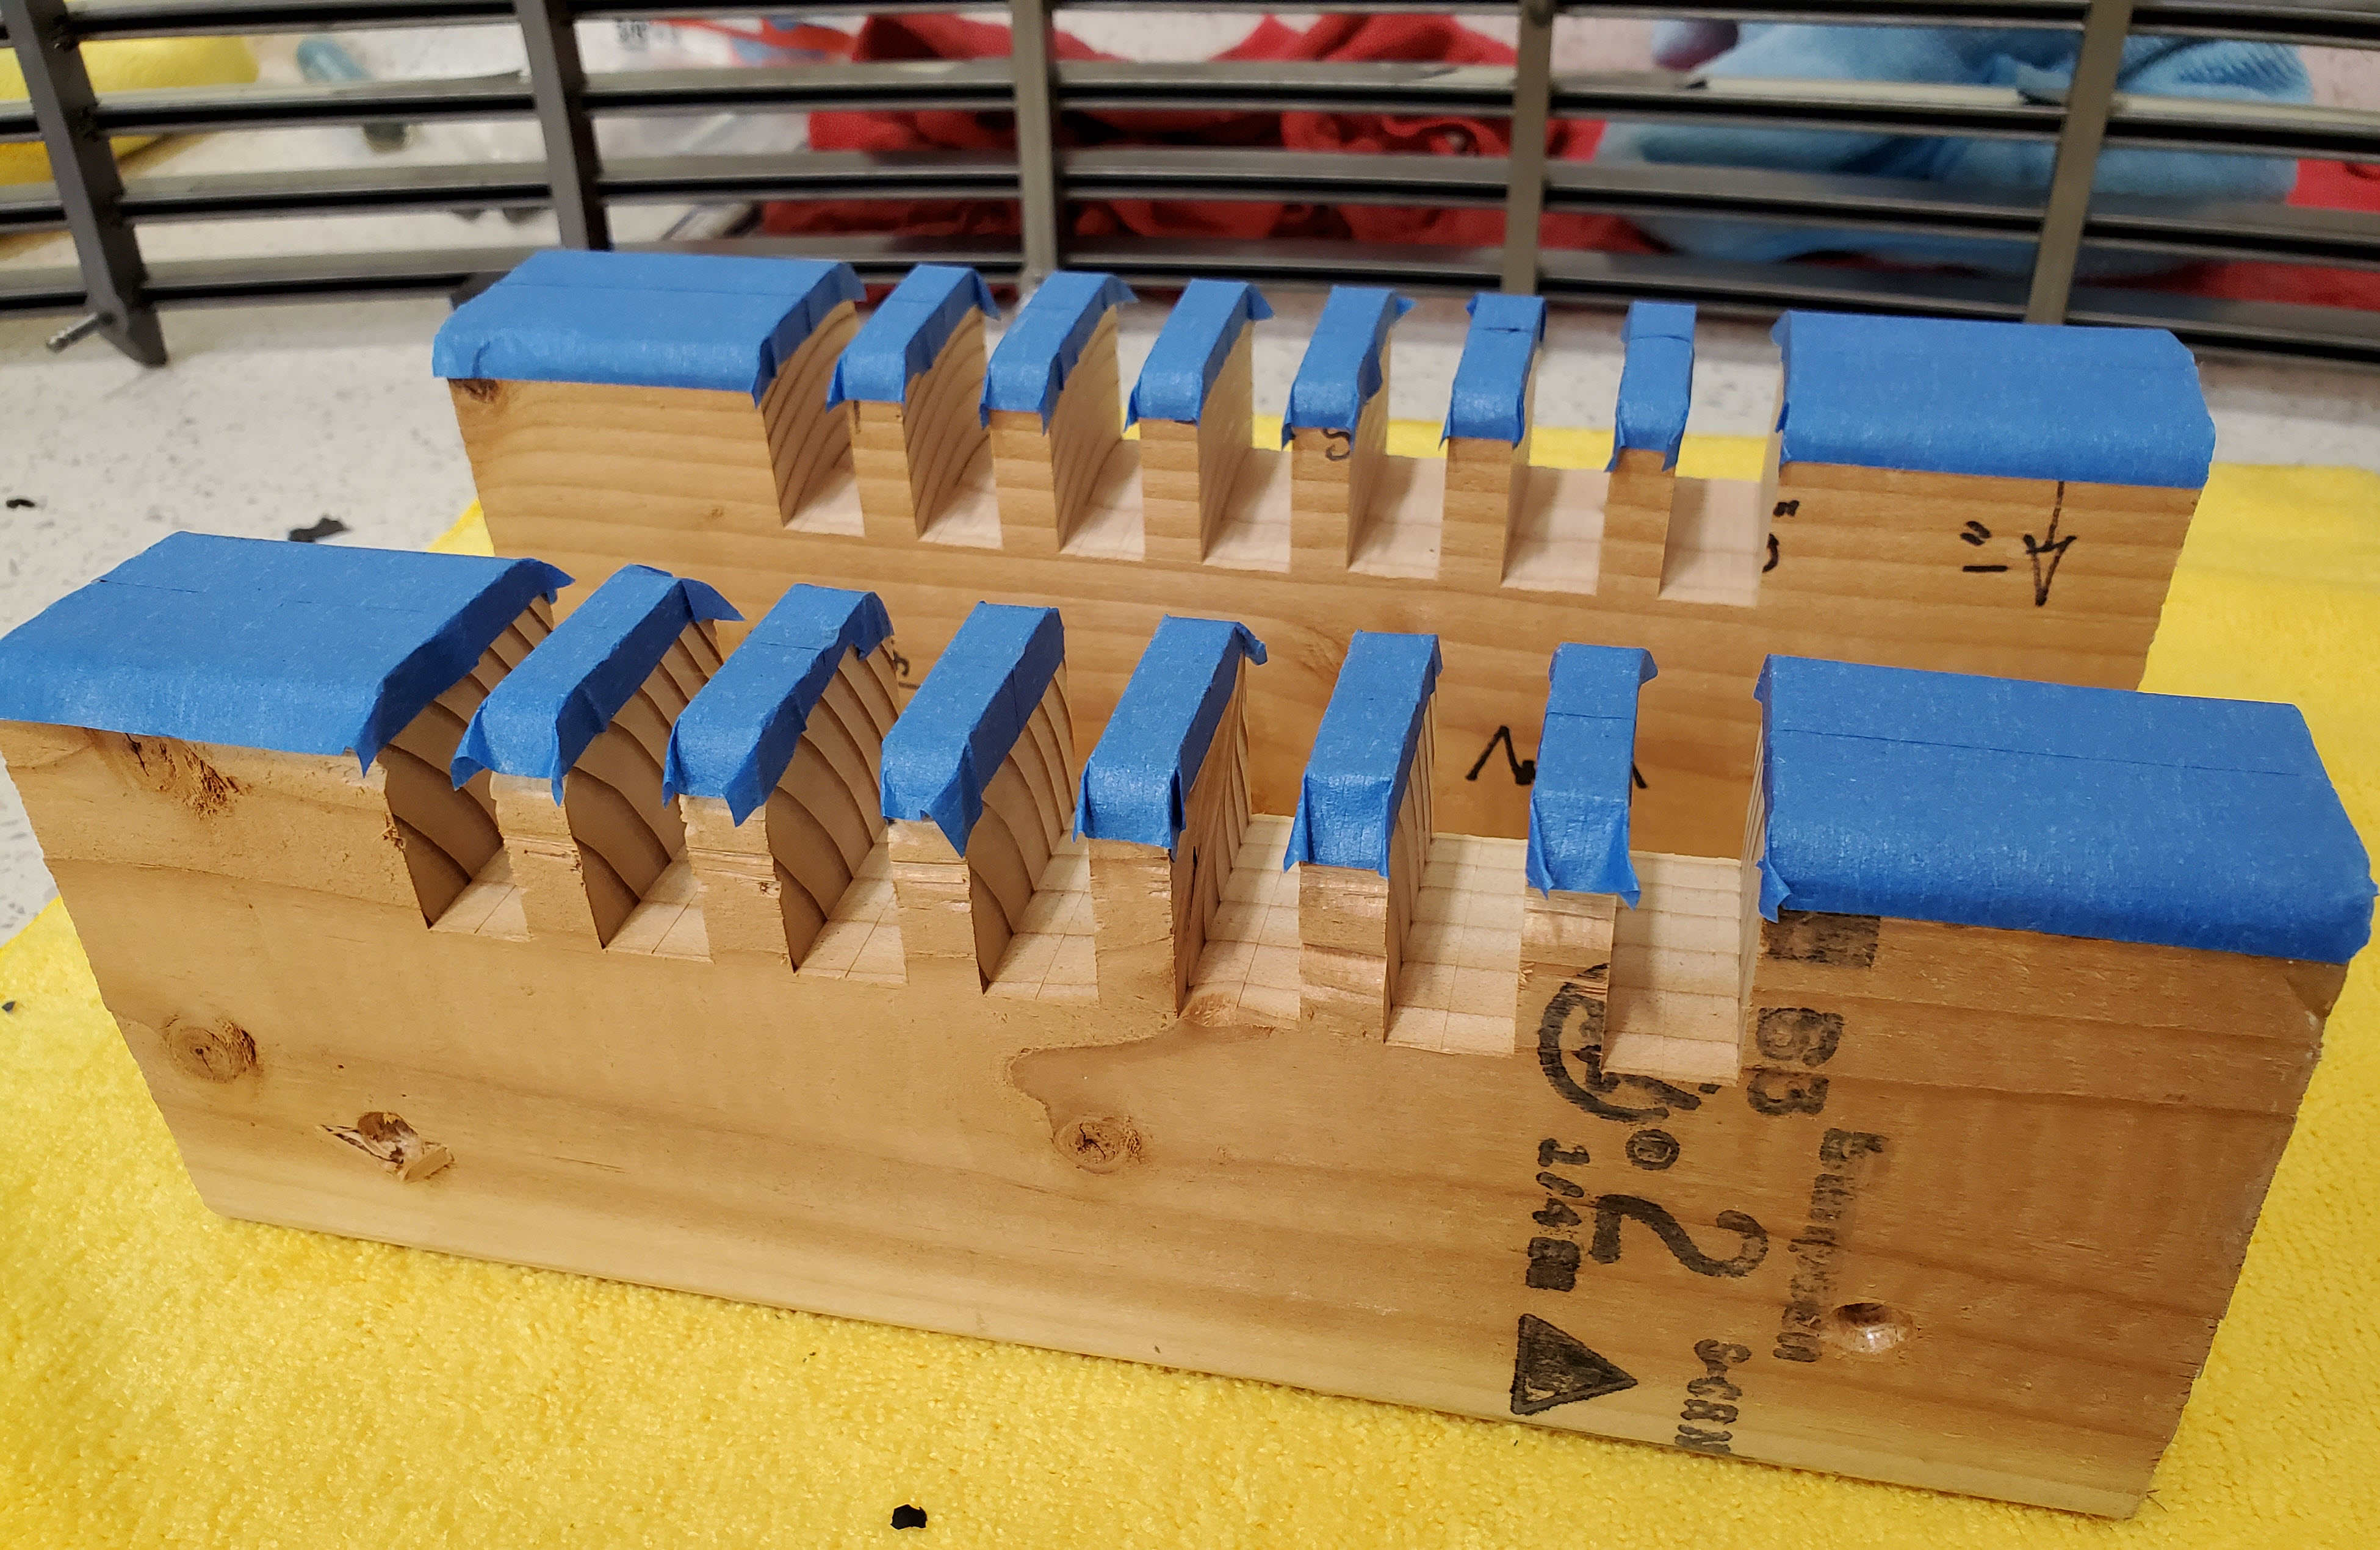
Here are the dimensions for spacing the slots starting in 2″ from one edge of the 2×4:
 Slot 1 Edge – 0″
- Slot 2 Edge – 0.833″ (~ 13/16″)
- Slot 3 Edge – 1.666″ (~ 1-11/16″)
- Slot 4 Edge – 2.5″
- Slot 5 Edge – 3.333″ (~ 3-5/16″)
- Slot 6 Edge – 4.167″ (~ 4-3/16″)
- Slot 7 Edge – 5″

With these two tools, I can prop the grill up on the bend on top of them, directly aligned with the plastic blocks, and safely and securely push out each slat.
Measure Before You Disassemble
At the factory I’m sure there was a jig for assembling the slats to the vertical blocks. The problem for us is that if we completely disassemble the whole grill, there are NO index marks for where each slat is to engage with the blocks.
A couple of solutions are possible.
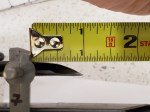
Just do one slat at a time, leaving the other six installed while you refinish a single slat. Then, reinstall it before removing another. Doing it this way the majority of the grill stays assembled at any given time. All you need to do before pulling out a single slat is measure the exposed length of one end to the nearest block, and put it back that way. Simple. This is the method I followed.
If you are going to do the complete disassembly all at once, you’ll need to do a few things to make yourself a road map for reassembly:
- Label each slat with a number or letter so you know which goes where
- Label which is the top of each slat so you get the curves properly oriented on reassembly
- Label which plastic block goes where, and which end is the top. I used a black Sharpie marker and wrote a 1, 2, 3, …. (starting from the left when looking at the back of the grill) on the back of each block at its top.
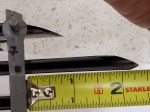
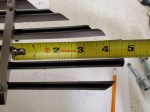
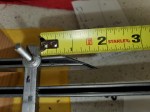
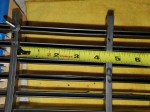
- Measure the end exposures of each slat and record it
- Measure the gaps between each block and record it.
- Be REALLY accurate and fussy in your measurements.
I’ve made a road map of my grill – see the Bonus section at the bottom of this article.
Procedure
Once you have the tool or jig made, removing a slat from the blocks takes about 5 minutes if you are being careful and your nerve is up to it.
This is definitely one of those procedures it’s better to watch the video rather than just read my write up. Read on, but then watch the video to be sure.
- Place your tools (jigs) on top of the work bench (any large enough firm surface is fine, even the garage floor)
- Maybe lay a towel out between the jigs to ‘catch’ the slat(s) as you push them out. You don’t want to scratch them even more when they pop out.
- Lay the grill face down into the jigs, supported at either side.
Align the jigs to support directly under the plastic blocks you are going to push near.- Remember, the whole point it to support the fragile plastic blocks, not the slats. You want to keep the plastic block super stable as you push a specific bar out of it. No flex or bending.

- Remember, the whole point it to support the fragile plastic blocks, not the slats. You want to keep the plastic block super stable as you push a specific bar out of it. No flex or bending.
- I started by using the jigs to support the outer most plastic blocks near the ends of the slat I want to work on
- With the jigs in place and the grill stable, select which bar you want to press out.
- Start at the outer end of one side, and re-position the jigs as you move your way across the slat releasing it in small steps from each block.
- To release the slat:
- I used my two thumbs placed on the back of the slat on either side of the plastic blocks.

- I applied even pressure straight down on the slat, increasing the pressure carefully until the slat finally started to move.
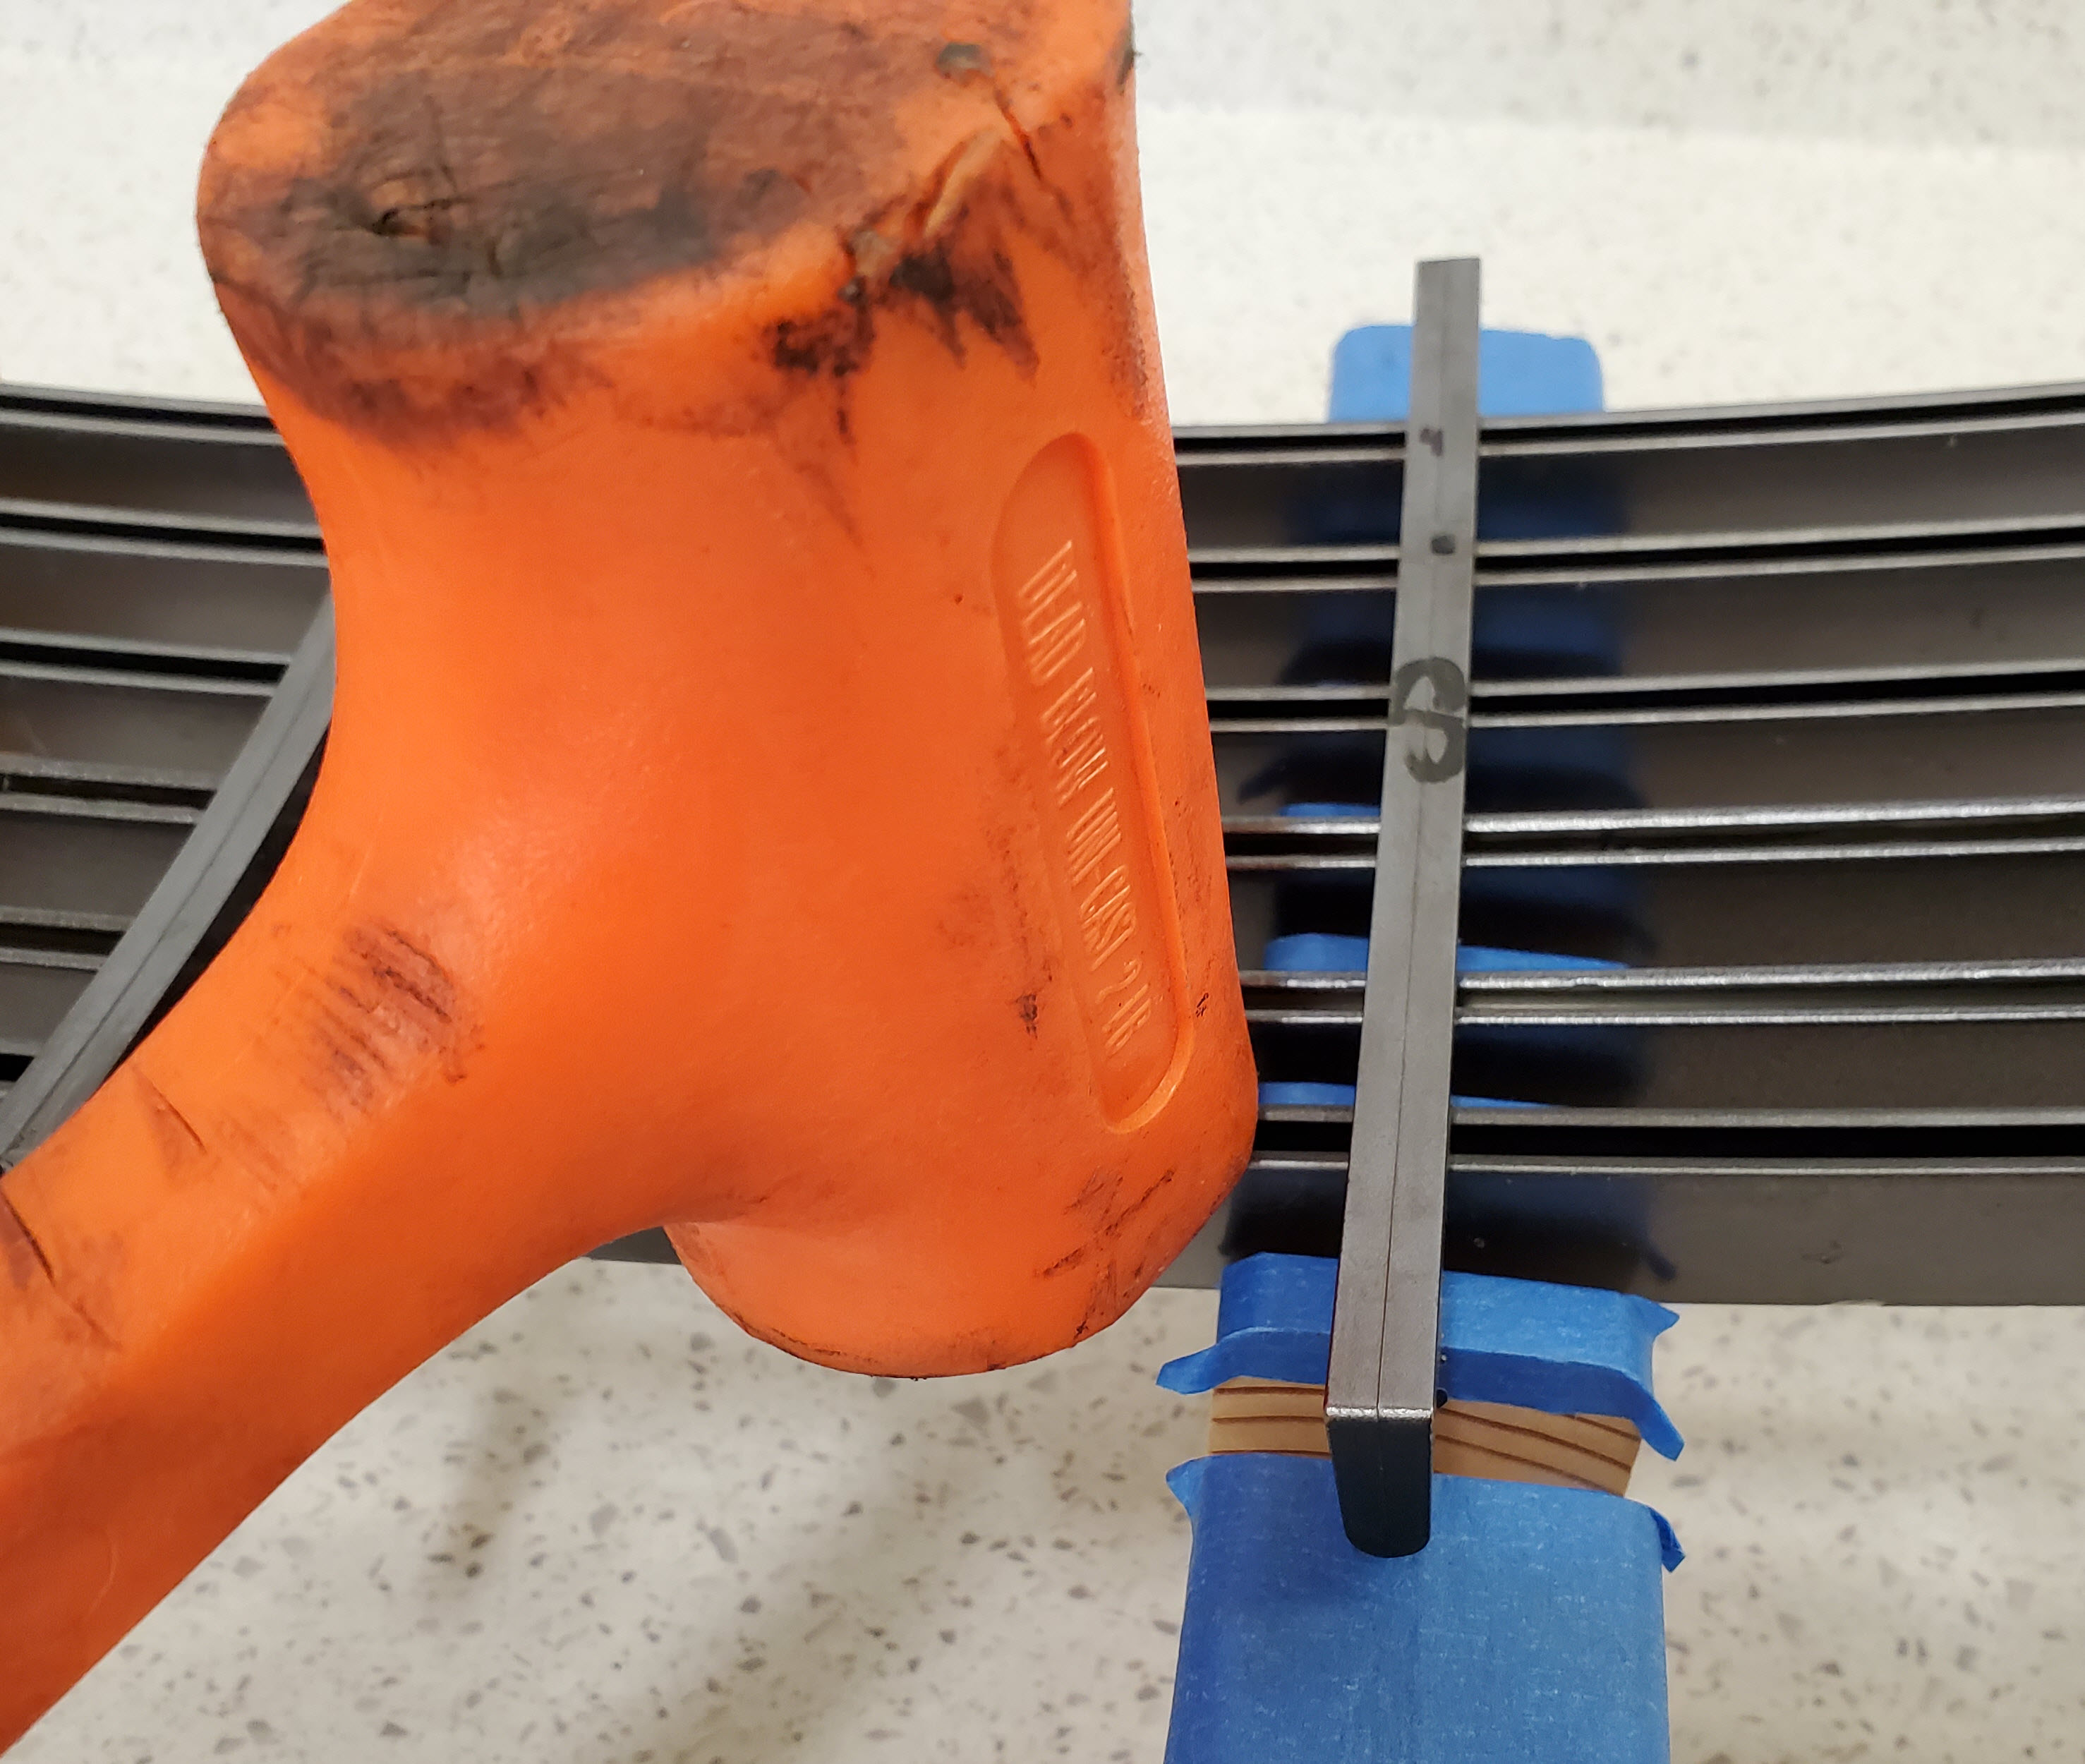
- To be honest, it was really hard to do with just my thumbs. The seem to really be ‘set’ in place, and getting the first 1 mm of movement was the hardest. I eventually brought out my soft face dead blow hammer to ‘tap’ it to get it started.
- I didn’t ‘hammer’ it all at once.
- I wanted to be as gentle as possible on releasing the slat from the tines. It usually moved in two stages.
- The first stage would be it would slide part way out (1 – 2 mm) until it caught on the tines
- Then with increased pressure it would finally release from the tines and be loose.

- Watch closely as you disengage the tines. The slat won’t fall out while you remove it from the first 2 or 3 blocks. It’s still trapped in the other blocks, so you need to work your way across one block at a time. By the time I got to the last block or two it was mostly loose and easier to finally separate. Resist the urge to go ‘gonzo’ on it and twist it out of the last few blocks without properly supporting them while doing it.
- I used my two thumbs placed on the back of the slat on either side of the plastic blocks.


Following that process you should now have one slat fully removed from the grill.
When you remove the top most slat, you’ll note it has plastic end plugs (finishers) inserted to give it a more finished look since you can see the ends of this slat with the hood (bonnet) open. You’ll need to pop these out, which isn’t too hard. I think mine were ‘tacked’ into place with a small amount of glue. Glue which was brittle after being installed for 14 years. I used a small screwdriver and just pried it a bit from inside the V slot of the slat, and it wiggled out easy enough once the glue gave up.

Next Steps
You can either embark on refurbishing just that one slat, or use the same technique to strip down the rest of the assembly. If you are stripping it all down, I’d suggest having a helper on hand to stabilize the assembly. The more it’s disassembled, the wobblier it will get. Wobble puts stress on the plastic blocks, so work hard to avoid this.
In another article I will show you how to strip the paint off the grill bars so you can refinish them with vehicle wrap, etc. And of course, check out this other video on my tips for how to reassemble the grill [Coming Soon].
Video
Here is the video I absolutely recommend you take the time to watch if you plan to undertake this task.
Bonus Measurements
I took a bunch of photos of the slats labelled and measurements between then. I labeled the plastic blocks 1 through 7 starting on the left when looking at the BACK of the grill sitting on the bench. I labelled the slats 1 through 7 starting at the top most slat.


I had taken off my grill in the past as I bumped in to a trailer and one of the blade dislodged from it space. If you want to remove blade from the holding plastic retainers you could spray some WD40 in to where blades are in that retaining mechanism and pull out the blade side ways like pulling out sword. As those retainers get old they get fragile and can break easily . While putting it back they can be just pushed back in. I had wrapped mine in carbon fiber look vinyl and after a while I am back to original look now .
LikeLike
Amazing review and skills.
I had a slightly damaged 7 slat grill and like you a new five bar design just wasn’t an option to keep my 2008 model intact as a AM purist.
My old grill was impossible to repair as the plastic frame was broken and a few of the vertical bar elements were missing. In the end I luckily bought a used perfect grill from someone in the UK who was ‘upgrading’ to a new five slat grill. I paid £500 for the old grill and a further £300 to ship and fit at Aston Martin in Dubai. Very happy with the end result.
I think your work is amazing. Maybe you should think about doing this for others? There is defo a market for it.
LikeLike
Hi Philip. Thanks for the Kudos. I joked with my Sweetie that we could go into business refinishing Grills. She wasn’t impressed. But, it is nice to work through fixing the issues. I’ll have the articles and videos with the finished result posted soon. It turned out really well.
LikeLike
Good reading buddy. I am myself in a little predicament now since my car caretakers apparently damaged my grill or its frame in disassembly (still waiting for the pics to determine the next steps). I was thinking that since AM is being a little foofoo with maintaining the production of this part (shame on them), maybe I can have a good used one scanned and 3D printed. If mine is structurally damaged for the plastic parts, I might epoxy and clean and have it scanned and printed… Thoughts?
LikeLike
Hi Khaled. I too had thought that since the plastic vertical struts are a weak spot getting someone to design and 3D print a replacement could be ideal. The ‘teeth’ in a couple of mine had cracked already. If an exact matching set could be made and sold from someone with the design and printer for $100 to $200, there would be some market for these. Getting the threaded bolt portion incorporated might need some thought, but honestly there is no need for these to be super strong steel bolts. Perhaps the replacements could be 3D printed with a plastic thread and course thread, and a plastic or stainless nut to match. Design improvement.
LikeLike
Hi Steve,
Mine are in dreadful shape so I have contacted the 3D scanner and printer company and I will be seeing them next week to go over the endeavor. It’s quite costly to run a single scan and run. I wonder if I do go ahead and generate the 3D CAD and have both the vertical slats as well as the back frame available if there is any market for them so we can have a production run.
LikeLike