 You may need to remove the airbox from your DB9 (or Vantage) to get to some other component that is buried in behind it. In my case, I needed to reach the Position Lamp Bulb which had failed and is located in the deepest, darkest reaches of the inner fender area well-hidden above the airbox (check out my other video on how to change this). Removing the airbox isn’t hard, and can be done with just a few basic tools.
Tools Required
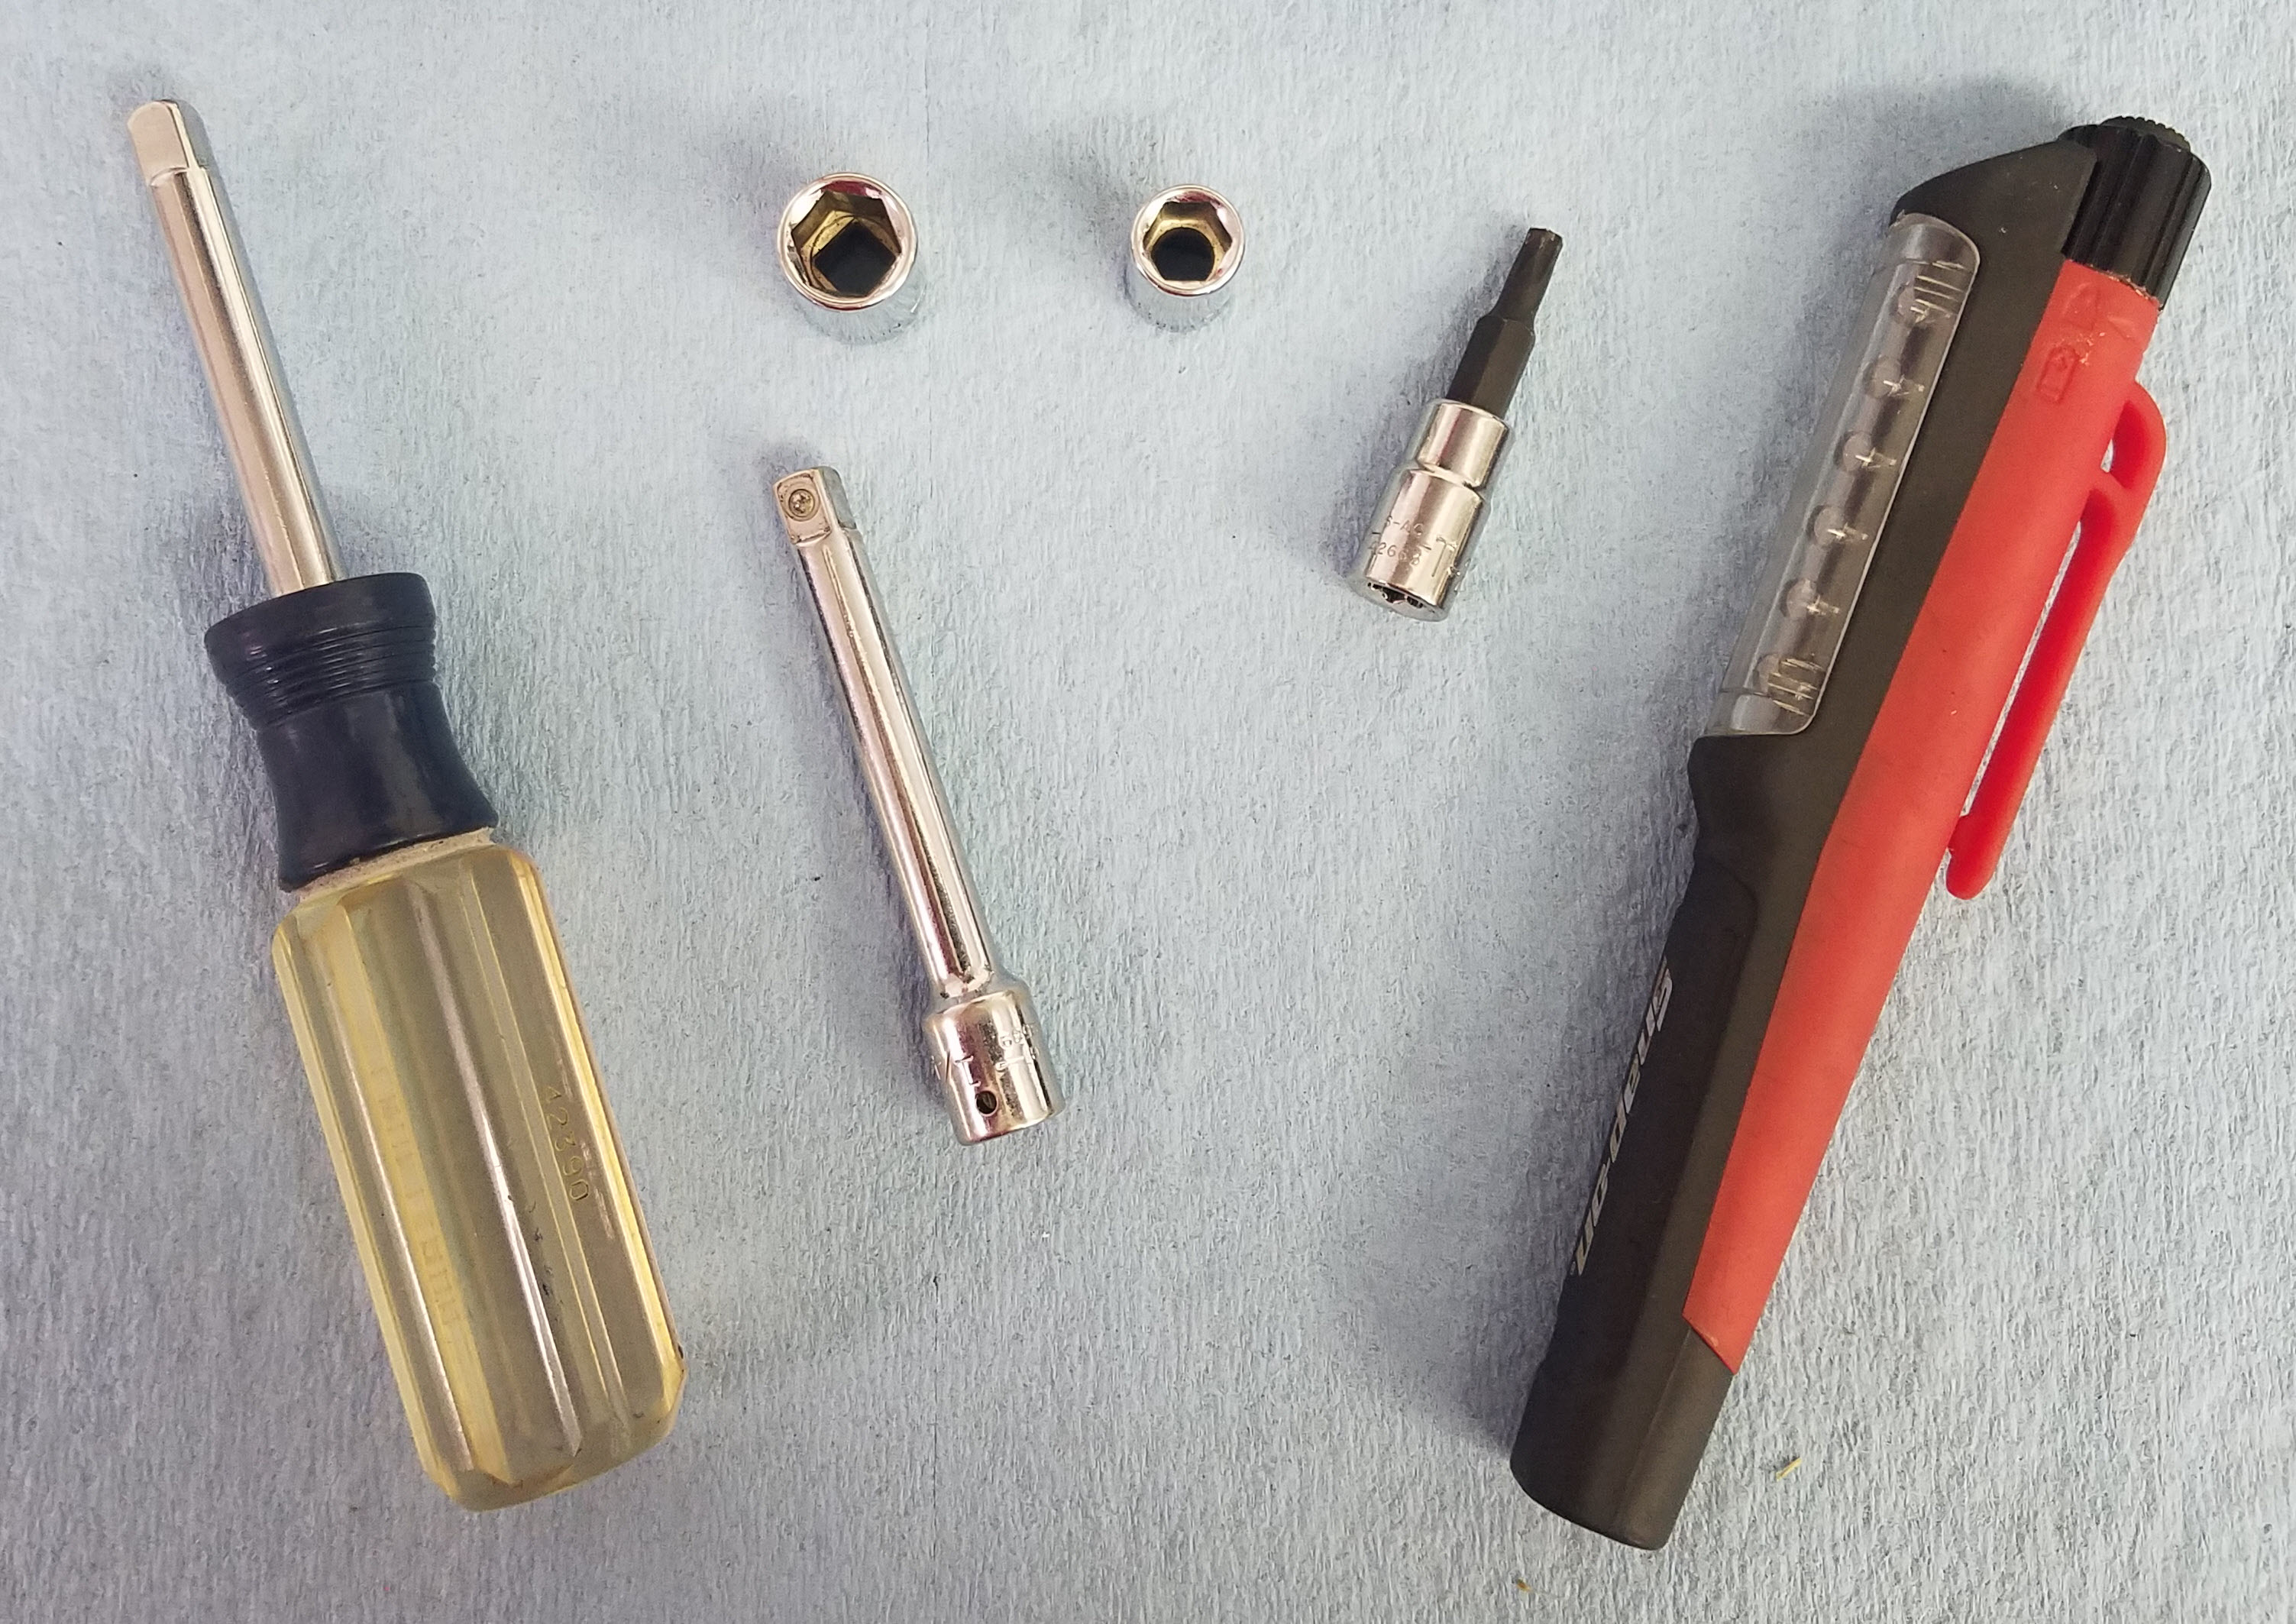
You’ll need a few tools to get the airbox out:
- 8mm 6 point socket
- 10mm 6 point socket
- Extensions for the sockets
- Nut driver or ratchet
- Inspection Light

Procedure
 As usual I started by reviewing the official Aston Martin Workshop Manual. Section 3.12 on the Air Charging System covers the airbox removal (check it out here). I’ve found that their process isn’t entirely correct, and I’ve improved it a bit with my own additions below.
To get access to the airbox, you have to do a ton of preliminary work, and I have articles for each of these steps:
- Single Point Jacking
- Removing a Road Wheel
- Removing the Front Inner Fender Liner
- Changing the Air Filter (you follow this process to get the air filter out of the way)
Once you’ve done the work to get to this stage, removing the airbox only takes about 5 minutes.
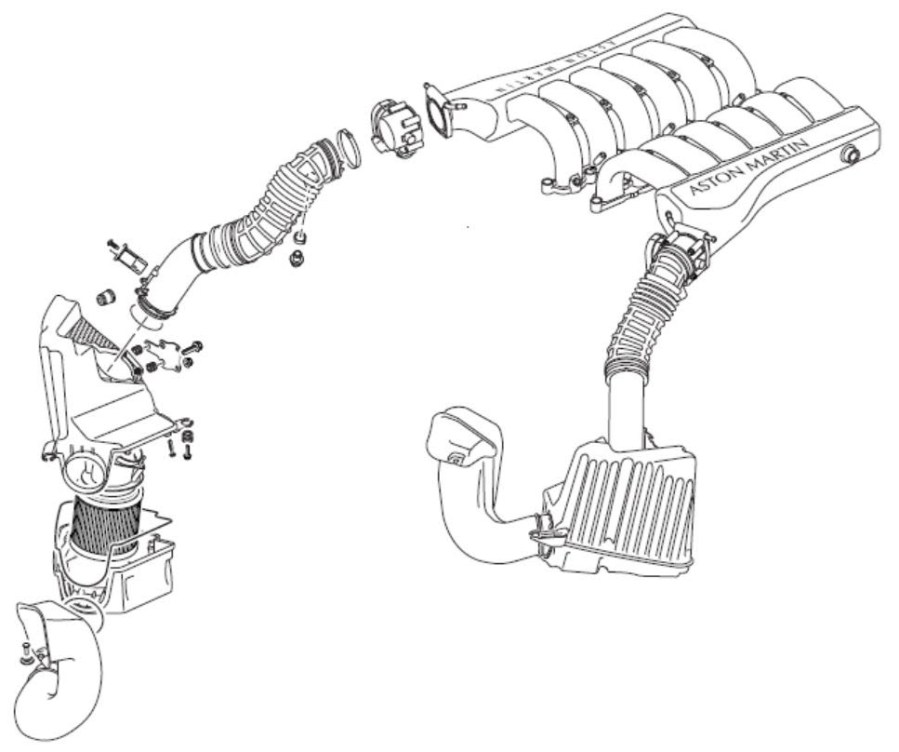
There are airboxes on the left and right side, but I am just showing how to do the left side one in the photos and video below. They are just a mirror image of each other so the process is identical.
Here’s how I did it:
- Following the steps in my Changing the Air Filter article, remove the bottom of the airbox and the air filter. You’ll just be putting the same air filter back in again later, but now might be a good time to change it if it is due.
- Use the T25 torx bit and remove the lock bolt that connects the top of the airbox to the air outlet pipe.

- Grip the air outlet pipe firmly and rotate it just a few degrees counter clockwise until the ‘tabs’ in it align with the gap in the airbox lip.
- You should really, really watch the video below to see what I mean here.
- The Mass Air Flow (MAF) sensor is mounted on the outlet pipe, so be careful around this. Just don’t pull and twist on this.

- Once its rotated properly you should be able to lift the outlet tube up slightly (just a tiny bit) to confirm it’s properly released from the airbox.
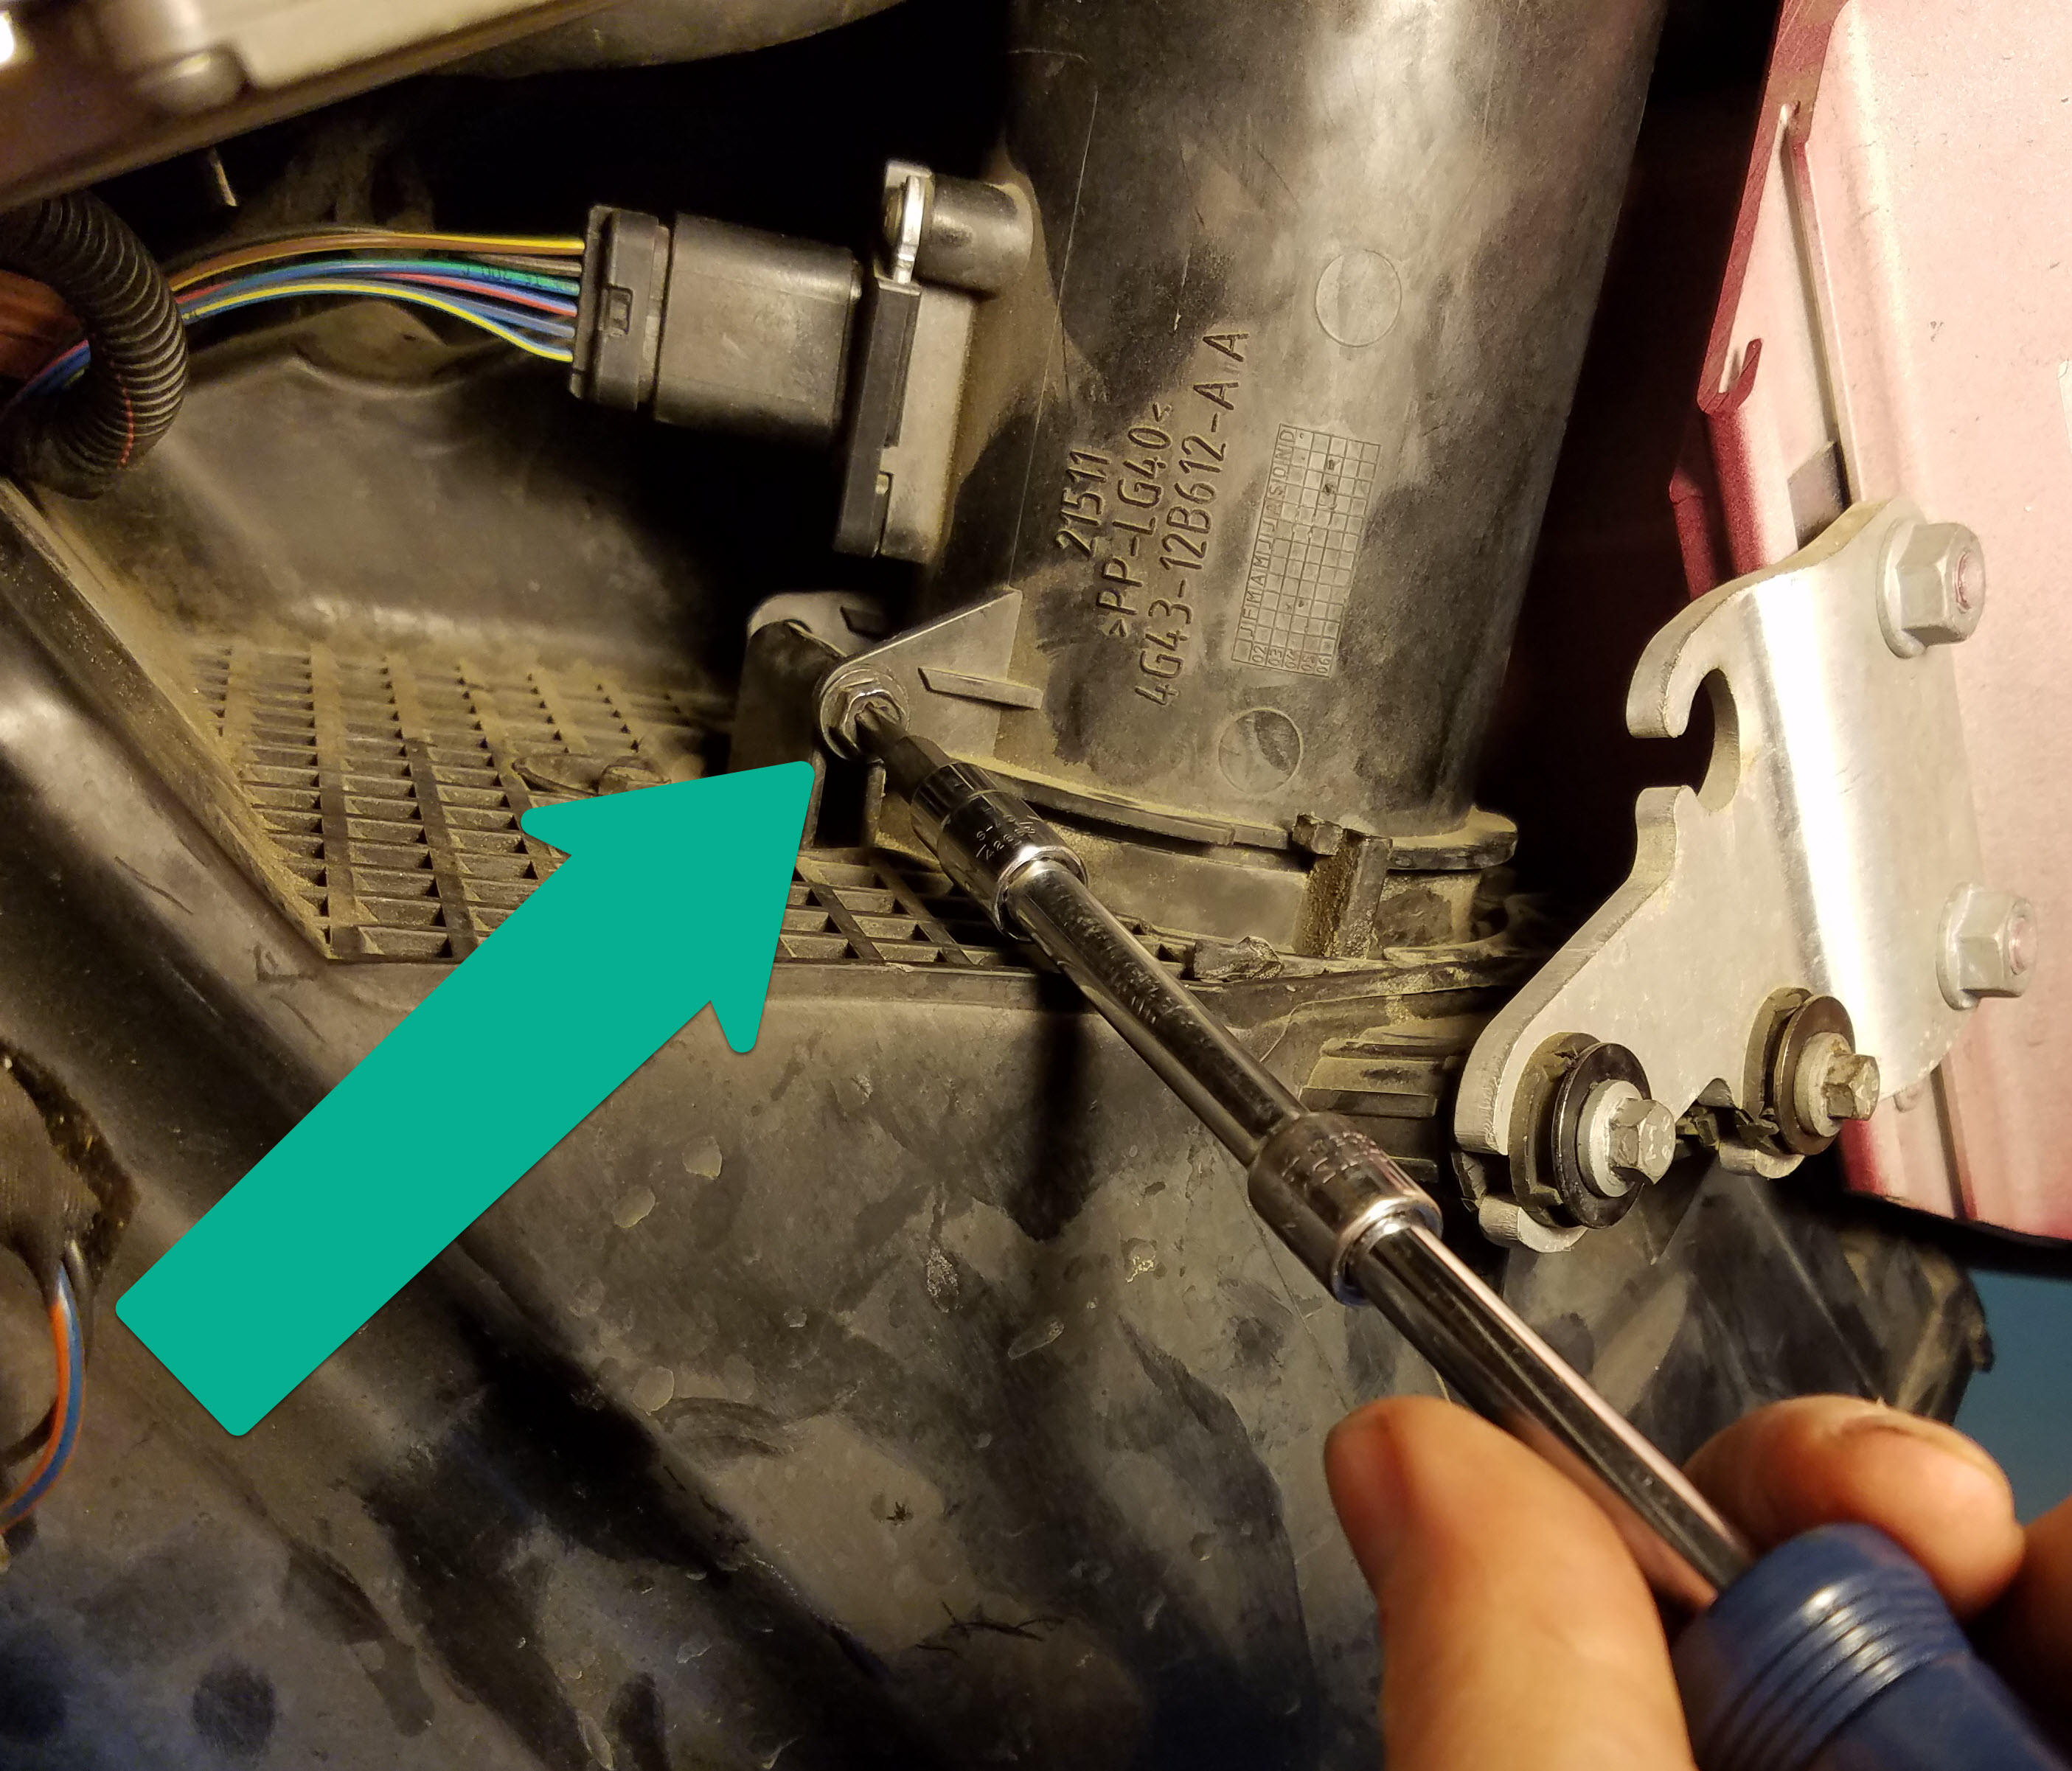
- Use the 8mm socket to remove the two adjacent airbox mounting screws on the side.

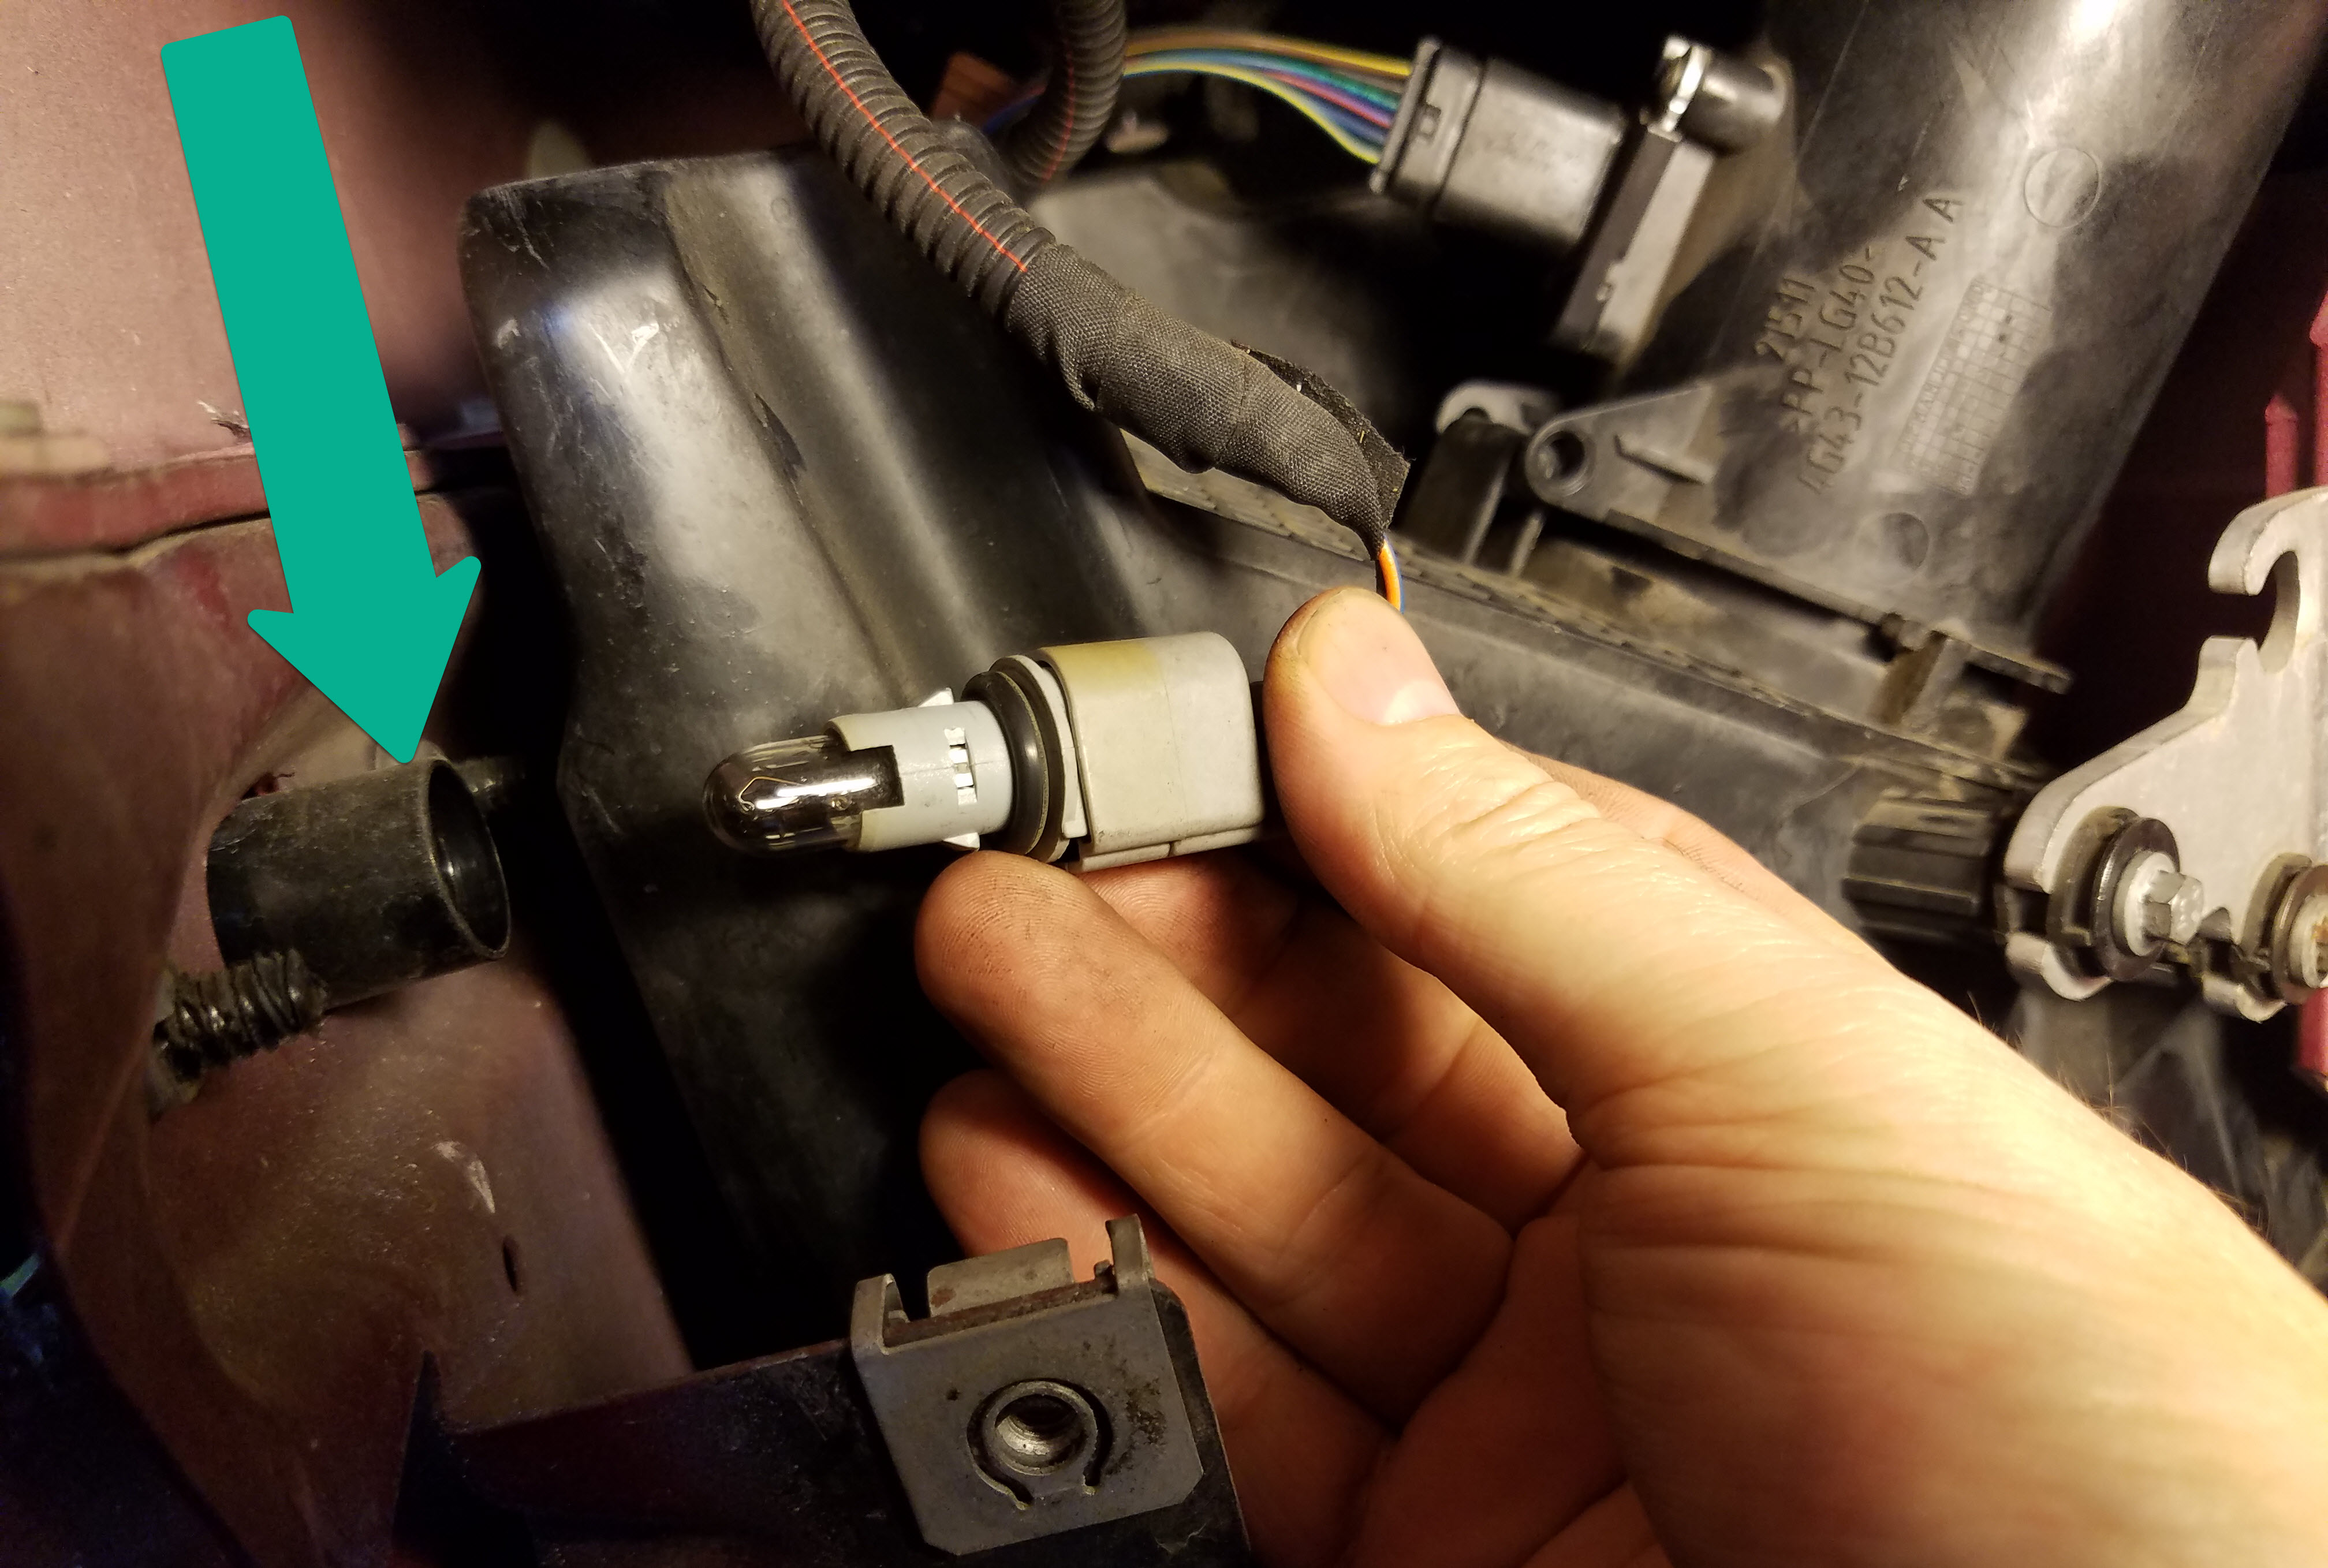
- It is wise to temporarily remove the side marker light bulb pigtail since it sits snuggled up next to the airbox. Removing it gives you a little more wiggle room as you take out the airbox.
- Removing the light pigtail is just a matter of gripping it and turning it about 45 deg counter clockwise to release it, then pull it out.
- Position it out of the way.

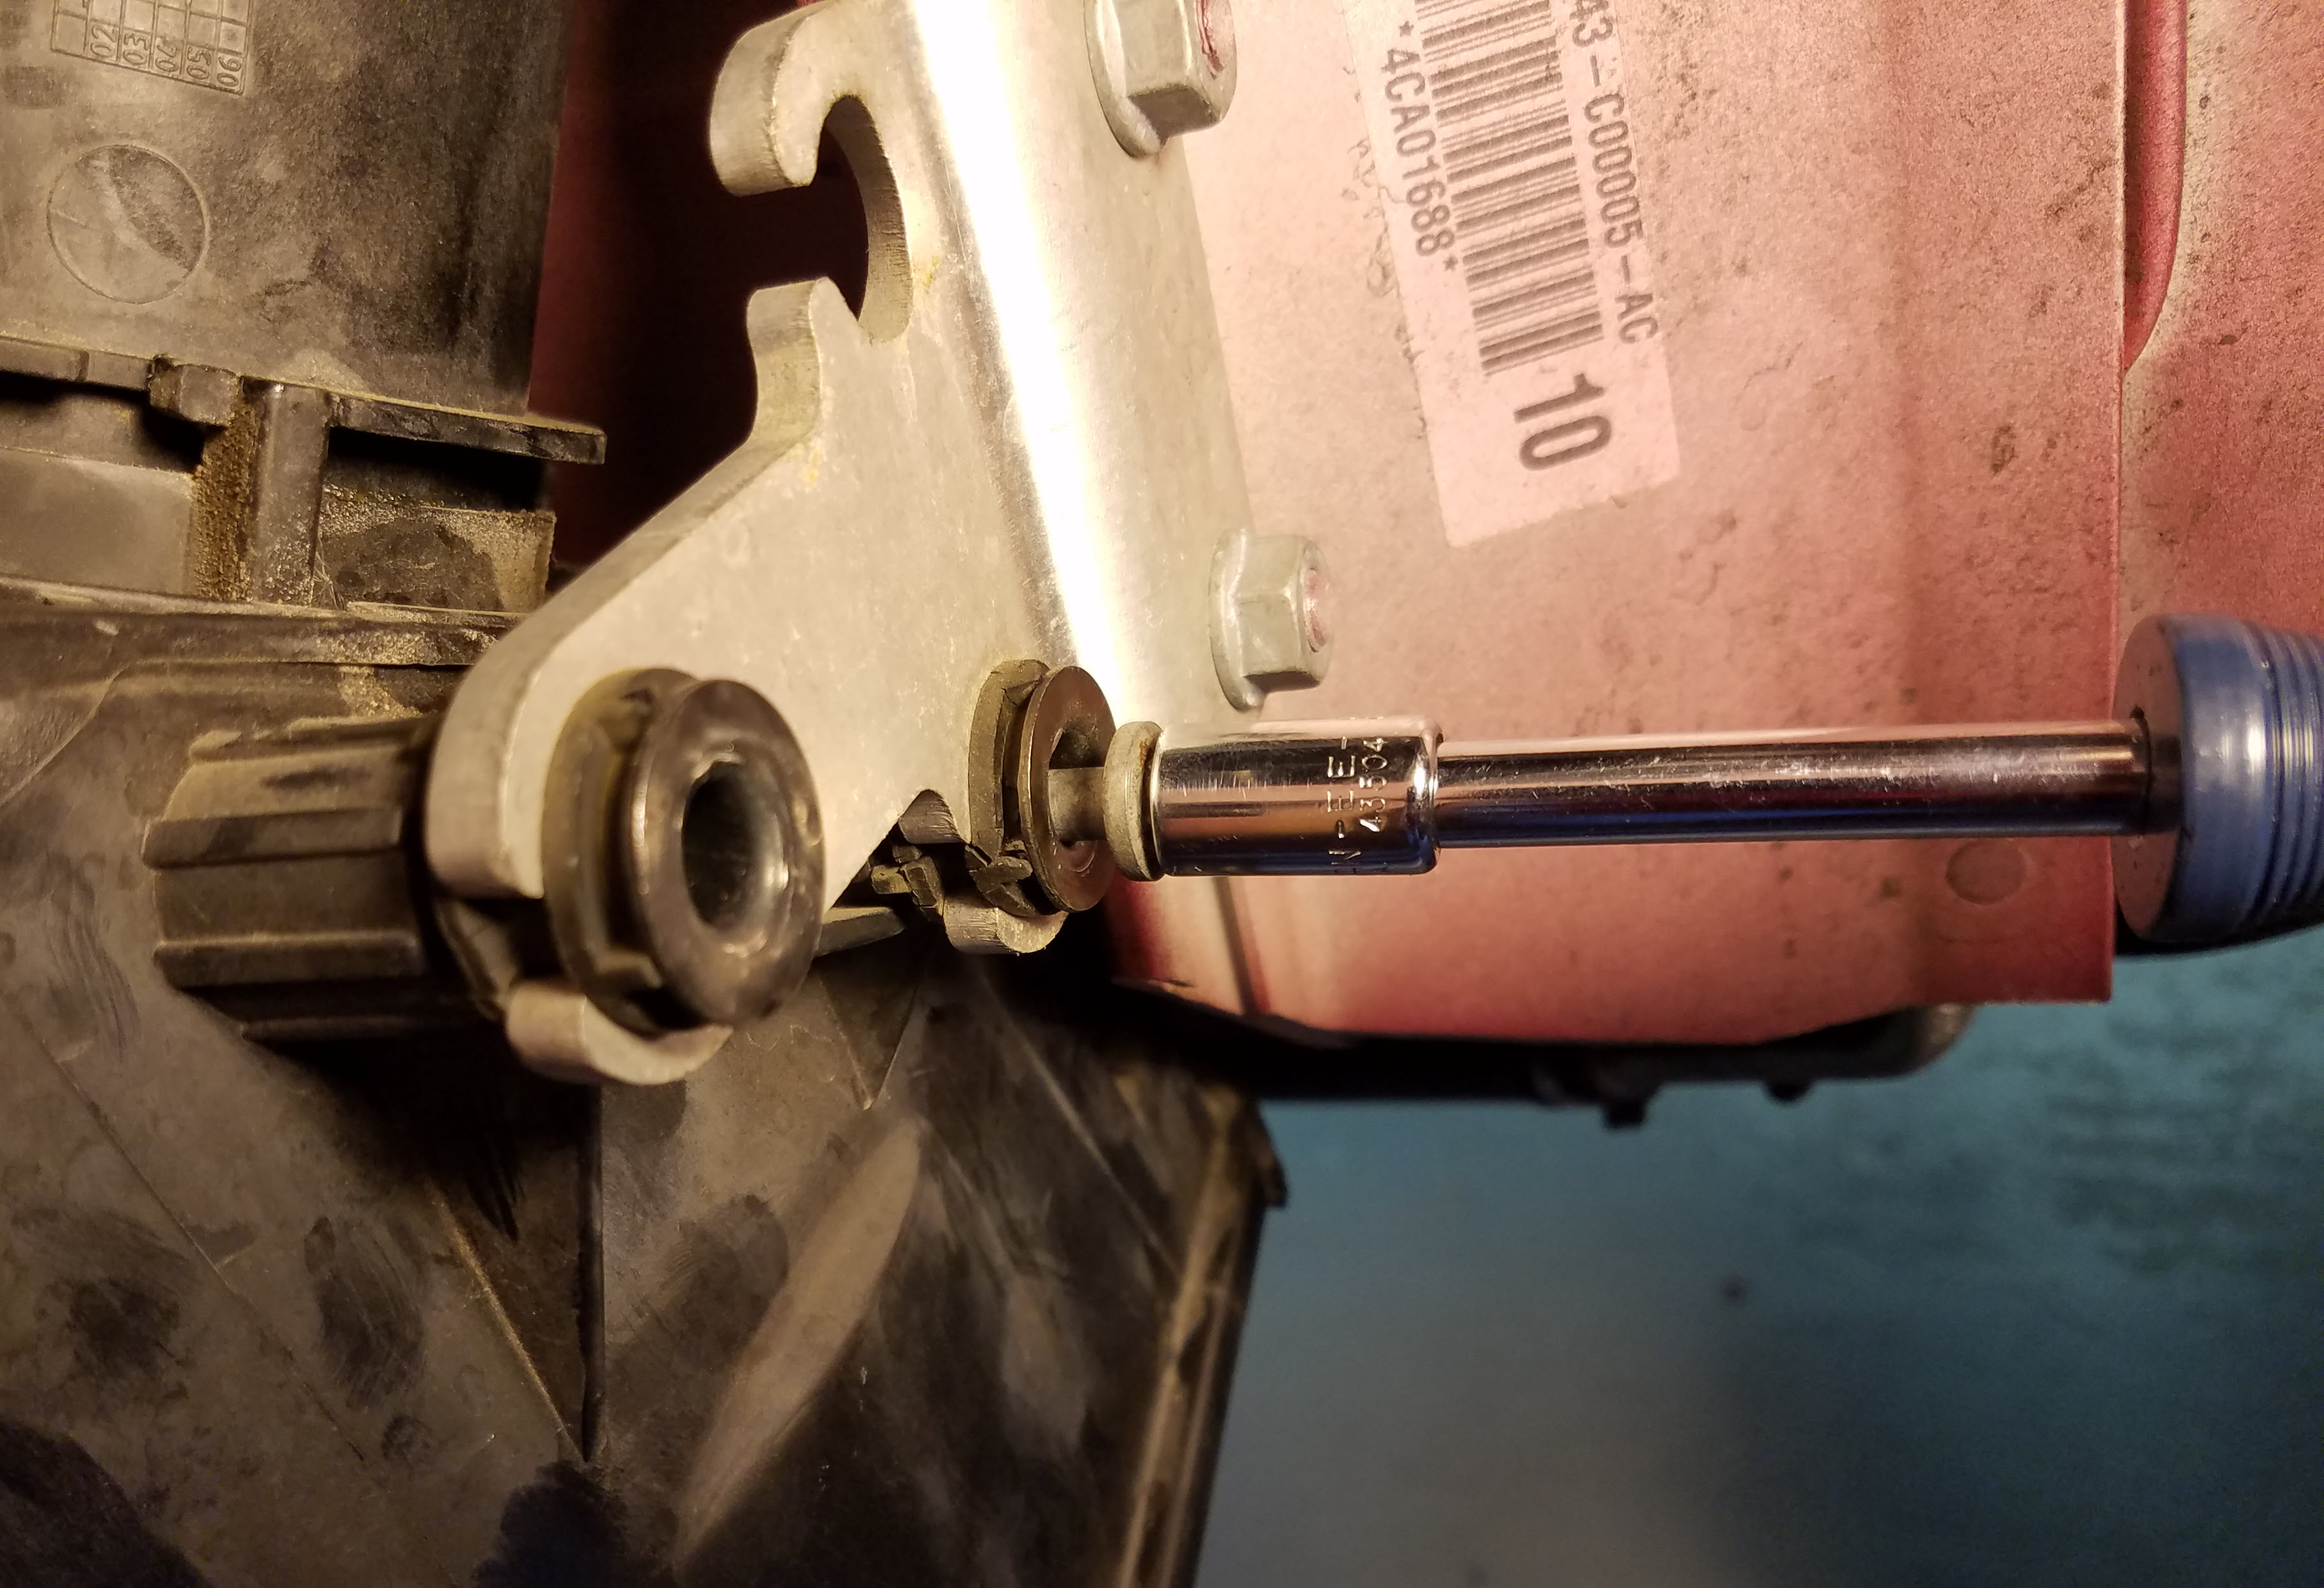
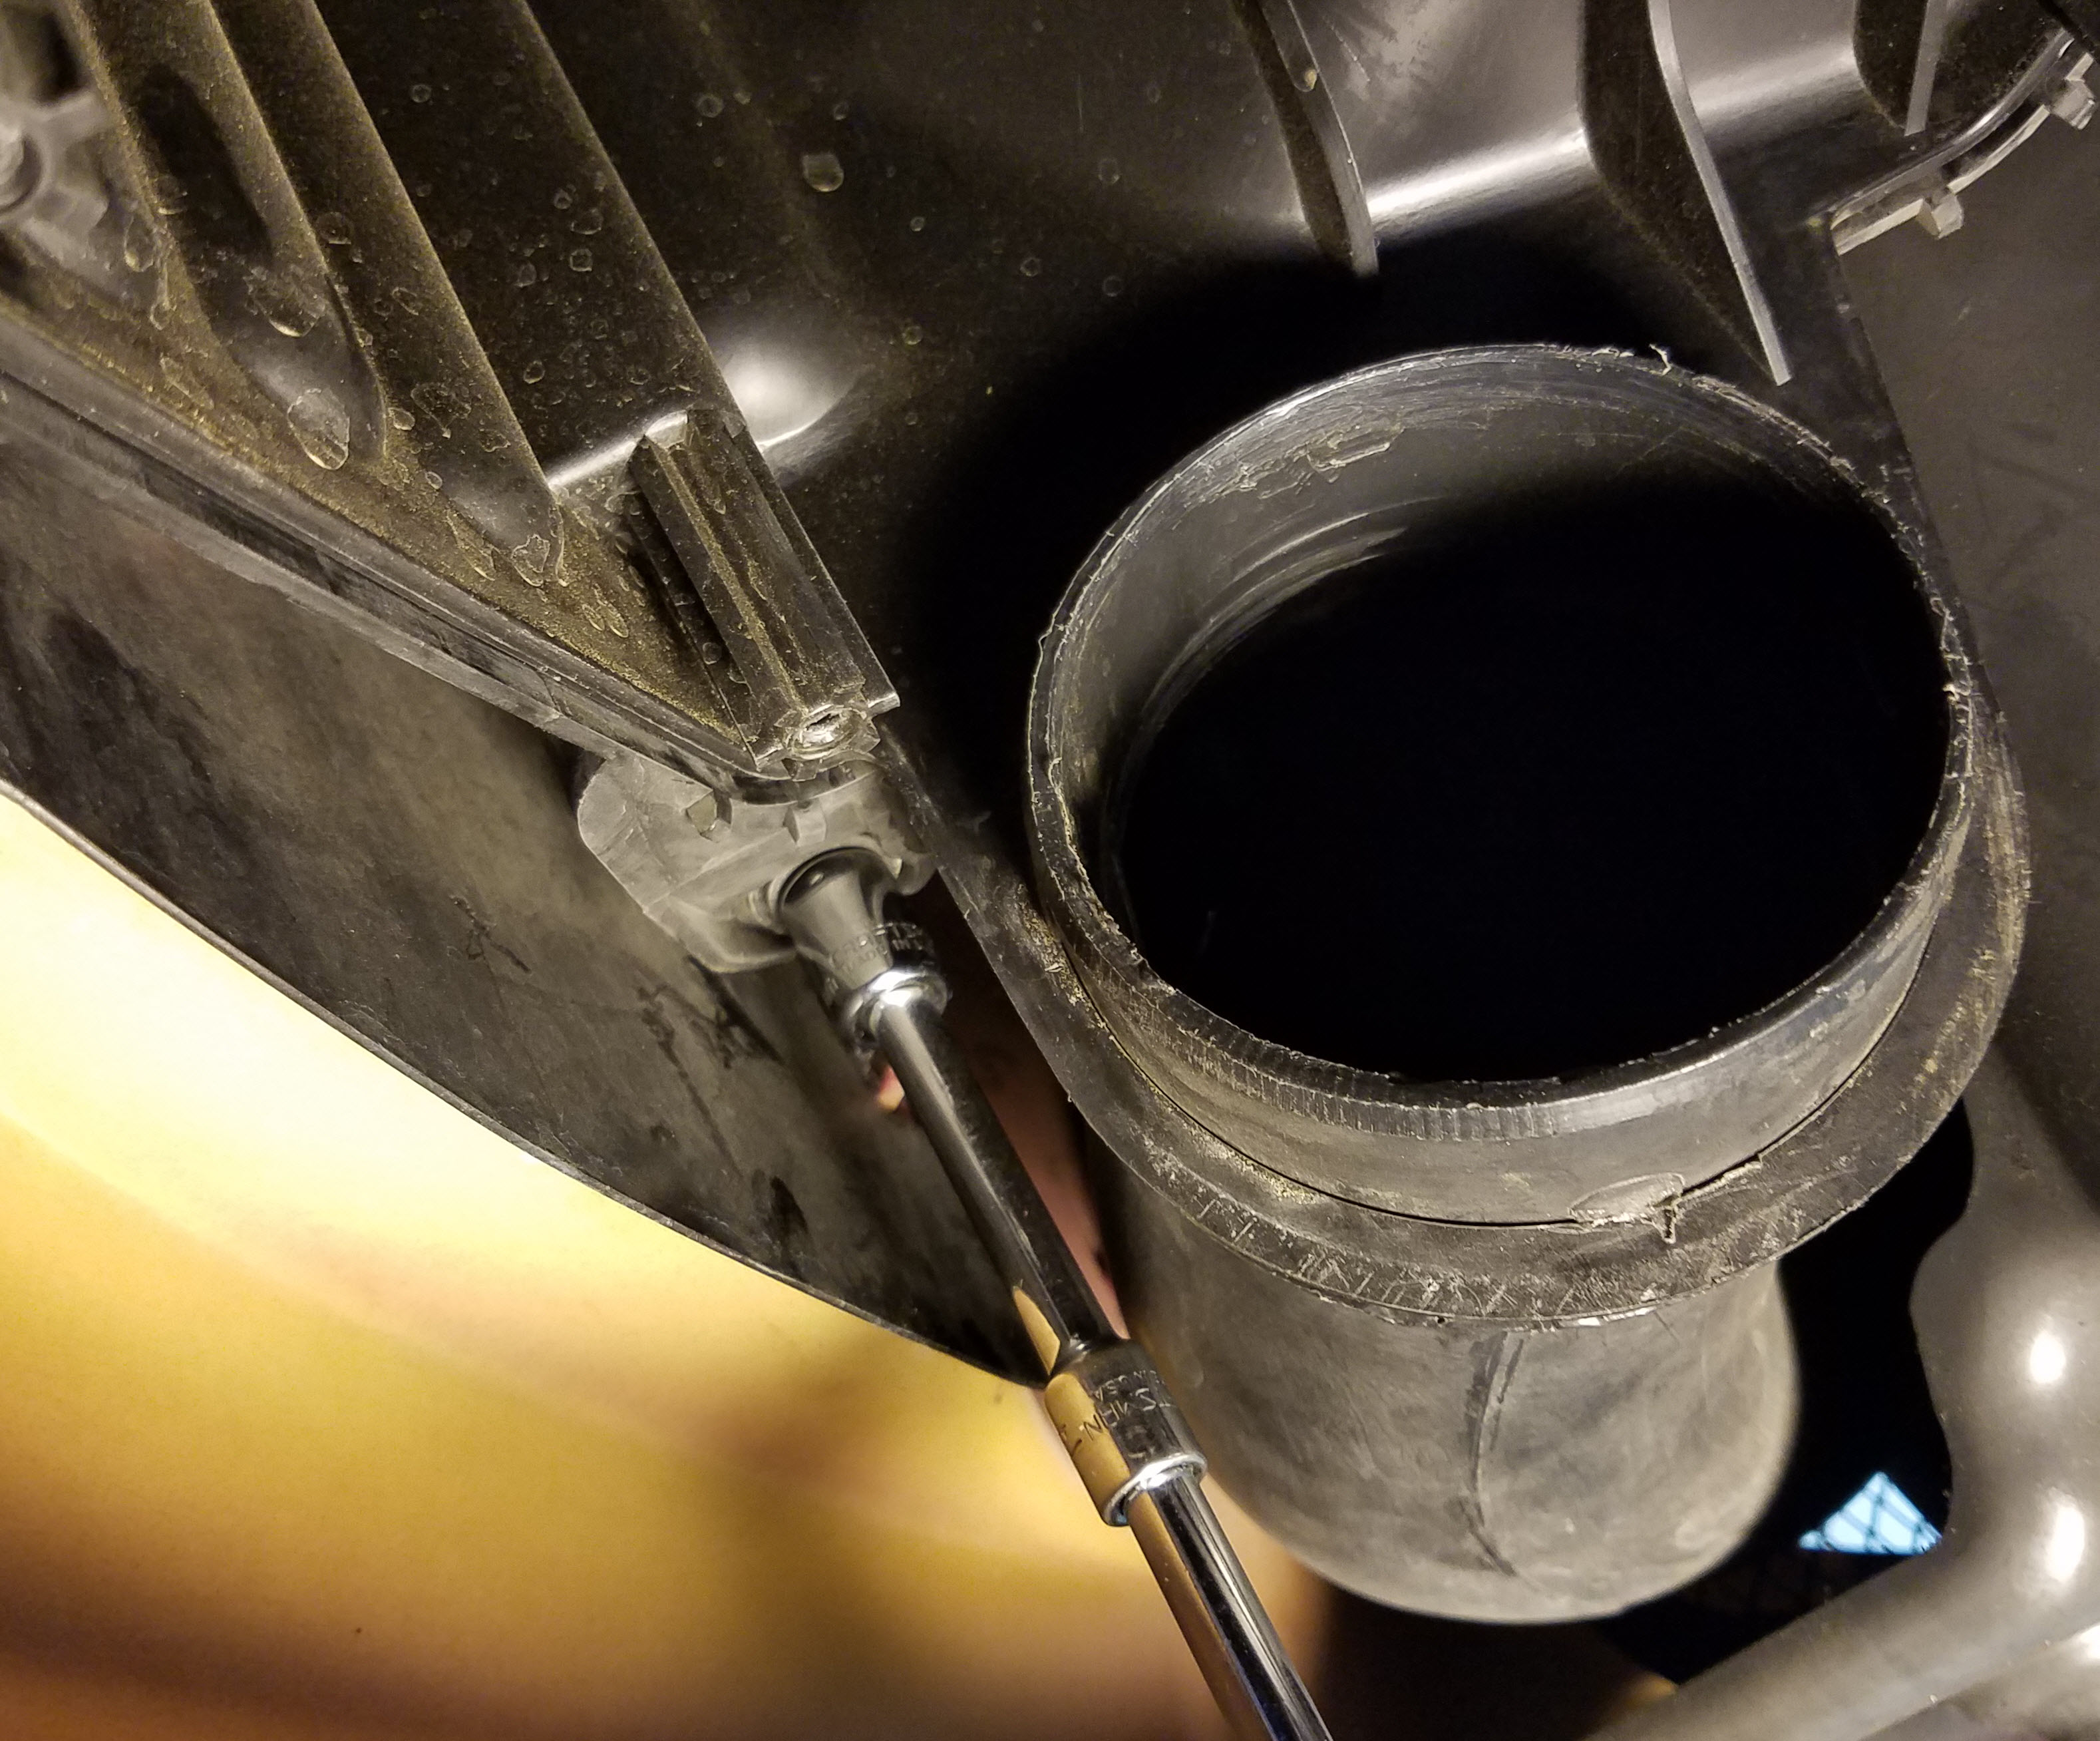
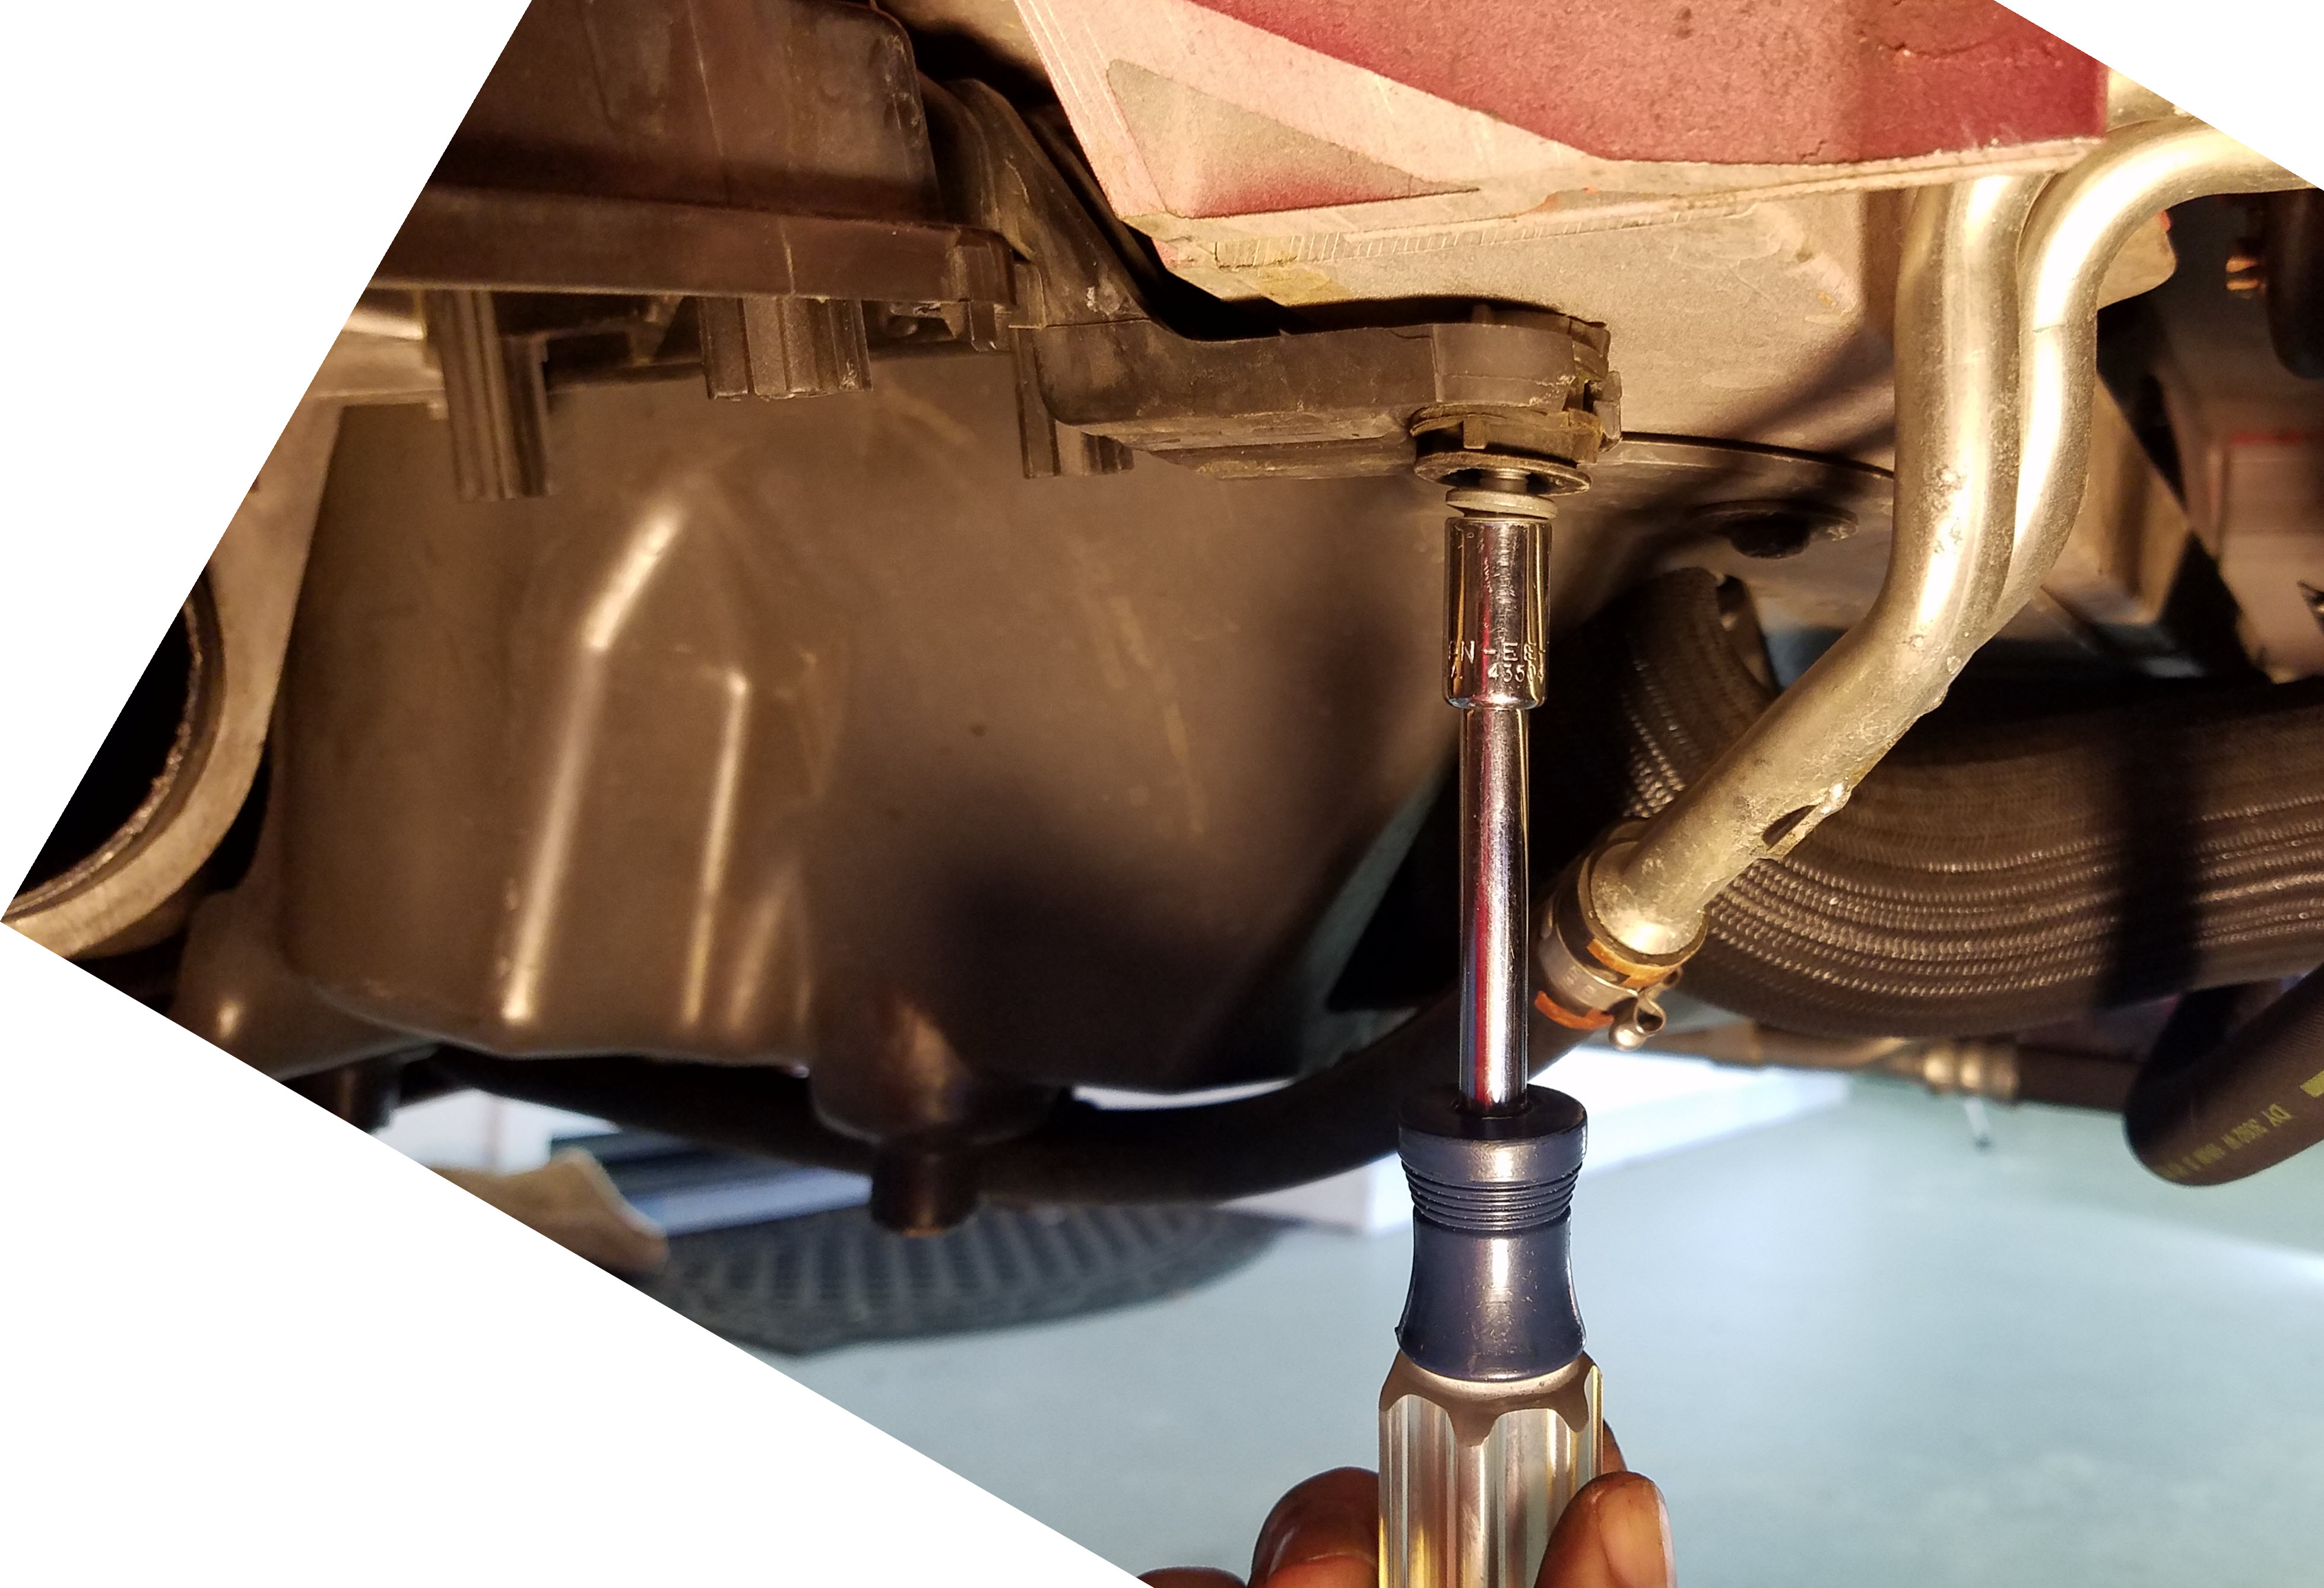
- Lying under the car looking up, use your 10mm socket to remove the one airbox housing mounting bolt at the front.

- Use your 8mm socket to remove the last mounting bolt at the rear.
- Don’t worry about it falling on you, it’s held in place by the air inlet pipe.

- Don’t worry about it falling on you, it’s held in place by the air inlet pipe.
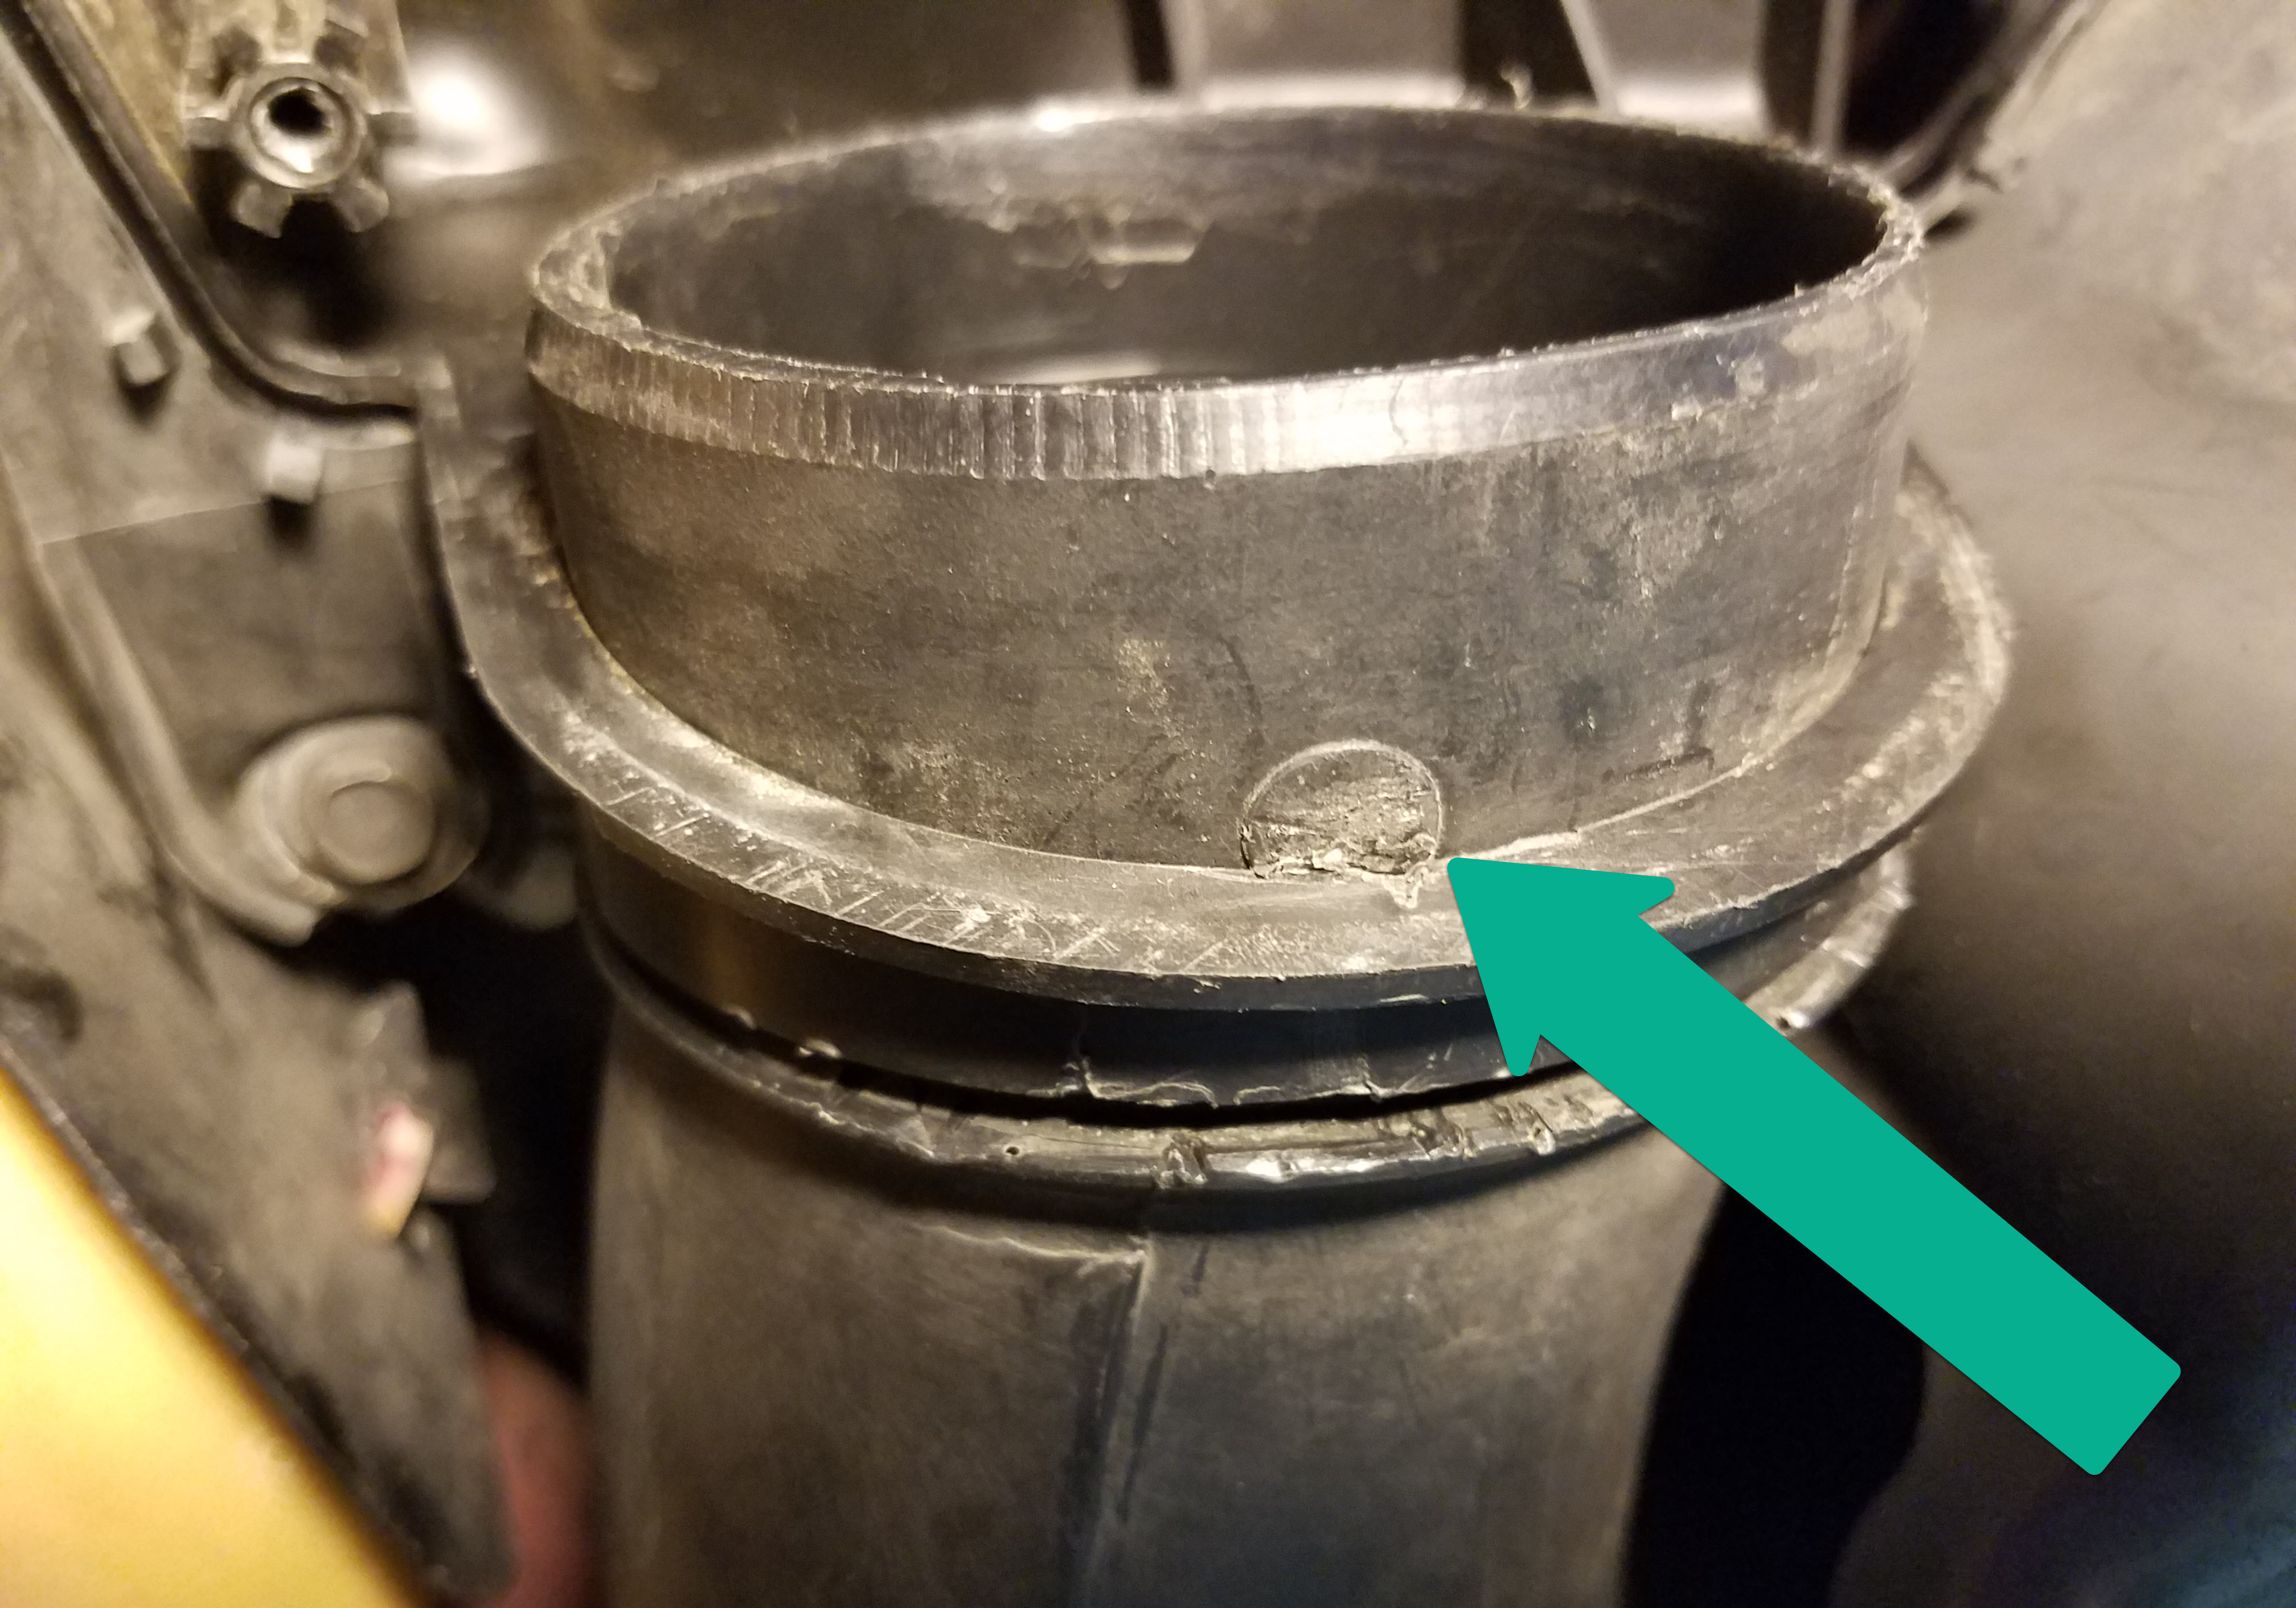
- With all the mounting bolts removed, it’s time to separate the aibox from the air inlet pipe. This is a bit tricky since it’s just a slip fit over the end of the pipe. There isn’t a lot of wiggle room, but you’ll need to work the airbox flange off the end of the pipe carefully.
- There was a bit of a ‘lip’ on the pipe that I had some challenges wiggling the flange of the airbox over.
- This is all just plastic, so you need to be careful, patient and gentle so not to break anything.
- Again, I’d really recommend that you watch my video below on how to do this.

- Once it’s clear of the inlet pipe, you just need to finagle the airbox out of the space. Just be careful and take your time, it comes out easy enough.

OK, that’s it! You’ll now have access to all the bits hidden behind and above it.
When it’s time to put it back together, please check out my other article and video on How to Install the airbox [Coming Soon], complete with the proper torque settings.
Video
Here is a short video showing the process I followed above:

Can you tell me on this image which side MAF sensor?
LikeLike
Hi Zain. I’ve responded by email. Not sure exactly what you are asking.
LikeLike