
I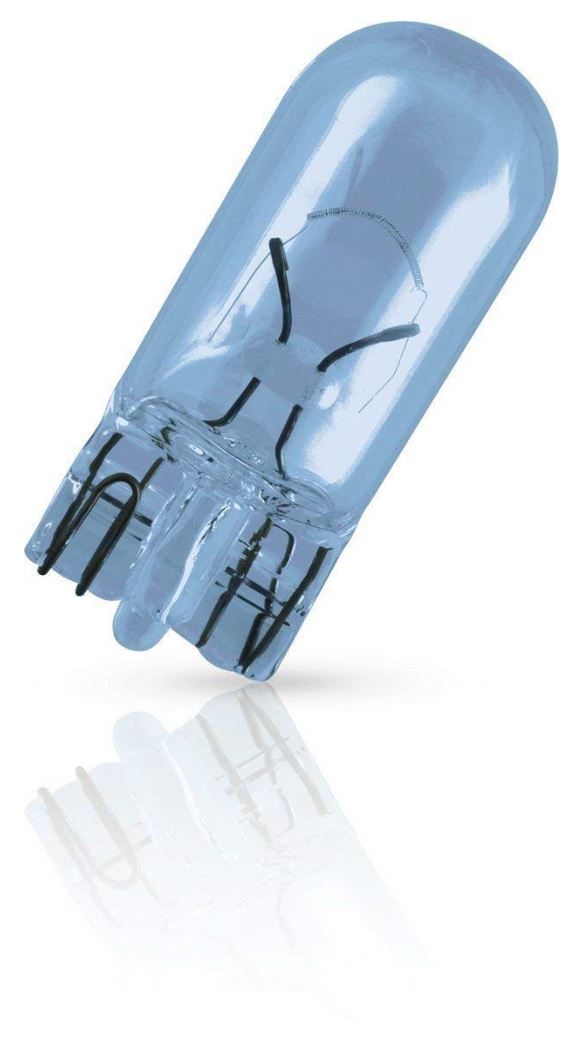 hadn’t even noticed that my DB9 had one of these until a reader of this blog asked me how to change it out. In each headlight cluster there is a small ‘Position Lamp’ that is always on when the lights are on. You can see it here in this picture. If you peer through the glass when the lights are off, you’ll notice the bulb is actually BLUE, even though when it’s on it appears mostly white. Like any bulb they can burn out, and eventually one of mine did. Is it the end of the world? No, but one you notice it all I can think of is that it’s a one eyed pirate. Changing this bulb isn’t trivial. As you can see it’s right at the very front most area of the headlight pod and there is no easy access to it. As you will learn in this article, it’s 99% prep getting to it, and 1% changing it. Read on to learn how.
The position lamp bulb is required by US law along with a few other bulbs on the car. Apparently we need to have a front running light, and it must be clear.
The headlamp cluster also has a separate bulb for the turn signals that is mounted just a few inches rearward. Completely different style bulb, and is orange (in the US).
Parts Required
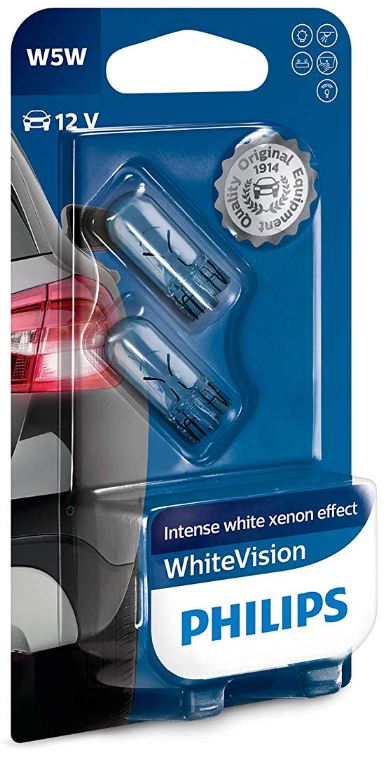
One piece of good news is that the bulb isn’t bespoke to Aston Martin. The bulb is Aston Martin part number 4G43-13465-AA-PK. You can purchase this from your dealer for a few dollars, or online for about $15 USD. But, when it arrives you’ll discover that the part is really just a Philips 12961NBVB2 WhiteVision Halogen Headlamp Bulb W5W. You may be able to find this in your local auto parts store, or order it online from Amazon for just $9 USD with free shipping. They come as a 2 pack so you can either do them both preemptively, or have a spare on the shelf.
The same bulb is used in USA and European models.
When you read the back of the packaging it alludes to the reasoning for the blue color “Intense white Xenon effect”. OK – it looks cooler.

How about using an LED Version? I’ve been looking at W5W LED replacement bulbs, and the cheap made in China versions are just as cheap as this OEM bulb now. BUT, since this bulb is going to be visible through the glass of the headlamp pod I’m not too keen on having a fairly ugly LED bulb in its place. I think in all the other areas of the car we can safely switch over to the LED bulbs, but in this one case I will probably stick with the original.
Tools Required
Swapping the bulb doesn’t require any tools other than your hands once you have access to it. I have a few suggestions to make the process a little easier here.
 An inspection light will be handy since the pocket of space where the bulb is will be hard to see in.
A mechanics glove could be useful to protect your fingers while pulling the old bulb.
You might want to have a garage creeper to lay on while you are reaching up doing the work. Not essential, you can just lay on the floor.
Procedure
As I already mentioned all the work in swapping the bulb is in getting access. You need to be able to reach the front most part of the headlamp assembly, which in turns requires removing the Airbox, which in turn requires removing the air filter, which in turn requires removing the fender liner, which needs you to remove the road wheel. I’ve already documented how to do these procedures, and here are the links to each step:
- Single Point Jacking (if you want to just work on the one corner)
- Putting your car on Jack Stands (if you’d rather have the car solidly in the air)
- Removing a Road Wheel
- Removing the Front Inner Fender Liner
- Removing the Airbox
I opted to wait and replace the bulb at my 2 year annual service which was just a month or so away from when I noticed it was failed. Part of the 2 year service is changing the air filter, which require doing about 75% of the prerequisite work on this list anyways. If you are close to a 2 year service you might want to do the same.
With all those steps out of the way, the rest of the process will only take a couple of minutes.
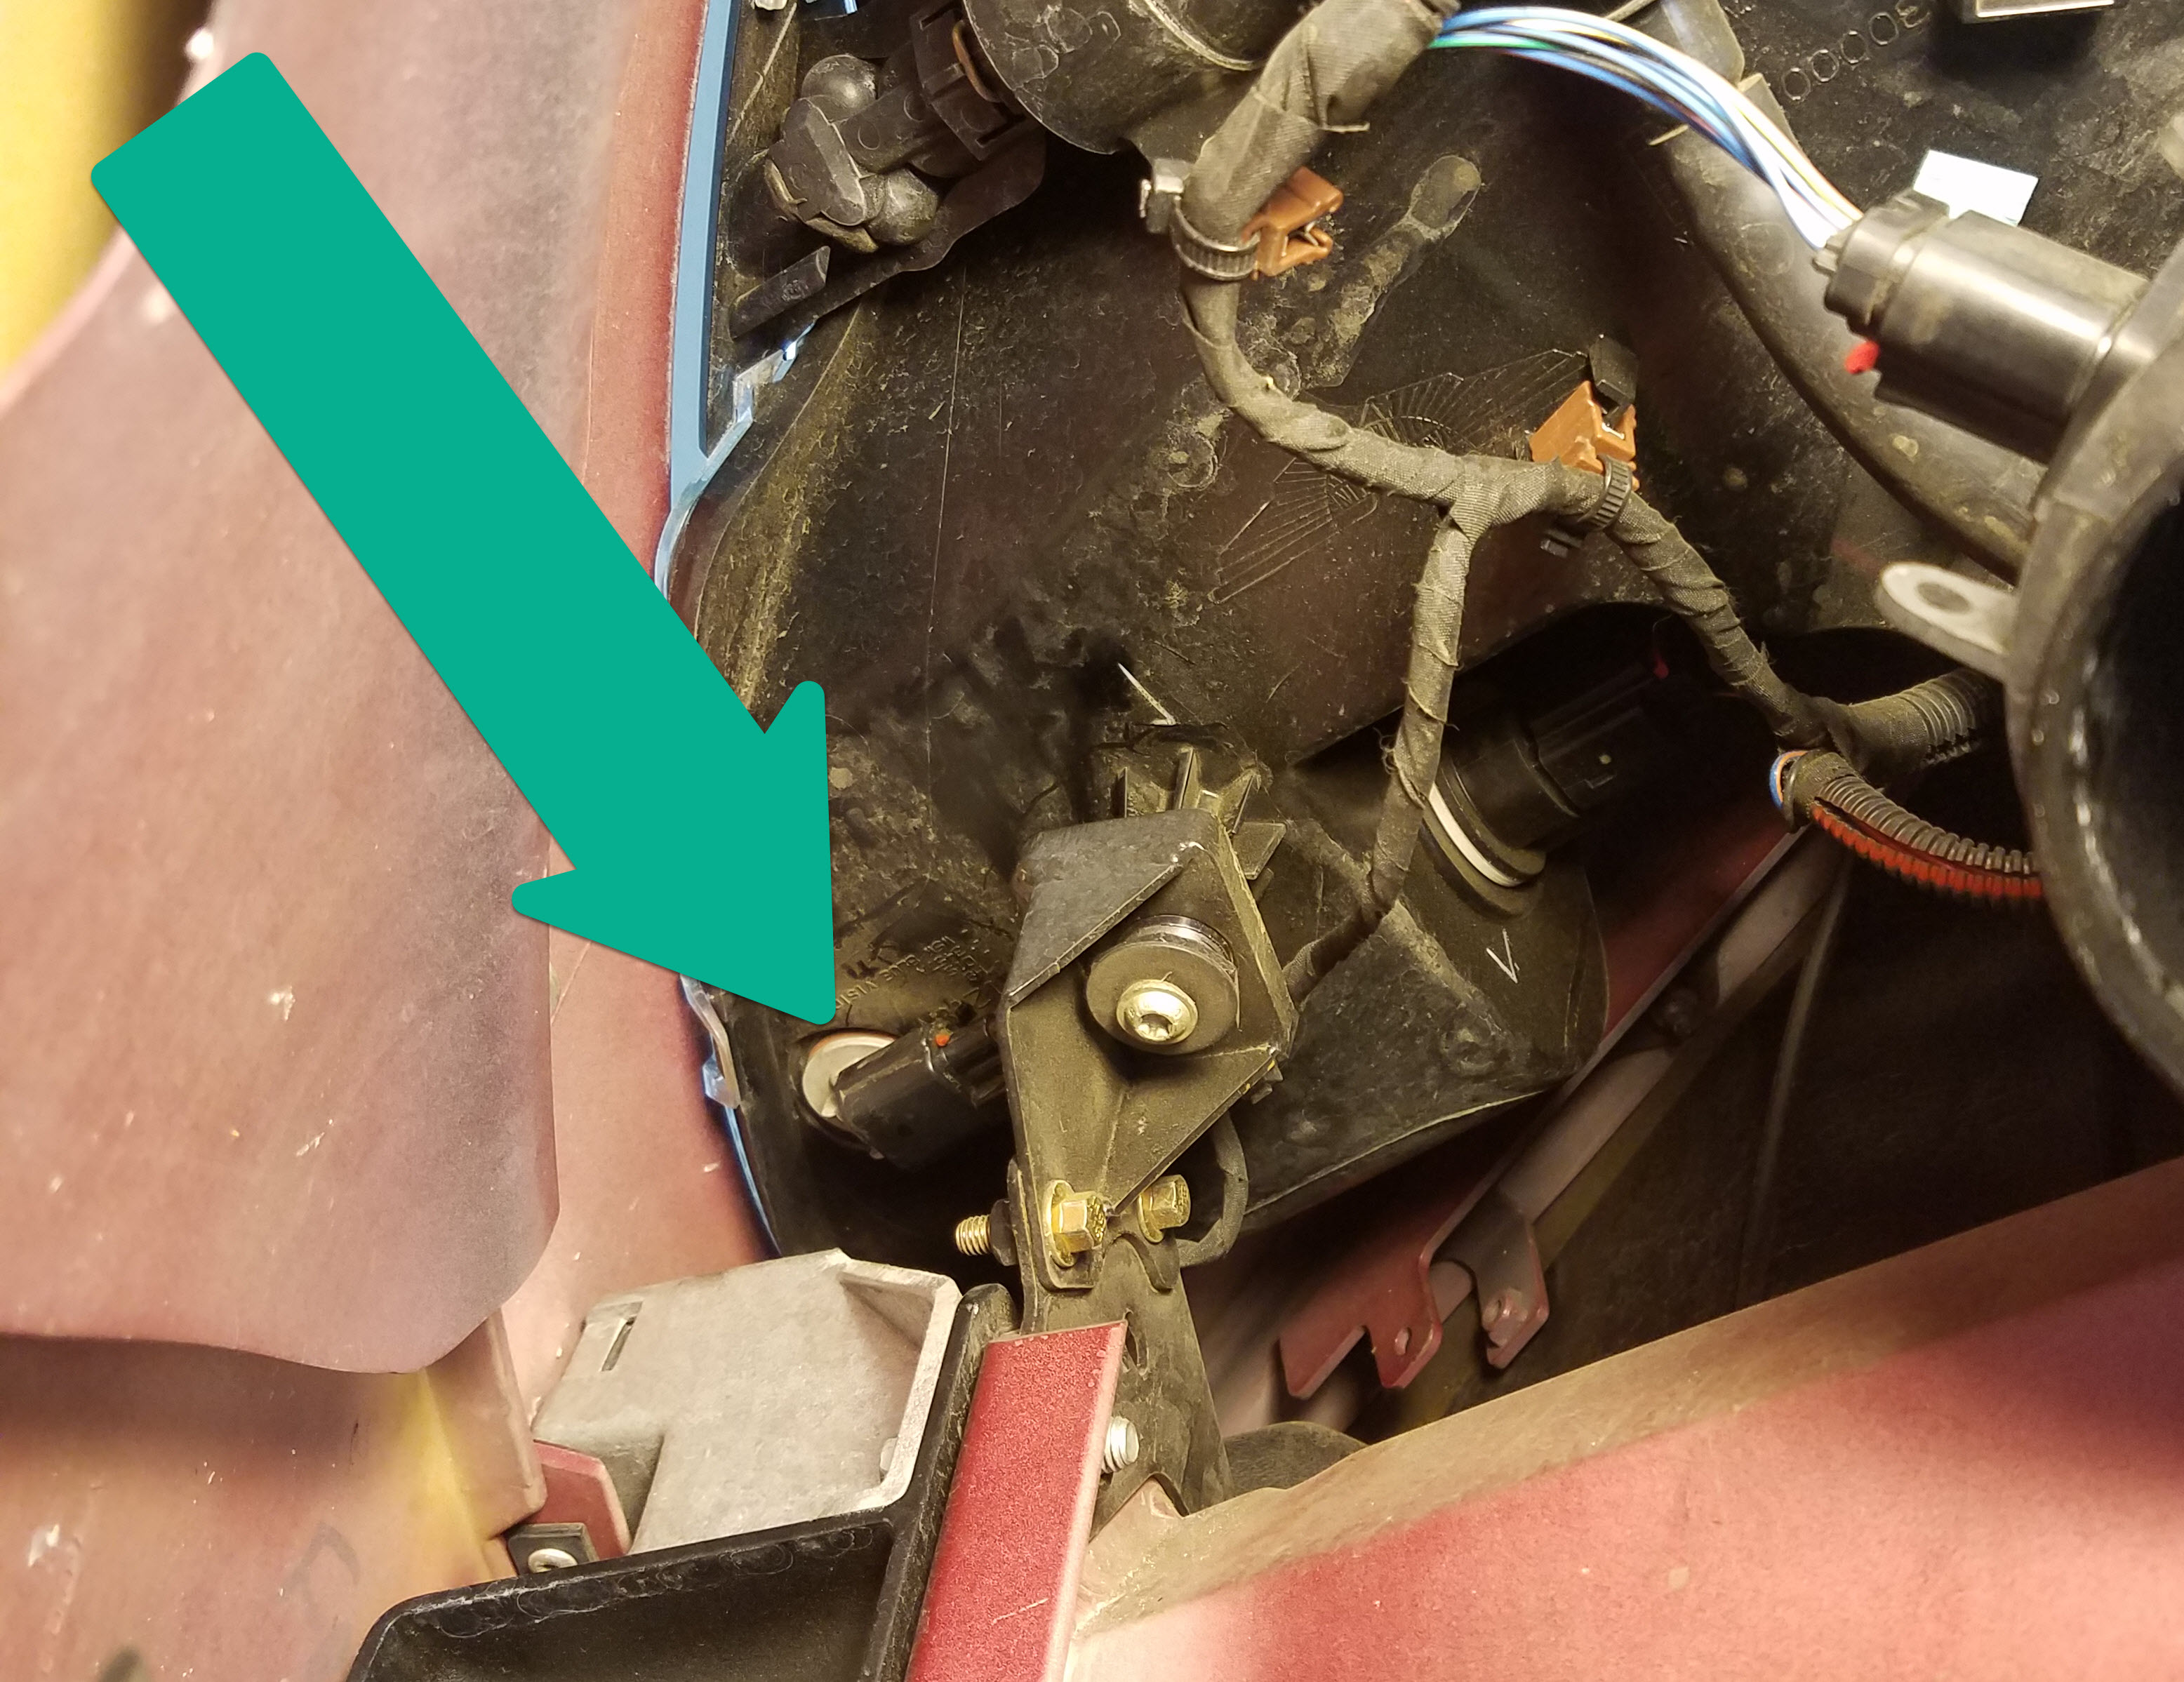
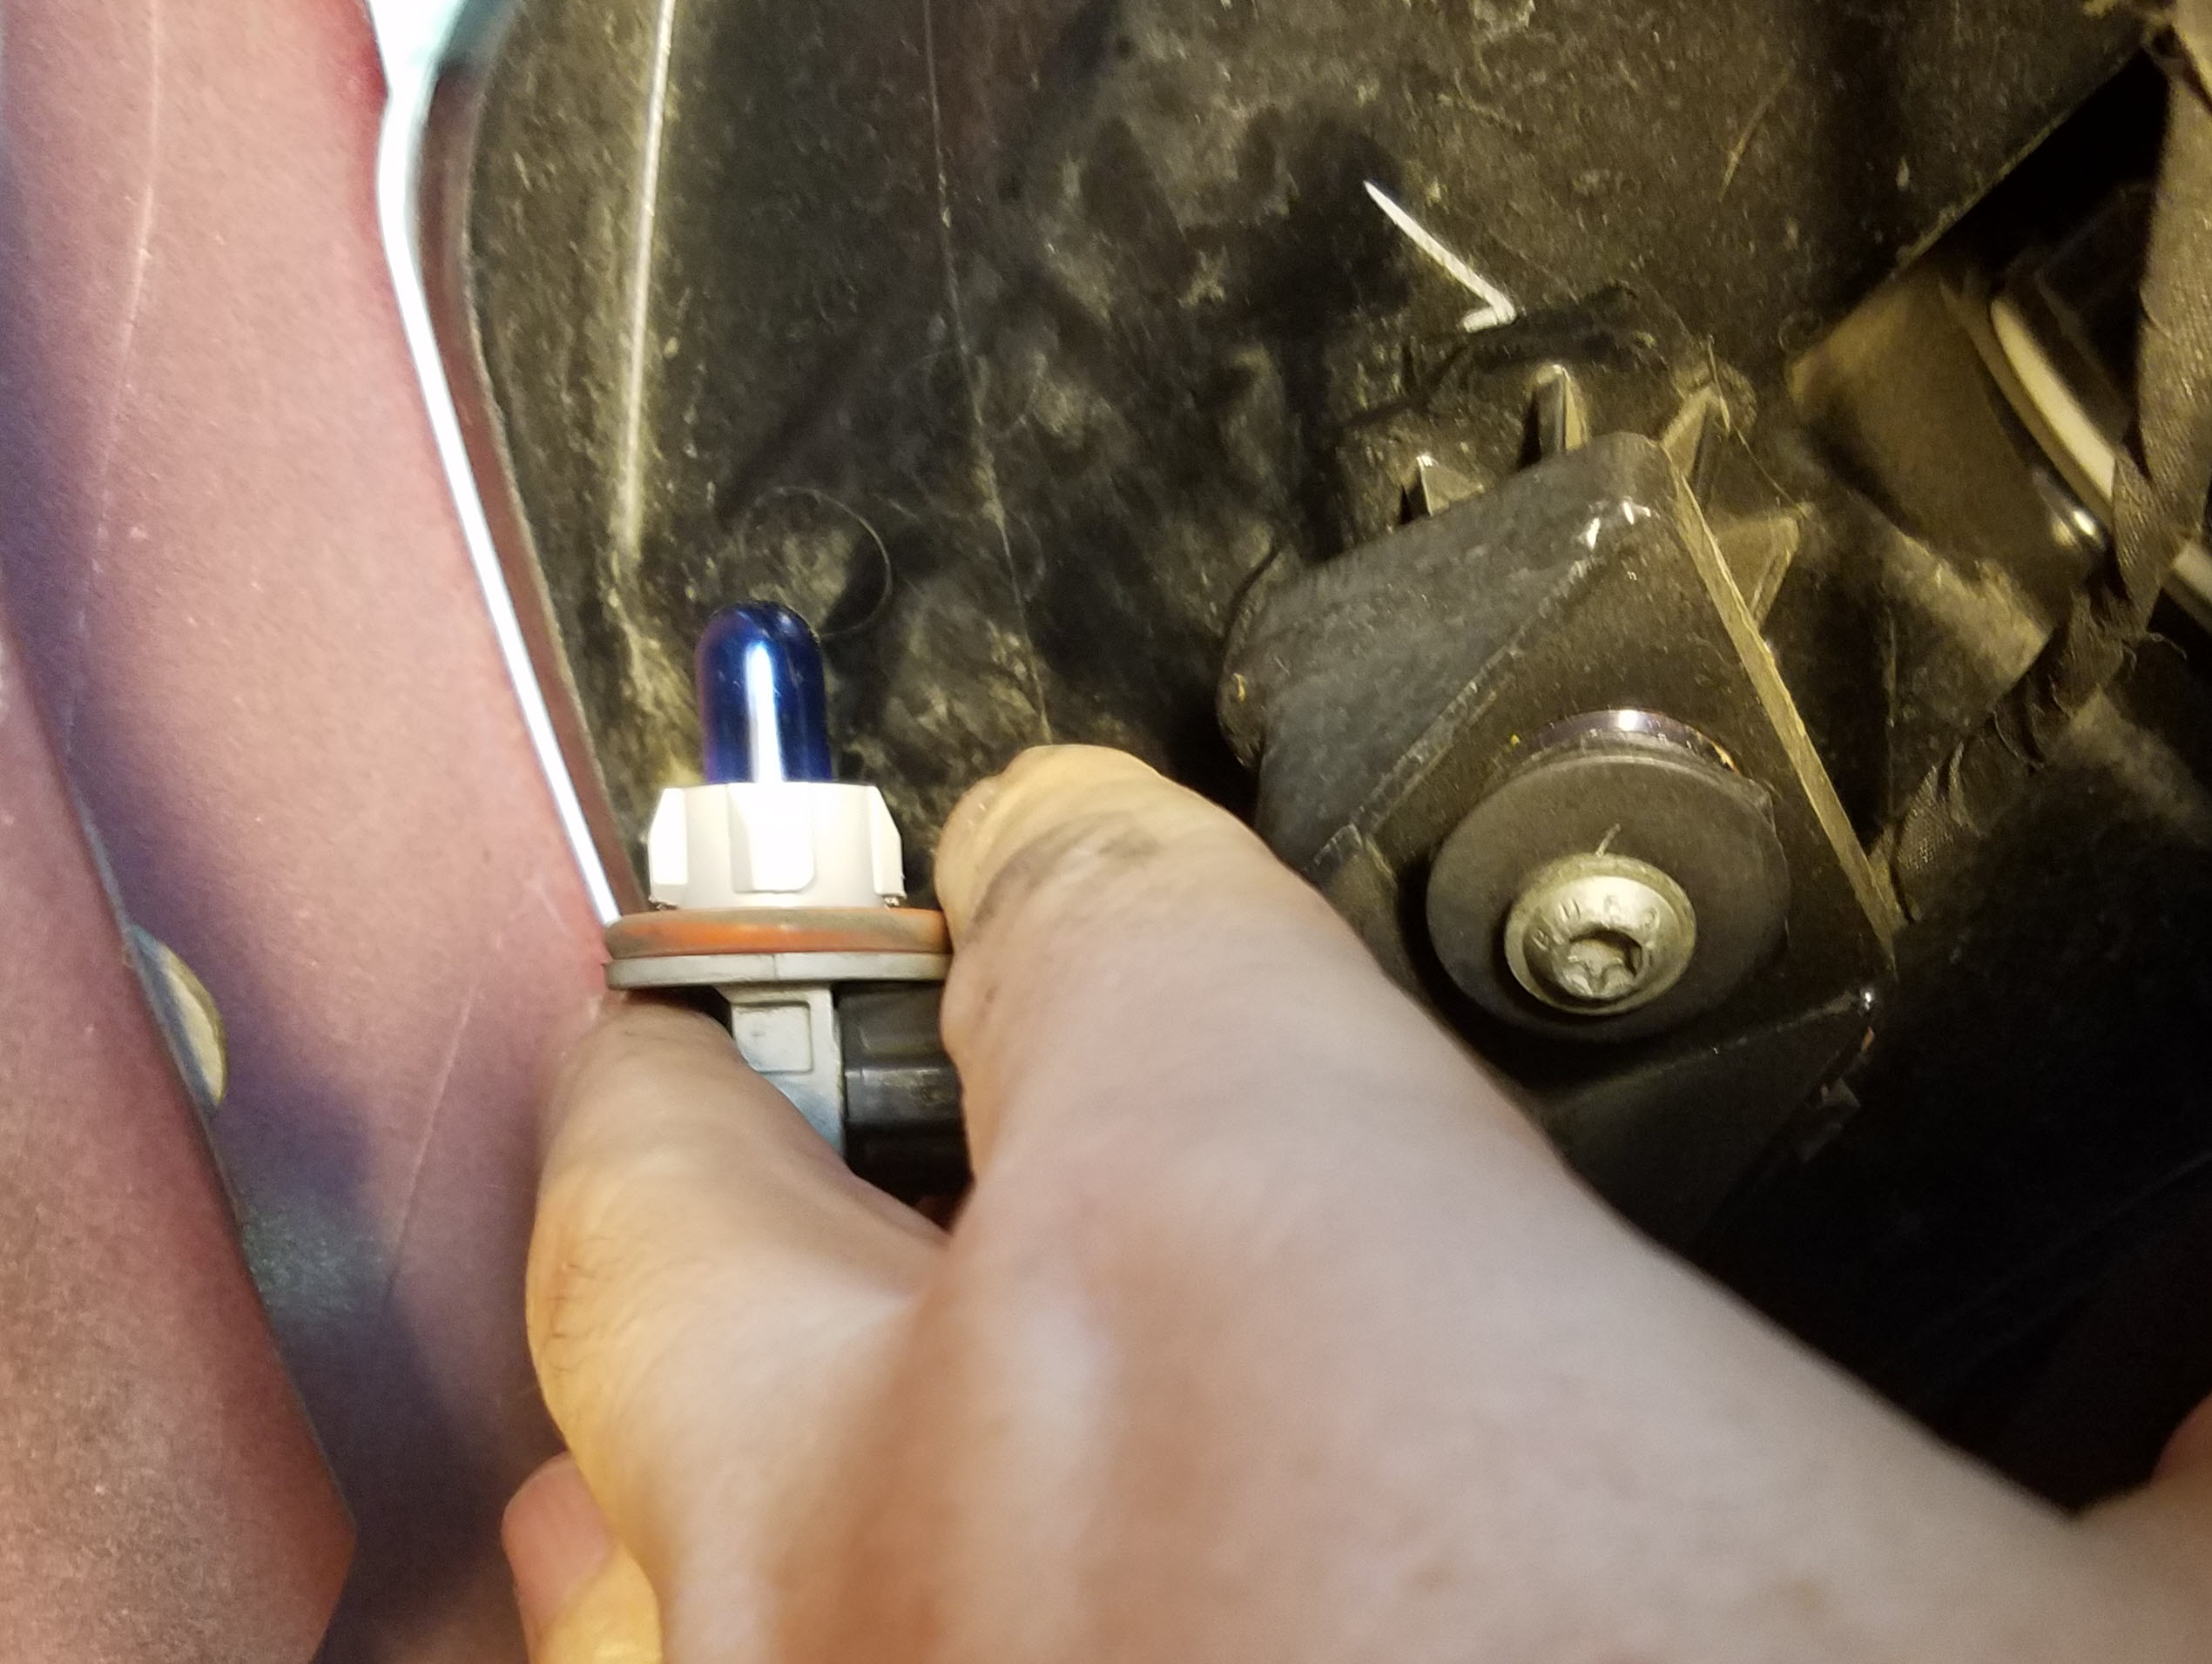
- Laying on your garage creeper (optional) and using your inspection light (optional) look up into the deepest recess of the space vacated by the airbox and you can see the bottom on the headlamp cluster. At the very nose of it you will just be able to see the smallest portion of the plastic lamp holder for the bulb.

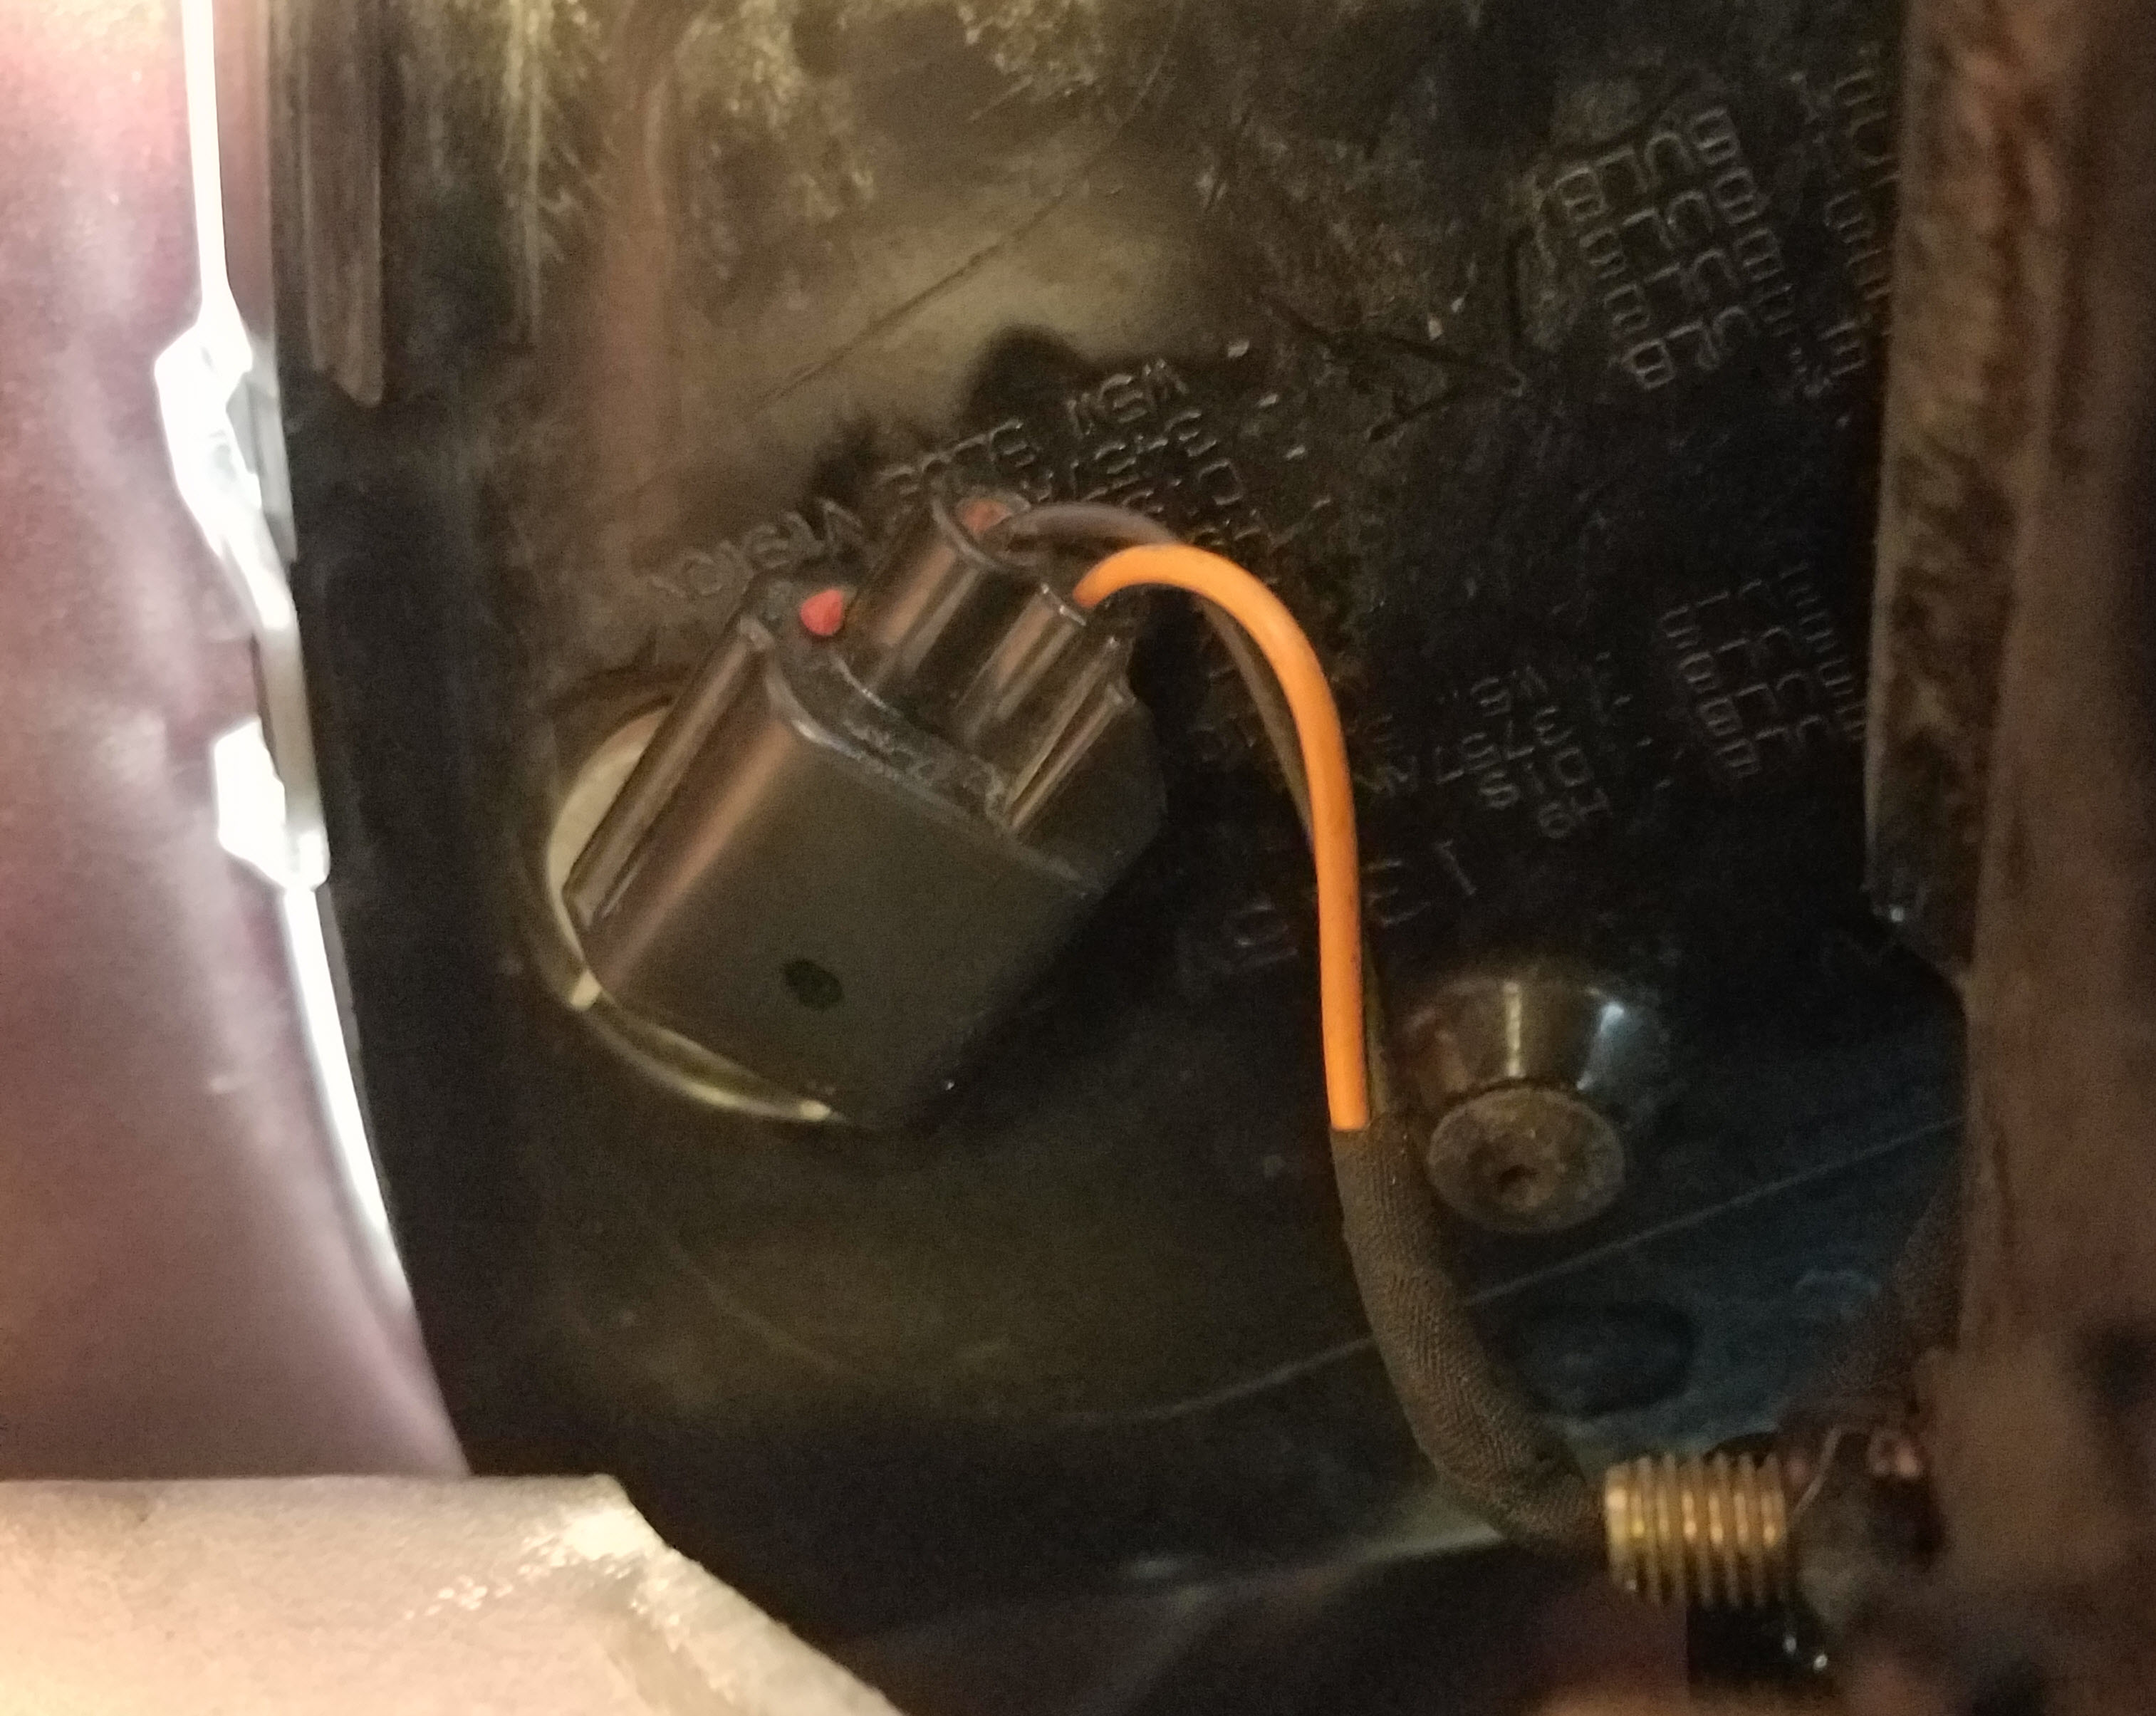
- Reach up and grip the holder, and then twist/rotate the base counter clockwise about 45 degrees.
- Be careful not to use too much force, this thing is plastic. If you are accidentally turning it the wrong way you don’t want to snap it off. If will give way easily enough, just be gentle.

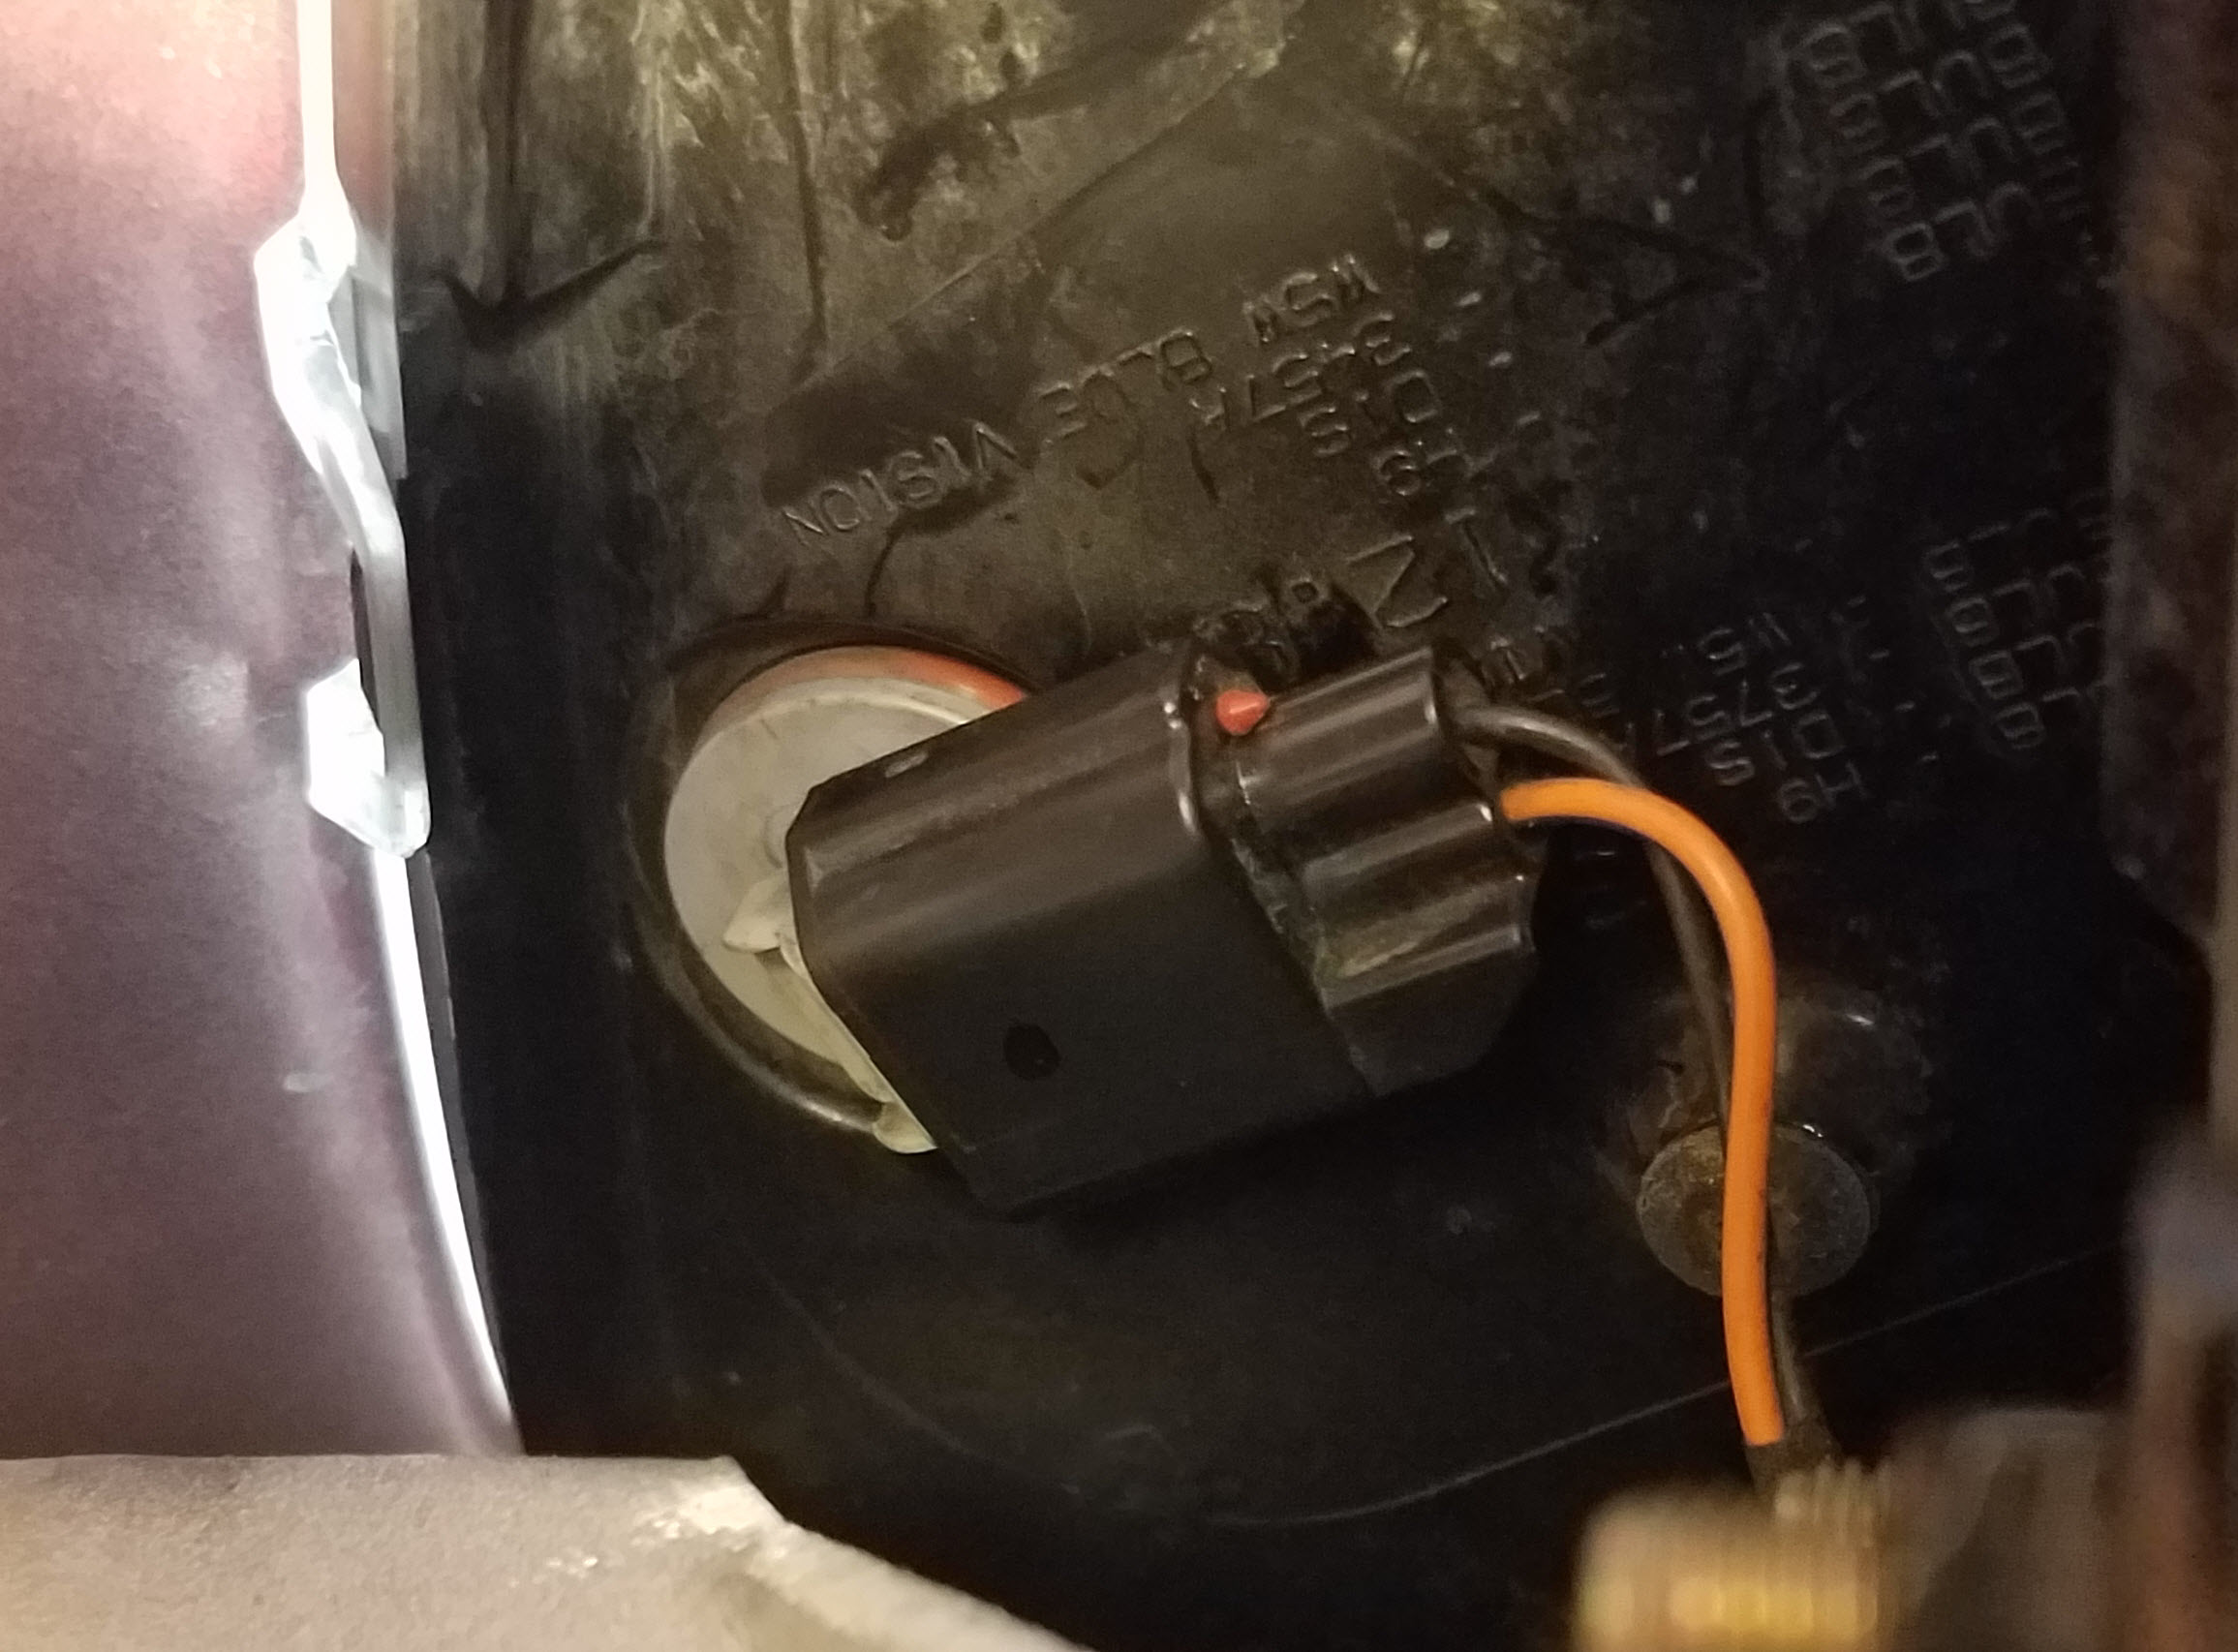
Already rotated 45 deg into open position
- Be careful not to use too much force, this thing is plastic. If you are accidentally turning it the wrong way you don’t want to snap it off. If will give way easily enough, just be gentle.
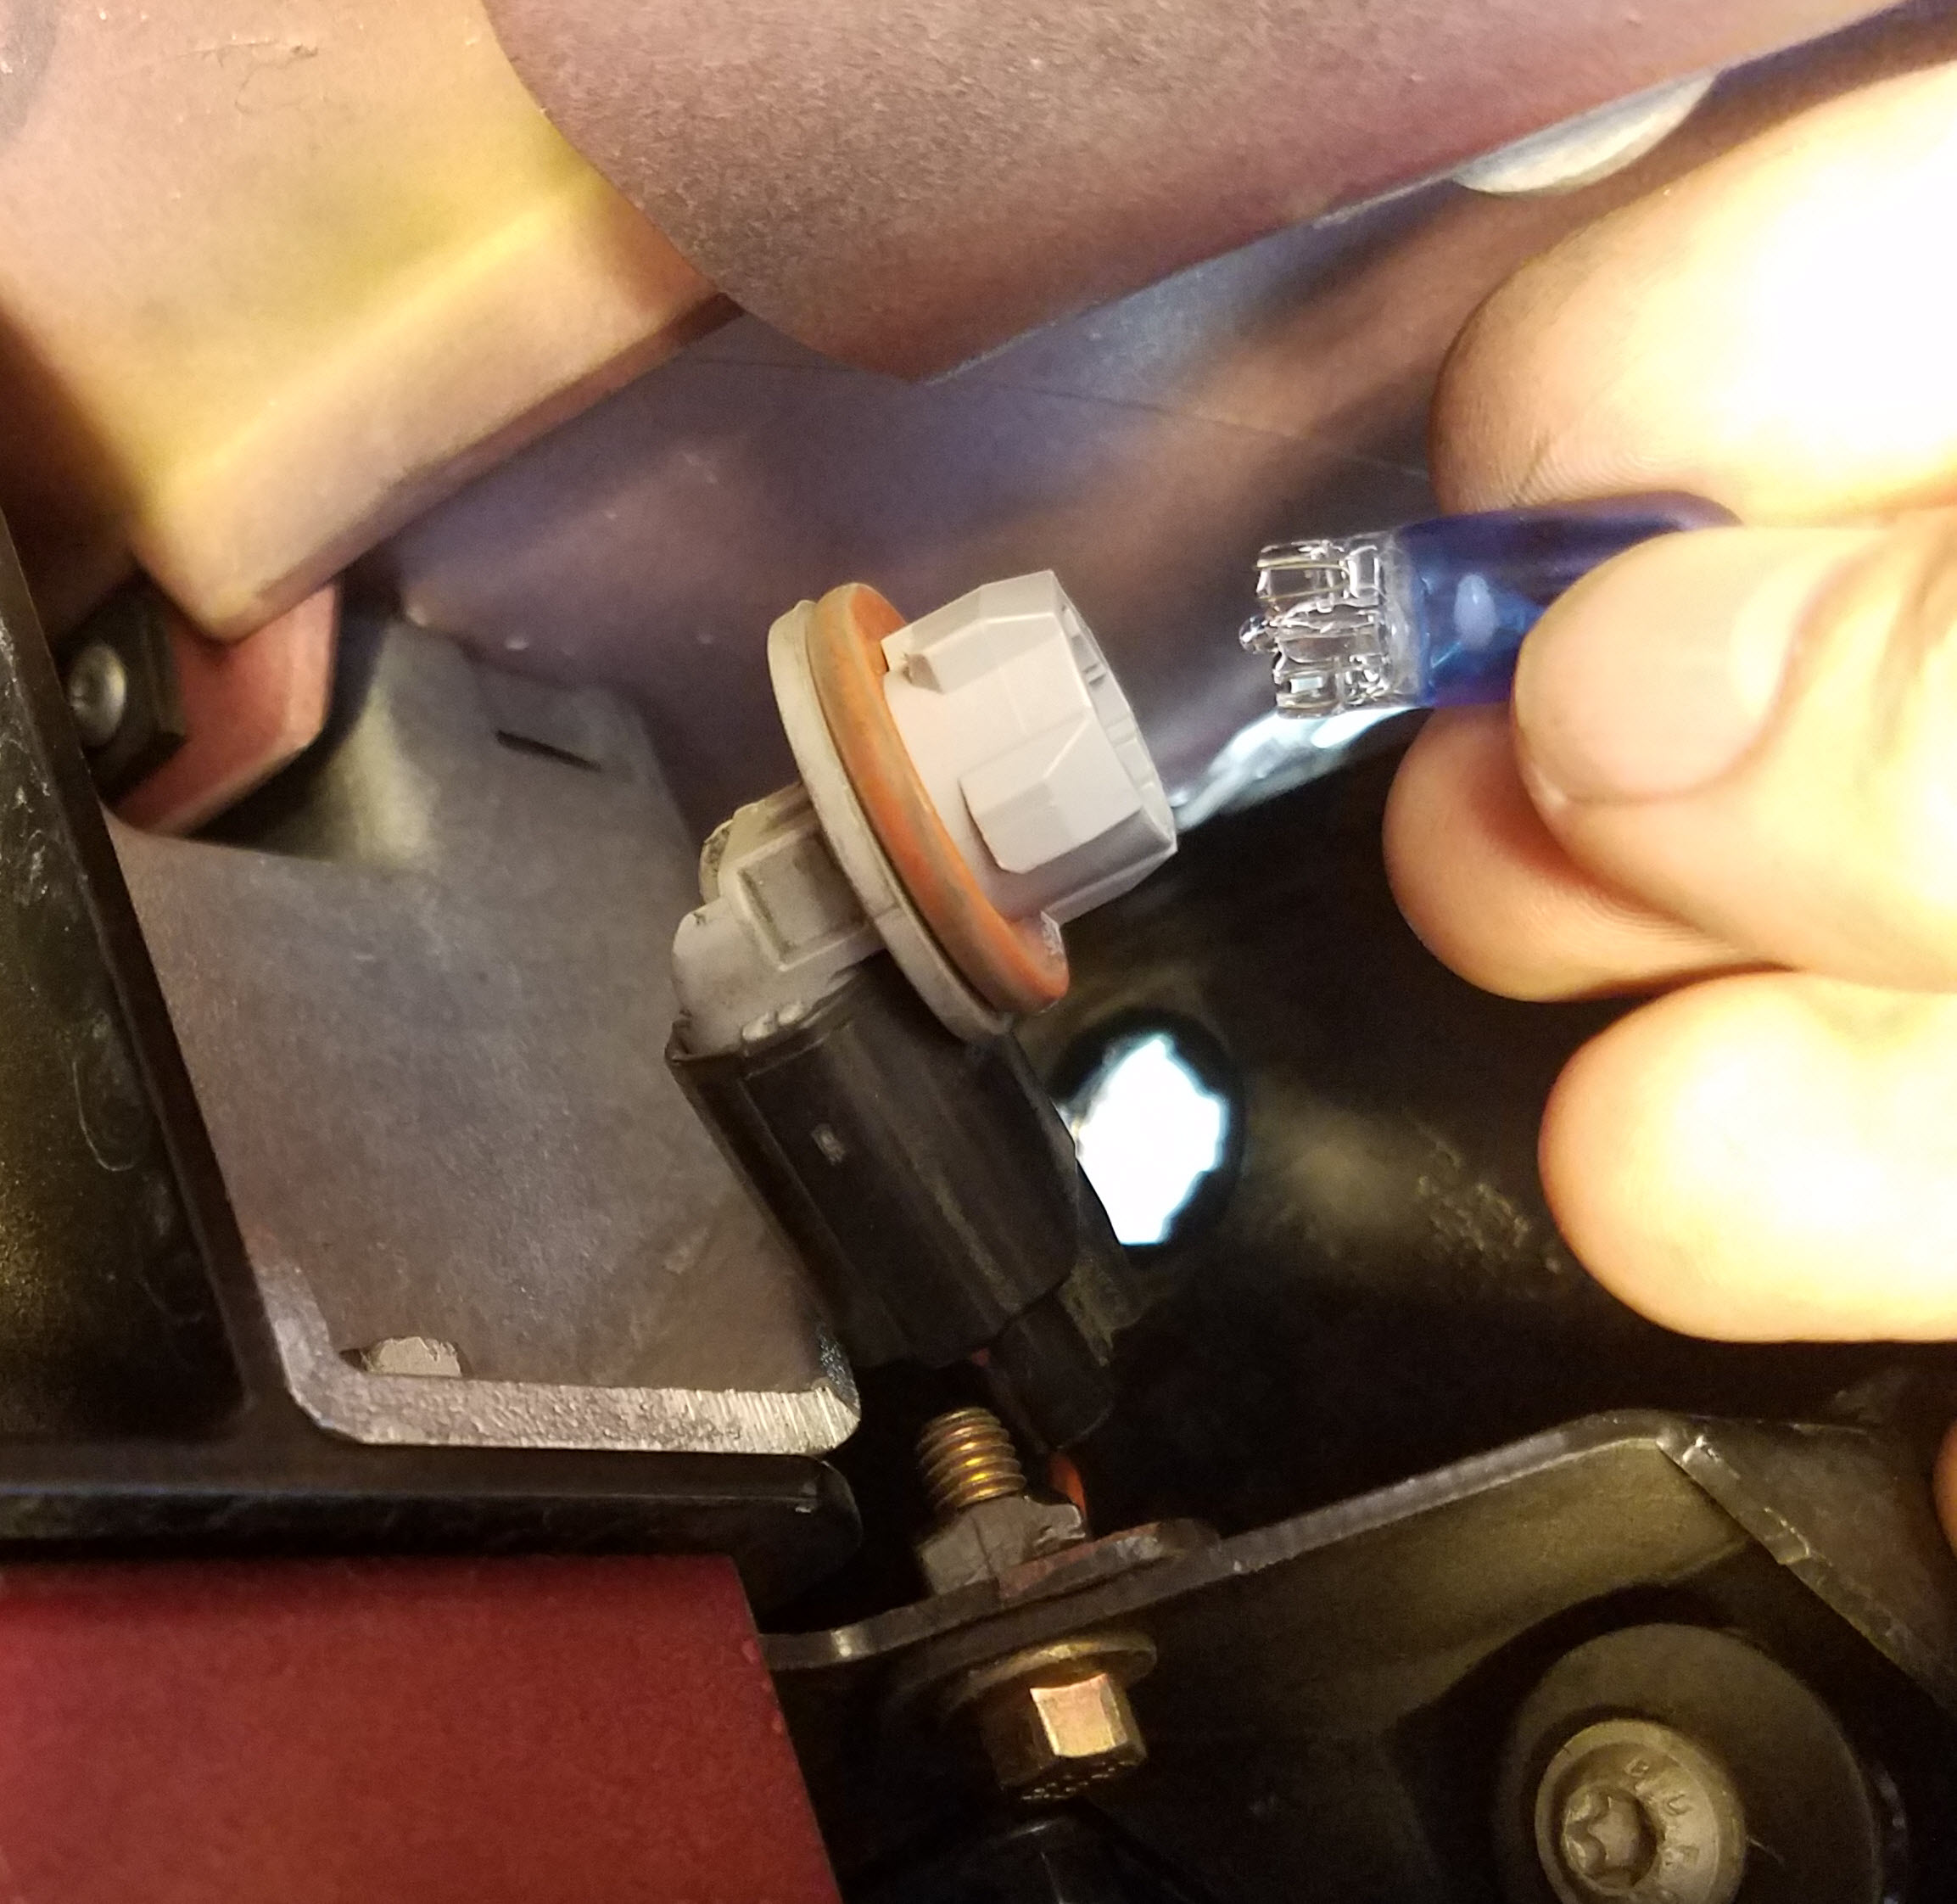
- The holder should then be able to pull down out of the headlamp cluster exposing the bulb.

Remove the old bulb by just pulling it straight out of the holder. It’s just a press fit and should come away easily.- Be careful here that you don’t hurt yourself. You are pinching a glass bulb and pulling on it. A gloved hand might be a wise precaution in case it breaks.
- Getting both your arms and hands into the space is a PITA. You’ll be on your back reaching up into a narrow tight spot.

- Using clean hands (you don’t want to get grease or dirt on the new bulb), open the package and then insert the new bulb into the socket until it’s firmly seated.
- Replace the plastic bulb holder into the opening and turn it 45 degrees clockwise until it clicks back into position.

Rotated back into locked position - TEST that the bulb is working now before you start to put the rest of the car back together. You could have a wiring fault or a faulty plastic bulb base, so be sure it’s working after the bulb swap. Turn on the headlights and visually inspect it. While you are at it, you should check all your other exterior bulbs (safety first!).
If your bulb is now working you just need to put the rest of the car back together (including properly torqueing the wheel nuts). Here are a few article and videos to help with the process:
- Reinstalling the Airbox [coming soon]
- Reinstalling the Front Fender liner
- Reinstalling a Road Wheel
- Lowering your car off Jack Stands
- Torqueing the Wheel Nuts
Video
Here is a quick video of the process I described above.

Hello, loving your informative site and excellent videos, I am brand new to Aston Martin ownership – just 2 weeks in to a 2005 DB9 V12 it is an awesome car ! There are a few niggles which I need to sort one of which is that the rear bumper is not secure in the centre section near to the boot latching mechanism, it appears to be “floating” a little and the paint is being scuffed from the boot lid as it is lifting a little. Do you know how to secure the mysterious fixings under the bumper centre section as I am unable to work out how to re-fix these annoying little fixings – I am working upside down and with a small mirror but I can’t work it out ! Keep the info coming – I love your methodical and detailed articles and videos congratulations !
LikeLike
Hi David. Welcome to the club. Never had the rear bumper cover off, so I’m not familiar with the connectors. Section 1-19 of the official Aston Martin owners manual covers it pretty well. Much is done from in the trunk and rear taillight clusters. Might be worth snagging yourself a copy of the PDF manual from AstonMartinTechnicalInfo.com like I detail in one of my early articles. Good luck!
LikeLike
Hi Steve thanks for your response much appreciated, the manual isn’t very specific I am afraid so it looks like at least partial removal in order to discover how the clips operate.
Thanks & regards Dave
LikeLike
Good luck with it. There was a section on the rear bumper cover, and it laid out the basics at least.
LikeLike