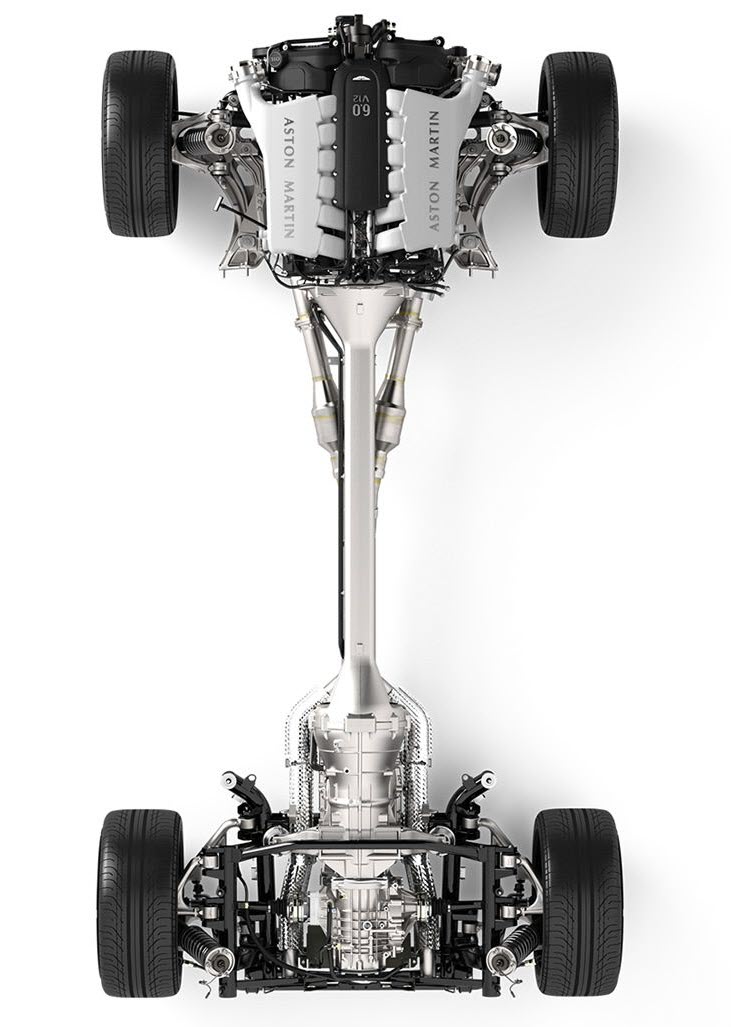
The Aston Martin DB9 has a very cool drivetrain support system. At the front the engine and suspension system is all mounted to a subframe. At the rear the transmission, differential and suspension system is mounted to a rear subframe. Connecting the Front and Rear is the ‘Torque Tube’ that comes off the back of the engine and links to the front of the transmission. All together you can literally drop the entire power train out of the car by disconnecting the subframes. Why talk about this now?
At the rear of the car if you need to do some work on the transmission or suspension, it’s all mounted to that rear subframe. One component of the rear subframe is a lower crossmember that links the bottom right and left sides together making it more rigid, and also providing something to mount the rear plastic aerodynamic undertray to. This article is about how to safely remove that crossmember so you can get to what you need to work on.
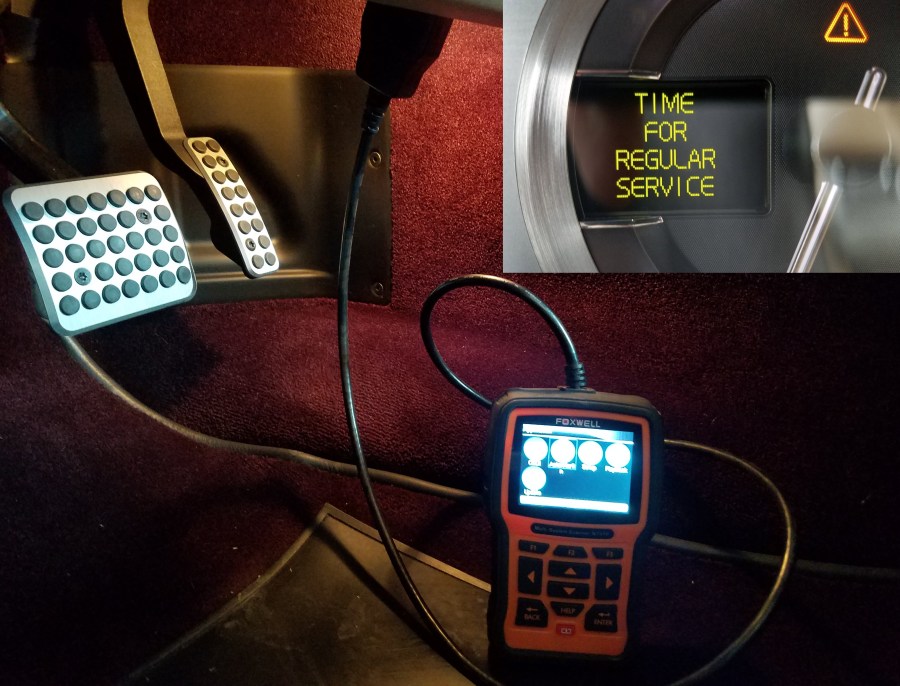
I’ve just changed the Automatic Transmission Fluid on my DB9 after 15 years and 45K miles. The process applies to other Aston’s like the DBS and Rapide fitted with the Touchtronic II 6-speed automatic transmission made by ZF. I’ve prepared an entire series describing the whole process, and you can find the index article for that here. As part of that process I spend sometime determining which tools would be needed to get the work done, PLUS I discovered a few tools and supplies that will make the process much easier. I wanted to share that with you in this article.
If you own an Aston Martin DB9, DBS, or Rapide from 2004 to about 2014 and it has an Touchtronic II 6-Speed automatic transmission, the official Aston Martin Service guide says the transmission is ‘Filled for Life’. In another article I debunked this idea (read the full article here), and uncovered the transmission manufacturer lists the service interval as a more realistic 80,000 to 120,000 kms (50,000 to 75,000 miles) or eight (8) years at the longest. If you have an Aston Martin made before 2011 you are likely due for an automatic transmission fluid change. If you are interested in doing it yourself (as I am) then you’ll need to know what very specific parts to track down. This article will point you at what you need and give you some options on where to get them.
Hello readers. I’ve just released the epic 7 part video series (epic to me at least) on how to change the transmission fluid in a DB9 fitted with a 6-speed automatic Touchtronic II transmission. Most DB9, DBS and Rapide’s from 2004 to 2014 were fitted with this transmission.
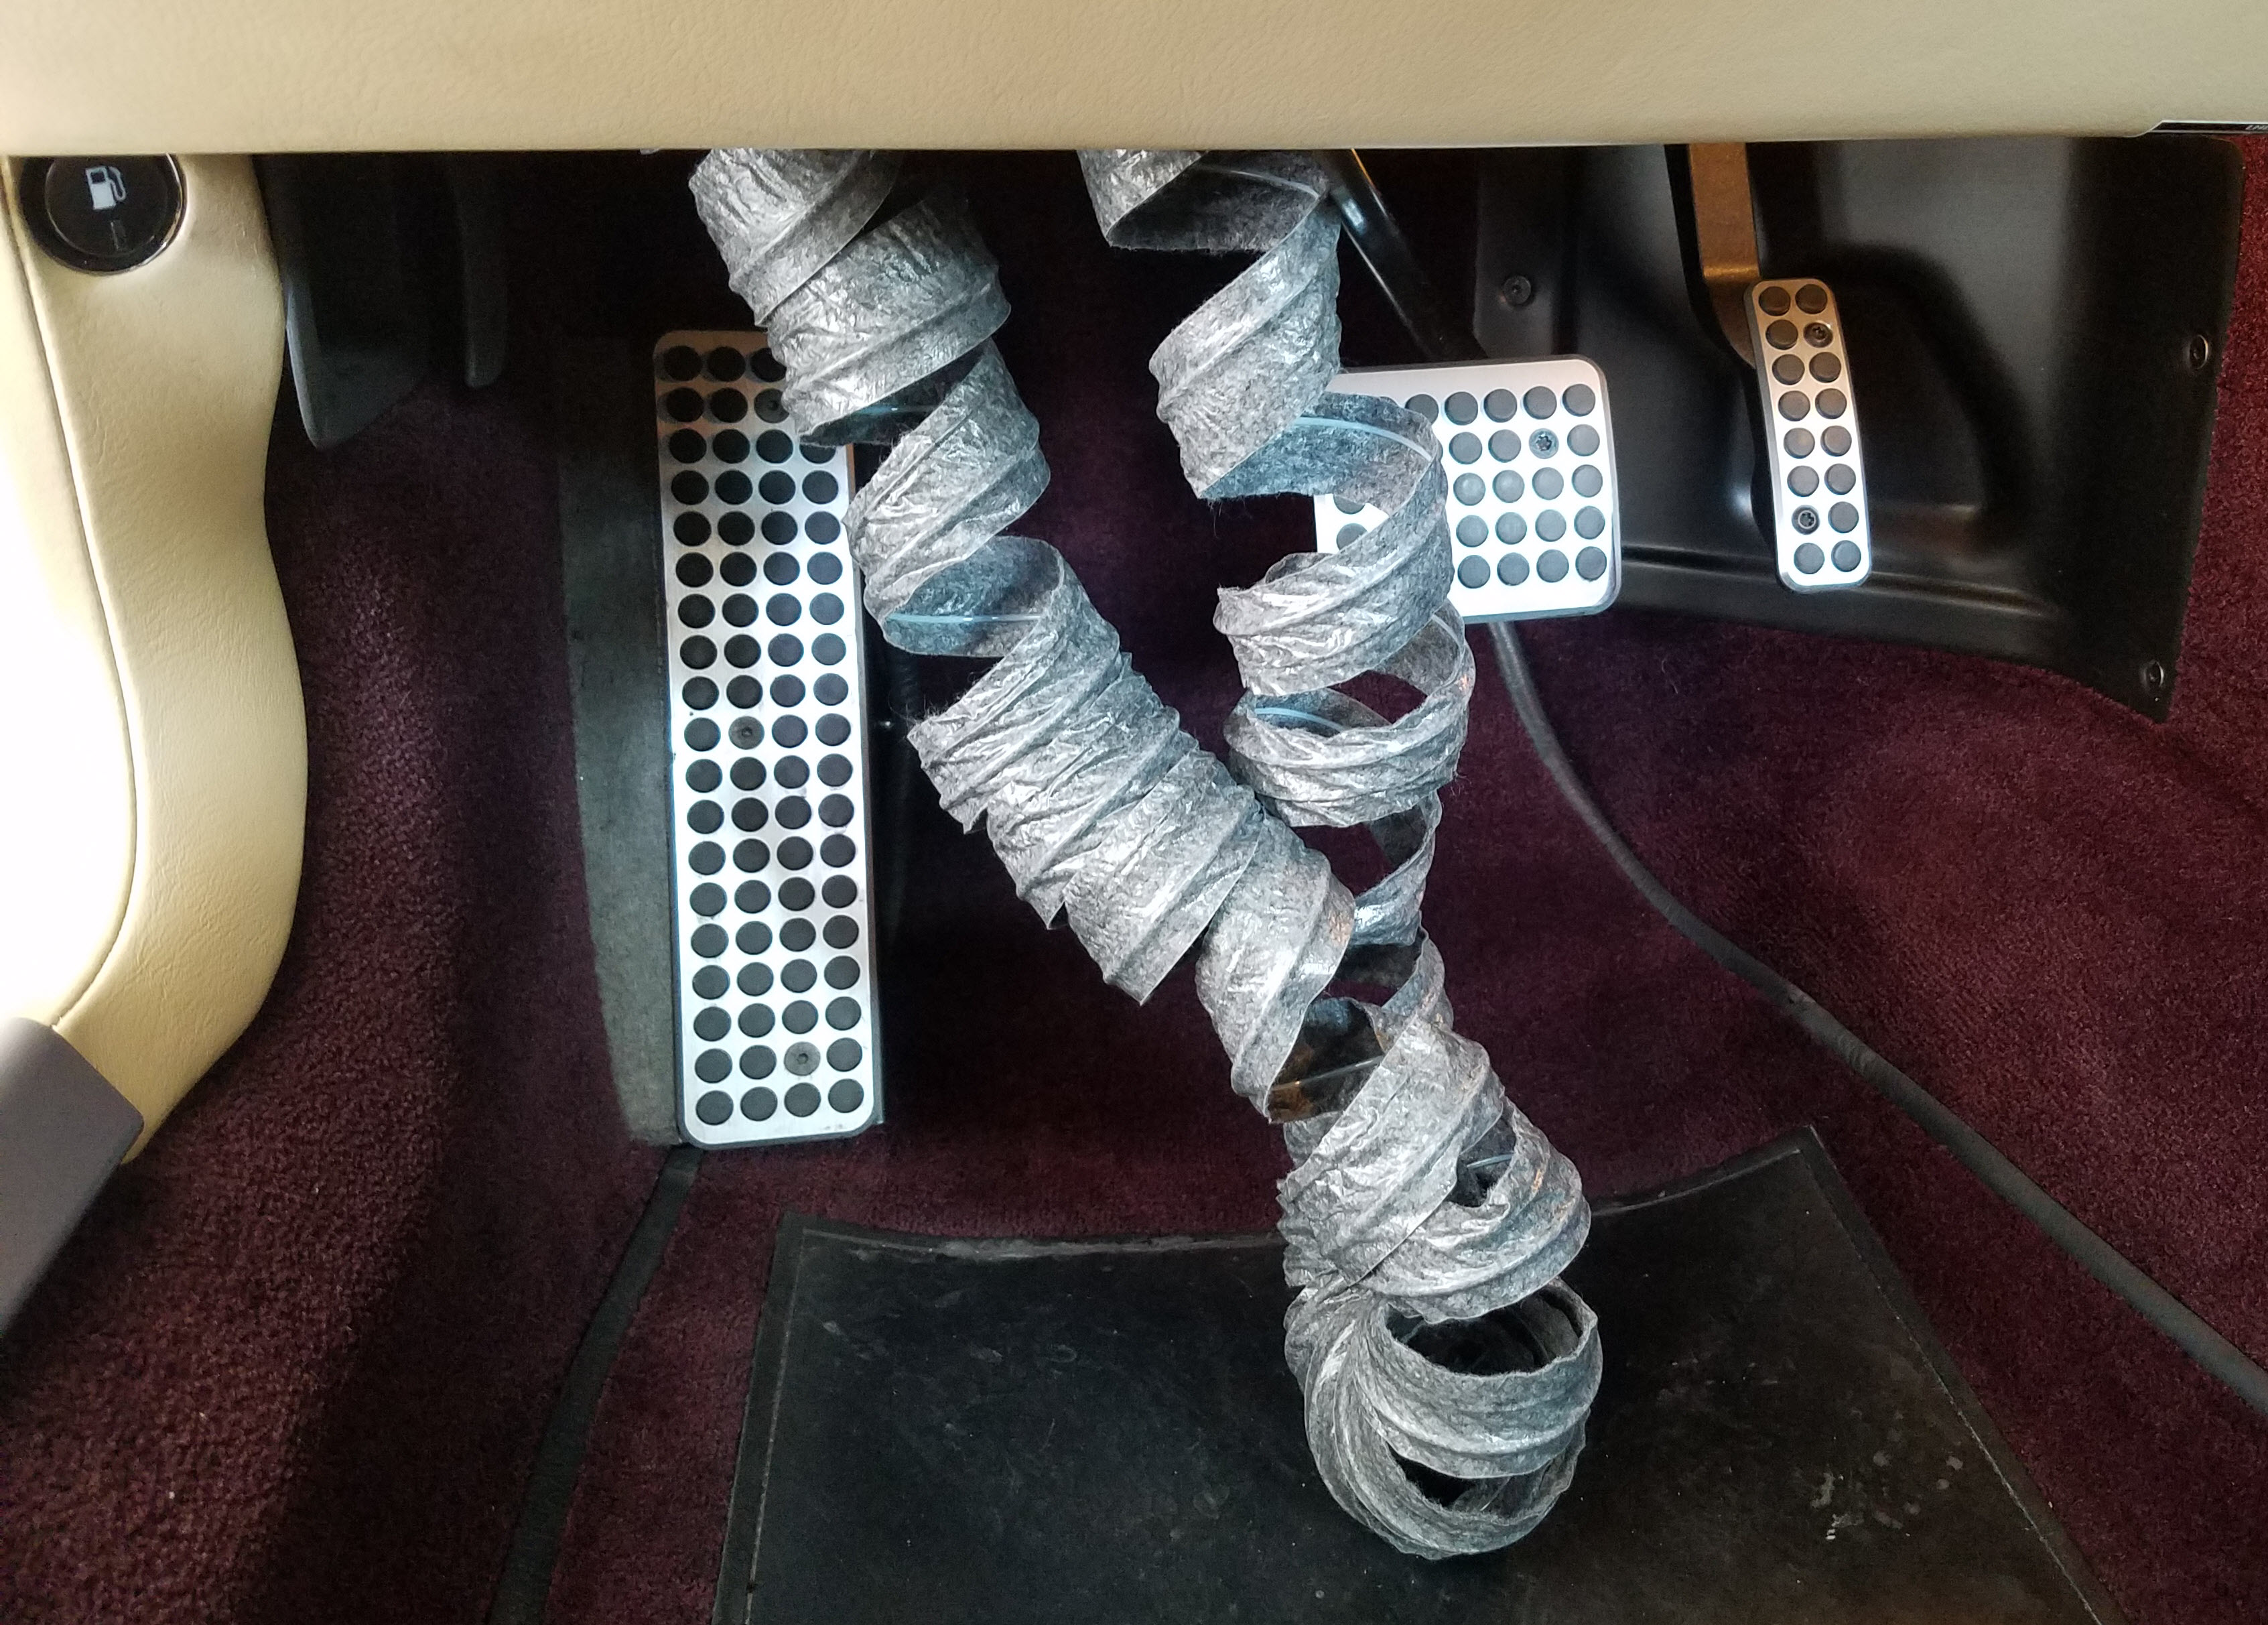
Heat destroys cars. I live in the central valley of California, and where the summertime average temp is 92°F or more. The sun & heat attacks the paint, the plastics, the wood, the leather and in particular kills the adhesives used to glue the parts together. One day when I was washing my baby I opened the drivers door only to see what looked like her intestines hanging down in the foot well. Ugh. Upon closer inspection I found this was the remnants of Air Conditioning side window demister hose. The spiral wound hose had completely delaminated and was now dangling like an old slinky from under the dash. Fortunately it wasn’t very expensive to repair, and you can easily tackle it yourself. Let me share a few tips on how. Continue reading “Replacing the A/C Side Window Demister Hose in an Aston Martin DB9”→
Cars develop a personality with age. The early model Aston Martin DB9 and Vantages are reaching 10-15 years old now. For many the new car smell has begun to fade away. A ‘fresh’ DB9 is a terrific smell of leather. But what happens to the smell with age? Humans get into the space and mess it up. Masking the odor with air fresheners is a shame and compounds one problem with another. I learned how to get rid of the actual issue, and will share that with you here. Continue reading “How to Deodorize the Interior of an Aston Martin DB9”→
Oil in the Throttle Body Area is a Sign of PCV Failure
Last November I was replacing the coil packs and spark plugs on my 2011 Rapide and the oil in the inlet manifolds and throttle bodies made it pretty clear that my PCV valves were past their best.
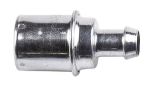
I decided to replace the PCV valves with these £15.98 metal ones from i6 Automotive (check it out here) in Sheffield, England. But since it would take them a few weeks to get to me here in Adelaide, South Australia I set to thinking. On my diesel 4wd one of the first modifications you do is to fit a catch can into the PCV system. Good ones are incredibly effective at removing the oil mist and preventing it being recycled through your engine.
When you’re working under the Aston just about every job seems to require you to remove the undertray or underpan. This is a large sheet of Aluminium approximately 1500mm long x 800mm wide. In itself it’s not heavy but due to its size it is very cumbersome to handle.
As those who have removed the undertray will know you seem to be undoing bolts for ages (about 36 in total, I kid you not !!!) before you can get it down/out. If you are doing an oil change there is a hole directly below the engine drain plug but I would defy anyone to get that plug out without the oil running all over the undertray. I don’t see the point of the hole as you have to remove the undertray to change the oil filter anyway, unless you do it from the top as Steve has done finding it almost impossible to remove the filter from below on a LHD Aston. I can confirm that on a RHD Aston it is relatively easy to change the oil filter from below.
Undertray hanging vertically under the Aston
When I first started removing and replacing the undertray I had to get my wife to hold the back end whilst I removed the final bolts then we could lower it together to the floor. Since just about every job under the car requires this taking off I decided I had to come up with another way of doing it and hence the “Third Hand” was created. When I stopped to think about it the answer was simple in the end … the best ideas are always the simplest.
Hook the string over exhaust bolts Pieces of wood pass through air flow fins
The “Third Hand” couldn’t be simpler, a piece of strong nylon string and two pieces wood. As you lift up the front end of the undertray the rear hangs from the exhaust bolts allowing you to feed the front end of the undertray over the lip of the front valance and insert bolts to secure it in place.
With the undertray bolted in position at the front the next stage is to insert the central bolt through to the main cross-member. Once this is in place the “Third Hand” can be removed and the rest of the bolts fitted.
Here is a short video showing how this works in practice.
So, we decided to go out for a short trip now that the Coronavirus lockdown has been eased a little and it was a beautiful sunny day. We set off with no particular destination in mind just a ride out for a change of scenery, we don’t think it is fair yet to descend on the local beauty spots where people who live there have also been in lockdown.
As I said it was a nice sunny day with temperatures in the low 20’s C so on went the Air Conditioning. Having travelled about 15-20 miles we both said “it’s a bit warm in here” and on checking, the Aircon wasn’t working. We decided to return and came back with the windows down !!!
I have quite a good setup in the garage with just about any tool I might need for doing a job as some of you might have seen in my previous Blogs, what I don’t have however is Aircon testing and gassing equipment, who does !!!
Anyway, I jumped on the internet to find a mobile guy near us to come and do a few checks. As it happens my wife’s Audi had a problem as well so I thought we could kill two birds with one stone. The first guy I rang asked me what the cars were, I told him an Audi A6 S-line 3.0ltr TFSI and the second car an Aston Martin DB9. There was then a pregnant pause and I could imagine the money signs in his eyes🤑! He came back with “I could do them both for only £465.00”. After a deep gulp I said I’d get back to him if I was interested but at that price I said, I think I’ll just be opening the windows !!!
My next call was to “Car Aircon Services” http://carairconservices.co.uk/ and I spoke with Damian. He covers Manchester and North Cheshire. All his prices were set out on his website, no hidden extras, he told me when he could come and even arrived an hour early. As soon as he started to look at the cars, I thought this guy knows what he’s doing. You just get that soft and squeezy feel about it. The Audi was resolved within a few minutes of checking gas pressures and connecting up his ODBII reader, a faulty pressure switch, for which he carried OEM parts in his van.
So, to the Aston, this is a story of woe I’m afraid at the moment. A check revealed no gas in the system. Moreover, we discussed the background to the car and we (well Damien) came to the conclusion as you will read.
Arrangement of Air Conditioning System DB9
Drive belt arrangement for A/C compressor drive and other items
I bought the car just over three years ago from a dealer in Wimbledon, South London and he undertook to carry out an oil change service prior to me collecting it a week later. Part way through the week I received a call saying that the air conditioning had stopped working and they would need another week to get it sorted. No problem I thought better to be sorted now than have a problem later.
When I collected the Aston, everything was perfect and as we drove back up to Manchester (about 31/2 hours just over 220 miles from the dealership for those who are not aware) the Aircon was working fine. However about 3 months later the aircon stopped working so I gave the dealer a ring and he said bring the car back and he would get it sorted again. After some discussion about the distance involved and me having to make two return trips to London and associated costs, he agreed for me to get it tested locally. I found a local mobile guy (not Damien at the time) who came and checked it out but he concluded that there were leaks from both the condenser radiator and the compressor. I relayed this to the dealer who was quite sceptical at first when I told him it needed a new condenser radiator and a compressor plus fitting of same. Eventually he agreed as long as he could supply the parts and my guy could fit them. A few days later an OEM condenser radiator arrived at the house direct from Aston followed by a “reconditioned” compressor from another company. These were duly fitted by the guy I was using at the time and the system re-gassed.
Aston Martin DB9 – Refrigeration System
All was then OK for the next 21/2 years or so, until now. Damien found traces of dye under Ultra Violet on the connections to the new condenser radiator but he concluded that this was dried residue from when the condenser was fitted. More serious he found evidence of fresh dye around the pulley drive end of the compressor. Damien suggested that even though the compressor was a reconditioned unit it should last a good number of years certainly more than 2-3 years.
Damien put forward a hypothesis with which I am inclined to agree. He has seen it before that a leaking system is repaired with a sealant additive. This works in the short term, however it is only a temporary repair, moreover it can lead to more problems. It is possible that the dealer in London might have had the original leak repaired by the use of such an additive. It follows that this repair would then fail after a short time, perhaps shorter than he would have expected and he then had to provide new replacement items under the 6 month warranty.
Unfortunately, once the sealant is in the system it is near impossible to remove, it requires complete flushing and possible replacement of other parts of the system. The sealant can blind pipes and galleries along with the other items in the system such as the expansion valve, receiver drier or the accumulator this causes the compressor to run at higher pressures to maintain circulation ultimately this higher pressure weakens seals in the compressor and produces the leakage trace usually at its drive/pulley end.
Expansion Valve comparison with sealant contaminationDamaged compressor shaft seal with sealant present
For now, we are in the testing period as Damien has refilled the system with gas at my request and we will see how long the Air Con keeps working. The result will determine the path forward but now the leak is established I suspect it will not be long before I have another Blog to post on changing the Air Con compressor or even more items !!!
A quick search on the internet found quite a few of these products on the market all professing to seal your system leaks, but none advise of the potential pitfalls. I found an article on line that confirms everything that Damien told me, you can read it by copying and pasting the link, if it doesn’t work don’t ask me what do I know, I found through Google so good luck !!! http://www.ricksfreeautorepairservice.com/does-ac-stop-leak-sealer-work/
There is a short video of the preparations for the investigations and some commentary on the results. See https://youtu.be/e6nYb2IMbQE
My recommendation would be to bite the bullet on your air conditioning and get someone in like Damien who knows what they are doing and don’t go for short term fixes, it could end up costing you a lot more in the long term. Watch this space over the next few months (or perhaps days !!!) for progress updates.
By the way Damien’s price for both cars one with a new pressure switch and the DB9 checked out and regassed not to mention his advice (he was here for over 2 hours) was £134.00, more than reasonable.