If you read my article on Power to Weight Ratio (check it out here) I was trying to work out where the best ‘bang for the buck’ was on performance upgrades for my DB9. One of the standout items was a simple change to a high flow performance air filter. These allow the engine to breath easier with less intake restriction. The claim was that they can add horsepower and have the added benefit of they are reusable so you can easily save more than they cost after a few service intervals. Win-Win. I figured it was time to try a set out.
High Performance Air Filter Options
 There are actually a couple of ways to go on this option. You can buy high flow performance air filters that are a direct replacement for the original Aston Martin filters. They install just like the OEM filters inside the existing airboxes. Velocity AP sells these online for about $120 USD. These will be a great improvement over stock, but I was still wondering if the airbox itself was a flow restriction.
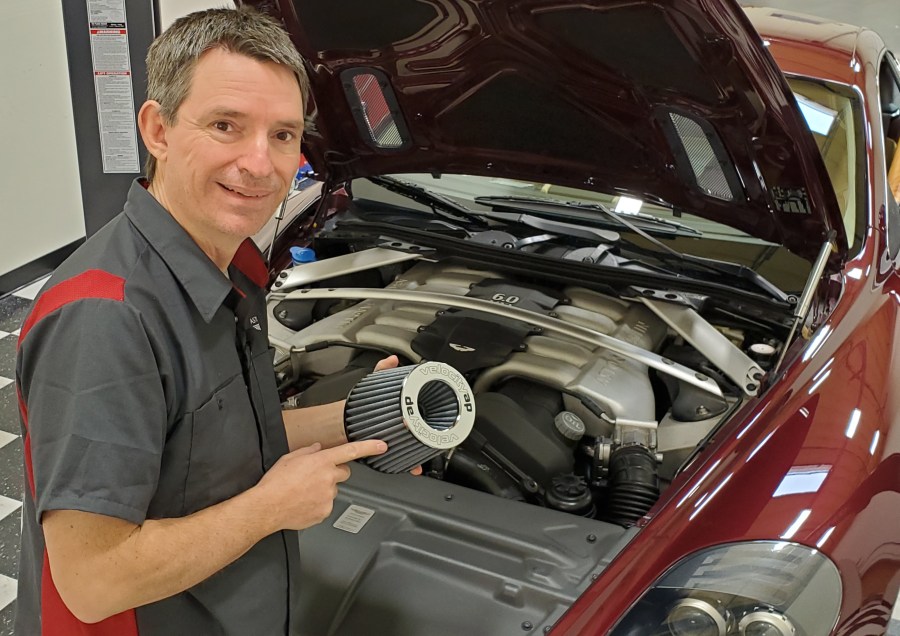
Velocity AP also offers a ‘GT4 Airbox Delete Kit‘ inspired by Aston Martin Racing. With this kit your remove your existing airbox and filter, and adapt a fancy looking high performance/high flow air filter to the intake system. The benefit to this is that the filter doesn’t have to suck all the air through the potential restriction of the cold air intake pipe. There is also some weight loss from this approach since the parts you remote weight notably less than the ones going in. The filters are reusable, just wash and re-oil them when they get dirty. This will ultimately save you money after just two filter changes. Another nice touch is a little bling, the new filters have some shiny bits on them. This was the path I decided to follow.
Parts
You need a couple of parts and supplies for this project:
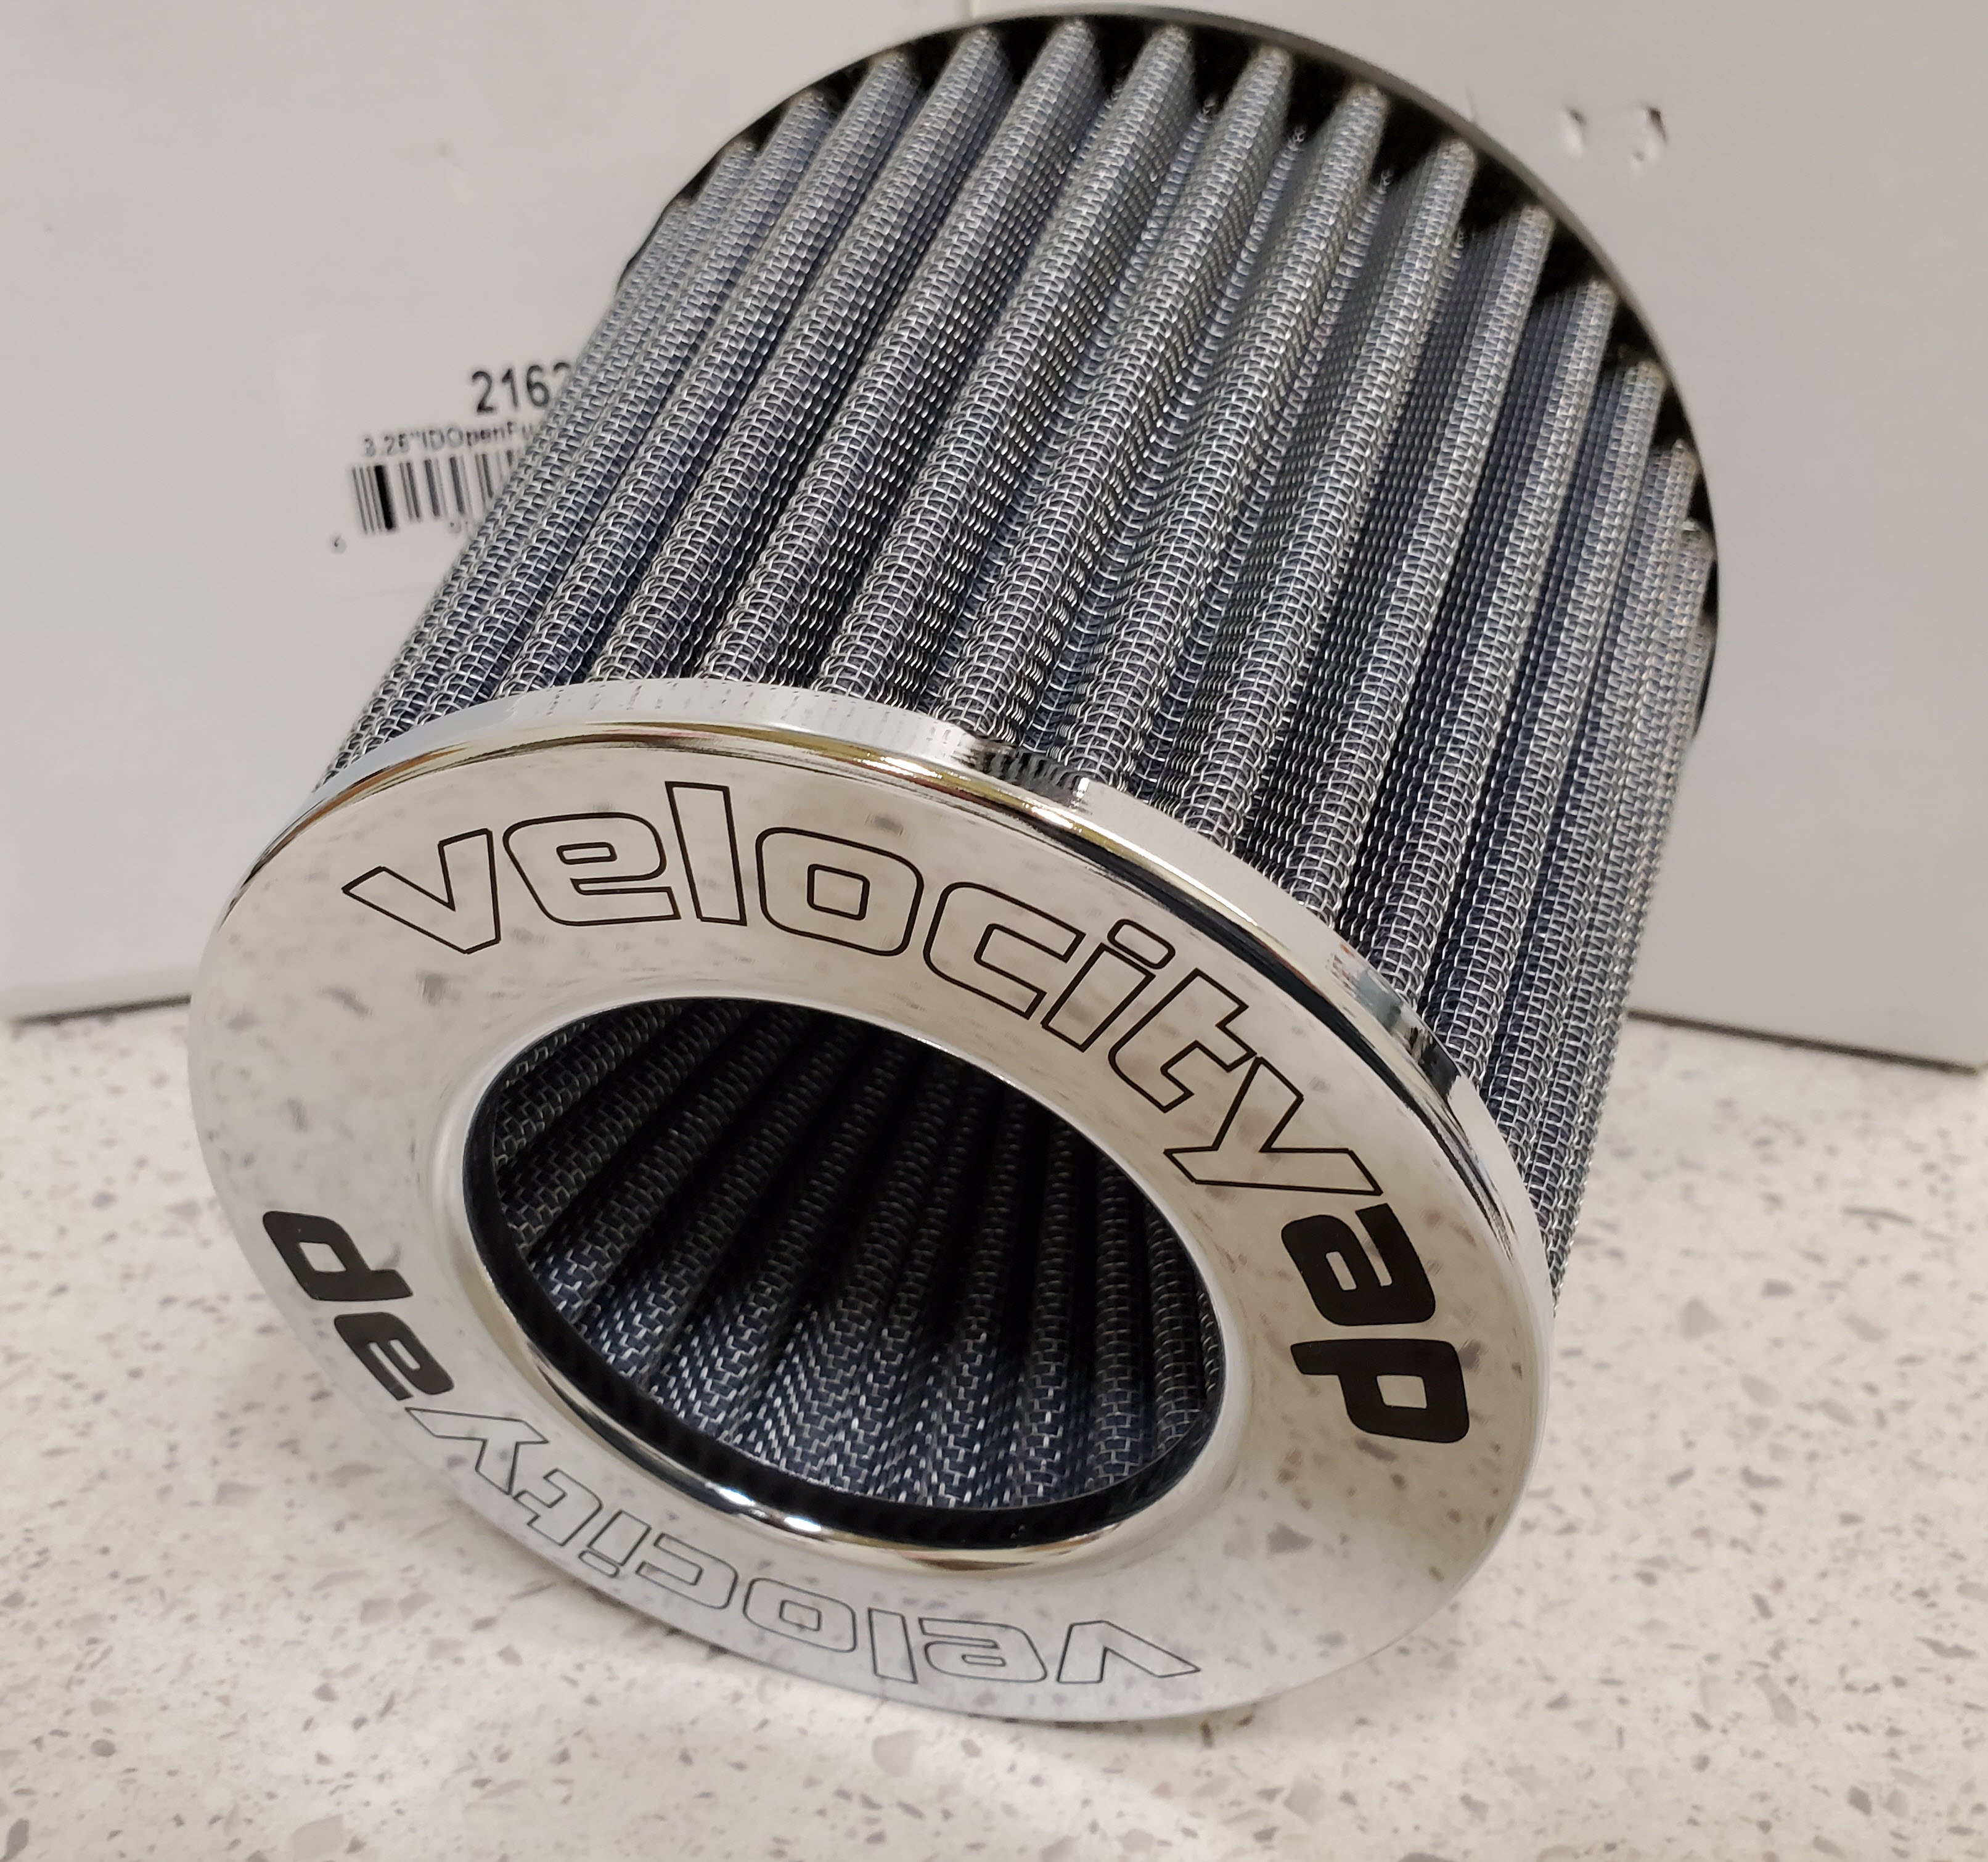
- Velocity AP GT4 Airbox Delete Kit
 Purchase online direct from Velocity AP for about $259 USD here. The kit include two filters, brackets, clamps, and zip ties. Almost everything you need.
- Note: The filter is already ‘pre-oiled’ by Velocity AP. I wasn’t sure with my kit and contacted them to confirm.
- Extra Zip Ties
- During my install I realized we needed some longer zip ties than they supplied
- Qty 4 – 12″ medium strength zip ties
- The 10″ zip ties they included in the kit were just 1/2″ too short. Close, but no cigar.
- You can get a 100 pack for about $7 from Amazon.com here with free shipping.
- You can probably also source these locally at your nearest home center or auto parts store

- Qty 2 – 24″ medium strength zip ties
- The cold air inlet pipes are left just free hanging after the removal of the airbox. They will bang around and rattle if we don’t strap them in.
- You can get a 30 pack for about $8 from Amazon.com here with free shipping.
- You can probably also source these locally at your nearest home center or auto parts store.
- Qty 4 – 12″ medium strength zip ties
- During my install I realized we needed some longer zip ties than they supplied
- Shop rags to wipe down the air intake tube
Tools
You need just a few basic tools to tackle this install:
- 10 mm wrench or socket
- 13 mm wrench or socket
- 5/16″ socket and nut driver to tighten the hose clamps
- Side cutters/snippers for cutting off zip ties
- Inspection Light
- Microfiber towel

Preparation
To get to the point where you can install this kit, you need to do a fair bit of prep to get access. I’ve already done articles and videos on these steps:
- Single Point Jacking
- I think you can do one side at a time with your car just up on the jack. Place a jack stand under as well just in case your jack fails. Never lay under the car only supported by a jack.
- Remove the road wheel
- Remove the inner fender well liner
 In my article I show you how to remove the entire liner. You don’t need to remove the whole thing. As you’ll see in my video below you can do the whole project with just the front half of the liner screws removed and pulled back. I removed all the bolts entirely in the fender well and forward section, and just pulled it back half way. You’ll see what I mean in the video below.
- Remove the existing air filter
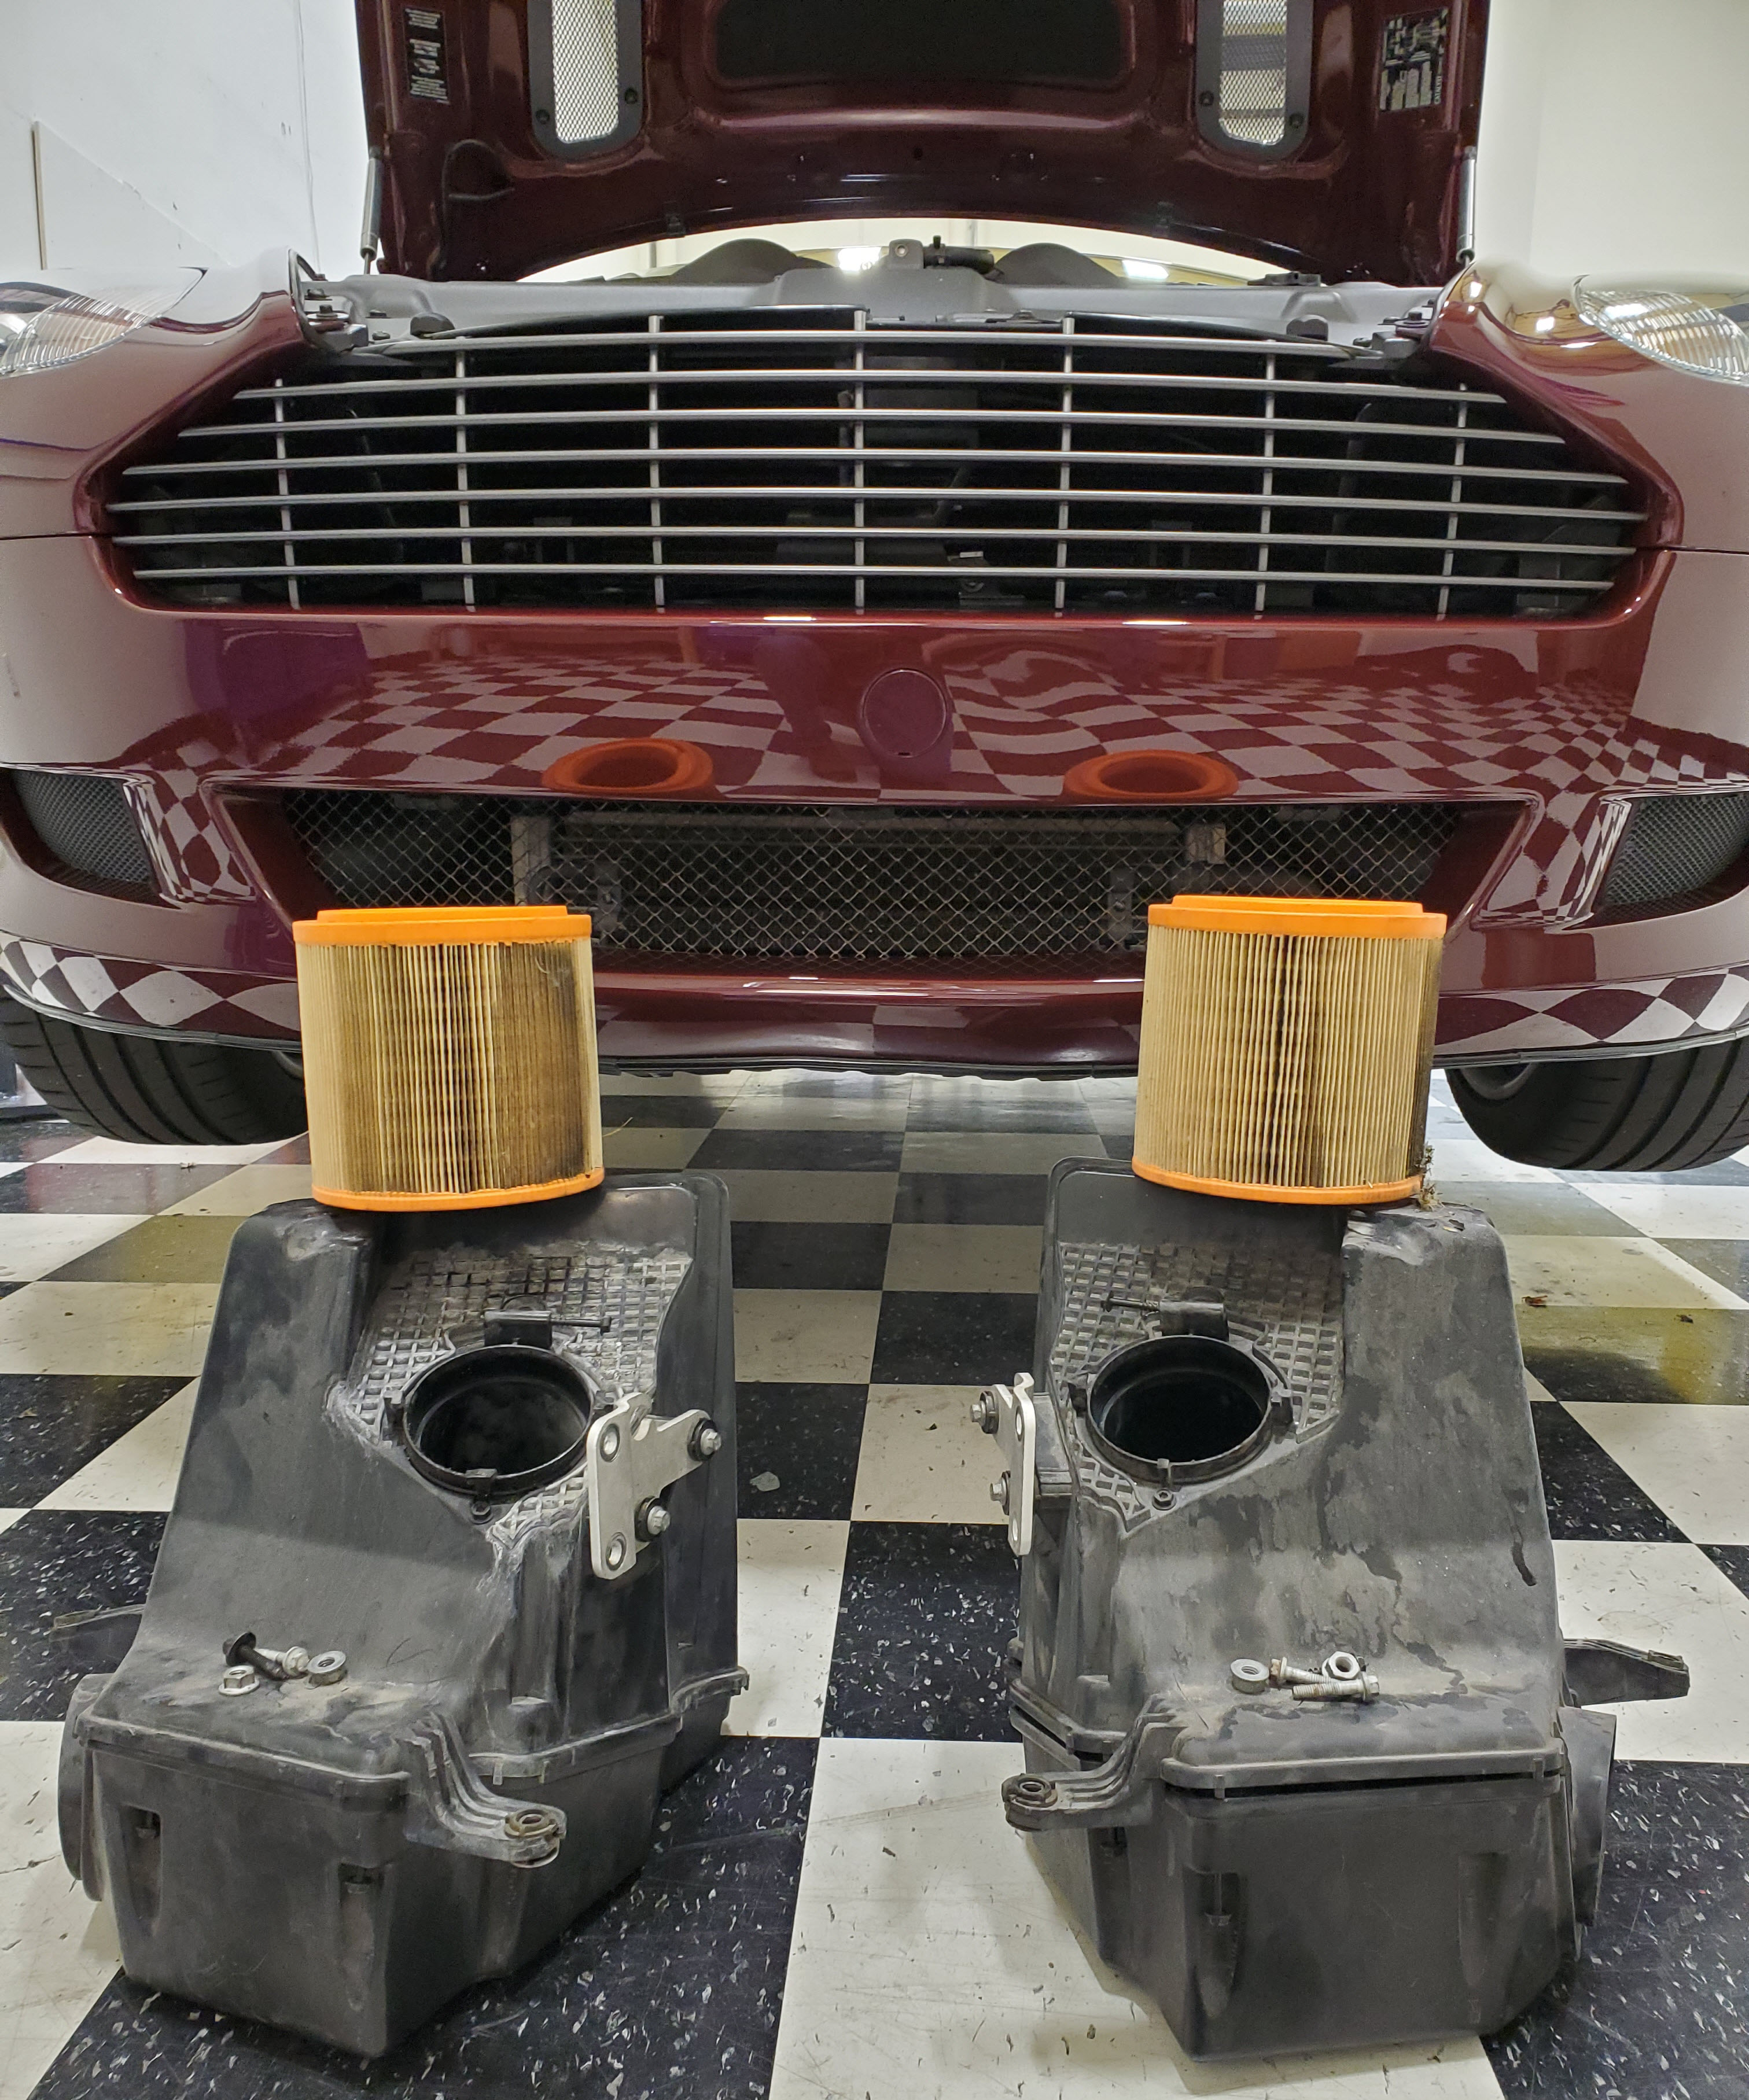
- Remove the airbox

You should be to the point where the airbox is removed and you are staring at the cold air intake pipe and the air inlet pipe just hanging in space.
Procedure
There were no instructions in the box with the kit. A little odd, but hey, how hard can it be. You’ll have the benefit of this article and video to show you the way. [Maybe Velocity AP will throw a note in the box referring to this article for future customers.]
You should plan on about 2 hours in the garage to do the whole project including the preparation steps. About an hour a side.
In the photos below you’ll see me doing the right or left hand side filters (wherever I got a better photo). In the video below you’ll see me do just the left side.
- With the airbox removed, there is still a small mounting bracket to remove since its no longer needed either. Its held on with two 13mm nuts. Use your 13mm wrench or socket and remove the bracket and nuts. Put them all with your old airbox for storage.

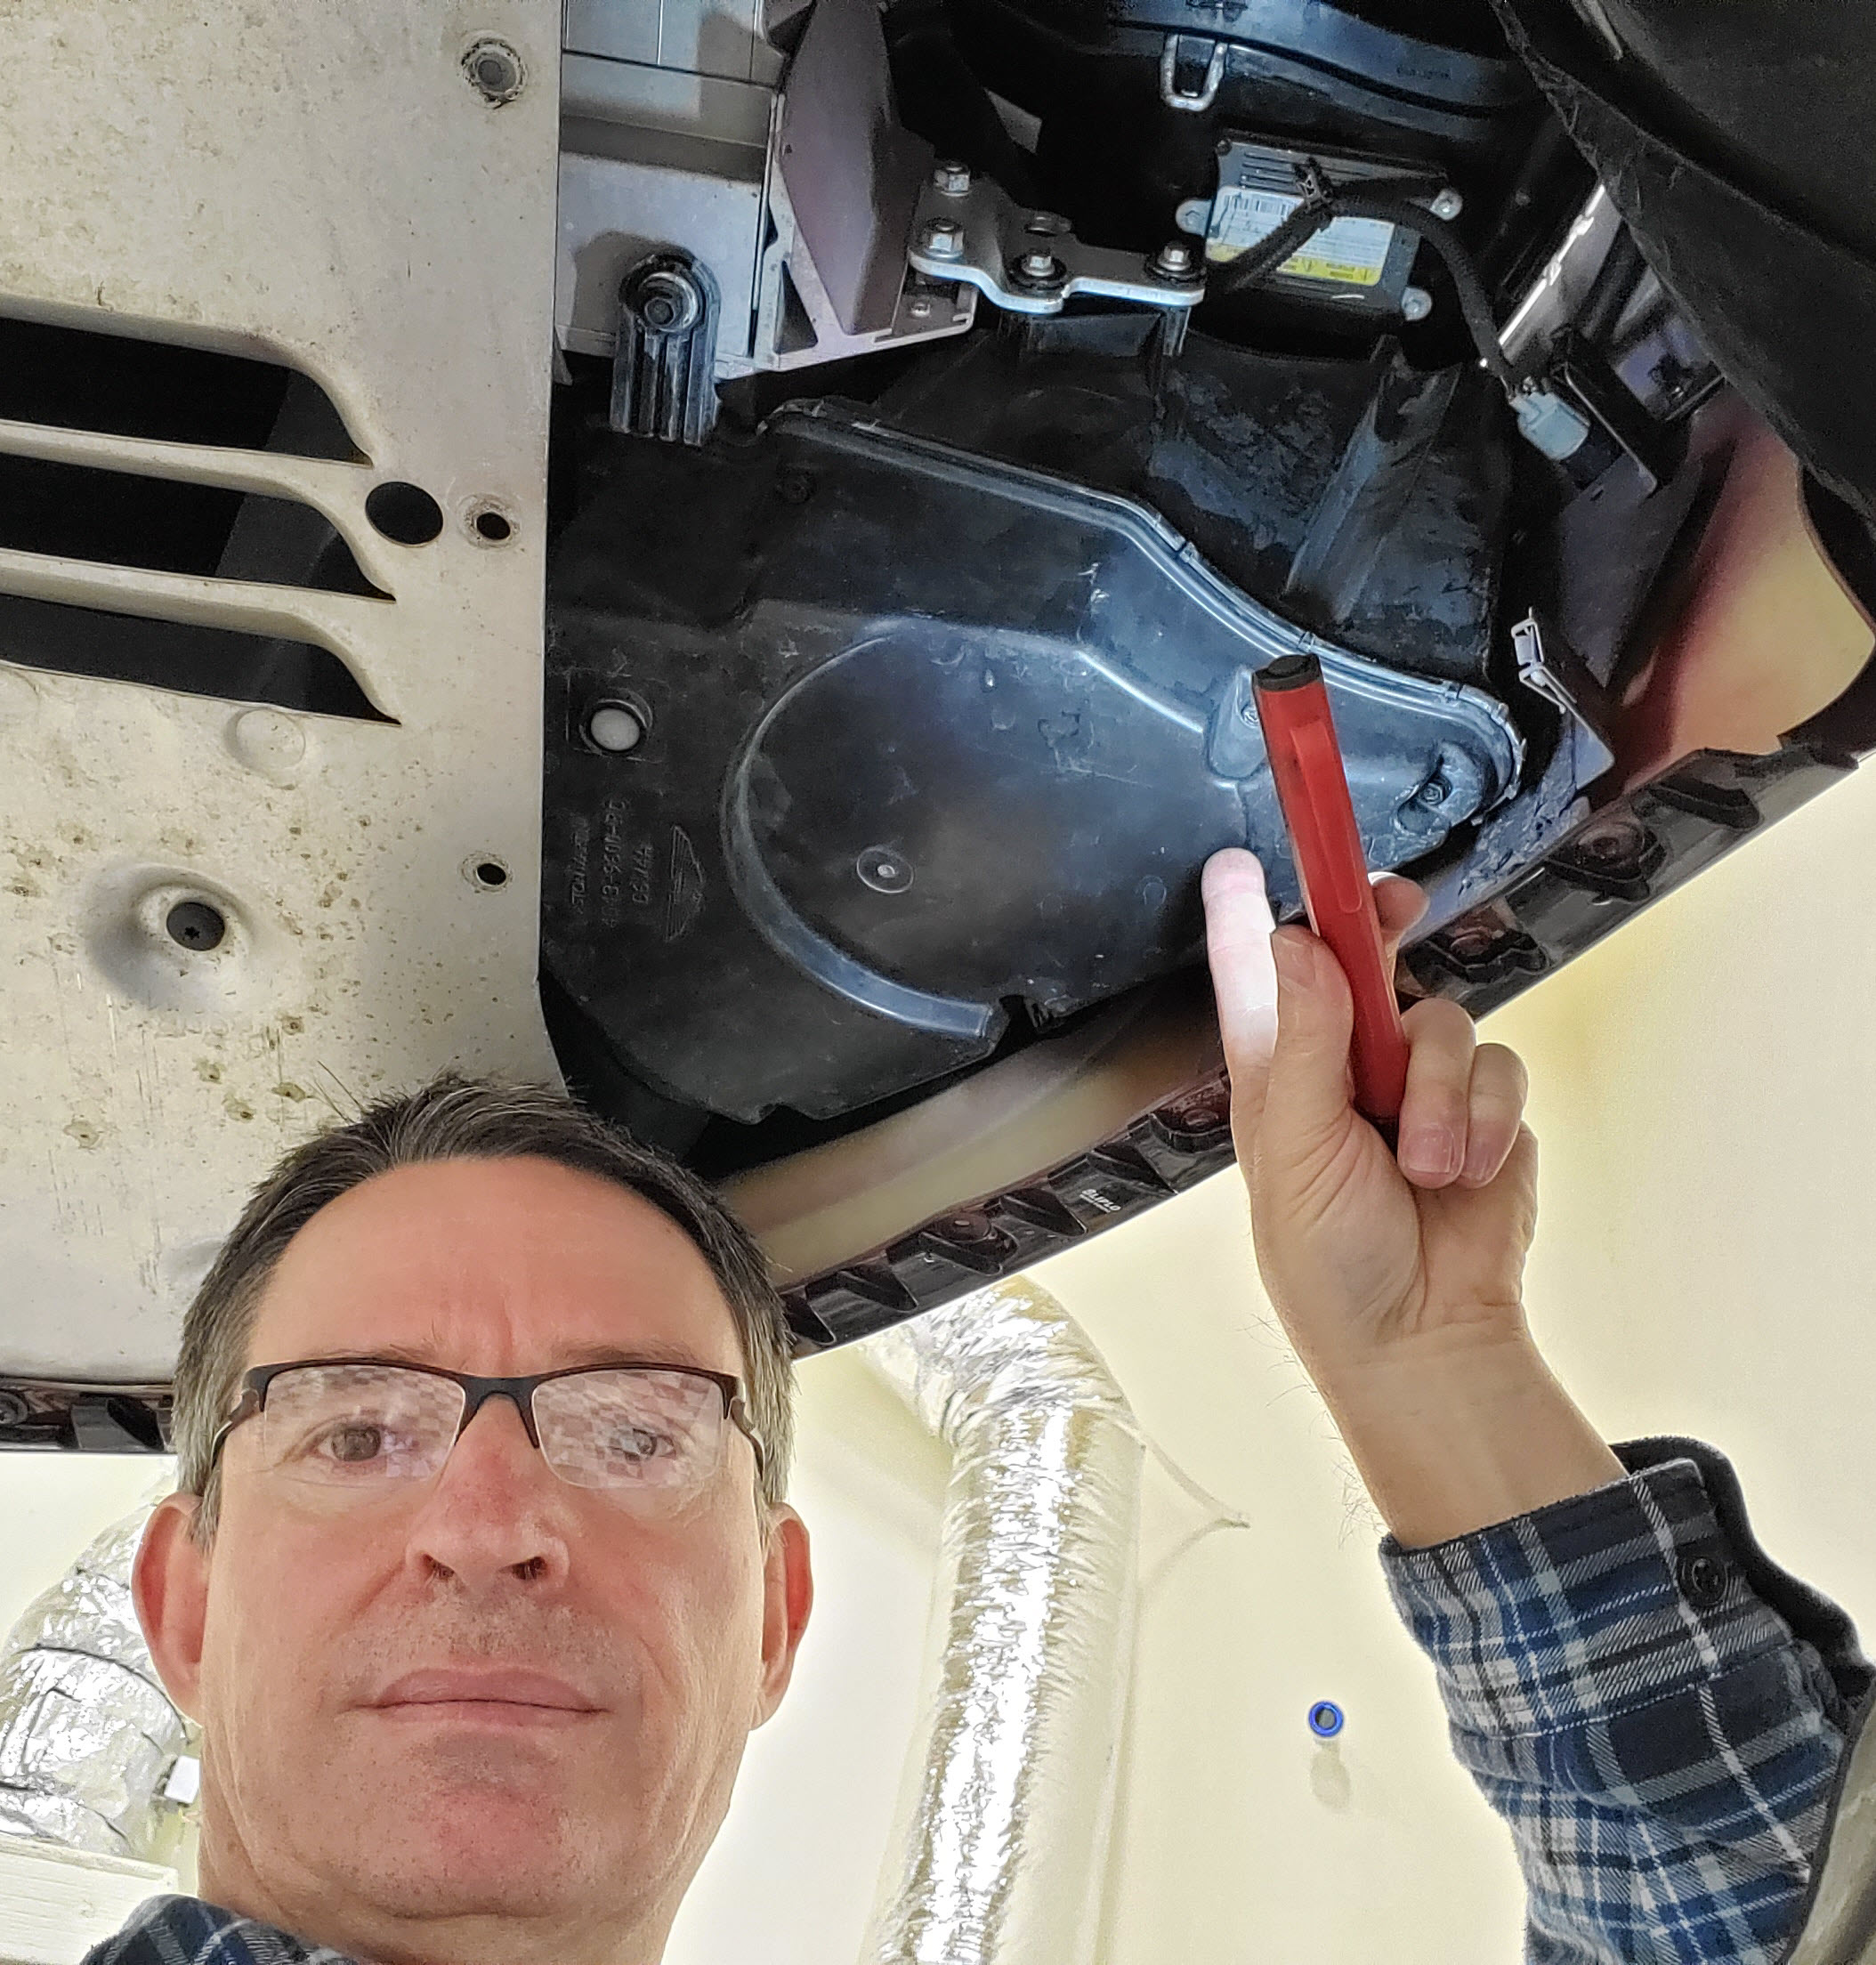
- We need to stabilize the cold air intake pipe that’s now loose and rattling around since its no longer attached to the airbox.
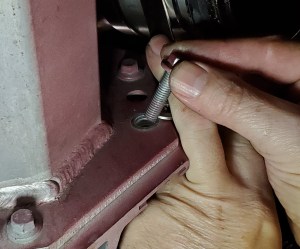
- Use the 24″ zip tie and slip the end through the front most mounting bracket for the old airbox (see photo). This will be our anchor point.
- Loop the zip tie around the cold air intake pipe, just behind the molded in lip so it won’t be able to slip off (see photo).
- Position the head of the zip tie somewhere you can pull hard on it and be able to reach it to snip off the extra length.
- Pull the zip tie snug and use your side cutters/snippers to cut off the extra length.
- Give the pipe a good wiggle to make sure its pinned into place now.

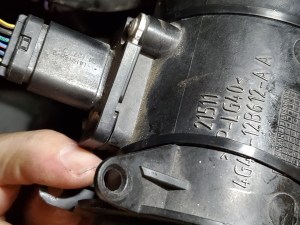
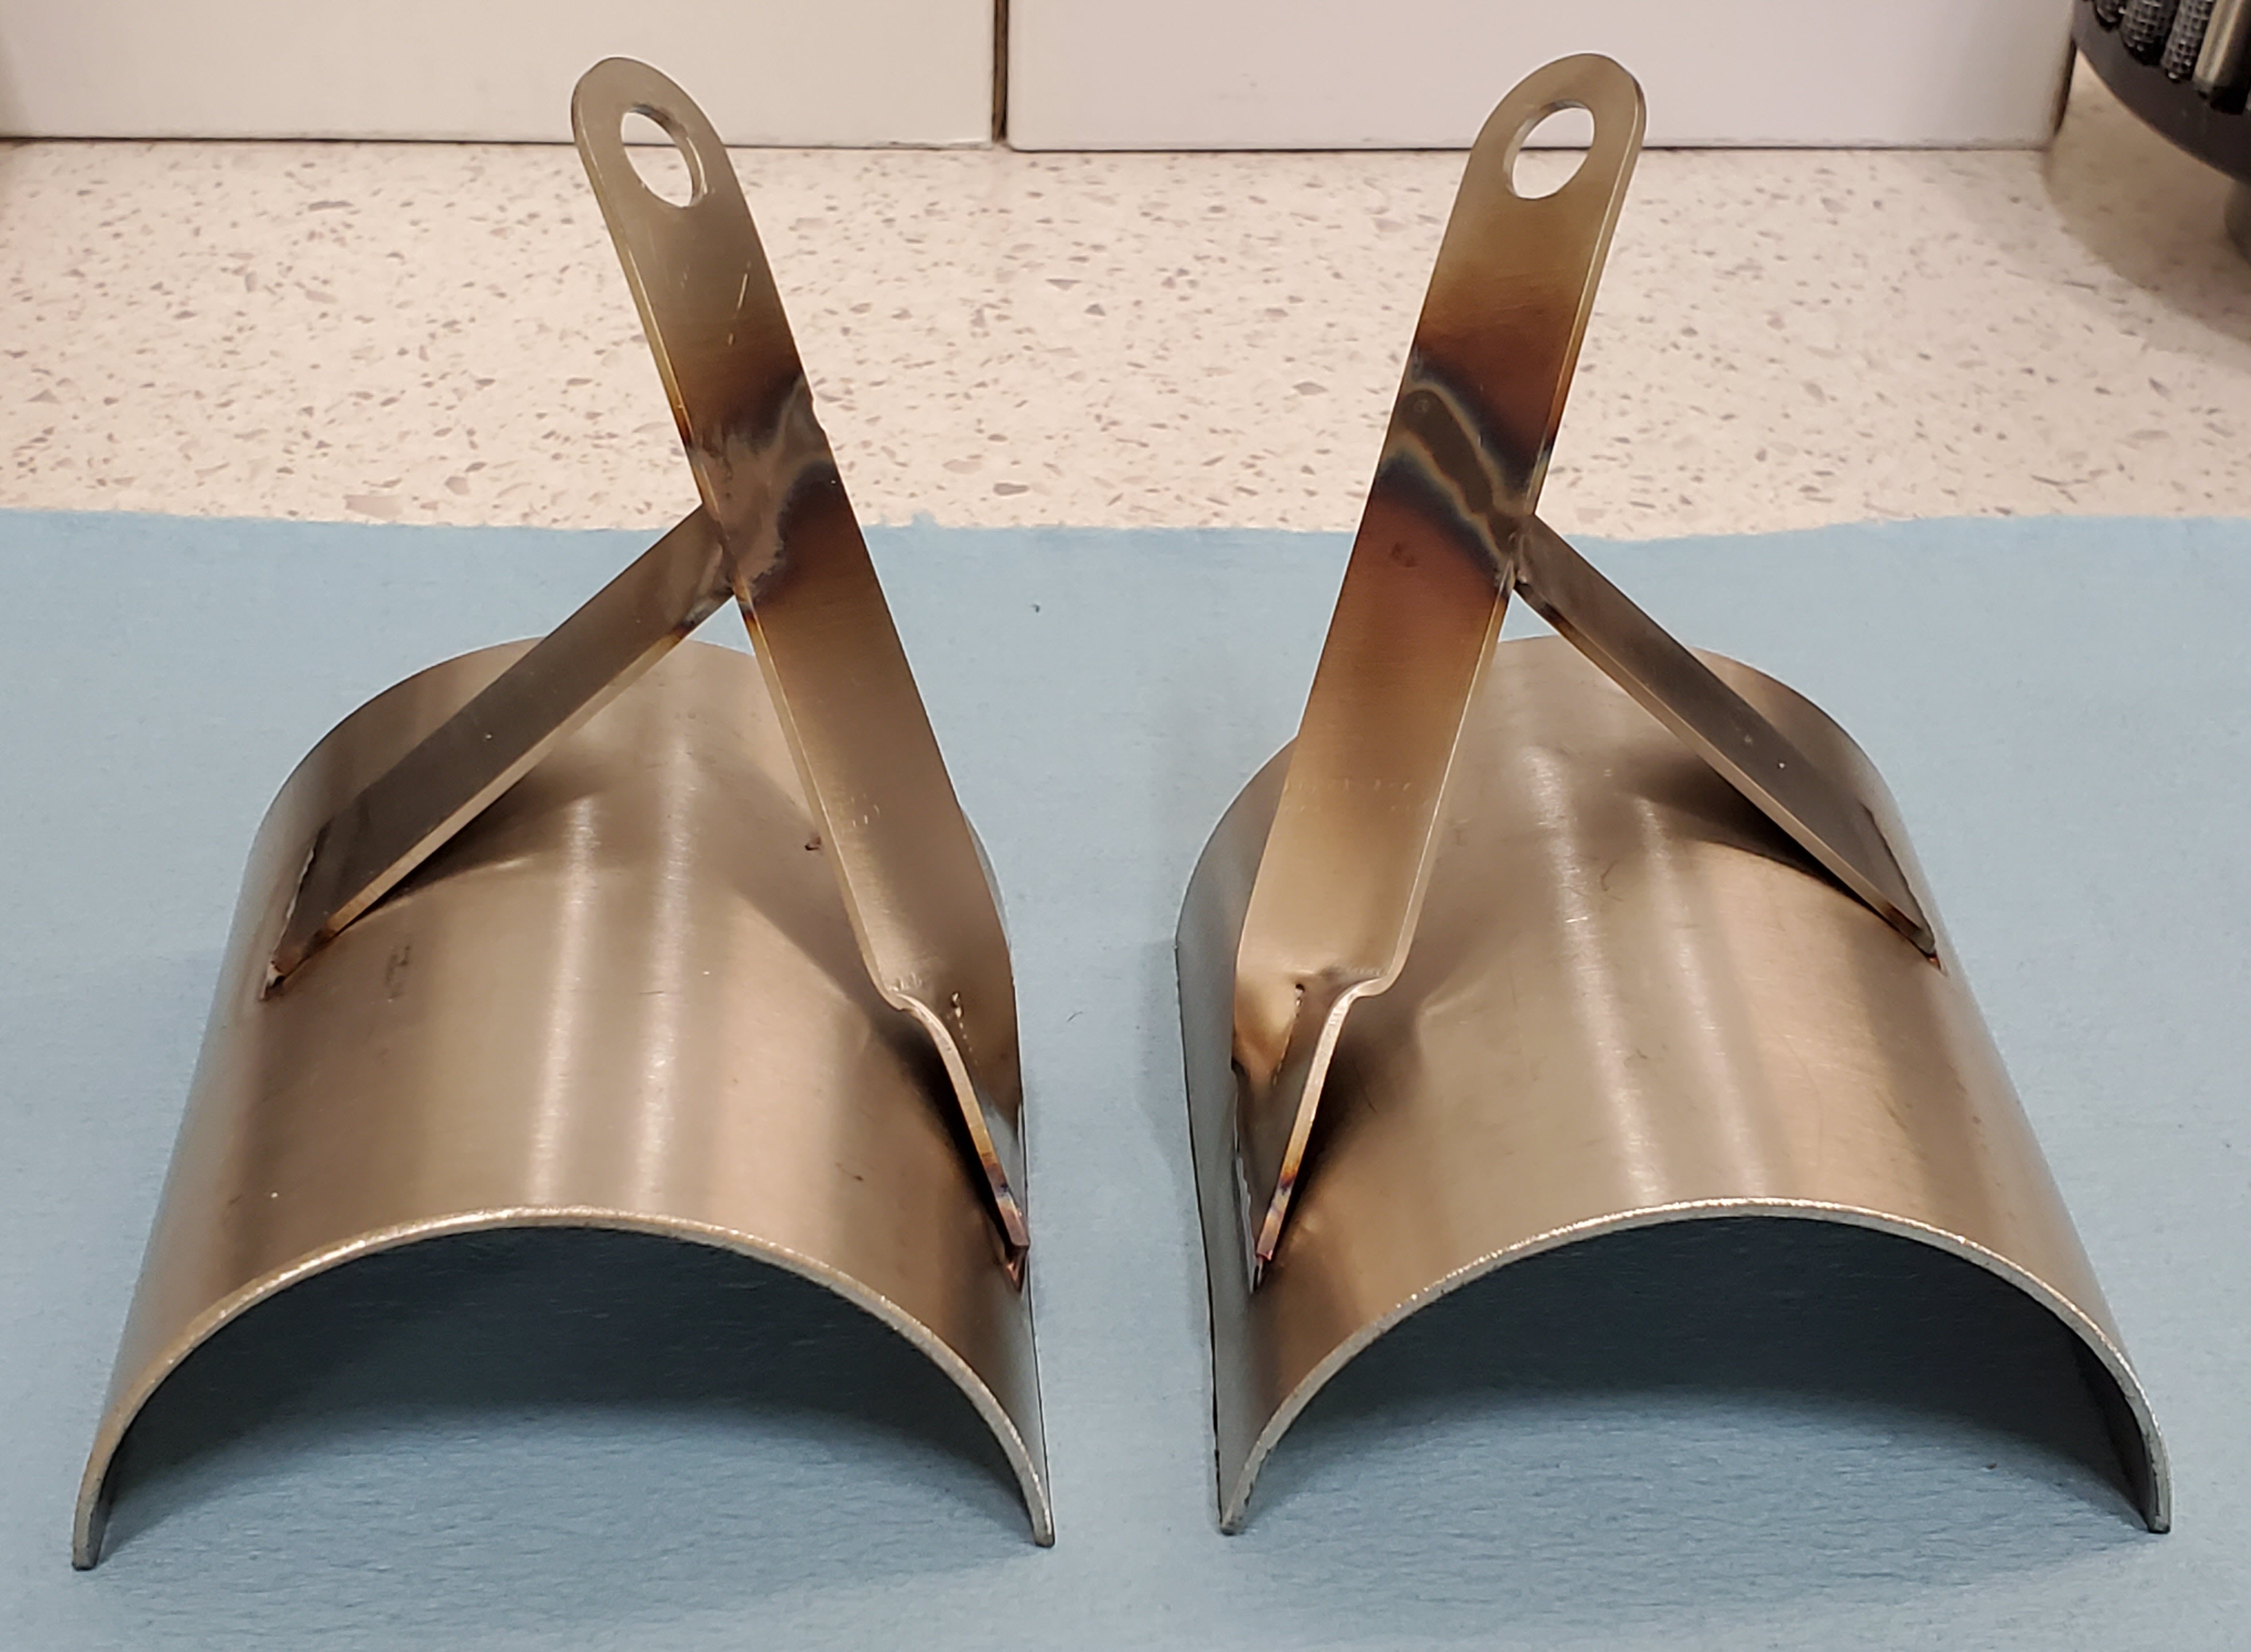
- Next we need to mount the bracket that will stabilize the air intake pipe that contains the mass air flow sensor.
- You need to be careful working around the sensor and its cables and attachments to be sure you don’t pinch or break anything off. Just be careful. It’s not super fragile, but just be aware its there.
- The two brackets in the kit are mirror images of each other, and aren’t labelled which is left or right side. Took me a good long while to figure out which was which and where they mounted since there were no instructions in the kit. A simple ‘R’ and ‘L’ written on the brackets would be a nice improvement [Maybe in future kits?] You can check out my photos and video below to see which works for right and left.
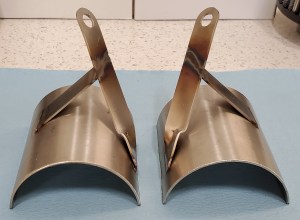
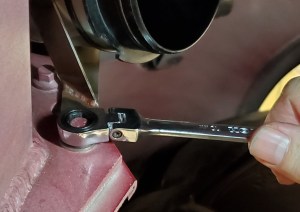
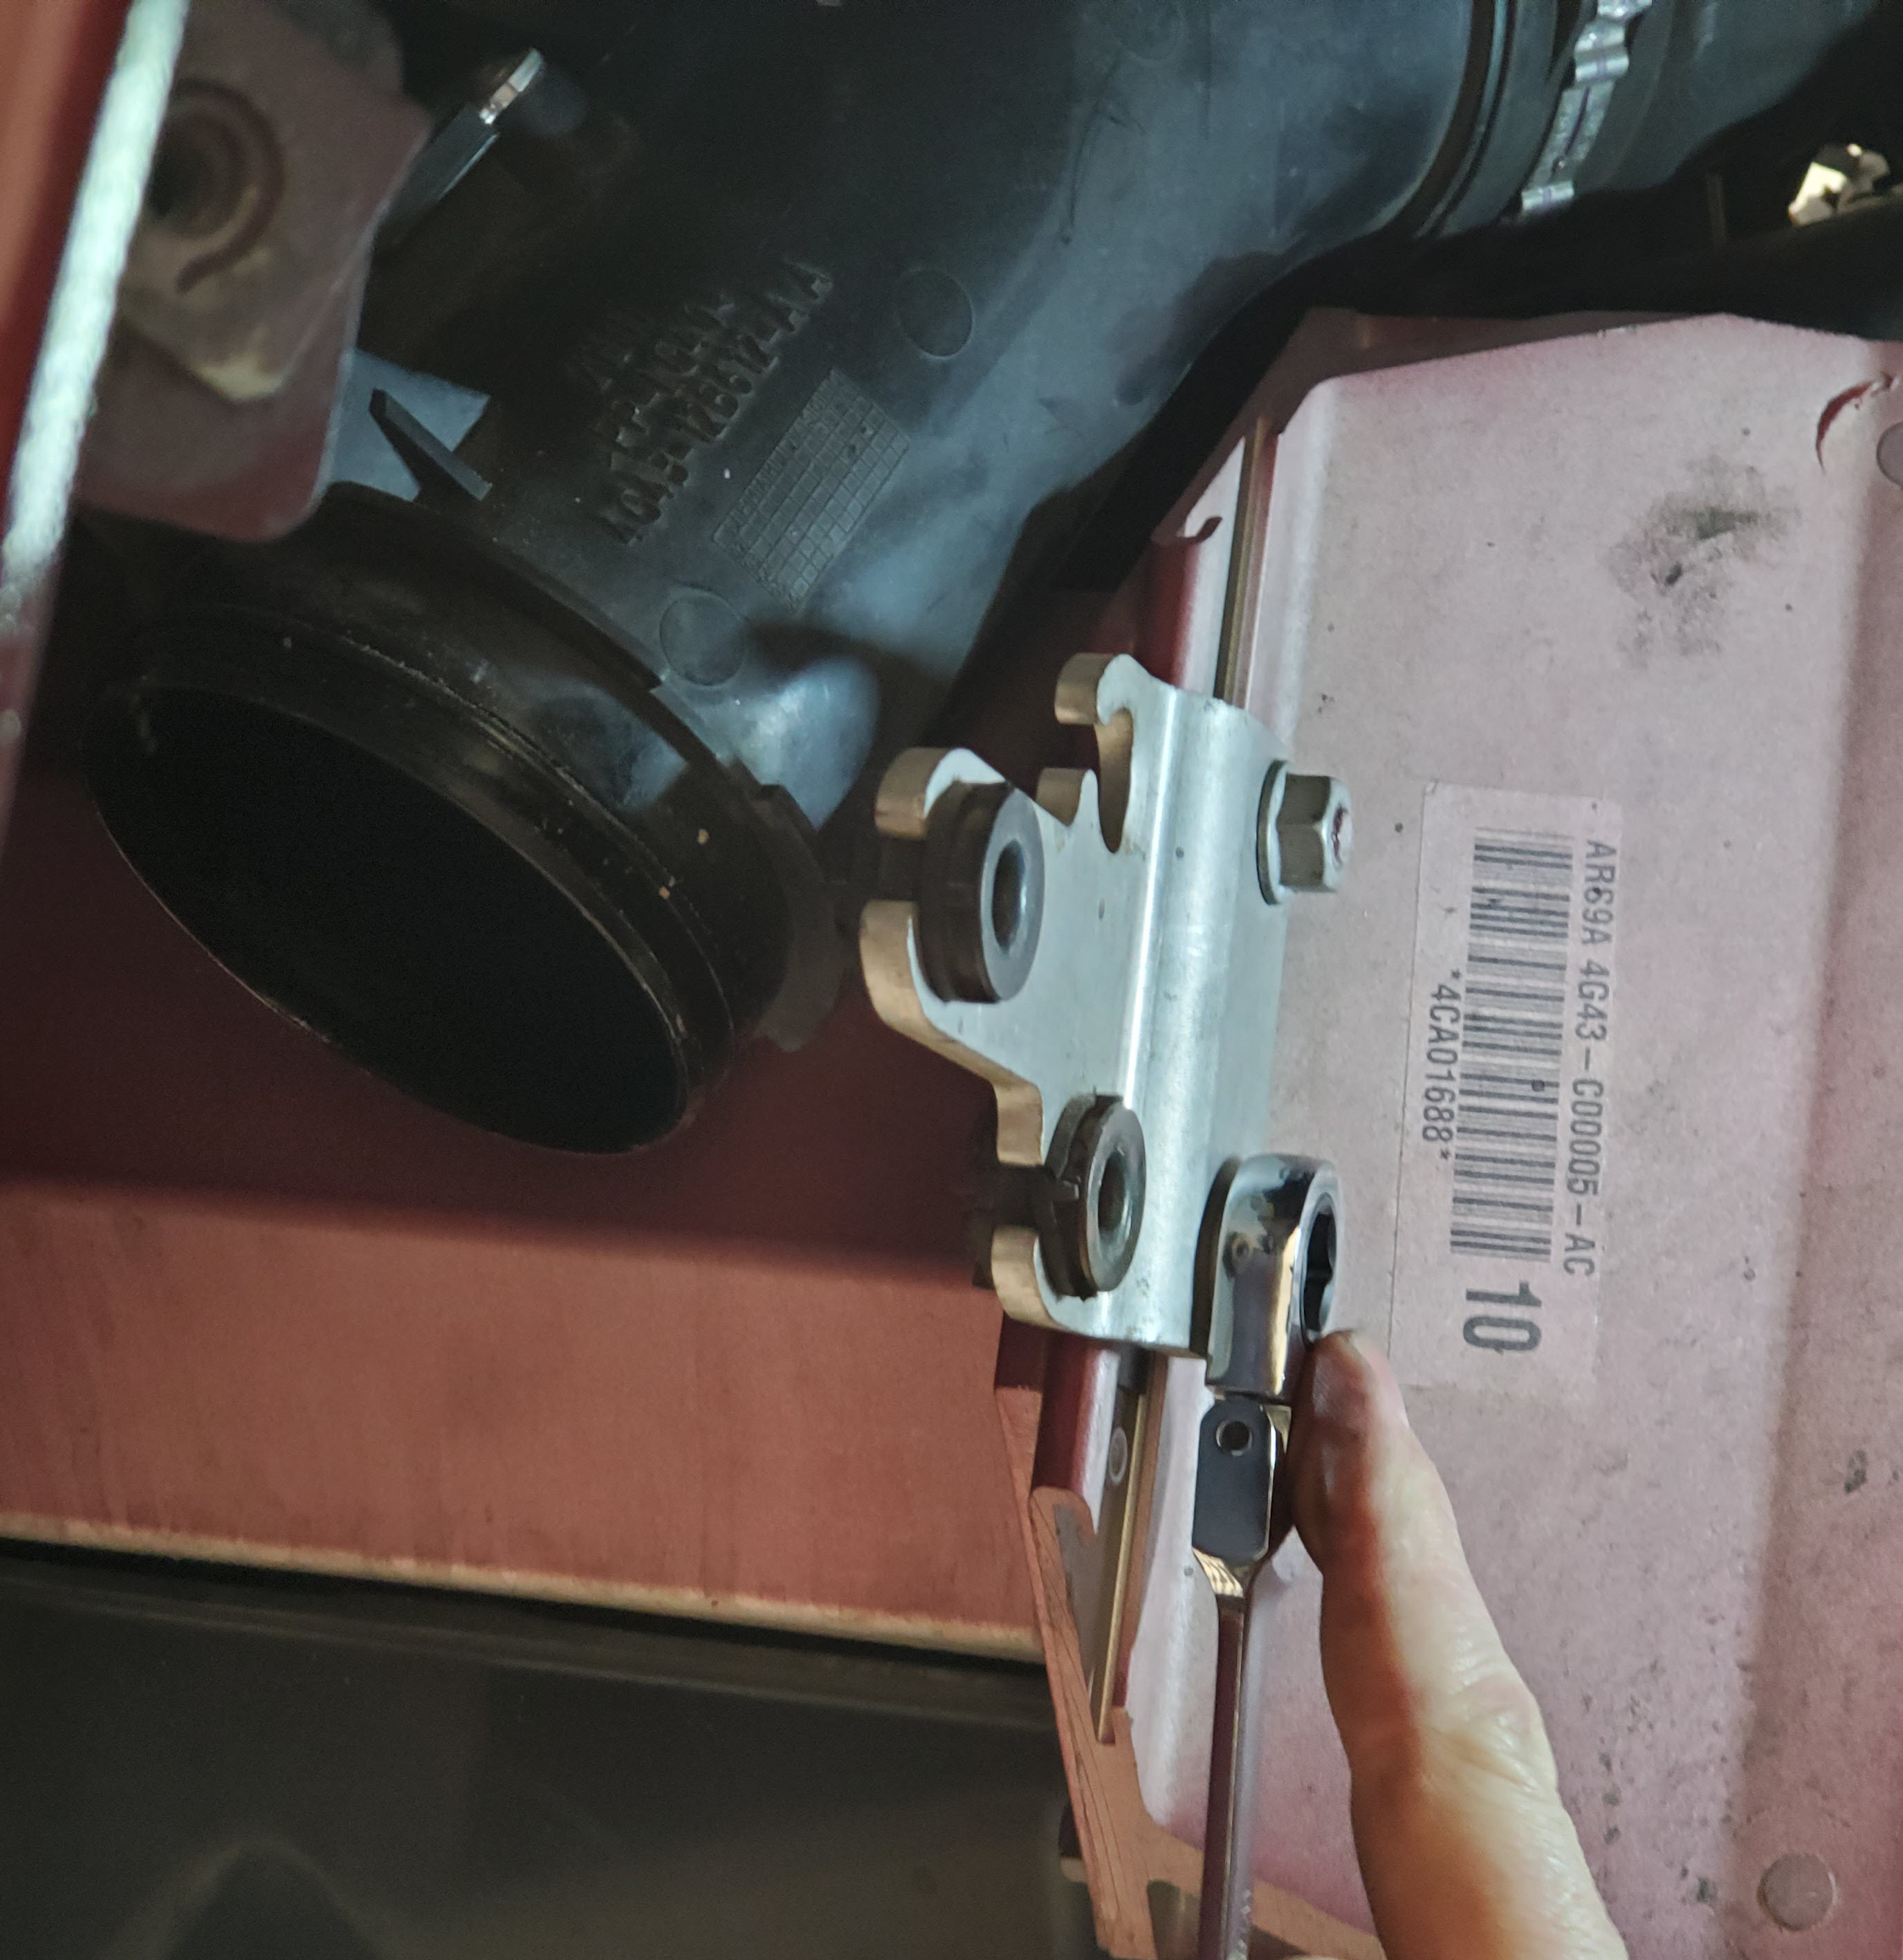
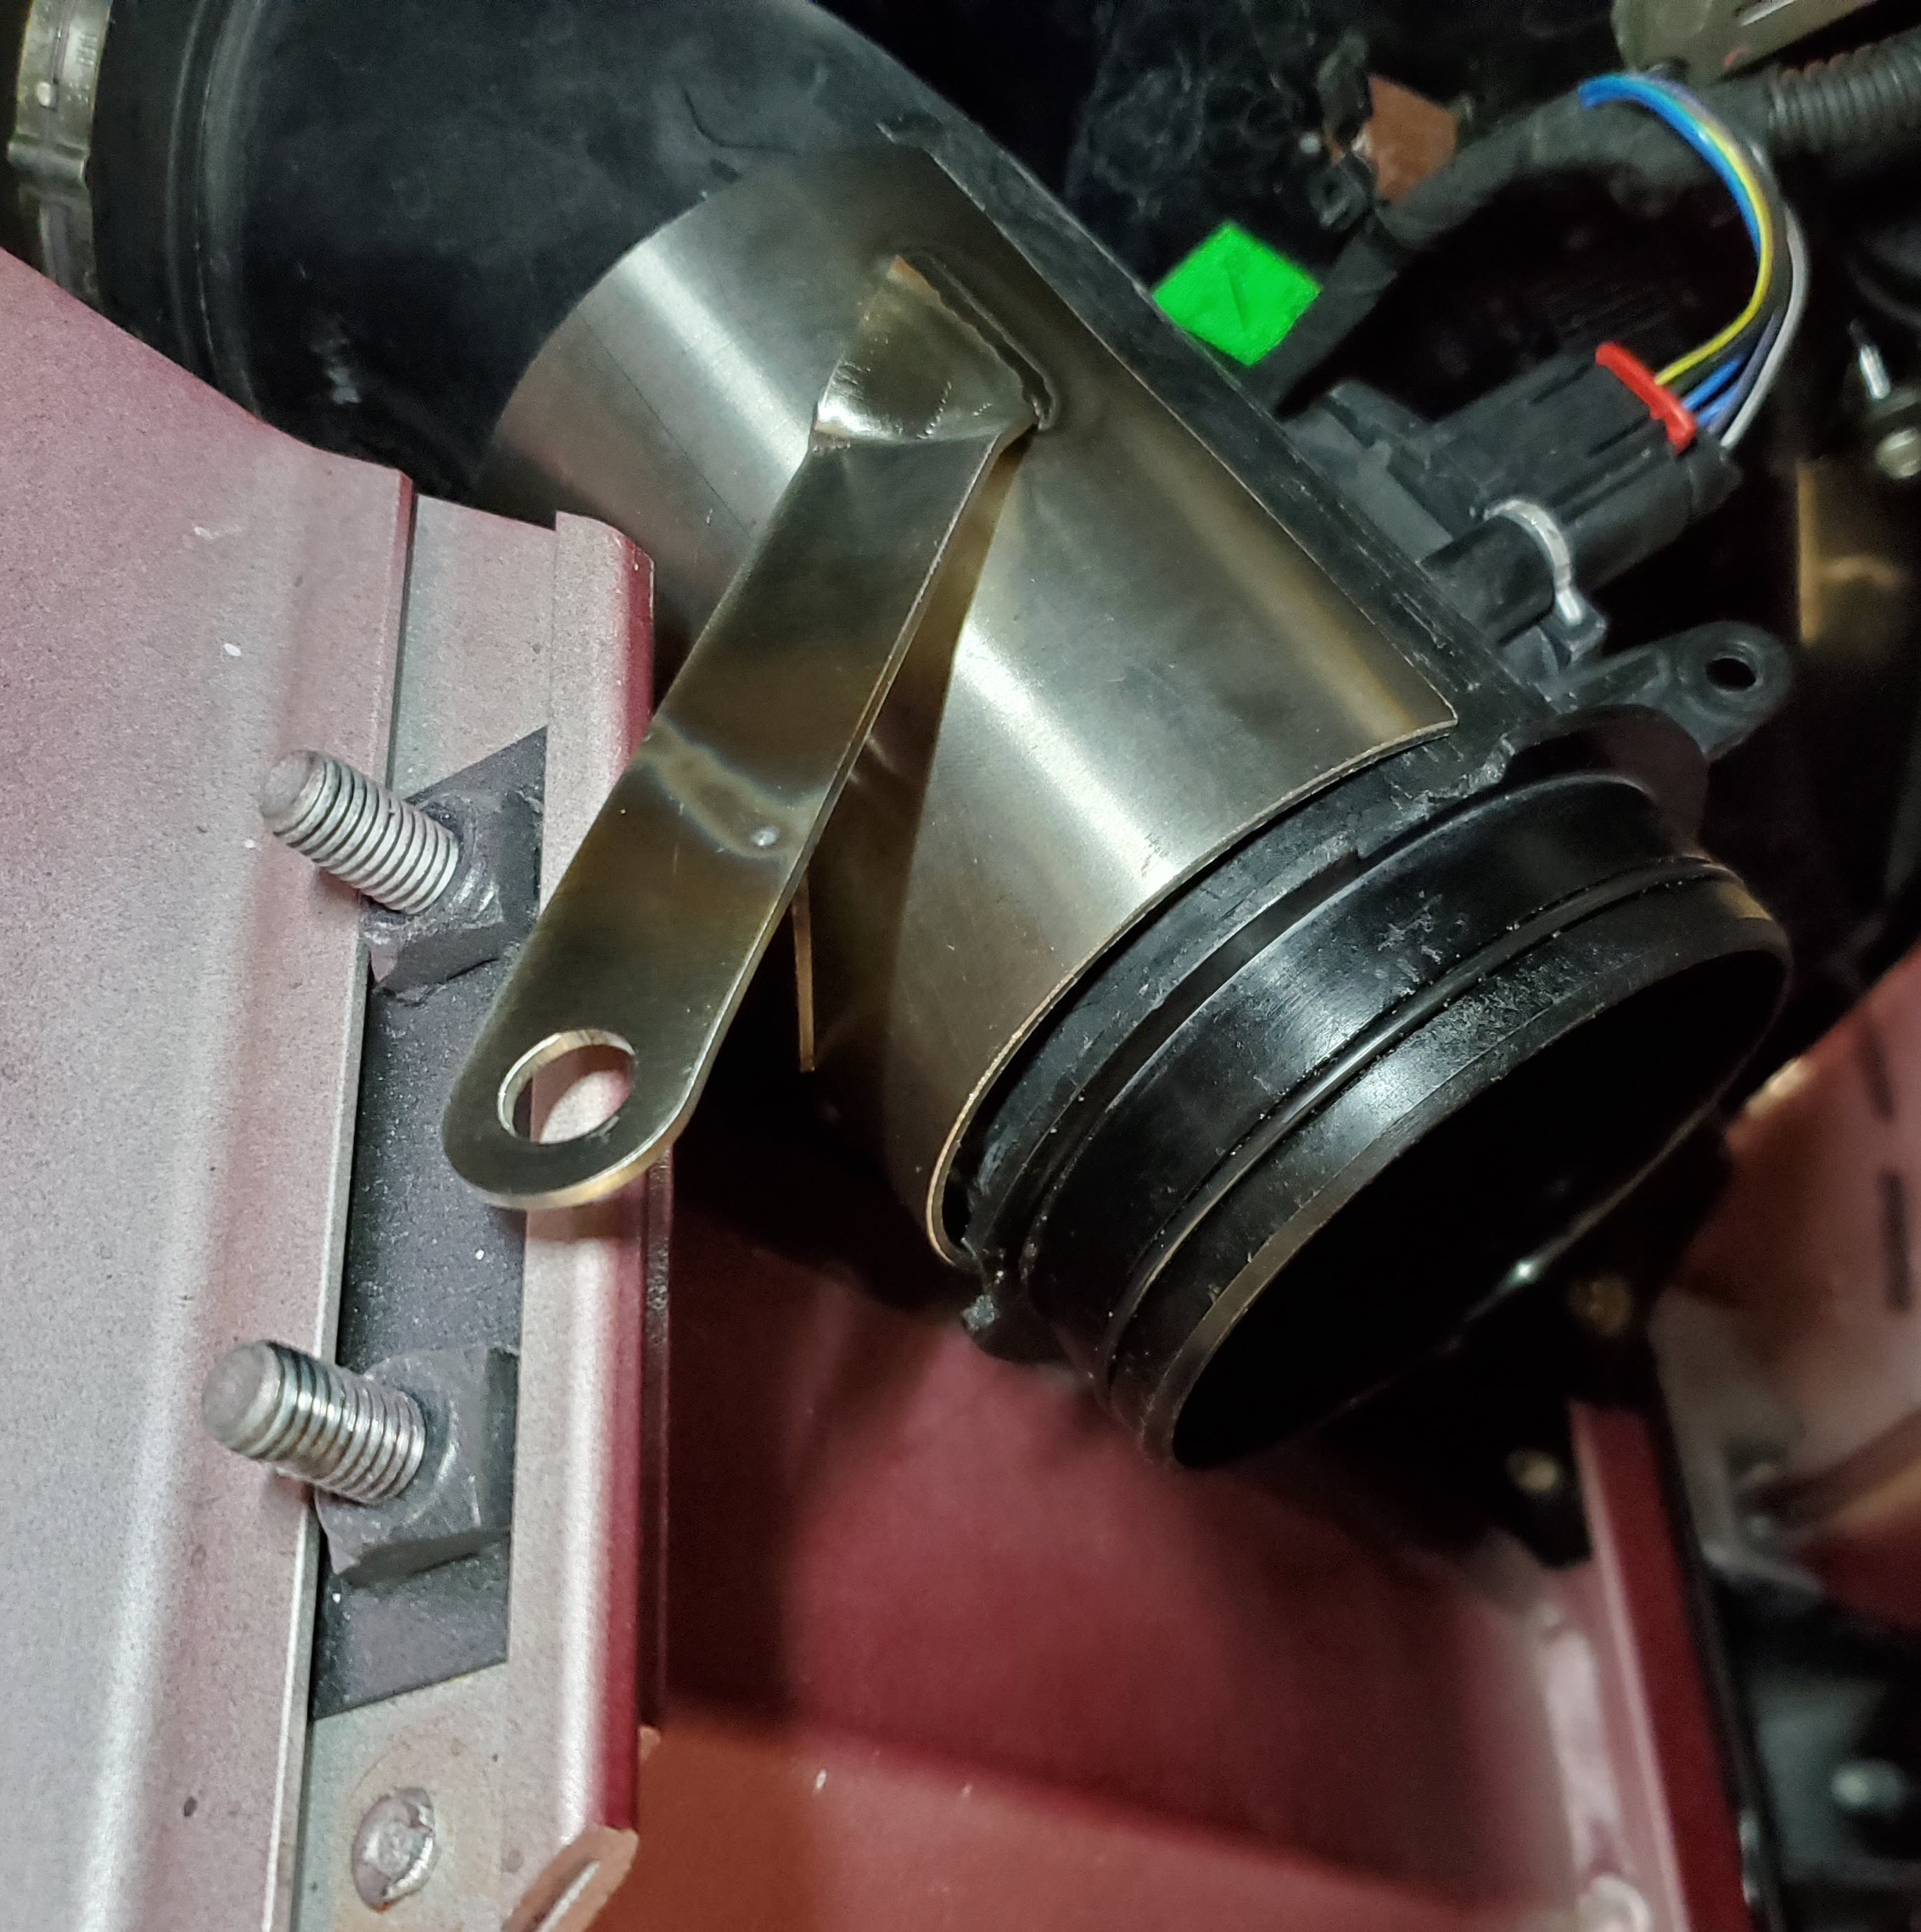
- The brackets mount on the FORWARD side of the lower bolt that holds the frame structure together. Check out the photo.
- Remove this 10mm bolt using your wrench or socket.
- Next we need to position the bracket on the plastic air pipe
- Slip it up into position essentially opposite of the mass air flow sensor.
- Slide it down so its right against the plastic lip at the end of the pipe
- Rotate it around so the bolt hole on the bracket lines up over the hole for the bolt removed
- The bracket needs to ‘squash’ onto the pipe a bit. Easy enough. Once you have it in position, just use your hands and press it tighter over the plastic pipe and it should squeeze completely on.

- Next we need to strap the bracket to the pipe to make it permanent.
- Take one of your 12″ zip ties and find a little spot below the mass airflow housing and the end of the pipe to route the zip tie. Pull it snug and clip the extra length off using your snippers.
- Take another 12″ zip tie and place it above the mass air flow sensor and pull it snug and clip it off.

- Give the bracket a tug/wiggle to be sure its securely strapped to the pipe now. Tighten anything up as needed.
- Take one of your 12″ zip ties and find a little spot below the mass airflow housing and the end of the pipe to route the zip tie. Pull it snug and clip the extra length off using your snippers.
- Next we need to mount the bracket to the frame.
- Check the alignment of the bracket hole to the bolt hole. On my left side it aligned perfectly. On the right side I found I needed to gently pull the bracket/pipe down about 1/4″ to get it to line up.
- Insert your 10mm bolt and re tighten using your socket or wrench. I didn’t have a torque spec for this handy during the install, I made it ‘tight’ with my wrench.
- Give the air inlet pipe a good push pull now to be sure its solidly mounted to the car now.
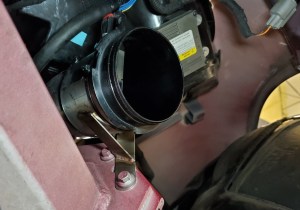
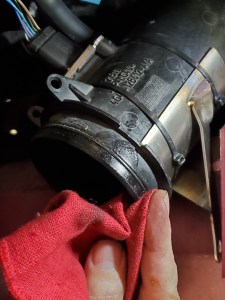
- Clean the end of the air inlet pipe.
- Mine was covered with bits of grit and oil from where it inserted into the airbox.
- Use a shop rag or paper towel to wipe all the debris off the end. You’ll see an o’ring that you can leave in place.
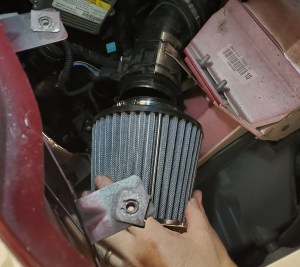
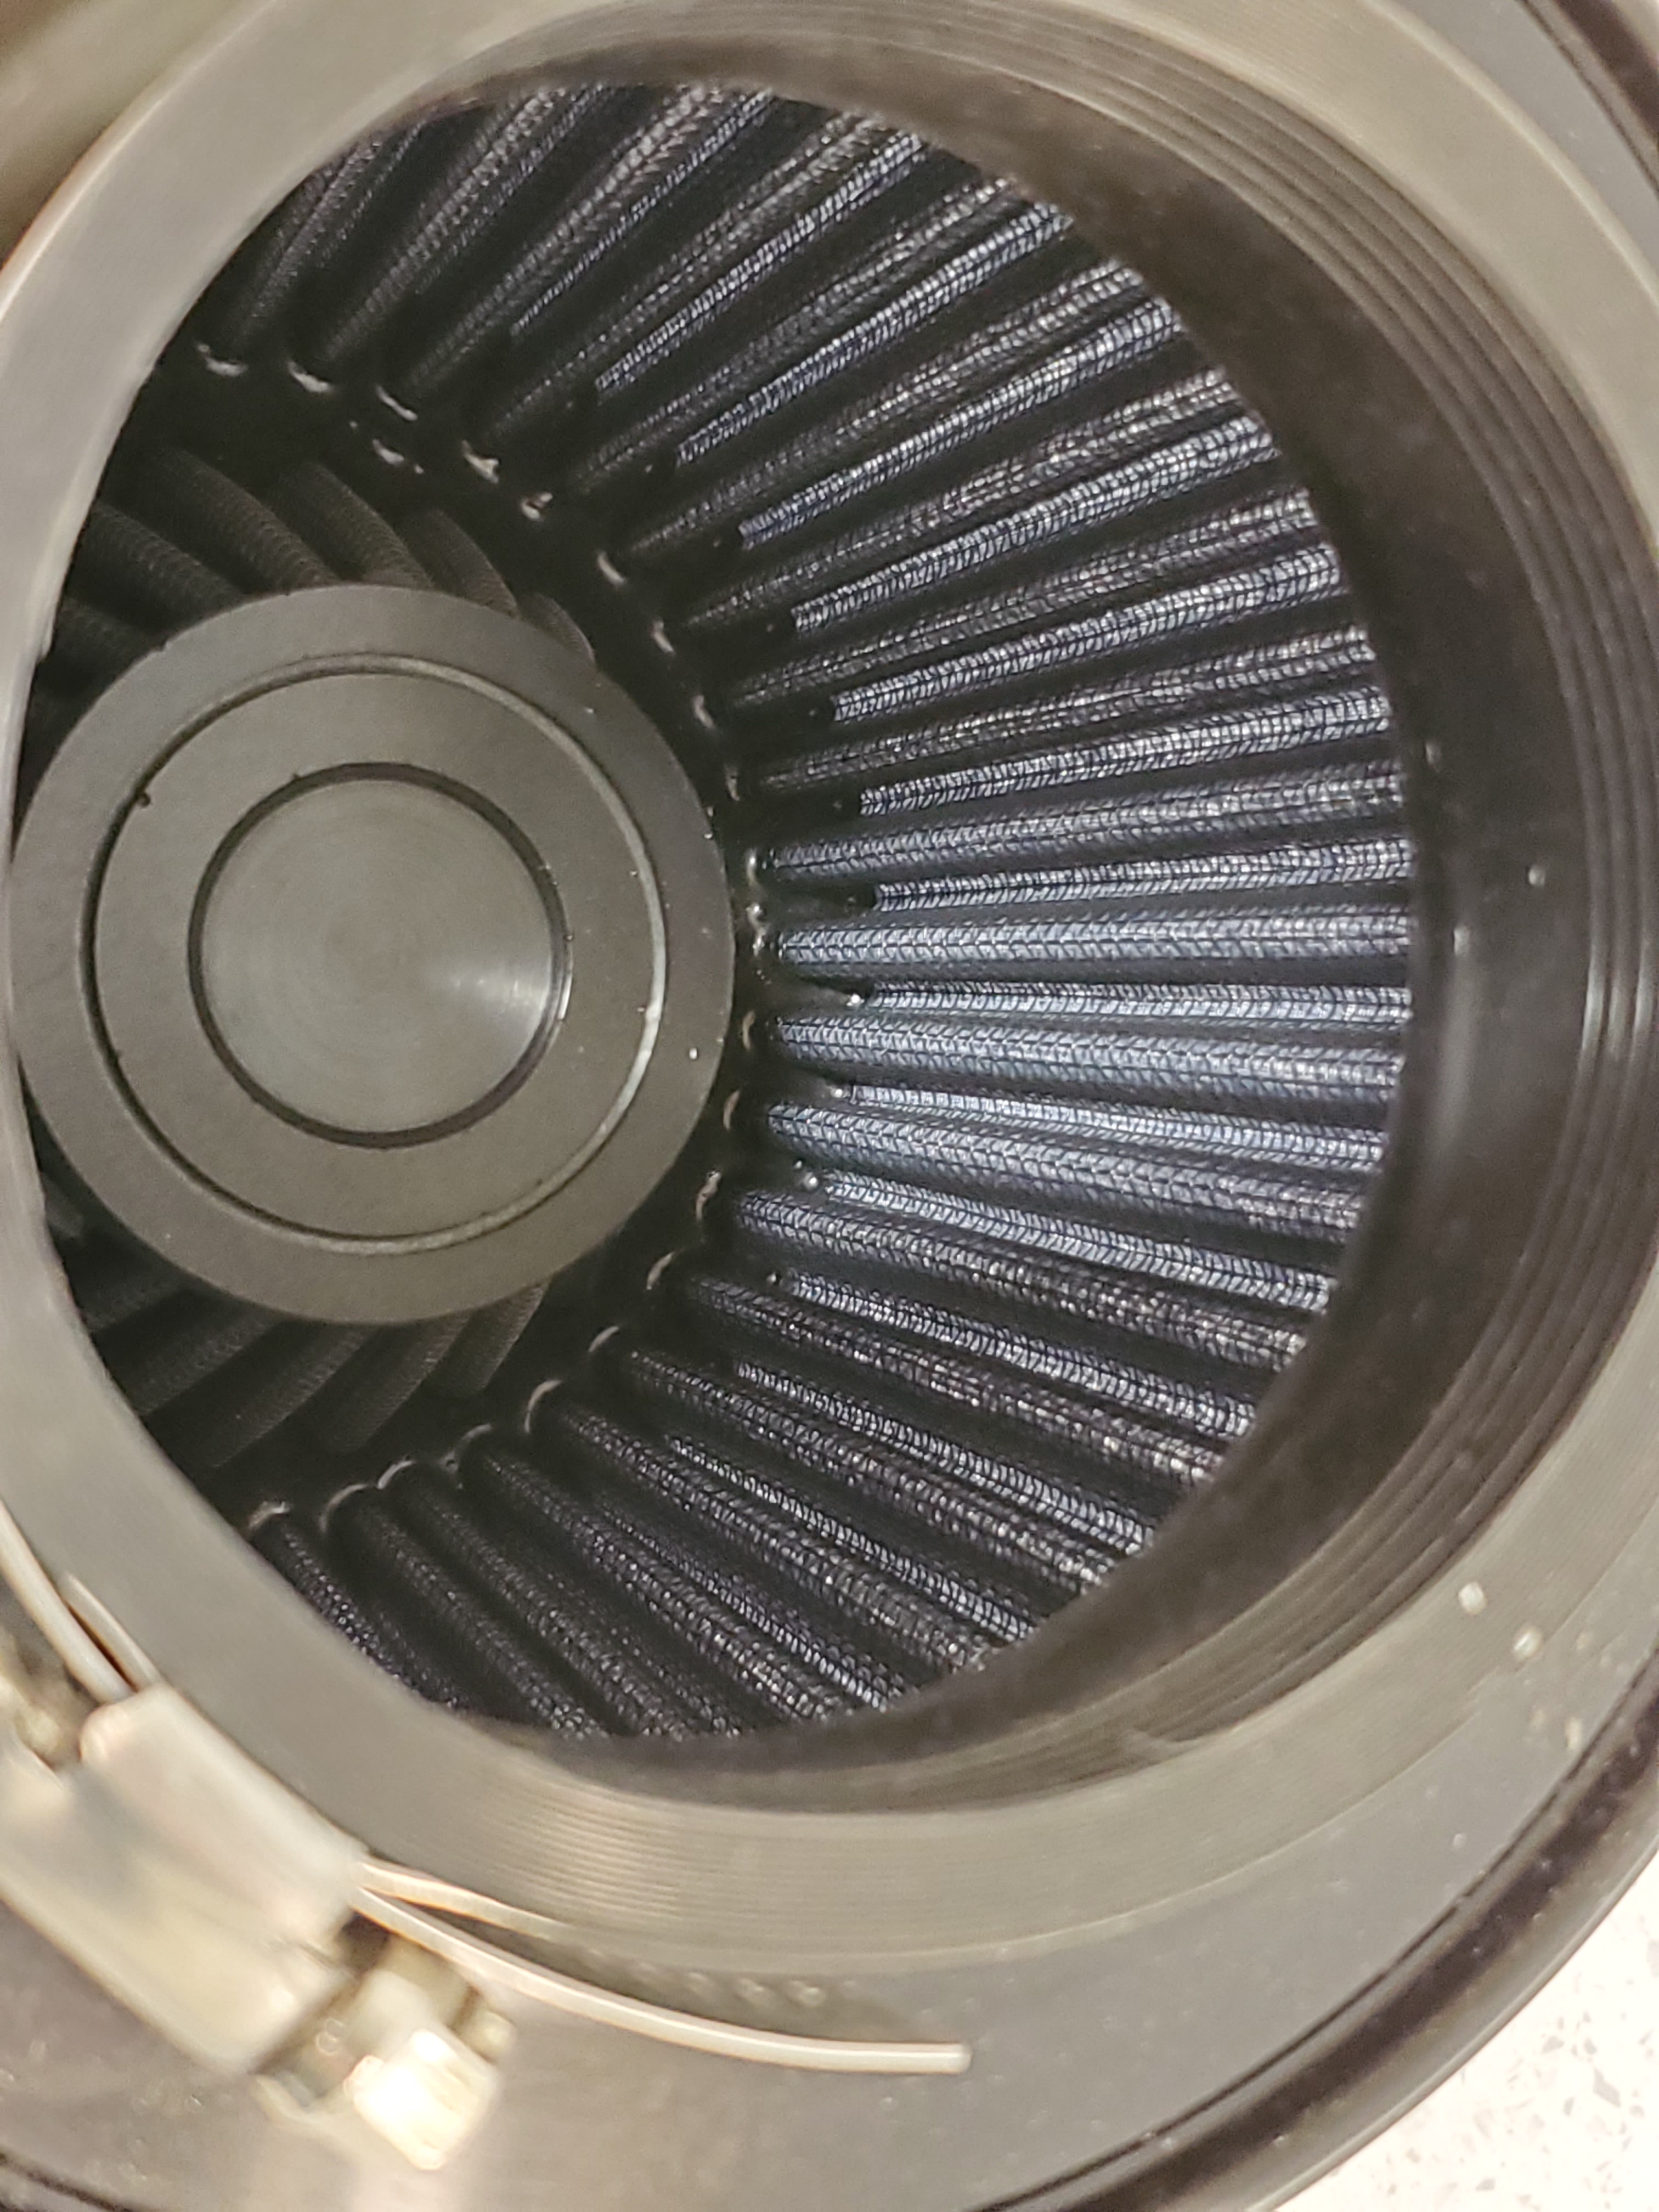
- Next we can install the air filter itself.
- Slip the large hose clamp over the end of the filter with head of the clamp in a position where you can get your nut driver on it once installed.
- Make sure the clamp is loose at this point
- Slip the filter over the end of the air inlet pipe until it butts with the ridge on the pipe. This should go on very easily.
- Use your 5/16″ nut driver to tighten the clamp nice and snug. This is rubber and plastic, so don’t go gonzo over tightening, but make sure its really snug.
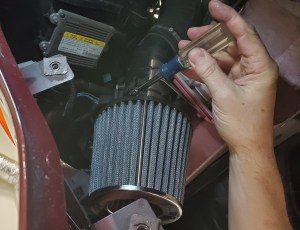
- Give the air filter a good wiggle/tug to make sure its securely mounted to the pipe.
- Give it a quick polish with your microfiber to wipe off any greasy finger prints on the new shiny chrome bits!


That’s it, the filter is installed. Now you need to put the rest of your car back together and I’ve already got articles on the steps to:
- Installing the front inner fender liner
- Installing a road wheel
- Lowering the car
- Torquing the wheel nuts
Now you can move on and do the other side of the car.
Weight Savings
I wanted to know how much weight would be saved by removing the two big airboxes and brackets, etc.
I weighed the entire Velocity AP kit, and it was 1.211 Kg (2.67 lbs) for both sides hardware combined.
I weighed one of the original Airboxes, used air filter, gribbly bits, and bolts and brackets no longer needed. ONE side weighed 1.990 Kg (4.39 lbs). Two sides would then weight 3.980 Kg (8.78 lbs).
This means a total weight savings of about 2.76 Kg (6.08 lbs).
If you read my previous article on the power to weight ratio of an Aston Martin DB9 it points out that removing 8.82 lbs of weight is equivalent to adding 1 bhp of power.
Since we’ve saved 6.08 lbs of weight, this is equivalent to adding about 0.7 bhp of power. Not a lot, but every little bit helps.
Storage of Old Airboxes
One of the things I really liked about this kit was that it was completely reversible. Want to change back to original? Just cut the zip ties, remove the filter and bracket, and bolt your old airbox back on. Simple.
I think you should put your old airbox away clean in case you need it again.
- Remove the old air filter. Its FULL of organic materials, and will grow mold, etc.
- Wash the outside AND inside of the box to get rid of all the dirt and debris (which is also organic). Wipe it out with a shop rag, etc. It’s not unusual to find oil residue in it.
- I only LOOSELY reattached the removable bottom of the airbox to the rest of the housing. There is a perimeter gasket between them, and figured it would be better to not leave it squashed tight for potentially years. I just did the bolts up 90% of the way.
- I assembled the bracket we remove off the car to the mounting point on the box with the two bolts. Three pieces I won’t loose now.
- Put the remaining extra bolts you’ll have (for the forward and rearward mounting points) in a Ziploc baggie and place them inside the housing. Maybe write on the baggie “Left Side Airbox Mounting Bolts” with a sharpie.
- Put the whole airbox assembly into a black plastic yard waste bag (or similar). This will keep dust and critters off the airbox.
- Find some place in your garage or storage for them and tuck them away for safe keeping.
Maintenance
I think we may need to consider changing the maintenance schedule for the air filters when using these ones. They appear to have less pleated surface area, and I think they will ‘plug up’ more quickly than the OEM sized filters. The inspection/replacement filter for the OEM filters is every 2 years as part of the regular 2 year service schedule (check it out here).
I think we should ‘inspect’ these filters annually as part of the 1 year service schedule (check it out here), and then clean and re-oil them as needed. This will only require accessing the filter with the partial inner fender liner removal as we did above. Since the annual service already requires bleeding the brakes (and thus jacking and removing the wheel), this should be about 10 minutes of work to access the filter, check and clean it.
About a year from now I’ll go an article on this, including how to clean and re-oil the filter. Stay Tuned!
More Power?
Well, wasn’t this the point? How much more power does this add?
In another article I will publish after a series of upgrades are complete I will document the power gains.
I can share the initial results though. This simple upgrade DID add a notable amount of performance. About 7-10 ft-lbs of Torque and 5 bhp between 2500 and 3500 RPM. Not bad for a simple $259 bolt on change you can do in 2 hours!
Check out the Dyno Testing videos below to see the baseline performance test and the test with this Velocity AP GT4 Airbox Delete Kit installed.
Video
I’ve done a complete video on this procedure, and its probably worth watching to see how things are supposed to fit, etc.

Hi Steve
I recently changed my air boxes, catalitic pipes to 200 grade from the factory 400, changed the muffler to a beautiful muffler made by Ferrari and remapped the ecu. The car screamed with power and sounds fantastic. At idle it is a very minor sound increase. At 3000 FPM much louder, awesome. At 4500+ you could break windows. Torque and throttle response is noticeably sharper. The remapping also allows you to clear faults, like the annoying one that comes up periodically regarding the fuse that is topically pulled to make the car louder. I estimate a minimum of 50 hp gain overall. Robert
LikeLike
Hi Robert, thanks for sharing the details. That’s what I am aiming for, about 50 bhp. Dyno testing at each step to really know which changes make an improvement. Secondary CAT deletes are next for me. I will be doing the ECU as well, but not the Muffler. Did you do the changes yourself? Cool stuff.
LikeLike
Hi Steve
Sure did, also did aerodynamic enhancements, improving air flow over upper and lower body(undercarriage). As well as developed a spoiler/skid plate. Also did extensive coach work, to interior with products from 2009 forward. Can send you a pic.
Thank you
Robert
LikeLike
Hope it works well for you Steve. Weight savings is always ‘good’!! Thanks for the note about them being available.
With other Marques where I’ve been active,(including well over ten thousand miles of track driving with one of them) there have been reports that the ‘oil’ from these aftermarket reusable filters caused problems with the Air Flow sensors.for the ECU.
And, I’ve also been leery of them, as increased air flow seems to me to mean the ‘holes’ in the filters are bigger. Thus ‘bigger rocks’ can flow through into the combustion chambers along with the greater volume of air. A conundrum for sure.
Hope it works out well – been there done that in looking for more horsepower in order to come out of those corners faster – HA.
LikeLike
Hi Gary. All good points. I’m not convinced the oil from the air filter will make its way to the MAF unless it was massively over oiled. Our Aston’s bleed engine oil down the MAF pipe as it is, so if it was going to happen, it would have already I think. The hole size, this may be a fair point. I suspect the oiled fabric material works its own magic compared to simple paper filter. Anyways, fun to tinker with.
LikeLike
As a note for posterity, the mounting brackets they included looked different than yours for my ’11 Volante. As the Volante apparently has a different crumple zone joint in the front frame columns you’d bolt to, those brackets didn’t fit so I returned them for credit. Zip typing them snug to nearby hardware seems just fine.
LikeLike
Hi Steve,
Thanks for the very interesting article. I have a question as to the applicability of this upgrade to my DB9 MY 2011. Do you think it would work there? My apologies if I am asking the obvious.
Best regards,
Tim Talaat
>
LikeLike
Hi Steve, in my 2014 vantage v12 the air box come w a secondary intake door that operate w the vacuum after the throttle body, I will close the vacuum…
I have 2 questions may be you can help me
@the rear RH of the intake manifold is a vacuum check port (black plug w a red secure clip) I take it out and I “believe” was all the way in but when I put it back again the plug was like 10 mm (3/8′) out, can you confirm if this port is all the way in in your car
Thanks for all the videos, helps a lot, I am a non Rich guy and this is my first super car, I bought crashed in a auction and I repair it all by my self, it’s been an amazing job and now I only need to paint 4 pieces and I am ready to roll it
LikeLike
Hi Steve,
Please ignore my previous question. I checked the AP website (which I should have done before asking you 😏 – case of fingers faster than the brain 😆) and the kit does work for all DB9, DBS, Rapide, Vantage, and Vanquish (V12 and V8 where applicable) through MY 2012.
Thanks for your great posts and blog.
Best regards,
Tim Talaat
>
LikeLike
Hi Tim. No worries. I think it does, so give it a try. Good luck!
LikeLike
Steve. I can not find the Velocity AP ECU Tune results, can you repost them
LikeLike