
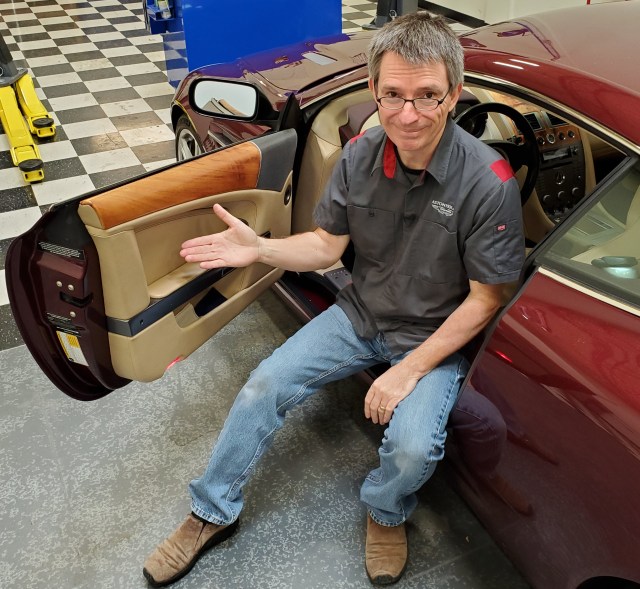
 I thought it was just another sign of getting older. I was having a hard time getting out of my Aston Martin DB9. I’d be seated in the car and it felt like I had to push the door open and hold it up while extricating myself from the car. Turns out it wasn’t me, it was the Door Check Arm Gas Struts were getting weak.
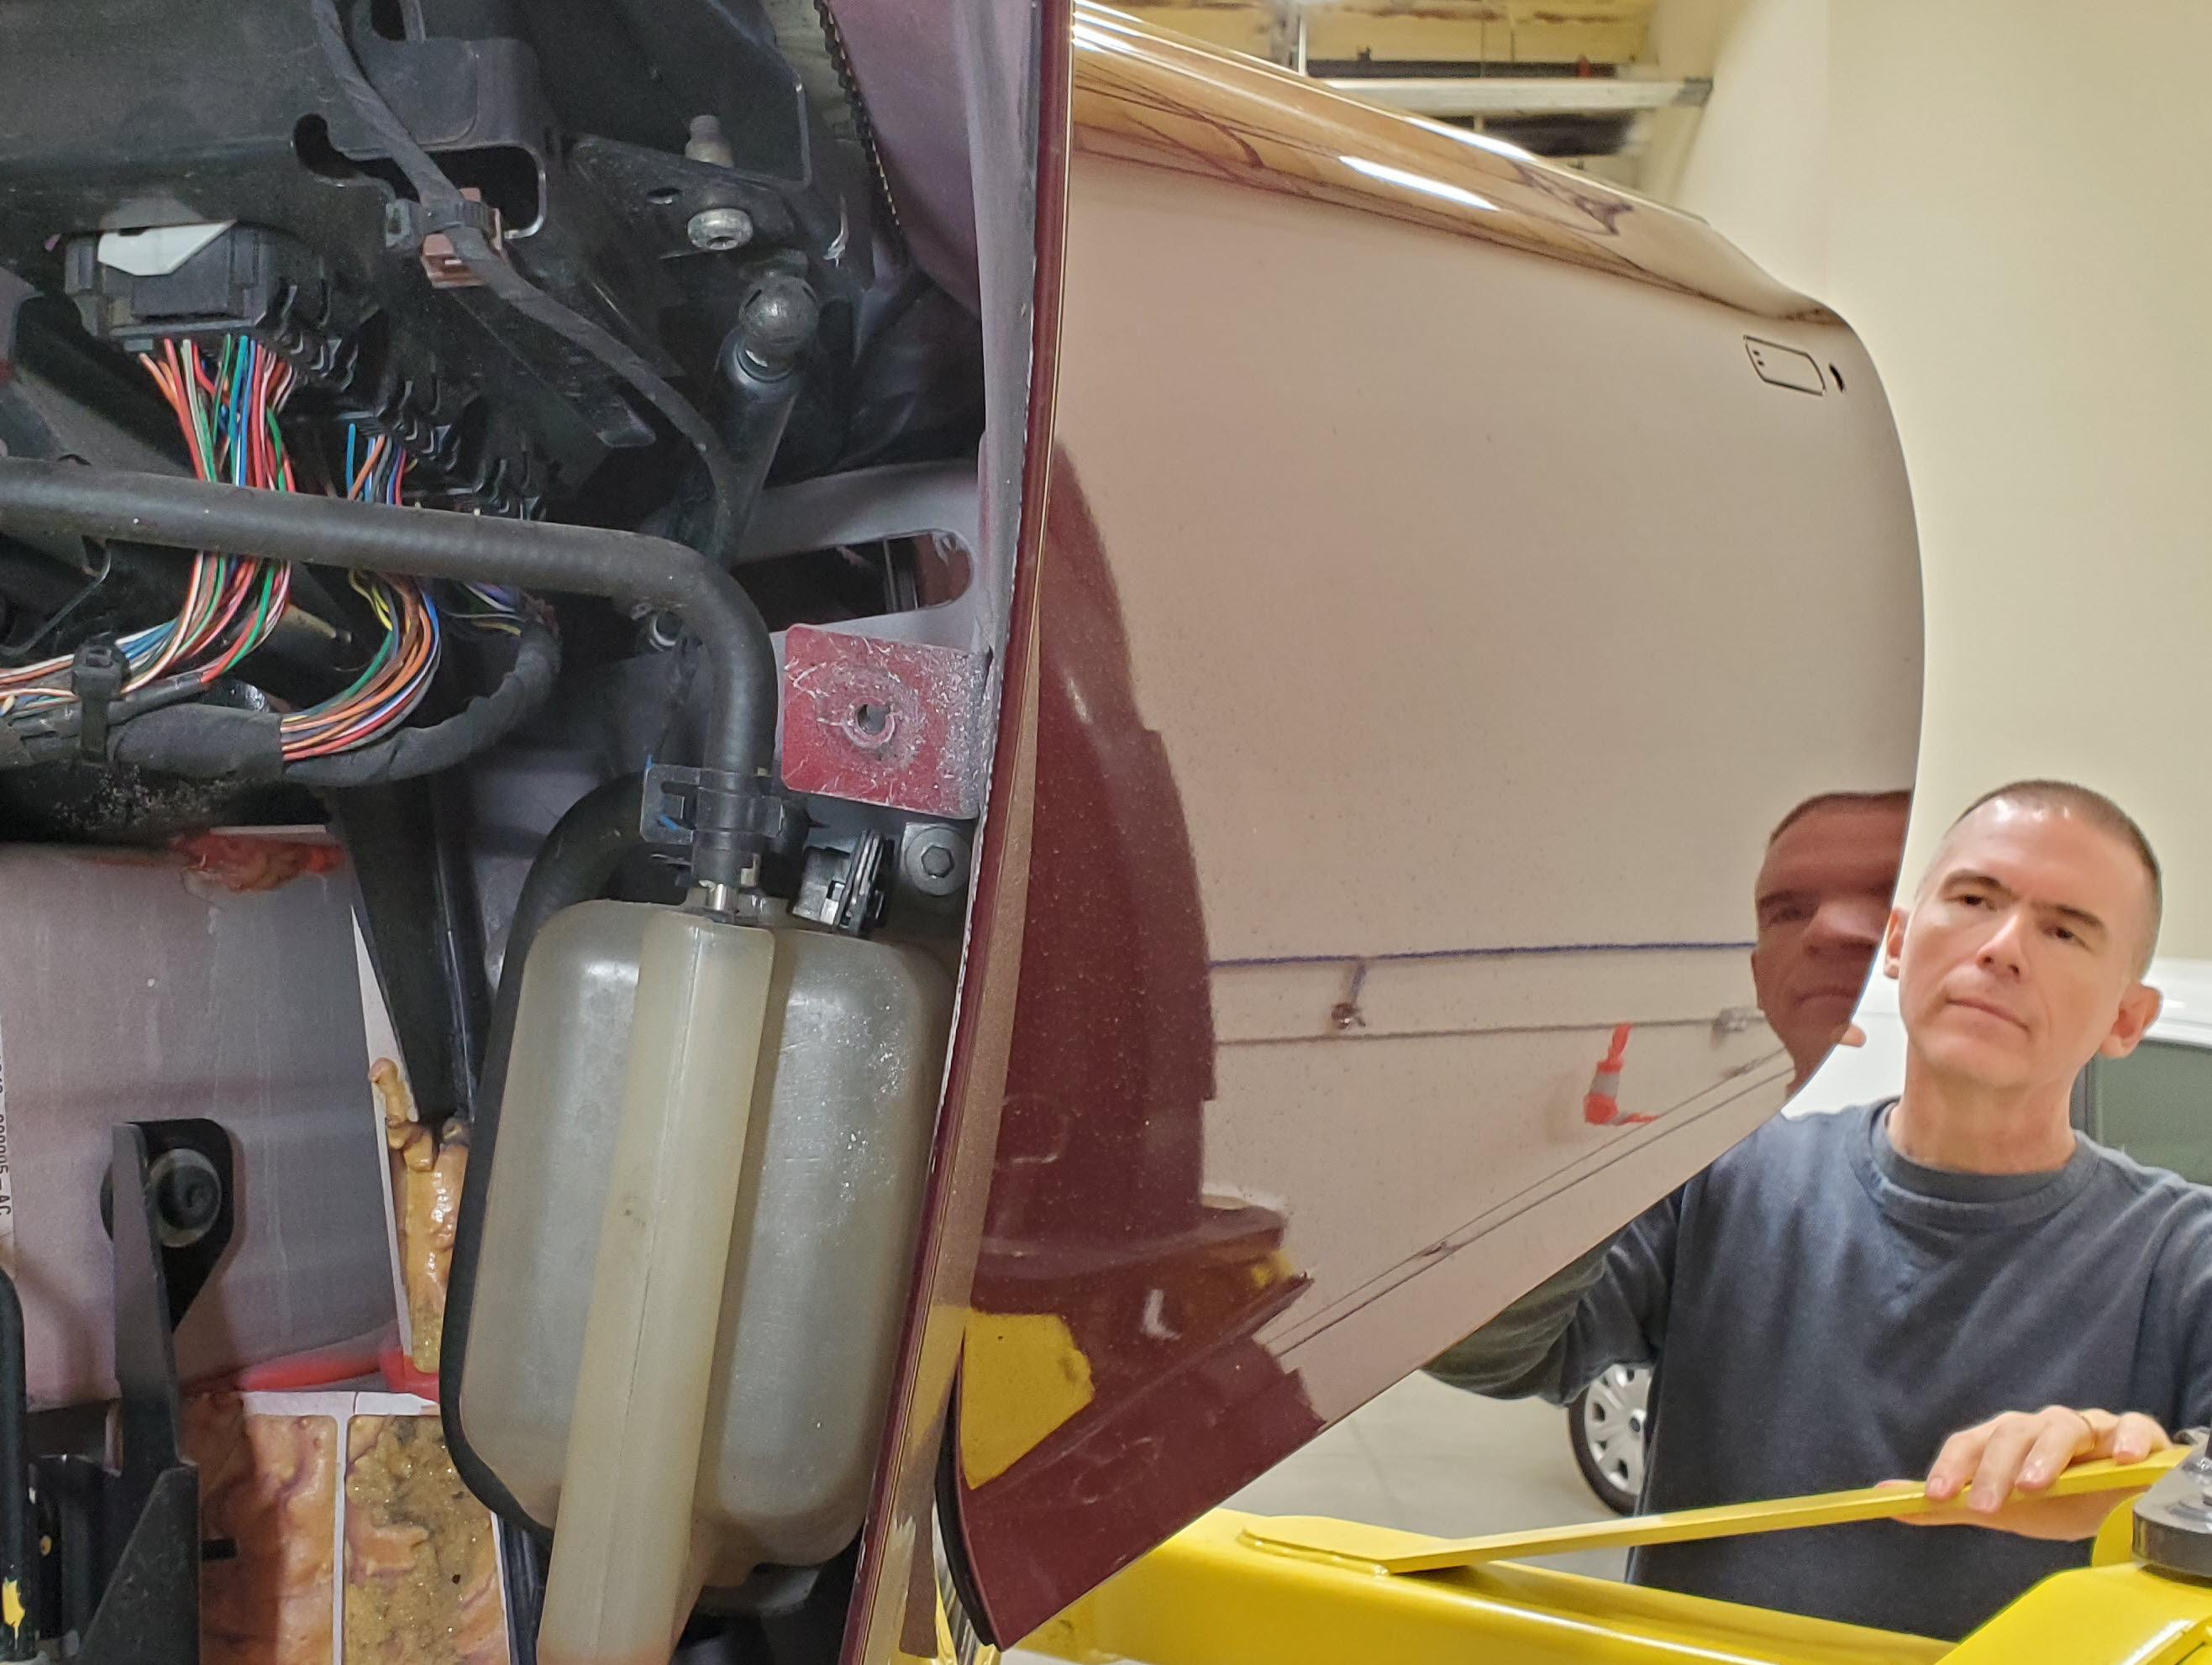
 The Swan Wing doors are one of the distinct features of the DB9. The doors open ‘up’ at an angle of about 12 degrees, creating a Swan like look. Unlike other road cars with normal horizontal doors, the DB9 requires Gas Struts to help open and hold open a door.
My car is 15 years old, and Gas Struts don’t perform well forever. They have seals and begin to loose pressure very gradually (getting weaker). You won’t notice it right away, but eventually the door may start to not hold itself open. One day that Swan is going to bite you in the ass, and you’ll know its time to change them.
The good news here is that the struts are fairly simple to replace, and not very expensive at all. You can fit them yourself, and let me give you a few tips to get it done right the first time.
Background
Gas struts are very popular and its no surprise Aston didn’t make a bespoke strut but rather outsourced the struts to a German company Stabilus. You can see it right on the labelling.
I had a solid look around the Stabilus website thinking I could potentially bypass Aston for the purchase, but I wanted to be 100% certain of the part number and spec’s of the strut before I went this route. Stabilus has a ‘Spare Part’ lookup tool, and it included the Aston Martin DB9 Coupe Door gas struts. It’s their part 3265YV. 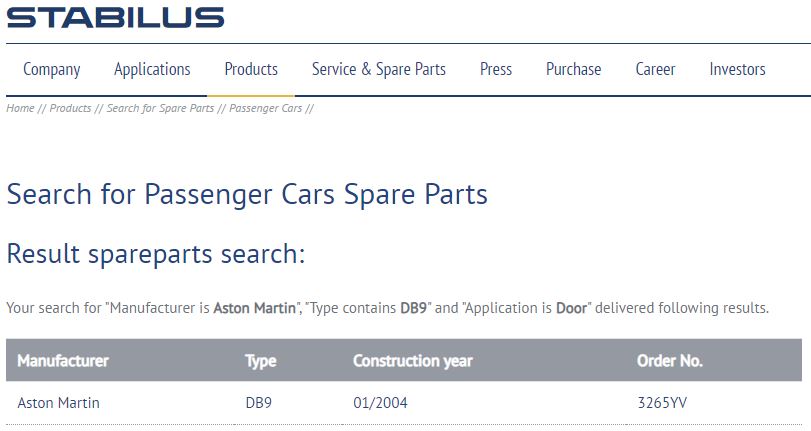
I figured great, I can Google that and get one off Amazon. Not so much. I certainly found some aftermarket struts that claim to be the equivalent, but I couldn’t be sure. I wasn’t able to find an exact ‘spec’ sheet from Stabilus with the dimensions and most importantly the Force rating [if you find an official one, please contact me with it]. I have measured it and the important facts are:
- Length (socket center to socket center) – about 260 mm
- Shaft Diameter – 8 mm
- Cylinder Diameter – 18 mm
- Stroke Length – about 43 mm (based on what I can see on the old ones)
- Ball Diameter – 10mm
I still didn’t know the ‘Force’ the strut was rated for. Then I noticed the line right on the label:

2854SW 0250N 188/17 CP 07
I wondered if the 250N meant 250 Newtons. Manufacturers rate the struts in ‘Newtons’ (N) of force. For the imperialists out there 1 pound of force is 4.448 Newtons of force (i.e. 10 pounds – 44.48 N). So, a 250N strut would be about 56 pounds.
I ‘borrowed’ my Sweetie’s bathroom scale (again) and made up pair of wood blocks with a divot that I could use to squash the strut between and measure the force.
The struts should be mostly linear (the same force anywhere on the stroke), but I aimed to compress them about one inch.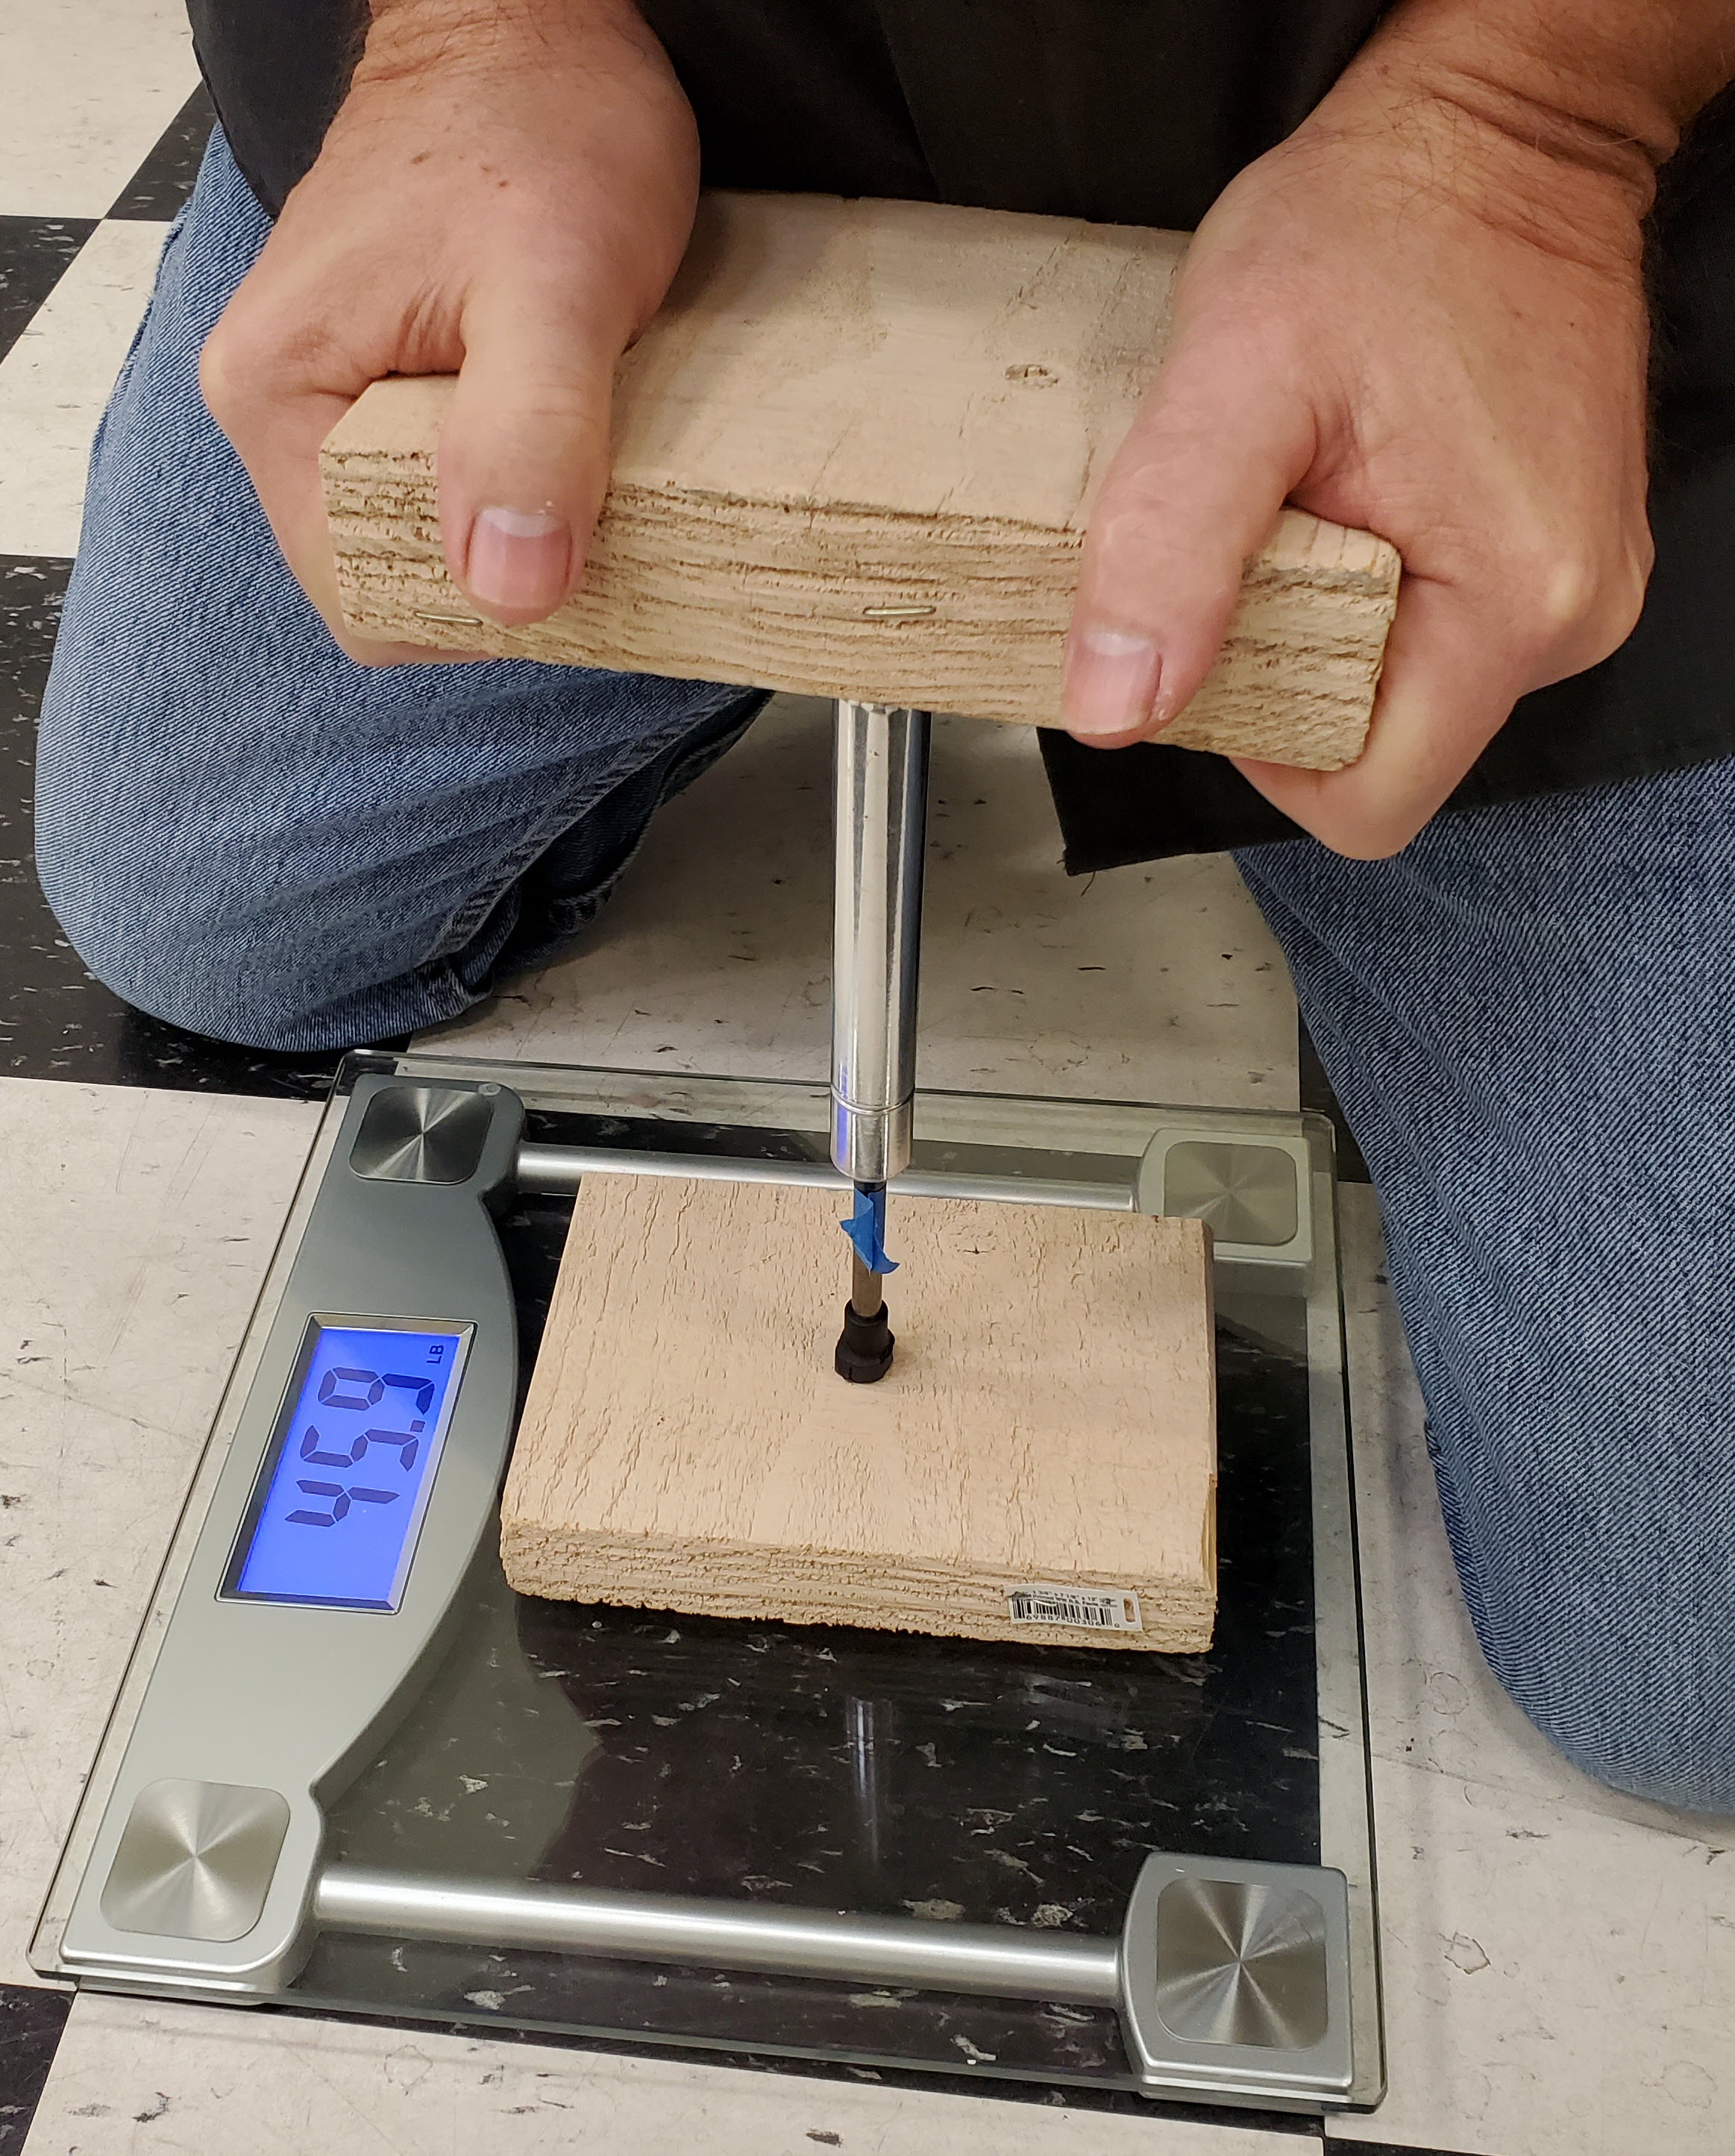
I tested both of the old tired struts and the new ones. The two old struts had the same value of ~48 pounds. The two new struts both measured ~108 pounds!
The old struts were down by ~56% versus new. That would mean there was ~60 pounds less of supporting force holding up the door. That is a lot and explains why it was falling back.
Since the new struts measured out at 108 pounds, that’s ~480 Newtons (N) and this doesn’t match up to the label if they were supposed to be rated for 250N. If you get a pair and do a similar measurement test, please leave a comment down below what you get.
Dealer Cost to Fix
What does it cost to get this fixed at an Aston Martin Dealership? Good piece of data to know if you are weighing if its worth the bother to fix it yourself. Recently there was a 2007 DB9 sold over on www.BringATrailer.com, and the owner posted his last Dealer Service Invoice from a visit in 2020 when he had all the niggles fixed on his car. The dealership was located in Northern California (one that I’ve visited before).

They charged $144 USD for parts, and $470 USD to install them, for a total of $614 USD. As you’ll see below, you can do it yourself for about $62 in 2 hours saving yourself about $452.
Parts
This is an easy one. If you have a DB9, DBS, Vantage or Vanquish – you need two of Aston Martin part number 4G43-23504-AB. 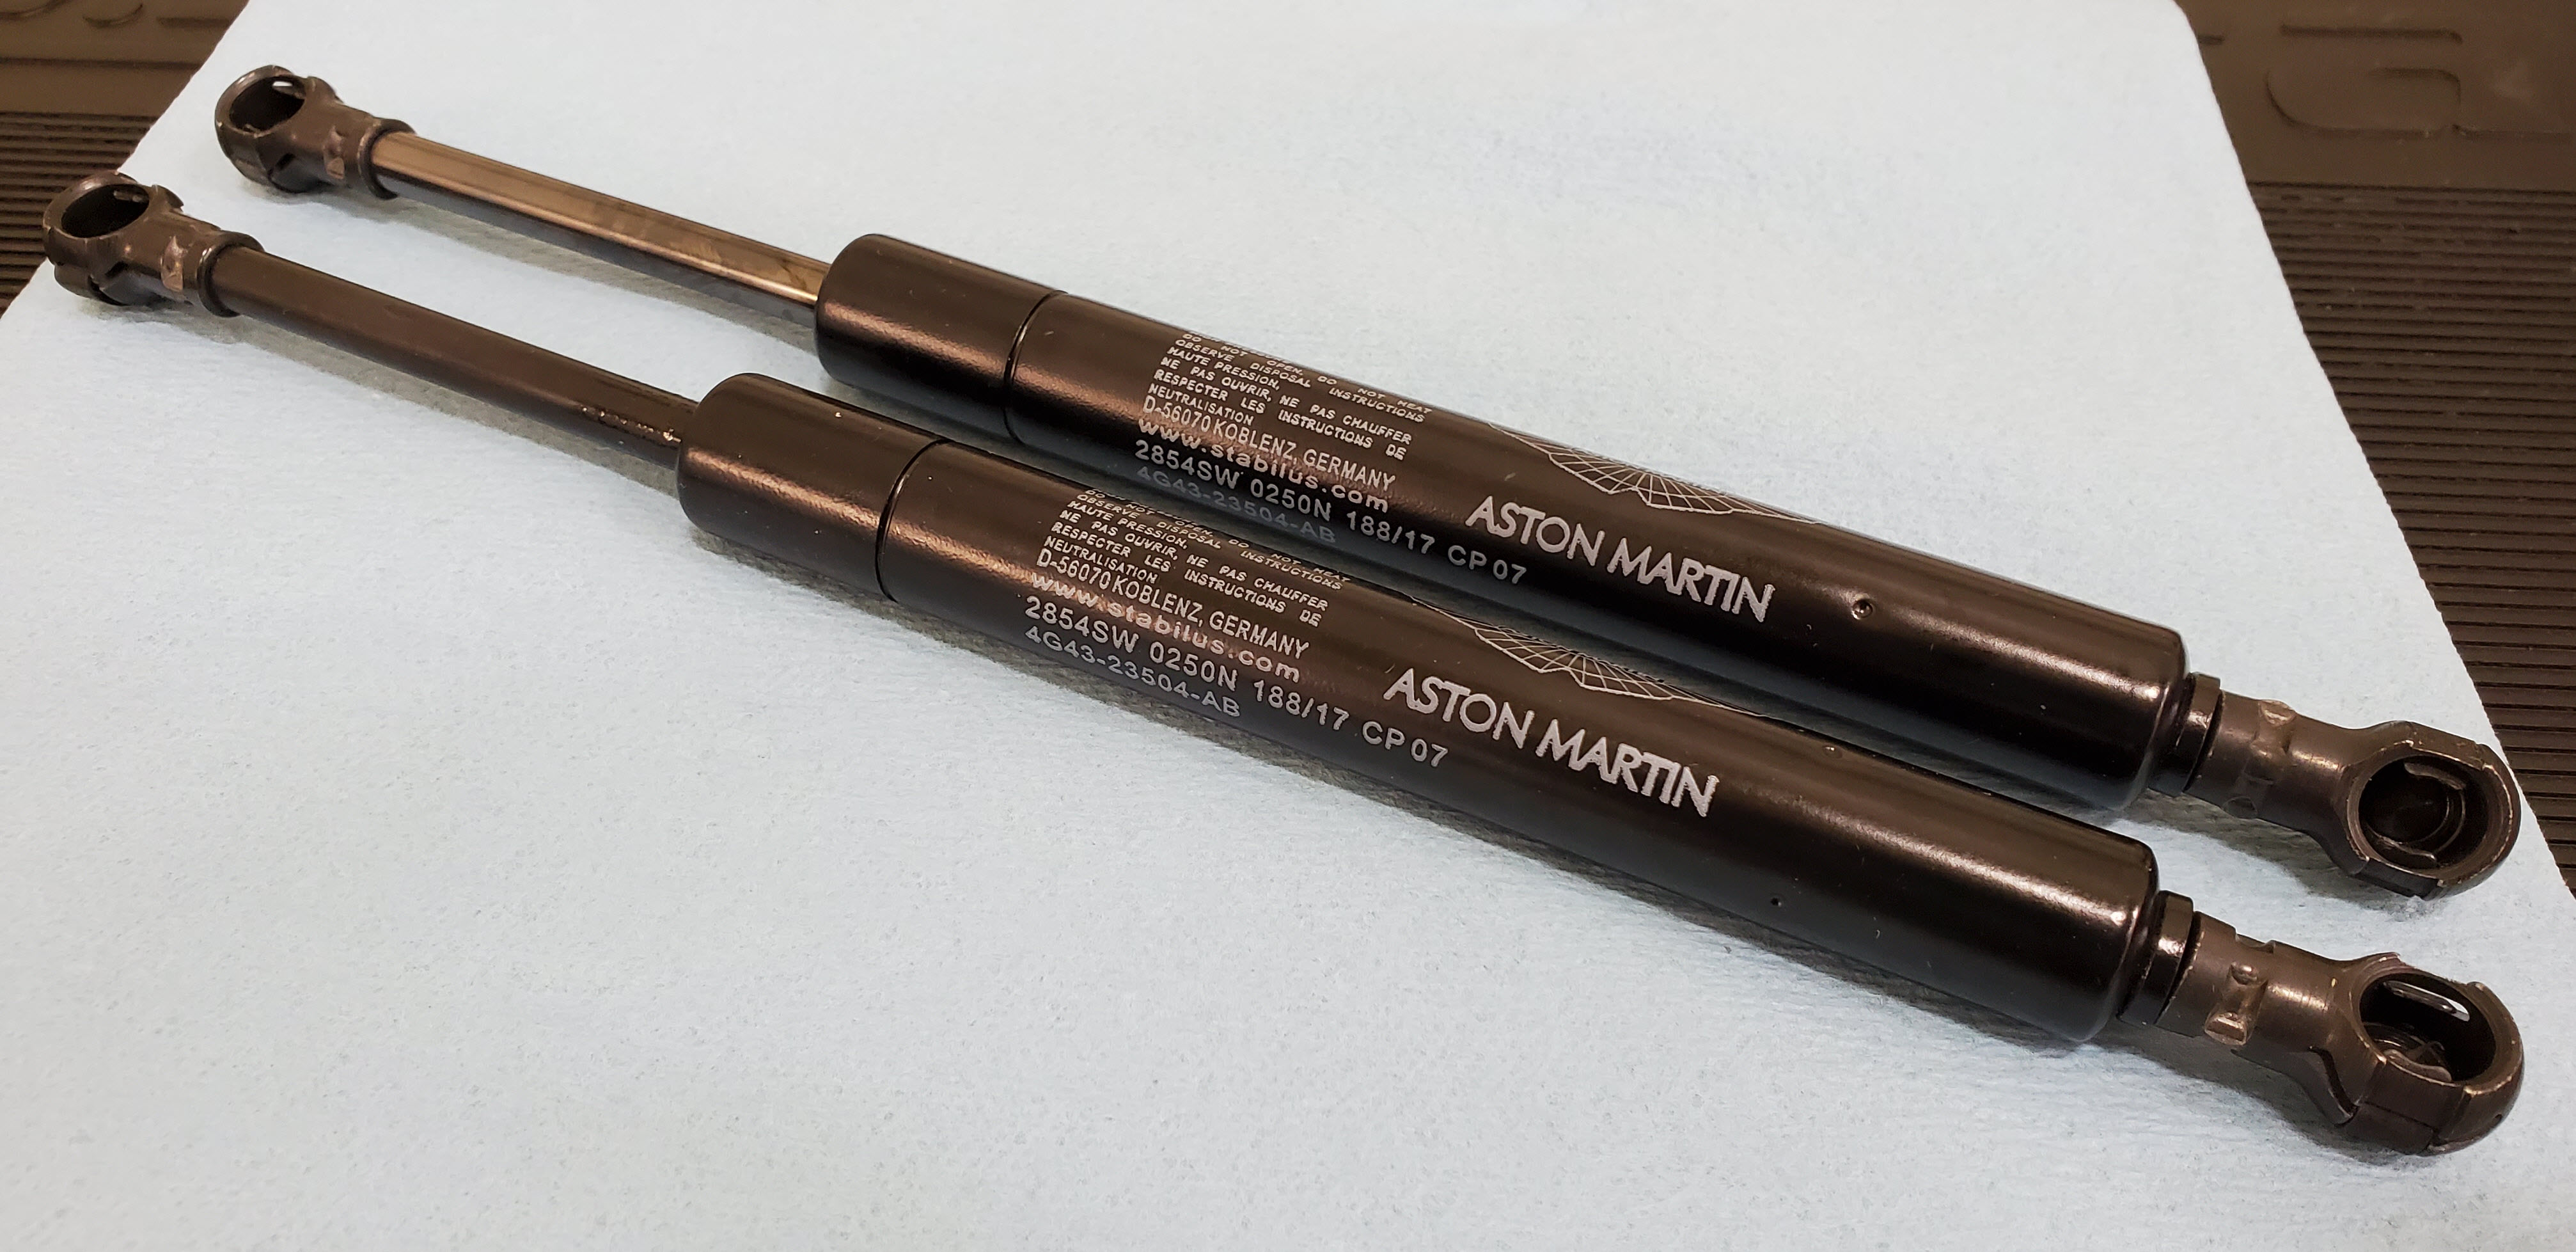
You can find them online at ScuderiaParts.com for about $31 USD each here.
If you live in the UK or EU you can reach out to the parts team at HWM England and they can probably give you a bit better pricing if you mention you were referred from this website.
This is a rare time when the Aston parts aren’t massively overpriced. I’d recommend that you pay the couple of extra bucks to get the Aston ones for peace of mind (and a neat logo). Saving $10 on a part you change every 10+ years doesn’t make a lot of sense (IMHO).
NOTE: While I was testing the strength of the new struts for the comparison above, I discovered one of my struts was much weaker than the other, 30 lbs weaker! It also was ‘weeping’ oil a tiny bit. I contacted my vendor and requested a replacement. I suspect these had been sitting a very long while on a stock shelf somewhere and were already part way to perished. I suggest you take the time to check your new struts BEFORE you take all the trouble to fit them to the car only to discover they aren’t working well.
Tools
You need very few tools and supplies to accomplish this task.
- Small Long Shaft Flat Blade Screwdriver
- Large/Long Flat Blade Screwdriver or similar Prybar
- White Lithium Grease
- Lint free shop rag
- Inspection Light

One very important tool not in the picture is a HELPER. You need someone or something to hold door wide open while you change the strut. You’ll see me use a camera tripod and do it solo, but if you can entice your Sweetie or friend to help you for 10 mins it will be even easier.
Prerequisites
 Getting access to the strut is the biggest challenge. Its hidden in the front wheel well behind the plastic fender liner. To get to it, you need to remover the liner. To remove the liner, you need to remove the road wheel. To do that you need to get the corner jacked up. No step is particularly difficult, you just need to plod through them. Here are links to each step to help:
Procedure
Swapping both struts (drivers and passenger sides) will take about 1 to 2 hours, and most of that time is spent getting access to them doing the prerequisite steps. The actual strut change takes just 5 minutes.
I checked the official Aston Martin Workshop manual and couldn’t find any specific reference to removing the struts. Other procedures mention removing them, but as “remove struts”. No details.
Learn how the Retaining Clips Work
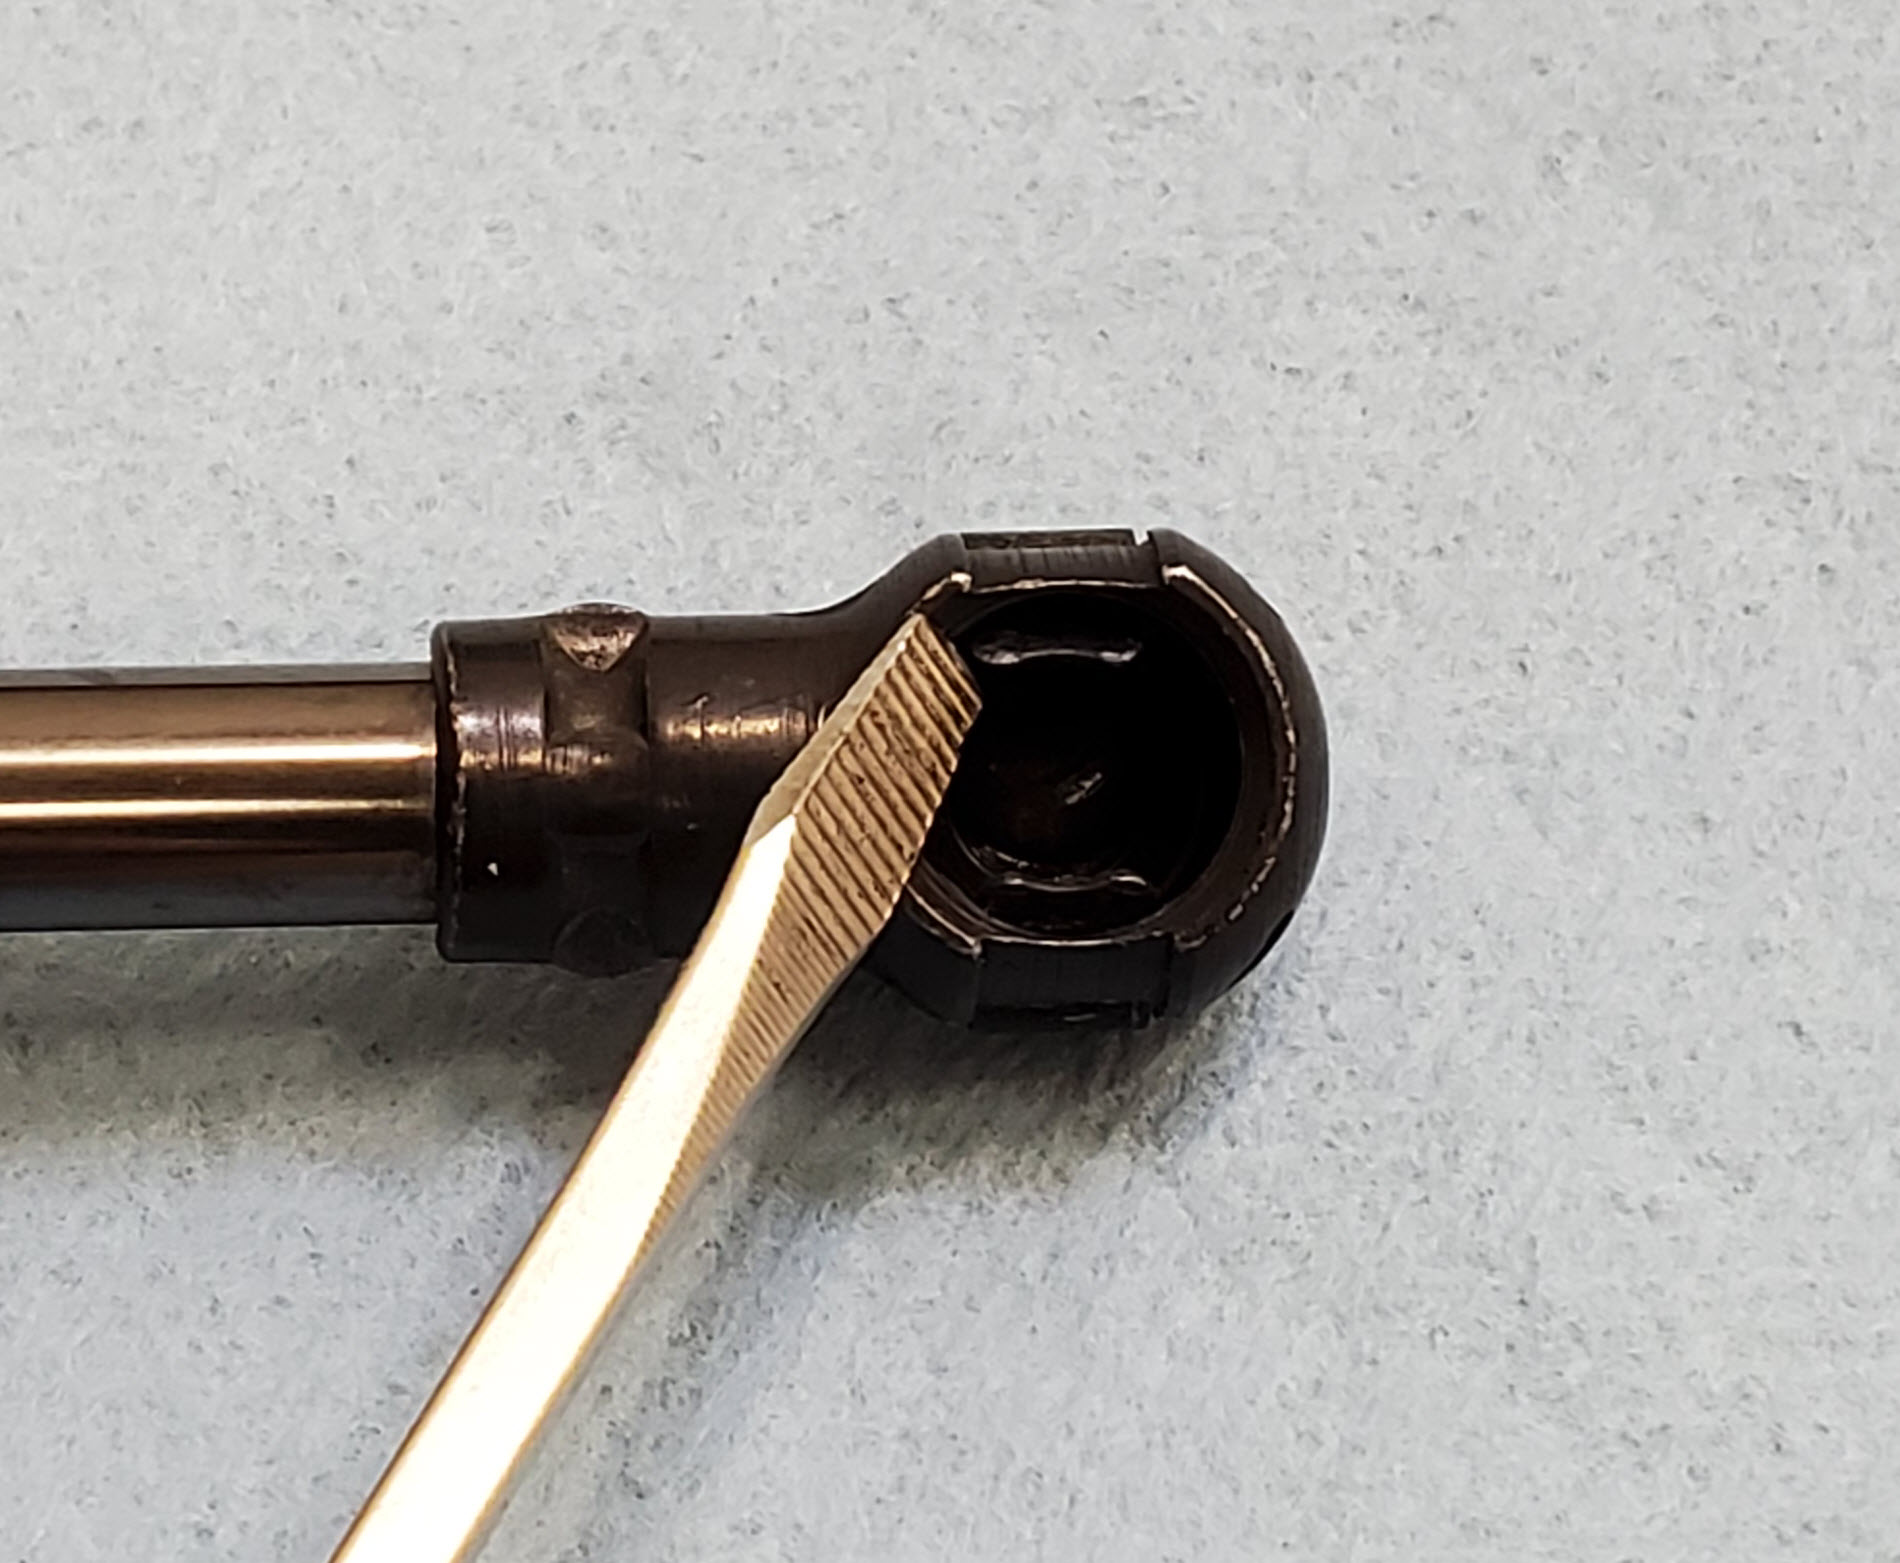
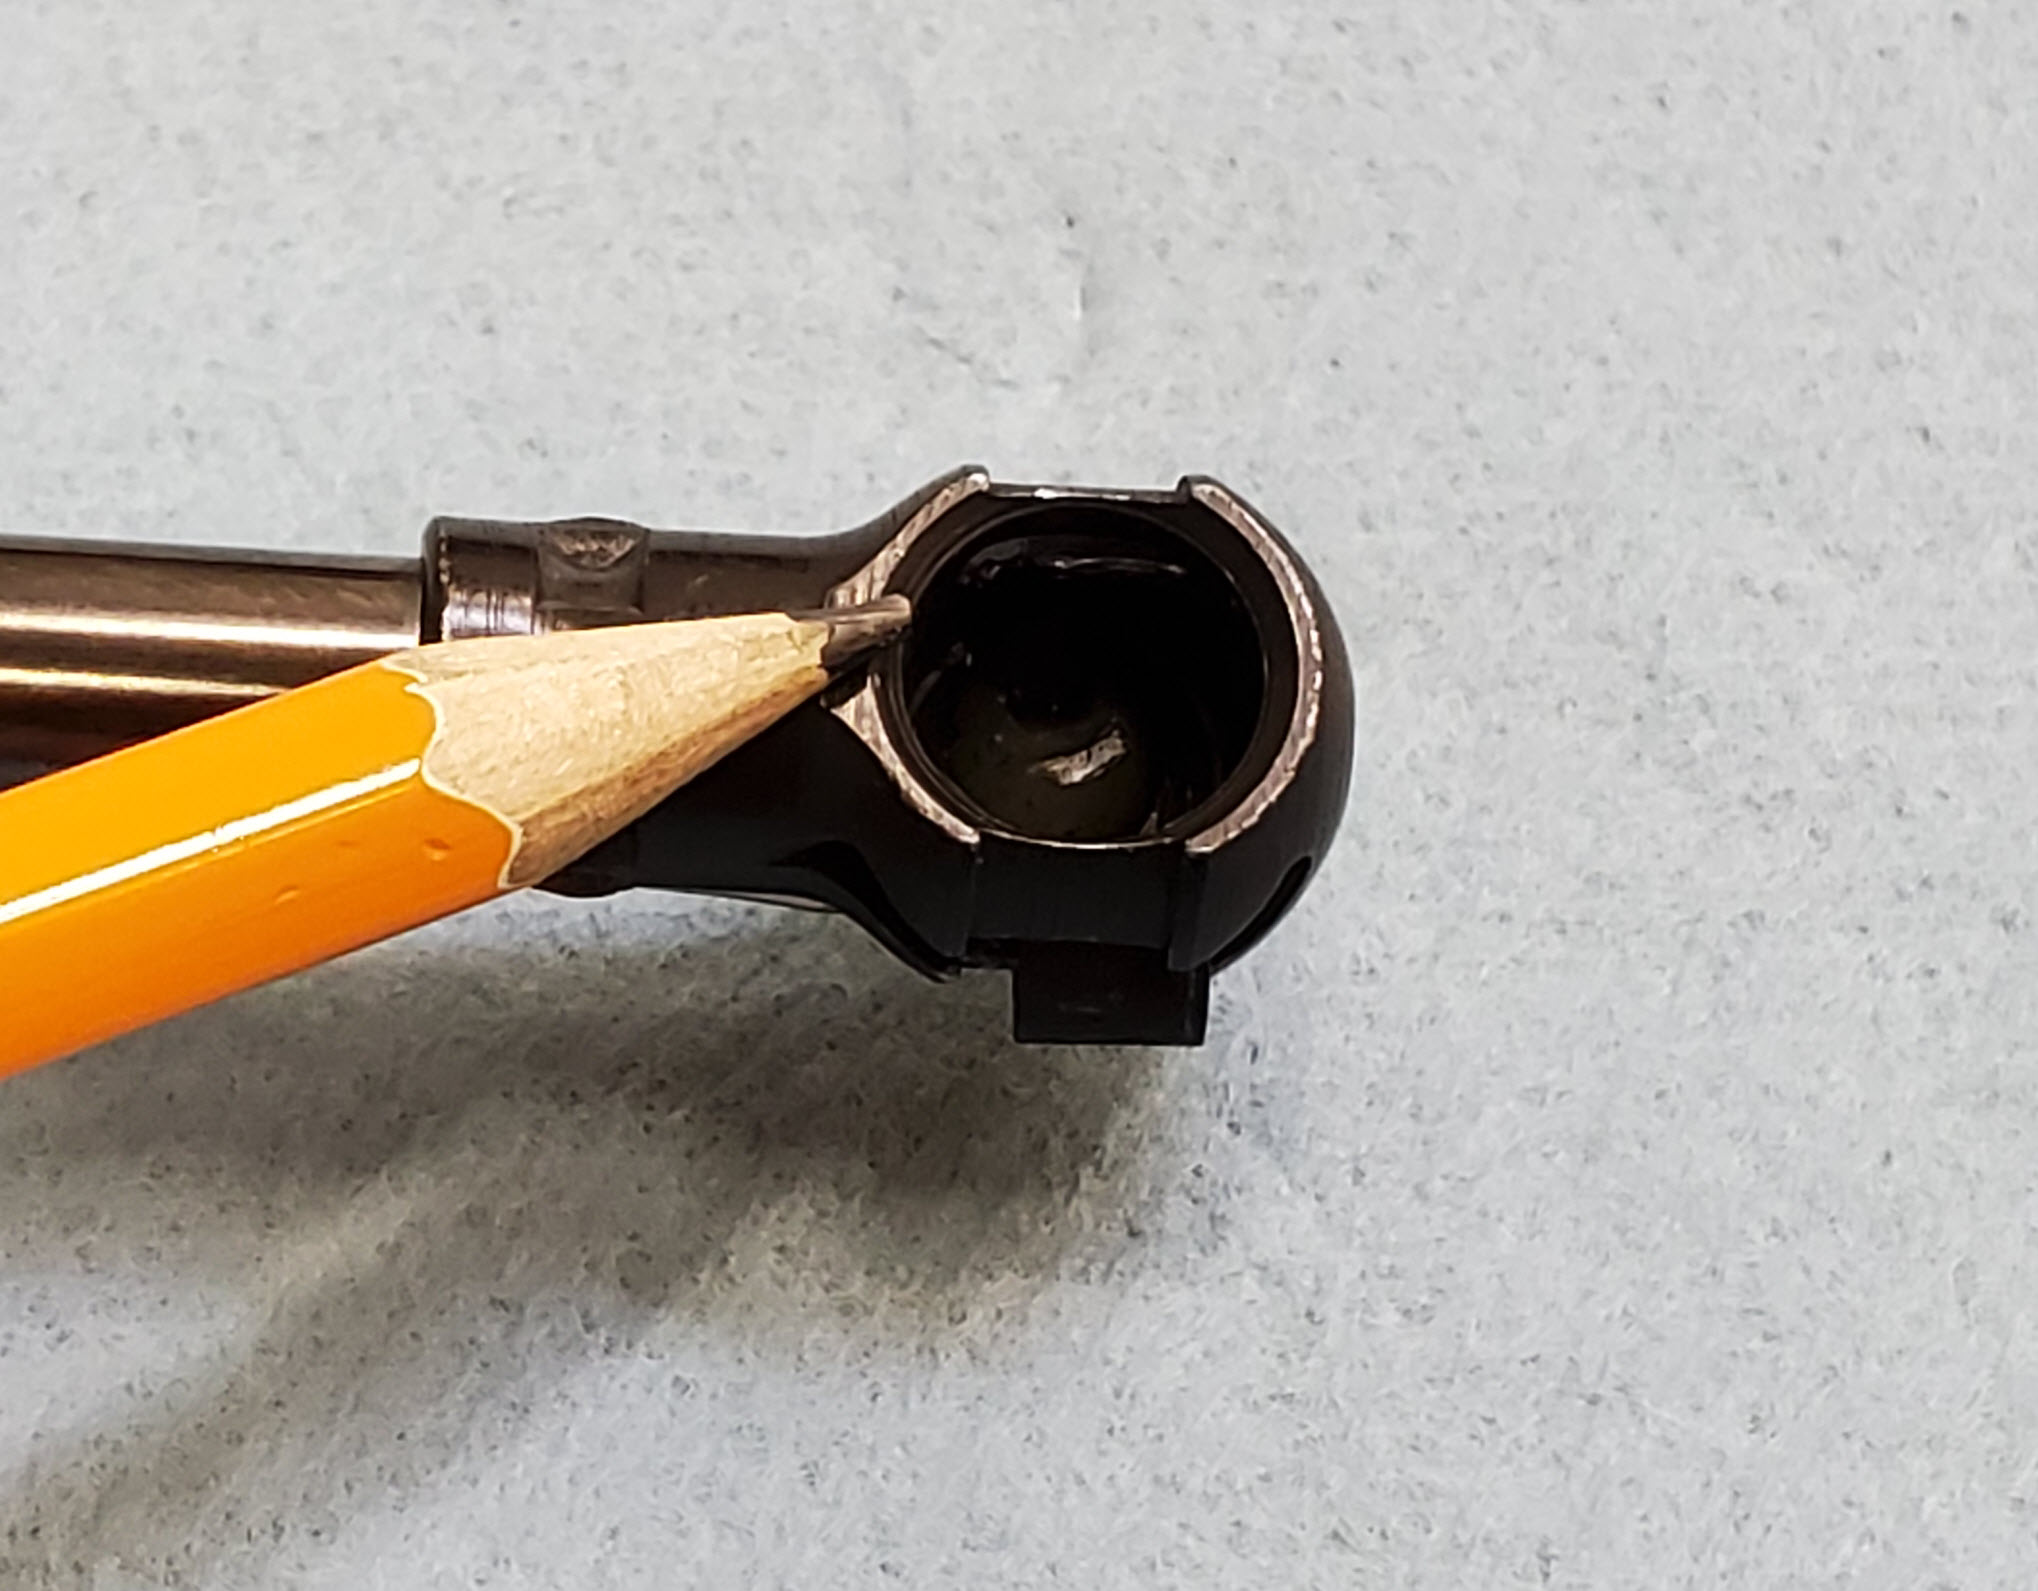
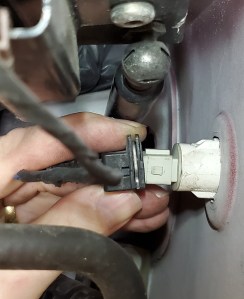
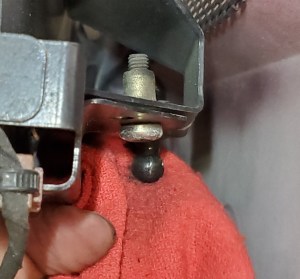
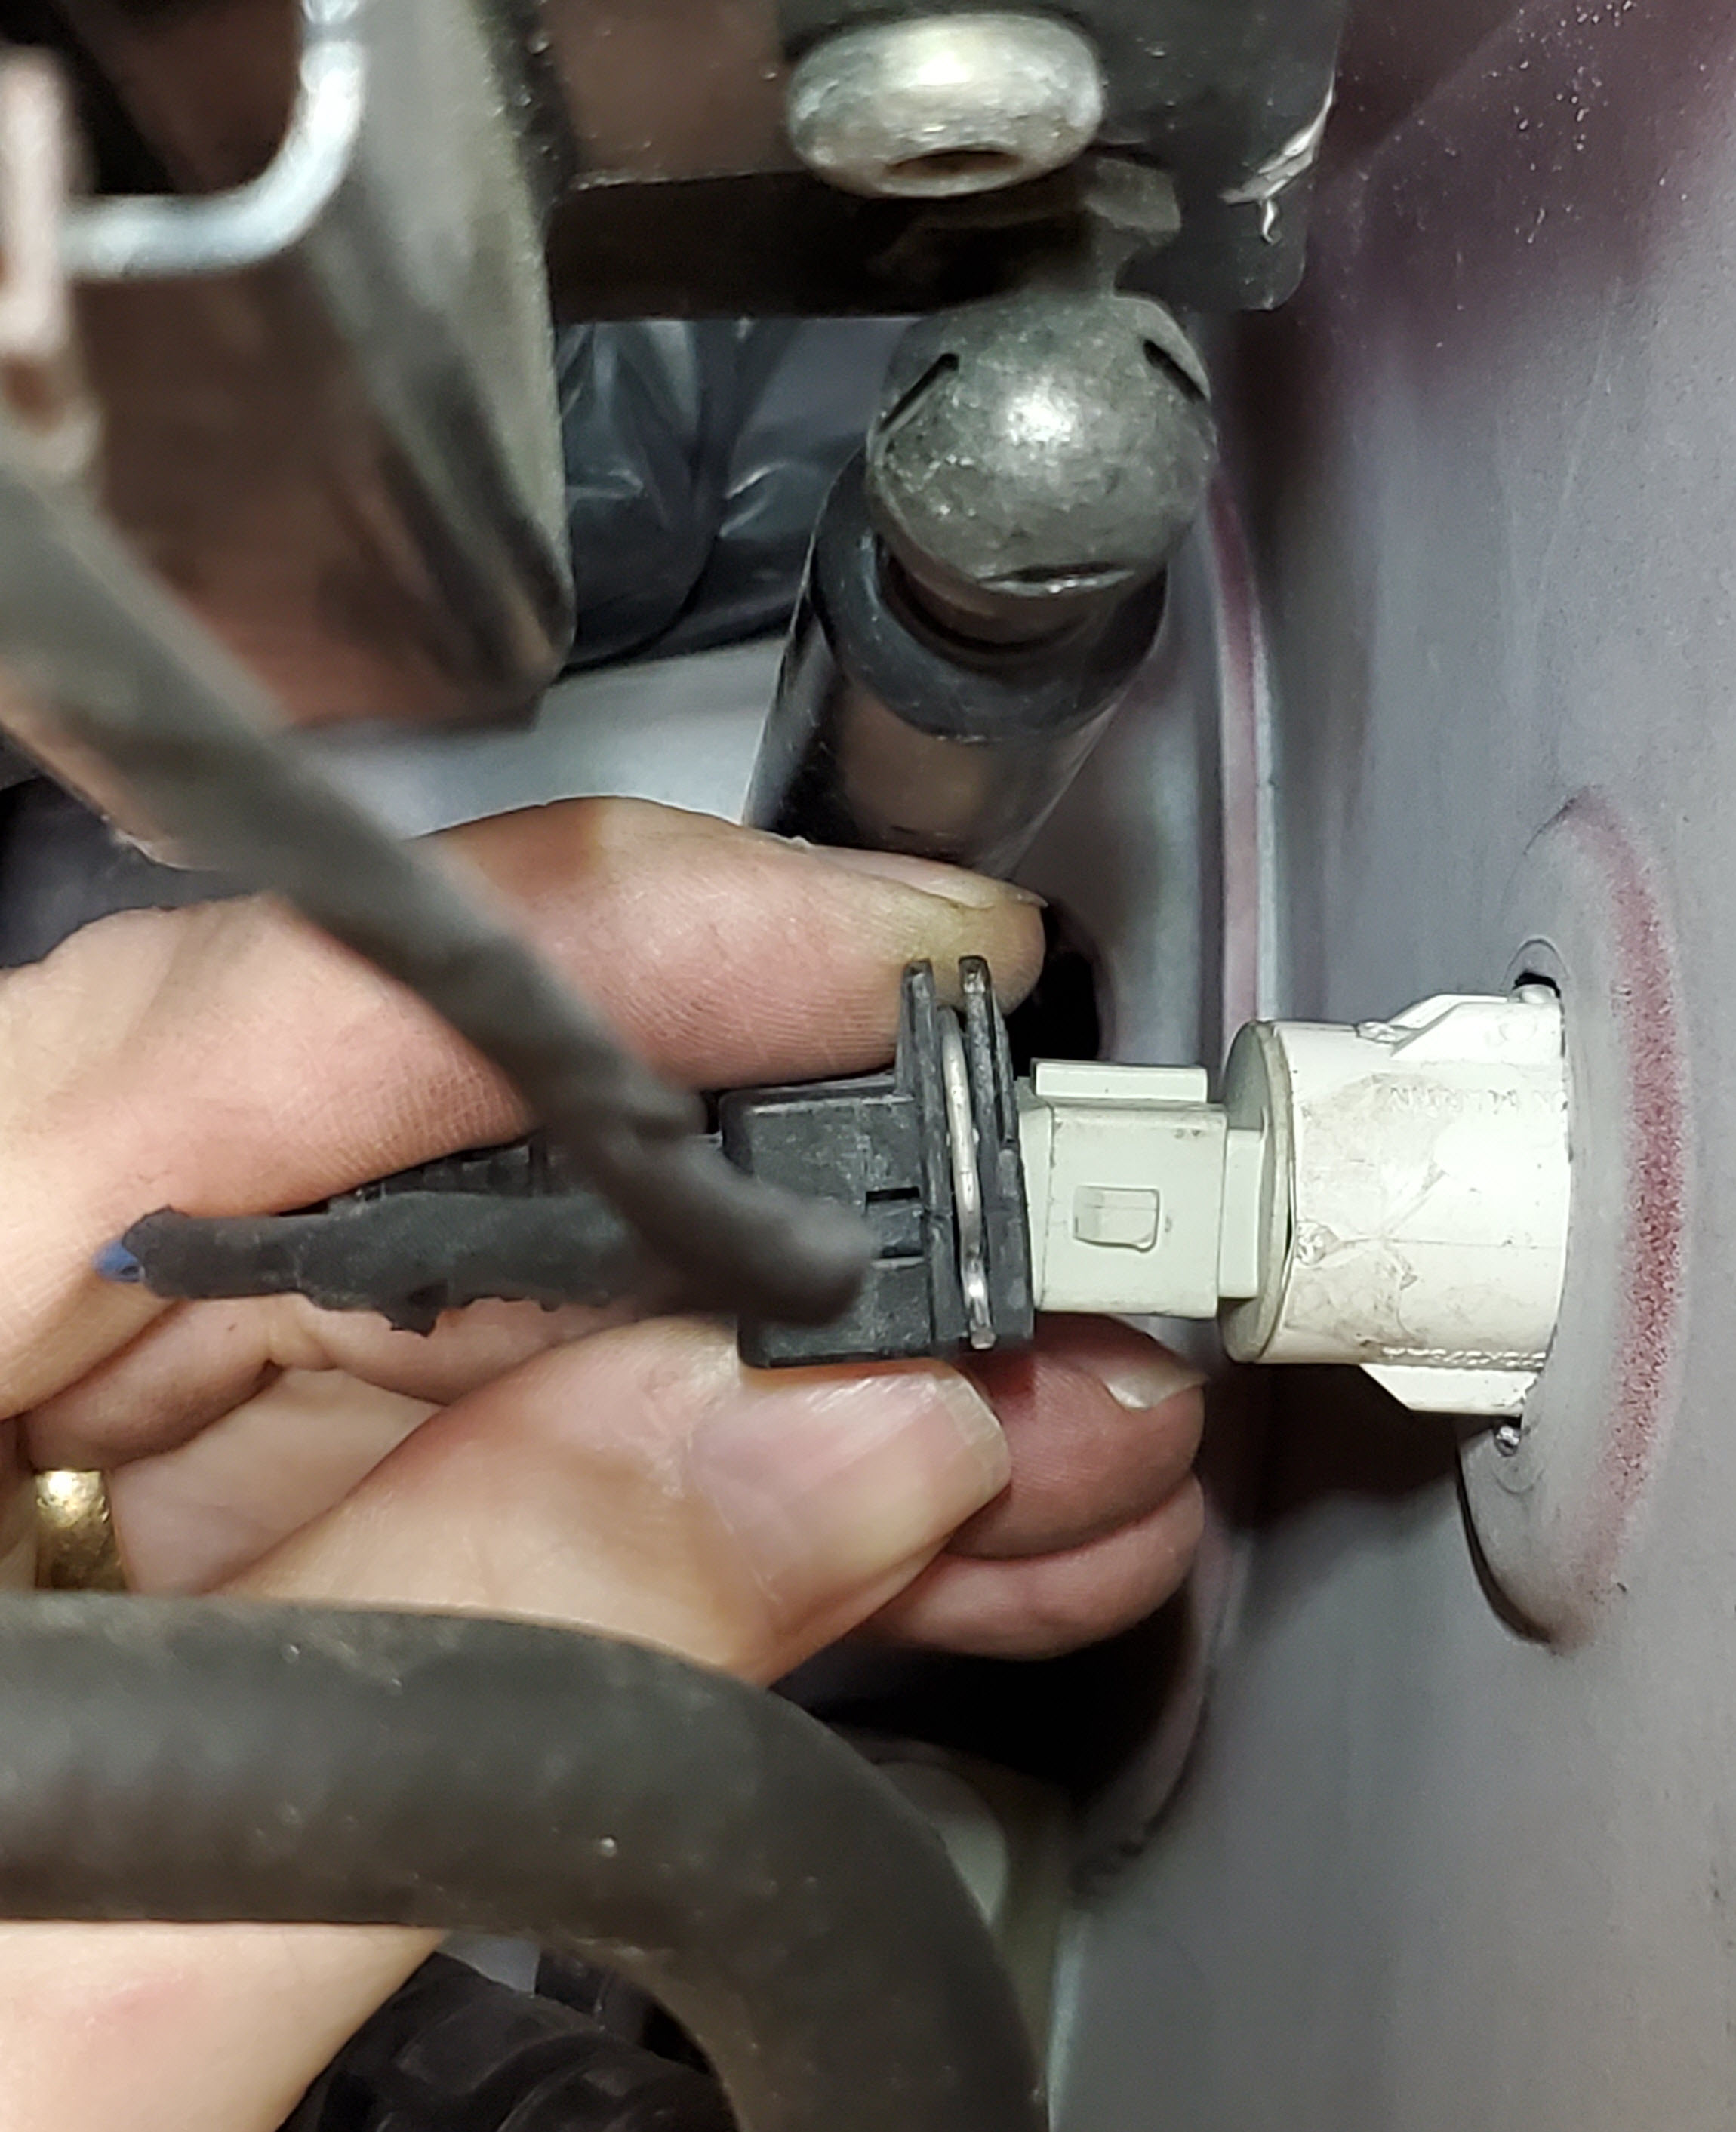
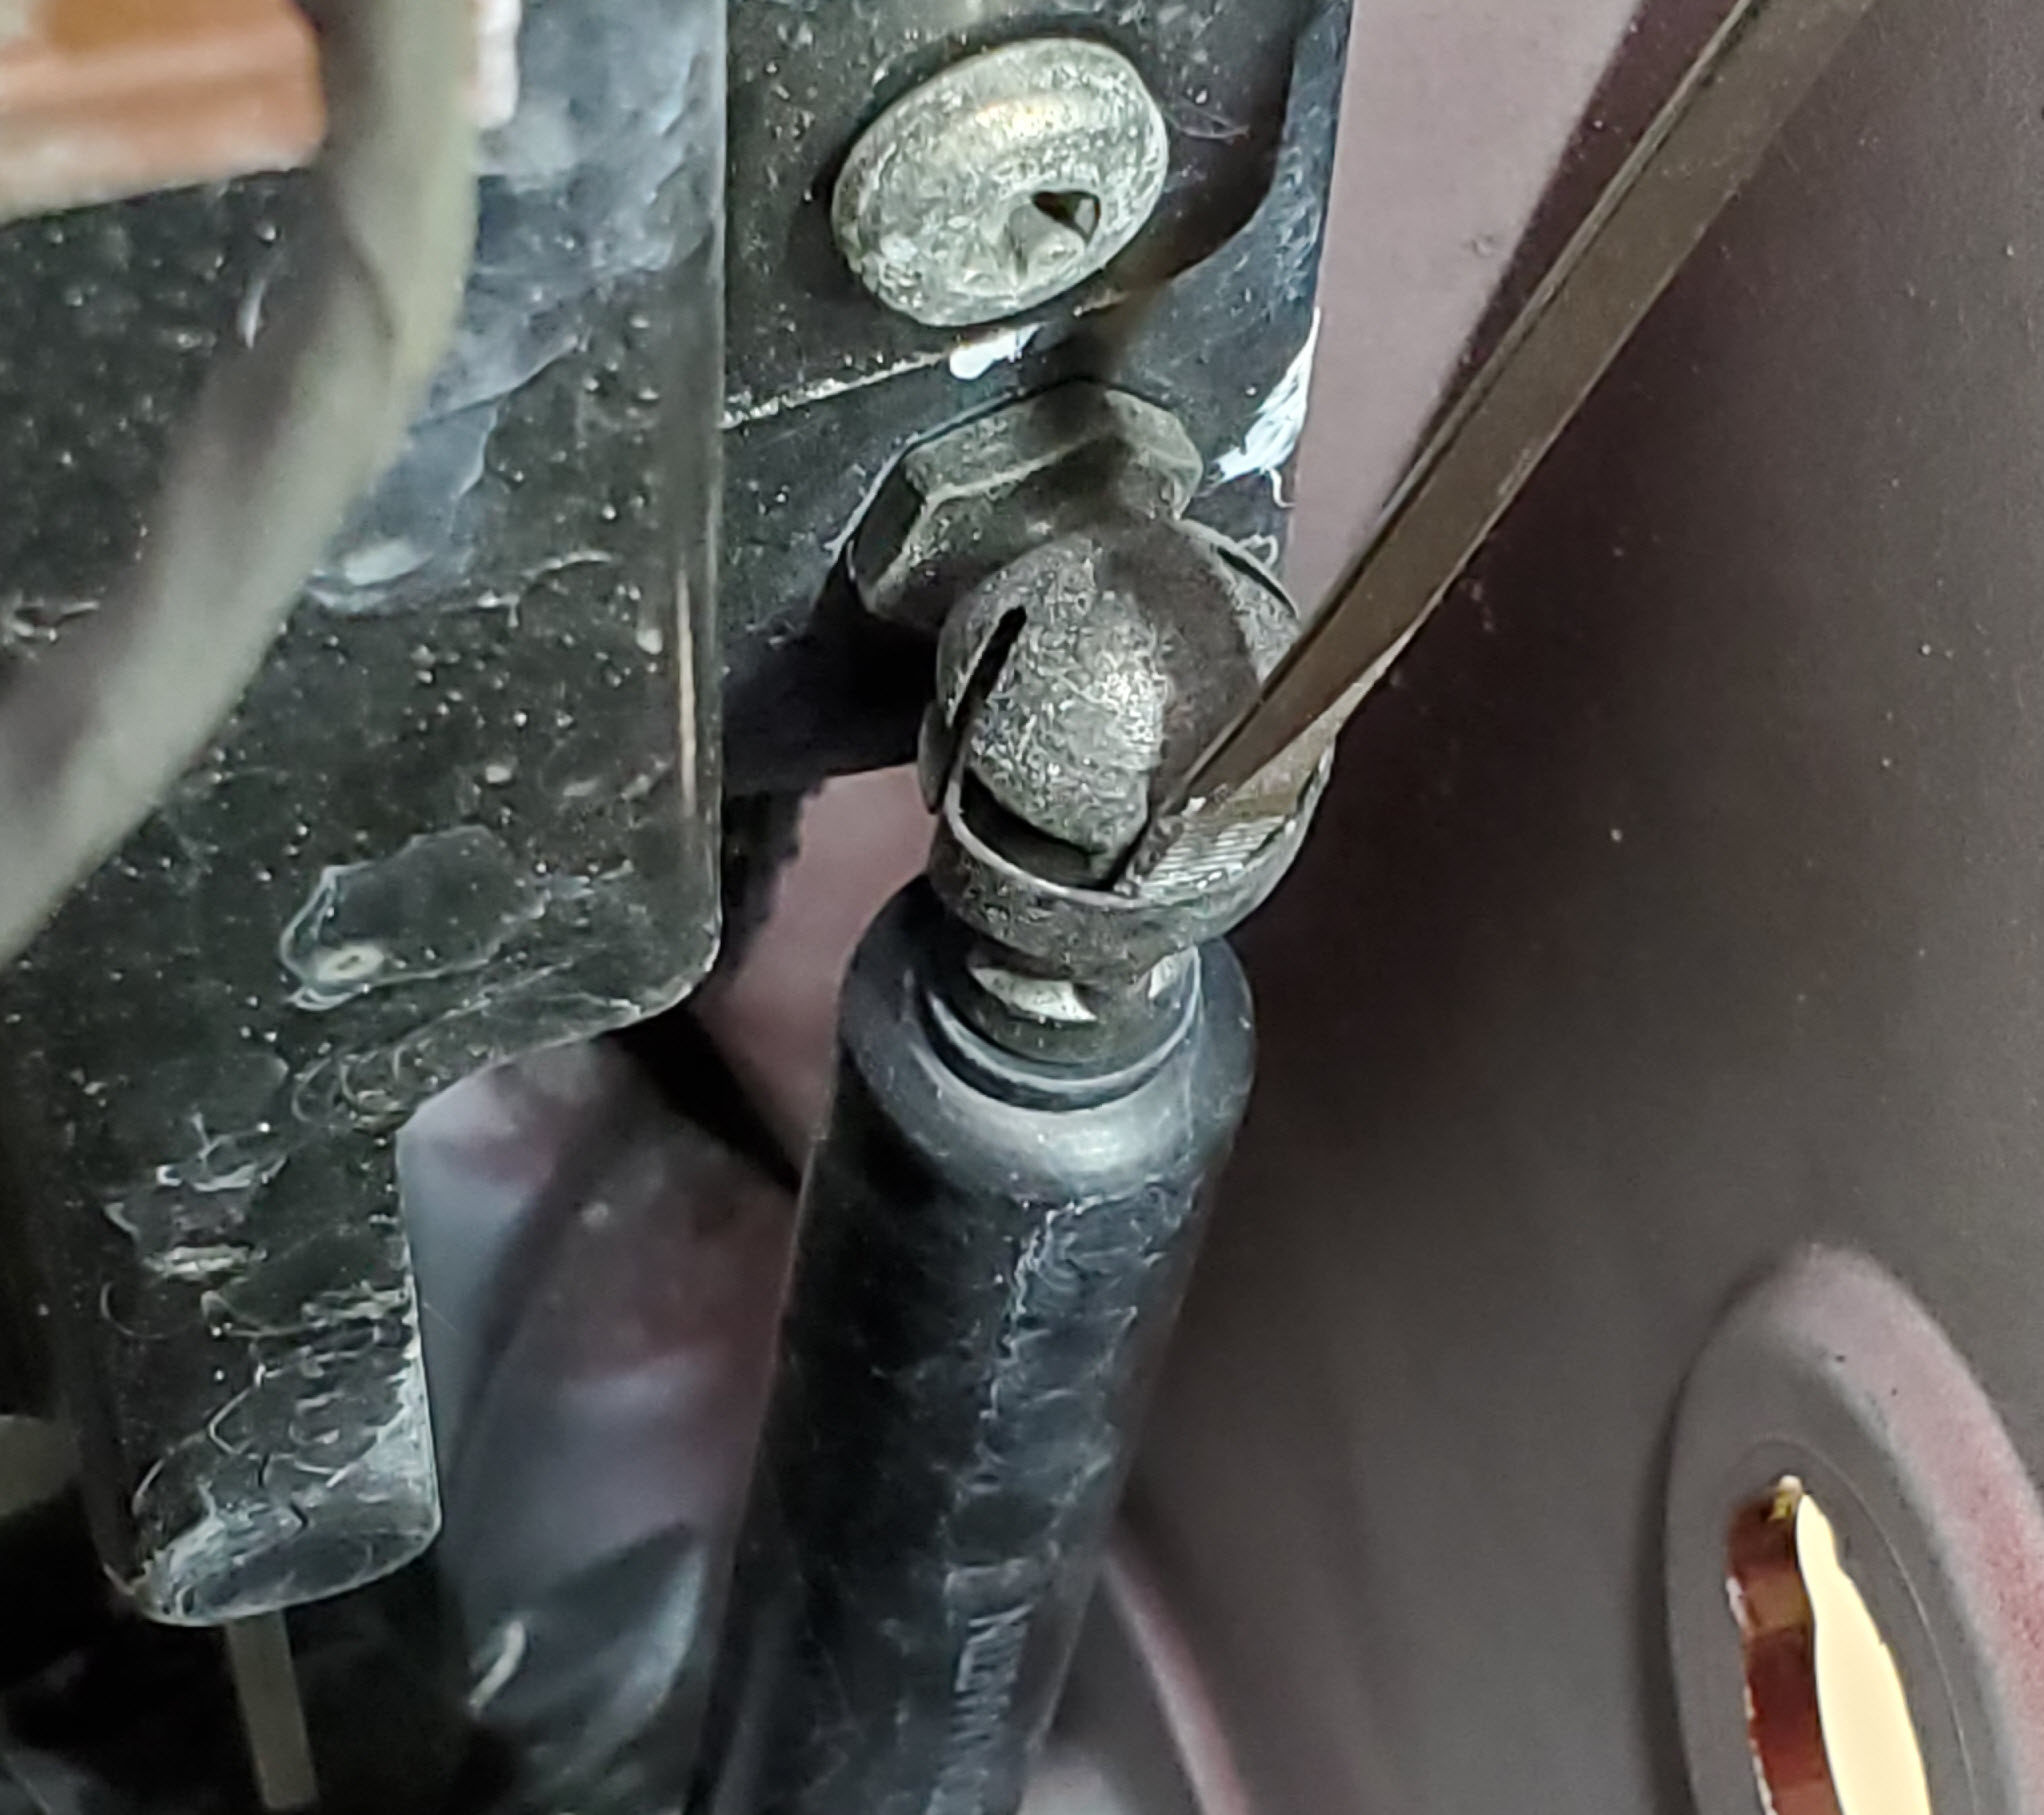
Each end of the strut is a ball and socket arrangement. To keep the socket from slipping off the ball there is a sprung metal clip that acts as a retainer. It’s a simple matter to release once you know these tips.
You don’t need to remove the clip entirely to release it. Doing that would create a problem actually, the clip is a witch to get reinstalled if you accidentally pop it all the way out. To release the socket so it can slip off the ball you only need to retract the clip a small amount. Do this by slipping a small flat blade screwdriver in the slot on the head of the socket (see photo). I strongly suggest you fiddle with this on the bench for a minute before trying it on the car. Figure out how it works.


Just inserting it that far is enough to retract the clips far enough. Here are pictures of the socket with clips out and retracted.
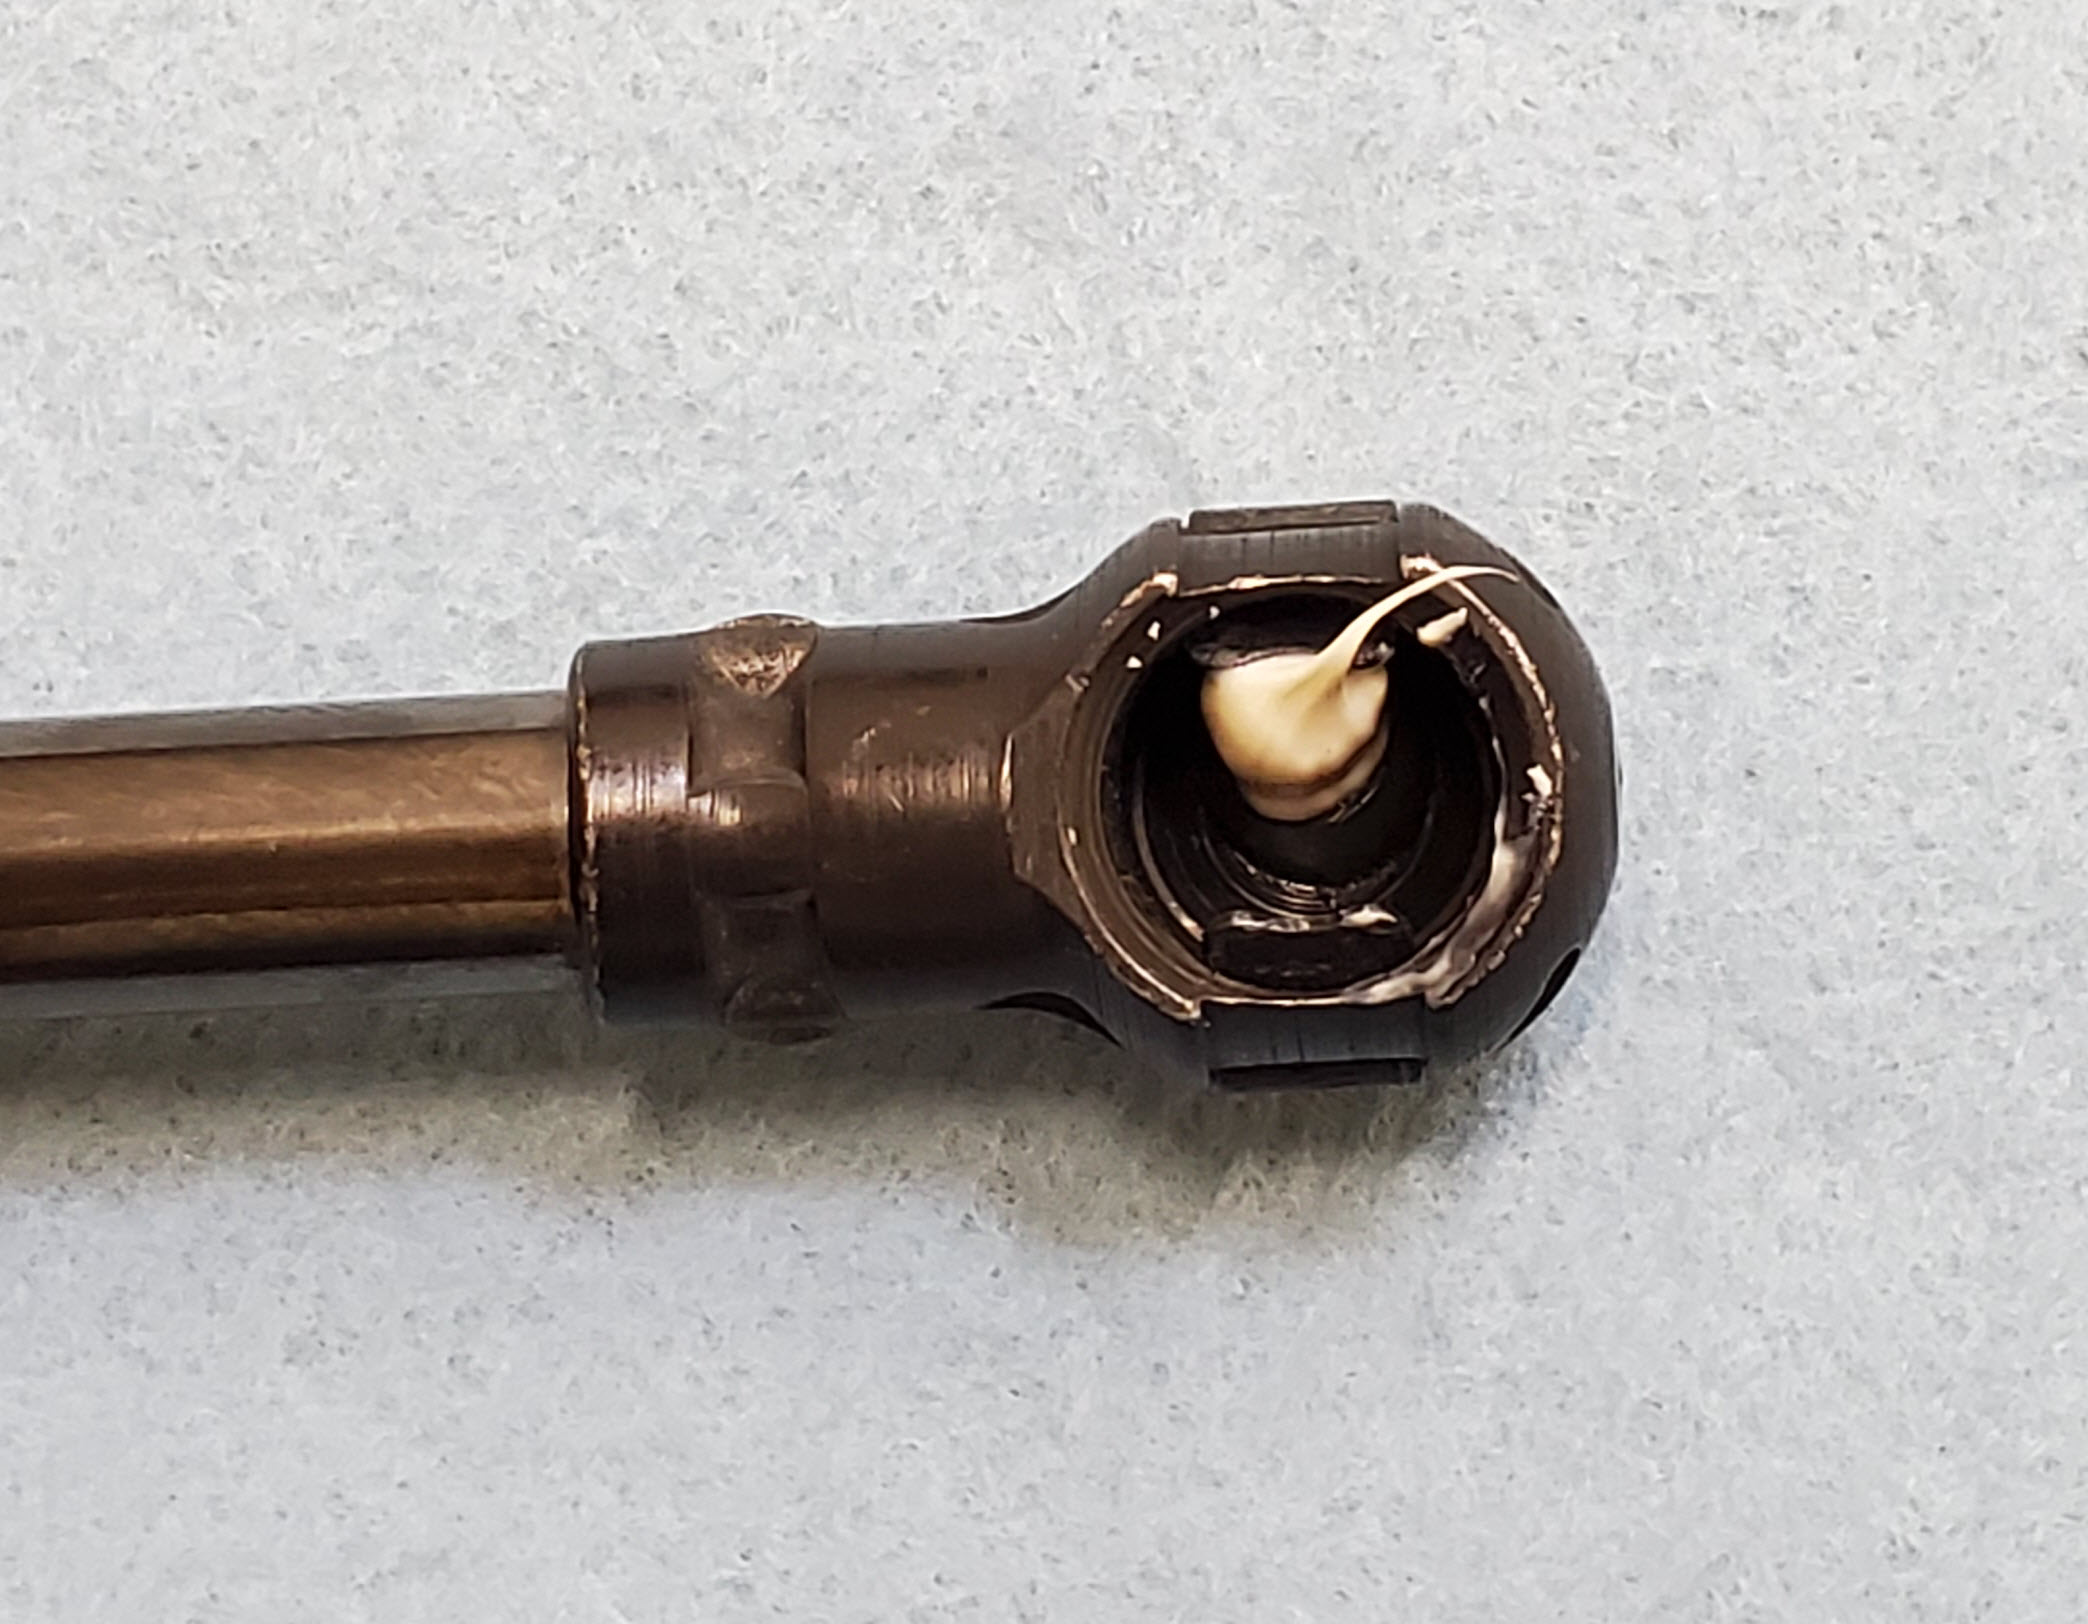
Lube the Sockets
The socket mounts over a ball, and the two things pivot under load. Having some lubricant (grease) in the socket will help. Inspect your new struts to see if there is a ‘dab’ [official measure] of grease in the socket already. If not, I’d suggest you put a dab of White Lithium grease in the socket. No need to spread it around, it will distribute as the ball inserts.
With the sockets lubed and tools in hand, lets get going:
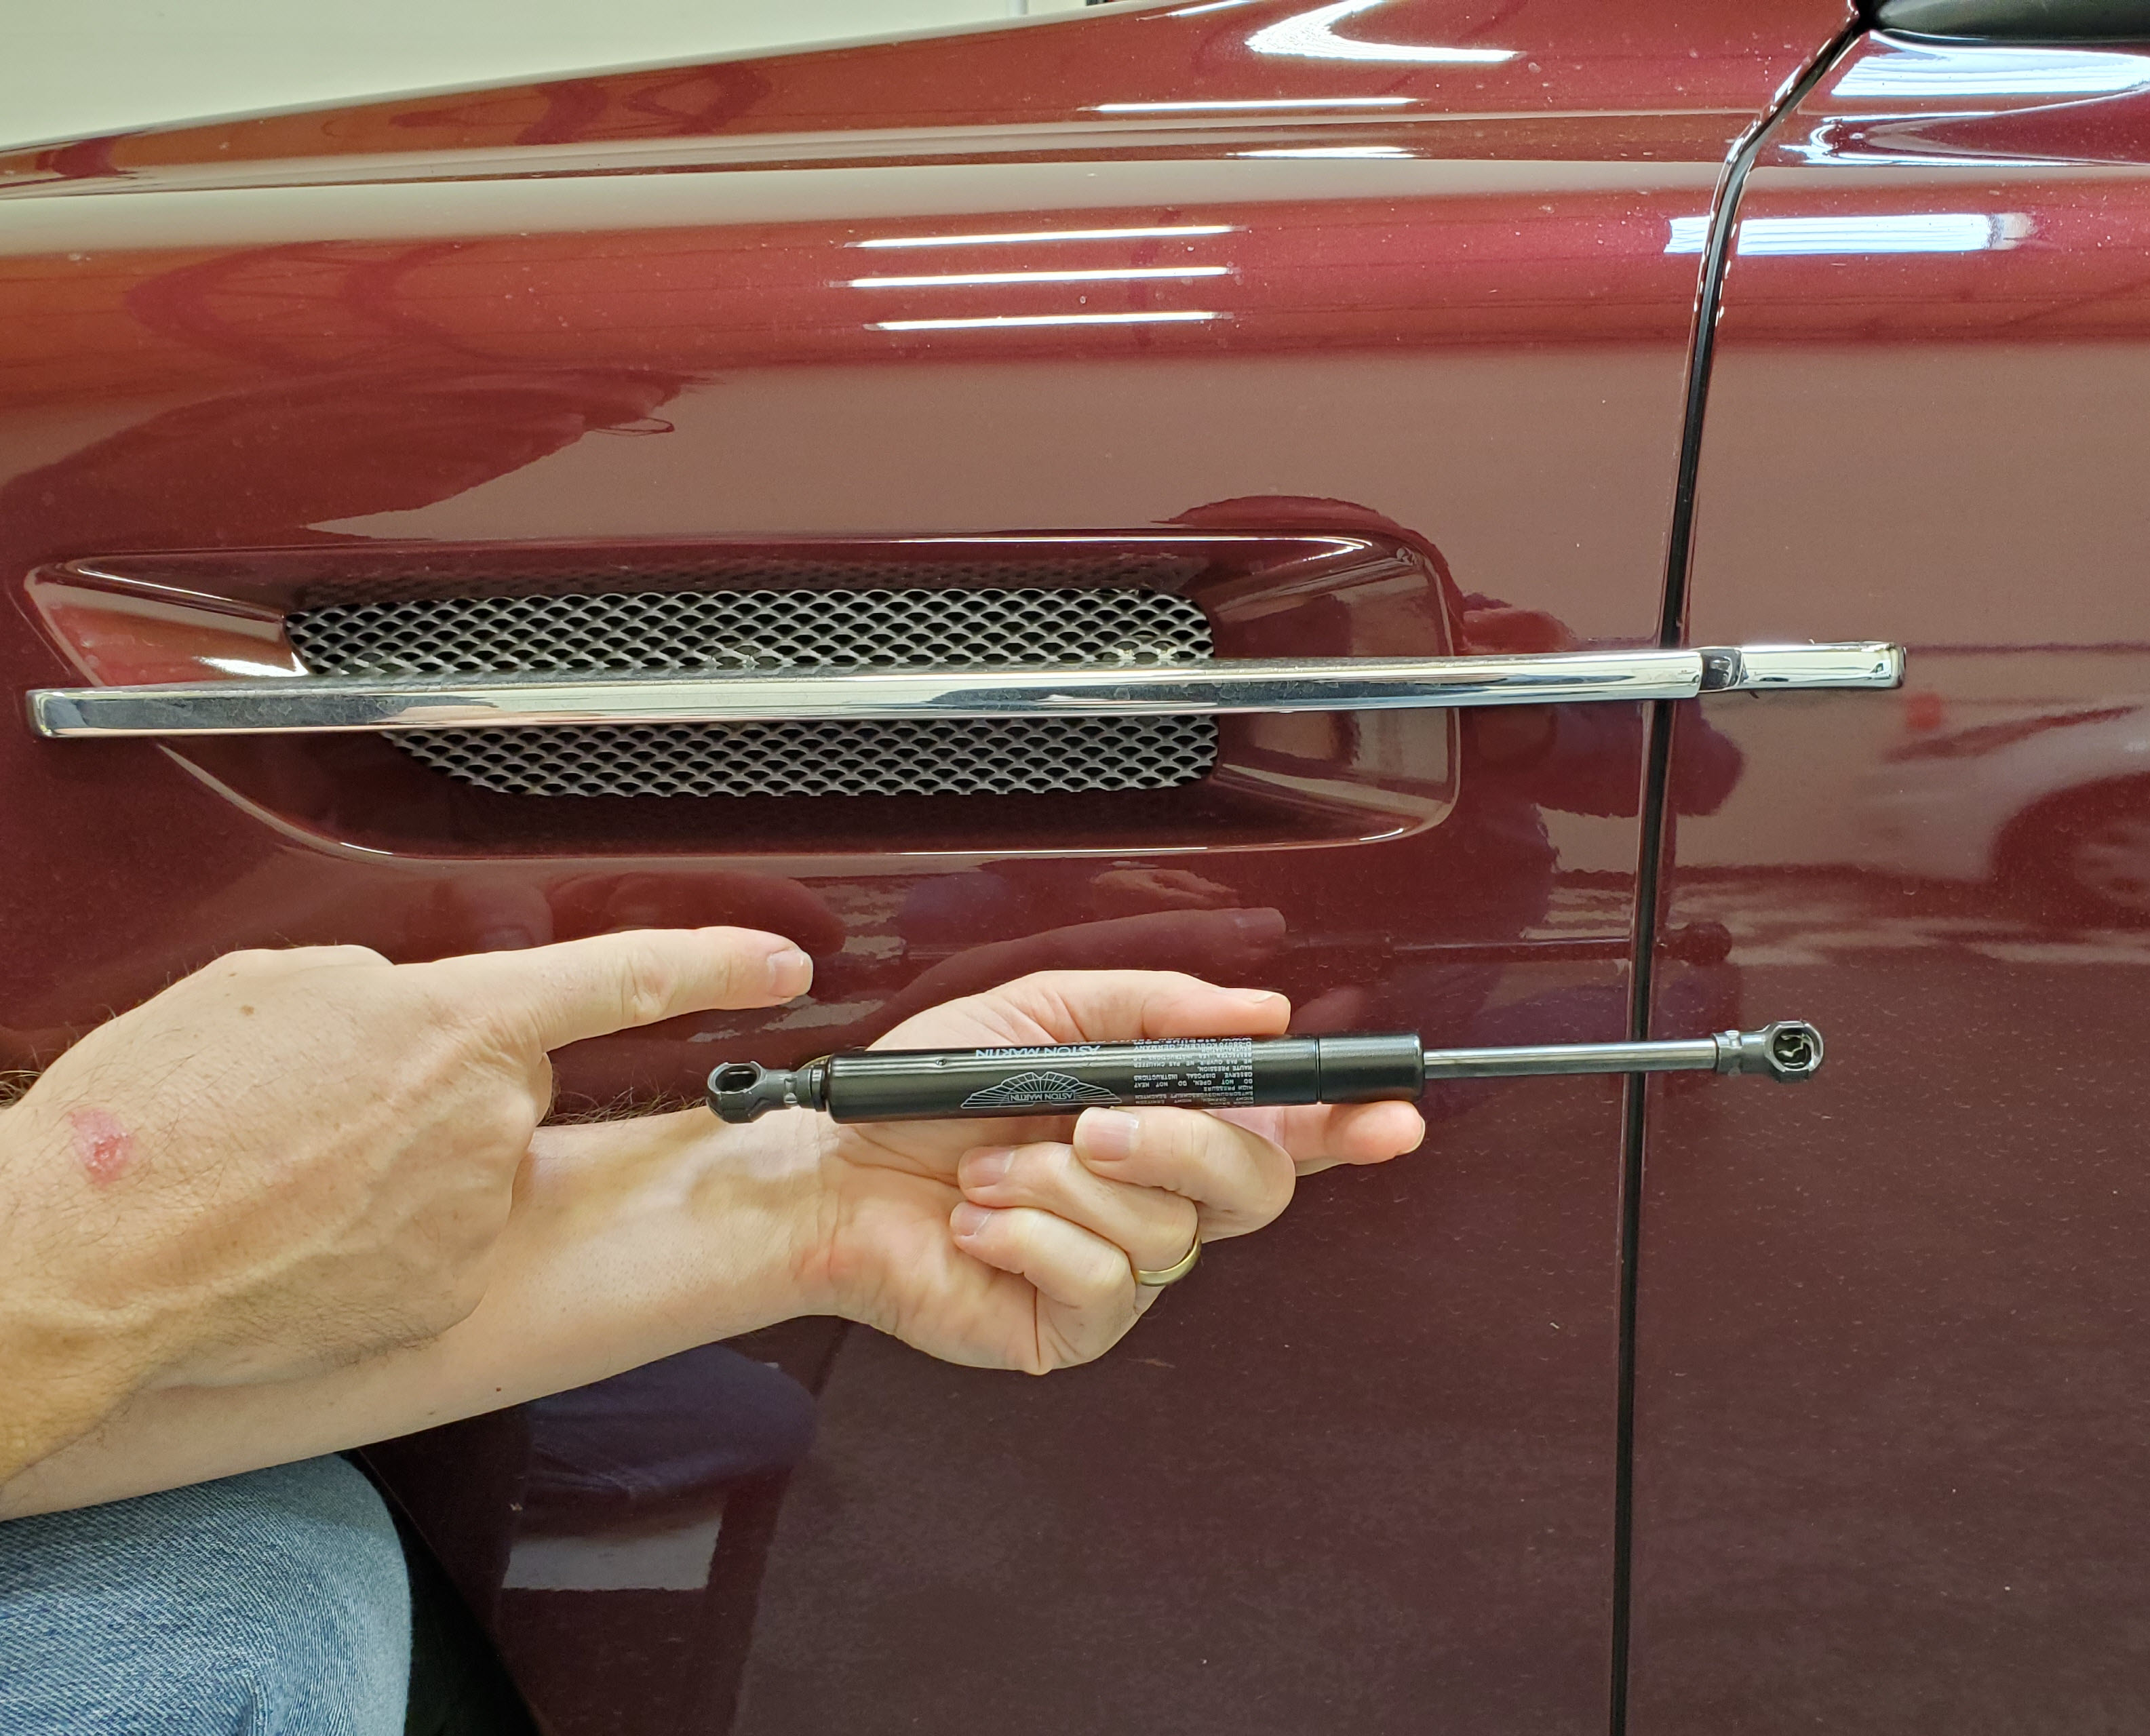
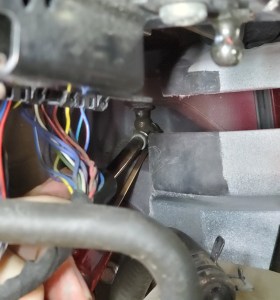
- Have a look around to orient yourself. The near end of the strut is easy to see. The FAR end of the strut is barely visible through a slot in the rear of the fender area. I’d suggest you have your helper slowly open and close the door as you watch the far end. You’ll see it move laterally back and forth. Note that at Full Open the head of the strut appears at the end of the slotted area, and we have the best access to it. Not great access, but enough. Check out my video below to see what I mean.
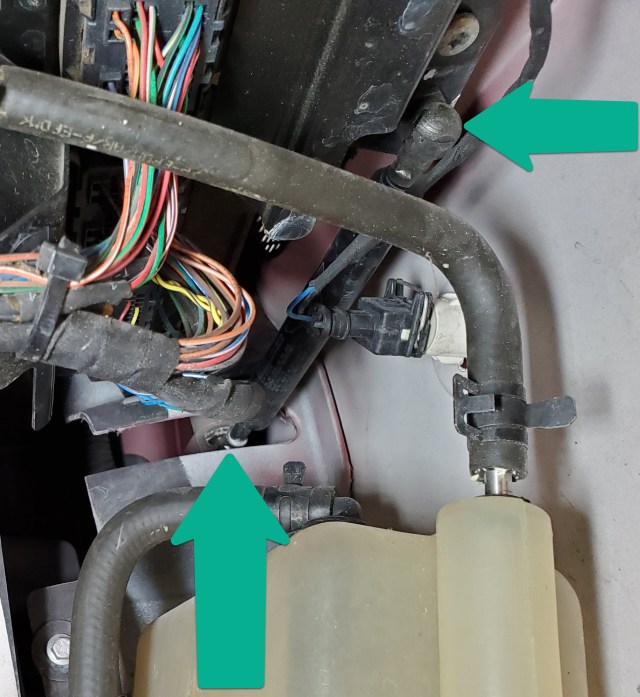
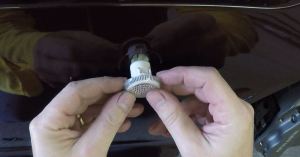
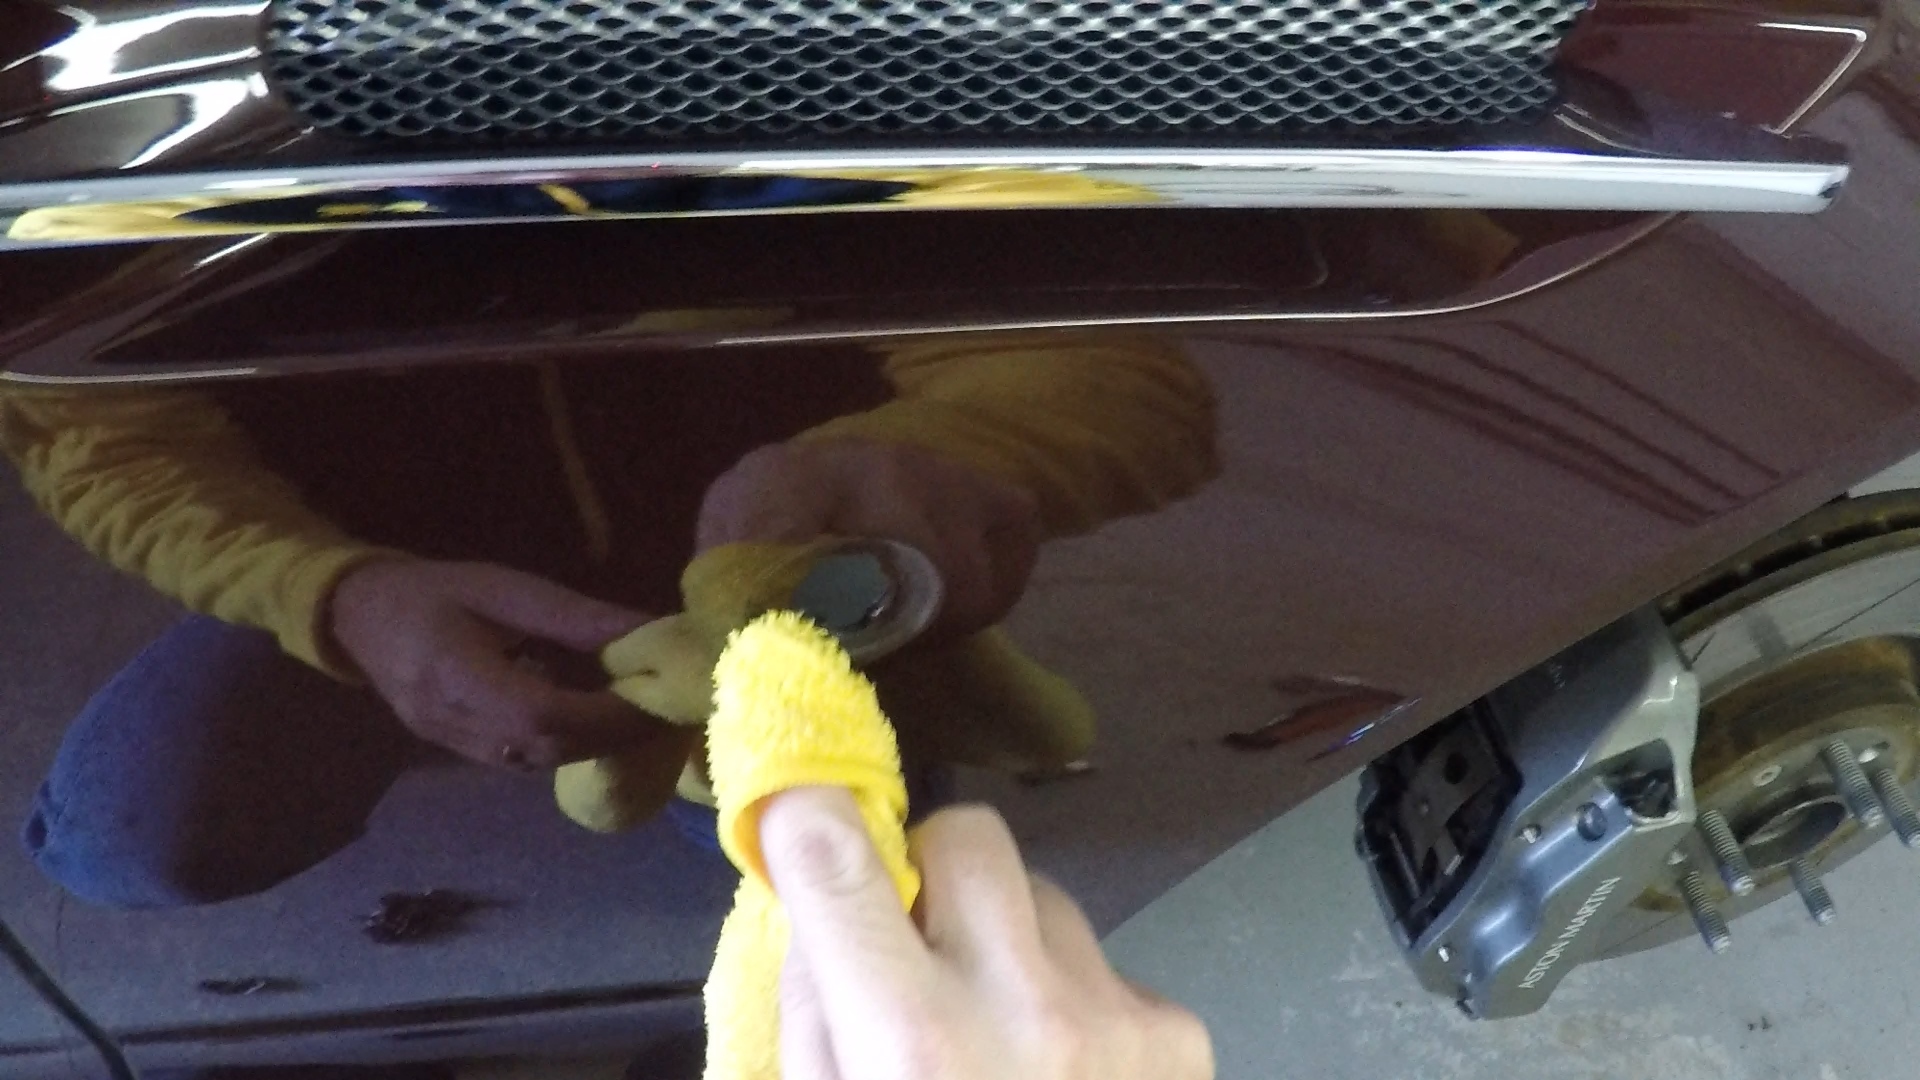
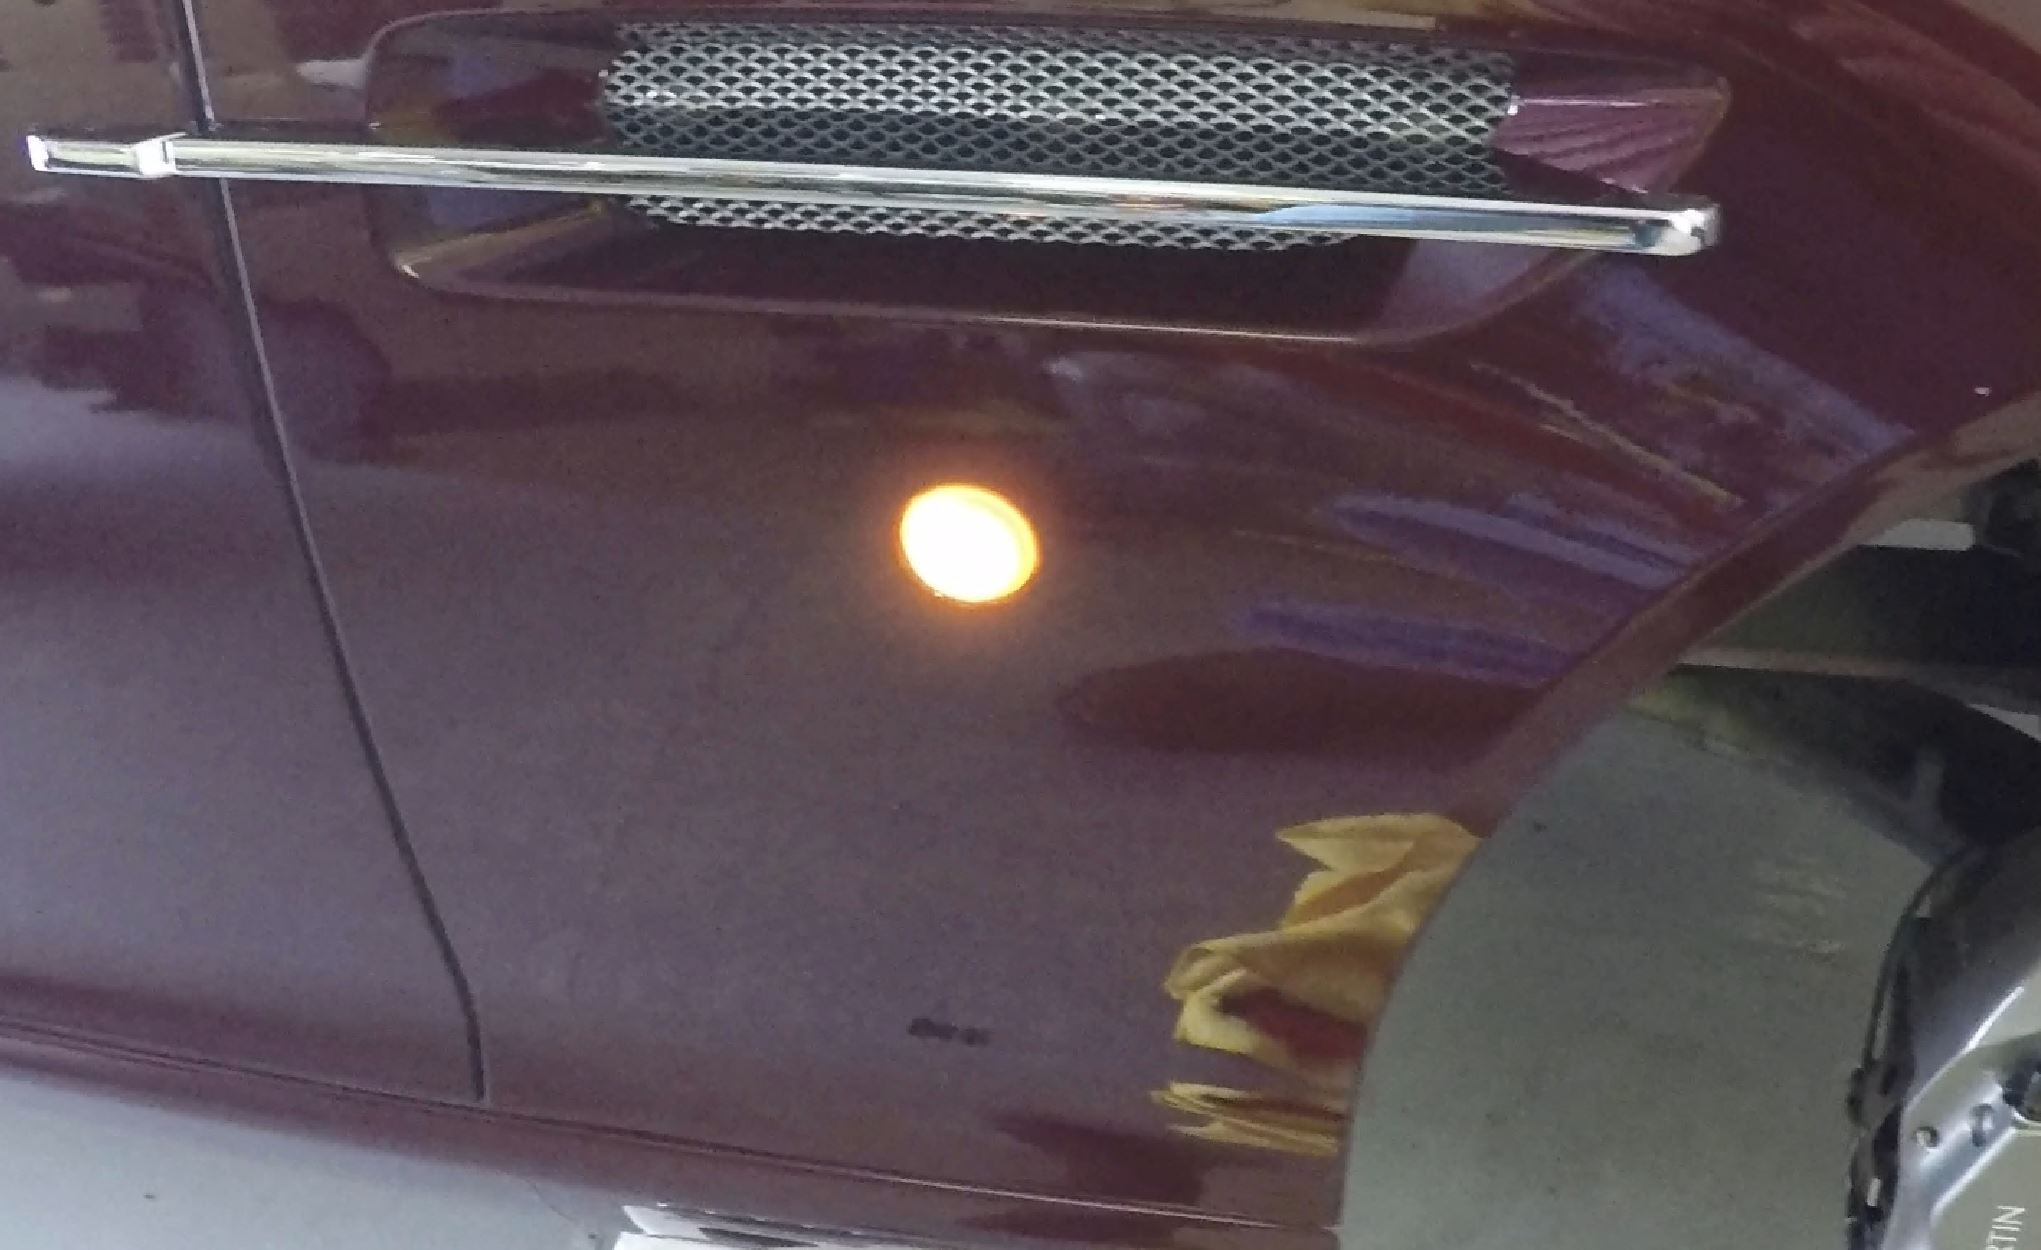
- To avoid breaking off the Side Marker Repeater Lamp (which sits directly below the closest end of the gas strut, lets remove it since its simple (credit to Rich at Redpants.lol that ran into this issue)
- Disconnect the electrical connection by pressing the wire bar on the back of it. Should press in easily. Pull off the connector. See the video below to make this easier to understand.
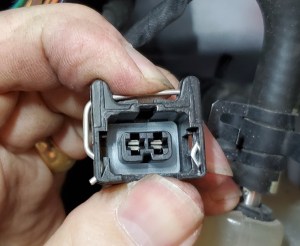
- Remove the plastic side repeater light body by gripping it firmly nearest the fender and rotating it carefully until it releases (about 20 degrees). Remove it through the fender hole.
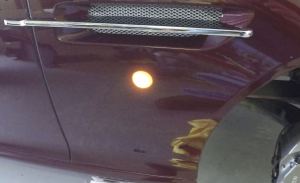
- Look at the condition of the side repeater light lens. If its yellowed from sunlight, you might want to replace it at the same time. Not an expensive item and readily available. Check out my other article on how to replace them here.
- Disconnect the electrical connection by pressing the wire bar on the back of it. Should press in easily. Pull off the connector. See the video below to make this easier to understand.
- Time for the Helper! Open the door fully. This allows the strut to be fully extended and under the least potential load. This will make your job easier. Note that it will still be under load though.
- NOTE: Make sure the helper is stabilizing the door, and not just leaning on the door to keep it open. Once the strut is released, the door can now OVER open, and you don’t want to accidentally kink it into the fender, etc. Just have them stand at the end of the door and hold it where it is full open.

- NOTE: Make sure the helper is stabilizing the door, and not just leaning on the door to keep it open. Once the strut is released, the door can now OVER open, and you don’t want to accidentally kink it into the fender, etc. Just have them stand at the end of the door and hold it where it is full open.
- Start with the closest connection. I do the easier connection first as it will make doing the harder one easier.
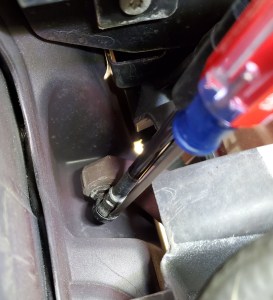
- Slip the tip of your small screwdriver in the slot under the retaining clip.
- Pull the socket down to pop it off the ball. Should move easily if the retaining clip is released enough. Just give it a tug and it should pop off.
- Slip the tip of your small screwdriver in the slot under the retaining clip.
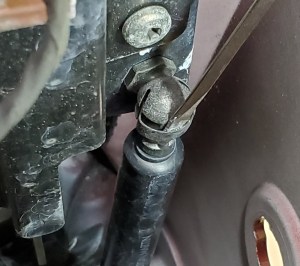
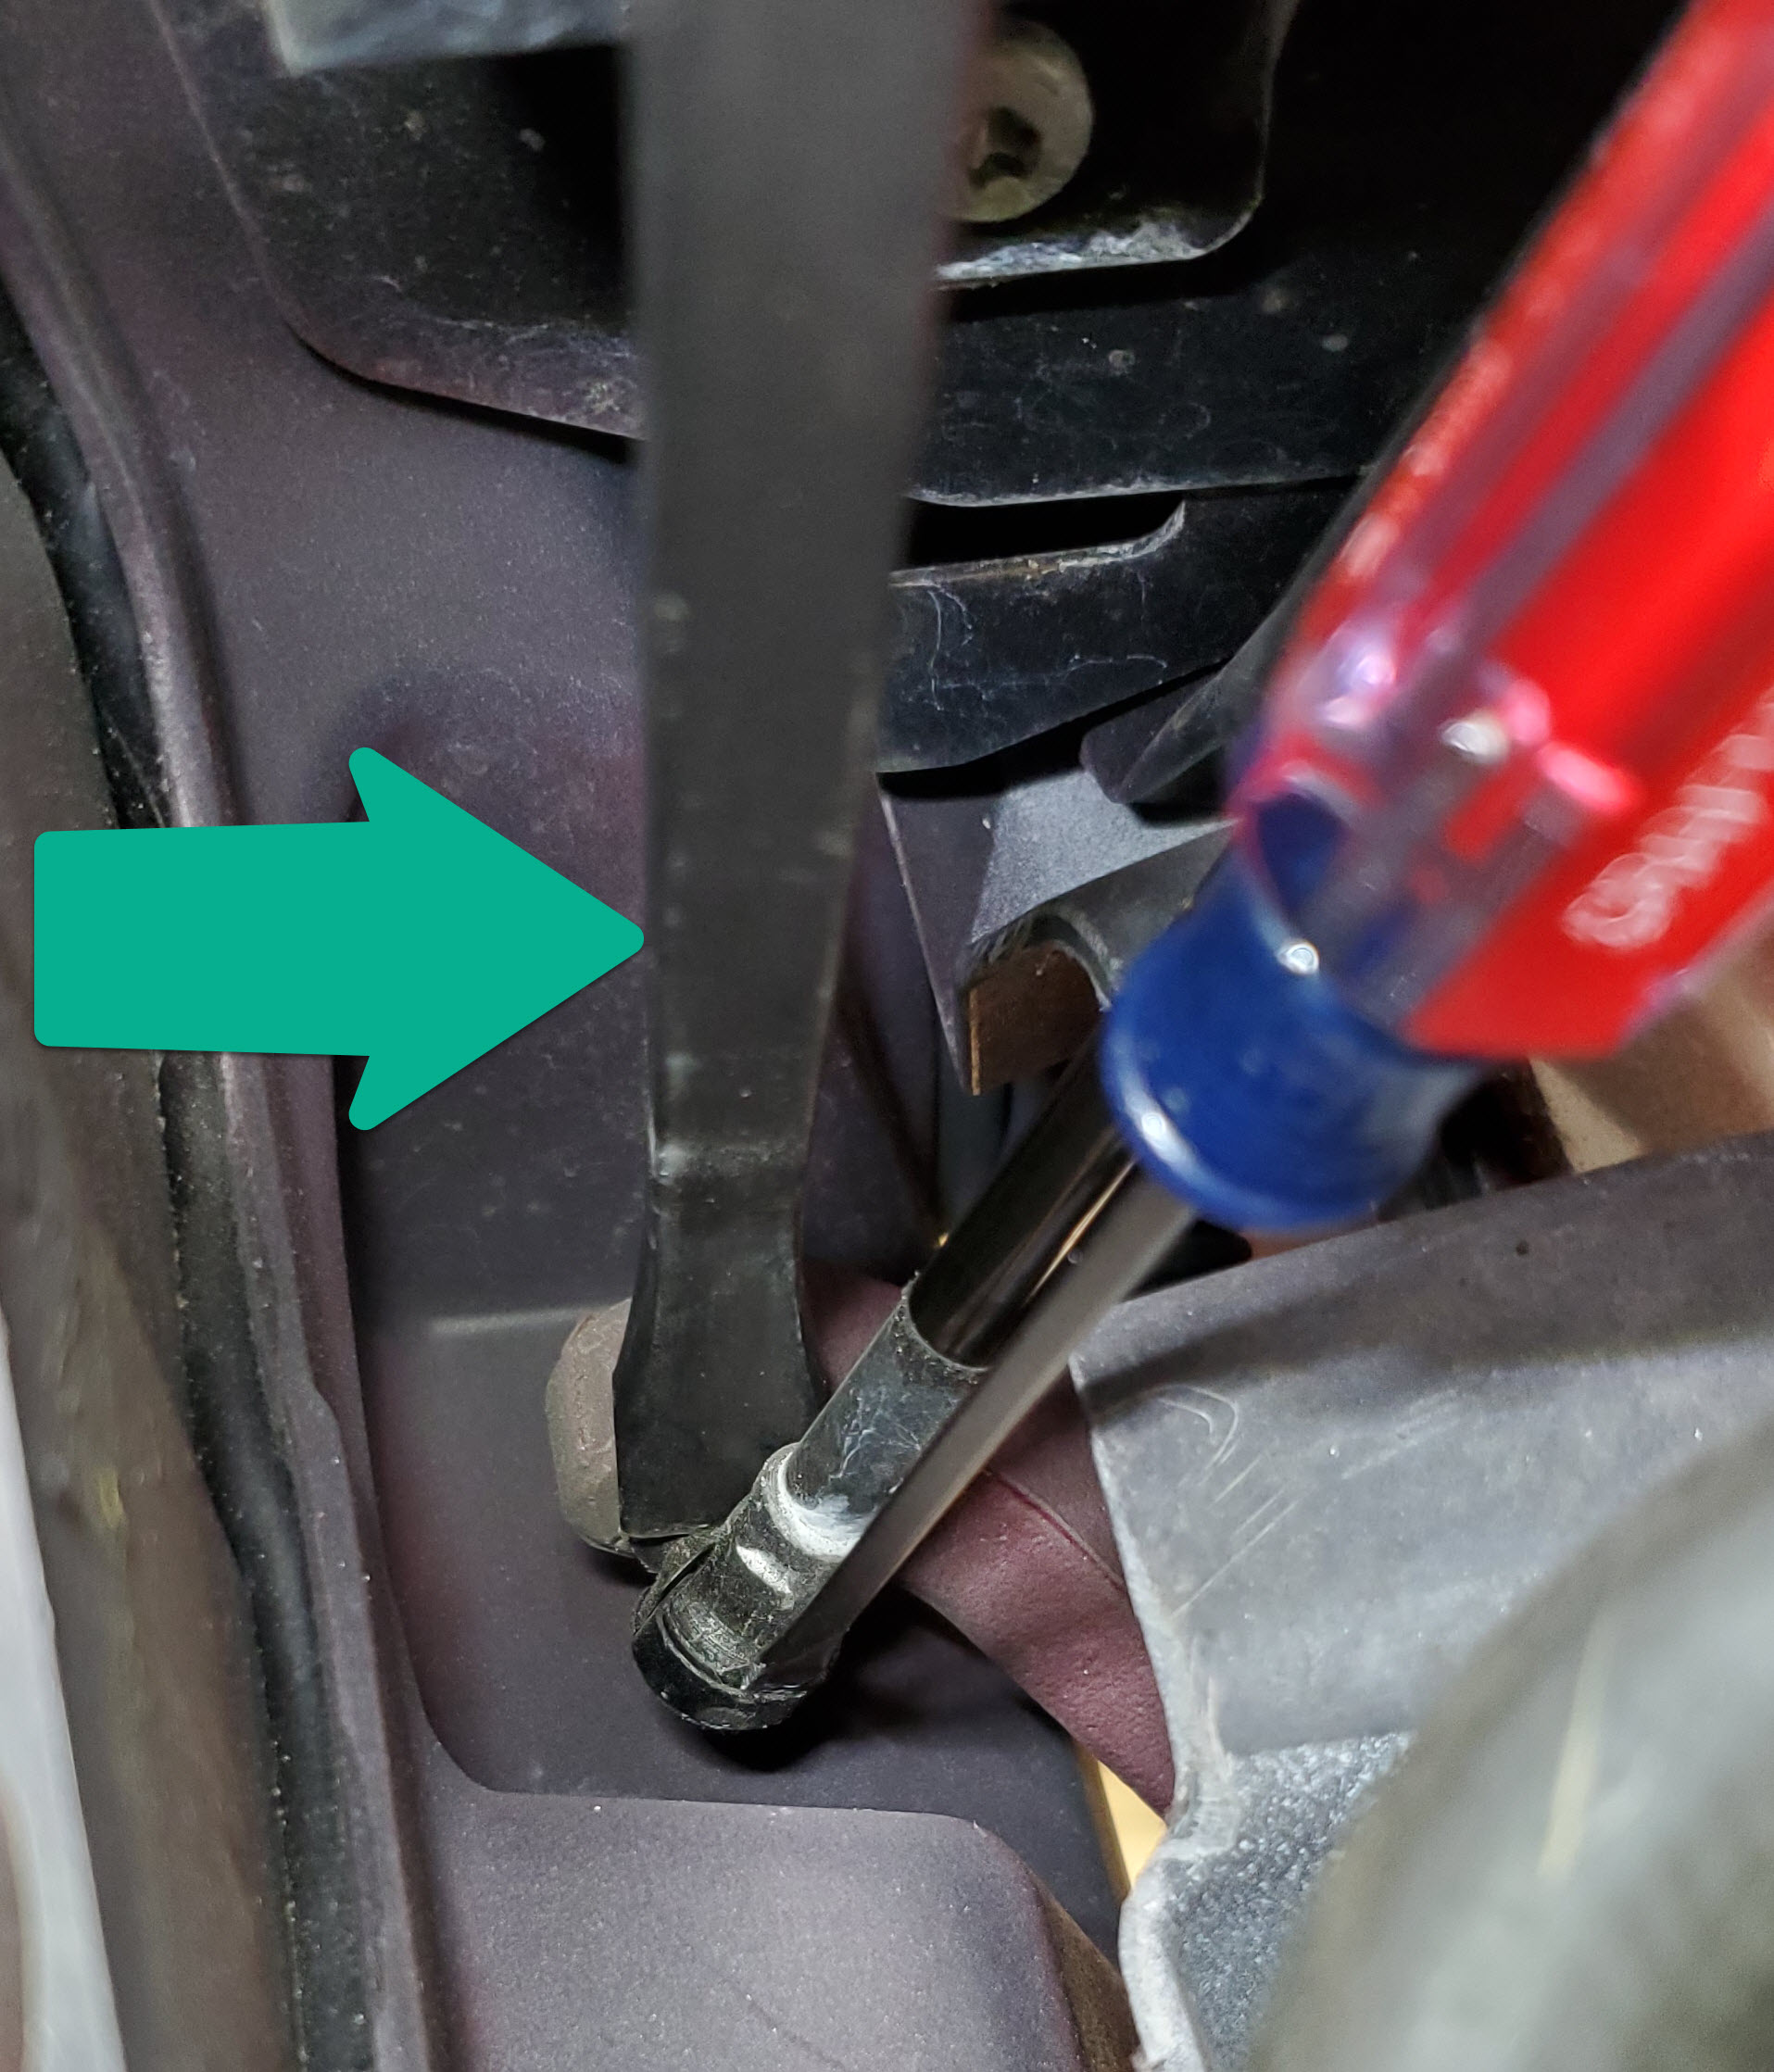
- Now lets remove the far connection (the hard one)
- Helper still has the door fully open
- The process is the same, just in a more difficult spot
- Wiggle your flat blade screwdriver tip under the retaining clip. This is why I suggested having a long neck screwdriver, you need the extra reach of it.
- In the video you’ll actually see me accidentally pop the entire clip off. Not the end of the world with the old one you are throwing away, it certainly made the next step easier.
- In the video you’ll actually see me accidentally pop the entire clip off. Not the end of the world with the old one you are throwing away, it certainly made the next step easier.
- With the retaining clips retracted (based on blind faith) its time to pop the socket off the ball.
- Use your long screwdriver or prybar to get a little purchase on something and apply a little downward pressure to the socket. It should pop off without much of a fight. Just be gentle about what you are prying on.
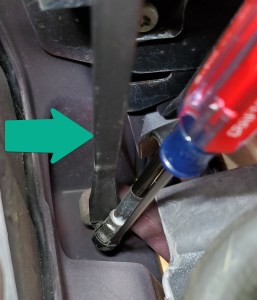
- Use your long screwdriver or prybar to get a little purchase on something and apply a little downward pressure to the socket. It should pop off without much of a fight. Just be gentle about what you are prying on.
- Once it pops off, you should have the entire strut loose in your hand.
- Set the old strut aside (and make sure your helper keeps holding the door).
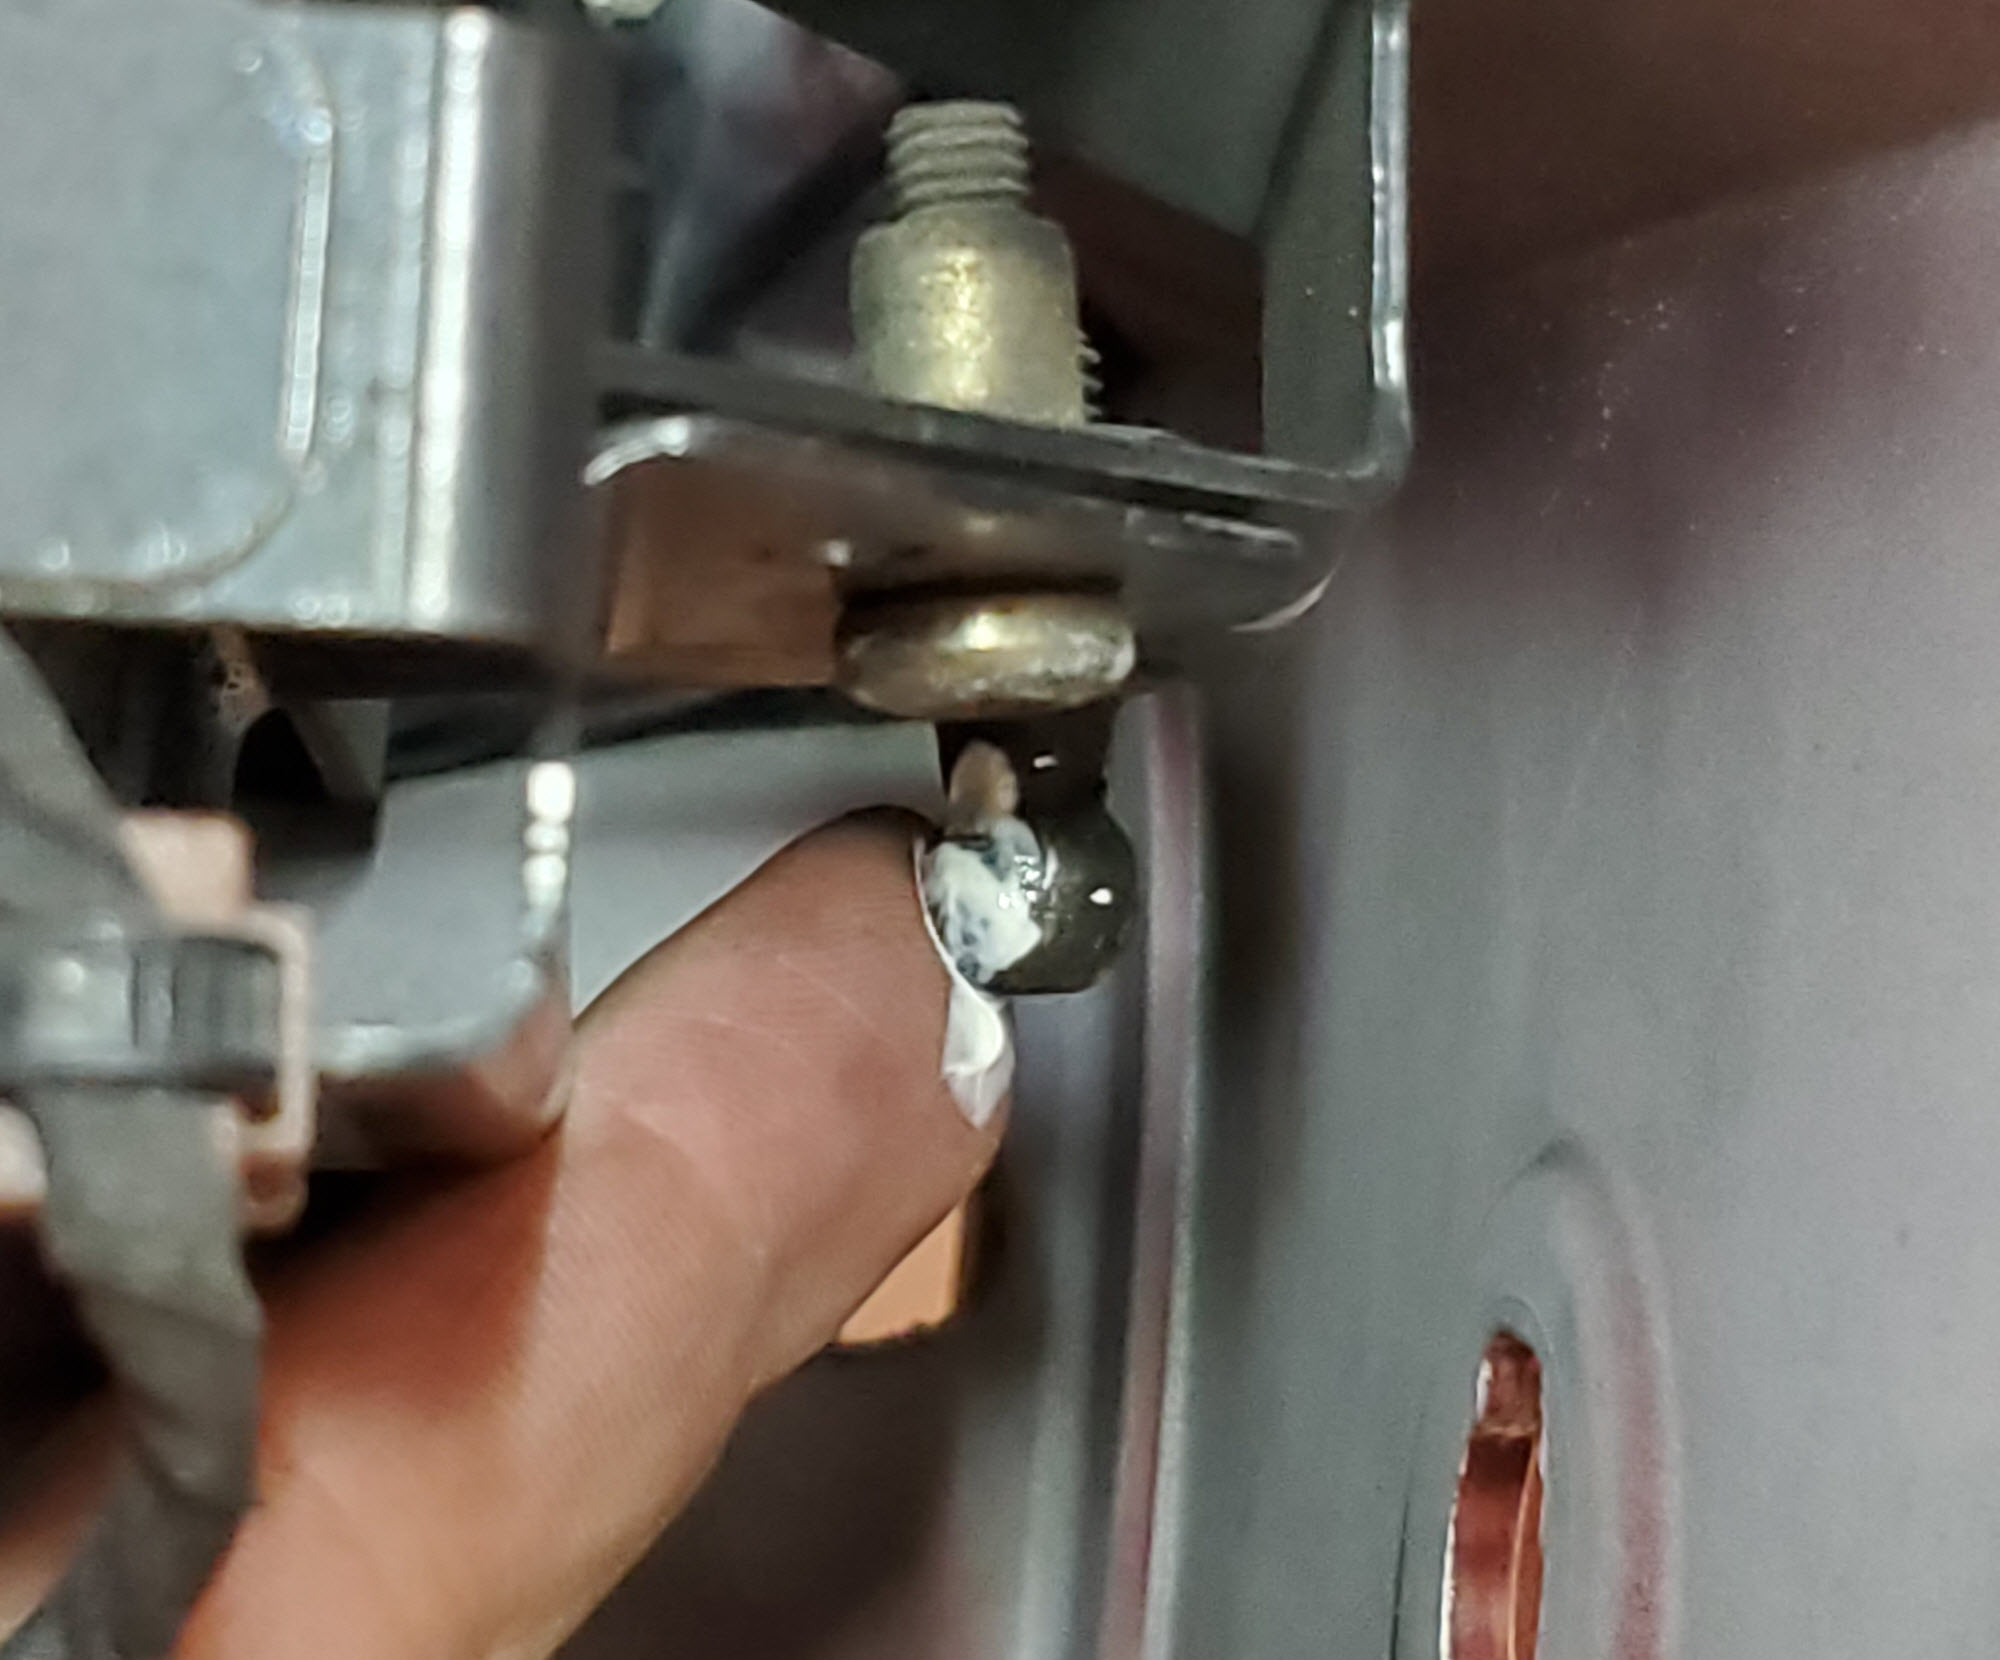
- Use your lint free shop rag and clean the old dirty grease off the two old balls.
- Use a bit of white lithium grease and lube the two balls.

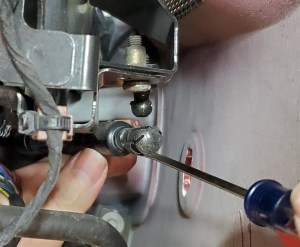
- Installing the new strut we start with the far connection first (the harder connection to make due to limited access).
- Orient the strut the same was it came off, with the cylinder portion nearest the closest connection.
- Insert your small screwdriver blade in advance to retract the far end retaining clip.
- Position the socket under the ball and then press it up over the ball with a gentle push. It should go on easily if you have the clips retracted.
- After it’s seated, remove the screwdriver blade and made sure the retaining clip springs back completely in place (flush).
- Move your attention to the close connection (the easy one)
- I’ve found there is NO NEED to insert the screwdriver for the close connection. You have good enough access to just apply a bit of extra pressure and push the socket over the ball. The retaining clips just spring out of the way automatically as you push it on.
- Just push it onto the ball until it snaps into place and make sure the retaining clip is fully seated flush afterwards.
- Before you start putting back fender marker lamps and fender liners, its time to test it works first.
- Your helper can be released from duty now. Have them let go of the door. It should hover in place.
- Gently give the door a close, and feel for the difference in effort. I found my door would stay open at most any position after the first ~20″ of opening. Vastly improved over the old way.
- If everything feels great now, time to finish up this side.
- Use a clean microfiber towel and carefully clean the spot where the side marker lamp seats. Often there is a build up of crud you can’t usually clean off washing the car. You have great access now.

- Reinstall the side marker lamp
- Notice that the hole it passes through is keyed so it fits only one way.
- Insert it and twist it back the ~20 degrees until it locks into place
- Reconnect the electrical connector by pressing in the wire bar and plugging it onto the connection.
- Verify the light works by turning on the ignition and then turning on that sides turn signal.
- Notice that the hole it passes through is keyed so it fits only one way.


With the strut successfully changed, all that’s left is putting back the fender liner, installing the road wheel, lowering the car and properly Torqueing the wheel. I have articles on each of these steps here:
Now you can repeat the same process on the other side of the car.
With just a morning in the shops time you’ve cured this issue for another decade, and all for less than $100. Well done.
If your door struts were worn out, it’s likely the other struts in the car won’t be far behind. There are gas struts that hold open the trunk/boot lid. If you find the trunk slamming shut or won’t stay open, those struts need replacing. Same for the struts that hold the hood/bonnet up. Check out my articles on change them here:
Video
Like most tasks it might help a lot to see the process rather than just read about it. I’ve put together this video for you.

Great video Steve, now I know what I am going to do next weekend 😊👍
LikeLike
Can I just thankyou for your range of informative articles and info presented with your own flare. Perusing any article on here is a joy. Hope you’ve still got the car, keep up the good work and cheers again.
LikeLike