
 My DB9 would piddle washer fluid on my foot each time I’d top up the reservoir. Kind of embarrassing [also reinforcing my Sweetie’s nick name for the car – Princess Piddles]. I knew she had the problem from the day I purchased her. I saw the leak the first time I topped off the fluid, and in one of my earliest video’s I spotted a crack near the top of the plastic tank. As it turns out, a cracked tank is a very common issue with the DB9, Vantage and other Gaydon models. The leak was not catastrophic, it still held 90% of the fluid and certainly functioned, and I could have just left it this way indefinitely. But, you know me, I figured if it was a problem on my car, it might be a problem on yours, so covering how to change out the tank would help us all. Let me share a few of my tips as I show you how to tackle this yourself.
Background
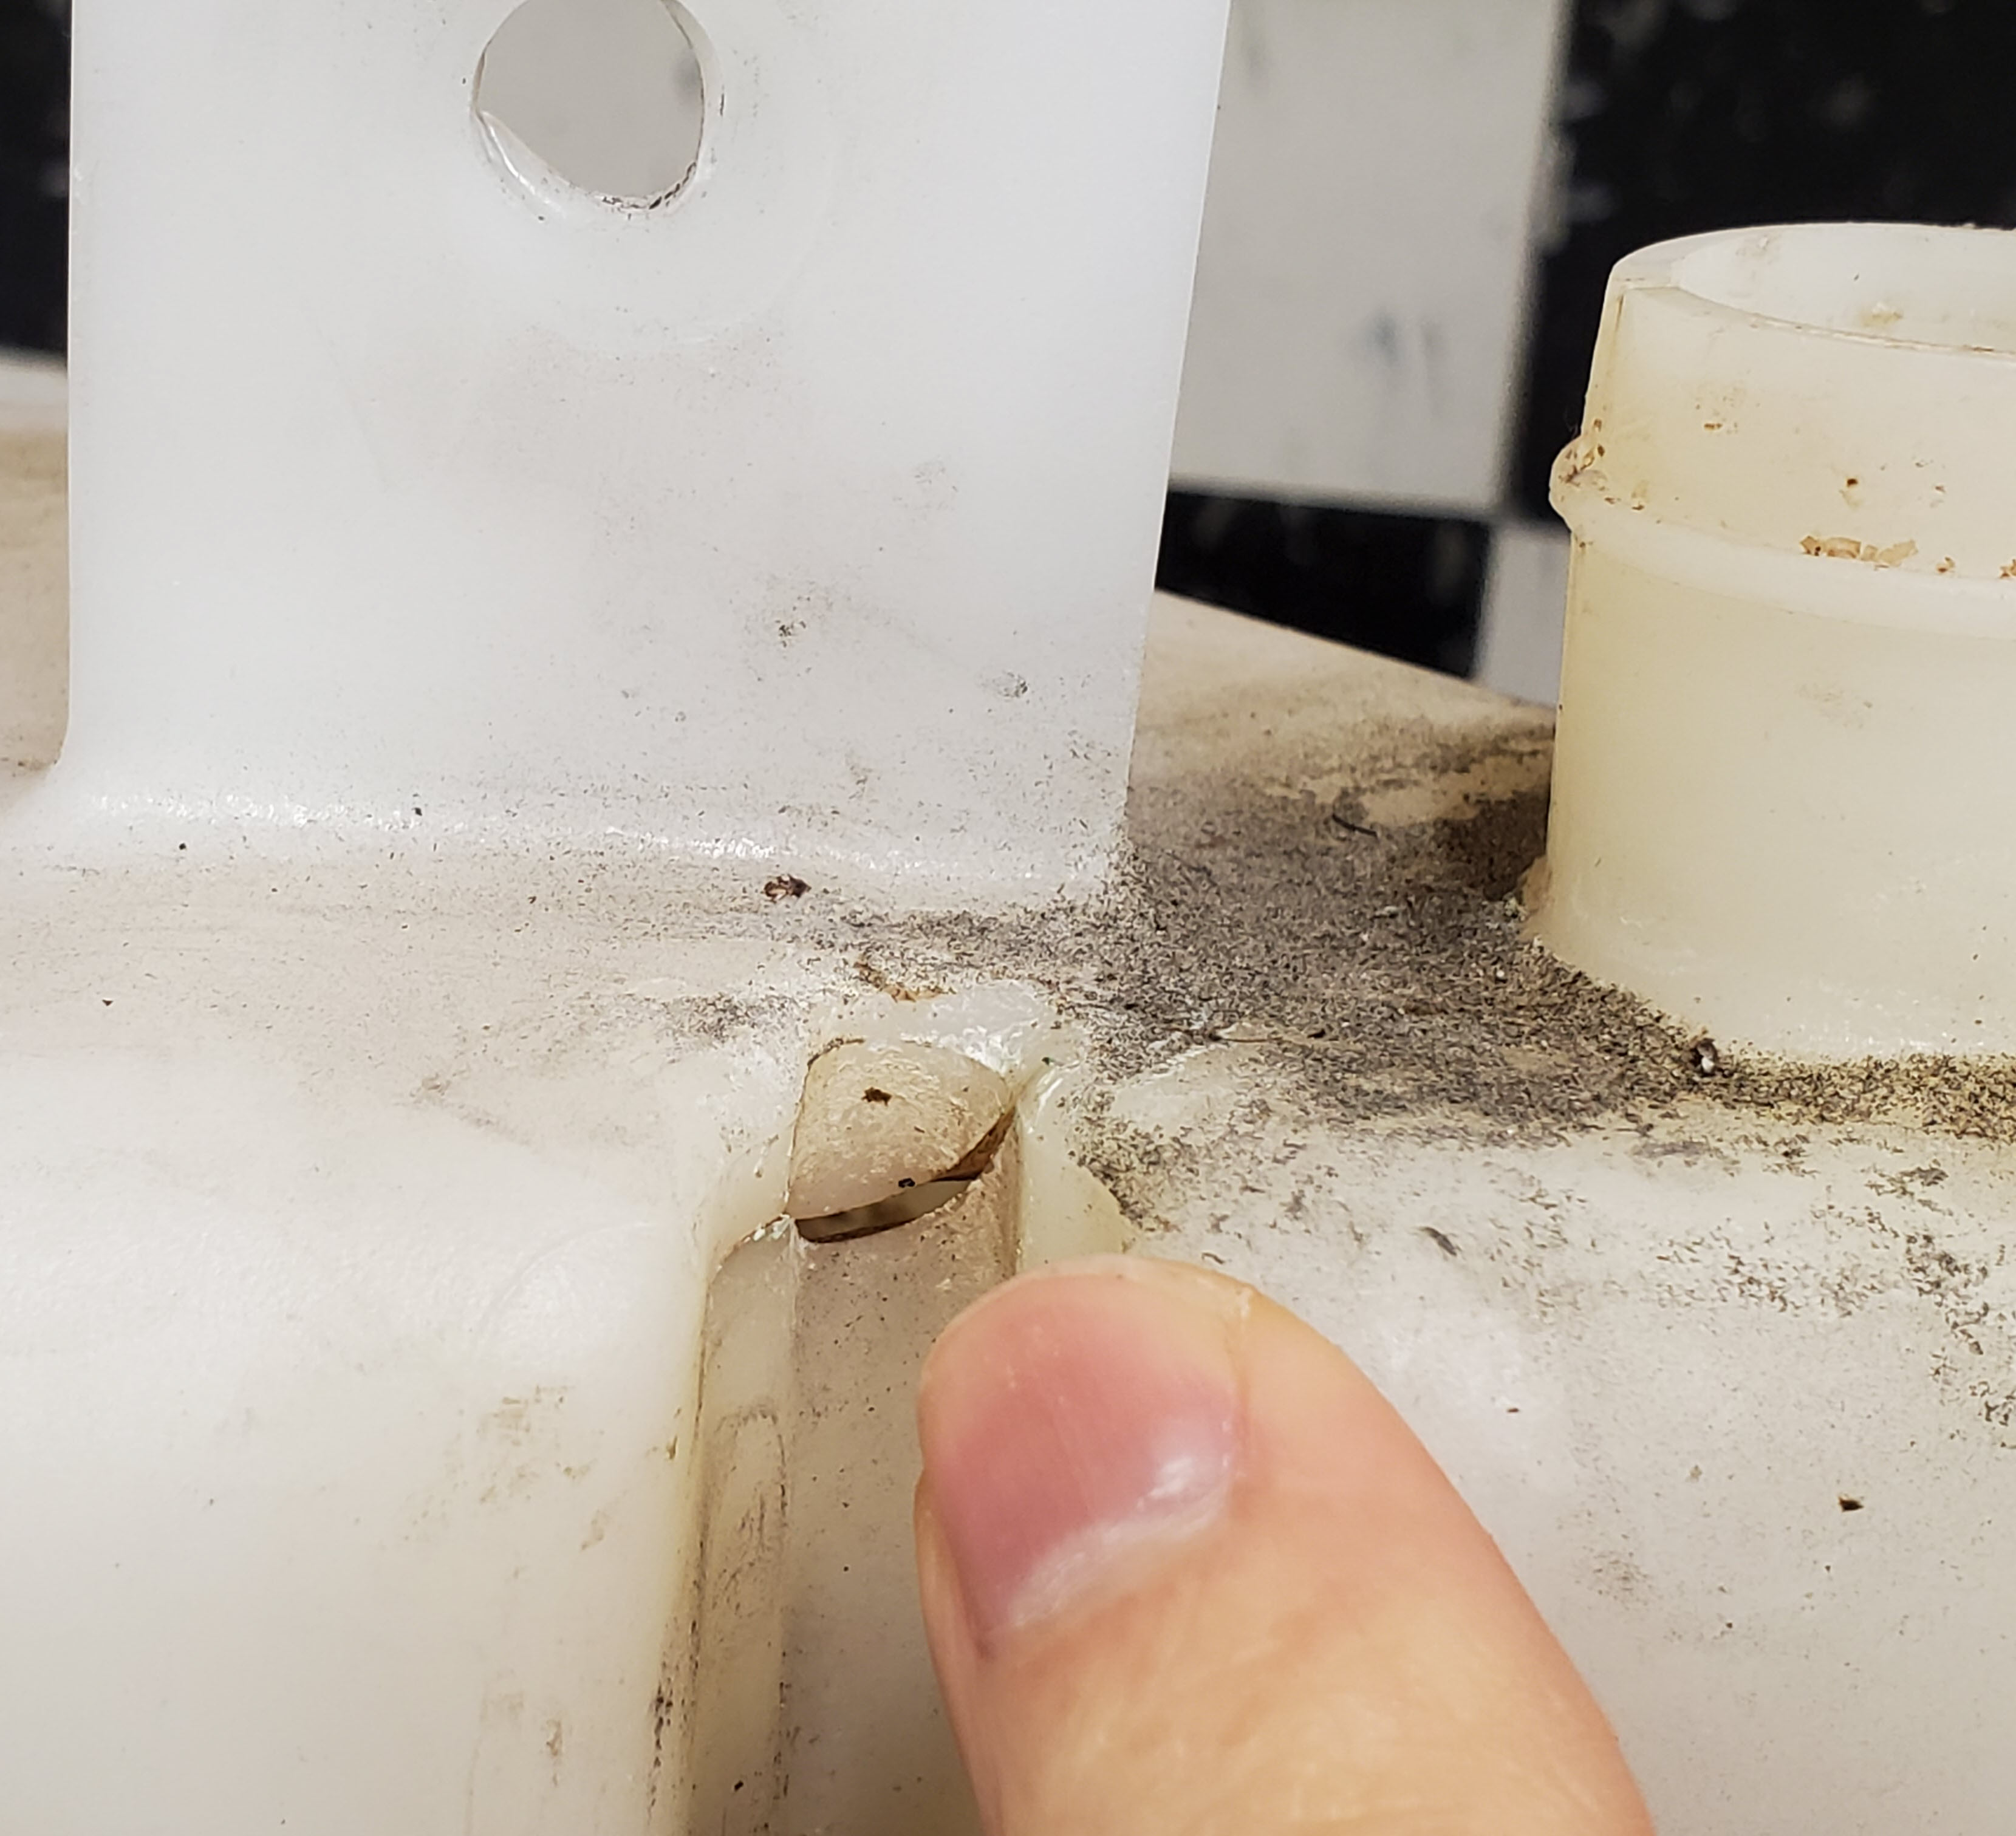
In 2014 I spotted this crack near the top of the tank below the filler neck. As you are blindly topping up the fluid during a service you have no idea your full until the water comes up the filler tube and is near the cap. At that point all the water in the neck and top inch or so of the tank would now drool out on my foot.
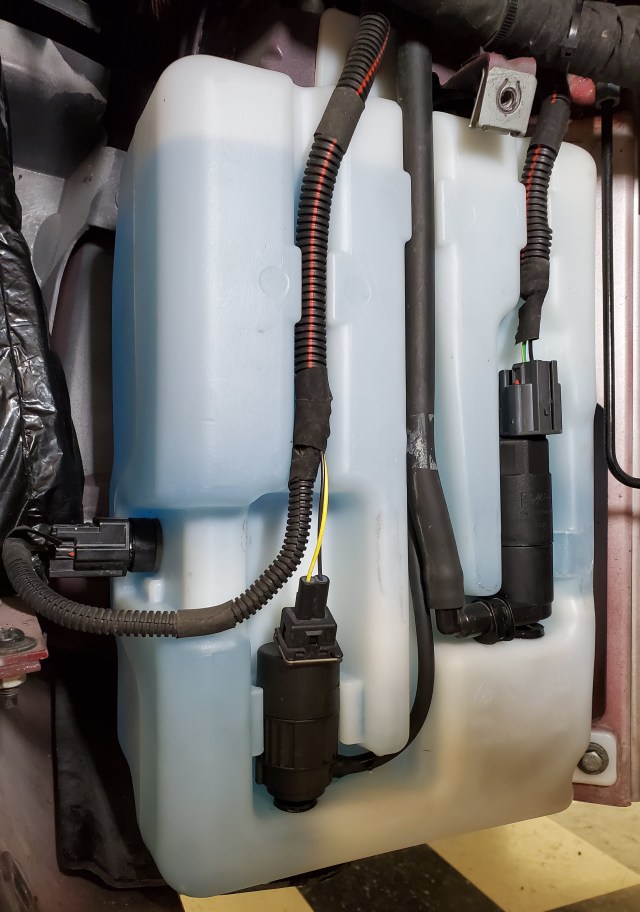
The tank has three items of interest mounted to it. It has one pump for the windscreen sprayers. It has another pump for the headlight sprayers. And it has an electronic level sensor to detect when the fluid level is down to about 1/3rd of the tank. The tank itself holds nearly 10 liters of washer fluid (wow).
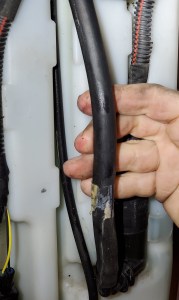
If you have a leak, don’t fail to consider that it could be lots of things in the system right there. The filler tube is just a rubber hose that can crack. The hose connects to the tank with a hose clamp and it can just be loose. There are two sprayer pumps mounted to the tank, and the rubber sealing grommet they mount through could be leaking. The pump bodies themselves could be cracked or leaking. The tank is fitted with a low fluid level sensor, and it could be leaking where that connects. If you have fluid on the floor, don’t just assume its the tank. Get access to it, top up the tank, and find where the fluid is leaking from first.
One thing I discover midway through the task is that my tank was FULL of crud. Bits of bio growth and debris that have come probably from 15 years of California warm weather and the tank being filled with just plain water. If I had been running a winterized formula of washer fluid (that contains alcohol) I suspect it would have sterilized the tank a bit and kept the growth down. Why this matters is that if the pumps suck up the bits of muck, they pump them to the very small sprayer outlets and could easily plug them up. If you have sprayers that get plugged, you might need to pull your non-cracked tank out just to give it a proper clean out.
Parts
 To replace the tank, you need just one part – the Windscreen Washer Fluid Reservoir. It is Aston Martin part number 4G43-17B613-BA. I think this is the correct part for the DB9 through 2016, the DBS, Virage and Vanquish (this is NOT the tank for the Vantage). The tank comes as an assembly, fitted with both pumps and the level sensor. A fresh sensor and pumps isn’t a bad idea, refurbishing the whole system at once. As far as I am aware you cannot just order the plastic tank without the fittings. The plastic tank is a bespoke design to fit the unique space in the Aston. The pumps are just Ford parts.
You can purchase the tank online for about $433 USD here. If you live in the UK or EU you can reach out to the parts team at HWM England and they can probably give you a bit better pricing if you mention you were referred from this website. HWM supplied me with this tank so I could do this article and video – Thank you HWM!
After I completed this project I realized I probably could have just mended the crack in my tank. It hadn’t changed in the 7 years I’ve owned the car, and I probably could have cleaned out the tank and sealed the crack with epoxy putty. I’m actually going to do a separate article on stripping down the tank, cleaning and repairing it along with the pump seals. [Coming in 2021 sometime]
 You’ll also need to refill your washer tank at the end. You can use tap water of course, or perhaps pickup a couple of 1 gallon bottles of washer fluid at the local auto parts store.
Tools
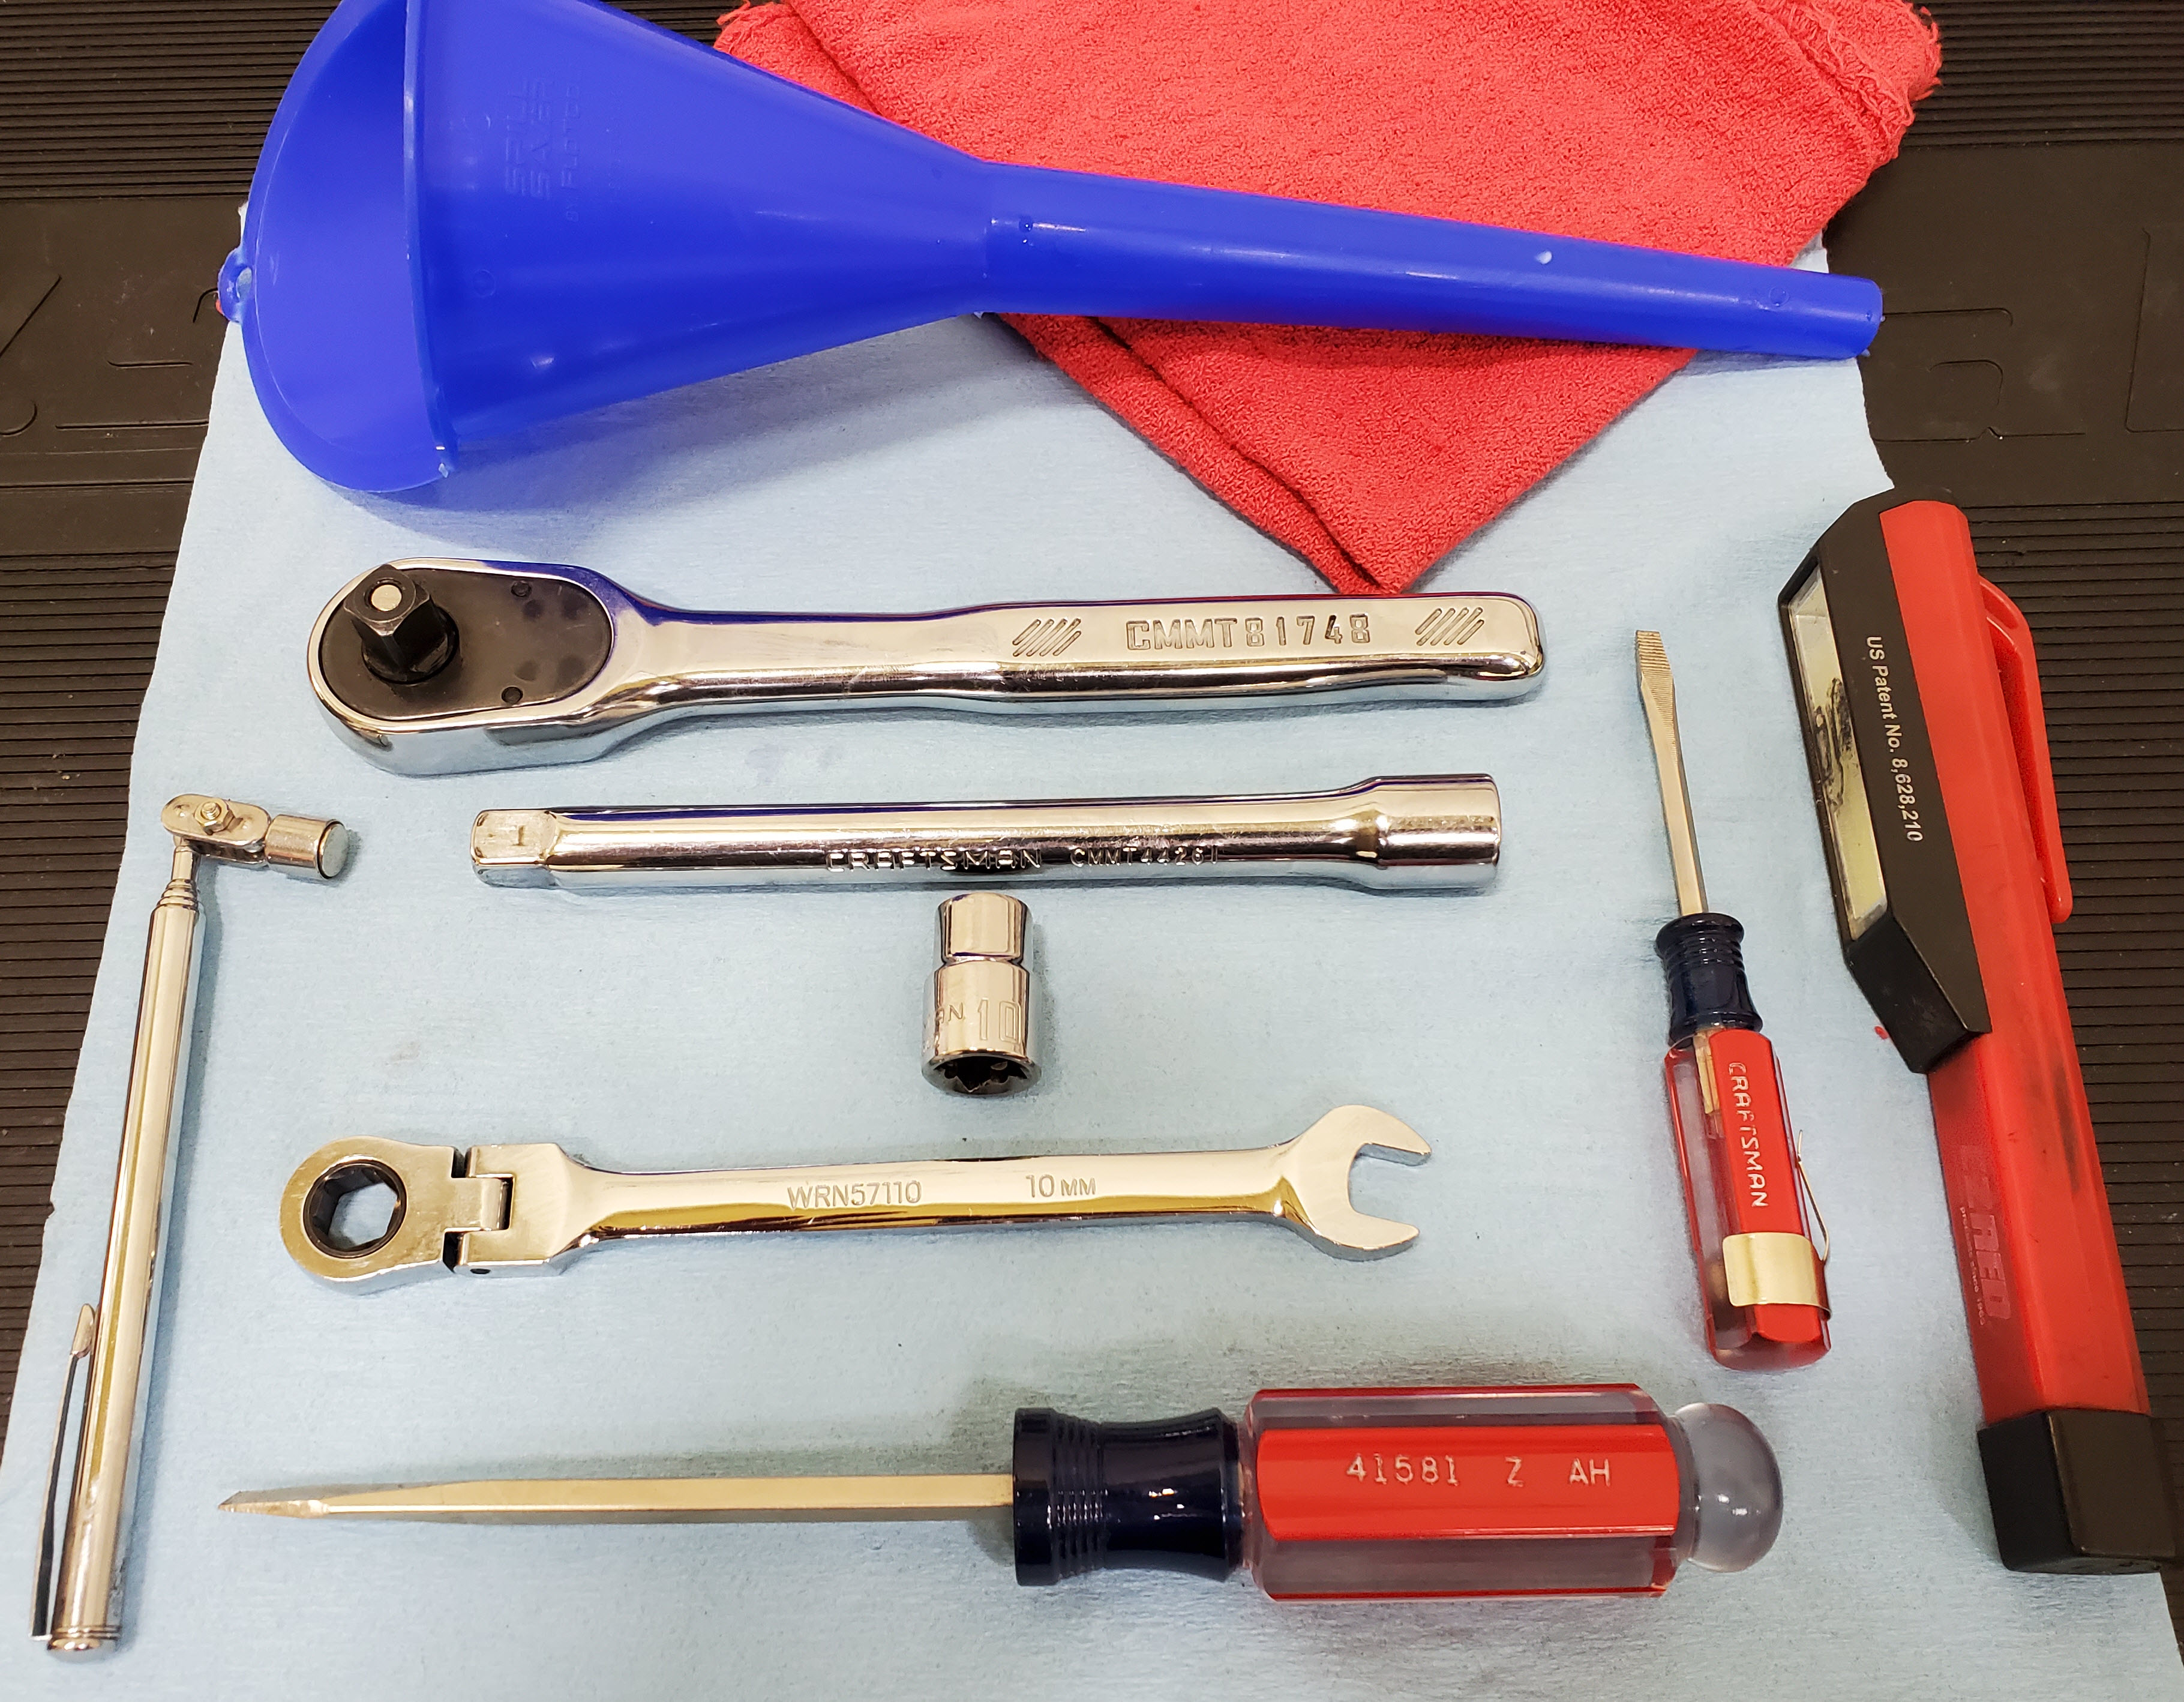
You will need a few tools to tackle this task, but nothing exotic:
- 10 mm bendy ratcheting combination wrench. The bendy bit, and ratcheting bit are both essential for this task. I don’t think I could have managed it without both features.
- 10mm socket
- 3/8″ ratchet and extension
- Medium size flat blade screwdriver
- Small flat blade screwdriver
- Inspection light
- Magnetic pickup tool (optional)
- Funnel for refilling washer fluid
- A small Dremel cutting tool, or hack saw blade to make a suggested modification to the plastic tank (I forgot to include in the tools picture below)
- Drain bucket
- Drip Tray
 Part of the procedure is includes draining the fluid from the old reservoir. Even with a drain bucket I still splashed fluid around, and a plastic tray on the floor helps.
- I purchased a dog kennel plastic tray/liner that was perfect for the task. One that was 35″ x 22″ was only $16 USD on Amazon with free shipping.
- Shop rag or disposable shop towels


Preparation
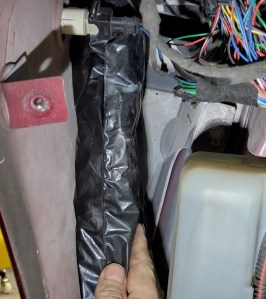
The plastic tank is hidden in the right front wheel well. You’ll need to get access to this area to do the work. I’ve created other articles on these steps to get in there:
Procedure
To start off I checked the official Aston Martin Workshop manual. Section 1.16 on the Wipers and Washer System covers the process. I read through it for some tips, and honestly I got the gist of it, but some of the description was lacking. You can find the section here if you are interested.
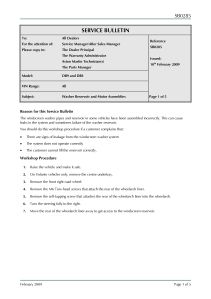 I then discovered that since this problem was so prevalent in the Gaydon era cars, Aston Martin had issued a Field Service Bulletin SB0285 that superseded the owners manual process. SB0285 basically describes the same things, but also includes some extensive troubleshooting to make sure the leak is the plastic tank and not the other bits I mentioned above. What still puzzled me was the process was still inaccurately documented. The numbers in the photos don’t correspond with the descriptions, and the process talks about a battery cable being mounted to the tank, of which I found no sign of (assuming it might be there on other models like the Vantage). You can read the bulletin here.
What’s described below is the Aston1936 procedure. The process will take about an hour once you have access to the tank. Plan for a morning or afternoon playing in your garage.
[Just a quick note that this is NOT the procedure for the Vantage. Similar, but the tank is slightly reshaped and access to the sensor and rear mounting bolt is different. Rich over at Redpants.lol has done an article and YouTube video on the Vantage you can check it out here.]
And now on with the show….
- Start by draining the fluid from the tank.
- If you have a large drip tray like I have this is a good use for it to minimize the mess on your shop floor.
- Remove the outlet hose connection on the windscreen washer pump. That’s the lower of the two pumps, the one on the left. Use your drain bucket to catch it, and keep in mind that a full tank is nearly 10 liters. I had to get a second bucket since my tank was nearly full.

- Prepare to wait a while if you just let it drain through this hole. Slow.
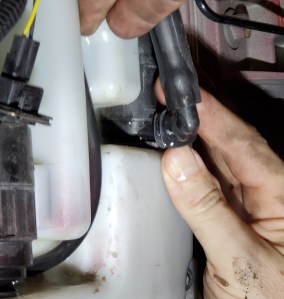
- To speed up the process I also removed the outlet hose connection from the headlight sprayer pump, the one slightly higher up on the right. Unlike the other pump, this one is connected with a Quick Connect fitting. Just press on the small white tab and ease the connection off. Should come away easily. This hose was much larger diameter and the flow was much faster.
- Fun Fact – Why is the headlight sprayer pump higher up than the windscreen sprayer pump? Safety. As the tank depletes of fluid, its more important to have washer fluid left for the windscreen than the headlights.
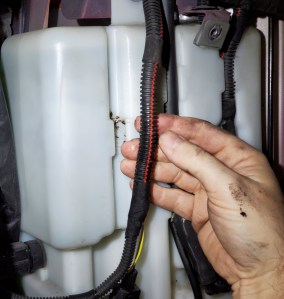
- With both pump outlet hoses disconnected, and the fluid drained out, you can now gently ease the hoses out of the channel/groove molded into center the tank. Also ease the electrical wiring harness out for the pumps and the level sensor.
- Gently work the electrical harness to each pump out of their molded grooves.
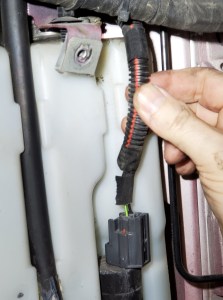
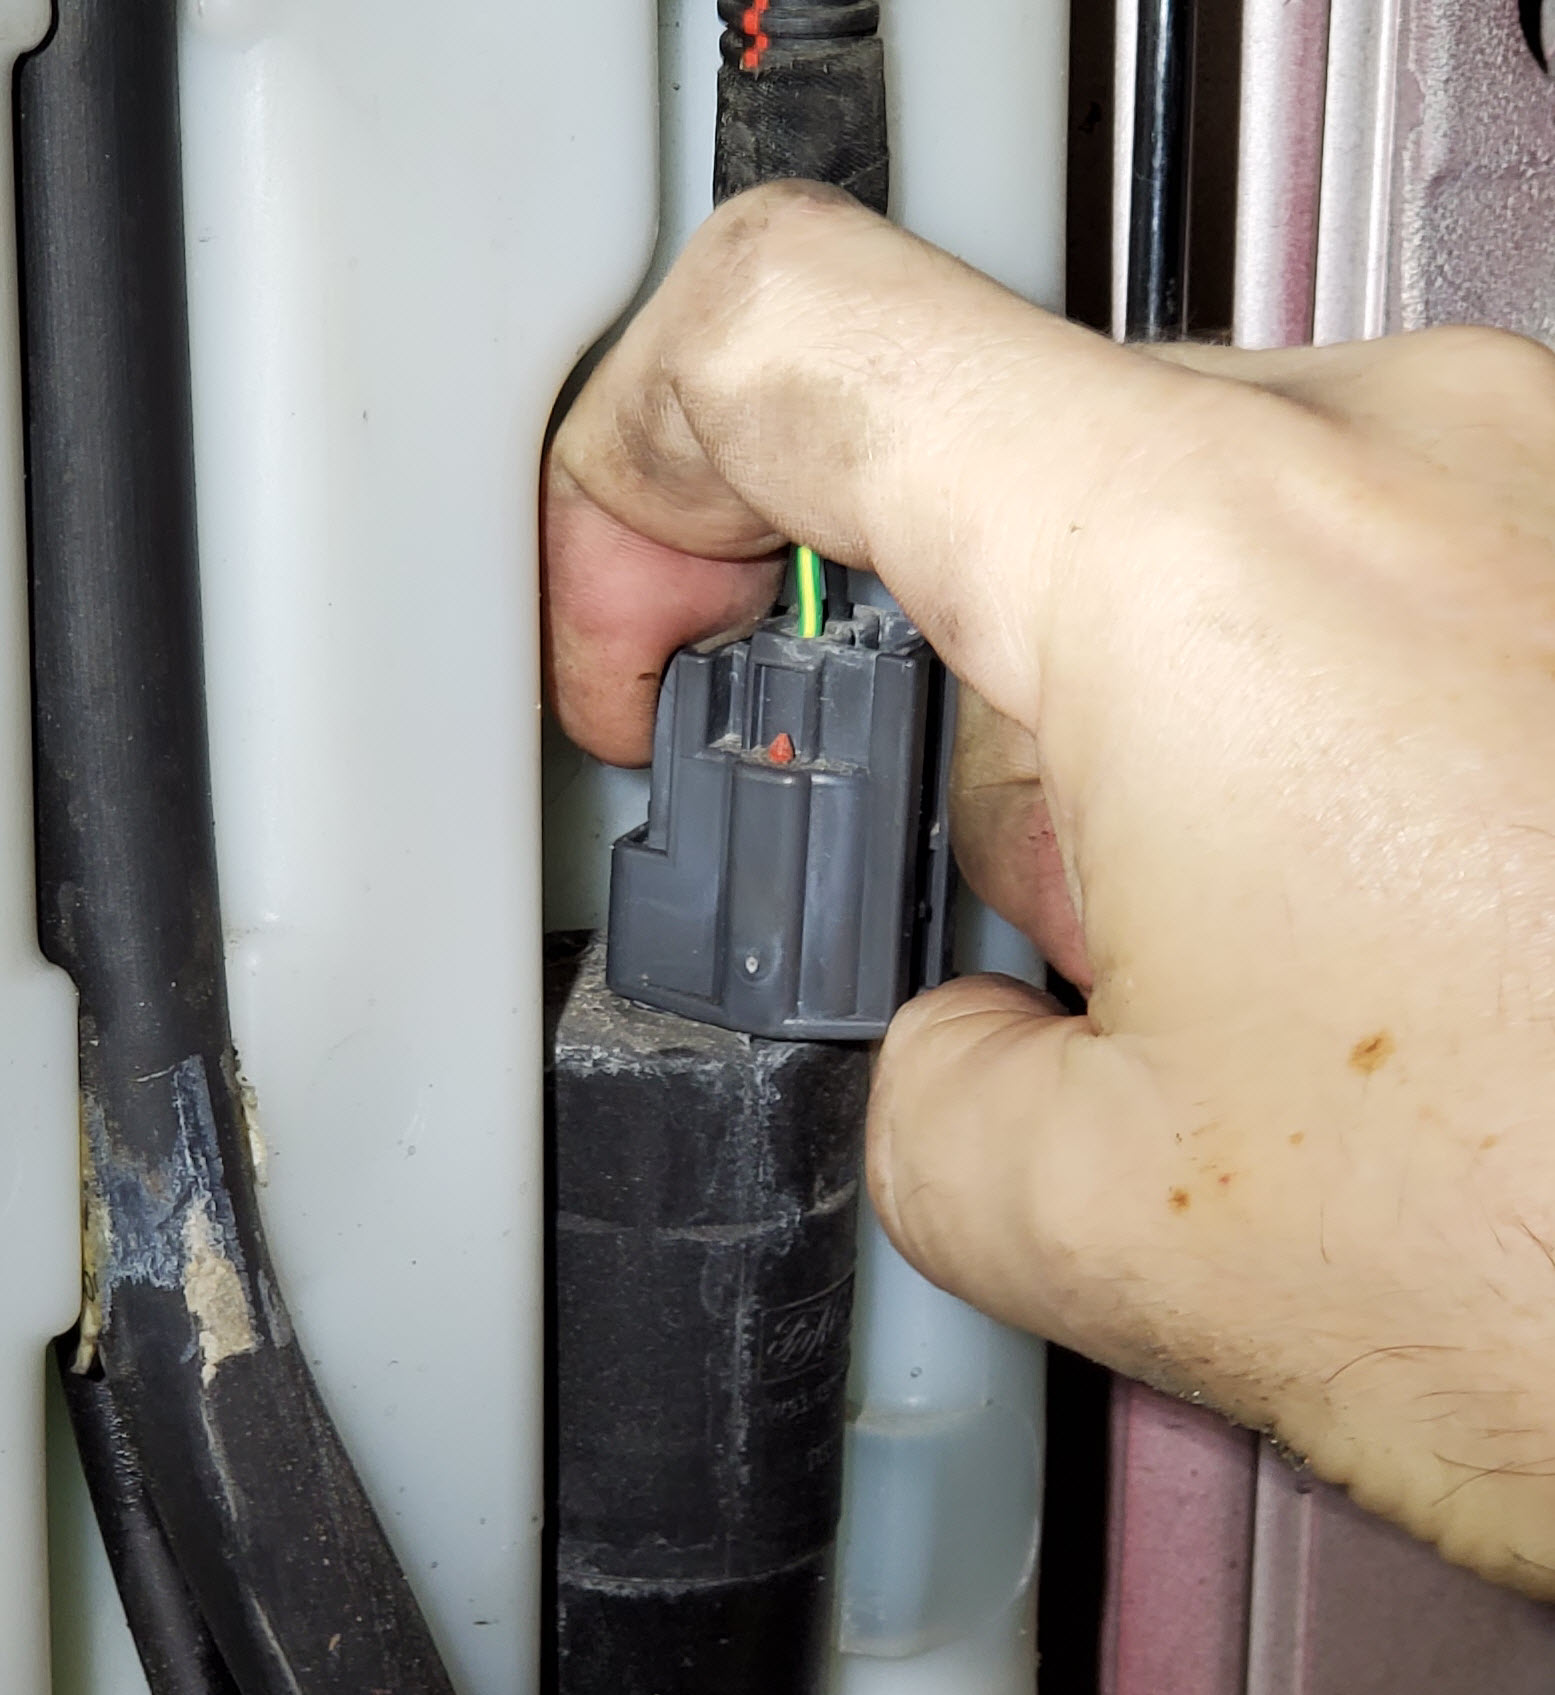
- Disconnect the electrical connection to the windscreen sprayer pump by pressing in the wire bar and pulling off the connector. It should come away easily.
- Disconnect the electrical connection to the headlight sprayer pump.
- This one was trickier than the first one.
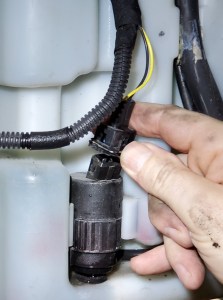
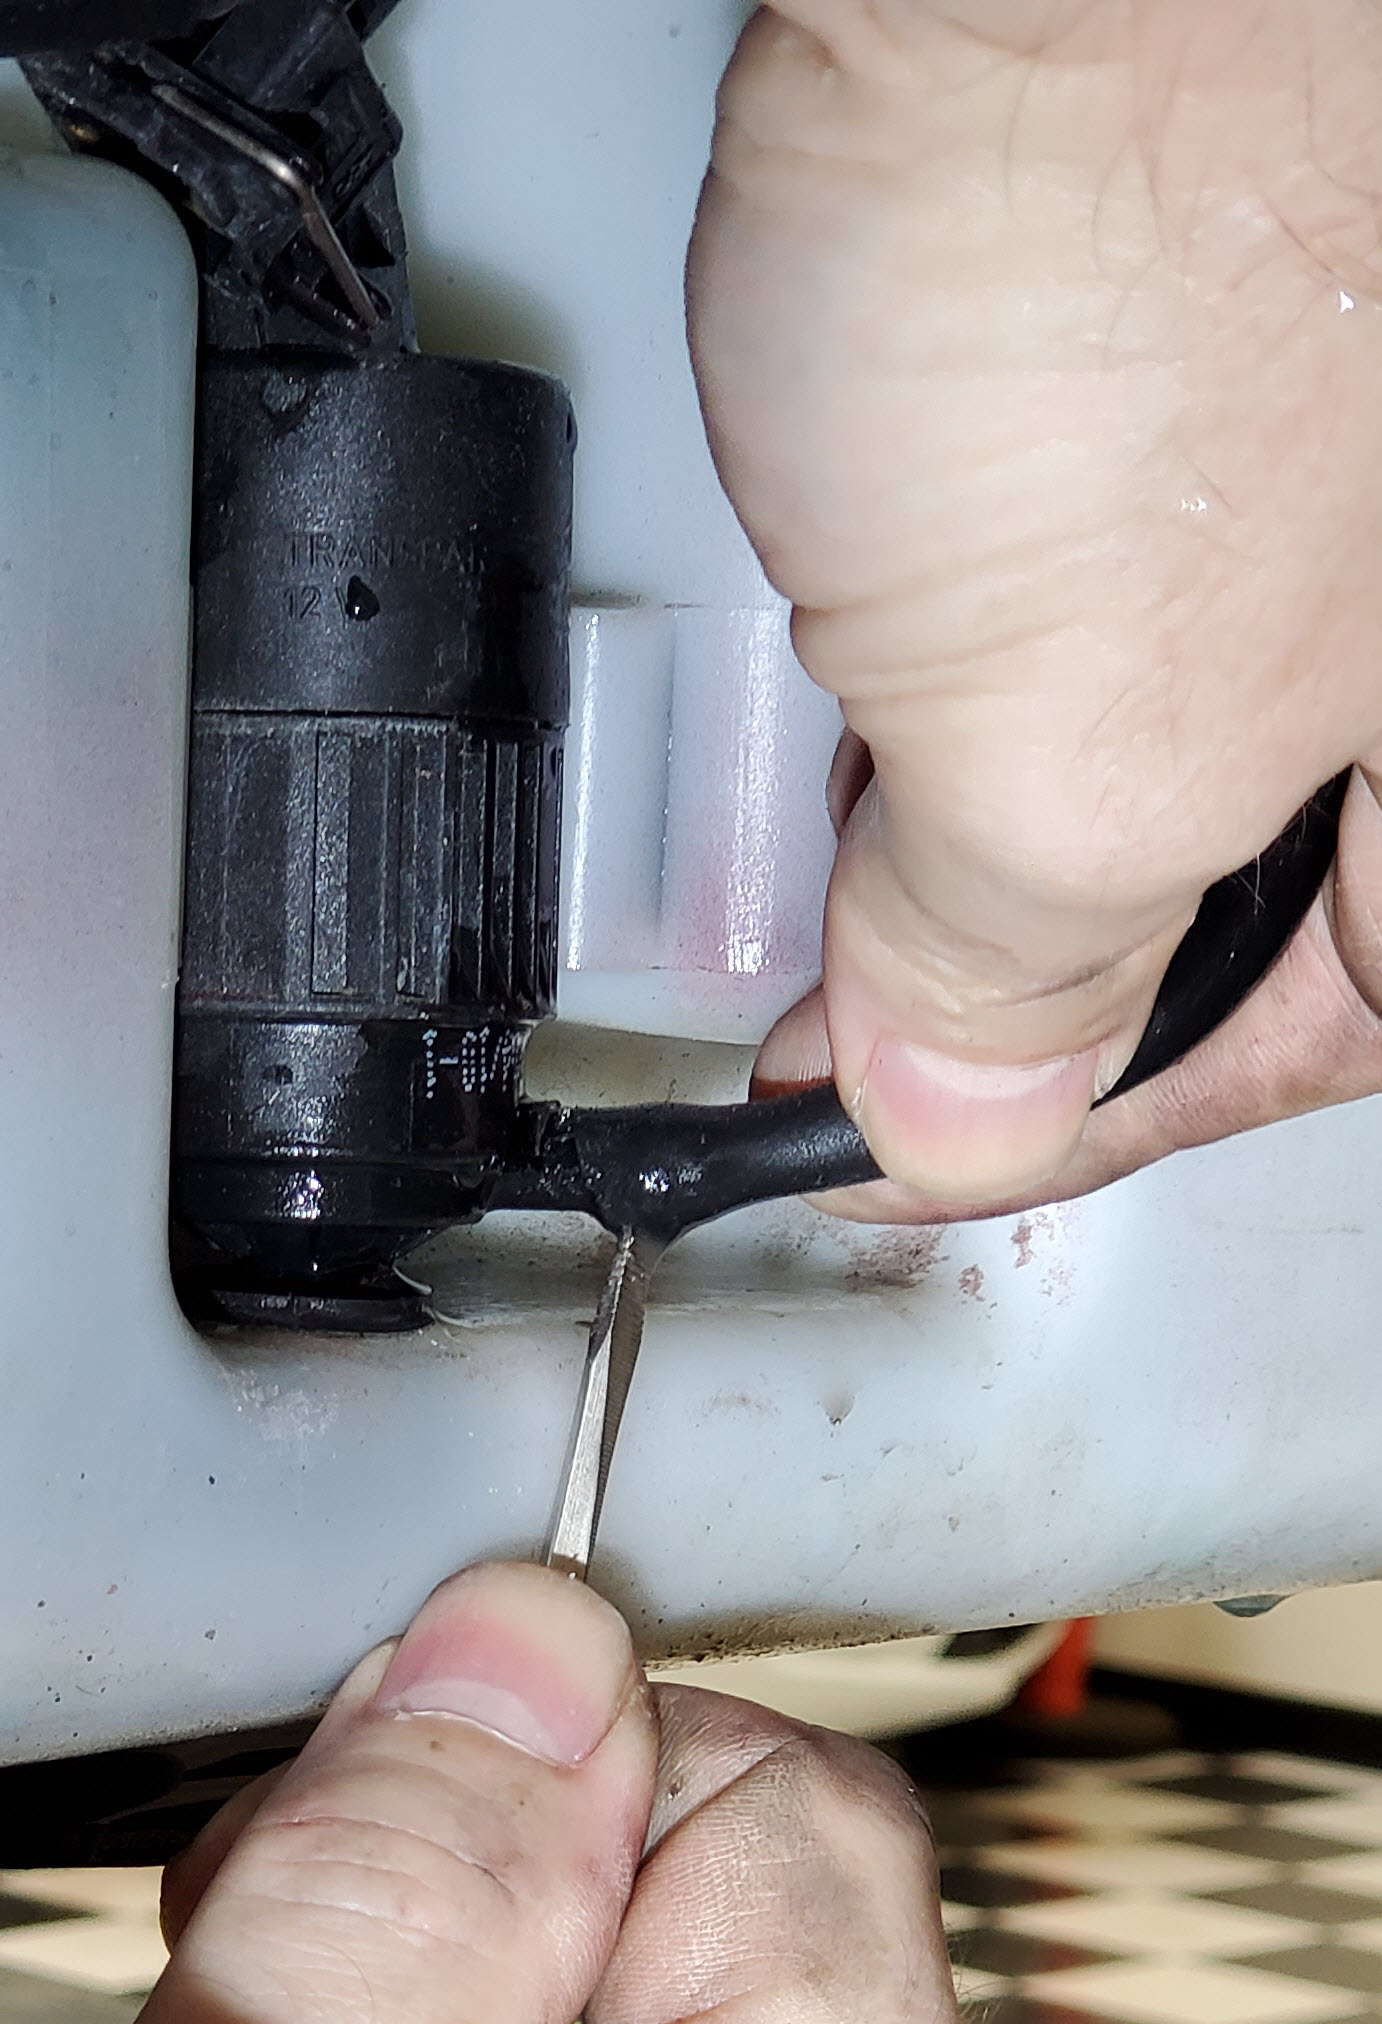
- Rotate the pump body to give you better access to the connector
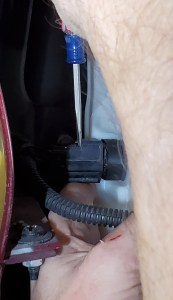
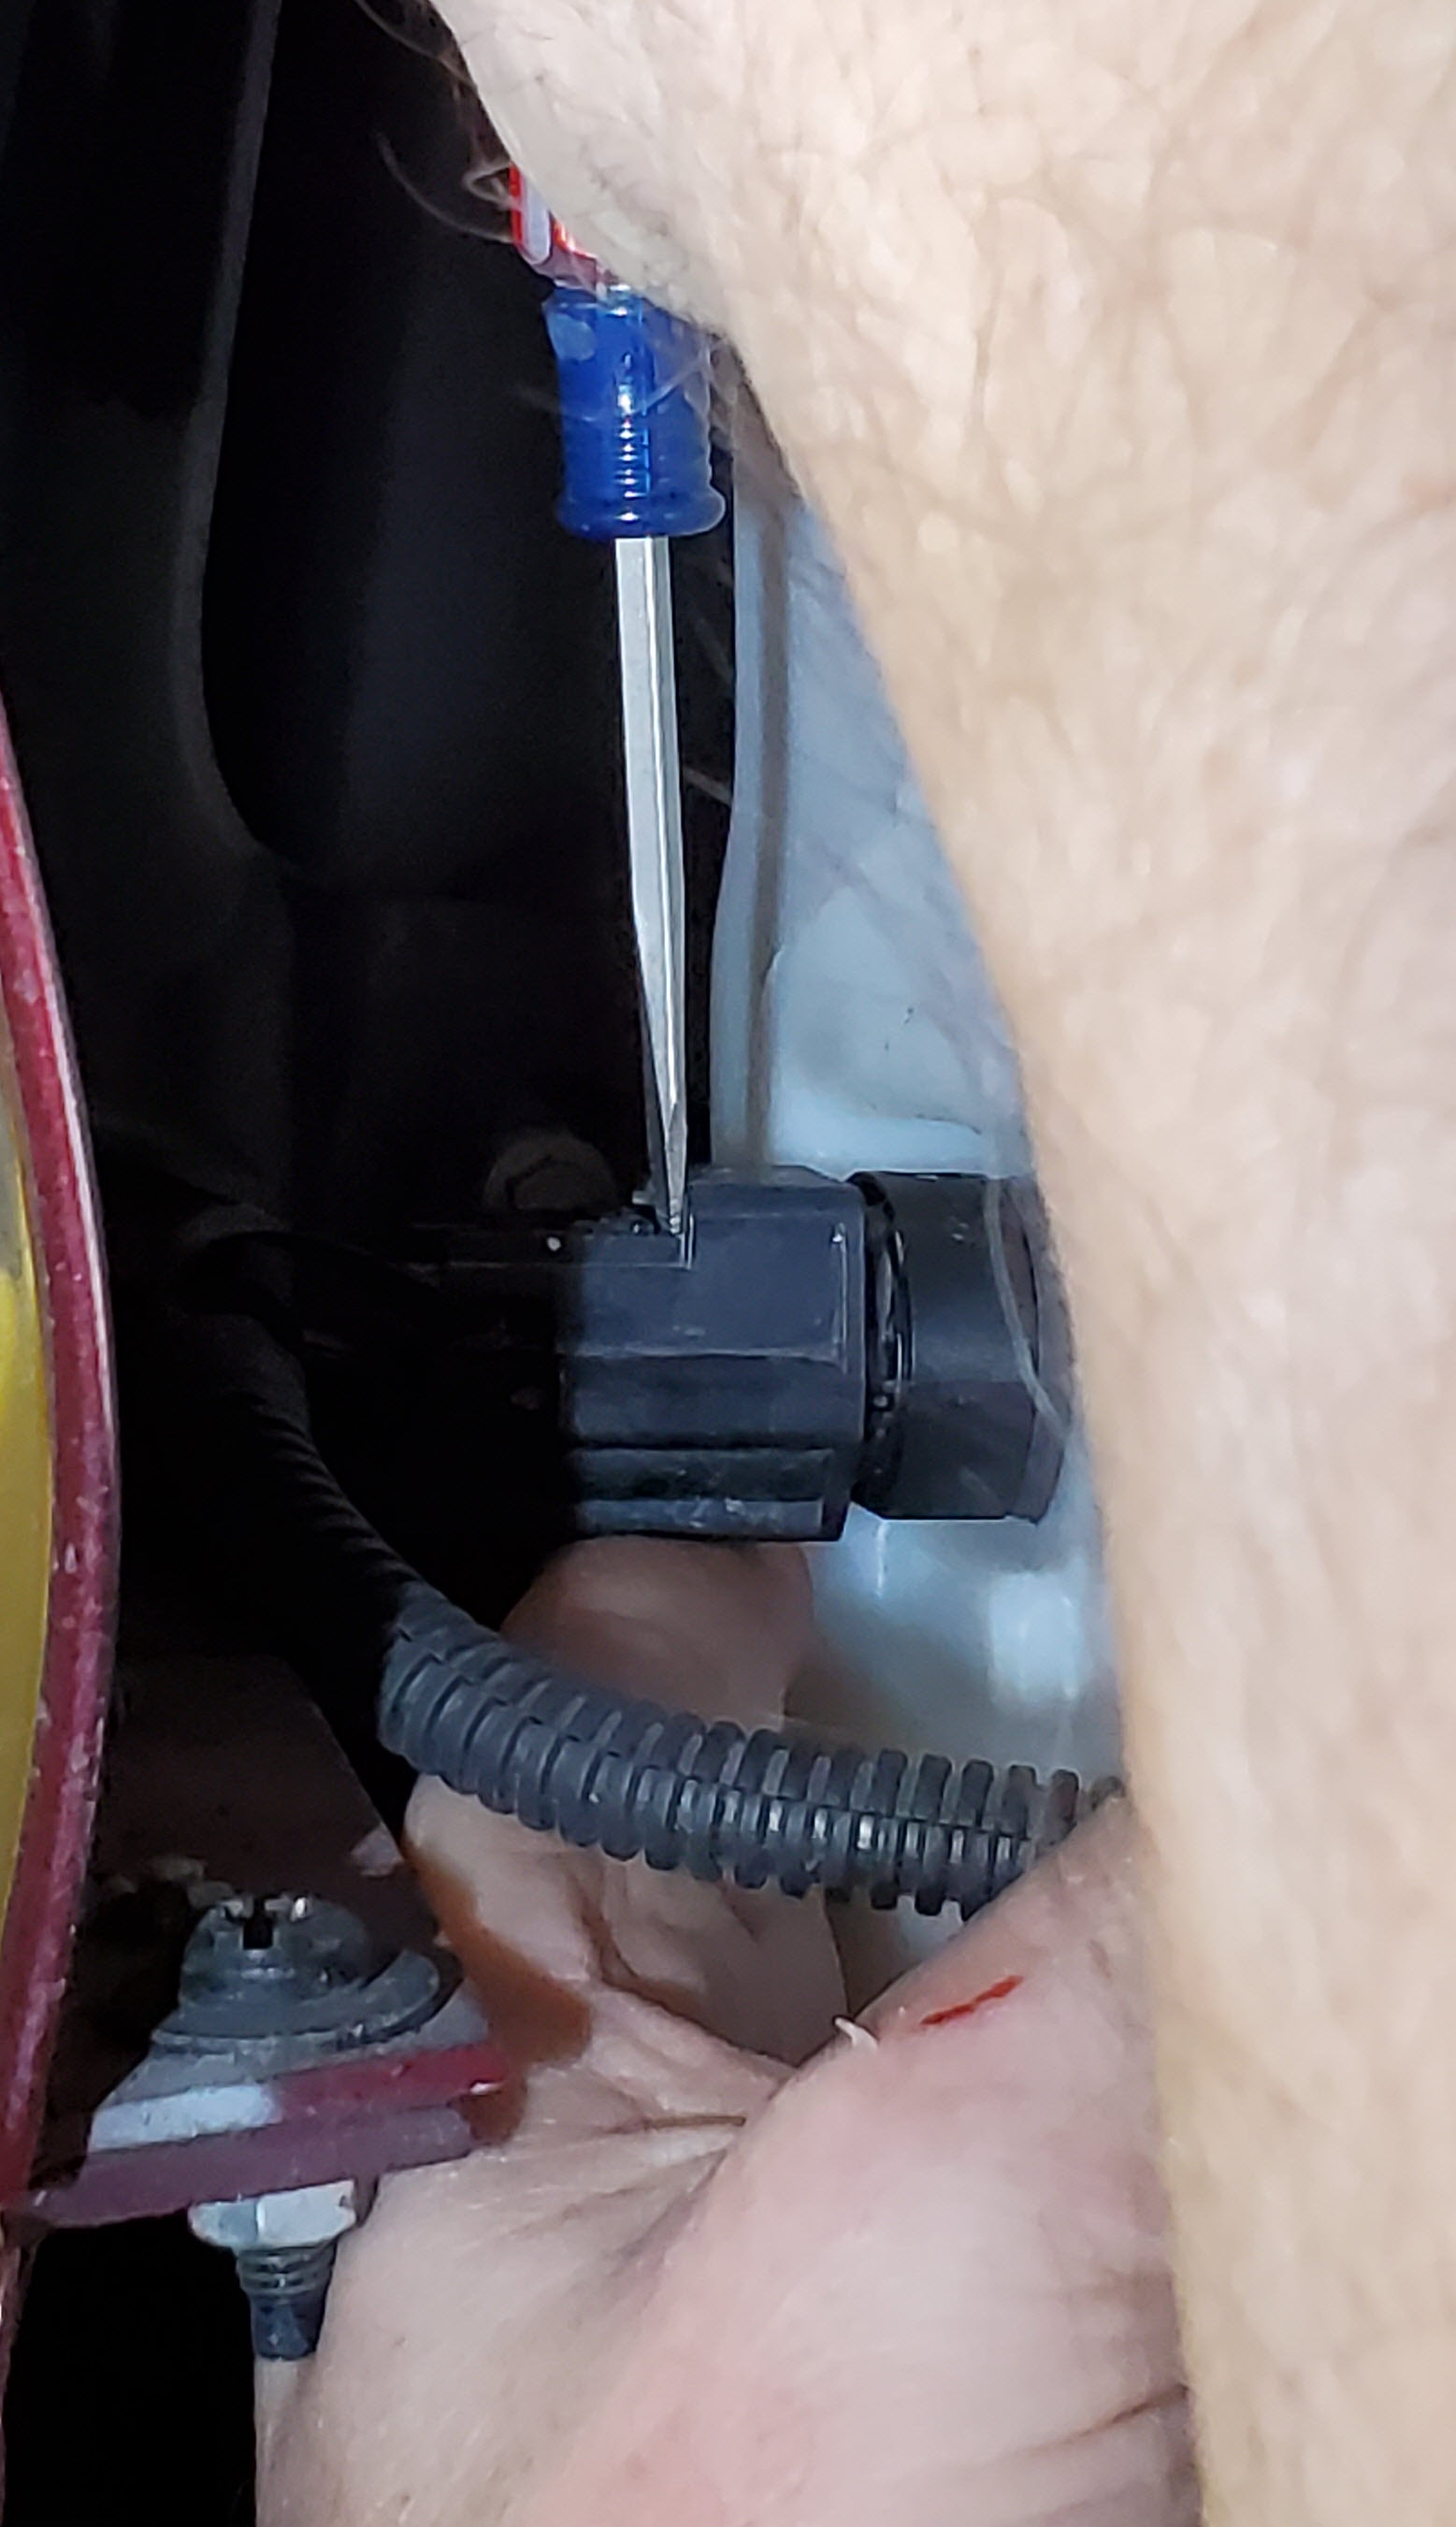
- Press on the connector tab and wiggle the connector off. I ended up using a small flat blade screwdriver and inserting it at this point to press directly on the release tabs. Worked much better than just squeezing it with my fingers. Check out the video below to see how I used the screwdriver with the tabs.

- You’ll be tempted to go after the level sensor electrical connection next, but wait just a bit until we are partially removing the tank, this will give you better access to it.
- Loosen the hose clamp holding the rubber tube on the filler neck.

- Wiggle the hose up and off the filler neck until it just clears. I just pushed it up easily.
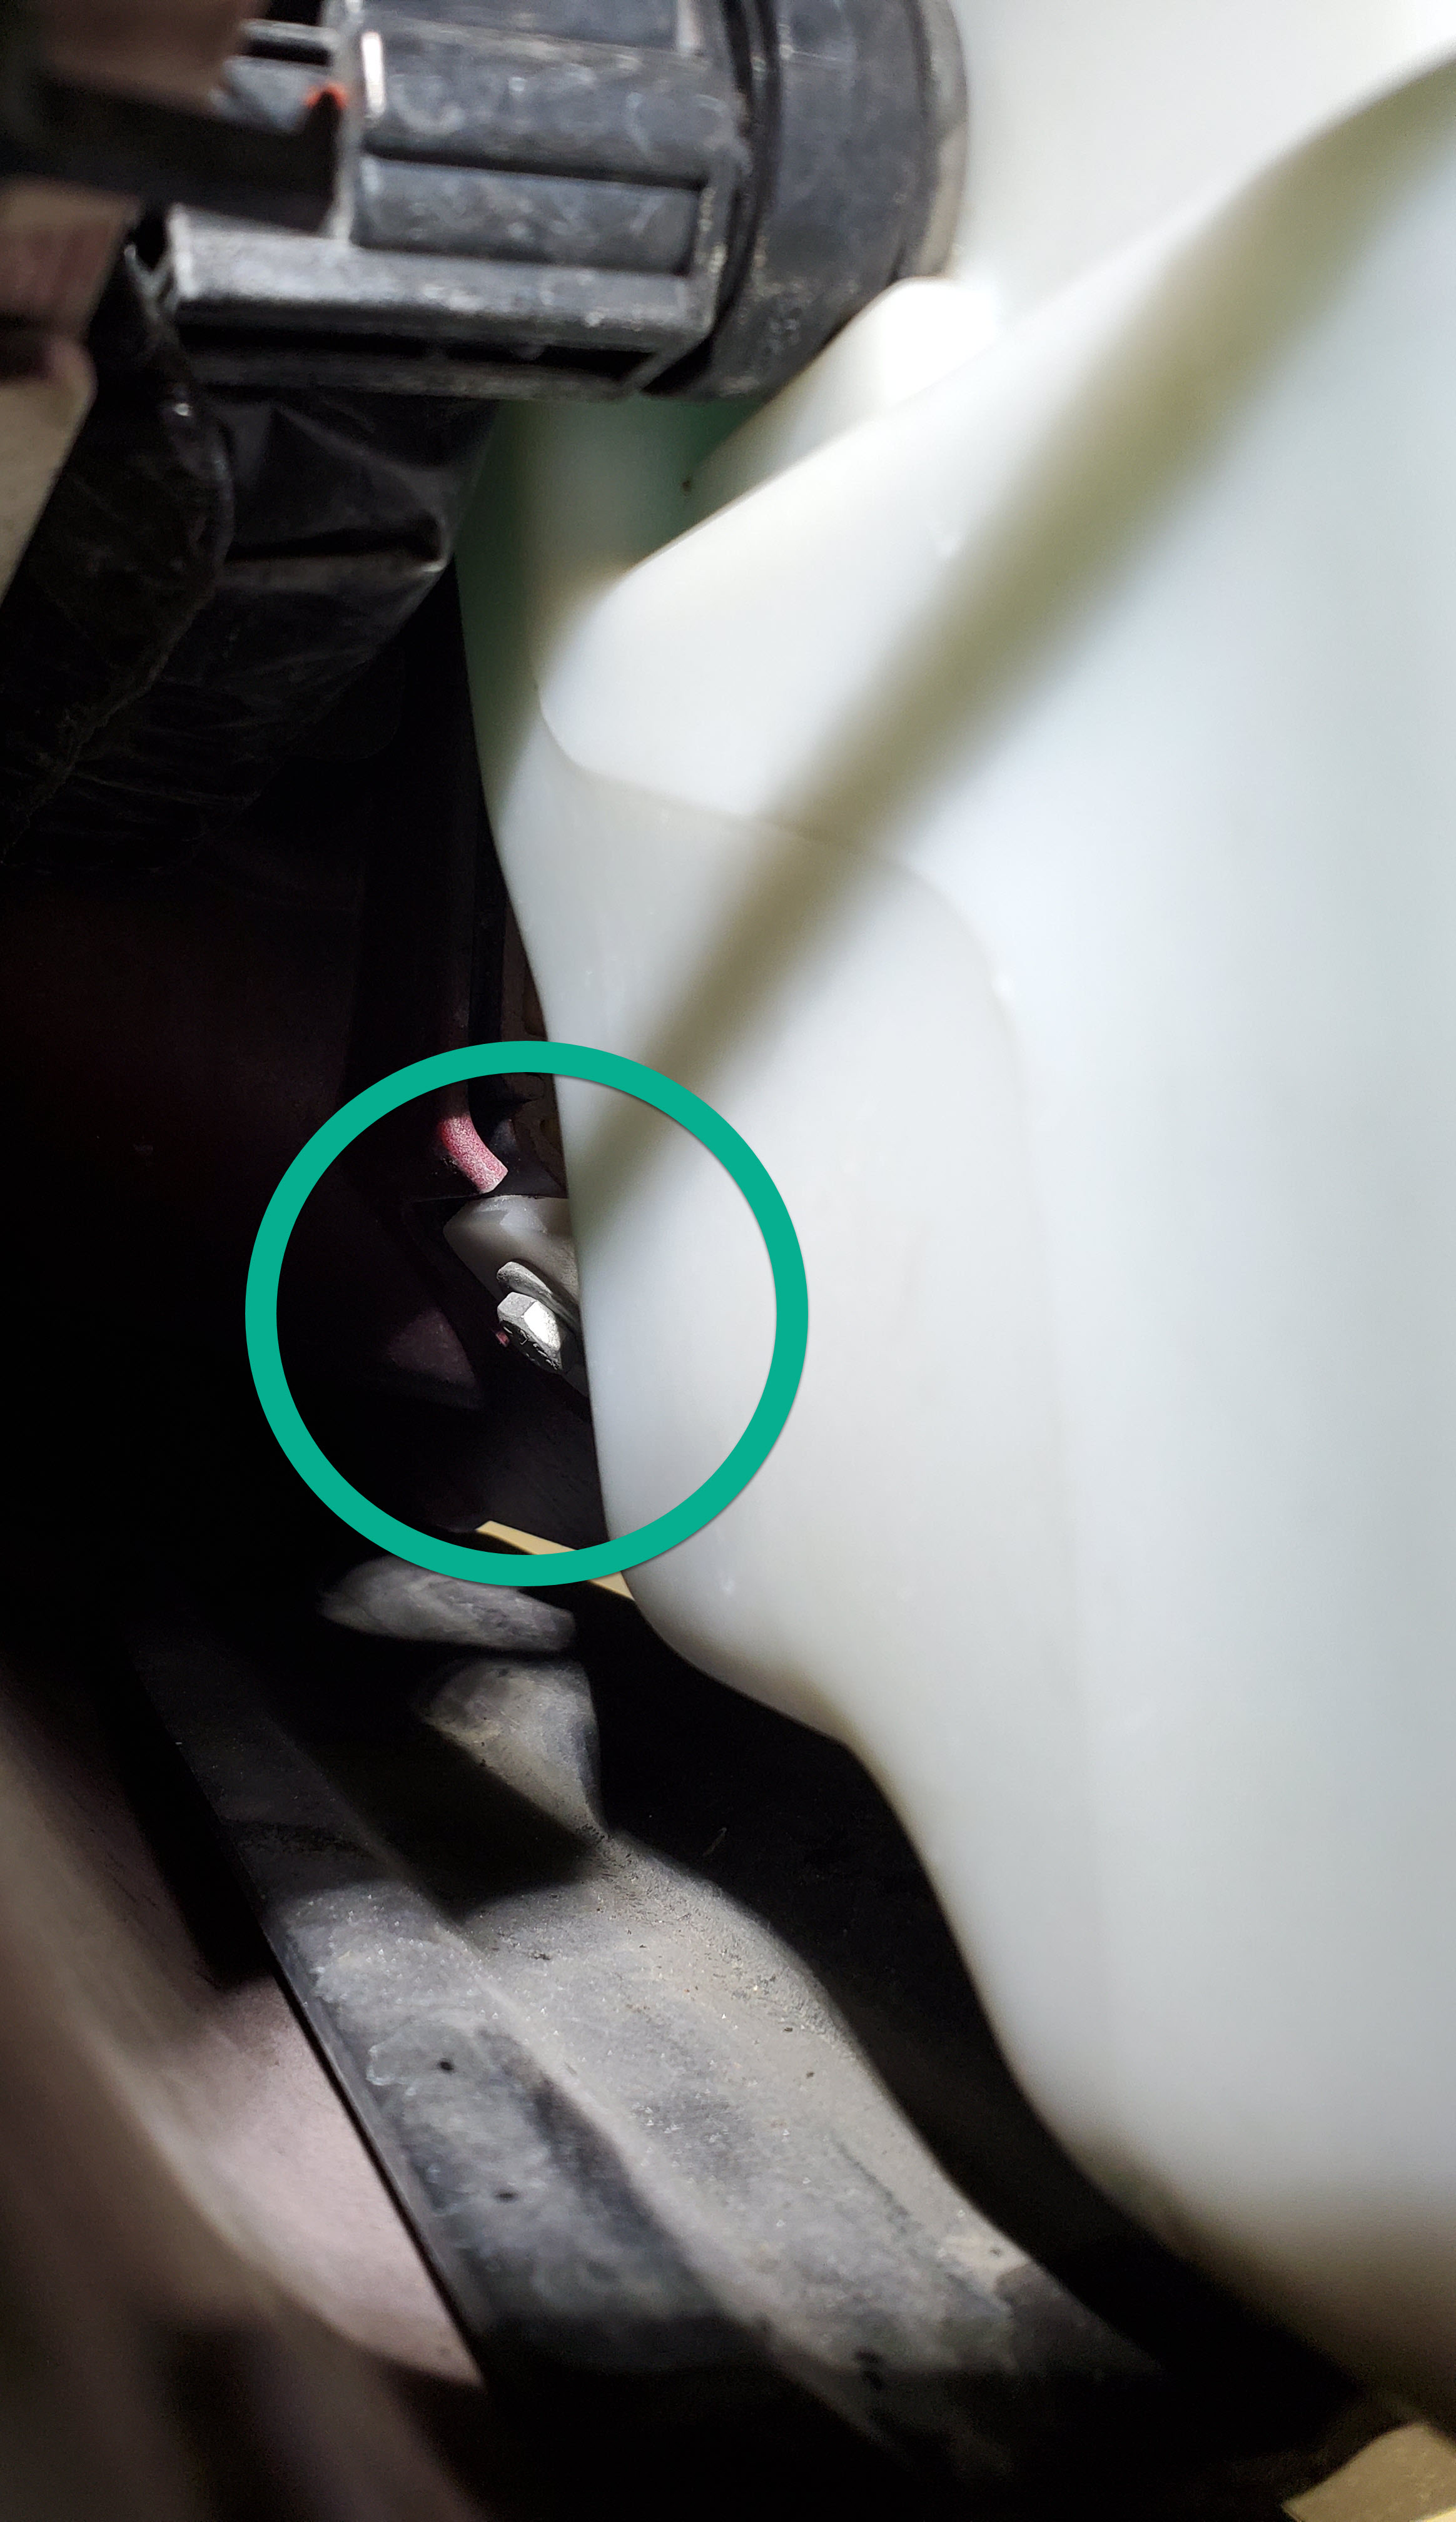
- Time to remove the bolts. All three (3) of them. I was looking at the tank going “what do you mean three bolts? I only see two”. You are about to discover the hard bit of this process, the hidden rear bolt. Look at your new tank to see where the third bolt will be buried.
- Before taking out the easy bolts I opted to get the hard one out first so that the remaining bolts would still be holding the tank in place.
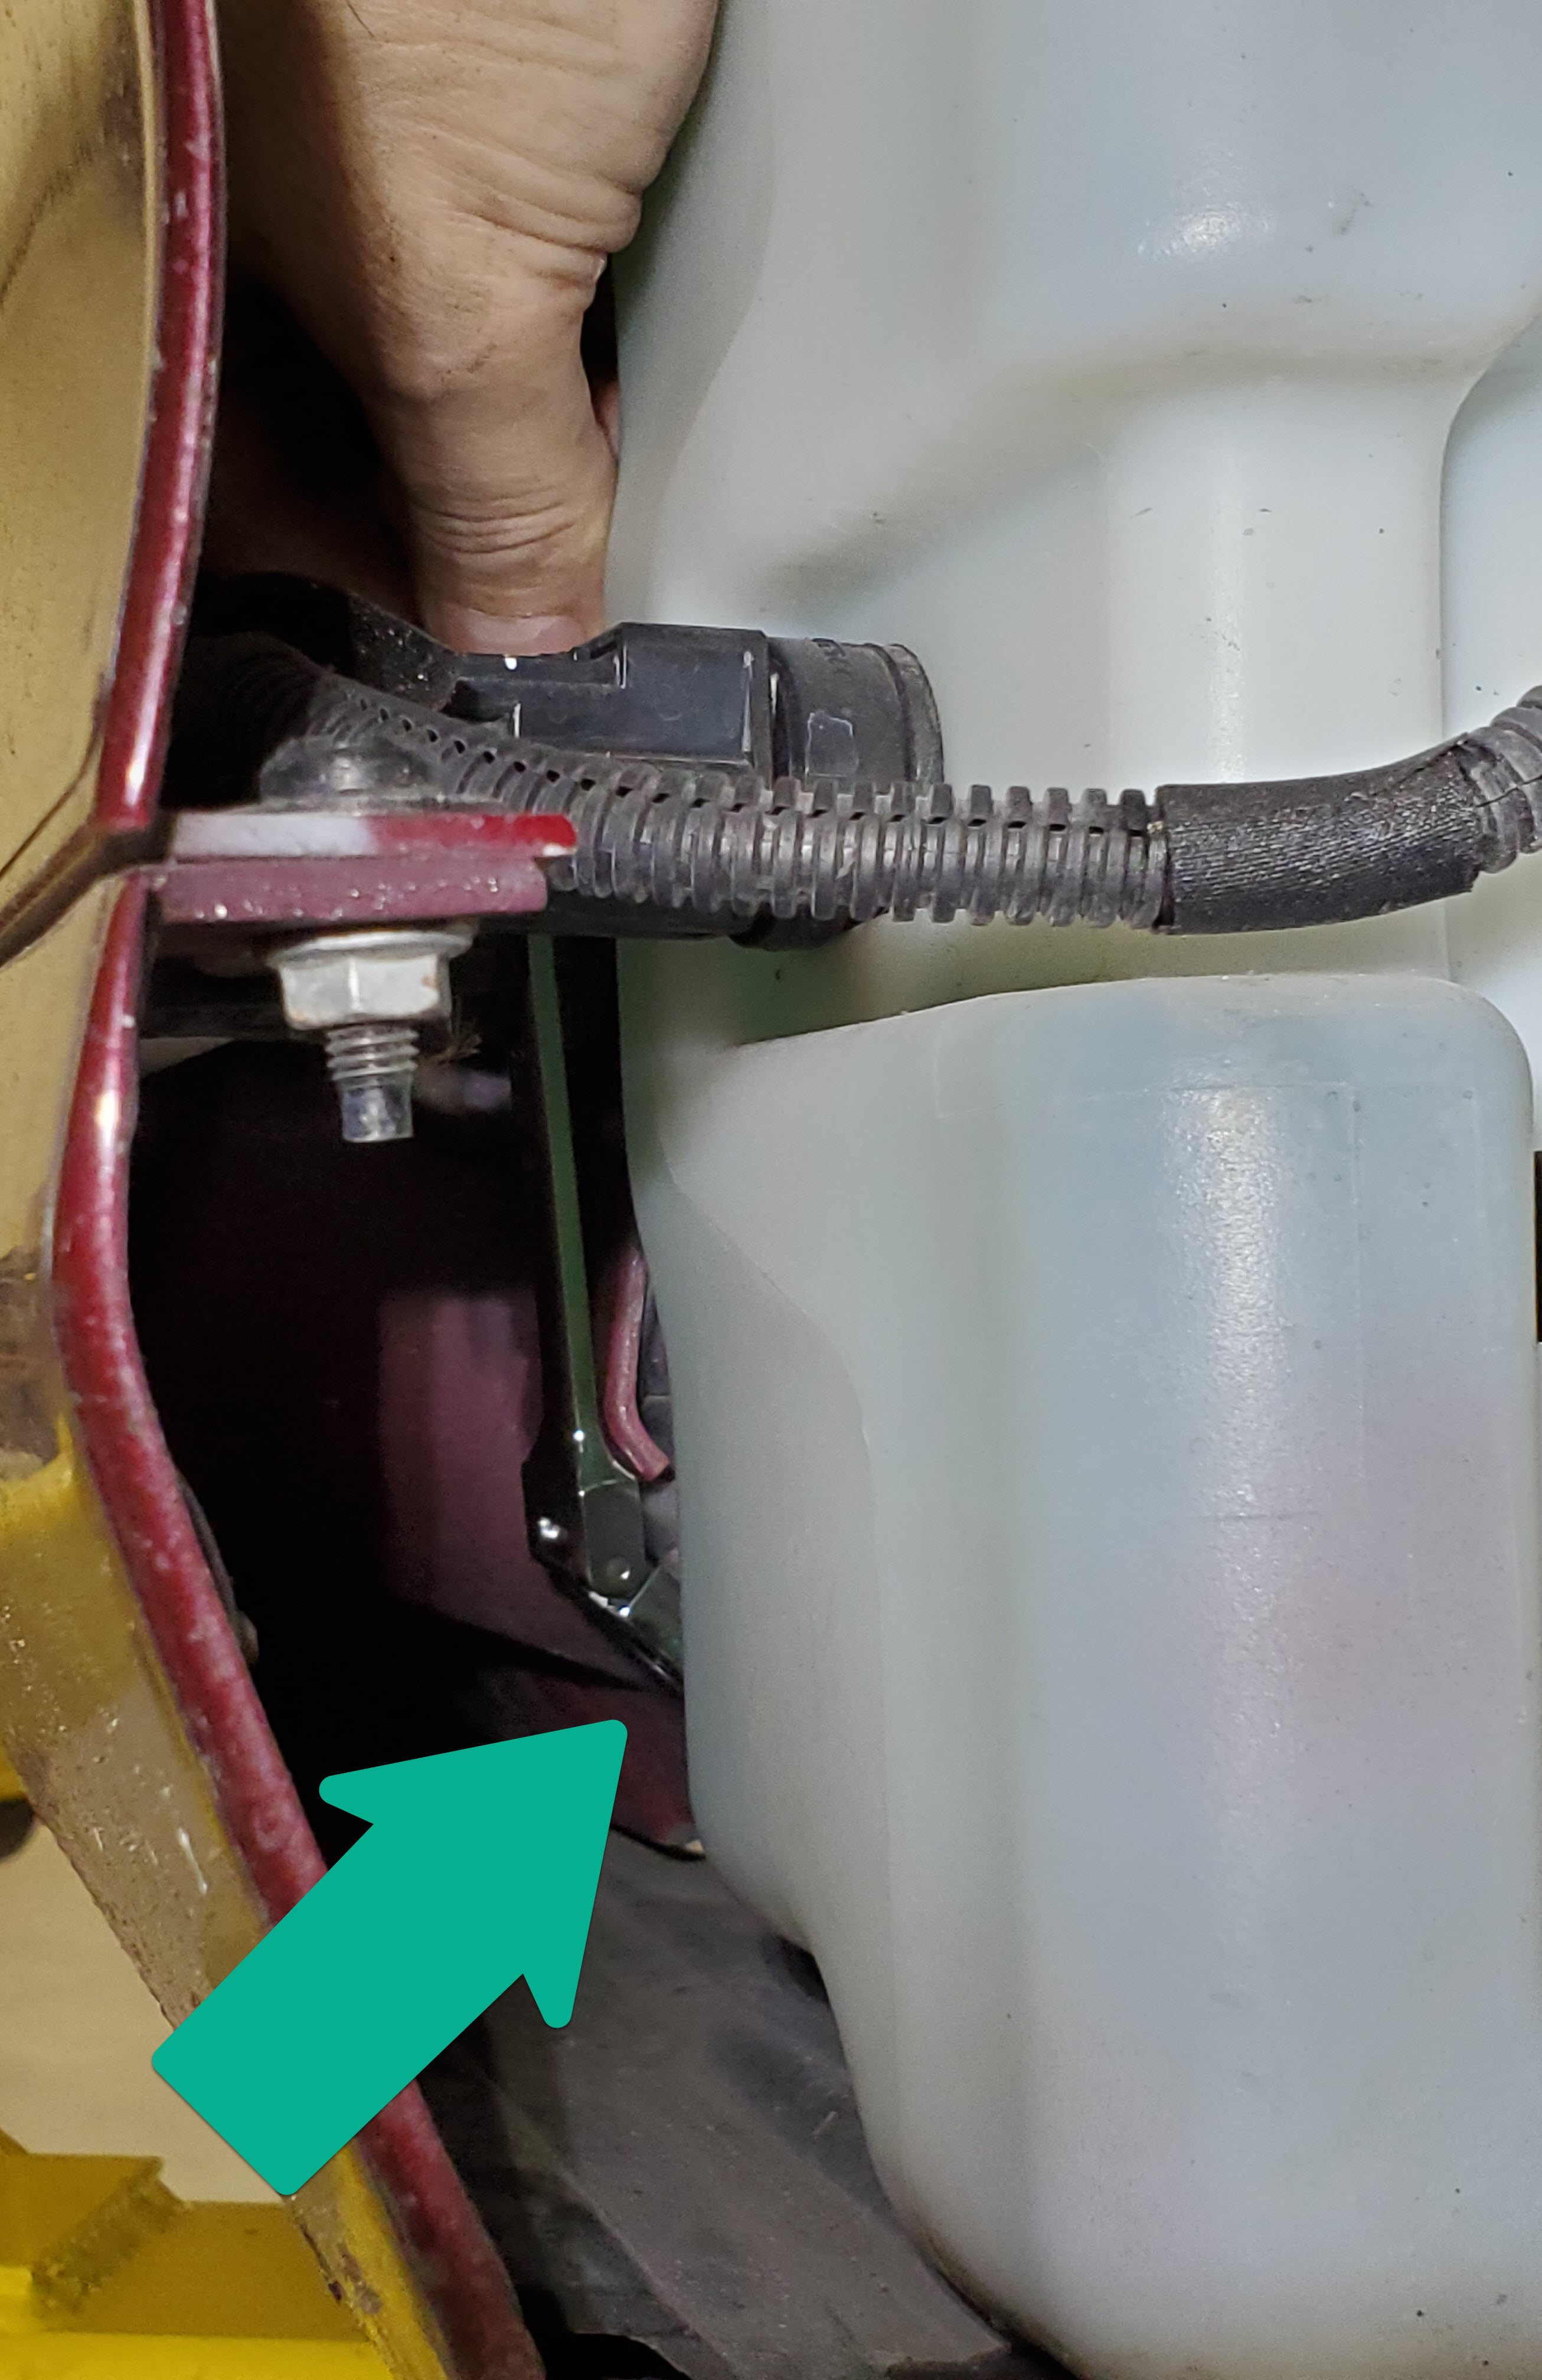
- Access to the bolt head is in a very ackward and difficult to reach place. Its in behind the tank on the rear left. To make it worse, its on a slightly angled face of the frame rail.

- I could just barely get my left hand stuffed in between the tanks and fender far enough to touch the bolt head with my finger tip.
- [In the pictures and video you’ll see my access was slightly better than yours, the mounting flange for one of my fender liner bolts sits right in this area, and it fell out when I removed the fender liner. It must have been broken off by the body shop during my recent respray. I found signs of a poor ‘re-glue’ job. To that end, I won’t cheat and get an air ratchet into the space to remove the bolt, I’ll do it just like you’ll need to. I re-epoxied the flange after my washer tank was replaced – good as new!]
- This is where the 10mm bendy ratcheting wrench will save the day.
- There was a piece of foam sound deadener stuffed into the cavity I needed to work in. The mounting tape was long perished, so I could just simply remove the foam or push it aside for now.
- I reached my right arm up and over the tank while holding the bendy wrench. I had the wrench already bent to the approximate angle I would need.
- I used my left hand stuffed into the small gap between the tank and fender just to get my finger tip on the wrench head and help it over the bolt.
- I then just awkwardly ratcheted it slowly out. Patience. You’ll be rewarded.
- Once the bolt comes out, you’re in the home stretch! If the bolt falls, you can use your magnetic pickup to snag it.

- Access to the bolt head is in a very ackward and difficult to reach place. Its in behind the tank on the rear left. To make it worse, its on a slightly angled face of the frame rail.
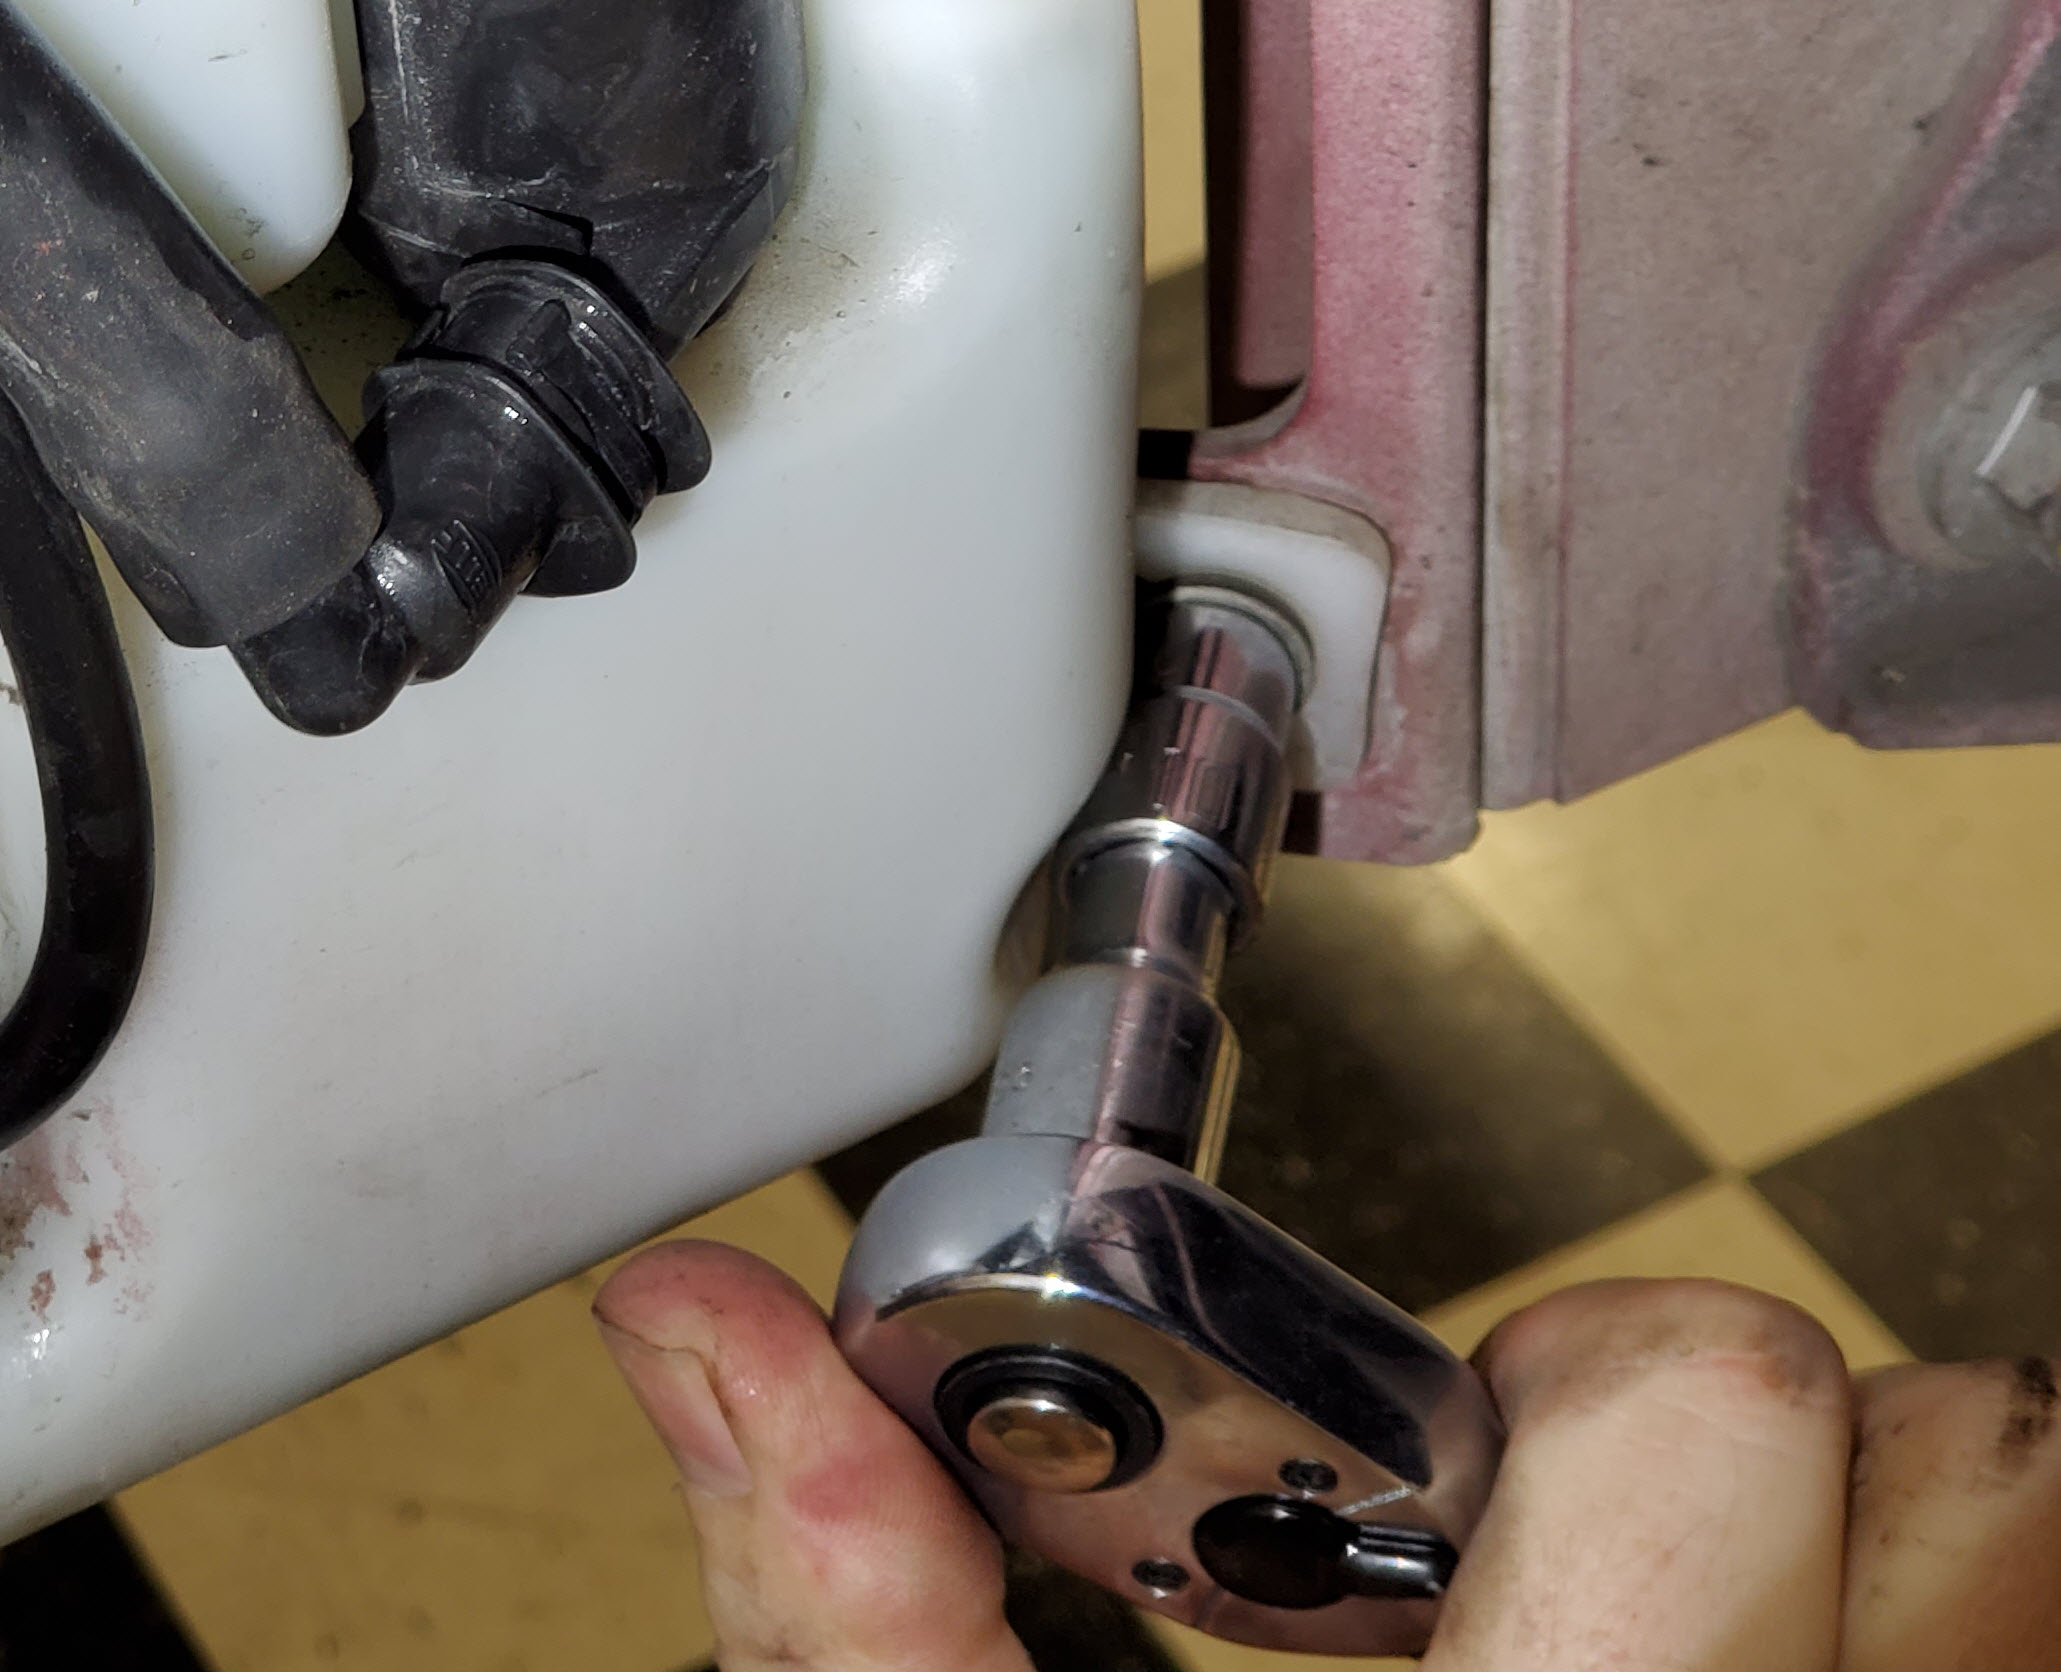
- Use your 10mm socket, extension and ratchet to remove the lower right bolt.

- Next remove the bolt near the top by the filler neck. You have to carefully move things around a bit to get the socket and extension into place. Be careful of the wiring harness you are nestled up against, don’t do anything to damage it.

- Before taking out the easy bolts I opted to get the hard one out first so that the remaining bolts would still be holding the tank in place.
- With the bolts removed, the tank should be free to begin to maneuver.
- Carefully rotate the tank to get better access to the electrical connector on the fluid level sensor on the left side of the tank.
- Disconnect the electrical connector. Its the same style as the headlight washer pump connector. I used my small screwdriver to press the tabs in again. I came easily away.

- With everything now disconnected, carefully work the tank out of the space.
- Once removed, I turned mine over and drained the last bits of fluid out into the drain pan, and that when I saw all the debris come out. Yuck!
- Time to ponder how to install that damned hidden rear bolt. When we remove it, we didn’t have the challenge of blindly holding and starting the threads in the hole. I couldn’t figure out how I could do this other than maybe some luck on the end of my pickup magnet.
- I elected to modify the flange on the new tank but cutting a slot in it. This way, I can already have the bolt started a turn or two, and when installing the new tank I just need to slide the flange in over the prestarted bolt. Heresy you say modifying the part? Maybe, but I gladly ask you leave a comment below on how to get it done otherwise. The section of the flange I will modify is not load bearing, so it will not affect the mounting strength. You might want to watch the video below to see exactly how I did this.
- I practiced first on the old tank flange
- Use one of the bolts as a gauge for how wide a slot will be needed.
- Use a Sharpie marker to mark out the slot you want to cut.
- Use a hack saw or Dremel cutting tool to cut out the material
- Test that you can easily slide the bolt down the slot
- Once you are satisfied on your Practice cut, repeat the process on the new tank.
- This really isn’t hard to do.
- The first step in the install then is to prestart that hidden bolt one or two full turns. Don’t put it in most of the way, you’ll be making your life harder as getting the modified flange onto it will be harder if there is less of a bolt sticking out.
- Offer the new tank back up into the space, weaving it carefully under the hoses and wires just as it came out.
- Time to slip the modified flange over the hidden bolt. You can just peer down the side of the tank to see the bolt and slot meet up.
- I found my plastic flange wouldn’t quite fit over the bolt, it was slightly warped out towards the fender. I removed the tank again, and gently bent the plastic flange over in the necessary direction about a quarter inch. Its polypropylene plastic, it can take this easily. It was a bit compliant and not hard to do.
- Once its fitted over the hidden bolt, I loosely started the other two mounting bolts to hold the tank in place.
- Reconnect your fluid level sensor while you still have easier access to it. It just pushes on until you hear it click.
- Time to tighten the three bolts.
- Do the easy two first so you can get if firmly mounted in place.
- Use your socket, extension and ratchet again to just make them firmly snug. No torque spec, its plastic. Don’t over tighten them.
- Use your bendy 10mm wrench again, stuff your hands into those hard to access places and tighten up the hidden bolt. Slow process again, but this is the last hard bit.
- Reposition the foam sound insulation into the space in the fender where you found it.
- Reconnect the rubber filler tube to the neck by wiggling it all the way down.
- Tighten the hose clamp.
- Reconnect the electrical connector to the windscreen washer pump. It should click when fully seated.
- Reconnect the electrical connector to the headlight washer pump. It should click when fully seated.
- Reconnect the small diameter tube to the windscreen washer pump. Make sure its pushed fully onto the spigot.
- Reconnect the larger diameter tube quick connector to the headlight washer pump. This should just push on with a slight click.
- Time to carefully refit the electrical cables and hoses into the grooves molded into the tank
- Tip – I rotated the pump bodies to make the hoses as flush to the tank body as possible


With everything now reconnected you might be tempted to just reinstall the fender liner and wheel and call it done. Not yet.
 Refill the tank and filler neck all the way to the top (it took about 10 liters). You need to test it. I am glad I did. I found THREE leaks that weren’t the tank. What was most annoying is that I thought it was only one leak, then I fixed it, then it would still be leaking from another spot. On my car I had leaks at:
- Where the filler tube mounts to the plastic filler neck. I hadn’t positioned the clamp properly when tightening it. Repositioned and tightened.
- Where the quick connect fitting pushes onto the headlight washer pump connection. I removed it (be prepared for gush of fluid), then I wiped the o-ring on the spigot and also cleaned out the socket of the quick connected. Reinstalled, no more leak.
- And the third leak….
Hop in the car and try your washer sprayers. It may take several applications to get the pump and lines to fill with fluid and start spraying. You want to make sure everything is spraying fluid now so you can be sure the new pumps work, the hoses are connected and the sprayers aren’t plugged. And now leak three:
- My third lead was discovered after the pump test. I found a puddle under the right front headlight, coming from inside the fender. Damn. I carefully followed the larger diameter hose from the headlight washer fluid pump along the fender wall and past the Y fitting to where it attached to the right front headlight unit. Tada, it was wet right where it attached to the headlight. It was the same style quick connect fitting. I popped it off, and the O-ring that is supposed to seal it came right off with it. It was totally perished. Fortunately I realized I could pirate the old o-ring off the old headlight washer pump (just removed) and I refitted it all. Third leak solved.
One you’re satisfied its all working and dry, its time to button things up. I have articles to help you with these steps too:
That’s it, your done! You might be interested in my video on how to adjust the windscreen sprayers if they aren’t landing right in the center of the wiper area [Coming soon].
Video
I created a video to better demonstrate the process describe above. Seeing how to do the steps with the electrical connector and flange modification might help.

Really love your videos
I have a 2005 DB9 and need a replacement washer fluid reservoir cap
Do you know where it can be purchased without buying a complete filler neck assembly?
Thank you
Eric
LikeLike
Hi Eric, I’d check the parts diagram at ScuderiaCarParts.com and see if its listed independently. If not, I suspect its not a bespoke Aston part and maybe someone can point out if its from a Volve, Ford, Jag or Mazda. Let me know what you learn.
LikeLike
I did the leaky reservoir repair project on my ’06 Volante today. It was a serious pain to remove that back bolt, as Steve said, but it would have been easier if my “bendy-head” 10mm wrench was an inch longer.
Rather than following Steve’s advice and cutting a slot in the mounting tab, I decided that I was going to be clever on the re-install and I bought a correctly-threaded screw and cut the head off to turn it into a stud. Then I inserted my new stud into the mounting hole to allow me to locate the tank in the right position, thinking that it would be relatively easy to install a nut on the protruding stud, which was far more visible than the mounting hole.
But it wasn’t. I couldn’t start the nut with my fingers until I finally thought of a manual right-angled ratchet my brother had bought me ten years ago and which I had never used. I wedged the nut in the socket, twisted the ratchet’s handle, and got the job done.
But the moral of the story is…listen to Steve!
LikeLike
Hello,
Do you know if it exist an aftermarket Windscreen Washer pump at raisonnable price ? As the genuine one cost more than 120€ for a single pump !
Regards
LikeLike
Hi
Could you point me at the part numbers for the washer bottle pumps please.
Thanks,
Richard
LikeLike