![]() I had the Transmission Oil Pan/Sump off my 2005 DB9 to change the fluid, filters and seals of the Touchtronic II 6-speed Automatic Transmission. This is the ZF 6HP26 fitted to most Aston Martin DB9, DBS and Rapide between 2004 and 2014. I’ve been doing an entire series on these tasks (check it out here) and for me its time to reinstall the Oil Pan. There are some specific steps to doing this properly, let me show you how.
I had the Transmission Oil Pan/Sump off my 2005 DB9 to change the fluid, filters and seals of the Touchtronic II 6-speed Automatic Transmission. This is the ZF 6HP26 fitted to most Aston Martin DB9, DBS and Rapide between 2004 and 2014. I’ve been doing an entire series on these tasks (check it out here) and for me its time to reinstall the Oil Pan. There are some specific steps to doing this properly, let me show you how.
Tools Required
You only need a few tools and supplies. I’ve covered them in detail (along with where to purchase them) in another article for the overall transmission service process (find it here), but here is the subset needed for this step.![]()
- T40 Torx Socket
- 3/8″ ratchet
- 6″ extension
- 1/4″ Torque Wrench capable of a very low 10 Nm (88 inch-lbs)
- Drip Tray
 The transmission never seems to stop dripping once you have the oil pan removed, so rather than fluid splashing and dripping all over your garage floor or onto cardboard that’s going to get soggy, I sought out a better solution
- I purchased a dog kennel plastic tray/liner that was perfect for the task. One that was 35″ x 22″ was only $16 USD on Amazon with free shipping.
 Pig Mat absorbent towels
- If a mess happens you are going to need to be able to soak up the spills. Pig Mat isn’t just ordinary paper towel, it can absorb a ton of fluid and just one or two sheets is all I needed.
- You can pickup a 50 ft roll on Amazon for $24 USD.
- Alternately you can just use a ton of regular paper towels.
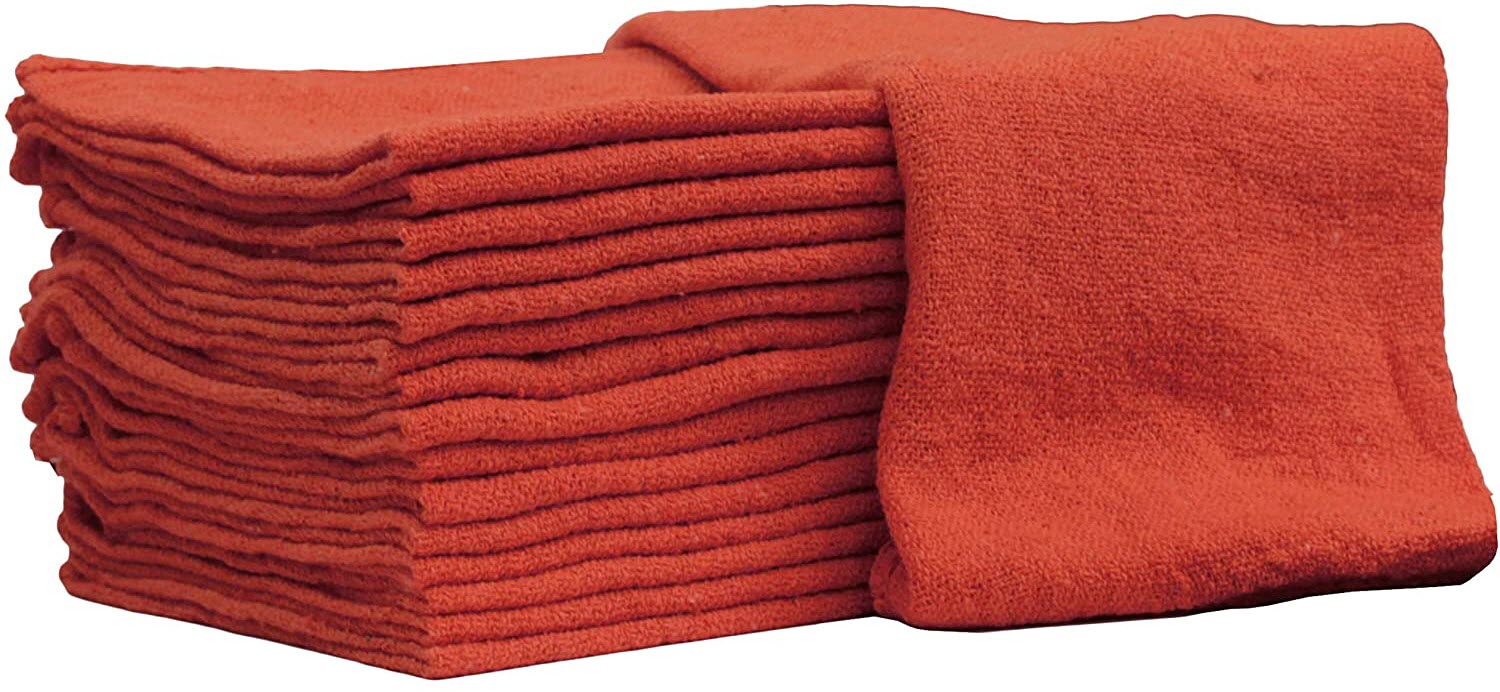
 Shop Rags
- Your hands and tools are going to get oily. Have a good supply of lint free shop towels on hand.
- I get a bag of 100 for about $25 USD from Amazon.
 Disposable gloves
- Even installing a new oil pan is a messy business, so having a couple of pairs of disposable gloves would be handy to have.


It’s going to be messy, so don’t wear your Sunday best to do the work. Time to put on your ‘garage clothes’.
Parts
I’ve already written up a lot of detail on the parts needed to change the fluid, filter and seals in the transmission. You can find all the details in the master article on this here. Suffice it to say that since the filter is integral in the plastic oil pan and cannot be replaced separately, its smart to replace the oil pan if you have it removed. The replacement oil pan includes a new sealing gasket.
Preparation
You need to do a number of steps to drain the fluid, change the seals and be ready to re-install the oil pan. I’ve already prepared articles on these steps.
- Get your car up level on Jack Stands (as high as possible)
- Remove the rear undertray
- Remove the rear subframe crossmember
- Remove the right rear exhaust heat shield
- Draining the Fluid from the Sump
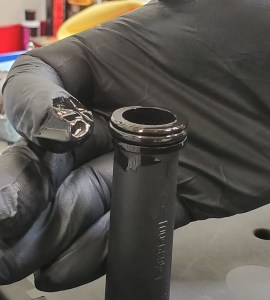
- Remove the Thermostatic Control Valve
- Remove the Oil Pan/Sump
- Remove the Electronics Sleeve
- Remove the Mechatronics Unit
- Changing the Mechatronic Valve and Bridge Seals
- Installing the Mechatronics Unit
- Installing the Electronics Sleeve
With those steps out of the way we can get on with it.
Procedure
The process will take about 15 minutes once you have all the preparation steps done.
Aston Martin actually have included a section on this in the official Aston Martin Workshop Manual. Section 7.01 Automatic Transmission covers this. What’s amusing is that they didn’t bother to make one unique to Aston, they just pilfered content from ZF and actually just show pictures of a transmission removed from the car flipped over on the bench (if only it was that easy).
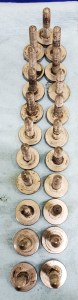
![]() As I’ve written about elsewhere, the transmission is really a ZF brand model 6HP26. ZF has an official service manual for the transmission and you can find it here. I managed to track down a ZF service technician training presentation that looks like something a trainer would be using to train new ZF service technicians (just like me – and you!). You can find a copy of that here. What matters most in that guide for now is the specific bolt tightening sequence for the 21 (yep – twenty one) bolts that hold the plastic oil pan on.. This is to ensure the Oil Pan doesn’t get warped during the process. Here is that pattern.
As I’ve written about elsewhere, the transmission is really a ZF brand model 6HP26. ZF has an official service manual for the transmission and you can find it here. I managed to track down a ZF service technician training presentation that looks like something a trainer would be using to train new ZF service technicians (just like me – and you!). You can find a copy of that here. What matters most in that guide for now is the specific bolt tightening sequence for the 21 (yep – twenty one) bolts that hold the plastic oil pan on.. This is to ensure the Oil Pan doesn’t get warped during the process. Here is that pattern.

- I started by using a clean lint free rag and made sure the mating surface on the transmission was clean and free of any grit, etc. Anything like this will lead to a leak later.
- I double checked that there wasn’t an O-Ring stuck in the oil sump spigot hole. It should have come out with the old oil pan, but it can’t hurt to be 100% sure there isn’t one still stuck up there.

- I cleaned up all 21 existing bolts (I gotta be me). Some of the after market replacement kits include new bolts, but mine were just fine to reuse.
- I realized that knowing the correct pattern for tightening the bolts was going to be a chore if I had to keep referring back to the diagram each time. I used some blue painters tape and then marked the sequence out on the oil pan itself. While this is also totally a ‘me’ thing to do, it is a serious time saver and worth your effort.

- Using some transmission fluid and your finger, wet the gasket surface all the way around. This will allow it to slip and squish better into position.
- NOTE: DO NOT USE ANY GASKET SEALER. The seal is a pliable rubber (ish) seal and is not intended to be used with any form of gasket sealer.

- NOTE: DO NOT USE ANY GASKET SEALER. The seal is a pliable rubber (ish) seal and is not intended to be used with any form of gasket sealer.
- I also used some transmission fluid to lubricate the O-Ring on the spigot so it slips up into the bore more easily.
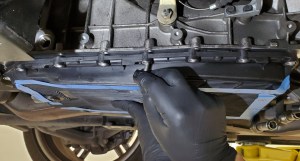
- Offer up the oil pan to the transmission.
- I focused on getting the sump spigot to engage in the bore in the transmission. Its easy, just a slip fit. Just line it up and ease it up in to position.

- I focused on getting the sump spigot to engage in the bore in the transmission. Its easy, just a slip fit. Just line it up and ease it up in to position.
- Holding the oil pan up with one hand, install bolts 1 and 2 finger tight. This will easily hold the weight of the oil pan and free up both hands to do the rest.
- Now hand start all 21 bolts.
- NO power tools. Steel bolts, aluminum housing.
- I just used the T40 Torx Socket on the end of the 6″ extension and installed them all by hand.
- If a bolt doesn’t go in easily, back it out, check the threads and socket, apply a little oil, try again.
- Do NOT start tightening any of them up yet, let them all be slightly loose.
- NO power tools. Steel bolts, aluminum housing.
- With all 21 bolts loosely in place, next I used my ratchet and took up the slack and barely snugged each bolt.
- Do this in order, from 1 to 21.
- I just wanted to get the oil pan fully seated and all the slack removed from all 21 bolts.
- Using my torque wrench set to 10 Nm, I set about doing the final torque on all 21 bolts following the pattern.


That’s it! With the oil pan/sump back in place you are one step closer to refilling the fluid. Up next for me will be reinstalling the Thermostatic Valve that we removed to get access to the sump bolts (check that article out here).
Video
You can see exactly how I reinstalled the sump in my video on Refilling the Transmission Fluid. Pickup the action at about the 10:00 mark.

Steve. You need to give up your day job and start to charge for this Info. I don’t have a DB9 as you know but what you are doing is very well respected among the AM owners and your work has been praised at length on the Forum . Keep it up 👍
LikeLike
Thanks John. It’s starting to feel like I am slowly building a full Haynes/Bentley service manual for the car. It’s a hobby I enjoy at least. My wish list would be to line up some actual official Aston Factory support for parts and knowledge. Maybe someday they’ll reach out. Or maybe I am the enemy of the dealer.
LikeLike
Thanks John. I’m too thourough and slow to make any money with it as a retiree, but I do enjoy it as a hobby. Glad I am finally done the Transmission fluid service series, it was a large and long one. 22 articles and 2 hours of videos. Anyways, onto some new interesting stuff. Watch for a new YouTube video on Dec 26 (Boxing day) where I will be interviewing Mike from Bamford Rose. My first interview segment. Fingers crossed people will find it a little interesting.
LikeLike